You know that feeling when a tiny handmade object makes a whole room feel cozier? Stone painting is one of the easiest ways to add a gorgeous handmade touch to any shelf, table, or windowsill. These 21 stone painting ideas for home decor cover quick weekend projects, gift-worthy keepsakes, and longer pieces that become seasonal accents you’ll actually keep out year-round.
You’ll find beginner-friendly techniques like dot mandalas and paint-pen lettering, plus more advanced finishes like resin gloss and metal leaf. I often start with a set of quality acrylics and a fine-detail brush—my go-to is an acrylic craft paint set and a detail brush set. Each project below includes exact materials, step-by-step instructions with drying times, troubleshooting tips, and easy display or gifting ideas so you can pick one and get painting.
Grab a hot cup of tea, clear a small work surface, and let’s make some stones that actually look like art. You’ll find rustic, boho, japandi, and farmhouse-friendly styles—plenty of ways to use stone painting ideas for home decor throughout your rooms.
- Mandala Dot Stones
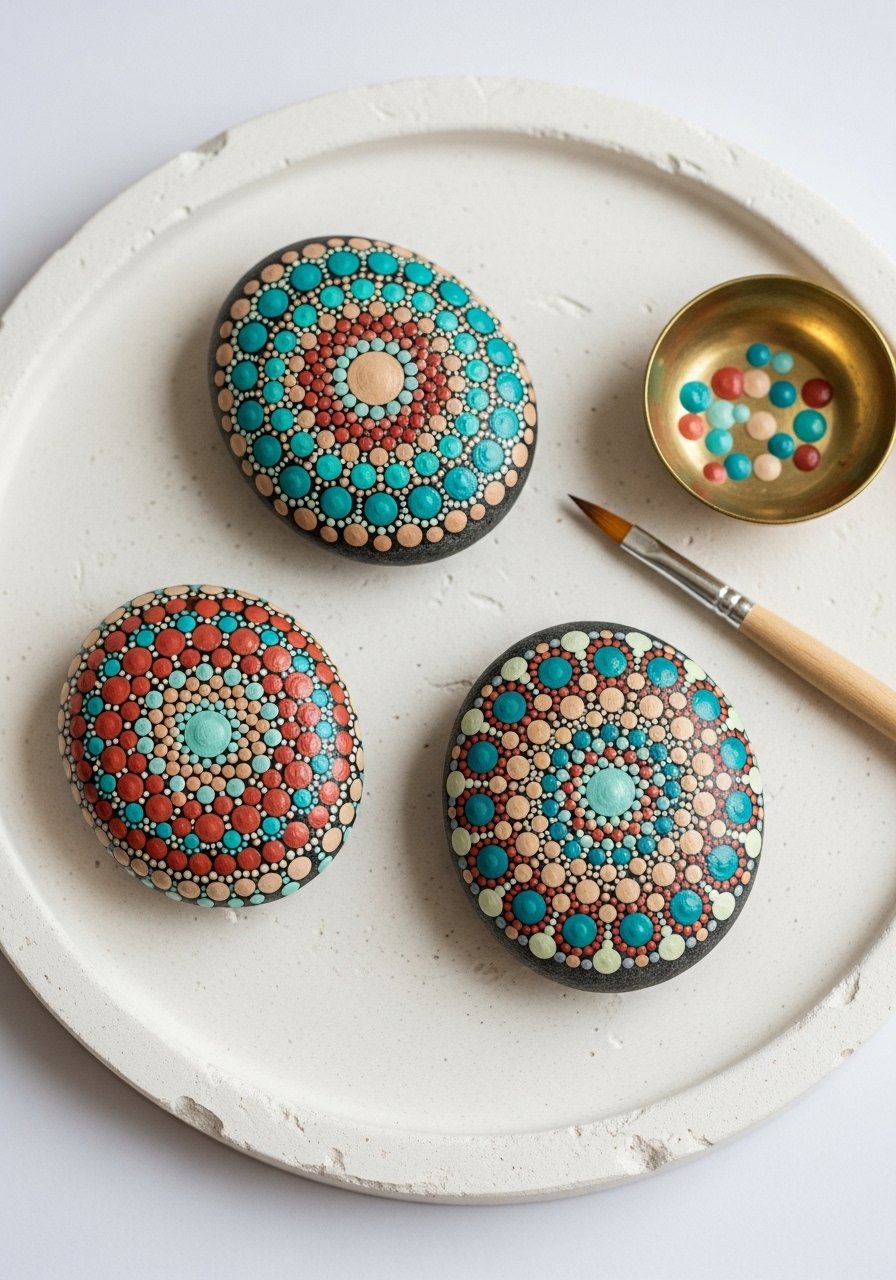
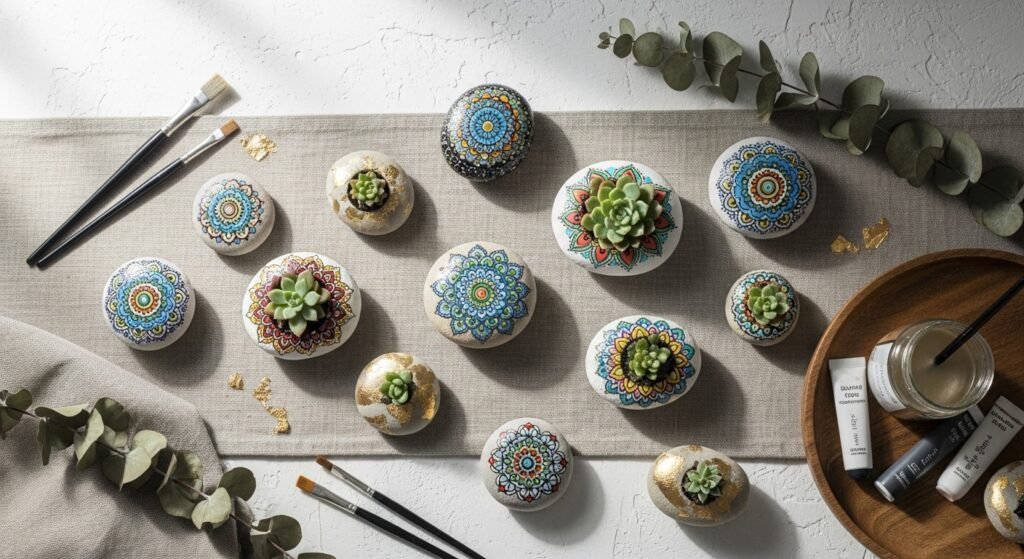
What makes this project special is the rhythmic dotting—so meditative and perfect for gifting. Finished stones have a matte painted body with glossy dot highlights if you choose to seal with gloss varnish. Beginner-friendly and ideal for anyone who loves precision work or wants a calming craft.
I use a round dotting tool or the blunt end of a paintbrush—both work great for consistent dots. Try a detail brush set for the centers.
Materials
- Smooth river stones, 3–4 pieces (about 2–3 inches each)
- Acrylic craft paints, 6 colors (small bottles, 2 oz each)
- White acrylic paint (for base coat), 2 oz
- Fine dotting tools set or ball stylus (2 sizes)
- Small detail brush (size 0–2)
- Palette or ceramic saucer
- Matte acrylic sealer spray, 1 can
- Paper towels and disposable cup for water
Instructions
- Wash stones with warm soapy water; remove dirt and dry fully (30 minutes).
- Lightly sand any glossy stone surfaces with fine sandpaper (220 grit) so paint adheres.
- Apply one thin coat of white acrylic base; dry 20 minutes. Apply a second coat if patches show; dry 20 minutes.
- Plan mandala pattern by marking center with pencil dot.
- Dip dotting tool into chosen color and press firmly to create the first ring of dots. Repeat with decreasing sizes to build concentric rings.
- For tiny center dots, use the tip of the detail brush. Let paint dry 10–15 minutes between contrasting color rings to avoid smudging.
- If desired, add tiny metallic dots with a gold paint pen for highlights.
- Once fully dry (about 1 hour), spray two light coats of matte sealer from 8–10 inches away; dry 15 minutes between coats.
- Check for tackiness—sealer should be firm to the touch and non-tacky after 30 minutes.
Troubleshooting: If dots spread, your base coat may be too wet—wait longer. For uneven dots, practice on scrap stones or cardboard to control pressure.
How to Display or Gift It
- Group three stones on a small wooden tray on a coffee table.
- Tie with twine and tuck a dried lavender sprig for a gift.
- Store extras in a craft organizer tray to keep them dust-free.
- For a mini gallery, place on a small wooden easel.
- Mini Succulent Planter Stones
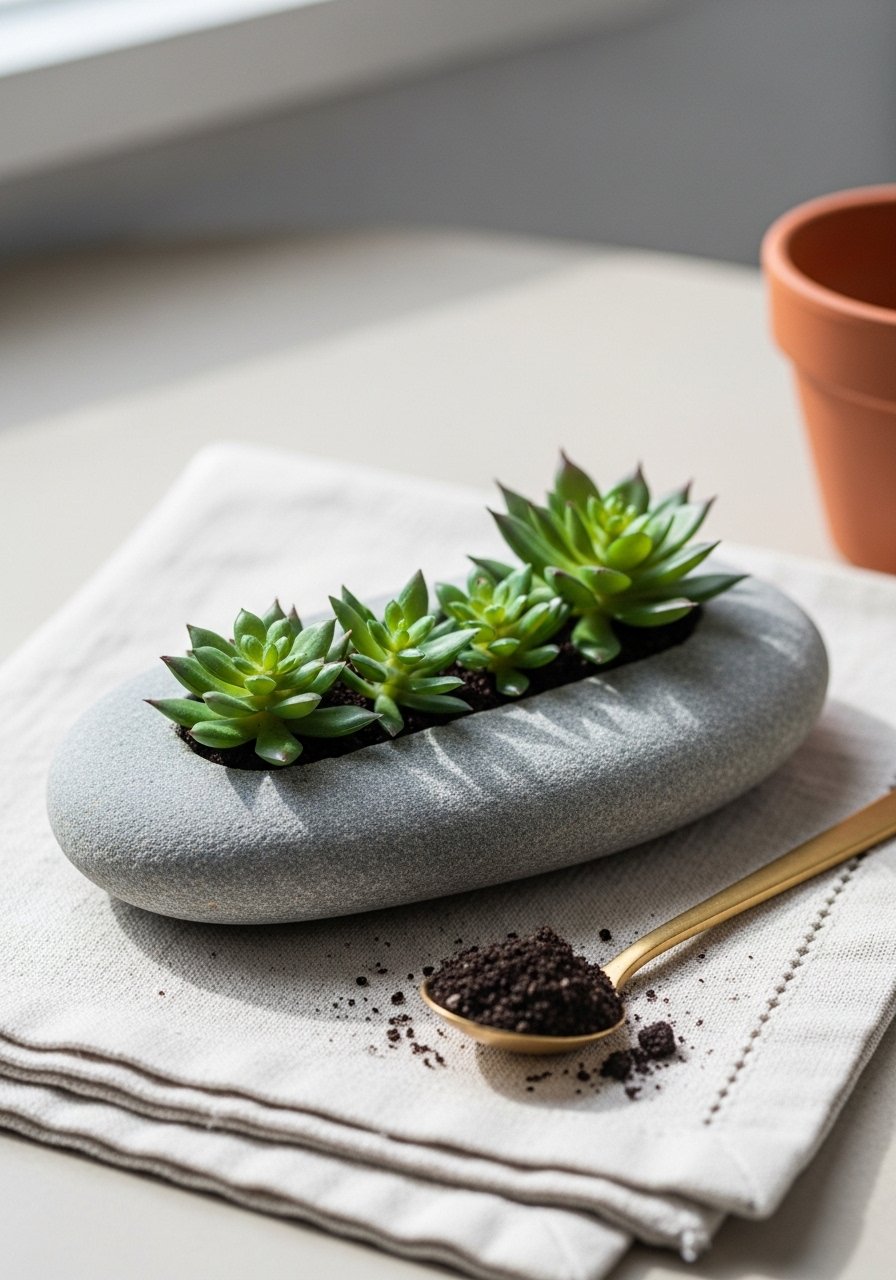
These stone planters mimic tiny succulent pots—perfect for windowsills and terrariums. Lightweight, tactile, and a sweet way to bring greenery into a room without needing big pots. Great for quick gifts and party favors.
For faux succulents, use scissors and a hot glue gun to trim stems—my go-to is a temperature-controlled hot glue gun to avoid drippy glue.
Materials
- Flat oval stones, 2–3 inches, 3 pieces
- Small faux succulent stems (3–6 pieces)
- Floral foam or tiny amount of potting soil (2 teaspoons per stone)
- Hot glue sticks (mini), 10 sticks
- Hot glue gun
- Sharp craft scissors
- Acrylic paint (stone gray or white), 1 small bottle
- Fine sandpaper, 120–220 grit
Instructions
- Clean stones and sand flat top surface lightly.
- Paint stone top rim and inside hollow area with acrylic; dry 20 minutes. Apply second coat if needed; dry 20 minutes.
- If using foam, cut into a rounded pebble-sized piece to fit hollow. For soil, dampen slightly (not wet).
- Trim faux succulent stems to ½–1 inch length. Arrange on foam to test placement.
- Heat glue gun and apply a small dab to foam; press succulent in place for 10 seconds. If using soil, glue base of succulent to stone and cover with scatter of small gravel.
- Allow glue to cool 5–10 minutes; check for wobble and re-glue if necessary.
Troubleshooting: Real succulents require drainage and soil—don’t use live plants in sealed hollow stones unless you can add drainage and proper soil depth.
How to Display or Gift It
- Line three mini planters on a windowsill or bookshelf.
- Present in a shallow wooden tray with moss accents.
- Use kraft gift boxes for gifting; add a handwritten care tag.
- Store faux stems in a craft organizer box between projects.
- Ombre Accent Stones — stone painting ideas for home decor
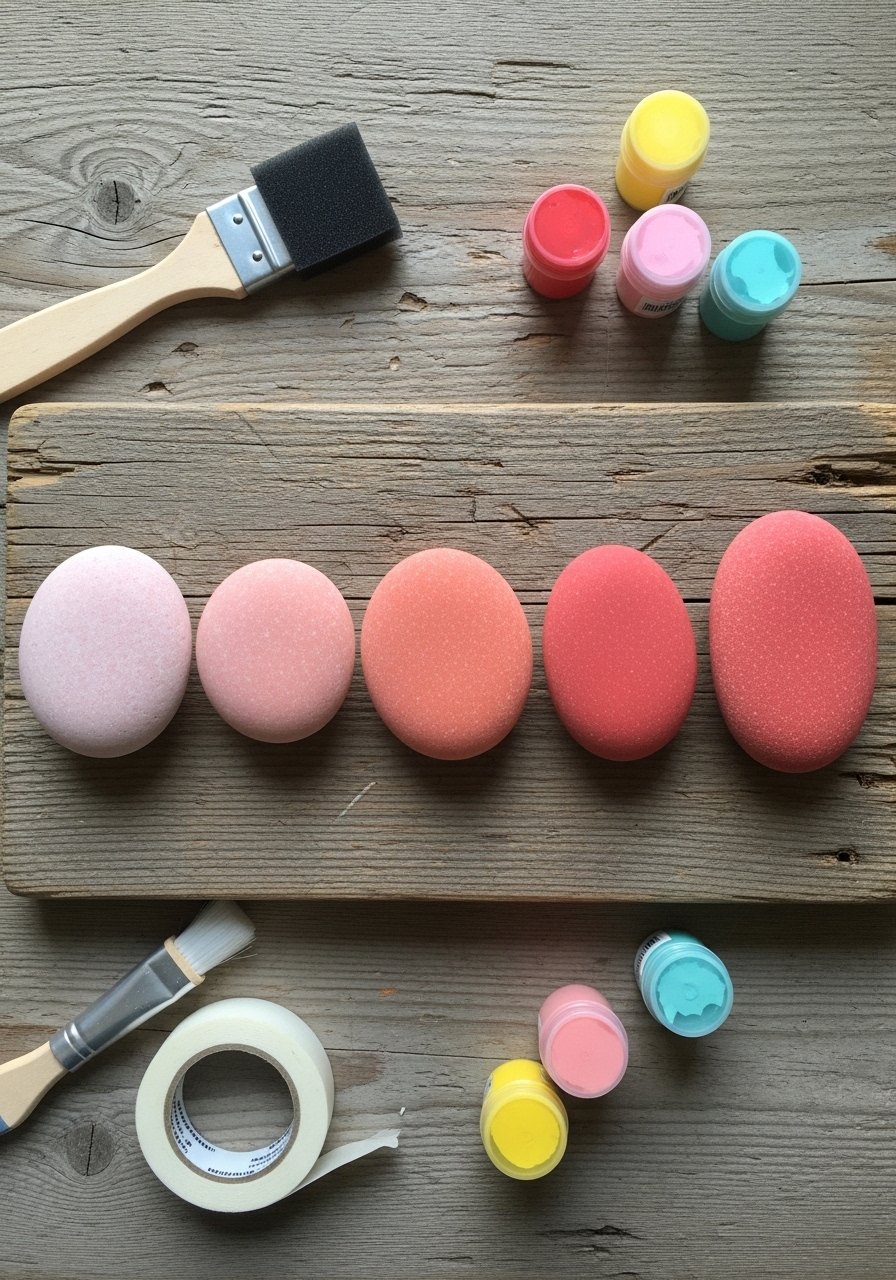
Ombre stones make subtle, modern accents for coffee tables and mantels. The soft gradient feels very japandi and pairs beautifully with neutral linens. These are tactile—smooth, shaded, and calming to hold.
A foam brush gives smooth, streak-free coverage—use a flat foam brush for easy blending.
Materials
- Smooth oval stones, 5 pieces (approx 2–3 inches)
- Acrylic paint in three tones of one hue (light, medium, dark), 1 oz each
- White base paint, 1 oz
- Flat foam brush
- Small blending sponge (makeup sponge works)
- Painter’s tape (optional for half-ombré), 1 roll
- Matte sealer spray, 1 can
- Paper plate palette
Instructions
- Clean stones; sand any rough areas.
- Apply one coat of white base paint; dry 20 minutes.
- For each stone, paint base color (lightest) fully; dry 15 minutes.
- While paint is tacky, dab medium shade at one end and blend with the sponge toward the center. Repeat with dark shade toward the other end for deeper gradient.
- Work quickly and in small areas to blend while paint is wet. Let dry 30 minutes.
- Add a second light glaze coat with watered-down paint (¼ water) if needed; dry 30 minutes.
- Seal with two light coats of matte sealer; dry 15 minutes between coats.
Troubleshooting: If paint dries too fast, mist lightly with water before blending. Too streaky? Use thinner paint and work wet.
How to Display or Gift It
- Arrange in a row on a narrow shelf to mimic color blocking.
- Glue to a wooden plank to make a wall hook display (use E6000 for strong hold).
- Tie a set of three with a ribbon and add a gift tag.
- Store in a stackable craft organizer between uses.
- Galaxy Night Stones
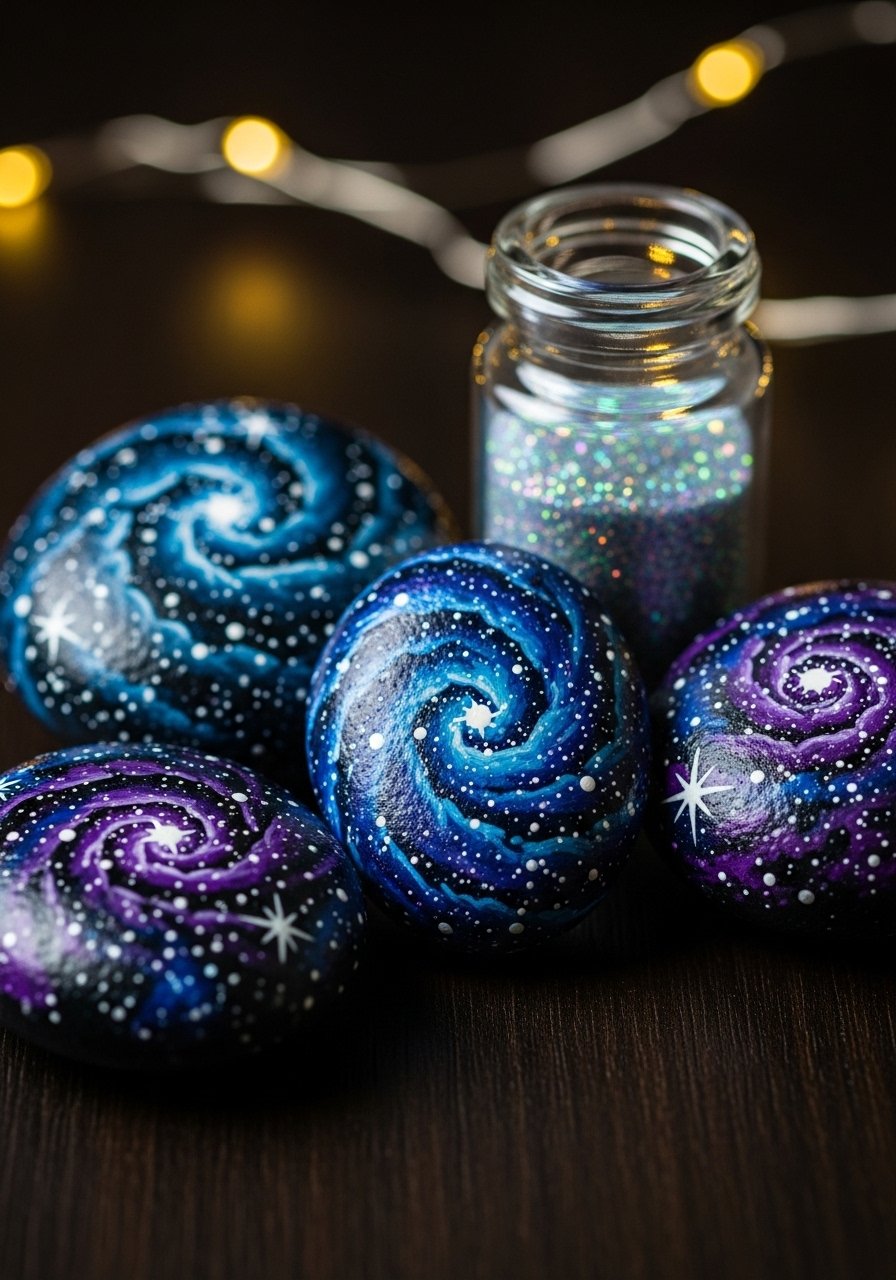
These stones look like tiny planets and bring a moody, boho vibe to nightstands or reading nooks. They’re glossy and slightly textured where glitter or metallics are used.
For the star speckles, a stiff-bristled toothbrush or an old paintbrush works great; I keep a small glitter jar on hand.
Materials
- Smooth river stones, 3–5 pieces, 1.5–3 inches
- Black or deep navy acrylic, 2 oz
- Purple and teal acrylics, small bottles
- White acrylic, 1 oz
- Fine glitter (optional), 1 teaspoon
- Stiff toothbrush for splatter
- Gloss varnish or resin (optional) — 1 oz epoxy resin kit if using resin
- Disposable gloves if using resin
Instructions
- Clean and sand stones; apply two coats of black/navy base, allowing 20 minutes drying between coats.
- Use a dry brush technique: load a stiff brush with purple, dab on a paper towel, then lightly sweep paint onto stones to create nebula shapes; blend with sponge.
- Repeat with teal and lighter purples; dry 15 minutes between layers.
- For star speckles: dip toothbrush into white paint, run thumb across bristles to splatter tiny dots. Practice on paper.
- Sprinkle tiny glitter over still-wet paint if desired.
- Let fully dry 1 hour. For glossy finish, apply one thin coat of gloss varnish and dry 30 minutes. If using resin, mix per instructions and pour; allow curing 24–48 hours.
Troubleshooting: Resin can yellow in sun—use a UV-resistant epoxy. Splatter too big? Thin the white paint slightly.
How to Display or Gift It
- Cluster on a bedside tray with a candle for an evening vignette.
- Glue to a wooden box lid to make a jewelry keeper.
- Gift wrapped in a small velvet bag for an elegant present.
- Store finished pieces flat in a craft tray while resin cures.
- Sea Glass Look Stones
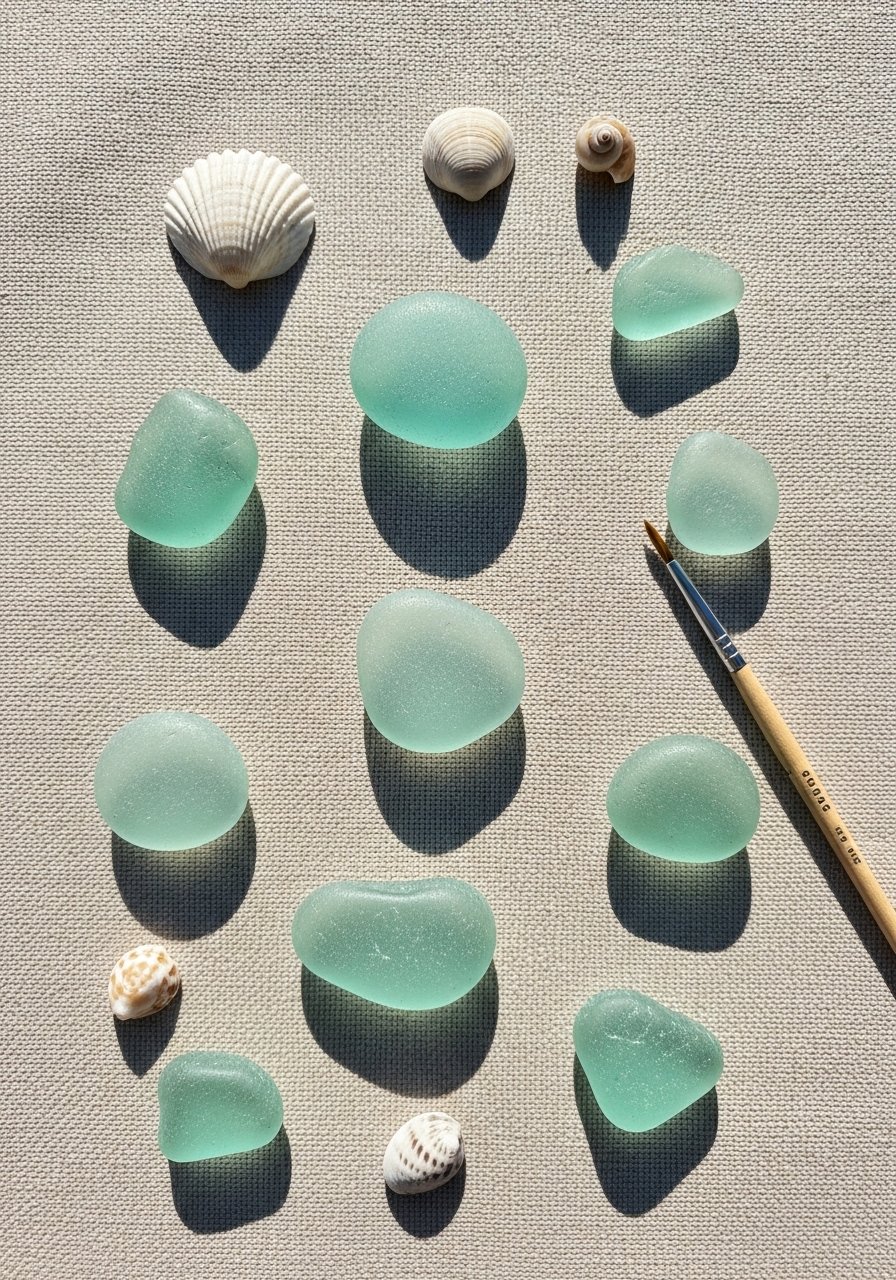
This finish mimics sea glass for a coastal, cottagecore display. The end result is frosted and slightly translucent when using diluted paint glazes or varnish.
A glaze made from diluted acrylics or a sanding-and-seal method gives the frosted look; a matte Mod Podge helps.
Materials
- Clear or white stones (smooth), 4–6 pieces
- Acrylic paints in aqua and mint, 1 oz each
- Matte Mod Podge or matte varnish, 2 oz
- Small foam brush
- Fine sandpaper (320–400 grit)
- Water for thin glazes
- Disposable mixing cup
Instructions
- Clean stones and sand any glossy patches with fine sandpaper to roughen surface.
- Mix a thin glaze: 1 part paint to 4 parts water. Test on spare stone.
- Brush one thin glaze coat; dry 15 minutes. Repeat in layers until slightly translucent, about 3–4 coats; dry 15 minutes between coats.
- Lightly sand between coats if surface becomes too grainy.
- Finish with two coats of matte Mod Podge; dry 20 minutes between coats. Fully cure 24 hours.
Troubleshooting: Too opaque? Thin paint more or use fewer coats. If finish feels tacky, allow full 24-hour cure.
How to Display or Gift It
- Tuck into a clear glass bowl with real shells.
- Use as mantel accents paired with driftwood.
- Gift in a small jar with a cork lid and a note.
- Keep extras protected in a stackable craft box.
- Pet Portrait Pebbles
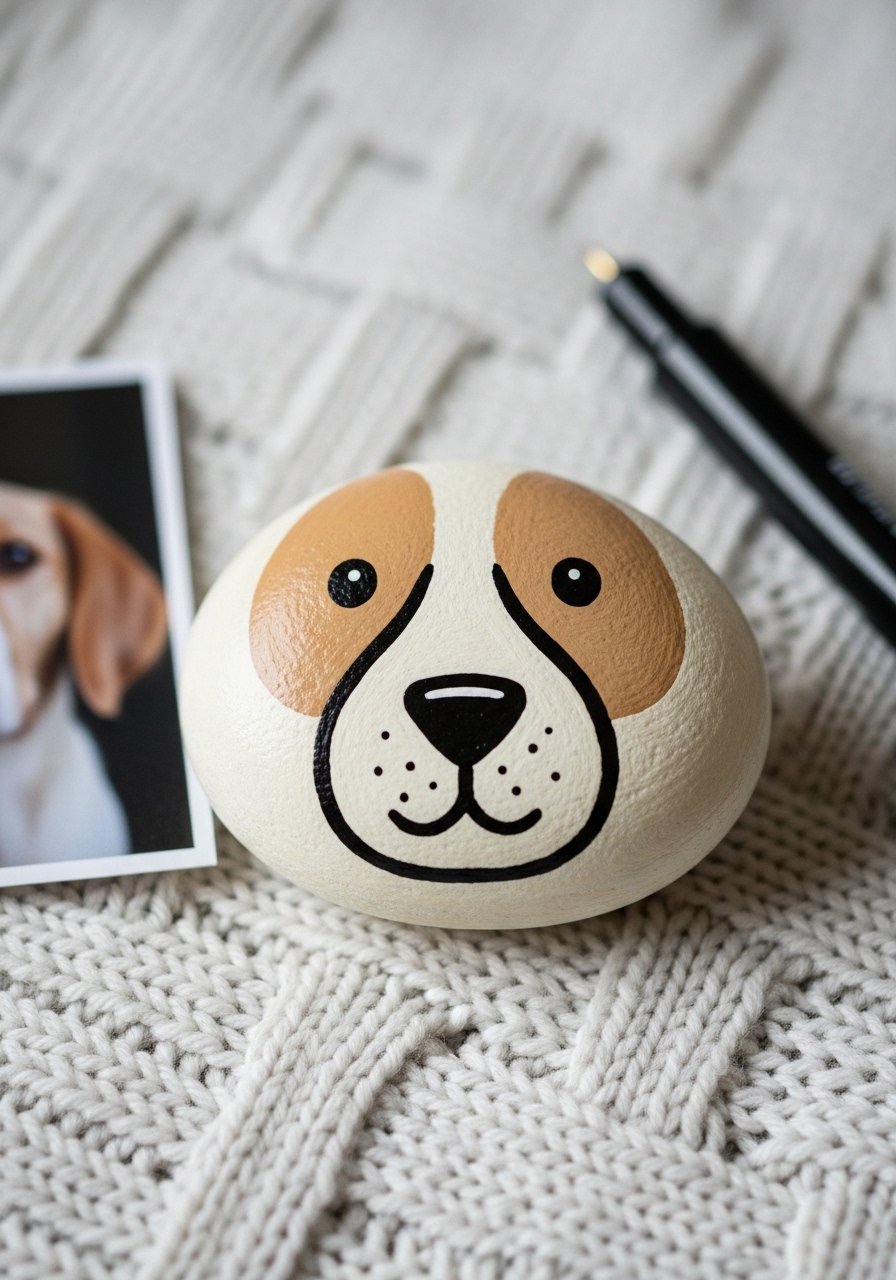
Turn a favorite pet photo into a tiny, adorable portrait. These make heartfelt gifts for pet parents and are beginner-friendly if you use paint pens for details.
A fine paint pen makes small facial features quick and clean—try a fine-tip paint pen set.
Materials
- Smooth, flat stones, 2–3 inches
- Acrylic paint for base (cream or light gray), 1 oz
- Black and tan paint pens
- Fine detail brush
- Pencil for sketching
- Matte sealer spray, 1 can
Instructions
- Clean stones and apply one coat of base color; dry 20 minutes.
- Lightly sketch the pet’s face in pencil using a reference photo.
- Fill larger shapes with acrylic and let dry 20 minutes.
- Use paint pens for eyes, nose, whiskers and fine details. Allow pen ink to set 10 minutes.
- Apply one thin coat of matte sealer; dry 15–20 minutes. Check after 30 minutes for tackiness.
Troubleshooting: If paint pens smudge, let base color cure 24 hours before detailing. For shy lines, practice strokes on paper first.
How to Display or Gift It
- Pair with the pet photo in a small frame.
- Glue to a magnetic disc to make a fridge magnet.
- Wrap in tissue and tuck into a greeting card.
- Keep portraits safe in a magnet storage case.
- Farmhouse Number Stones — stone painting ideas for home decor
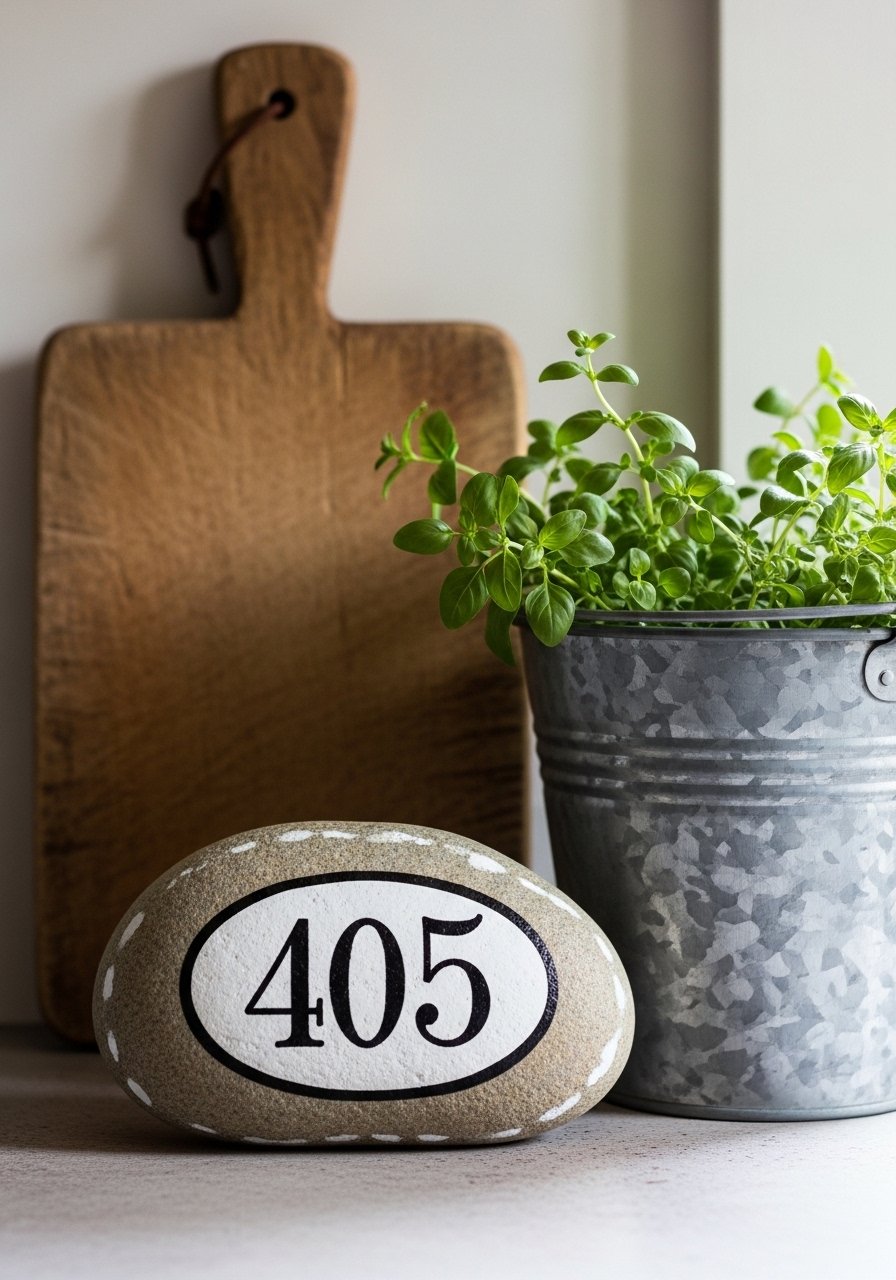
These number stones make charming house accents, porch markers, or mailbox stones. The classic farmhouse palette—white, black, and natural textures—fits many decor styles.
A fine-tip brush or a paint pen helps with crisp numbers; I keep a paint pen set handy.
Materials
- Large flat stones, 3–4 inches
- White acrylic paint (base), 2 oz
- Black acrylic or paint pen for numbers
- Pencil and ruler for spacing
- Clear outdoor sealer (if placing outside), 1 can
- Fine sandpaper, 220 grit
Instructions
- Clean and sand stones; apply two coats of white base paint, 20 minutes drying between coats.
- Measure and lightly mark center with pencil and guide lines using ruler.
- Sketch numbers freehand or use a stencil.
- Fill numbers with black paint or use a paint pen; allow 30 minutes to dry.
- If using outdoors, top with an outdoor-rated sealer; allow 24 hours curing before placement.
Troubleshooting: For crisp edges, tape the outline or use a stencil. If paint chips, sand and apply an additional sealer.
How to Display or Gift It
- Lean on a porch step or place near potted plants.
- Add twine and hang on a garden stake for an outdoor marker.
- Store extra stones in a garden organizer tote until ready to place.
- Story Stones for Kids
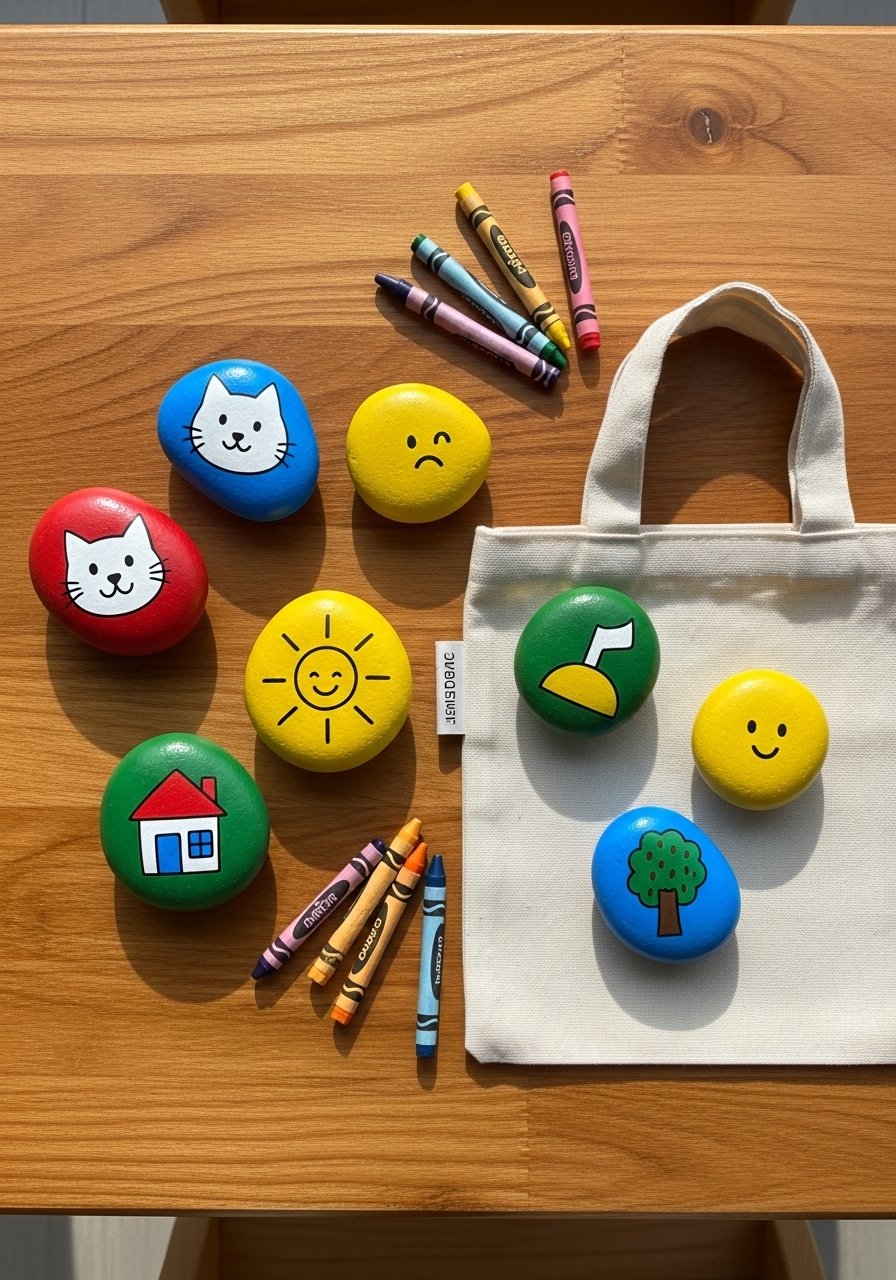
Story stones are interactive and great for imaginative play. Paint simple icons on smooth stones—kids can use them to make up tales, practice vocabulary, or sequence events.
A small acrylic paint set and round brushes are perfect—grab a kids-safe acrylic paint set.
Materials
- Smooth pebbles, 15–20 pieces (1–1.5 inches)
- Bright acrylic paints, multi-color set
- Round brush set (sizes 2–6)
- Small canvas tote or pouch
- Matte sealer spray
- Fine-tip marker for tiny outlines
Instructions
- Clean stones and paint a white circle on each as a base; dry 15–20 minutes.
- Paint simple icons: sun, tree, cat, house, moon, car, boat, etc.; dry 10–15 minutes between colors.
- Outline icons with a fine-tip marker for definition once paint is dry.
- Seal all stones with two light coats of matte sealer; dry 15 minutes between coats.
Troubleshooting: Avoid tiny details for younger kids—bigger, bold icons read better.
How to Display or Gift It
- Store in a small canvas pouch for playdates.
- Use as a quiet-time activity in car trips.
- Pack a set in a kids craft storage bin for portability.
- Pebble Mosaic Picture Frame
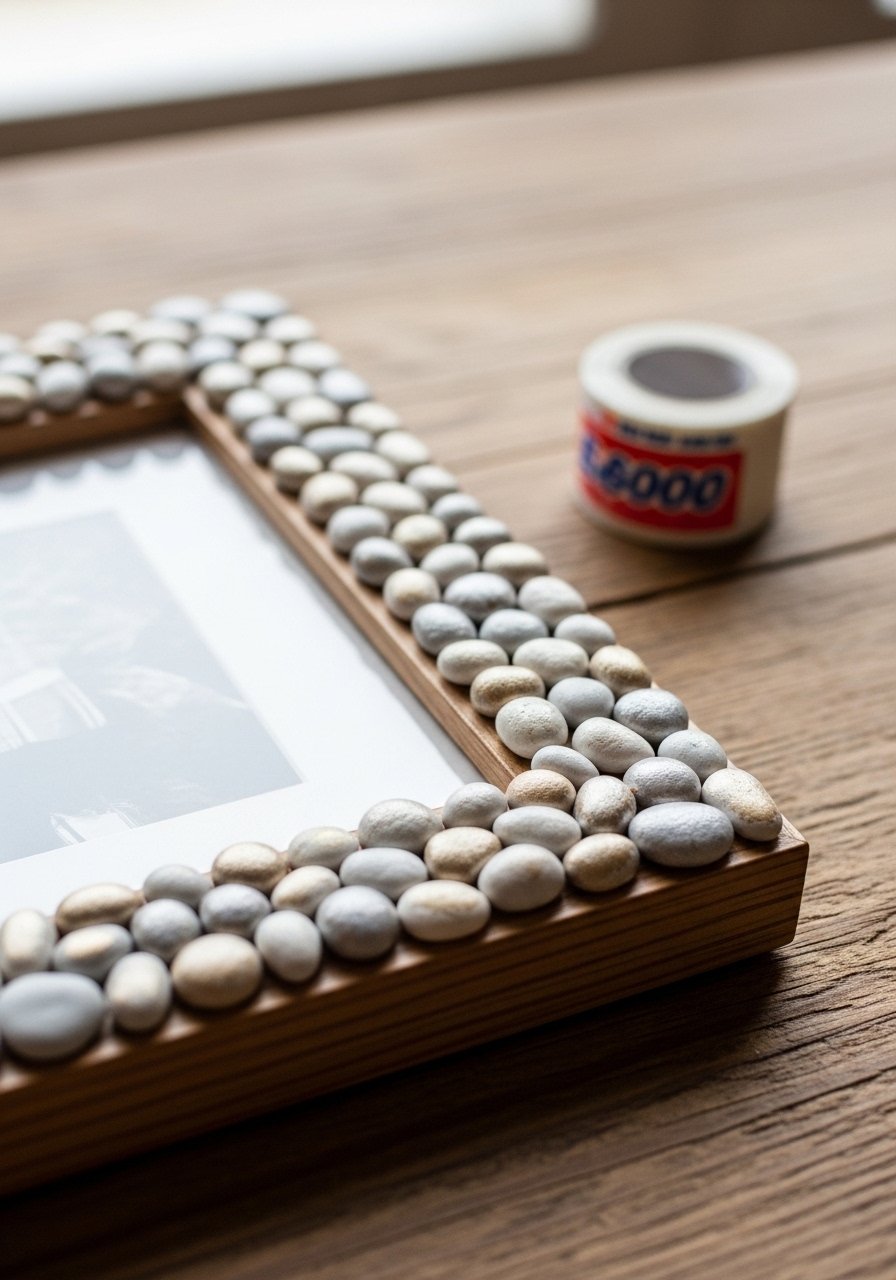
A pebble mosaic frame turns a simple photo into a tactile, coastal-friendly piece. Small pebbles glued in patterns create texture and visual interest.
Use a strong adhesive like E6000 for long-lasting hold.
Materials
- Small flat pebbles, 50–100 pieces
- Wooden frame (any size)
- E6000 glue (or strong craft adhesive), 1 tube
- Acrylic paints in neutrals and metallics
- Small sponge brush and tweezers
- Clear sealer spray
Instructions
- Lay out design on frame before gluing to plan pattern.
- Paint pebbles in your chosen palette; dry 15–30 minutes.
- Working in small sections, apply a thin bead of E6000 to frame and press painted pebbles in place with tweezers.
- Allow adhesive to set 24 hours before handling.
- Spray light coat of sealer to protect paint; dry 30 minutes.
Troubleshooting: Avoid over-applying glue—squeeze small beads to prevent seepage between pebbles.
How to Display or Gift It
- Display on a mantel or shelf with a black-and-white photo.
- Wrap in kraft paper and place in a gift box for housewarming.
- Store spare pebbles in a clear craft storage jar.
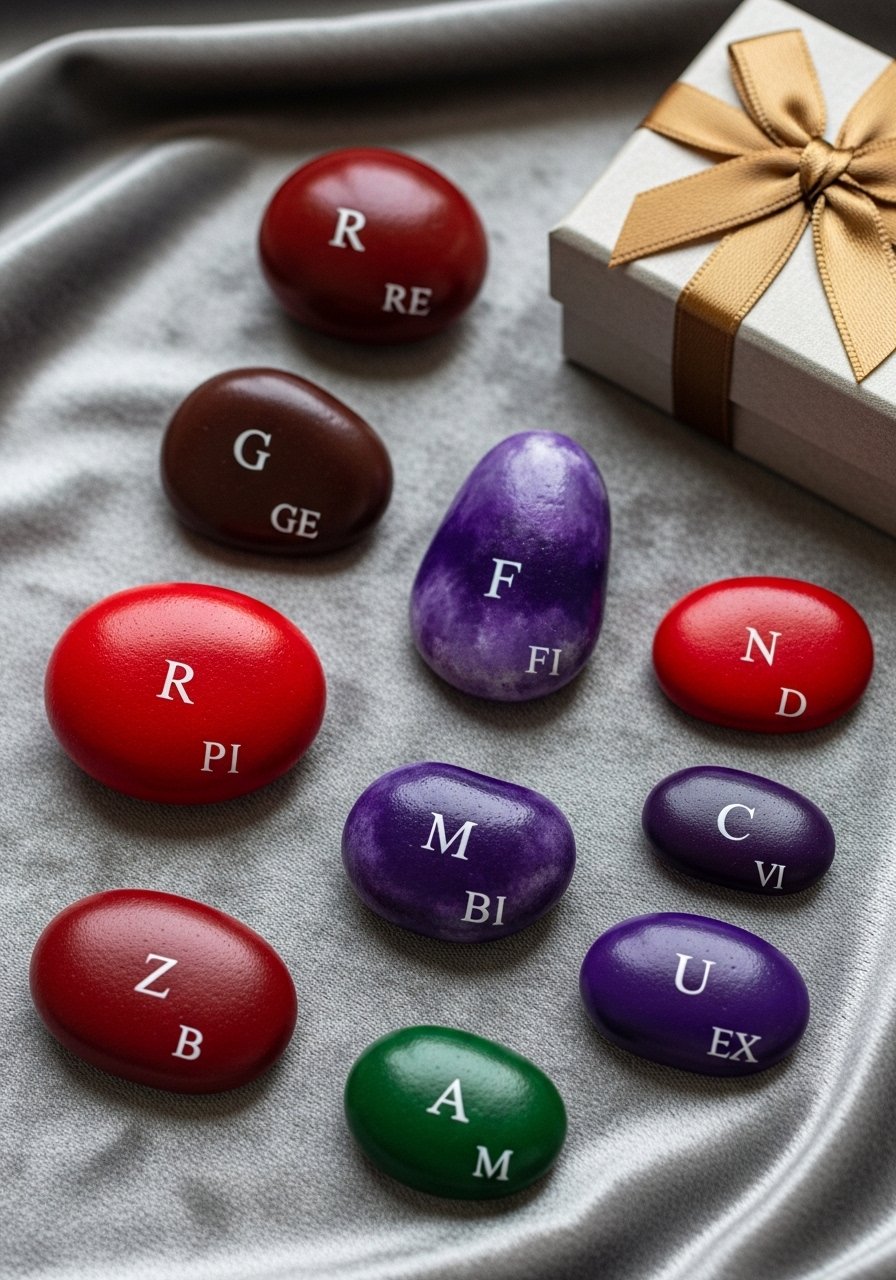
- Alphabet Learning Stones
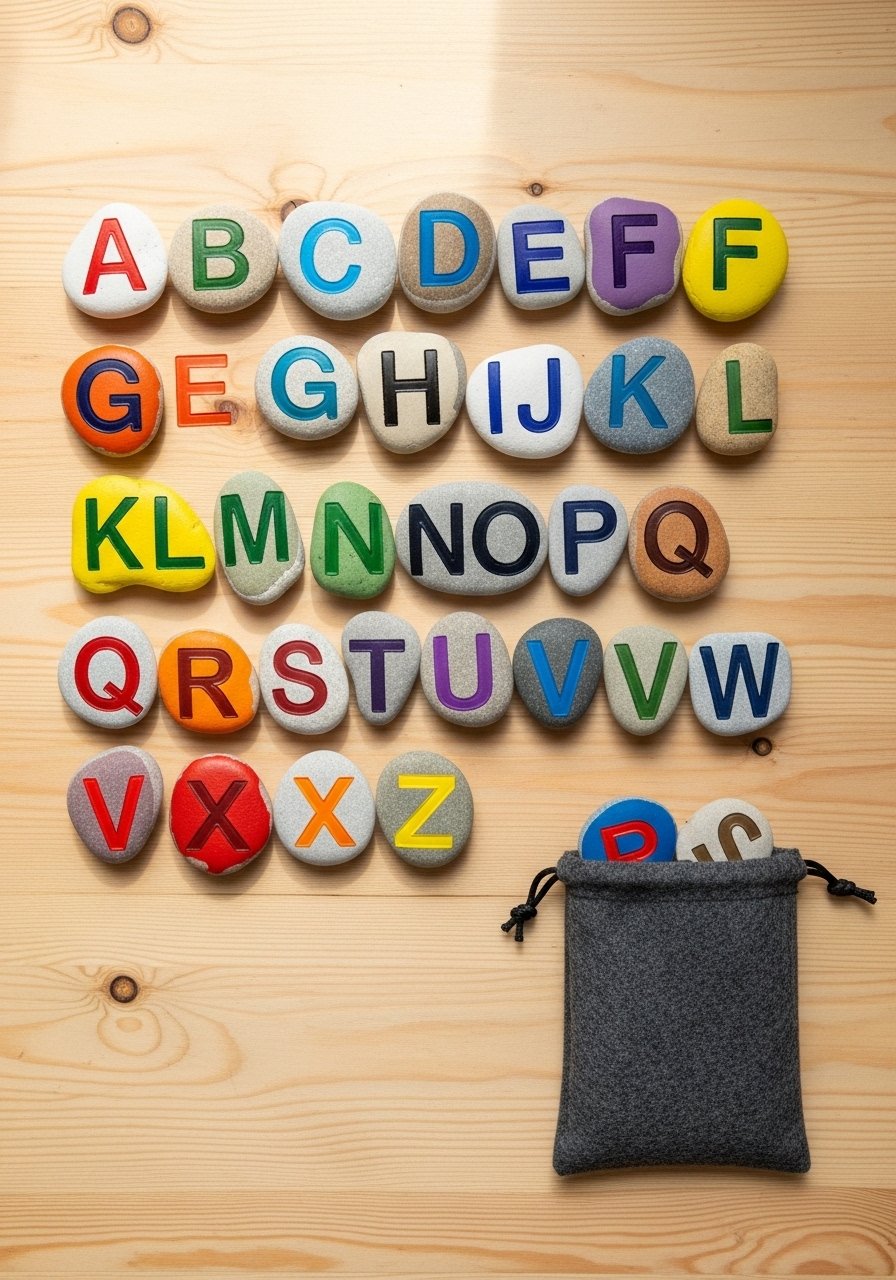
These stones help toddlers learn letters and can be used for spelling games. Bold, high-contrast colors make letters readable from a distance.
A stencil set helps keep letters uniform—try an alphabet stencil kit.
Materials
- Smooth small stones, 26 pieces (about 1–1.5 inches)
- Acrylic paints (primary colors), small bottles
- Alphabet stencil kit
- Small foam brush for filling in stencils
- Matte sealer spray
- Small felt storage bag
Instructions
- Clean stones and paint each stone a background color; dry 15 minutes.
- Center stencil on stone and press firmly. Use foam brush to fill stencil with contrasting paint. Remove stencil carefully; dry 10–15 minutes.
- Touch up edges with a fine brush if needed.
- Seal with matte spray; dry 15 minutes between coats.
Troubleshooting: If paint bleeds under stencil, press stencil edges more firmly or use stencil adhesive spray.
How to Display or Gift It
- Use in letter-matching games on a felt play mat.
- Gift with a small wooden box and instruction card.
- Store in a kids storage pouch.
- Cactus Pebble Garden
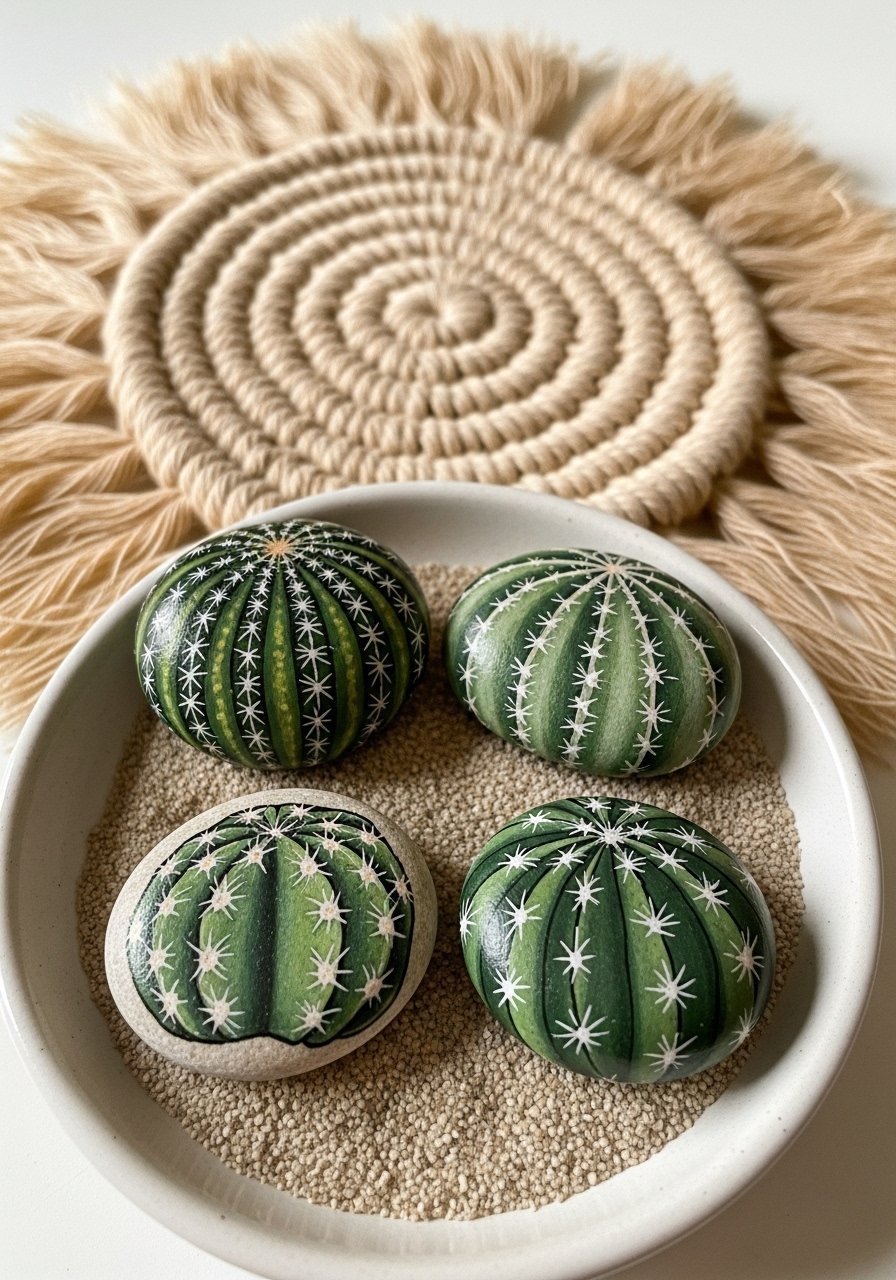
These tactile cactus stones add a touch of desert boho to shelves and desks. They’re perfect for people who like greenery but not the maintenance.
A thin liner brush makes the tiny spines crisp—use a liner brush.
Materials
- Flat medium stones, 4–6 pieces
- Acrylic paints in greens and sand-color
- Liner brush or paint pen for detailing
- Small shallow tray or dish
- Fine sand or faux sand for base, 2 tablespoons
- Matte sealer spray
Instructions
- Paint stones as cactus shapes with two coats; dry 20 minutes.
- Add lighter highlights and darker shading with a dry brush technique; dry 15 minutes.
- Draw spines with a white paint pen or liner brush; dry 10 minutes.
- Place sand in shallow tray and nestle stones in place.
- Seal stones if you expect handling; dry 15 minutes.
Troubleshooting: For realistic texture, stipple paint with a sponge before adding highlights.
How to Display or Gift It
- Display in a small dish on a windowsill or desk.
- Pair with a tiny framed desert print for a themed gift.
- Keep in a small ceramic tray for easy grouping.
- Inspirational Quote Stones — stone painting ideas for home decor
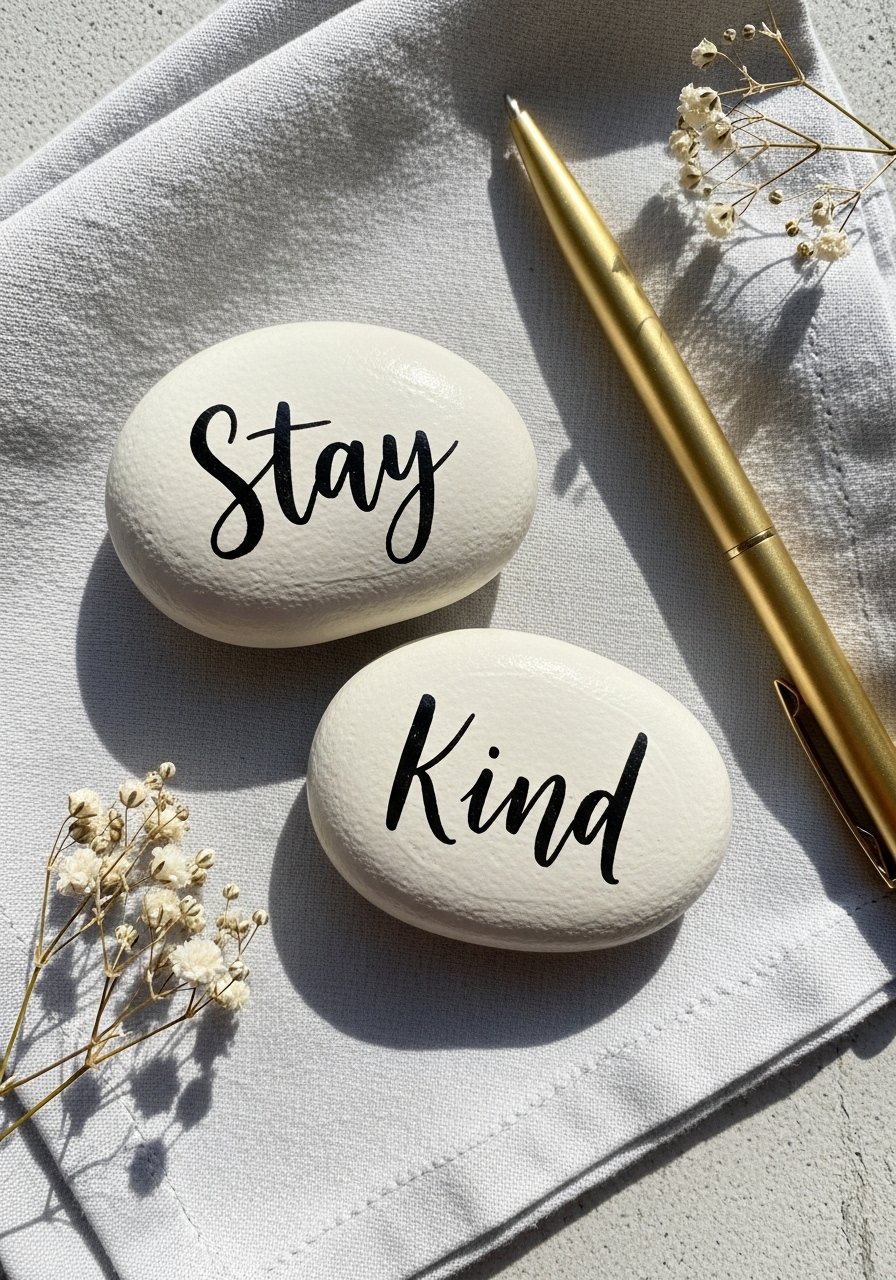
Tiny quote stones add personality to shelves and make thoughtful, inexpensive gifts. Hand-lettering gives them a modern farmhouse or minimalist vibe.
For hand lettering, keep a brush marker set nearby to practice strokes.
Materials
- Smooth flat stones, 4–8 pieces
- Acrylic base paint (cream or soft gray), 1–2 oz
- Black paint pen or brush marker
- Pencil and eraser for planning
- Matte sealer spray
- Fine sandpaper
Instructions
- Paint stones with base color; allow 20–30 minutes to dry.
- Lightly pencil quote or word placement.
- Trace over pencil with a black paint pen or brush marker. Allow ink to dry 10–15 minutes.
- Apply one thin coat of matte sealer; dry 15 minutes.
Troubleshooting: If your pen skips, shake well or heat slightly (per manufacturer) and test on paper.
How to Display or Gift It
- Place in a decorative bowl on an entry table.
- Tuck into a bouquet as a keepsake gift.
- Store extras in a small gift box.
- Stone Garden Markers
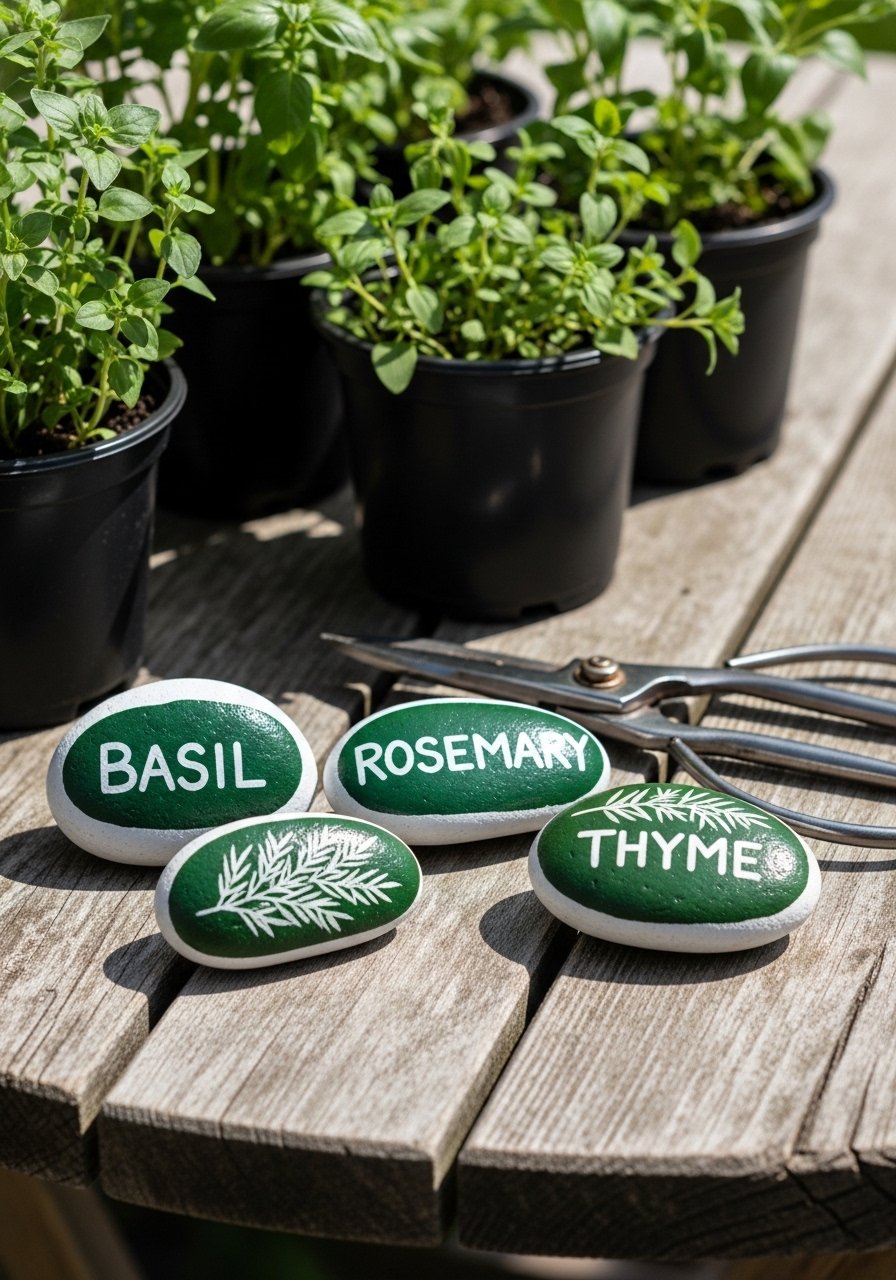
Use these in herb pots or garden beds to keep plant names tidy and stylish. Use outdoor-rated paint and sealer for longevity.
A small outdoor sealant spray protects against UV and moisture—grab an outdoor clear sealer.
Materials
- Flat stones, 6–10 pieces
- Dark green acrylic paint, 2 oz
- White paint pen for lettering
- Outdoor clear sealer spray, 1 can
- Pencil for lettering guides
- Long wooden skewers or plant stakes (optional)
Instructions
- Base coat stones with dark green; dry 20 minutes.
- Letter plant names with pencil then fill with paint pen; dry 15 minutes.
- Seal with two light coats of outdoor sealer; dry 20 minutes between coats. Cure 24 hours.
- For pathway placement, glue stones onto a short wooden stake with outdoor adhesive.
Troubleshooting: If left outdoors, re-seal annually to maintain color.
How to Display or Gift It
- Place in potted herb clusters or garden rows.
- Gift with a small plant in a kraft box.
- Keep a few extras in a garden tote bag for replacements.
- Metallic Leaf Accent Stones
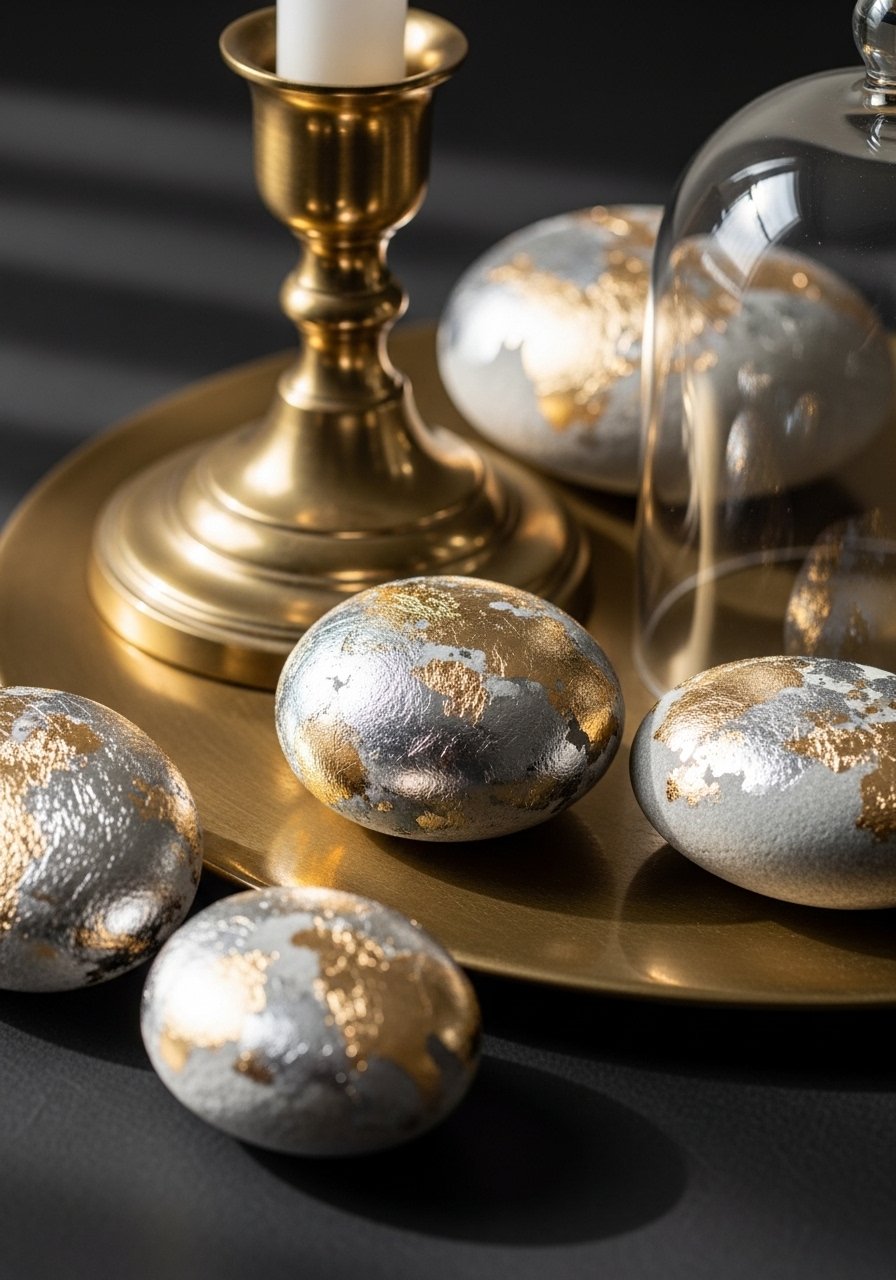
Metal leaf adds luxe shimmer—perfect for modern glam or elegant farmhouse decor. Use adhesive size and delicate handling, or faux metallic paints for easier application.
I use thin metal leaf sheets and a soft brush—try a metal leaf starter kit.
Materials
- Smooth stones, 3–6 pieces
- Gold or silver leaf sheets (vintage or adhesive), 1 pack
- Adhesive size (leaf glue), 1 oz
- Soft brush for burnishing
- Clear gloss sealer spray
- Tweezers
Instructions
- Paint stone base with desired color; dry 20 minutes.
- Apply adhesive size where leaf will go; wait until tacky per product instructions (usually 10–15 minutes).
- Gently lay leaf and press with soft brush. Trim excess leaf with brush.
- Seal with clear gloss spray; dry 30 minutes. For extra durability, apply two coats.
Troubleshooting: Metal leaf tears easily—work slowly and use tweezers for placement.
How to Display or Gift It
- Place on a console table with neutral ceramics.
- Use as paperweights for stationery gifts.
- Store leaf and small pieces in a small craft kit box.
- Glow-in-the-Dark Pathway Stones
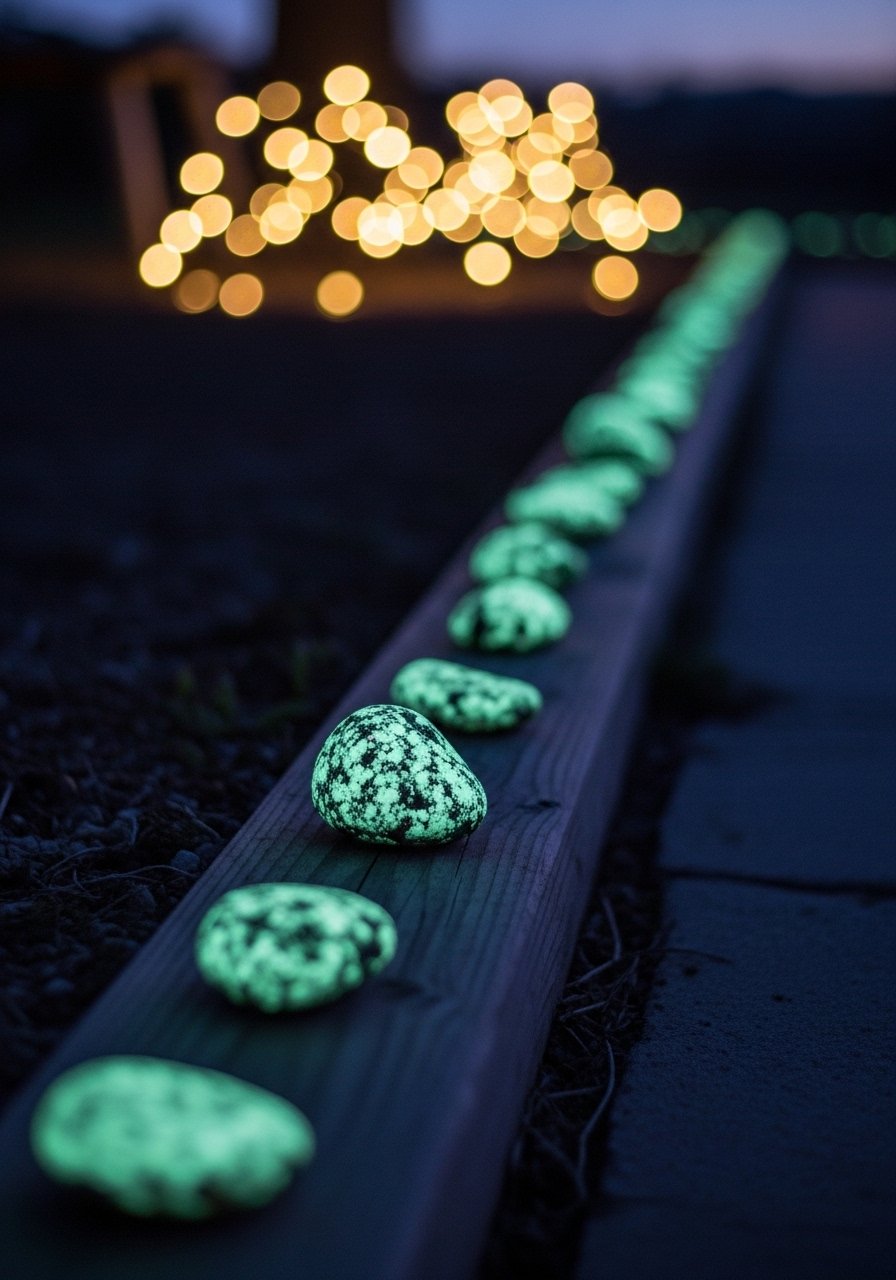
These stones charge in daytime and glow at night—great for subtle outdoor ambiance. Use a durable outdoor sealer to protect the glow coat.
Glow pigment performance varies; try a reputable glow-in-the-dark paint.
Materials
- Large flat stones, 6–10 pieces
- Glow-in-the-dark paint, 2 oz
- White base paint (to prime), 2 oz
- Outdoor clear sealer spray, 1 can
- Foam brush
Instructions
- Paint stones white to prime; dry 20 minutes.
- Apply two coats of glow paint; dry 20–30 minutes between coats.
- Charge in sunlight for at least 2 hours for best glow.
- Seal with outdoor sealer; dry 20 minutes. Cure 24 hours.
Troubleshooting: For deeper glow, apply glow paint over white primer. Glow fades over months—reapply as needed.
How to Display or Gift It
- Line pathway edges or planter rims.
- Present as a nightlight alternative in a small bag.
- Keep extras in a garden storage box.
- Decoupage Fabric Stones
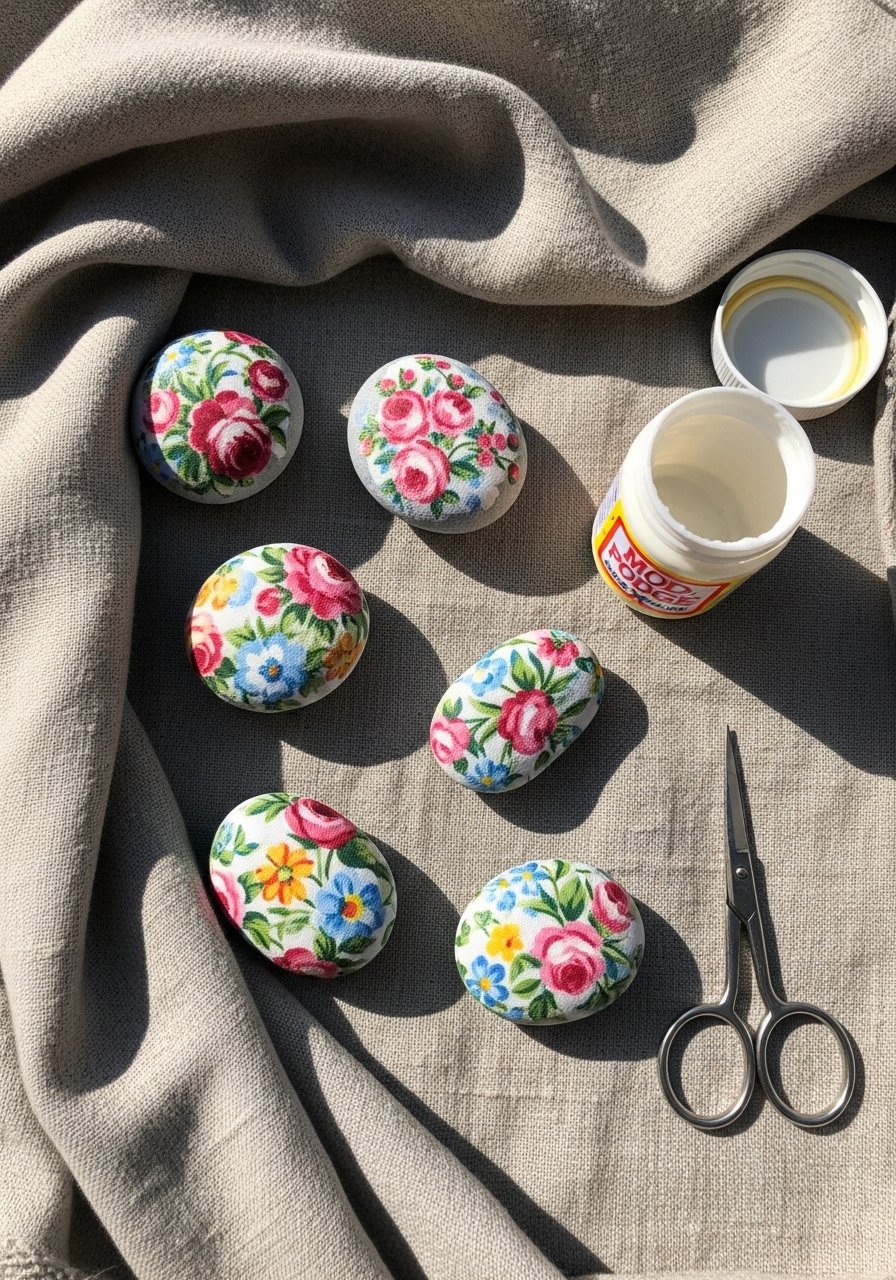
Decoupaging fabric onto stones creates delicate, shabby-chic accents that work well in cottagecore or vintage displays. Use thin cotton fabrics for best results.
Mod Podge works wonderfully; grab a Matte Mod Podge jar.
Materials
- Smooth stones, 4–6 pieces
- Thin cotton fabric scraps
- Mod Podge (matte), 4 oz
- Foam brush and scissors
- Fine sandpaper
- Acrylic sealer for topcoat
Instructions
- Sand stone lightly and clean.
- Cut fabric slightly larger than stone. Brush a thin coat of Mod Podge on stone.
- Press fabric onto stone, smoothing with foam brush. Trim edges close with scissors.
- Brush a thin coat of Mod Podge over top; dry 20 minutes. Apply second coat; dry 30 minutes.
- Seal with clear spray for water resistance; dry 30 minutes.
Troubleshooting: Bubbly fabric? Smooth from center outward and press firmly while glue is wet.
How to Display or Gift It
- Nestle in a bowl with dried flowers.
- Use as a decorative accent on stacked books.
- Wrap in tissue and tuck into a kraft gift box.
- Pebble Coasters Set
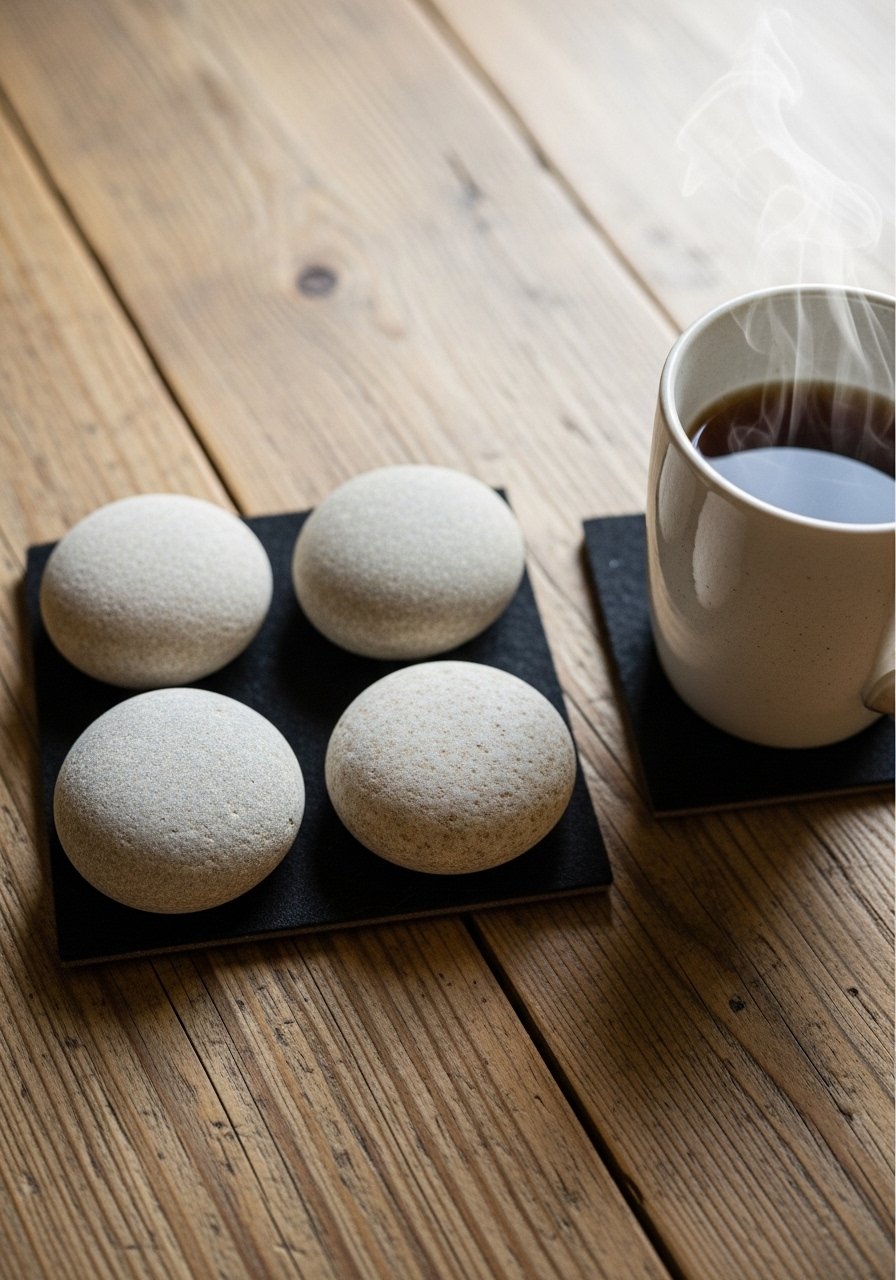
Join small pebbles into coasters for a tactile drink coaster set. Top with a clear sealer for waterproofing and add a felt backing to protect furniture.
A hot glue gun or E6000 works for strong bonding; I keep E6000 adhesive in the studio.
Materials
- Small flat pebbles, ~20 per coaster
- Thick cork or felt backing, 4 pieces (4” x 4”)
- E6000 or hot glue gun
- Clear waterproof sealer
- Pencil for layout
Instructions
- Arrange pebbles on cork to plan patterns; photograph layout.
- Glue pebbles to cork one by one with E6000; dry 24 hours.
- Once set, spray with waterproof sealer; dry 30 minutes.
- Trim excess cork if needed.
Troubleshooting: Uneven coasters? Use a jigsaw to square cork edges after glue cures.
How to Display or Gift It
- Tie set with twine and include care instructions.
- Store coasters stacked in a kitchen drawer organizer.
- Zodiac Constellation Stones
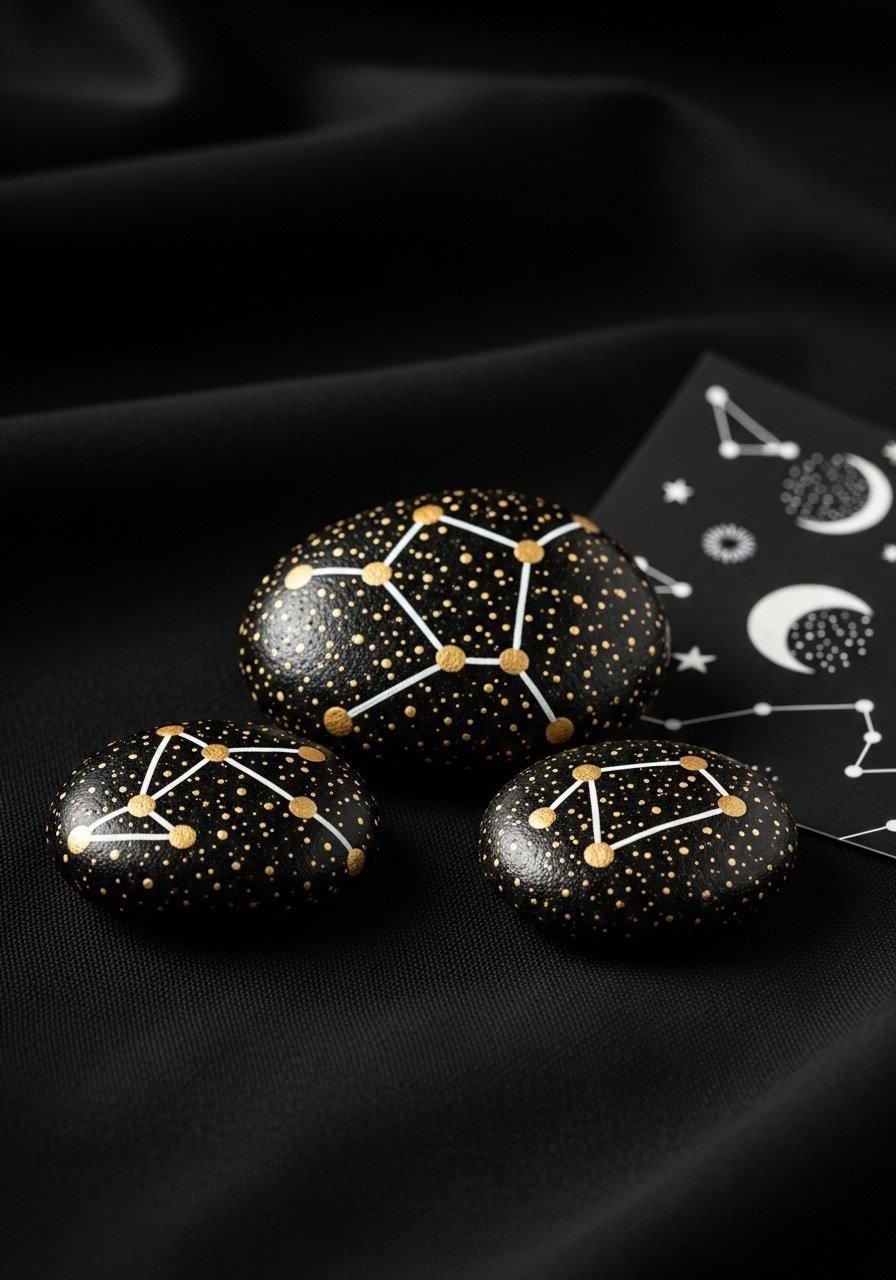
Paint tiny constellation patterns for astrology lovers. Use metallics for star dots and a thin liner to connect them for a delicate look.
A precision liner brush or white gel pen works—try a white gel pen set.
Materials
- Dark stones (black or navy), 6–12 pieces
- Metallic gold paint or paint pen
- White paint pen or liner brush
- Reference constellation chart (printable)
- Clear gloss sealer
Instructions
- Paint stones dark base (if needed); dry 20 minutes.
- Lightly pencil constellation dots using reference.
- Add star dots with metallic gold paint; dry 10–15 minutes.
- Draw connecting lines thinly with a white pen; dry 10 minutes.
- Seal with gloss if you want shine; dry 30 minutes.
Troubleshooting: Small mistakes? Cover with base color and retry once dry.
How to Display or Gift It
- Place on a bedside table; pair with an astrology print.
- Gift in a small velvet pouch with the recipient’s sign.
- Store extras in a velvet jewelry bag.
- Pebble Tile Trivet
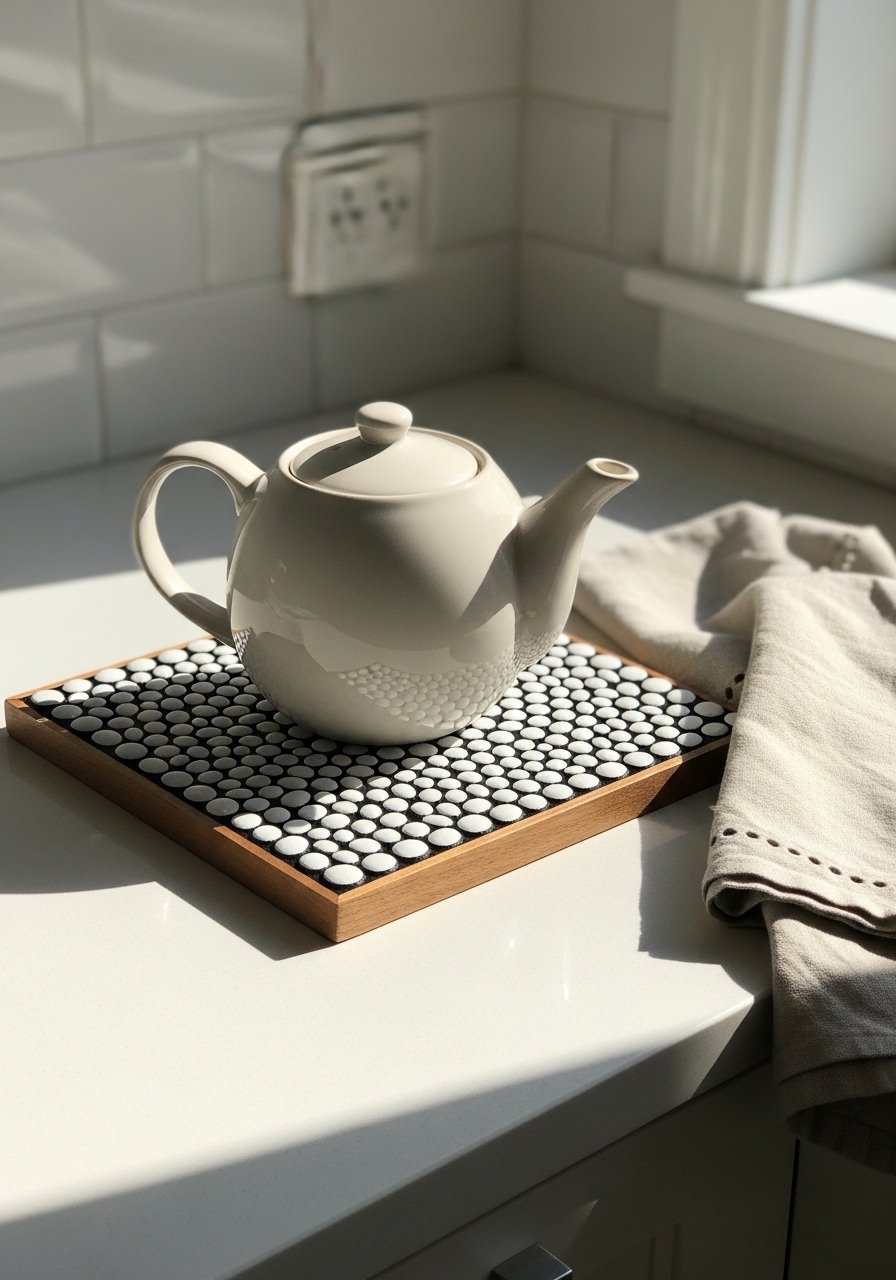
Create a functional trivet by gluing pebbles to a heat-resistant wooden base. Seal properly for protection from steam and spills.
Use a heat-safe wooden base and waterproof adhesive such as E6000.
Materials
- Small pebbles (~80–100)
- Wooden trivet base (6” x 6”)
- E6000 adhesive
- Clear heat-resistant sealer
- Sandpaper and pencil for layout
Instructions
- Paint pebbles if desired; dry 20 minutes.
- Arrange pebbles on trivet base and photograph layout.
- Glue pebbles in place with E6000; press and allow 24 hours to cure.
- Seal with heat-resistant sealant; cure per product instructions, typically 24–48 hours.
Troubleshooting: Avoid placing very hot pots directly—use a thin cloth underneath for extra protection.
How to Display or Gift It
- Keep on countertop as a display piece and use as needed.
- Wrap in kraft paper for a housewarming present.
- Store in a kitchen organizer tray.
- Zodiac Birthstone Accent Stones
Pair zodiac or birthstone colors with initials for personalized décor or small keepsakes. Metallic dot accents give a polished finish.
A small gemstone paint pen or alcohol ink can give rich color—try an alcohol ink set for deep hues.
Materials
- Smooth stones, 12–12 for each birth month
- Acrylics or alcohol inks in birthstone shades
- Small metallic paint pen for accents
- Fine brush for initials
- Matte or gloss sealer depending on finish preference
Instructions
- Paint stones in birthstone color; dry 20–30 minutes.
- Add tiny initials with a fine brush; dry 10–15 minutes.
- Highlight with small metallic dots and seal with desired finish; dry 30 minutes.
Troubleshooting: Inks can be unpredictable—test on a spare stone first.
How to Display or Gift It
- Bundle month sets in a small box with a printed card.
- Place on a jewelry tray for a personalized display.
- Store in a small keepsake box.
- Textured Relief Stones with Modeling Paste
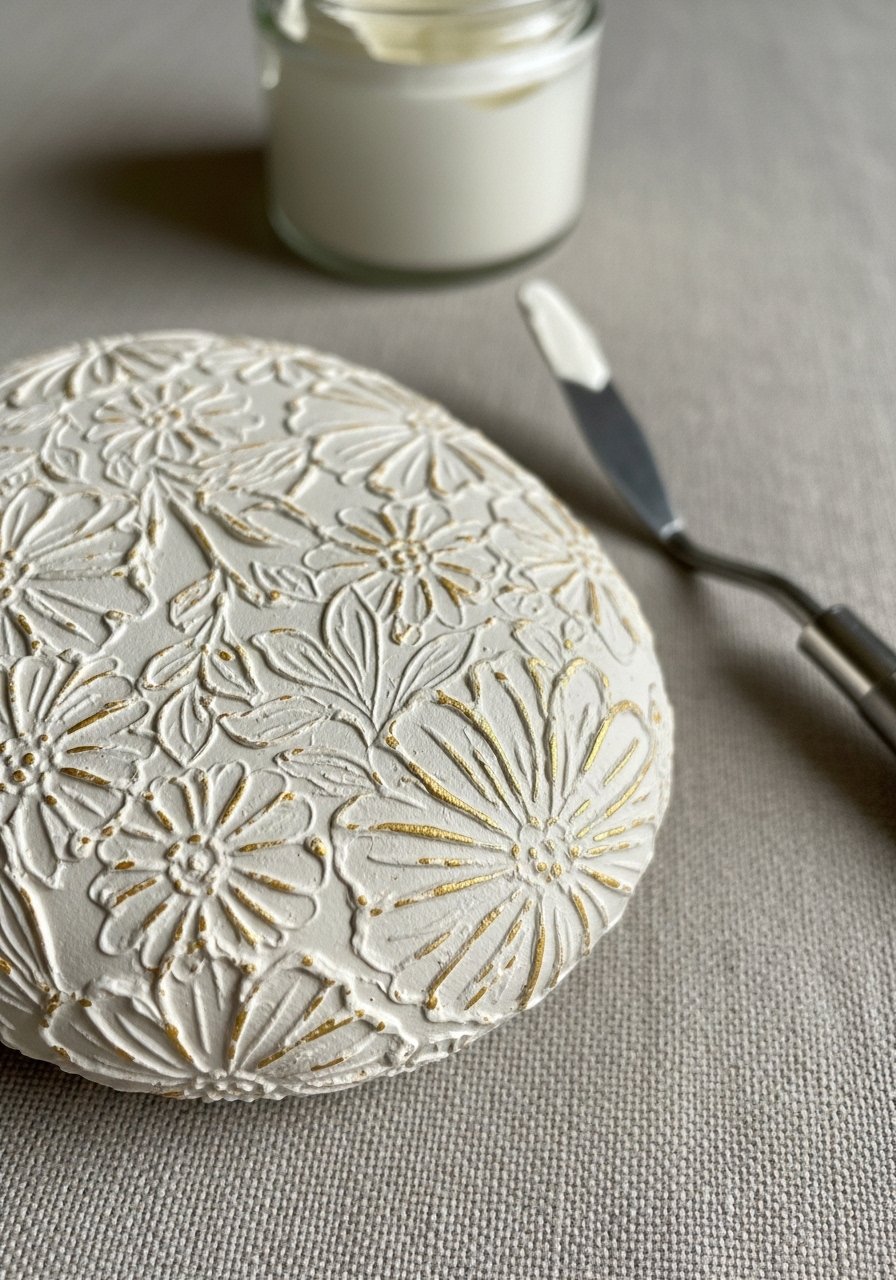
Using modeling paste or texture gel adds dimensional designs—great for tactile wall accents. It’s slightly advanced but very rewarding.
A palette knife and modeling paste are key—try a modeling paste jar.
Materials
- Large smooth stones, 3–4 pieces
- Modeling paste or texture gel, 2–3 oz
- Palette knife
- Acrylic paints and metallic wash
- Fine sandpaper for smoothing
- Clear matte sealer
Instructions
- Clean stone surface. Apply modeling paste using palette knife to create raised patterns (leaves, florals, waves).
- Allow paste to dry 24 hours fully; thin areas dry faster.
- Lightly sand any rough edges once cured.
- Paint over textured surface with acrylics, using a dry brush for highlights.
- Seal with matte or gloss sealer depending on desired finish; dry 30 minutes.
Troubleshooting: Thick paste takes longer—allow full cure to avoid cracking. Work in layers for deep relief.
How to Display or Gift It
- Mount on a shadowbox frame for wall art.
- Group on a decorative tray as a sculptural set.
- Pack carefully in tissue and place in a sturdy gift box for shipping.
You made it to the end—21 fresh ways to use painted stones around your home, from quiet mandalas to bold metallic accents. Each idea is designed to be approachable, with precise drying times and realistic material lists so you can jump in without guesswork. Save this for later or pin your favorites so you can try one a weekend at a time.
Which project will you make first? Share a photo with a friend or gift your first batch—handmade stones are small, personal, and so easy to love. If you’ll be doing a lot of these projects, trust me: a quality temperature-controlled hot glue gun and a set of detail paint brushes will make multiple projects go faster and look more polished.


