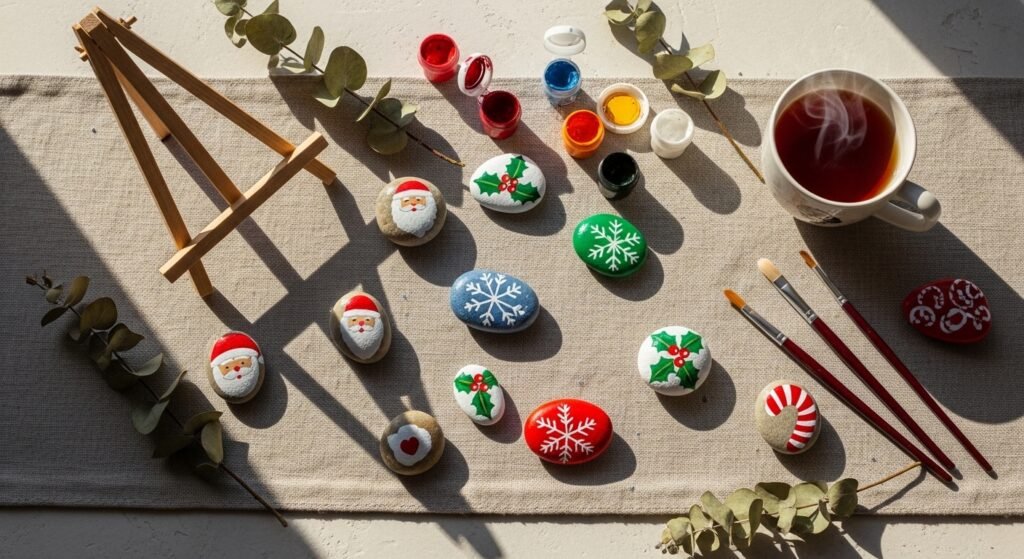
Ready to add a pocket-sized burst of holiday cheer to your mantel, porch, or gift-wrap? These 28 holiday stone painting ideas are full of festive color, cozy textures, and approachable techniques you can tackle in an afternoon. Whether you love neat Scandinavian silhouettes, cottagecore berries and berries, or bold boho ornaments, you’ll find playful options for beginners, kids, and serious crafters.
You’ll see projects that use simple acrylic paint and paint pens, a few that mix in epoxy resin for a glossy finish, and some that pair painted stones with small wooden easels or mason jars for instant display. I usually keep an acrylic craft paint set and a set of fine paint pens at hand—those two tools cover most techniques here. Pin the styles you love and scroll down for full materials, step-by-step instructions, drying times, and display ideas for each design.
- Classic Mini Christmas Tree Stones
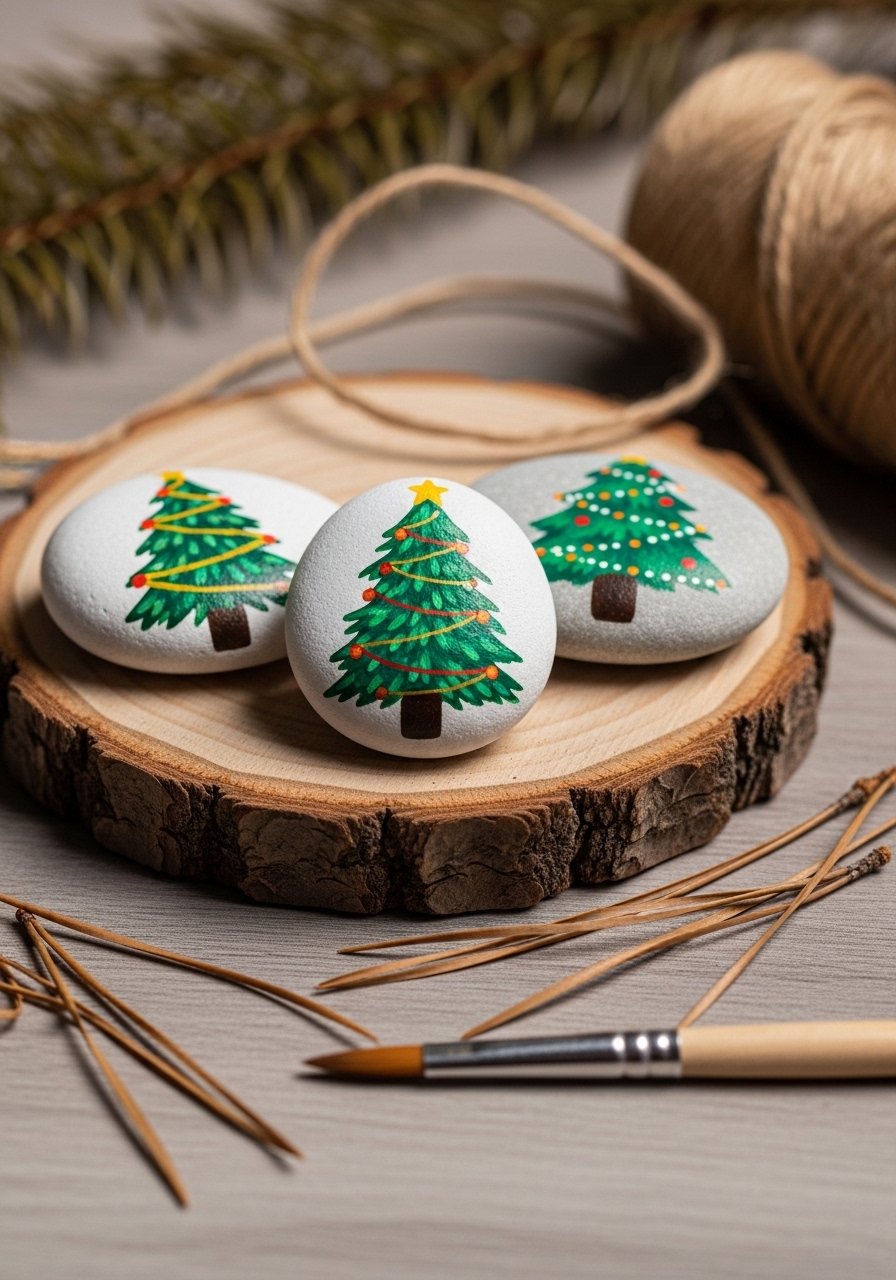
What makes this one work: small stones become charming tabletop trees with layered brushstrokes and a tiny star accent. The texture looks brushy and slightly matte, perfect for a farmhouse or cottagecore shelf. Great for beginners and kids with supervision.
Materials
- 6 smooth river stones, 2–3 inches each, cleaned
- Acrylic craft paint: green, dark green, white, gold
- Fine-tip metallic paint pen in gold
- Flat 1/2-inch foam brush
- Detail round brush size 0–2
- Pencil for sketching
- Clear acrylic spray sealer (matte)
- Paper towels and disposable tray
Instructions
- Wash stones with mild soap, rinse, and let dry completely (30–60 minutes).
- Lightly sketch triangular tree shapes with pencil.
- Apply a base coat of green with the foam brush; let dry 20–30 minutes for opacity.
- Layer darker green brushstrokes horizontally to mimic branches. Dry 15–20 minutes.
- Use the detail brush to add tiny ornaments (white dots) and a trunk (brown or dark green).
- Draw small gold stars on top with the metallic paint pen. Let dry 10–15 minutes.
- Spray 2 thin coats of clear acrylic sealer, waiting 15 minutes between coats. Fully cure 24 hours.
How to Display or Gift It
- Arrange three sizes on a small wood slice or inside a shallow bowl for a holiday vignette.
- Tie a set of three together with twine and tuck into a kraft gift box with tissue.
- Store unsealed extras in a stackable craft organizer until you seal them with spray sealer.
- Show on a mini wooden easel for shelf display; I use a simple small wooden easel for seasonal rotations.
- Snowflake Mandala Stones
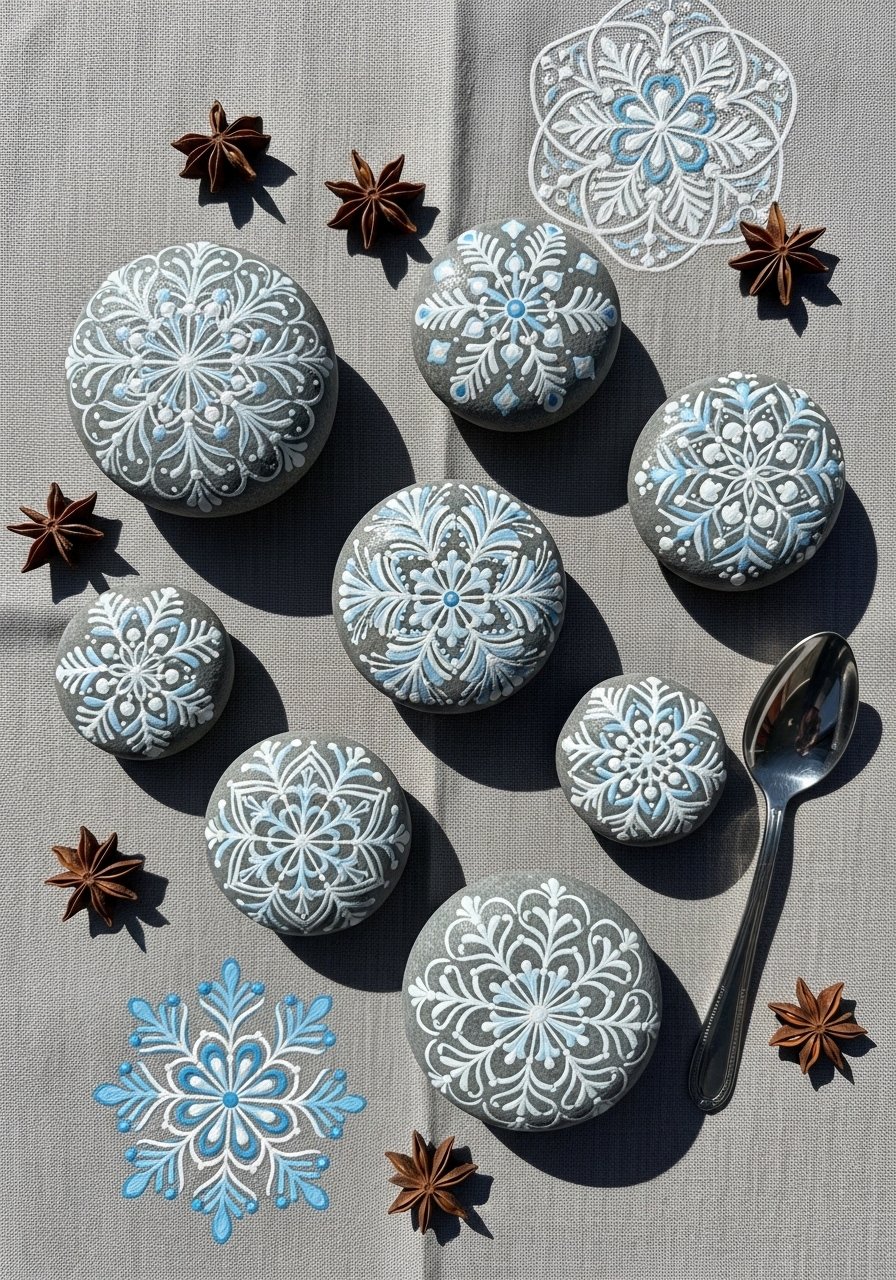
These crisp snowflake mandalas are delicate and graphic—perfect for a modern holiday mantel. Dotting tools or the back of a paintbrush make the tiny points easy. This one gives a frosty texture that glows against navy or slate backgrounds.
Materials
- 8 round stones, 1.5–2 inches
- Acrylic paints: navy, pale blue, white
- Dotting tool set or the end of a paintbrush
- Fine liner brush size 0
- Pencil and eraser
- Matte Mod Podge waterbased sealer (1 small jar)
- Microfiber cloth
Instructions
- Clean stones and let fully dry 30–60 minutes.
- Paint base coat navy on each stone using a foam brush; dry 30 minutes.
- Sketch a faint center dot and primary arms of the snowflake.
- Use white paint and a dotting tool to build concentric dots and lines into a mandala pattern.
- Add pale blue accents between white dots for depth. Dry 20–30 minutes.
- Apply 1–2 thin coats of Mod Podge with a flat foam brush; dry 15–20 minutes between coats. Full cure 24 hours.
How to Display or Gift It
- Glue small felt pads to the backs and use them as drink coasters for small glasses.
- Pack in a white gift box with shredded paper and a twine bow.
- Store finished stones flat in a multi-drawer craft organizer to avoid chipping; try a craft organizer tray.
- Rustic Holly Berry Stones — holiday stone painting ideas for farmhouse decor
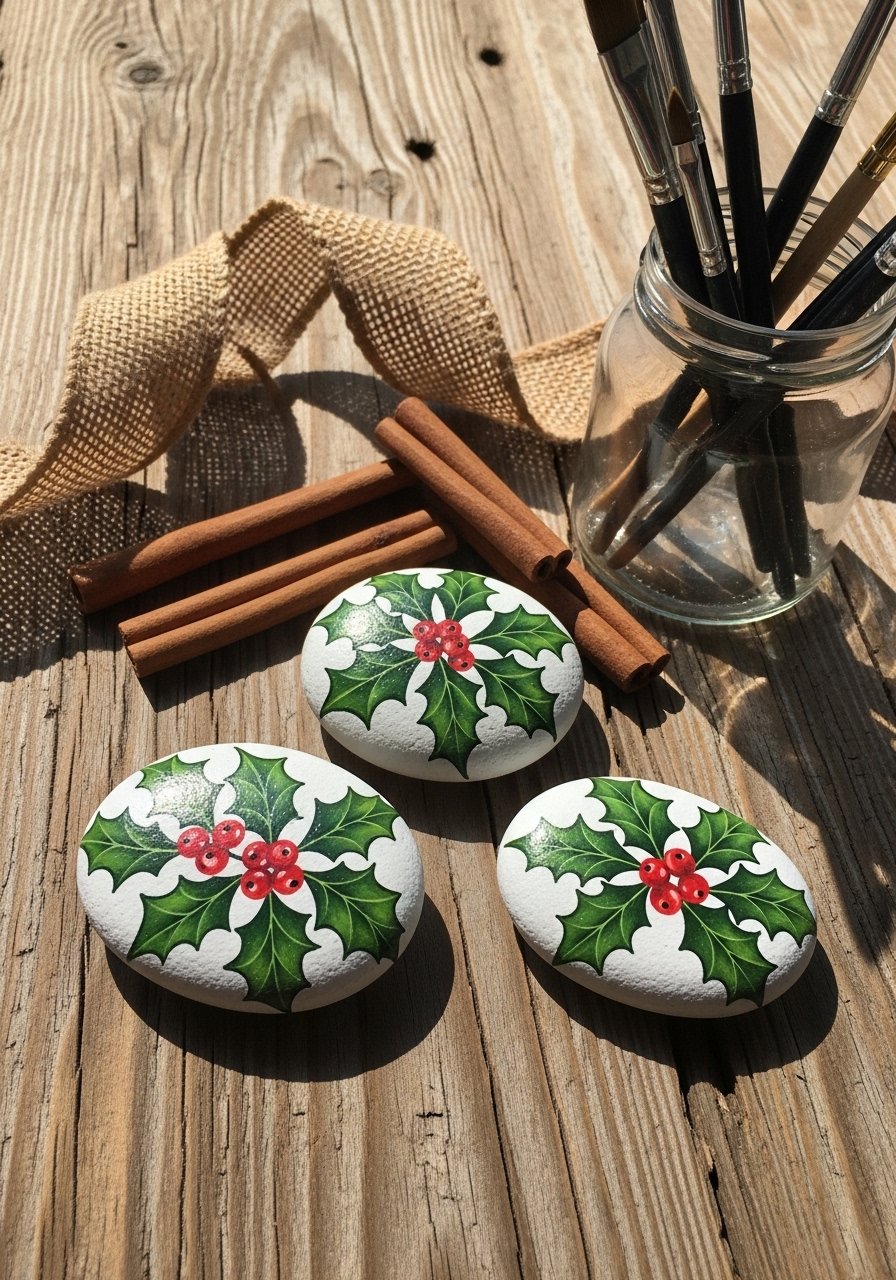
These holly-strewn stones give a classic holiday look with a soft, textured finish. The leaves are painted with layered strokes for depth. Perfect as place card weights or to tuck into wreaths. Beginners will like how forgiving the leaf strokes are.
Materials
- 10 oval stones, 2–3 inches
- Acrylic paints: sap green, deep green, crimson, white
- Flat 3/4-inch foam brush for base
- Filbert brush size 6
- White gel pen for tiny highlights
- Fine sandpaper (220 grit)
- Gloss Mod Podge or gloss spray for a slight shine
Instructions
- Sand any rough spots; wipe dust off.
- Base-coat stones in sap green with foam brush; dry 20–30 minutes.
- Paint holly leaf shapes with filbert brush using deep green; add lighter strokes for veins.
- Dot crimson berries; let dry 10–15 minutes.
- Add white highlights to berries with gel pen for shine.
- Seal with 2 thin coats of gloss Mod Podge or gloss spray. Wait 15 minutes between coats. Cure 24 hours.
How to Display or Gift It
- Group a cluster on a mantel with mini pinecones and a candle.
- Attach to place cards with a simple felt base for holiday dining.
- Wrap a set in kraft tissue and tuck into a kraft gift box with ribbon.
- Santa Face Pebbles
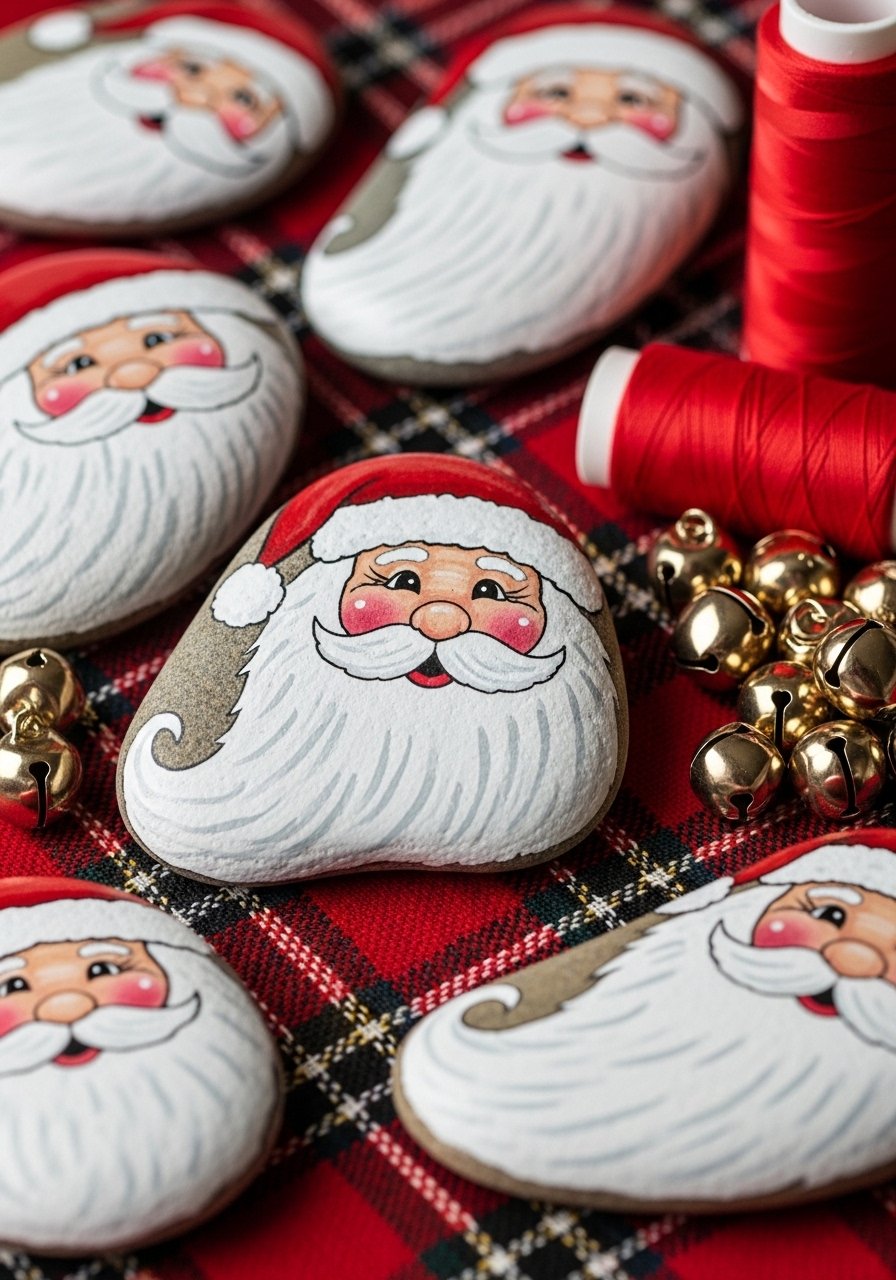
Tiny, friendly Santa faces are an instant mood lifter. Use a round brush for beard strokes to create texture. Kids love helping paint the rosy cheeks and glittered hat brims.
Materials
- 12 flat oval stones, 2 inches
- Acrylics: flesh tone, red, white, black, rosy pink
- Round brush size 4
- Fine liner brush size 0
- Small foam sponge (for cheeks)
- White glitter glue (optional)
- Matte sealer spray
Instructions
- Clean and dry stones fully.
- Paint a flesh-tone circle for the face; dry 20 minutes.
- Add red cap shape on top; dry 15 minutes.
- Using a round brush, paint beard with short strokes of white for texture.
- Dot black eyes and pink cheeks using sponge for soft blush.
- Optional: dab white glitter glue on hat trim. Seal with matte spray. Cure 24 hours.
How to Display or Gift It
- Stick on a tiered tray with mini candy canes.
- Pack individually in clear cellophane bags tied with ribbon for neighbors.
- Keep extras in a small mason jar labeled “holiday stones” for easy gifting; try small glass mason jars.
- Candy Cane Striped Stones
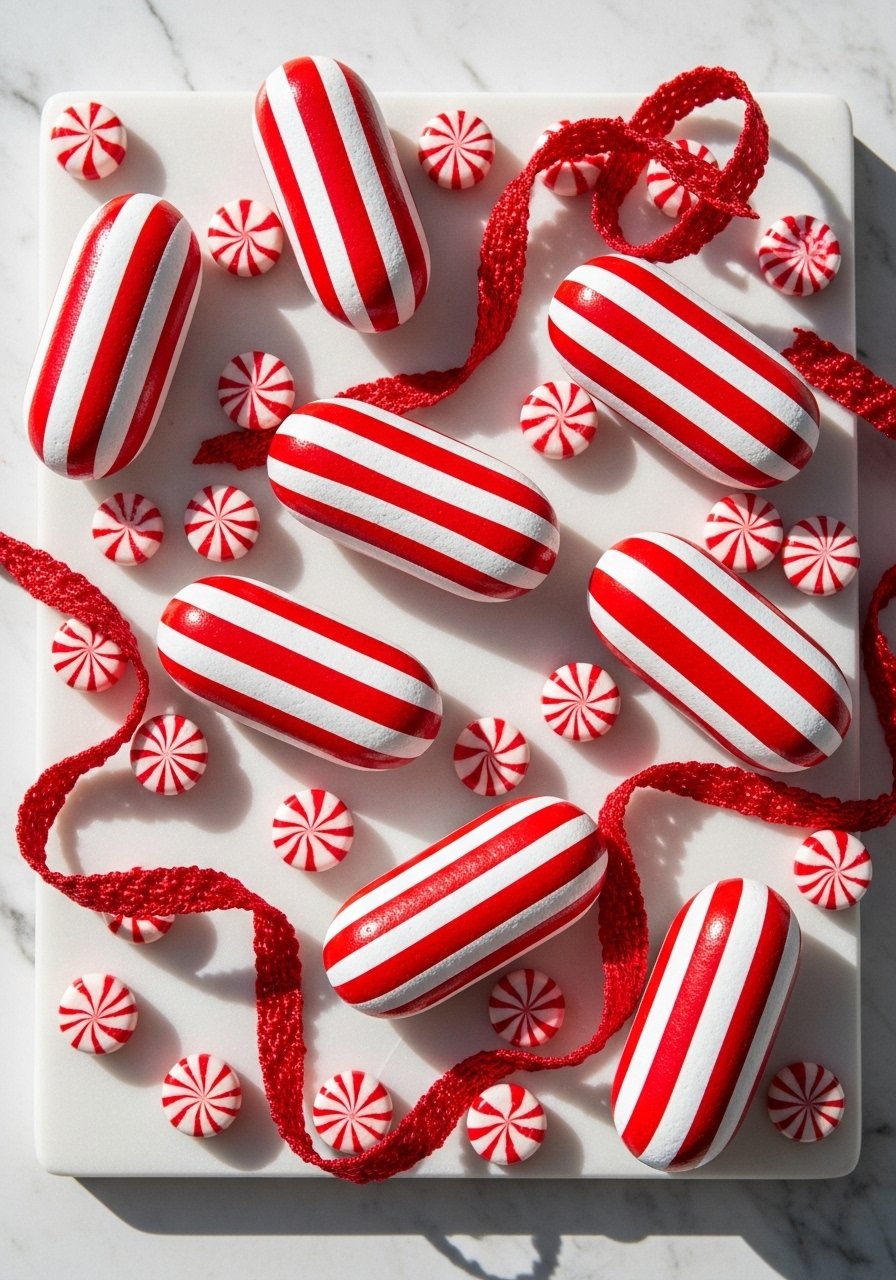
These striped beauties are graphic and fast. Painter’s tape helps you get razor-clean diagonal lines for that classic candy-cane look. They shine on a modern mantel or in a child’s stocking.
Materials
- 10 elongated stones, 2.5–3 inches
- White acrylic base paint
- Red acrylic paint
- Painter’s tape 1/8–1/4 inch
- Foam roller or brayer for base coat
- Detail brush size 0
- Matte or glossy sealer
Instructions
- Clean stones; apply white base with foam roller for smooth coverage. Dry 30 minutes.
- Wrap painter’s tape diagonally to create stripes, press edges firmly.
- Paint exposed stripes red with a flat brush. Dry 15–20 minutes.
- Remove tape slowly for crisp lines.
- Touch up edges with detail brush if needed. Dry 10 minutes.
- Seal with 1–2 coats of chosen sealer. Full cure 24 hours.
How to Display or Gift It
- Nestle in decorative glass bowls or a candy dish for seasonal decor.
- Glue to clothespins and clip on stocking cuffs as mini weights.
- Store in a foam-lined craft box to keep stripes unmarred.
- Little Nativity Pebble Set
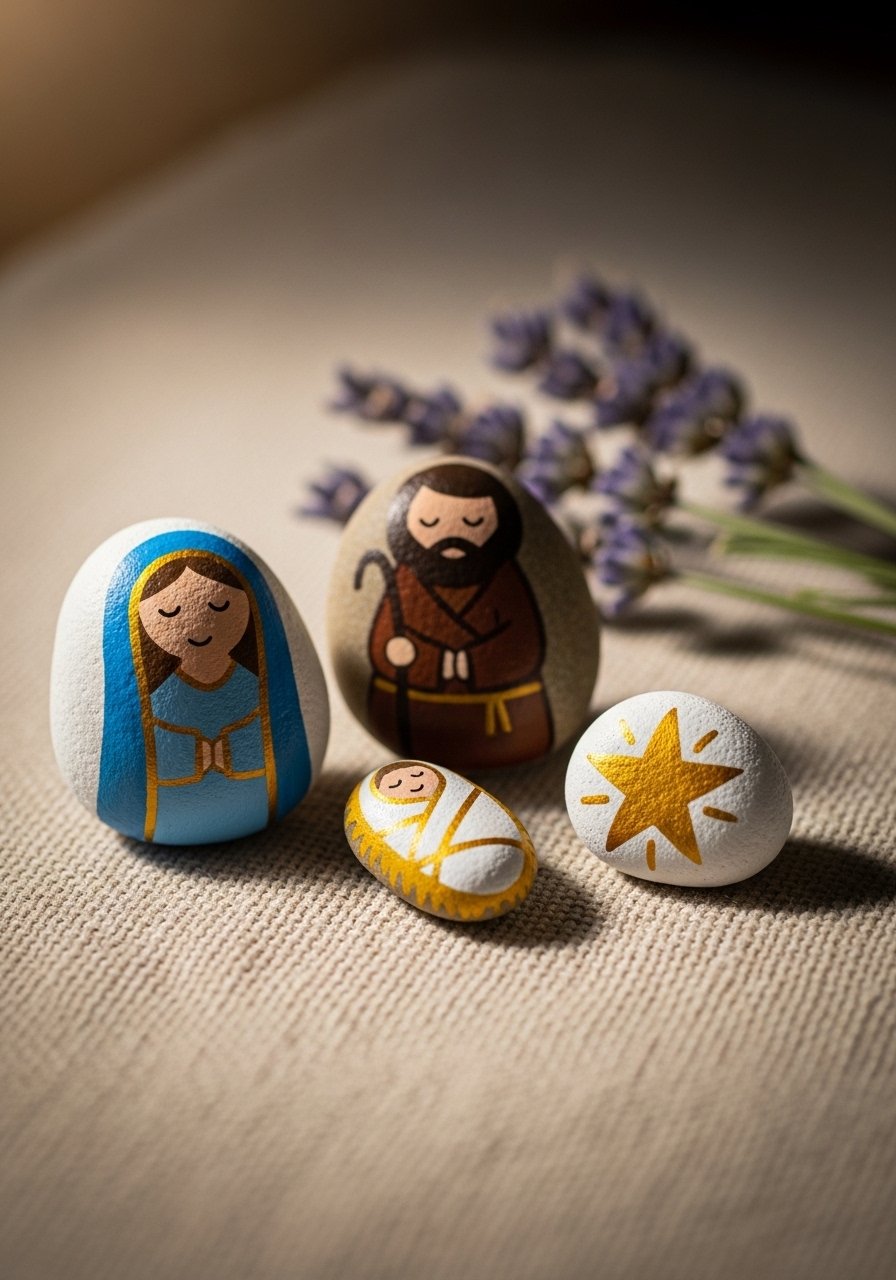
A sweet, minimalist nativity set created on smooth pebbles. Simple shapes and muted tones give it a Scandi-chic feel. It’s a thoughtful handmade gift for those who celebrate.
Materials
- 4 smooth oval stones, 1.5–2 inches
- Acrylic paints: ivory, muted blue, brown, gold
- Round brush size 2
- Gold paint pen for star
- Small piece of felt for backing
- Craft glue (clear-drying)
- Matte sealer spray
Instructions
- Wash stones and dry completely.
- Paint base tones for each figure: ivory for baby, blue for Mary, brown for Joseph.
- Add simple facial dots and cloth lines with a small round brush.
- Draw a gold star on a separate stone with the paint pen. Dry 10–15 minutes.
- Glue felt to backs for a finished look and to protect surfaces.
- Seal lightly with matte spray; cure 24 hours.
How to Display or Gift It
- Prop on a plate or a small wooden nativity shelf.
- Include in a small linen bag as a gentle, handcrafted gift.
- Store gently in a padded craft organizer drawer between seasons.
- Festive Polka Dot Ornament Stones
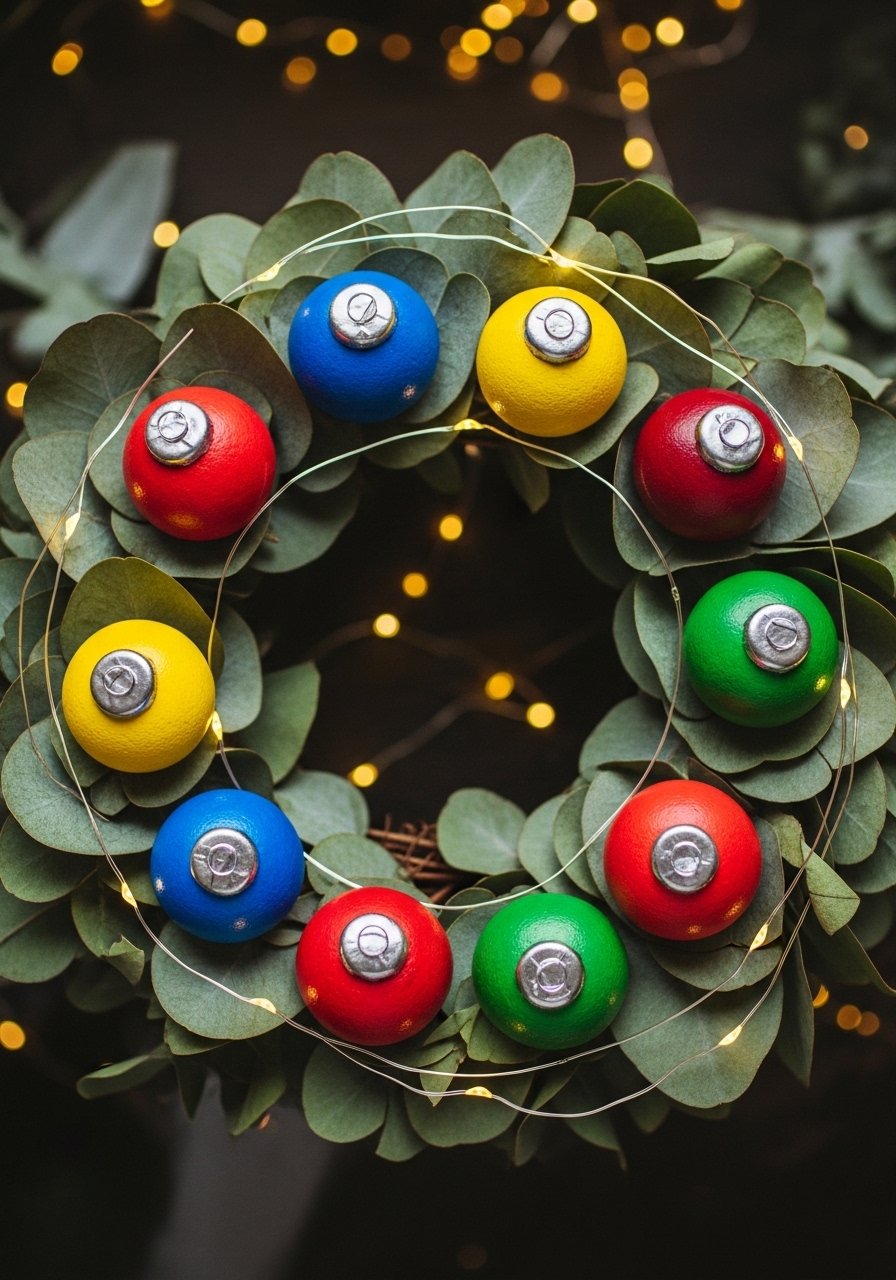
These ornament stones mimic glass bulbs with metallic caps. Use metallic paint or a gold paint pen for the tops. They add color and movement to garlands or tree displays.
Materials
- 12 round stones, 1.5–2 inches
- Acrylic paints: red, teal, blush, gold
- Metallic gold paint pen
- Flat foam brush for base coats
- Detail brush for dots
- Thin ribbon or jute for hanging loop (optional)
- Hot glue gun and glue sticks (low-temp)
Instructions
- Base-coat stones in bright ornament colors; dry 20–30 minutes.
- Add decorative polka dots or stripes with a detail brush.
- Paint a metallic cap area at the top; add a small gold loop with the paint pen.
- Attach a short ribbon loop with a dab of hot glue for hanging if desired.
- Seal with gloss spray for that reflective ornament look. Cure 24–48 hours.
How to Display or Gift It
- Hang from a small branch or use as gift tags on wrapped presents.
- Scatter across a mantle with mini string lights.
- Store flat in a divided craft box to protect ribbons and paint.
- Woodland Animal Friends Stones
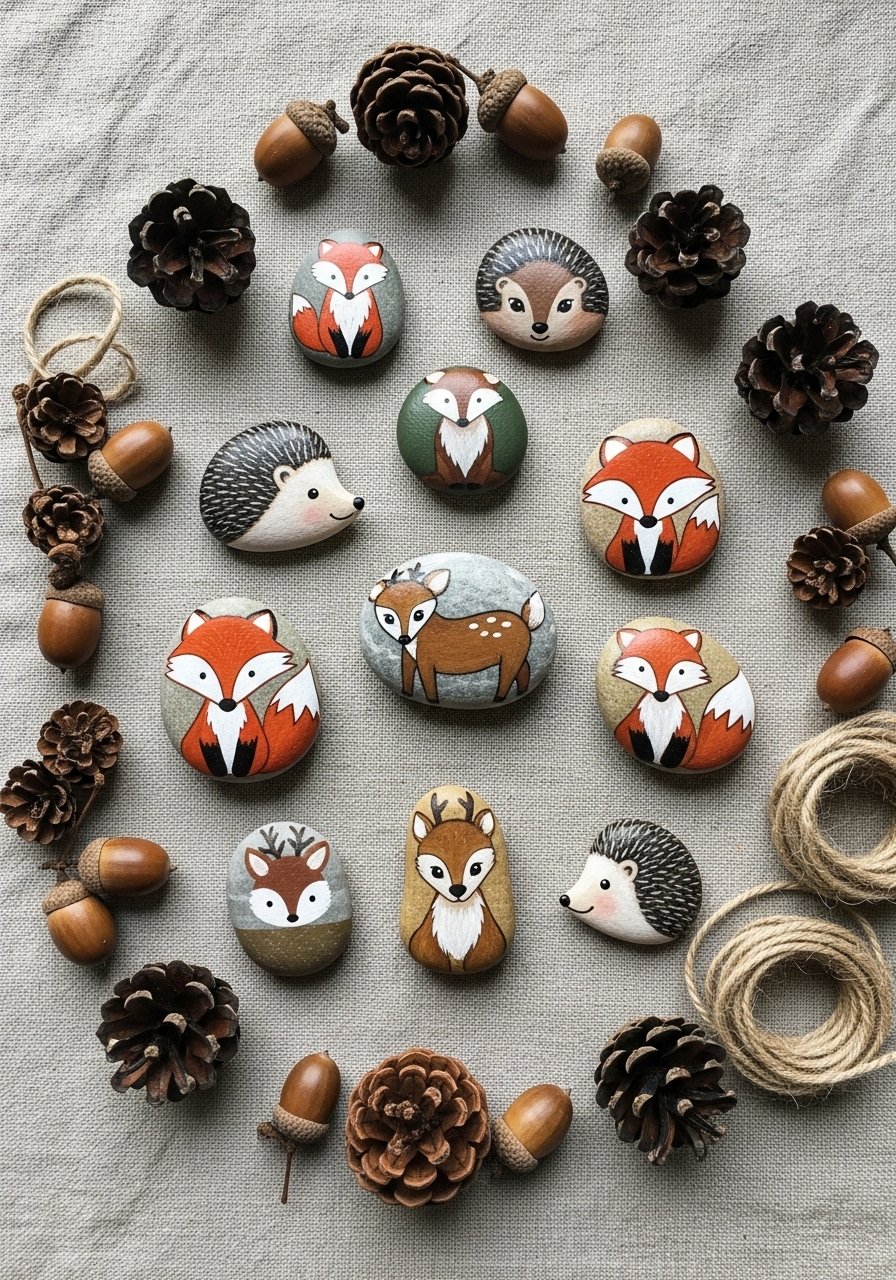
Whimsical woodland creatures painted with soft strokes—great for a nature-themed holiday table or kids’ crafts. Use a fine liner brush for facial features.
Materials
- 10 assorted stones, varied sizes
- Acrylic paints: burnt orange, cream, brown, black
- Fine liner brush size 0
- Pencil for sketching faces
- Matte varnish spray
- Small plastic palette for mixing
Instructions
- Clean stones and sketch simple animal faces.
- Fill base shapes with color; let dry 20–30 minutes.
- Add facial details with the fine liner brush.
- Create fuzzy textures with short, soft strokes.
- Seal with matte varnish spray; wait 15 minutes between coats. Cure 24 hours.
How to Display or Gift It
- Use as place markers on a holiday kids’ table—write names on the back with pencil then seal.
- Bundle two or three with twine in a kraft bag and include a handwritten note.
- Keep extras organized in a clear craft storage box.
- Poinsettia Painted Rocks
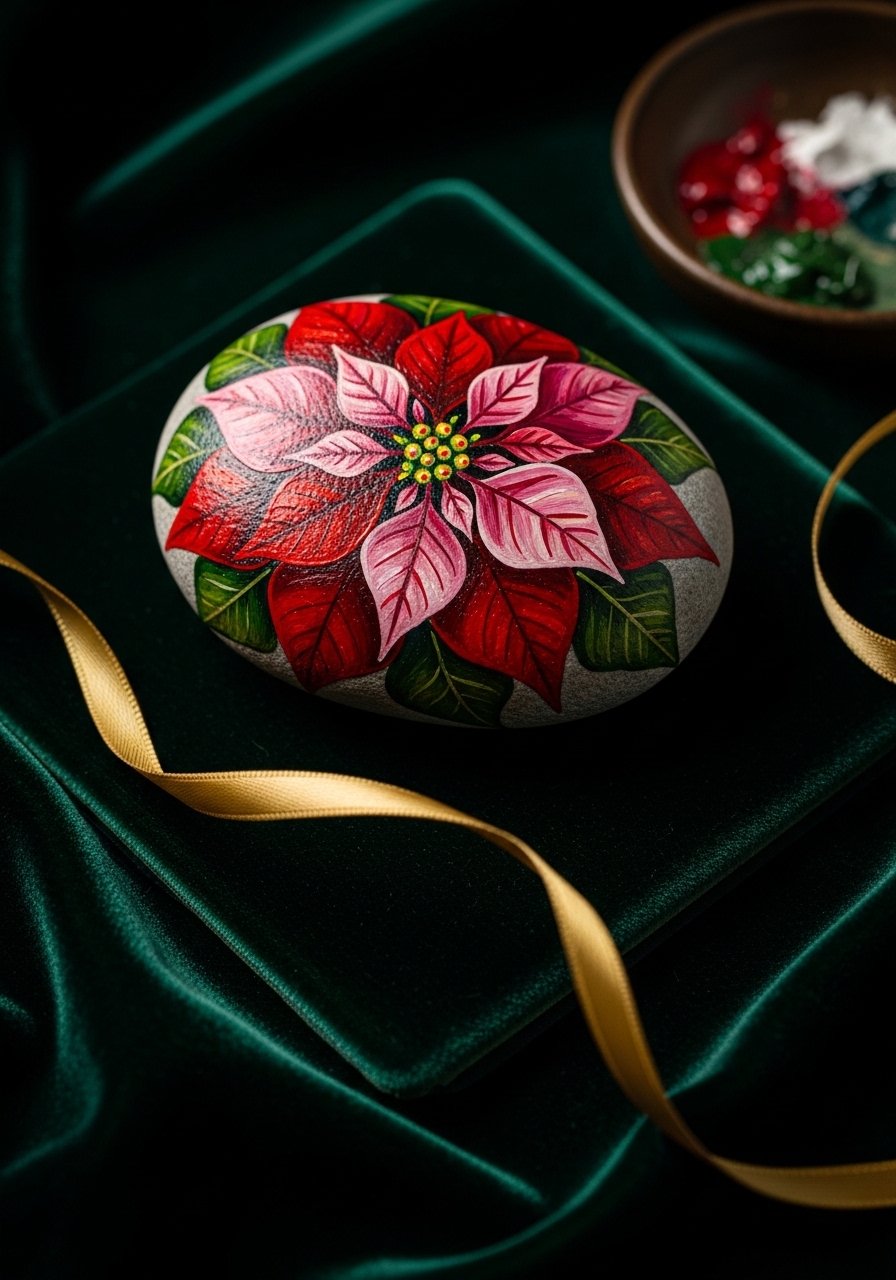
A single large poinsettia on a flat stone looks like a mini artwork. Layered petals and a textured center create depth. This suits gift-giving or a polished mantel display.
Materials
- 1 large flat stone, 3–4 inches
- Acrylic paints: crimson, rose, green, yellow
- Filbert brush size 8
- Tiny detail brush size 0
- Palette knife or toothpick for texture in center
- Gloss sealer for a sheen
Instructions
- Prime stone with white base; dry 30 minutes.
- Sketch petal layout lightly with pencil.
- Paint base petals in crimson; dry 15–20 minutes.
- Layer rose highlights toward petal centers.
- Dot the center with yellow and add texture with a palette knife or toothpick.
- Seal with gloss for a slightly lacquered finish. Full cure 24–48 hours.
How to Display or Gift It
- Place on a velvet gift card or small plate for an elegant present.
- Pair with a seasonal candle on a tray for holiday centerpieces.
- Store in a padded box between uses.
- Gingerbread Cookie Stones — holiday stone painting ideas with a cozy vibe

These gingerbread-inspired stones read like baked treasures. White icing lines and little button dots make these irresistibly cozy. Kids can help with dotting, which is fun and simple.
Materials
- 8 flat stones, 2–3 inches
- Brown acrylics for biscuit base
- White paint or white paint pen
- Small round brush and dotting tool
- Matte sealer
- Small cookie cutter shape (for stencil, optional)
Instructions
- Paint base brown; dry 30 minutes.
- Use white pen/paint to draw icing edges and buttons with dotting tool.
- Add tiny rosy cheeks with a sponge if desired. Dry 10–15 minutes.
- Seal with matte spray; cure 24 hours.
How to Display or Gift It
- Tuck into gingerbread-themed gift boxes with paper shred.
- Use as stocking fillers or tree ornaments with ribbon loops.
- Keep extras in a shallow craft drawer lined with tissue.
- Scandinavian Tree Trio
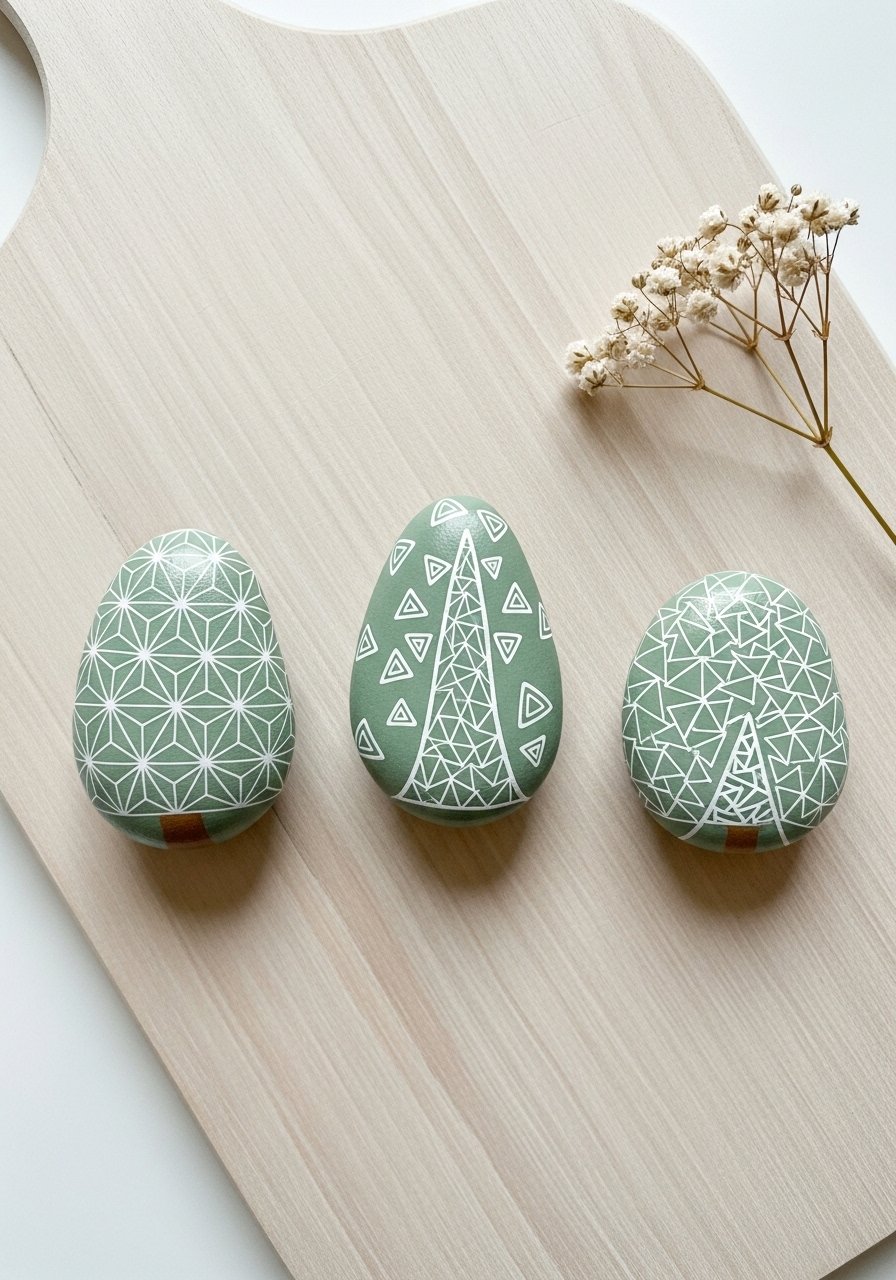
A trio of tiny Nordic trees with geometric motifs fits cottagecore and Japandi aesthetics. Clean lines and muted tones make these subtle and stylish mantel accents.
Materials
- 3 stones, 2–3 inches each
- Acrylics: sage, olive, cream
- Ruler and pencil to plan motifs
- Fine liner brush for geometric marks
- Matte Mod Podge
- Small wooden rectangle as a base (optional)
Instructions
- Paint stones in muted base colors; dry 20–30 minutes.
- Plan and lightly mark geometric motifs with pencil.
- Paint motifs with the fine liner brush in cream.
- Optional: glue stones to a small wooden base for a standing trio; use craft glue and press firmly.
- Seal with matte Mod Podge; cure 24 hours.
How to Display or Gift It
- Line them on a narrow mantle shelf with a linen runner.
- Gift as a set on a tiny wooden plaque wrapped in baker’s twine.
- Store in a labeled craft drawer to keep sets together.
- Metallic Ornament Accent Stones
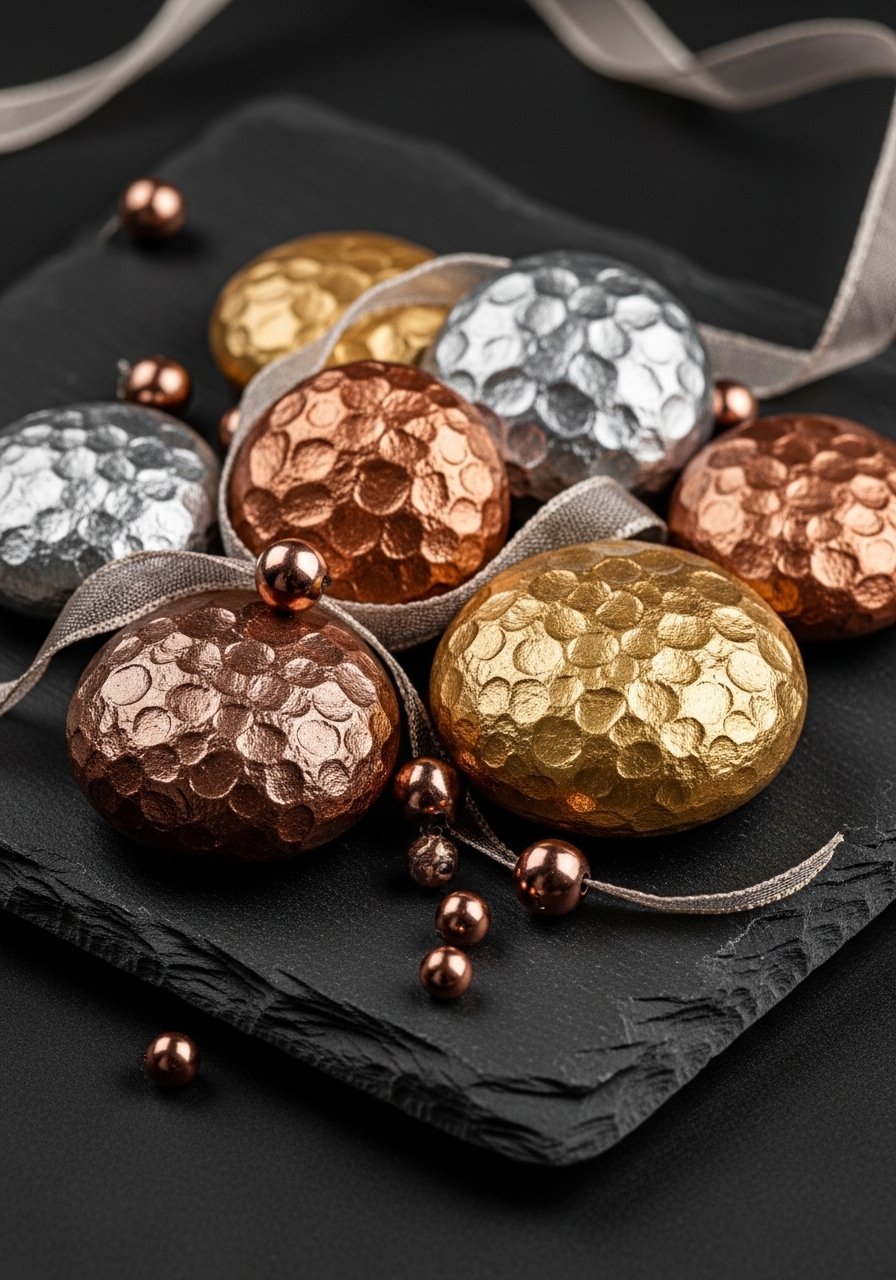
Go glam with metallic paints for shimmering accents. These feel luxe and pair beautifully with velvet or dark greenery. Great for modern or glam holiday themes.
Materials
- 6 smooth stones, 2–3 inches
- Metallic acrylic paints: gold, copper, silver
- Soft foam brush for smooth base
- Fine liner brush for detailing
- Microfiber cloth for buffing
- Gloss varnish spray
Instructions
- Prime stones with a neutral base coat; dry 20–30 minutes.
- Apply metallic paints in thin, even layers; dry 15–20 minutes between coats.
- Create hammered texture with light stippling from the brush tip.
- Buff gently with a microfiber cloth after paint is totally dry for extra shine.
- Seal with gloss varnish. Cure 24–48 hours.
How to Display or Gift It
- Scatter across a dark runner for a luxe mantle display.
- Use as paperweights in gift-wrapping stations.
- Wrap individually in tissue and place in a lined gift box.
- North Pole Signpost Stones
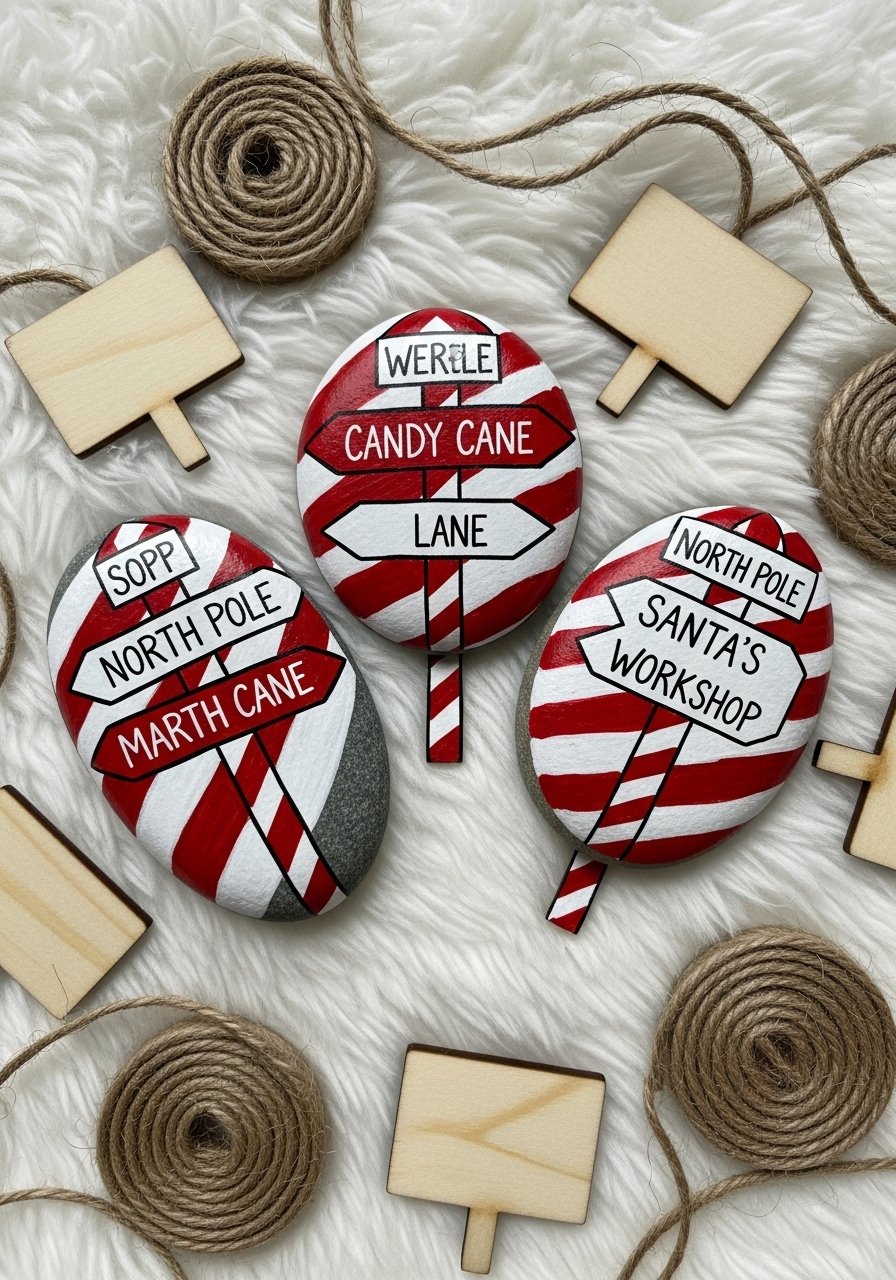
These directional signpost stones bring whimsy to entry tables or a children’s corner. Layered lettering and stripes make the mini signs pop. Kids can personalize destinations.
Materials
- 3 elongated stones, 3–4 inches
- Acrylic paints: white, red, black
- Small flat brush for stripes
- Fine liner brush for lettering
- Pencil and eraser
- Hot glue gun (to attach to a small dowel post, optional)
- Small wooden dowels if making standing signs
Instructions
- Paint base white; dry 20–30 minutes.
- Add red diagonal stripes with a flat brush; dry 15 minutes.
- Sketch destination words lightly and paint with fine liner.
- Optional: glue to a dowel to make a standing signpost; press and let glue set 5 minutes.
- Seal with matte spray; cure 24 hours.
How to Display or Gift It
- Plant standing signs in a potted rosemary or small faux tree.
- Use as playful bookshelf accents—stack with small vintage books.
- Package with a ribbon and attach a small handwritten note for gifting.
- Evergreen Needle Texture Stones
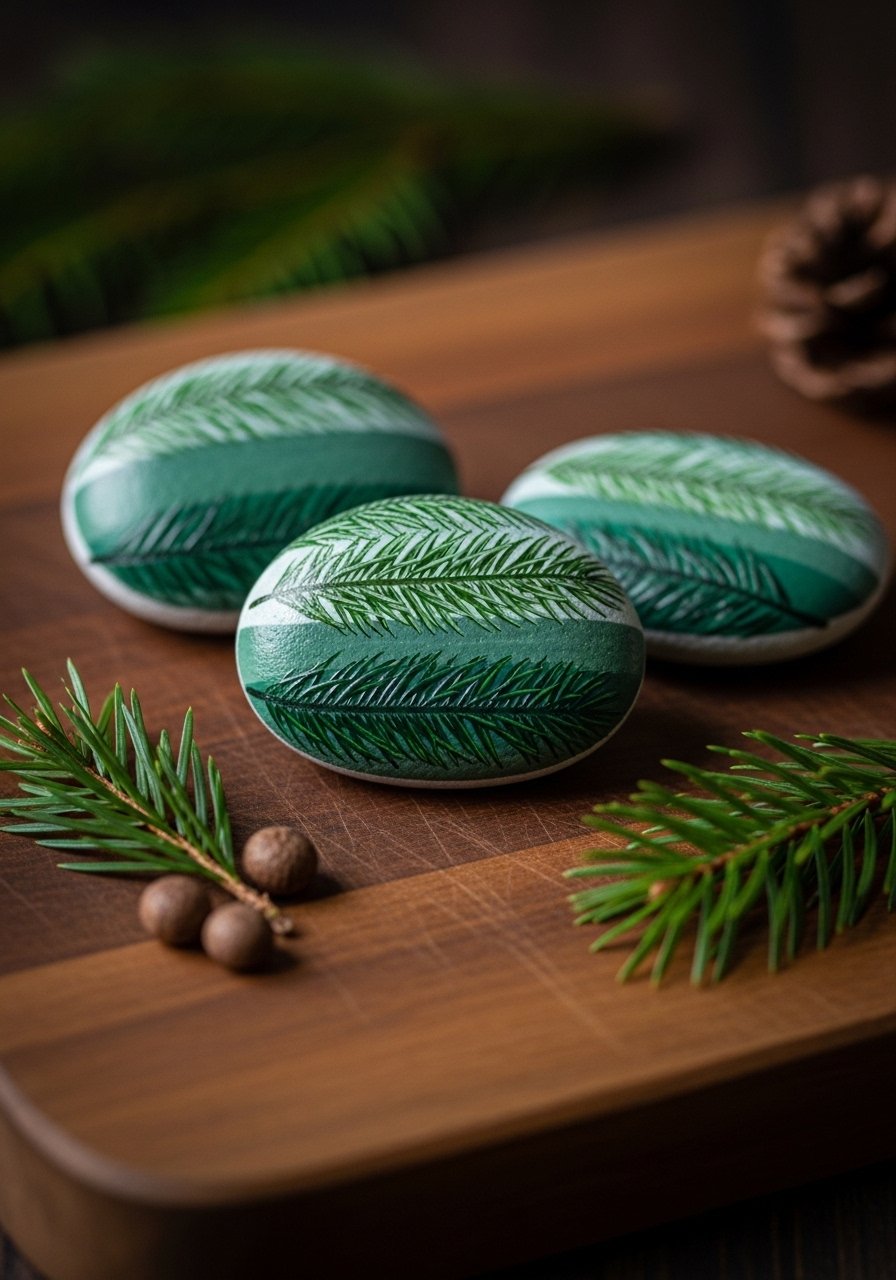
For a tactile approach, press a real evergreen sprig onto wet paint for a textured print, then accent by hand. The result is natural and slightly imperfect—very cottagecore.
Materials
- 6 flat stones, 2–3 inches
- Acrylic paints: forest green, sage, white
- Fresh evergreen sprigs (small)
- Palette for mixing
- Small foam brush
- Matte sealer spray
Instructions
- Mix a medium-thin paint consistency.
- Press evergreen sprig into paint then firmly onto stone to transfer texture.
- Let impressions dry 20–30 minutes.
- Add hand-painted highlights with a fine brush to emphasize needles.
- Seal with matte spray; cure 24 hours.
How to Display or Gift It
- Arrange in a wooden crate with real pine for a rustic centerpiece.
- Use as natural place markers sealed to resist moisture.
- Store wrapped in tissue in a craft organizer drawer to protect textures.
- Retro Midcentury Ornament Stones
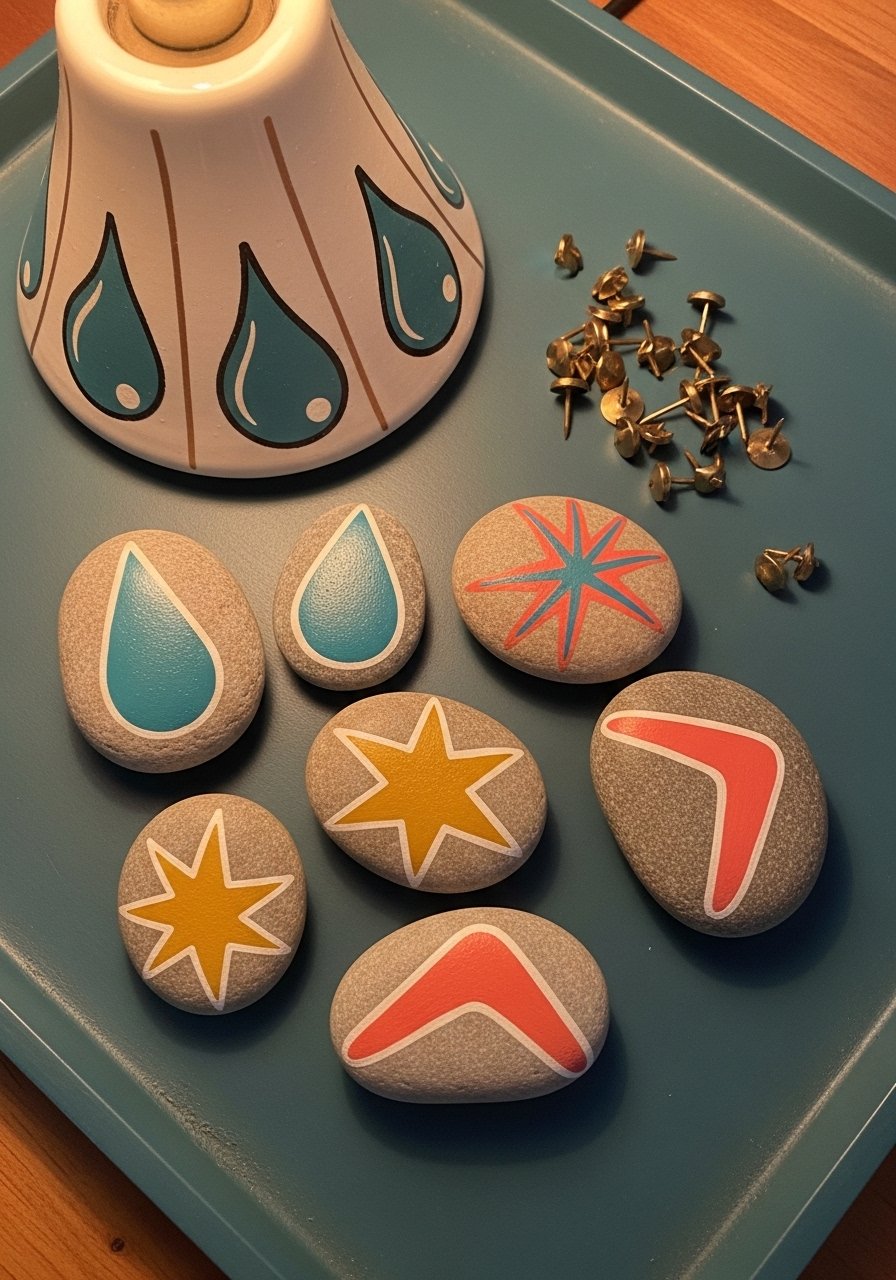
Channel midcentury modern with bold shapes and retro colors. Clean edges and simple patterns give these a curated vintage vibe that pairs well with brass accents.
Materials
- 10 assorted shapes of stones, 2–3 inches
- Acrylic paints: teal, mustard, coral, white
- Painter’s tape for crisp edges
- Small angled brush
- Gloss varnish
- Pencil for layout
Instructions
- Plan shapes and base-coat with chosen colors; dry 20–30 minutes.
- Tape edges for crisp shapes where needed.
- Add retro motifs (starbursts, lines) with the angled brush.
- Remove tape carefully and touch up edges.
- Seal with gloss varnish for a classic shine. Cure 24–48 hours.
How to Display or Gift It
- Nest inside a vintage ornament bowl for a party-ready look.
- Present in a small curated box with a typed note about the color story.
- Store separated in tray compartments to avoid scratching.
- Glittery Snow Globe Scene Stones
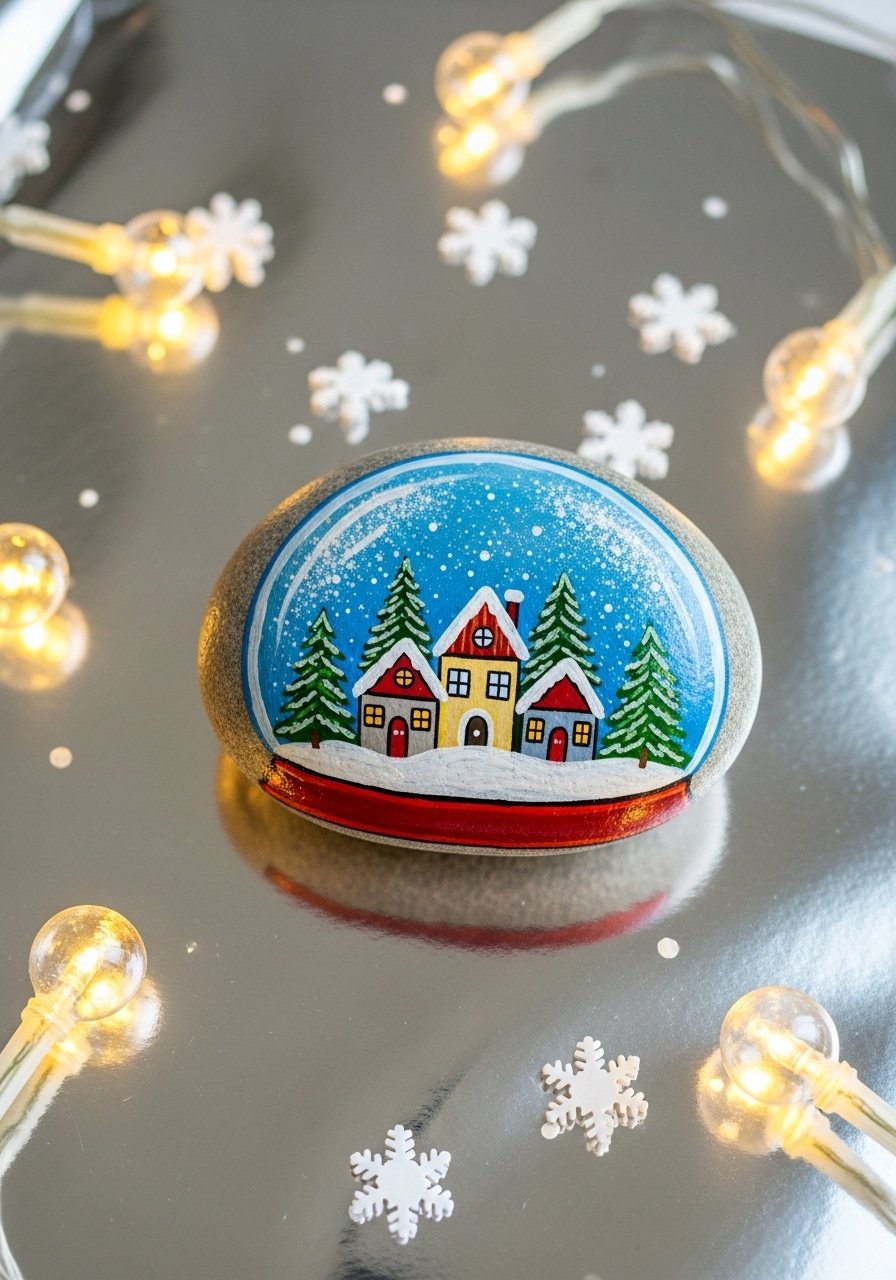
Paint a tiny winter scene and finish with a touch of epoxy or glitter for a snow-globe shimmer. Epoxy gives a glass-like dome but requires careful handling and curing time.
Materials
- 1–2 flat stones, 3 inches
- Acrylic paints: ivory, soft blue, forest green
- Epoxy resin kit (clear) — read instructions carefully
- Mixing cups and stir sticks
- Fine paintbrush for tiny details
- Disposable gloves and masking tape
- Glitter (fine) for inside-snow effect
Instructions
- Paint your miniature winter scene; allow full dry 24 hours.
- Mix epoxy resin per manufacturer’s instructions in a well-ventilated area.
- Pour a small dome of resin over the painted area to create the globe effect.
- Sprinkle a pinch of glitter into the resin before it sets.
- Let resin cure undisturbed for 24–72 hours per kit instructions.
- Lightly sand any sharp edges if needed and buff with microfiber cloth.
How to Display or Gift It
- Place on a small mirrored tray with battery tea lights to mimic snowglobe glow.
- Wrap carefully in bubble wrap and a small gift box for safe shipping.
- Store upright in a padded storage box so the resin dome doesn’t get nicked. I use an epoxy resin kit that includes mixing cups and stir sticks.
- Minimalist Chalky White Stones
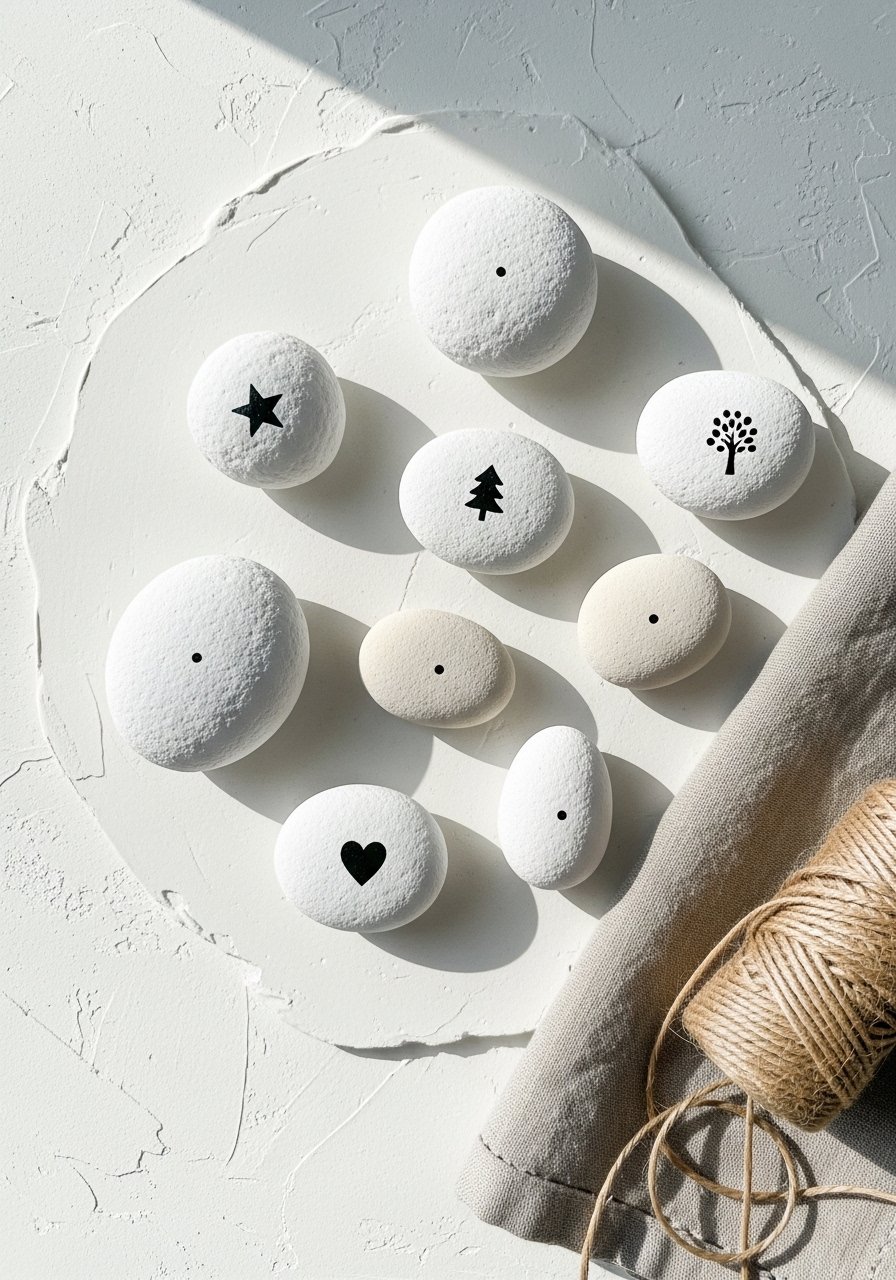
This Japandi-inspired set keeps things neutral and very modern. A chalk paint finish gives a velvety matte feel that’s soft to the touch. Minimal icons make powerful statements.
Materials
- 8 stones, 1.5–3 inches
- Chalk-style acrylic paint in white and cream
- Fine black paint pen
- Sanding sponge for distressing (optional)
- Matte sealer
- Microfiber cloth
Instructions
- Apply two coats of chalk paint; dry 30 minutes between coats.
- Lightly sand edges for a soft-worn look if desired.
- Draw minimalist icons with a fine black pen.
- Seal with a matte varnish; cure 24 hours.
How to Display or Gift It
- Stack on a ceramic tray in your entryway for discreet decor.
- Wrap in textured tissue and a twine bow for clean, modern gifting.
- Store in a fabric-lined box to protect the matte finish.
- Candy Wrapper Collage Pebbles (Mod Podge transfer)

Use small snippets of leftover holiday wrapping or vintage candy wrappers for a colorful collage. Mod Podge seals them down and gives a slight sheen. This one is great for upcycling scraps.
Materials
- 6 flat stones, 2–3 inches
- Scissors for cutting collage pieces
- Matte Mod Podge
- Flat foam brush
- Clear gloss spray (optional)
- Tweezers for placement
Instructions
- Cut small shapes from wrappers or paper.
- Brush a thin layer of Mod Podge onto stone.
- Place collage pieces, smoothing with a brush or tweezers.
- Apply another thin coat of Mod Podge over the top. Dry 15–20 minutes.
- Repeat for opacity with 2–3 coats. Full cure 24–48 hours.
- Optional: add a gloss spray for extra sheen.
How to Display or Gift It
- Nest in a small ceramic bowl on a coffee table for a pop of color.
- Wrap individually in cellophane and tie with a ribbon.
- Store flat in a drawer organizer to keep collage pieces from lifting.
- Tiny Woodland Wreath Stones
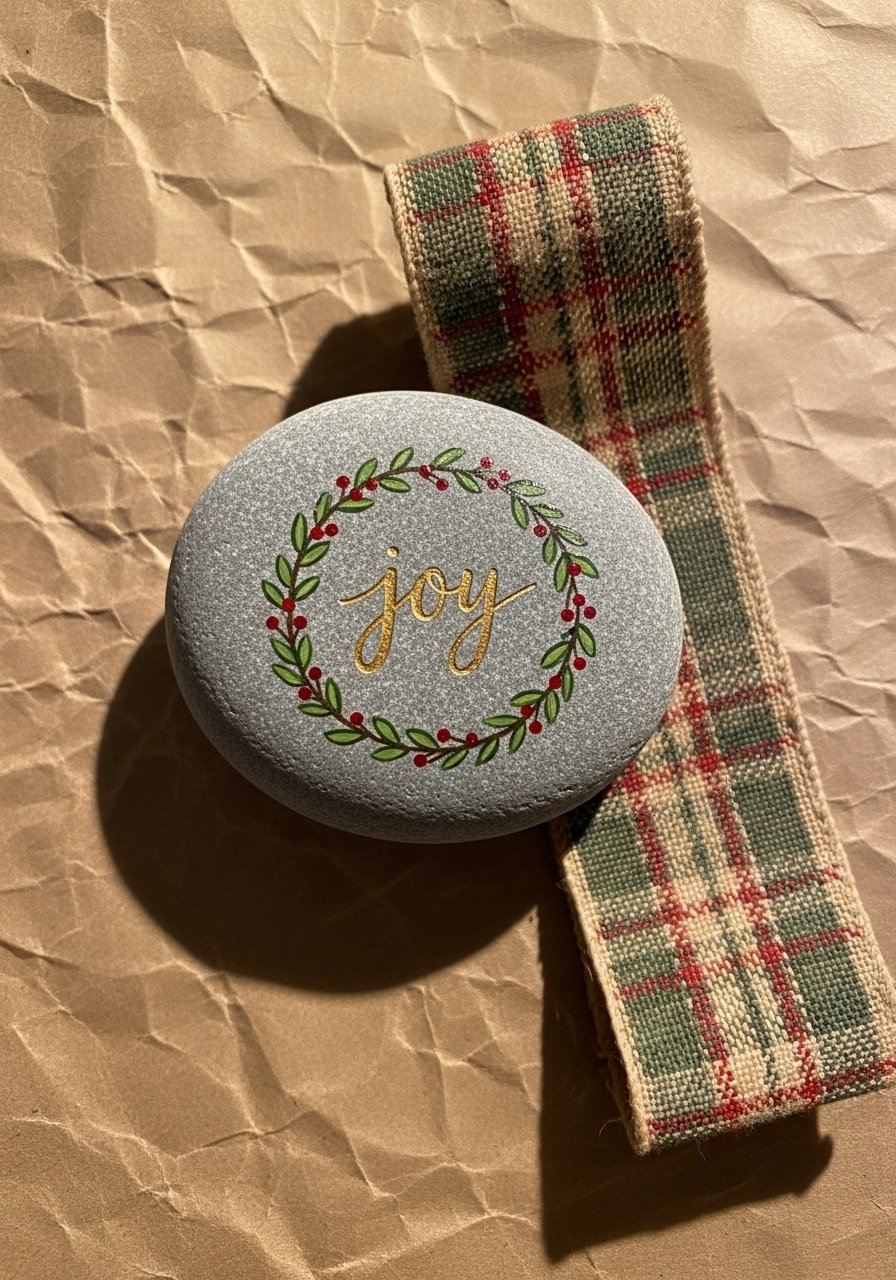
A painted wreath encircling a hand-lettered word gives the look of miniature holiday signs. Hand lettering adds personality—use a paint pen for control.
Materials
- 1 round stone, 3 inches
- Acrylic paints: leaf green, deep red, gold
- White paint pen or gold script pen for lettering
- Round brush size 2
- Matte sealer
Instructions
- Paint a neutral base; dry 20–30 minutes.
- Paint tiny leaf clusters in overlapping strokes.
- Dot red berries between leaves.
- Write a small word in the center with a gold pen.
- Seal with matte sealer; cure 24 hours.
How to Display or Gift It
- Tie with a tiny ribbon and tuck into envelope for a holiday card surprise.
- Place on a napkin at each seat for dinner parties.
- Store in a flat, shallow box to protect lettering.
- Holiday Hot Cocoa Stones (Mini cup art)
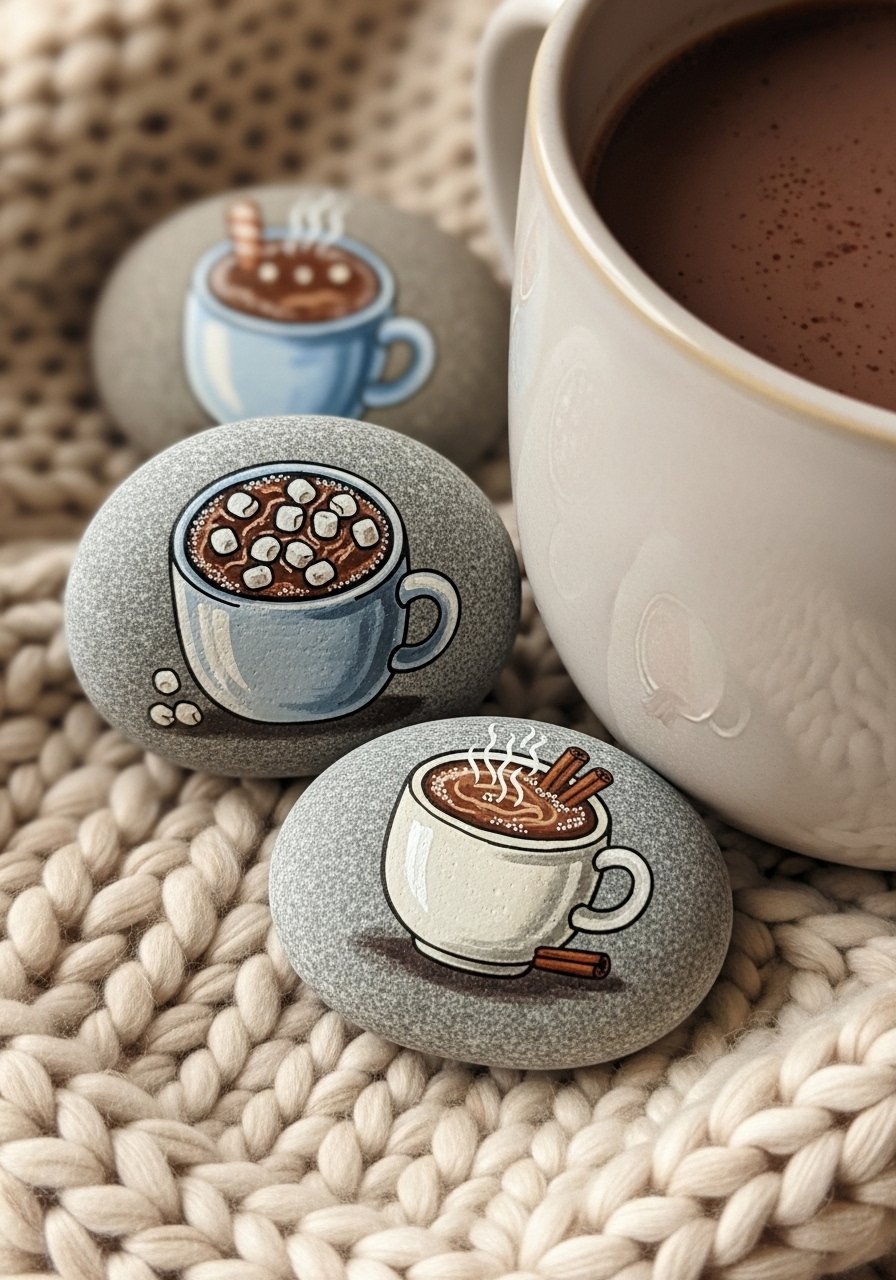
Paint tiny steaming mugs with marshmallows for a warm, tactile decoration. Use a white paint pen for marshmallows to keep them bright.
Materials
- 6 small smooth stones, 1.5–2 inches
- Acrylic paints: brown, cream, pink
- White paint pen for marshmallows
- Fine liner brush
- Matte varnish
Instructions
- Paint a small mug shape; dry 15–20 minutes.
- Fill with chocolate brown and add cream-colored marshmallows.
- Add steam lines with a fine liner brush.
- Seal with matte varnish; cure 24 hours.
How to Display or Gift It
- Bundle into a little “hot cocoa kit” with cocoa mix and send as a neighbor gift.
- Tuck into a basket near the coffee station for seasonal charm.
- Store in a small craft jar labeled by design.
- Starry Night Constellation Stones

Create tiny skies with pointillist stars and delicate constellation lines. Metallic paint adds a celestial shimmer.
Materials
- 8 dark navy stones, 2 inches
- White and metallic gold paint pens
- Fine liner brush
- Pencil for mapping constellations
- Matte spray sealer
Instructions
- Prime stones navy; dry 20–30 minutes.
- Sketch constellation lines lightly.
- Dot stars with white and add metallic gold accents.
- Connect dots with a fine liner brush.
- Seal with matte spray; cure 24 hours.
How to Display or Gift It
- Arrange in a circle on a shelf with a soft LED light behind for a subtle glow.
- Gift as a set inside a black velvet pouch for a night-sky keepsake.
- Store in a jewelry-style organizer drawer to protect the metallic dots.
- Rustic Tag Stones with Twine
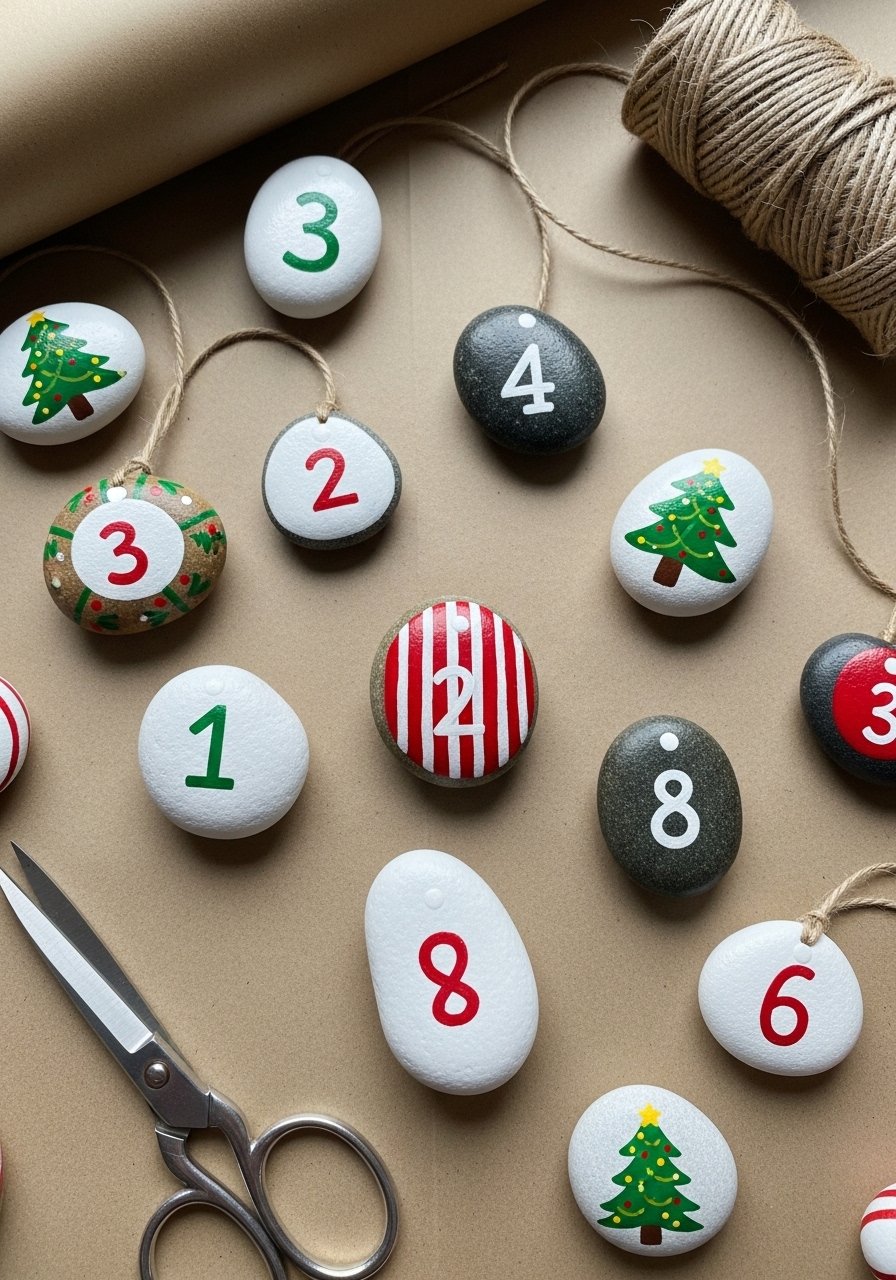
Paint stones as reusable gift tags—write numbers or names on them. The twine loop makes them easy to tie to packages.
Materials
- 12 stones, 1.5–2.5 inches
- Acrylic paints: white, black, red
- Fine paint pen for writing
- Drill with tiny bit (optional for making holes) or hot glue for attaching twine
- Natural jute twine
- Matte sealer
Instructions
- Paint a light base for writing; dry 20–30 minutes.
- Write names, numbers, or small motifs with a fine paint pen.
- If drilling, carefully drill a tiny hole for twine and sand edges. Alternatively, attach twine loop with hot glue.
- Seal with matte sealer; cure 24 hours.
How to Display or Gift It
- Tie to wrapped gifts as a lasting keepsake tag.
- Use as place markers at your holiday table.
- Store in a divided box alongside spare twine and ribbon.
- Joyful Lettered Mini Stones

Simple single-word stones read loud and clear. Bold block letters on jewel-toned bases work for many décor styles.
Materials
- 6 stones, 2–3 inches
- Acrylic paints: berry, pine, deep blue
- White paint pen or acrylic marker
- Ruler for spacing (optional)
- Matte sealer
Instructions
- Paint base colors; dry 20–30 minutes.
- Lightly pencil the letters, then go over with a white paint pen.
- Apply a thin sealer coat; cure 24 hours.
How to Display or Gift It
- Line up on a windowsill or shelf spelling out a festive message.
- Gift as a set in a small fabric bag with tissue.
- Store in a small chest or craft box between seasons.
- Woodland Moss & Lichen Realistic Painting
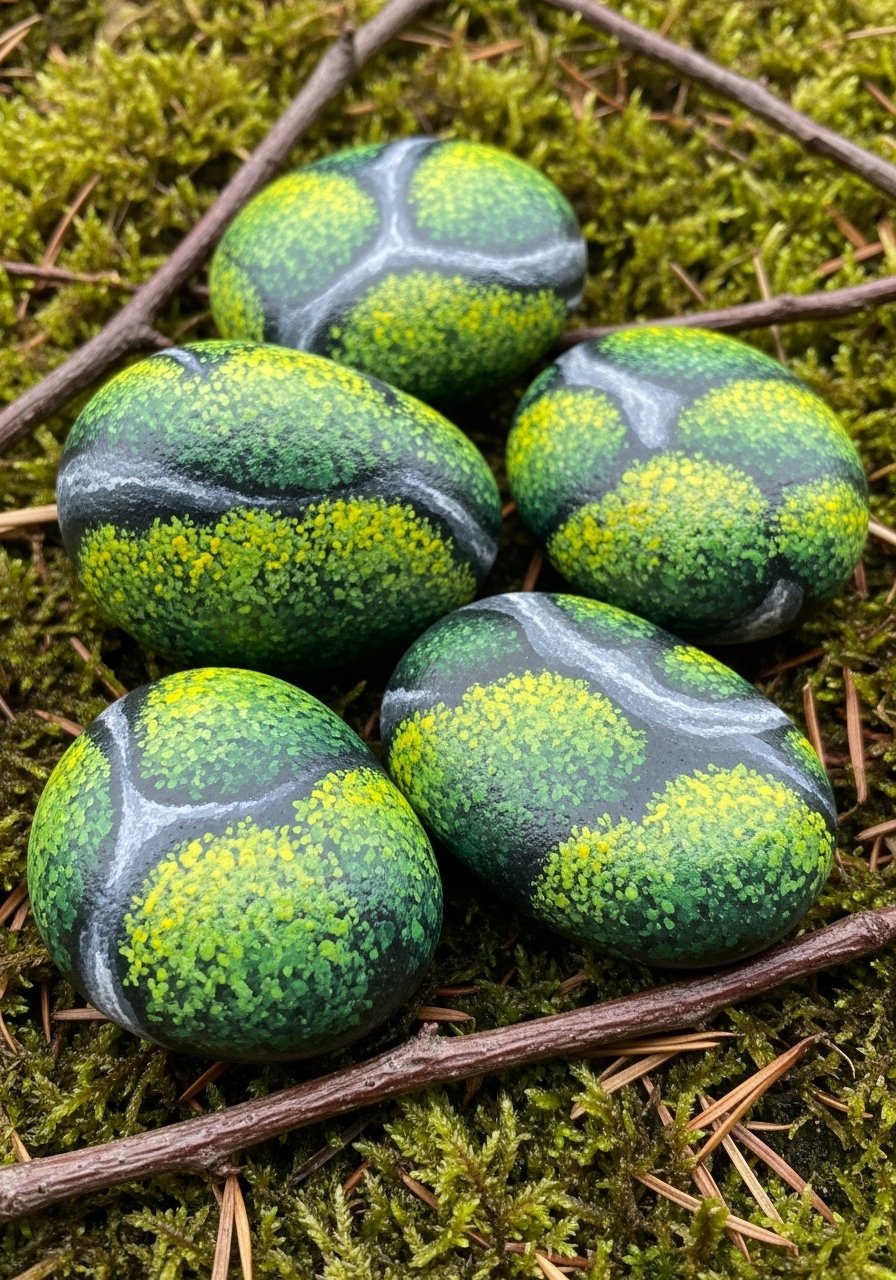
Paint textured moss and lichen for an organic look that blends with greenery. Use stippling and layering for realism.
Materials
- 6 rounded stones, 2–3 inches
- Acrylics: moss green, chartreuse, yellow ochre
- Stippling brush or old toothbrush
- Palette knife for texture
- Matte sealer
Instructions
- Base coat in neutral gray-green; dry 20–30 minutes.
- Stipple moss tones in layers, starting darker then adding bright chartreuse highlights.
- Add tiny pale yellow dots for lichen.
- Seal with matte sealer; cure 24 hours.
How to Display or Gift It
- Nest among real moss in a terrarium or wooden box for a natural centerpiece.
- Use as botanical paperweights on a plant shelf.
- Keep in a fabric-lined box if gifting to avoid smudges.
- Nordic Star Pattern Stones
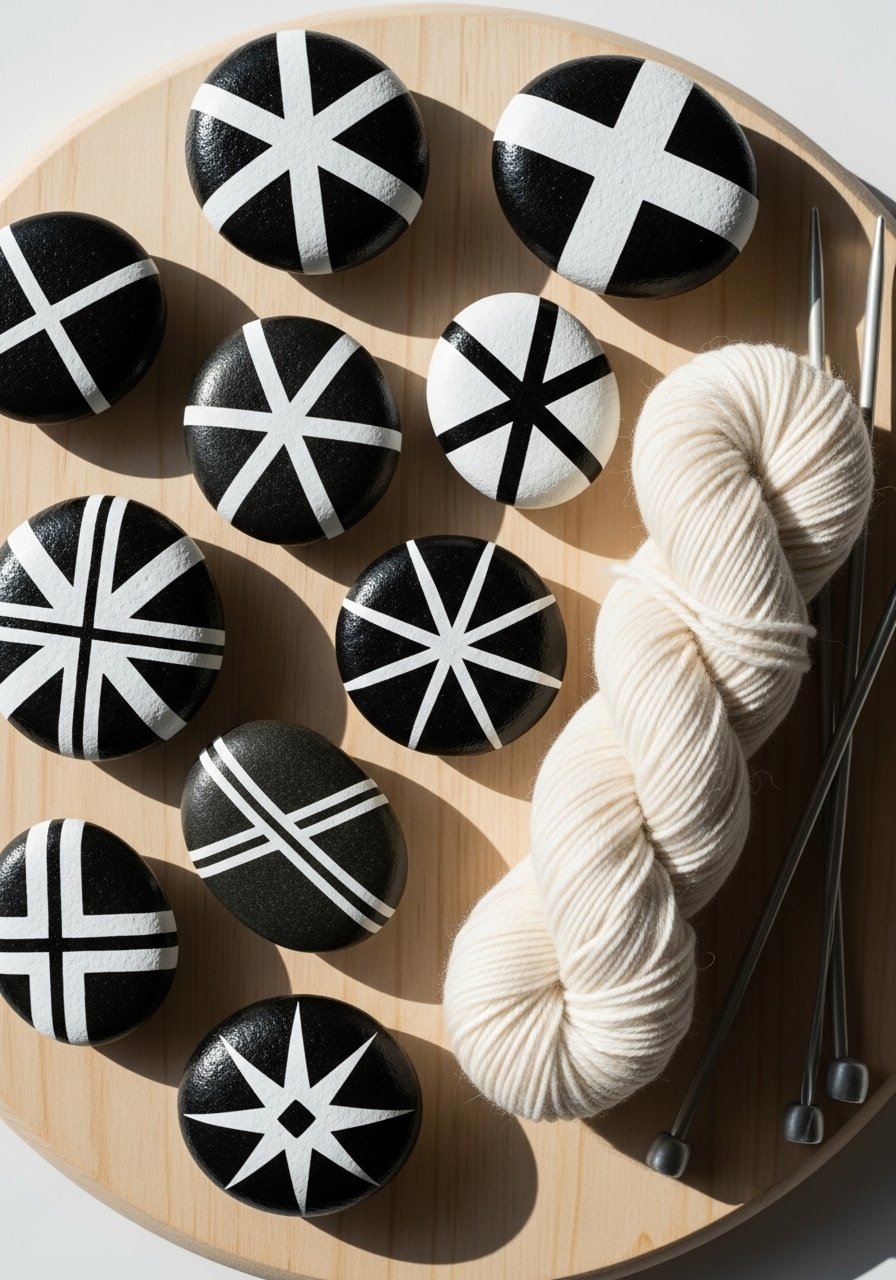
High-contrast star patterns feel hand-knit and perfect for hygge-style decor. Use sharp lines and symmetry for a clean look.
Materials
- 6 stones, 2–3 inches
- Black and white acrylic paint
- Fine liner brush and small ruler for layout
- Pencil
- Matte varnish
Instructions
- Paint base in white or black; dry 20–30 minutes.
- Sketch star pattern lightly.
- Fill in with contrasting paint using a fine liner brush.
- Seal with matte varnish; cure 24 hours.
How to Display or Gift It
- Arrange in a tray with wool pom-poms for a knitted feel.
- Slip into a handmade card for a tactile holiday surprise.
- Store flat in a shallow box to keep star edges crisp.
- Little Reindeer Pebbles
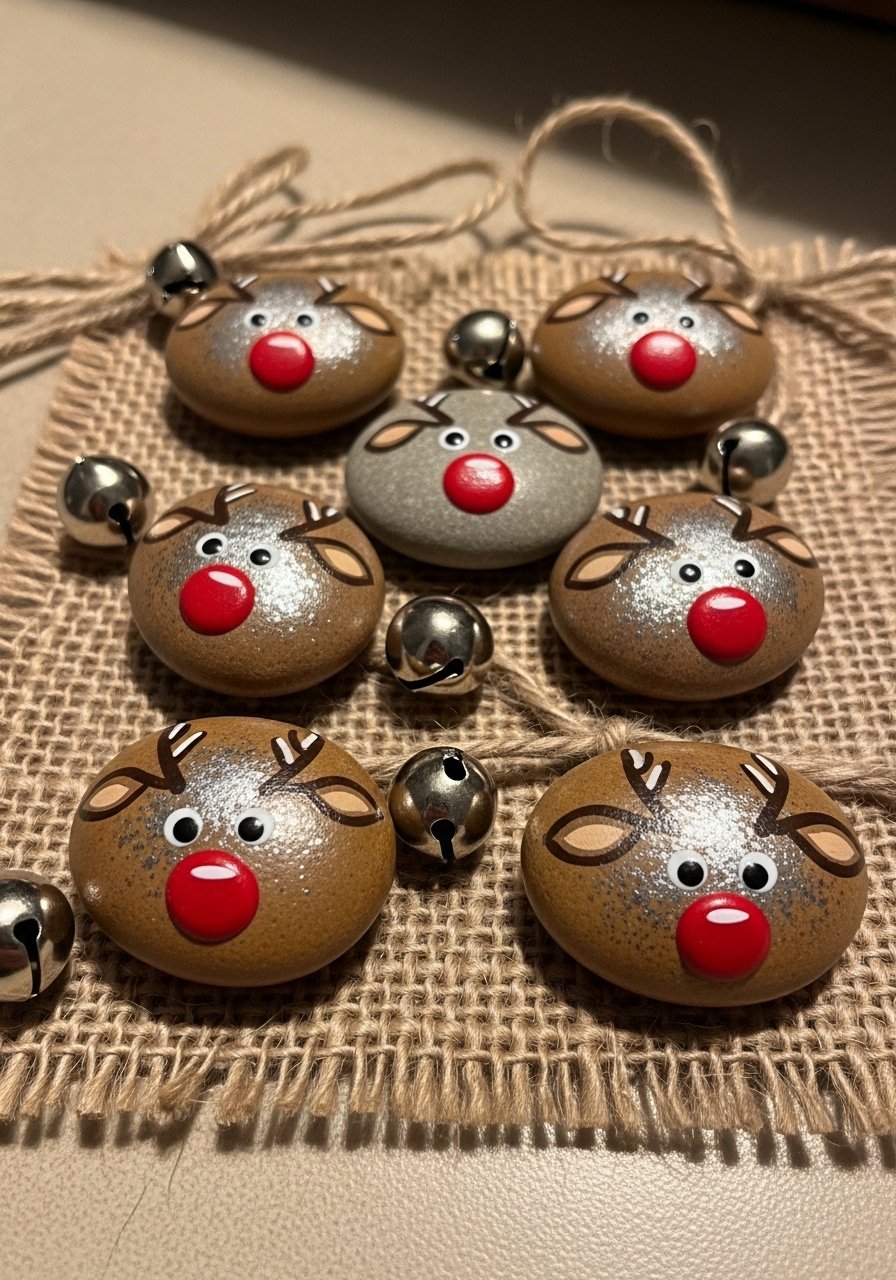
Tiny reindeer with red noses and painted antlers are cheerful and playful. A metallic fleck wash adds holiday sparkle.
Materials
- 10 oval stones, 1.5–2 inches
- Acrylic paints: tan, brown, red
- Fine liner brush for antlers and face
- Metallic wash or gold flakes
- Matte or satin sealer
Instructions
- Paint base tan; dry 20–30 minutes.
- Add antlers and facial features with a fine liner brush.
- Dot red nose and add metallic flecks if desired.
- Seal with matte or satin sealer; cure 24 hours.
How to Display or Gift It
- Attach to small gift boxes as an adorable keepsake.
- Display in a bowl lined with faux snow for a whimsical table piece.
- Keep extras in a clear craft box labeled by design.
- Mini Wreath Ornament Stones
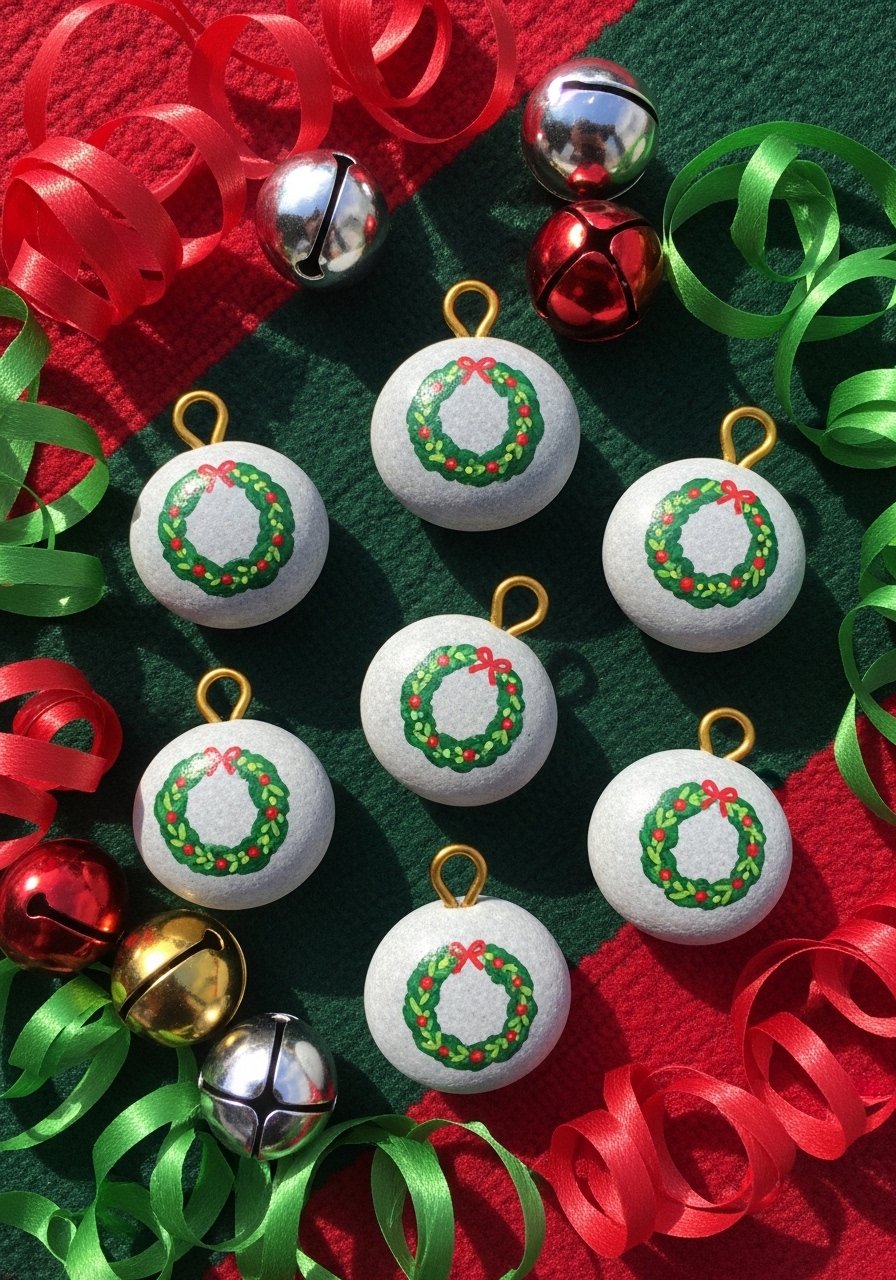
Create tiny wreath ornaments with painted greenery and a gold hanger for lightweight tree decor. They’re small, charming, and great for last-minute adornments.
Materials
- 12 round stones, 1–1.5 inches
- Acrylic paints: various greens, red for berries
- Thin ribbon or gold cord
- Hot glue gun for attaching cord
- Fine brush
- Gloss sealer (optional)
Instructions
- Paint wreath rings of tiny leaves in layers; dry 15–20 minutes.
- Add red berry dots and tiny highlights.
- Attach a small cord loop with hot glue on the back for hanging.
- Seal lightly with gloss sealer if you want shine; cure 24 hours.
How to Display or Gift It
- Hang mini stones on the tree as a natural, handmade ornament.
- Bundle several on a ribbon as a garland.
- Store in a small ornament box between seasons.
- Personalized Name & Date Keepsake Stones
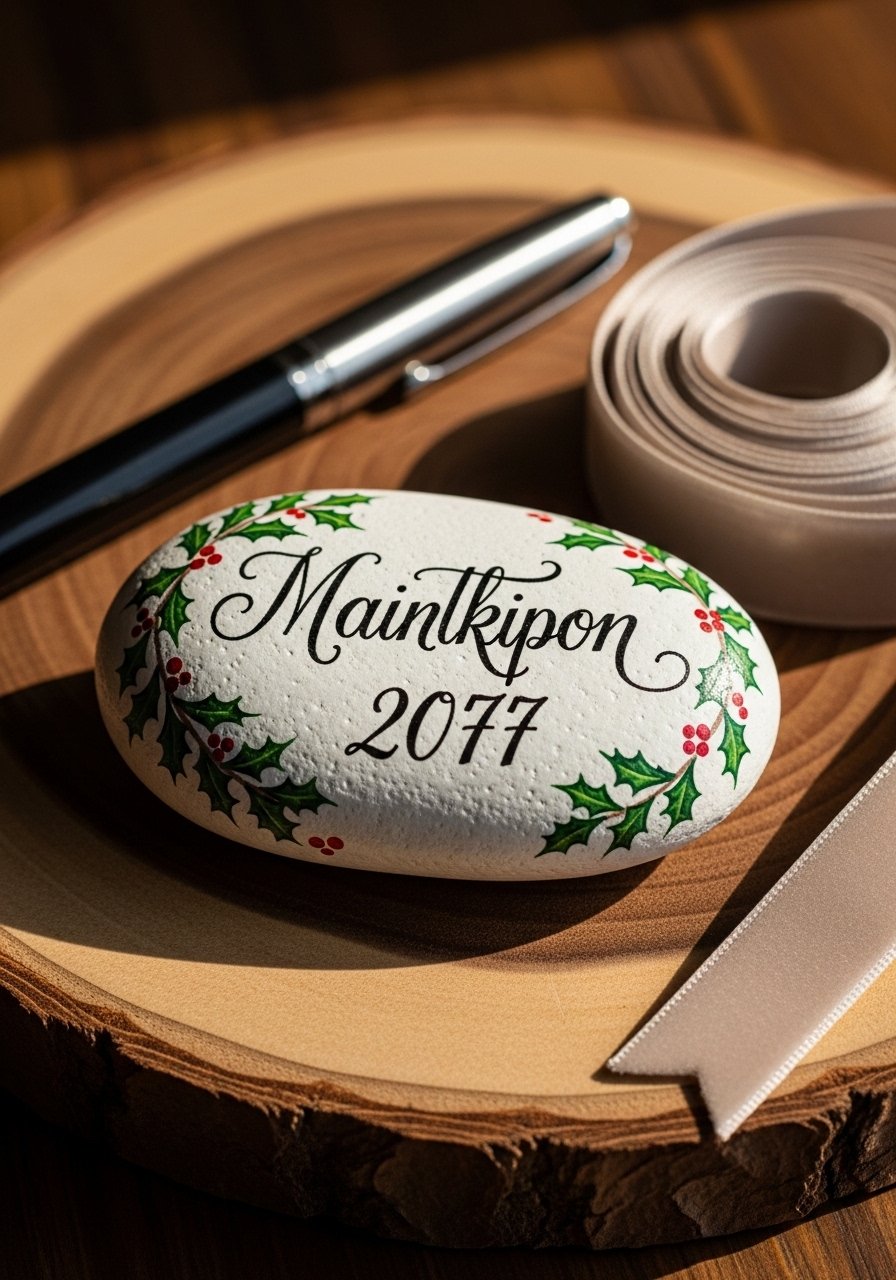
A personalized stone makes a meaningful keepsake. Hand-letter names and dates for commemorating gatherings, new homes, or first holidays together.
Materials
- 1–2 larger flat stones, 3–4 inches
- Acrylic paint base color of choice
- Fine script paint pen or acrylic marker
- Pencil for layout
- Small brush for accents
- Protective sealer spray
Instructions
- Paint base color and let dry 30 minutes.
- Pencil in name and date placement.
- Trace with a fine script paint pen; allow 10–15 minutes to dry.
- Add small holly or decorative accents around text.
- Seal with a clear protective spray. Full cure 24 hours.
How to Display or Gift It
- Present as a mantel keepsake in a small velvet bag.
- Use as a weight for holiday cards or as part of a gift basket.
- Store with tissue paper in a small keepsake box.
I hope these 28 holiday stone painting ideas gave you plenty of seasonal inspiration—whether you’re painting with kids, crafting for gifts, or styling a cozy mantle. Try a few simple projects to get your rhythm, then mix techniques like dotting, lettering, and even resin domes for variety. Save or pin this roundup so you can return when you need quick, handmade holiday accents.
If one tool could help across most of these projects, a good set of fine-tip paint pens will speed up details and lettering, and a quality hot glue gun keeps loops and attachments secure with far less fuss. Which design will you try first? Share with a friend who loves crafting or keep a few tucked away as surprise gifts.


