You know that feeling when you find the perfect sweater and wonder, "Could I make that?" If you're searching for knitting for beginners sweater projects, this list is for you. These 22 patterns are built around simple stitches—garter, stockinette, seed, and easy raglan shaping—so you get a wearable result fast and with minimal frustration.
You'll find everything from cropped jumpers and roomy cardigans to cozy turtlenecks that read cottagecore, boho, or relaxed Japandi. Each project lists exact yarn weights, needle sizes, gauge, realistic time estimates, and step-by-step instructions. I lean on circular needles for most sweaters; I use my Addi Turbo circular needles when I want smooth joins and fast knitting. For yarn I often grab a reliable worsted like Lion Brand Vanna's Choice yarn for easy care and soft drape.
Pin your favorites, pick a skein, and let’s knit a cozy, stylish sweater you’ll actually wear.
- Cozy Garter Pullover (knitting for beginners sweater)
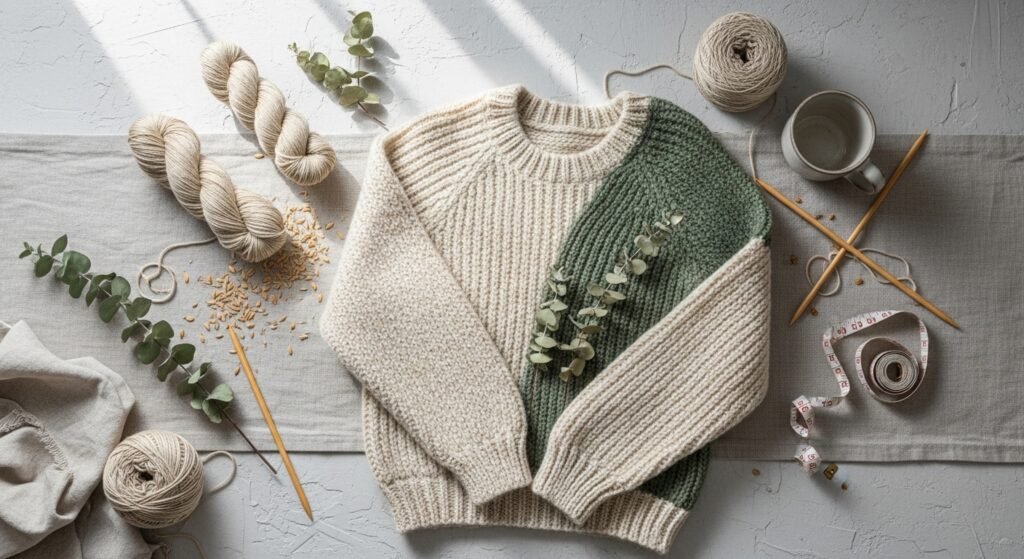
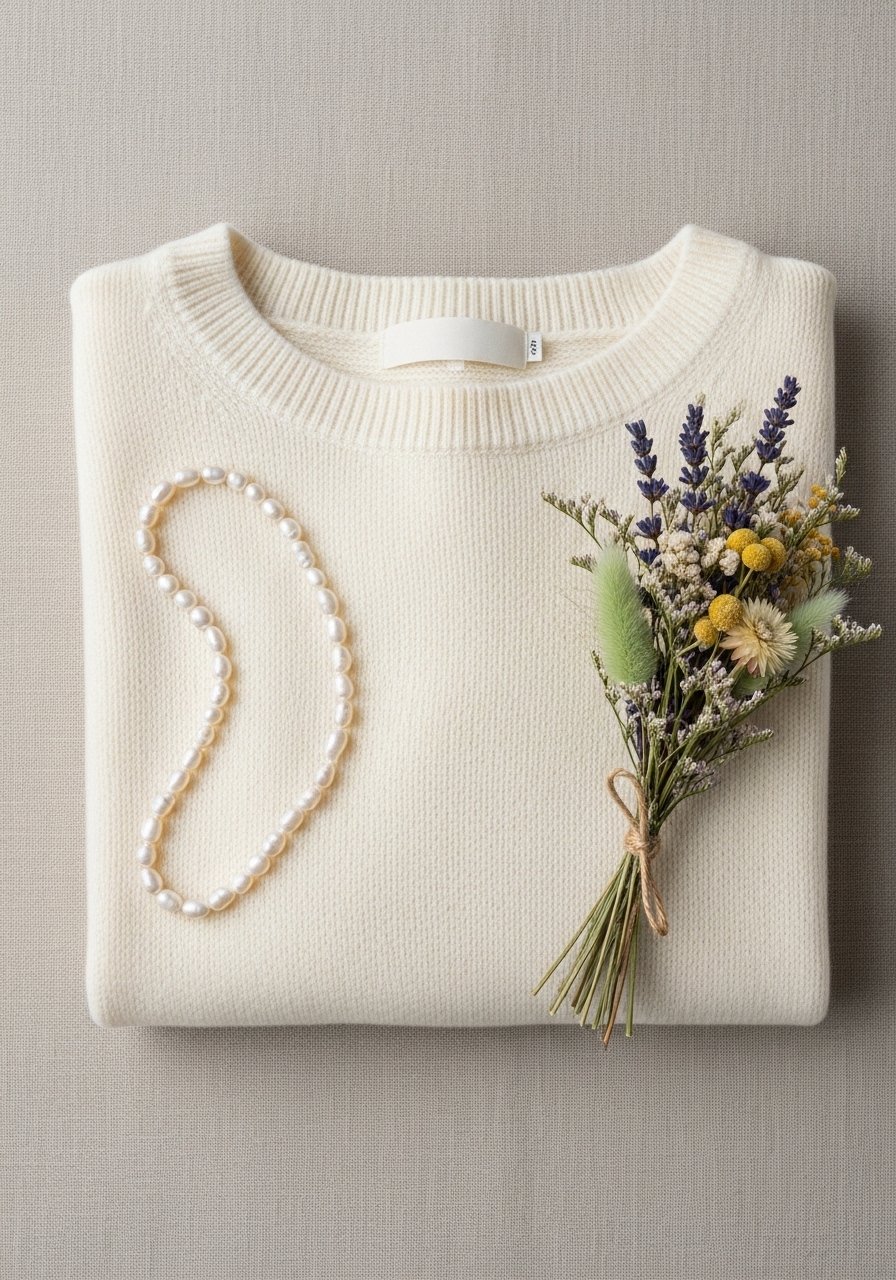
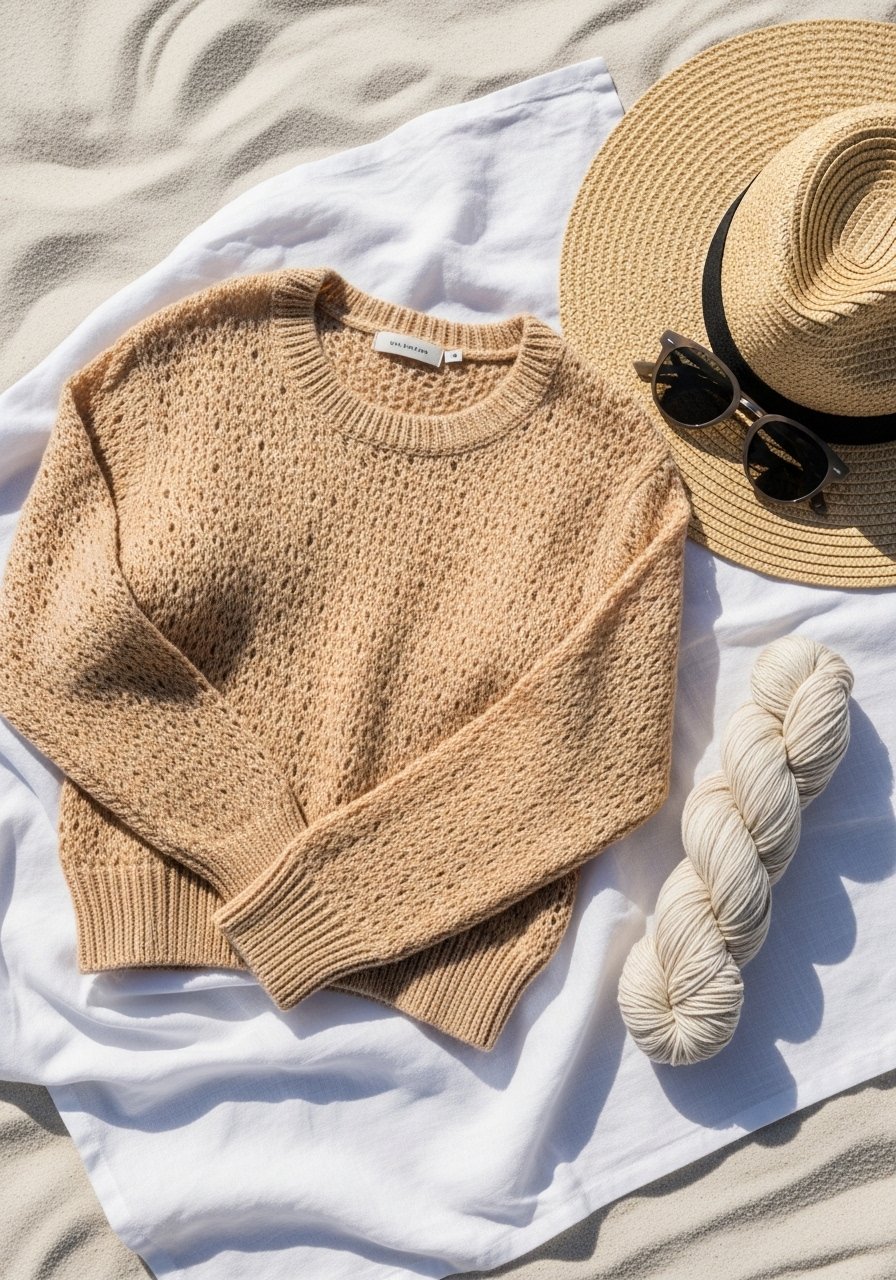
This all-garter pullover is the textbook beginner sweater. Garter stitch produces squishy texture and lies flat—no seaming hassles if you work it in the round. The result is a cozy boxy silhouette that feels handmade and modern.
You’ll love its pillowy feel and the effortless look it brings to jeans or skirts. Knit it in bulky yarn for a quick weekend project. I reach for Knit Picks Wool of the Andes Bulky when I want warmth without weight.
Materials
- Yarn: 6 skeins bulky (#5) wool-blend, approx 700–800 yards
- Needles: US 10.5 / 6.5mm circular needle (24" / 60cm) or size to obtain gauge
- Notions: tapestry needle, 6 locking stitch markers, measuring tape
- Gauge: 12 sts x 24 rows = 4 in in garter stitch on 6.5mm
- Finished bust: 38–42 in (adjustable by adding/removing cast-on multiples)
- Time: 8–12 hours total knitting time
Instructions
- Cast on 48 sts (adjust in multiples of 6 for wider/narrower fit). Join to work in the round, placing marker for beginning.
- Work garter stitch in the round by knitting one round, then purling one round. Continue until body measures 16 in from cast-on for cropped or 18–20 in for standard length.
- Divide for sleeves: place 12 sts each for sleeves on waste yarn or stitch holders, join body stitches together (remaining 24–28 sts) and continue in garter for torso for 8–10 in or desired length.
- Bind off loosely. Transfer sleeve sts back to needles, pick up 8–12 sts under each sleeve if you want fuller cuffs.
- Knit sleeves in garter stitch in the round until sleeve length is 17–18 in or desired. Bind off loosely.
- Weave in ends with tapestry needle. Block gently to shape—spritz and pin to measurements, allow 24–36 hours to dry.
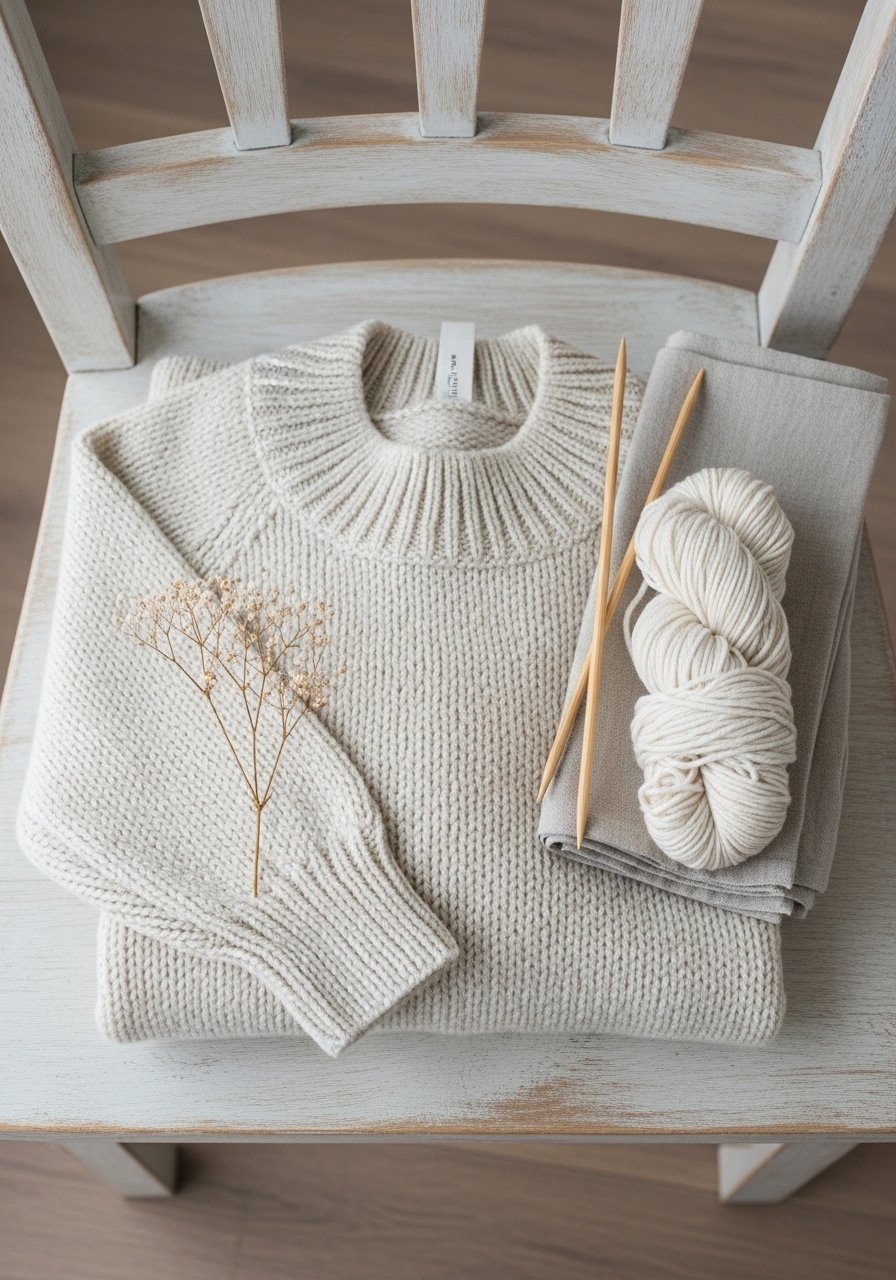
How to Display or Gift It
Drape the pullover over a ladder or small wooden chair for a cozy vignette. A simple twine bow and a sprig of dried lavender tucked into the fold makes a thoughtful gift. Store folded in a breathable cotton storage bag. For gifting, slide the sweater into a kraft gift box with tissue and a handwritten care card. A small set of tape measure and sewing notions looks cute tucked inside.
- Easy Raglan Pullover (top-down)
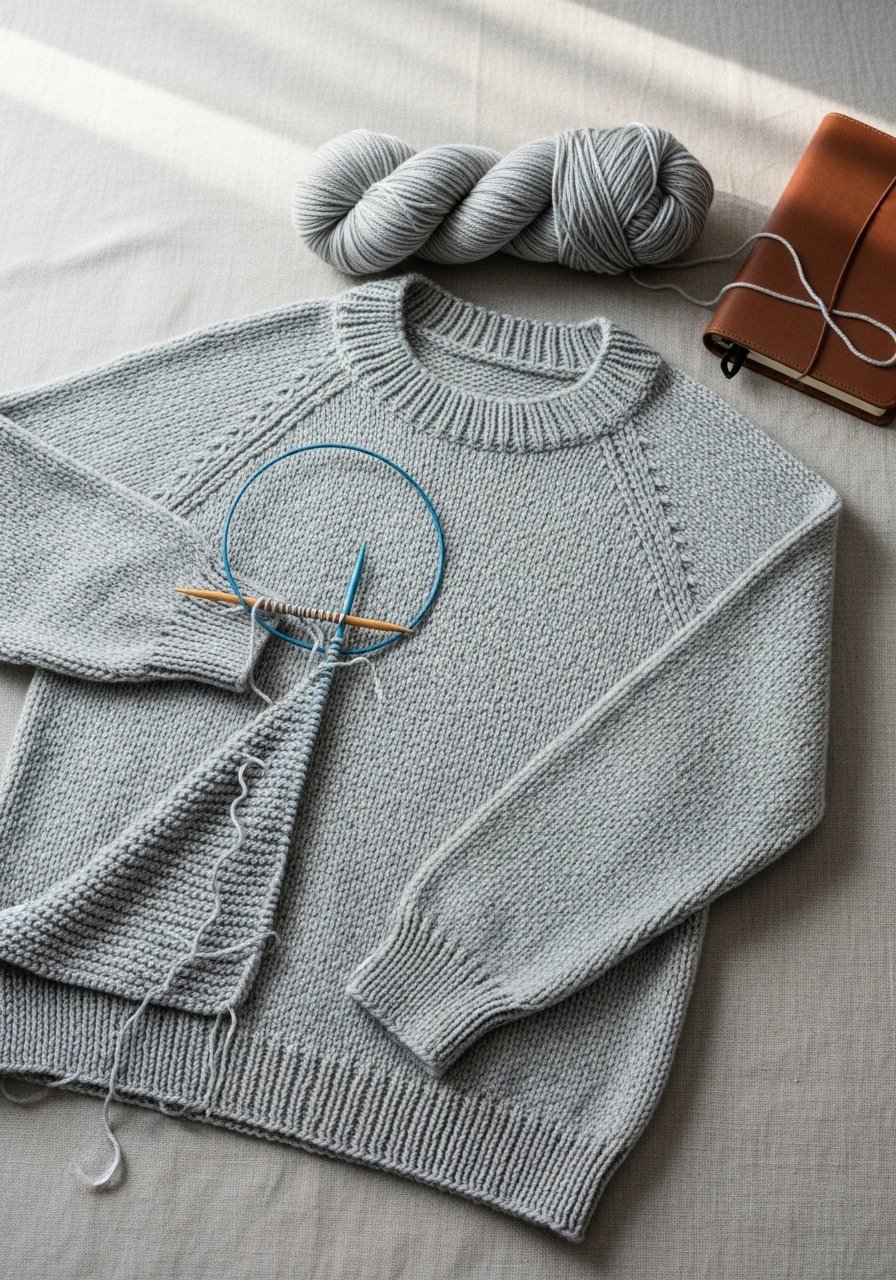
Top-down raglan is a favorite because you can try on as you go. This pattern uses basic increases for raglan lines and stockinette for a clean finish. It’s forgiving for fit and quick to adapt.
Materials
- Yarn: 5 skeins worsted (#4), approx 900 yards
- Needles: US 8 / 5mm circular needles (32" recommended) and set of double-pointed needles or magic loop
- Notions: stitch markers (4 contrasting), tapestry needle, row counter
- Gauge: 18 sts x 24 rows = 4 in in stockinette on 5mm
- Finished bust: 36–44 in
- Time: 10–15 hours
Instructions
- Cast on 120 sts using long-tail method. Join, place 4 markers evenly to mark raglan increases.
- Work 1×1 rib (k1, p1) for 2 in for neckband.
- Switch to stockinette. On each increase round, k to marker, m1, k1, m1 at raglan seam—repeat at each marker.
- Continue increase rounds every 4 rows until yoke measures 9–11 in from cast-on or fits underarm when tried on.
- Place body sts on one needle and divide sleeve sts onto holders. Join body and work in the round until torso measures 15–18 in from underarm.
- Pick up sleeve sts and knit in the round to desired length (16–18 in). Finish with rib cuff 2 in and bind off.
- Weave ends; block gently; allow 24–48 hours to fully dry.
How to Display or Gift It
This pullover flat-folds nicely in a drawer or looks great on a mid-century hanger in a minimalist closet. Add a small stitch marker set as a gift; I like pairing it with a compact row counter for new knitters.
- Slouchy Drop-Shoulder Sweater
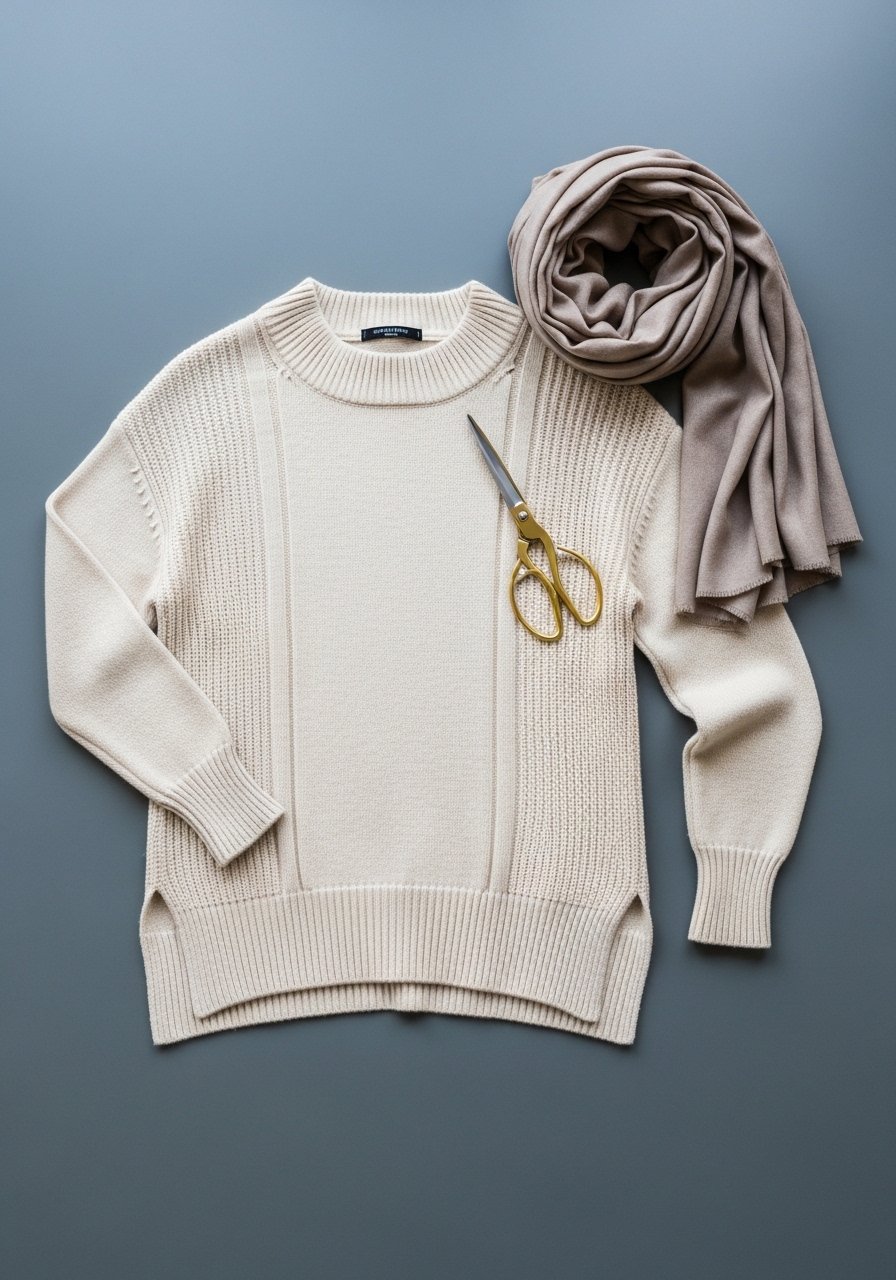
Drop shoulders simplify shaping: you knit the body and sleeves without complex decreases. The style reads effortless and pairs perfectly with wide-leg pants or leggings.
Materials
- Yarn: 8 skeins aran / heavy worsted (#5), approx 1000–1100 yards
- Needles: US 9 / 5.5mm circular needle (32")
- Notions: tapestry needle, stitch holders, 8 locking markers
- Gauge: 16 sts x 22 rows = 4 in in stockinette on 5.5mm
- Finished bust: 40–52 in (oversized)
- Time: 12–18 hours
Instructions
- Cast on 160 sts for a roomy fit. Join and work in k2, p2 rib for 2 in for hem.
- Switch to stockinette and knit in the round until piece measures 15 in from cast-on (or desired body length to armhole).
- Bind off 40 sts evenly for each sleeve opening (place those stitches on holders), leaving center for body.
- Join body sts and continue in the round for torso for 10–12 in more.
- Return to sleeve sts; pick up 6–8 sts underarm if desired. Knit in the round to 16 in, finish with 2 in rib cuff.
- Bind off, weave ends, block lightly and let dry 24–36 hours.
How to Display or Gift It
Fold the sweater over a chunky wooden hanger to show its slouchy silhouette. For gifting, tuck a small pack of hand-wash wool soap with the sweater; I like using a compact craft organizer box to keep small notions tidy.
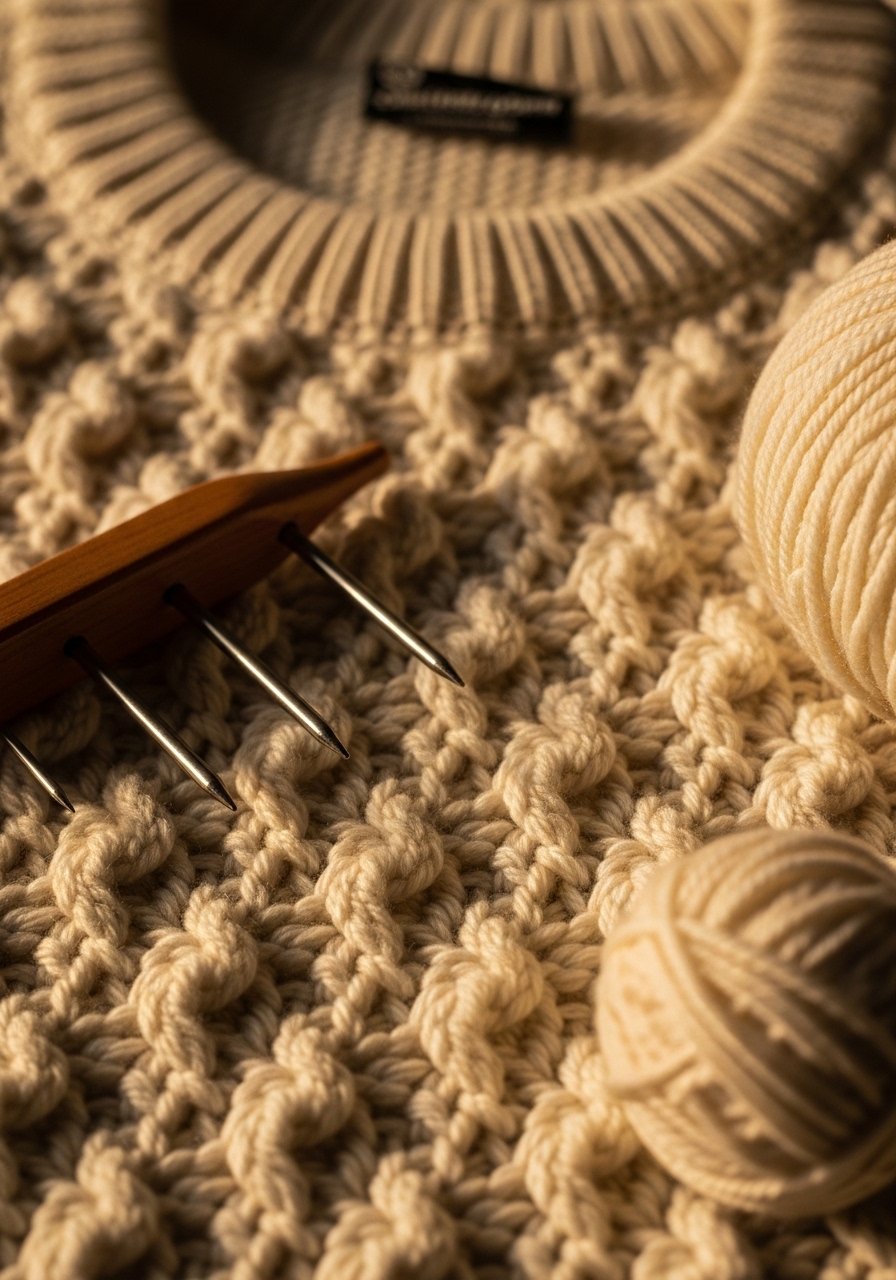
- Cropped Boxy Sweater (seed stitch)
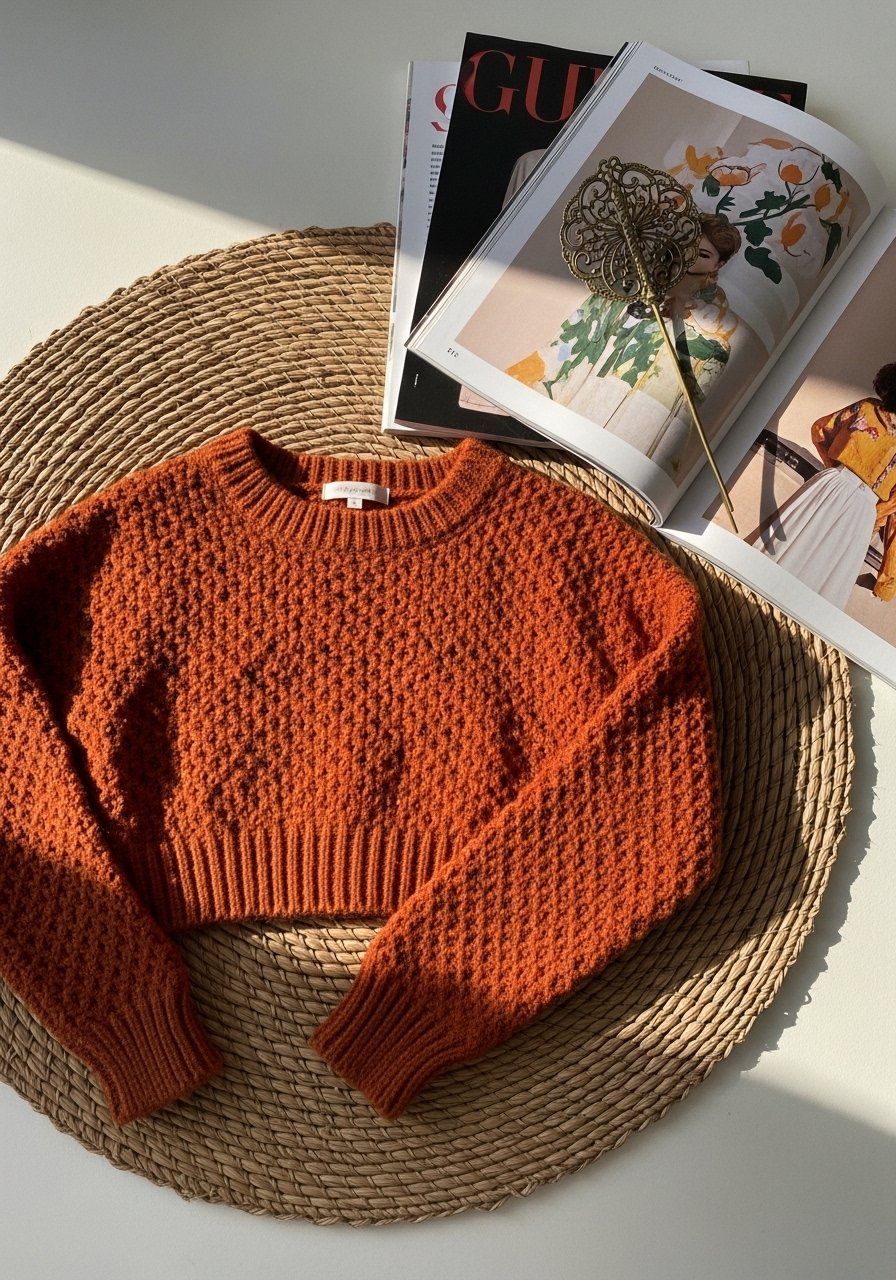
Seed stitch gives this cropped boxy sweater a bumpy, textured finish that hides minor tension inconsistencies—perfect for beginner knitters who want visible, tactile texture.
Materials
- Yarn: 4 skeins worsted (#4), approx 600 yards
- Needles: US 8 / 5mm circular needle (16–24")
- Notions: stitch marker, tapestry needle, stitch counter
- Gauge: 18 sts x 24 rows = 4 in in seed stitch
- Finished bust: 34–38 in
- Time: 6–10 hours
Instructions
- Cast on 120 sts. Join to work in the round.
- Work seed stitch in the round: Round 1 k1, p1 across; Round 2 p1, k1 across. Repeat until garment measures 12–14 in from cast-on.
- Bind off loosely in pattern. Weave ends and block flat—expect 24 hours to dry.
- If you want a slightly longer sleeve, pick up sts at arm openings and knit a short 3–4 in sleeve in seed stitch.
How to Display or Gift It
Crop styles pair well with high-waisted skirts. Style the sweater on a small wooden easel in a boutique-style gift box. Include a mini wool wash bottle for care instructions inside the box.
- Striped Raglan Tee (knitting for beginners sweater)
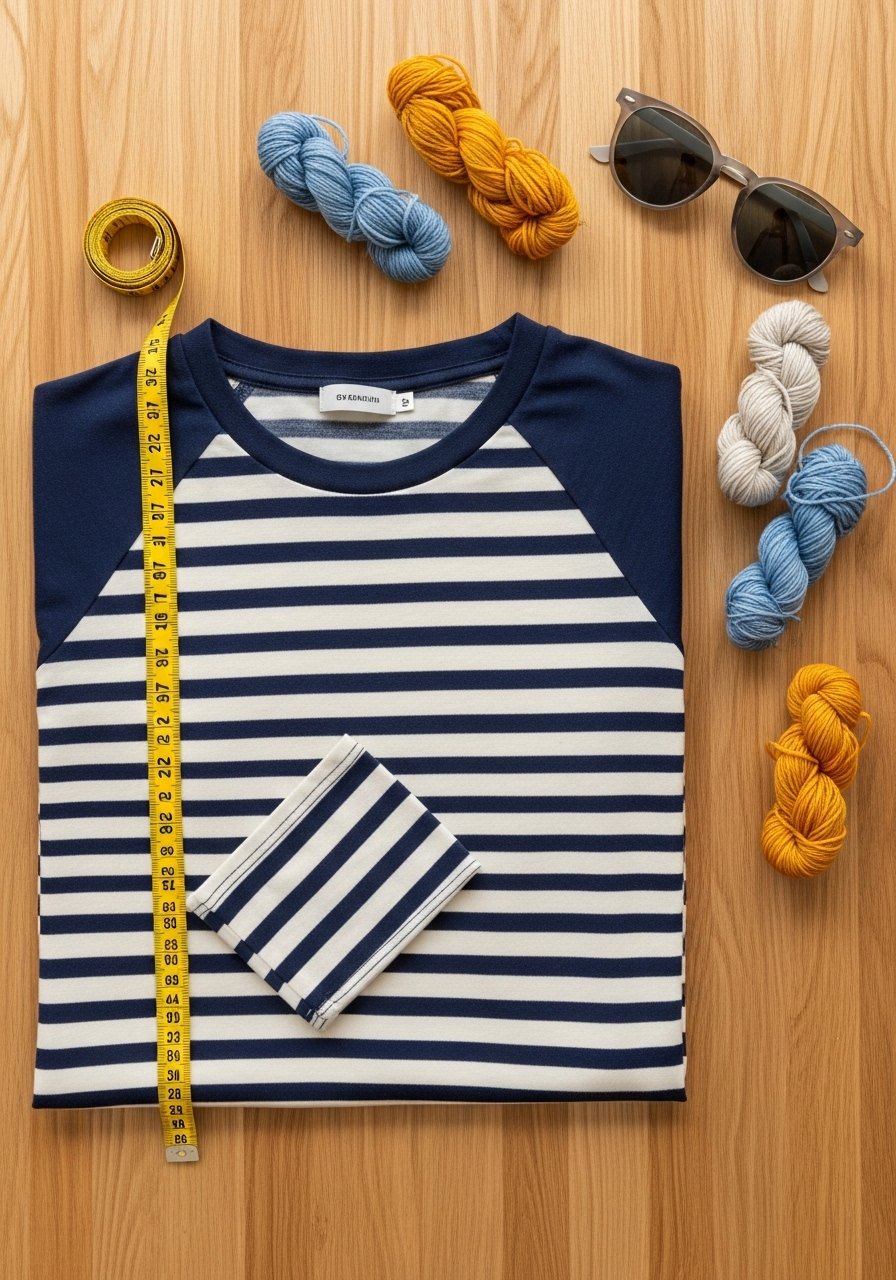
Stripes are a fun way to play with color without complicated shaping. This top-down raglan tee uses simple stockinette and short stripes that create a fresh, nautical feel.
Materials
- Yarn: 3 skeins worsted (#4) navy + 2 skeins cream, approx 700 yards total
- Needles: US 7 / 4.5mm circular needle (24–32")
- Notions: stitch markers (4), tapestry needle, yarn needle for ends
- Gauge: 20 sts x 28 rows = 4 in in stockinette on 4.5mm
- Finished bust: 36–42 in
- Time: 10–14 hours
Instructions
- Cast on 120 sts, work 1×1 rib for 1.5 in.
- Begin stockinette and set raglan markers as in other raglans. Work increases every 6th round to shape yoke.
- Introduce stripe pattern: 4 rounds navy, 2 rounds cream repeat across yoke and body.
- Continue until yoke fits underarm. Separate sleeves and body. Knit body in stripes until desired length (16–18 in).
- Knit sleeves in stripes to 7–8 in for short-sleeve tee, or longer for elbow-length.
- Weave in ends; give a light steam-block focusing on stripes to even tension. Dry 24 hours.
How to Display or Gift It
Fold the tee with a slim kraft band and include a small care label. For storage, use a breathable fabric storage bag to avoid compressing the stripes.
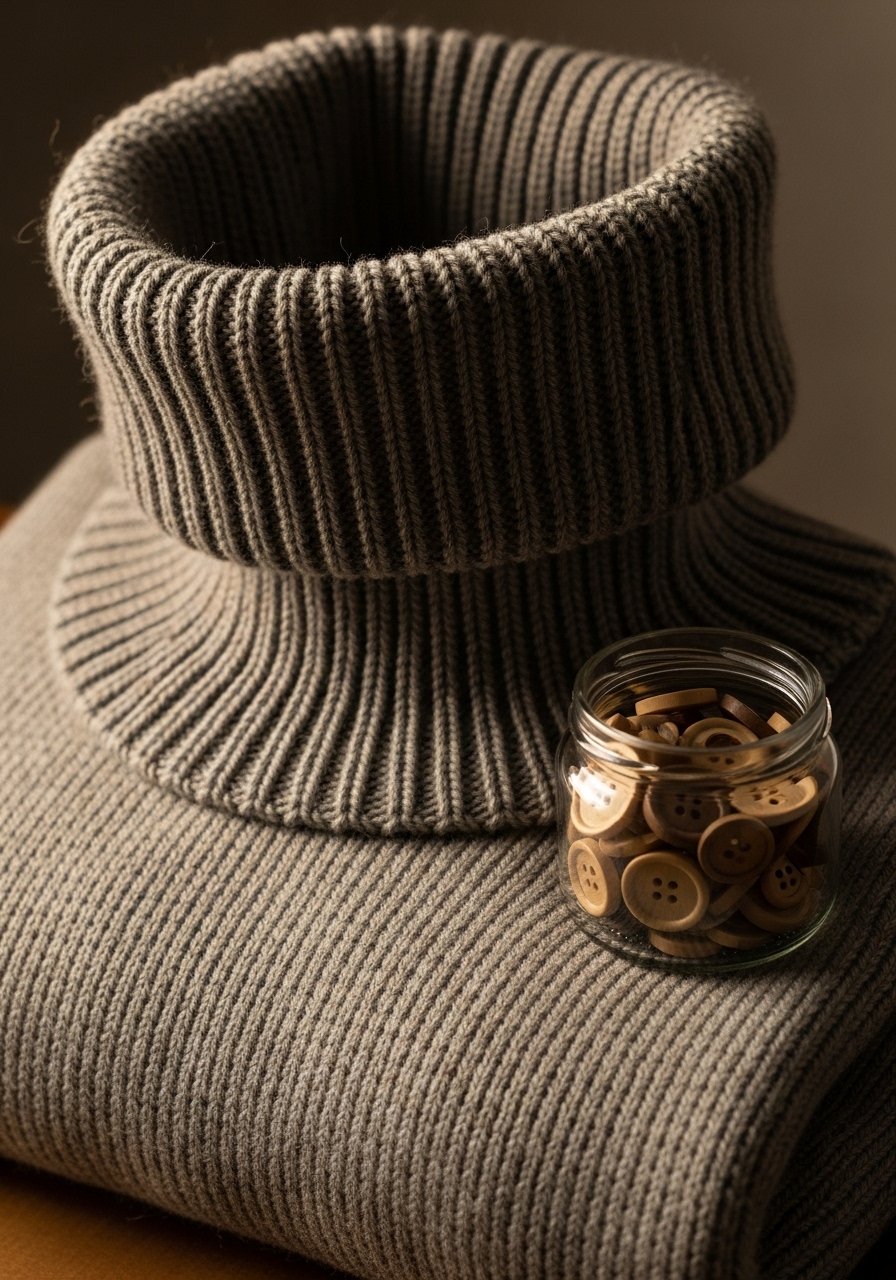
- Minimal Turtleneck Sweater
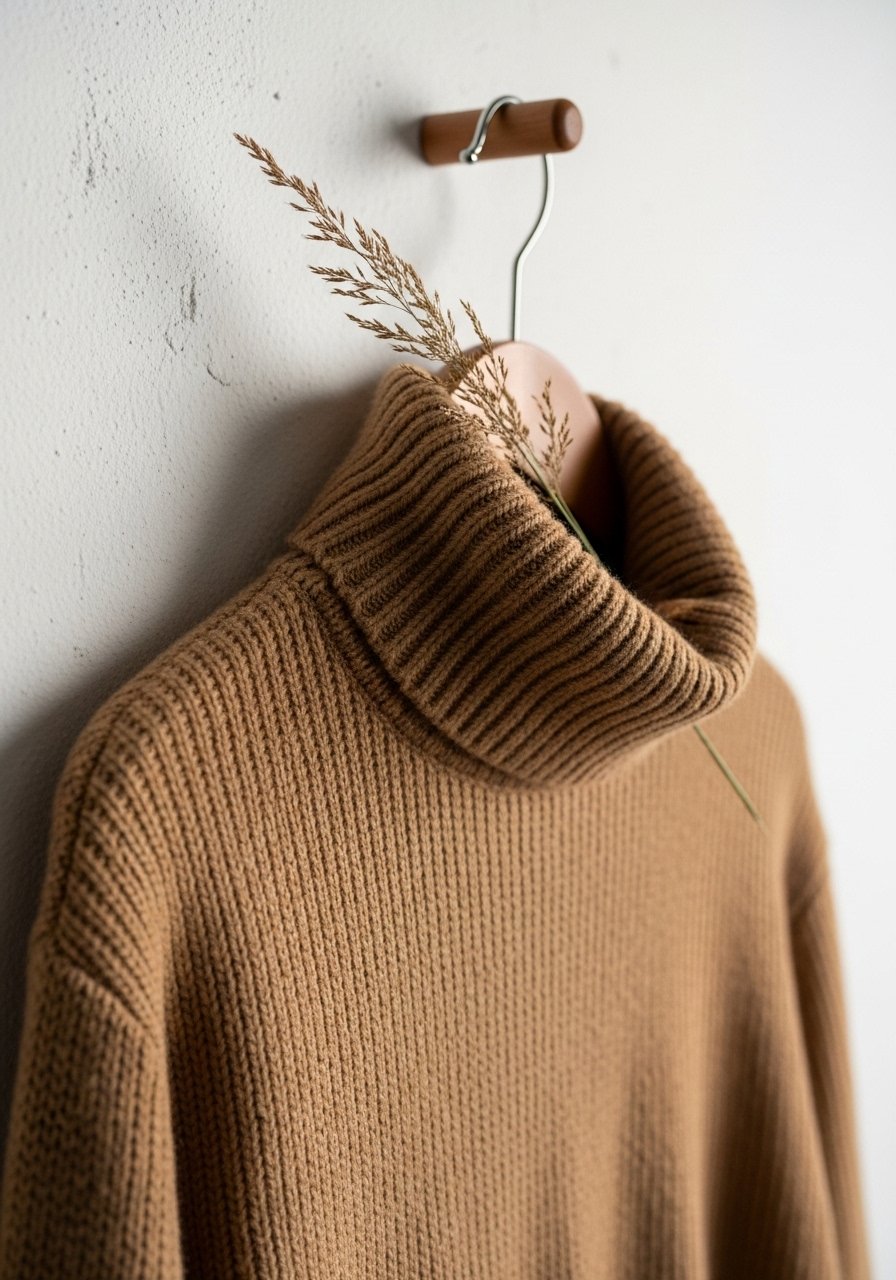
A simple turtleneck uses stockinette and a folded neckband. It's a flattering piece that looks luxe with minimal effort.
Materials
- Yarn: 7 skeins DK to light worsted (#3-4), approx 900 yards
- Needles: US 7 / 4.5mm circular needle (32")
- Notions: tapestry needle, stitch markers, blocking wires (optional)
- Gauge: 22 sts x 30 rows = 4 in in stockinette on 4.5mm
- Finished bust: 36–44 in
- Time: 12–18 hours
Instructions
- Cast on 144 sts. Join and work 2 in of 1×1 rib for waistband if desired, otherwise proceed in stockinette.
- Work flat in the round until yoke shaping begins. Use raglan increases or simple shaping across shoulders.
- For the neck, fold the top 3–4 in down and pick up the same sts to create a folded turtleneck, or knit a separate neckband and graft.
- Finish sleeves with 2 in rib cuff.
- Block on a flat surface; let dry for 24–48 hours.
How to Display or Gift It
A turtleneck looks elegant draped over a wooden hanger or folded with a silk scarf tucked in. For gifting, include a small jar of lavender buds.
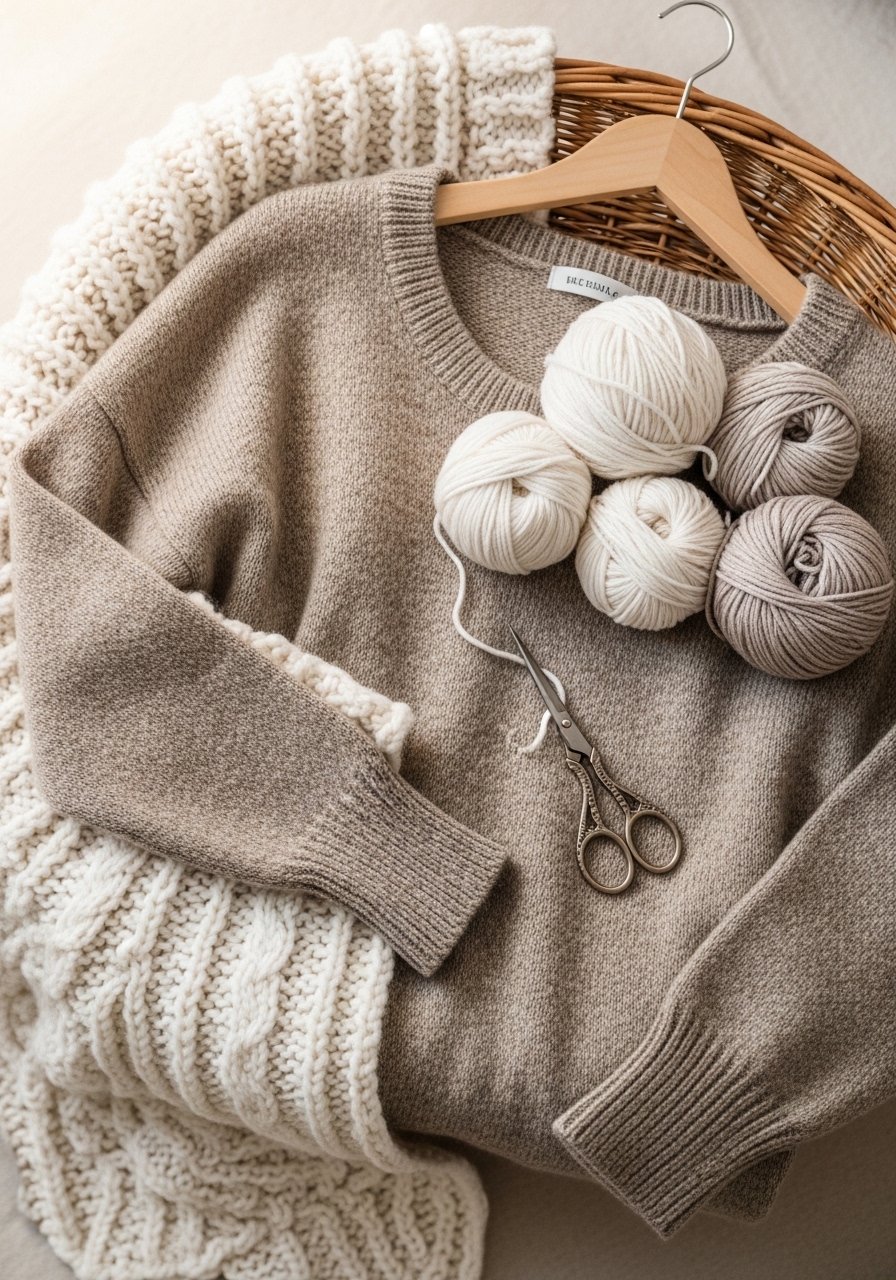
- Button-Front Raglan Cardigan
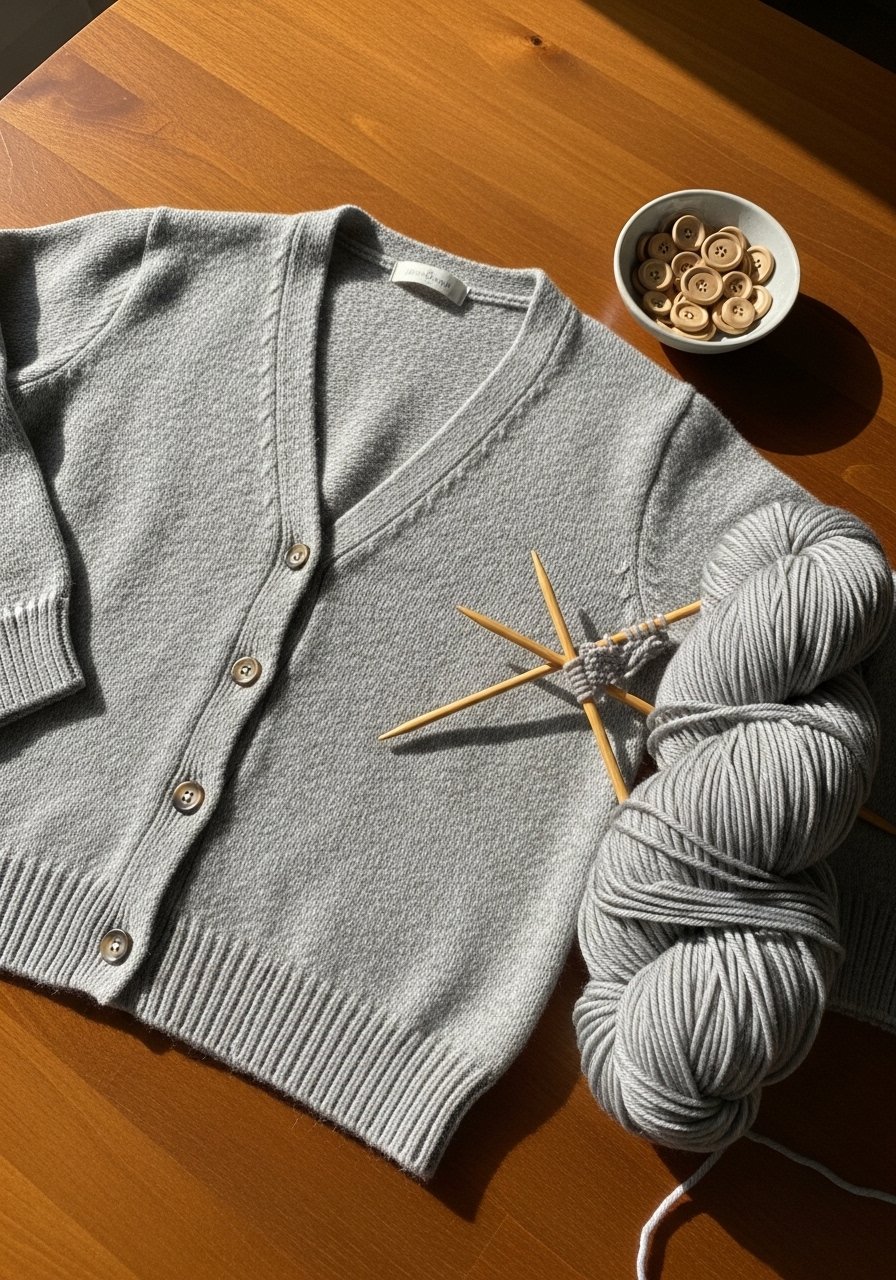
Cardigans require a bit more finishing but this top-down raglan cardigan keeps things simple—no complex steek. Buttons add charm and make it wearable year-round.
Materials
- Yarn: 8–9 skeins worsted (#4), approx 1200 yards
- Needles: US 8 / 5mm circular needle (32")
- Notions: 6 wooden buttons, tapestry needle, 8 markers
- Gauge: 18 sts x 24 rows = 4 in in stockinette
- Finished bust: 38–46 in
- Time: 15–22 hours
Instructions
- Cast on 130 sts, work neck rib 2 in.
- Set raglan markers and increase every 6 rows until underarm circumference fits.
- Separate body/sleeves; work body in stockinette to desired length.
- Pick up sts for button band and knit 1×1 rib for 2 in, create buttonholes evenly spaced on one side (bind off 2 sts at buttonhole position and cast on 2 sts on the next row).
- Sleeve instructions as usual; finish cuffs with rib.
- Block and sew on buttons with yarn and tapestry needle, ensuring alignment.
How to Display or Gift It
Button-front cardigans look lovely on a wooden hanger with the top button fastened. For gifting, include a small pack of extra buttons and a compact sewing kit.
- Simple Boatneck Pullover
Boatneck shapes are flattering and require no collar shaping. This is a roomy, classic knit you can wear with layered shirts.
Materials
- Yarn: 6 skeins worsted (#4), approx 900 yards
- Needles: US 8 / 5mm circular needle (32")
- Notions: stitch markers, tapestry needle, measuring tape
- Gauge: 18 sts x 24 rows = 4 in in stockinette
- Finished bust: 36–44 in
- Time: 10–16 hours
Instructions
- Cast on 140 sts. Work 1×1 rib for 1.5 in at hem if desired.
- Continue in stockinette; shape shoulders with simple bind offs or short rows for a flattering fit (bind off 8 sts at shoulder edges on 2 rows).
- Pick up neck sts and work a short rolled hem by knitting in garter stitch for 1 in then binding off.
- Finish sleeves and weave ends; block flat and let dry 24 hours.
How to Display or Gift It
Fold the boatneck on a clean surface with a sprig of dried lavender on top. For storage, a breathable hanger cover will keep dust off.
- Textured Mock Cable Sweater (beginner cable)
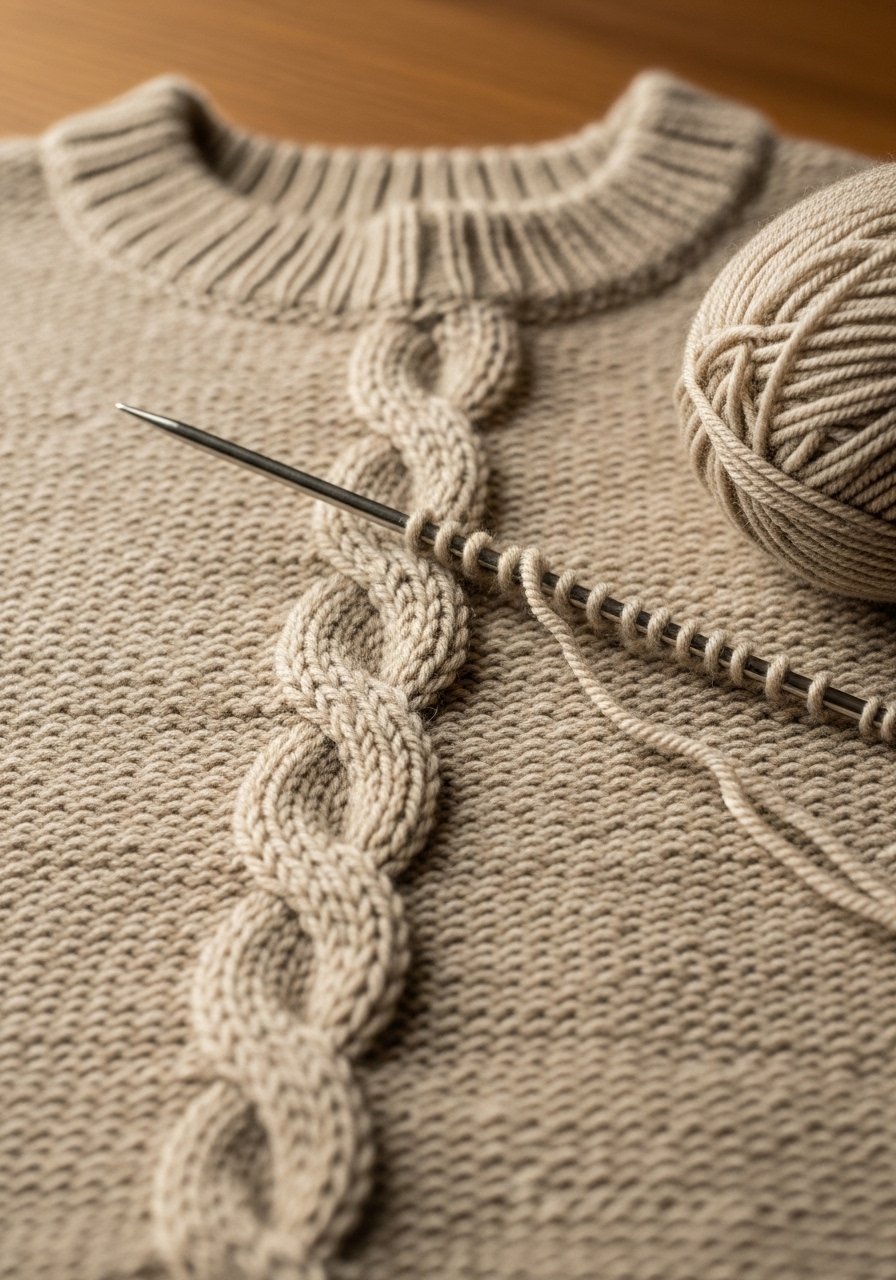
A small cable panel adds interest without heavy technique. This mock cable uses a simple 4-st cross every 8 rows—easy to learn and very satisfying.
Materials
- Yarn: 6 skeins worsted (#4), approx 800–950 yards
- Needles: US 8 / 5mm circular needle (24" or 32")
- Notions: cable needle, stitch markers, tapestry needle
- Gauge: 18 sts x 24 rows = 4 in
- Finished bust: 36–42 in
- Time: 12–18 hours
Instructions
- Cast on 132 sts, placing a central 8-st cable panel on the front by marking its edges.
- Work body in stockinette. When you reach the cable row, slip 2 sts to cable needle, hold to front, k2 from left needle, then k2 from cable needle; repeat across panel.
- Repeat the cable every 8th row while continuing body to desired length.
- Shape sleeves and neck as preferred. Block and let cable settle 24–48 hours.
How to Display or Gift It
A sweater with cable detail looks great folded with the cable centered. Include a small cable needle set as a gift along with care instructions.
- Balloon Sleeve Sweater
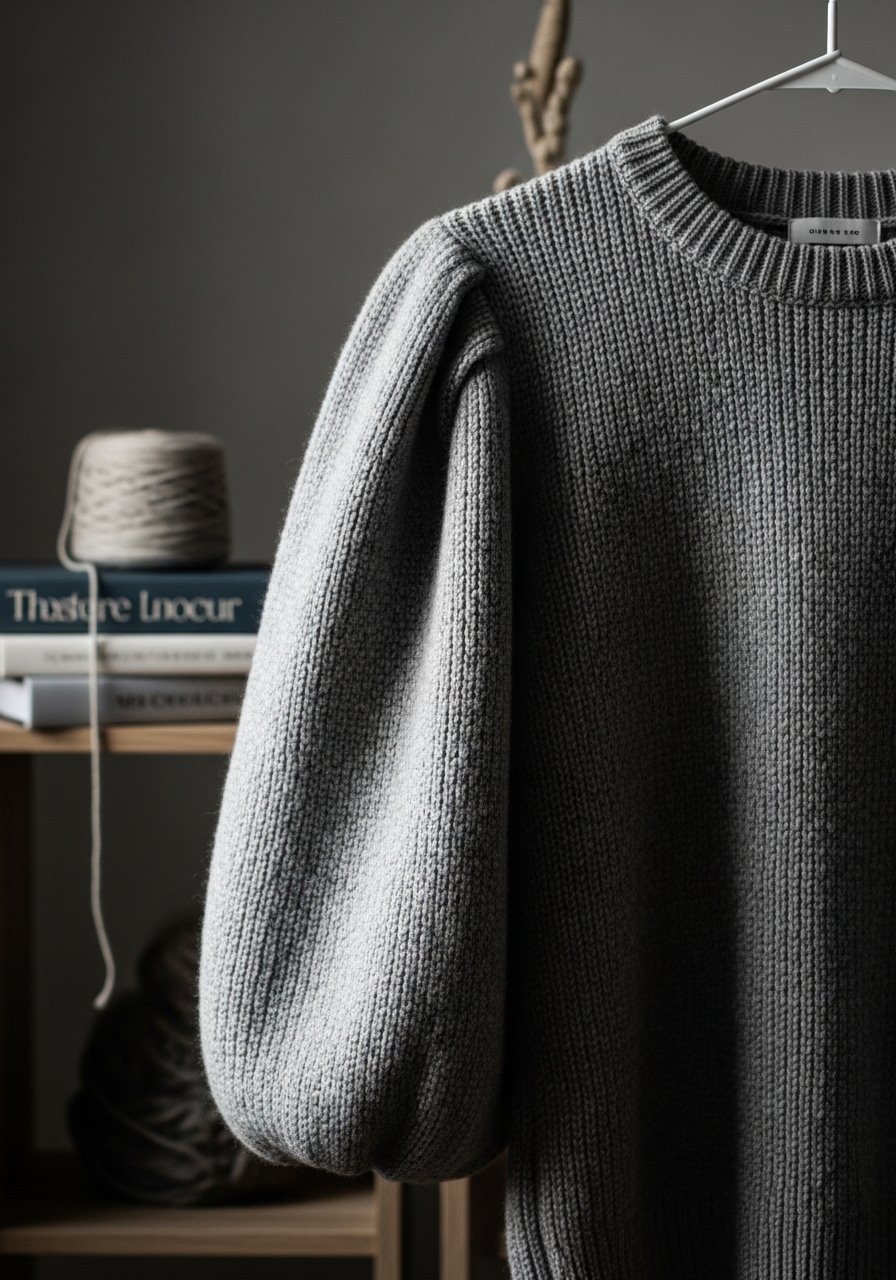
Balloon sleeves add playful volume with simple decreases at the cuff. The body remains minimal so the sleeves shine.
Materials
- Yarn: 7 skeins worsted (#4), approx 900–1000 yards
- Needles: US 8 / 5mm circular needle (32")
- Notions: stitch markers, spare yarn for sleeve shaping, tapestry needle
- Gauge: 18 sts x 24 rows = 4 in
- Finished bust: 36–44 in
- Time: 14–20 hours
Instructions
- Cast on 140 sts. Work rib hem 2 in.
- Continue in stockinette. For sleeves, place markers and transfer sleeve sts onto holders.
- When knitting sleeves, increase gradually to create volume (m1 every 6 rows until you have 50–60 sts).
- At cuff region, decrease rapidly (k2tog every 4 rows) until reaching 12–16 sts, finish with 2 in rib.
- Block the garment to shape and let dry 24–36 hours.
How to Display or Gift It
Show the balloon sleeves by hanging the sweater on a sculptural hanger. For gifting, include a small set of wooden hangers to present it nicely.
- Cozy Hoodie Pullover
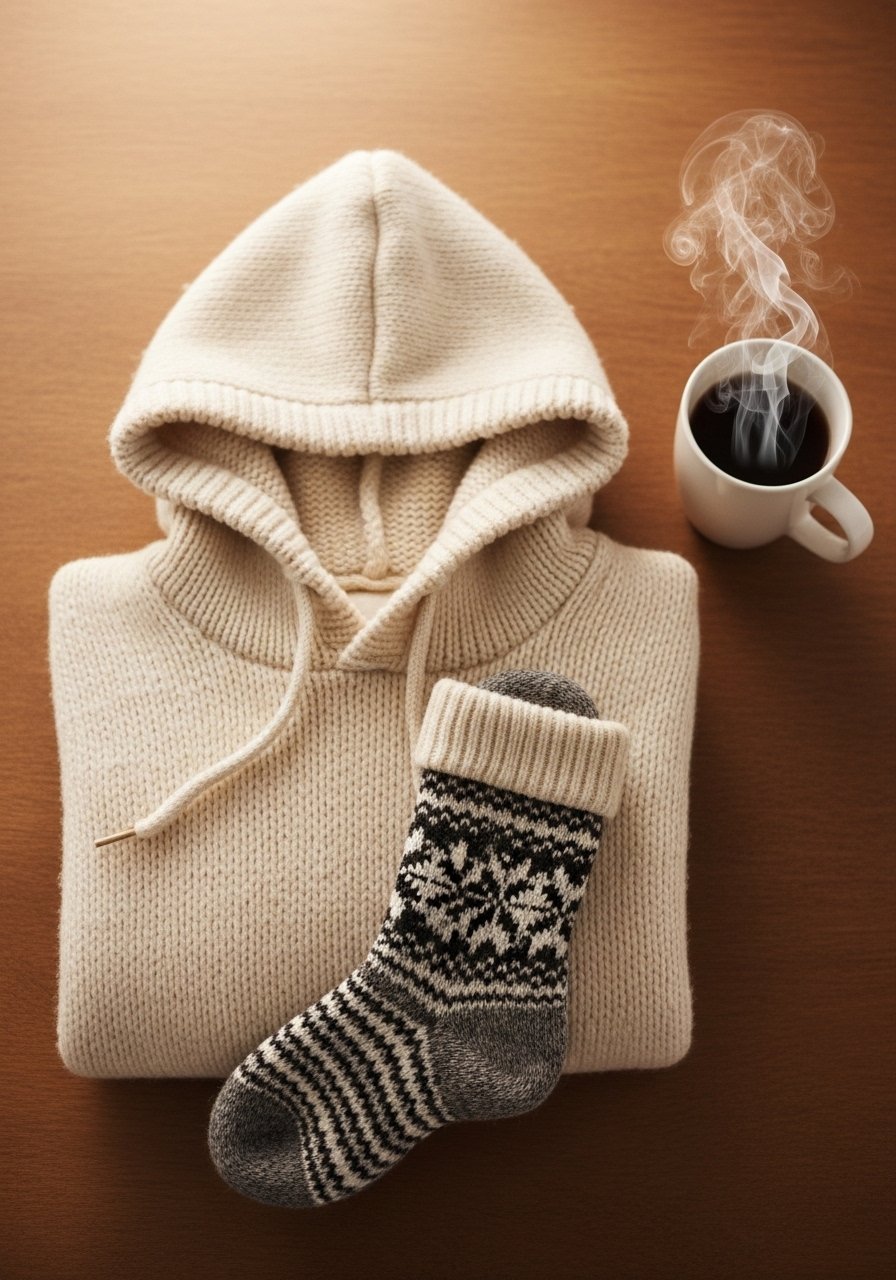
A hoodie brings practical warmth and a casual silhouette. This pattern keeps construction straightforward by making a roomy body and attaching a simple hood.
Materials
- Yarn: 9 skeins bulky (#5), approx 1100–1300 yards
- Needles: US 10 / 6mm circular needle (32" or 40")
- Notions: tapestry needle, stitch markers, spare yarn for hood shaping
- Gauge: 14 sts x 20 rows = 4 in in stockinette on 6mm
- Finished bust: 40–50 in
- Time: 15–25 hours
Instructions
- Cast on 160 sts. Work hem rib 2 in.
- Knit in stockinette until underarm depth 18 in. Separate sleeves and body.
- Continue body to desired torso length (10–12 in), bind off.
- Make hood: pick up 80–90 sts evenly around neckline and knit in stockinette for 10–12 in, shape crown by simple decreases and bind off.
- Sew hood seam using mattress stitch; weave in ends; block lightly and dry 24–48 hours.
How to Display or Gift It
Fold and place hoodie in a kraft box with a hand-written care tag. Add a soft insulated mug for a cozy gift pairing.
- Lightweight Summer Knit (knitting for beginners sweater)
A summer sweater uses cotton or linen-blend yarn for breathability. This is a loose-fitting, boxy knit that works well for warm-weather layering.
Materials
- Yarn: 6 skeins cotton-linen blend, DK/light worsted (#3-4), approx 900 yards
- Needles: US 6 / 4mm circular needle (32")
- Notions: stitch markers, tapestry needle, washable wool soap
- Gauge: 20 sts x 28 rows = 4 in
- Finished bust: 38–46 in
- Time: 12–18 hours
Instructions
- Cast on 140 sts. Work 1×1 rib for 1 in for hem.
- Continue in dropped-stitch open pattern: Row 1: k1, yo, k2tog across; Row 2: purl. Repeat for airy texture.
- Knit body until desired length (18 in). Separate sleeves and body and finish sleeves with same pattern.
- Block gently to open pattern and relax fibers; cotton/linen can sag—pin to measurements and let dry 24–48 hours.
How to Display or Gift It
This sweater looks lovely folded in a shallow basket on a porch bench. For gifting, include a small cotton laundry bag for washing.
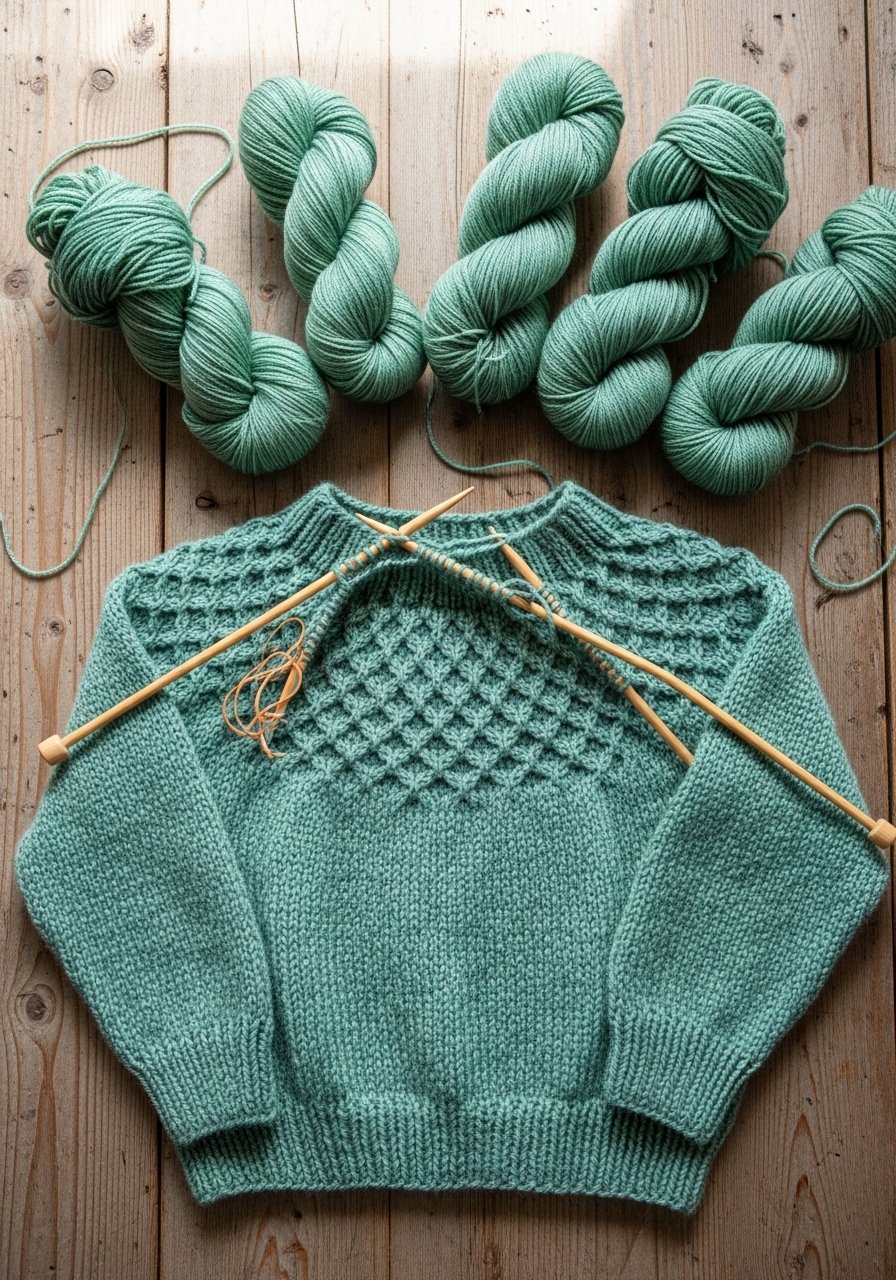
- Textured Yoke Sweater

A textured yoke adds visual interest without complicated lace or cables. Use purl rows and cluster stitches to build a pretty motif that looks designer-level.
Materials
- Yarn: 7 skeins worsted (#4), approx 950 yards
- Needles: US 8 / 5mm circular needle (24–32")
- Notions: stitch markers, tapestry needle, chart for yoke (print if needed)
- Gauge: 18 sts x 24 rows = 4 in
- Finished bust: 36–44 in
- Time: 14–20 hours
Instructions
- Cast on 132 sts. Join and work stockinette until yoke shaping begins.
- Follow a simple 8-row repeat pattern for textured yoke: Row 1: k; Row 2: p; Row 3: k; Row 4: p; Row 5: (k2tog, yo) across; Row 6: p; Row 7: k; Row 8: p.
- Continue yoke until underarm circumference is adequate. Separate body/sleeves and finish as usual.
- Block and pin to shape; allow 24–36 hours to dry.
How to Display or Gift It
Textured yokes look great on a wooden hanger against a plaster wall. Add a small printed care tag; a compact label maker can make tidy tags.
- Paneled Side-Slit Sweater
Side slits add movement and make a sweater more breathable. Panels are created by alternating rib and stockinette for a structured, modern look.
Materials
- Yarn: 7 skeins worsted (#4), approx 1000 yards
- Needles: US 8 / 5mm circular (32")
- Notions: stitch markers, tapestry needle, stitch holder
- Gauge: 18 sts x 24 rows = 4 in
- Finished bust: 38–46 in
- Time: 14–20 hours
Instructions
- Cast on 140 sts. Work in pattern: Panel A: 8 sts rib; Panel B: 20 sts stockinette repeat across.
- Knit to desired length; for side slits, bind off 8–12 sts at each side and continue front and back length separately for 2–3 in, then rejoin.
- Finish sleeves and hem as desired. Block on flat surface for 24–36 hours.
How to Display or Gift It
Fold to display the side slit, or hang to show panel lines. Pair the sweater with a small gift box and tissue set for presentation.
- Basket-Weave Sweater

Basket-weave creates a woven look using alternating blocks of knit and purl. It hides tension variations and looks woven and cozy.
Materials
- Yarn: 7 skeins worsted (#4), approx 1000 yards
- Needles: US 8 / 5mm circular (24–32")
- Notions: stitch markers, tapestry needle, printed stitch chart
- Gauge: 18 sts x 24 rows = 4 in
- Finished bust: 36–44 in
- Time: 15–20 hours
Instructions
- Cast on 136 sts. Work basket-weave in an 8-row pattern: 4 rows k4, p4 blocks, then 4 rows p4, k4 blocks.
- Continue to desired body length. Separate sleeves and finish.
- Block gently to settle squares; dry 24–36 hours.
How to Display or Gift It
This sweater looks gallery-ready on a wooden hanger. For gifting, wrap it in kraft paper and tie with jute twine.
- Simple Yoke Pullover (top-down)
This top-down yoke uses minimal shaping and gives you the chance to try on as you go to customize length.
Materials
- Yarn: 6–7 skeins worsted (#4), approx 850–1000 yards
- Needles: US 7 / 4.5mm circular (32")
- Notions: stitch markers, tapestry needle, row counter
- Gauge: 20 sts x 28 rows = 4 in
- Finished bust: 36–44 in
- Time: 12–18 hours
Instructions
- Cast on 132 sts, work neck rib 1.5 in.
- Increase for yoke every 6th round until underarm fits. Try on as you go.
- Separate sleeves and body and continue to desired lengths.
- Block gently; allow 24 hours to dry.
How to Display or Gift It
Fold the pullover with a small printed care card tucked inside. Include a portable stitch marker set for gifting.
- Ribbed Tunic Sweater
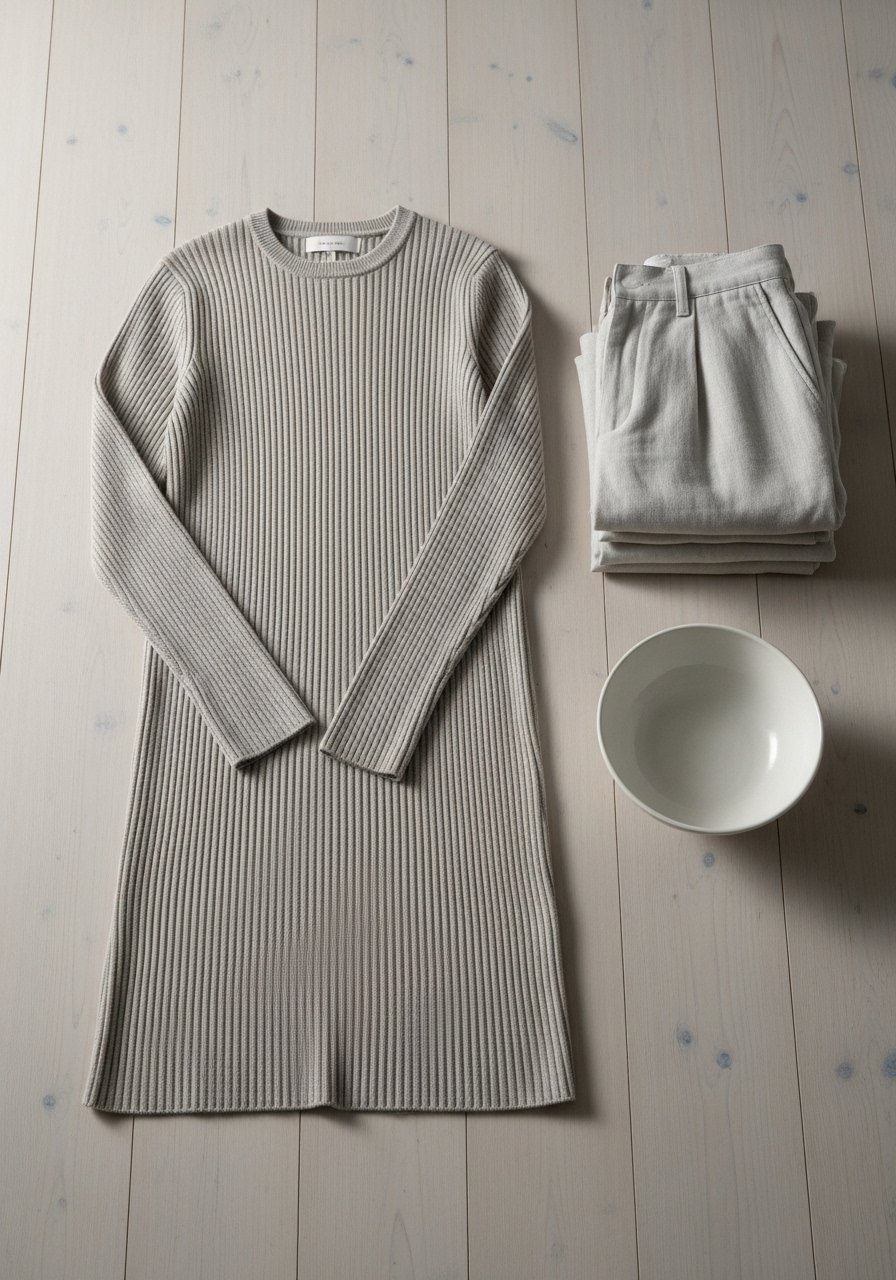
Longer ribbed tunics are flattering and forgiving. Vertical ribs create slimming lines and add stretch without shaping.
Materials
- Yarn: 9 skeins worsted (#4), approx 1200 yards
- Needles: US 8 / 5mm circular (40")
- Notions: tapestry needle, tape measure, 6 markers
- Gauge: 20 sts x 28 rows = 4 in in 2×2 rib
- Finished bust: 36–48 in
- Time: 16–24 hours
Instructions
- Cast on 180 sts. Work 2×2 rib for hem 3 in.
- Continue in 2×2 rib for body to tunic length (26–30 in).
- Shape shoulders by binding off gradually or use short rows.
- Knit sleeves in rib for snug fit. Block lightly; drying 24–36 hours.
How to Display or Gift It
Fold and stack with coordinating knit hats for a bundled gift. Use a stackable craft organizer to hold leftover yarn and patterns.
- Popcorn Stitch Sweater (textured)
Popcorn stitch creates cute bobbles across the fabric. Use sparingly for a bouncy, playful finish that's beginner-friendly if you stick to small bobble repeats.
Materials
- Yarn: 7 skeins worsted (#4), approx 950 yards
- Needles: US 8 / 5mm circular
- Notions: crochet hook for bobbles (optional), tapestry needle, bobble chart
- Gauge: 18 sts x 24 rows = 4 in
- Finished bust: 36–44 in
- Time: 14–20 hours
Instructions
- Cast on 132 sts and work body in stockinette.
- For popcorn rows, follow a bobble chart: knit into st 5 times, turn and purl back, then knit 5 together to form bobble—space every 8 sts.
- Repeat bobble row every 6–8 rows across a few repeats for a balanced texture.
- Finish as usual; block and allow 24–48 hours to dry.
How to Display or Gift It
Popcorn texture looks fun folded with a plush ribbon. Pack in a breathable gift box and tuck a small yarn needle set inside.
- Pocket Pullover
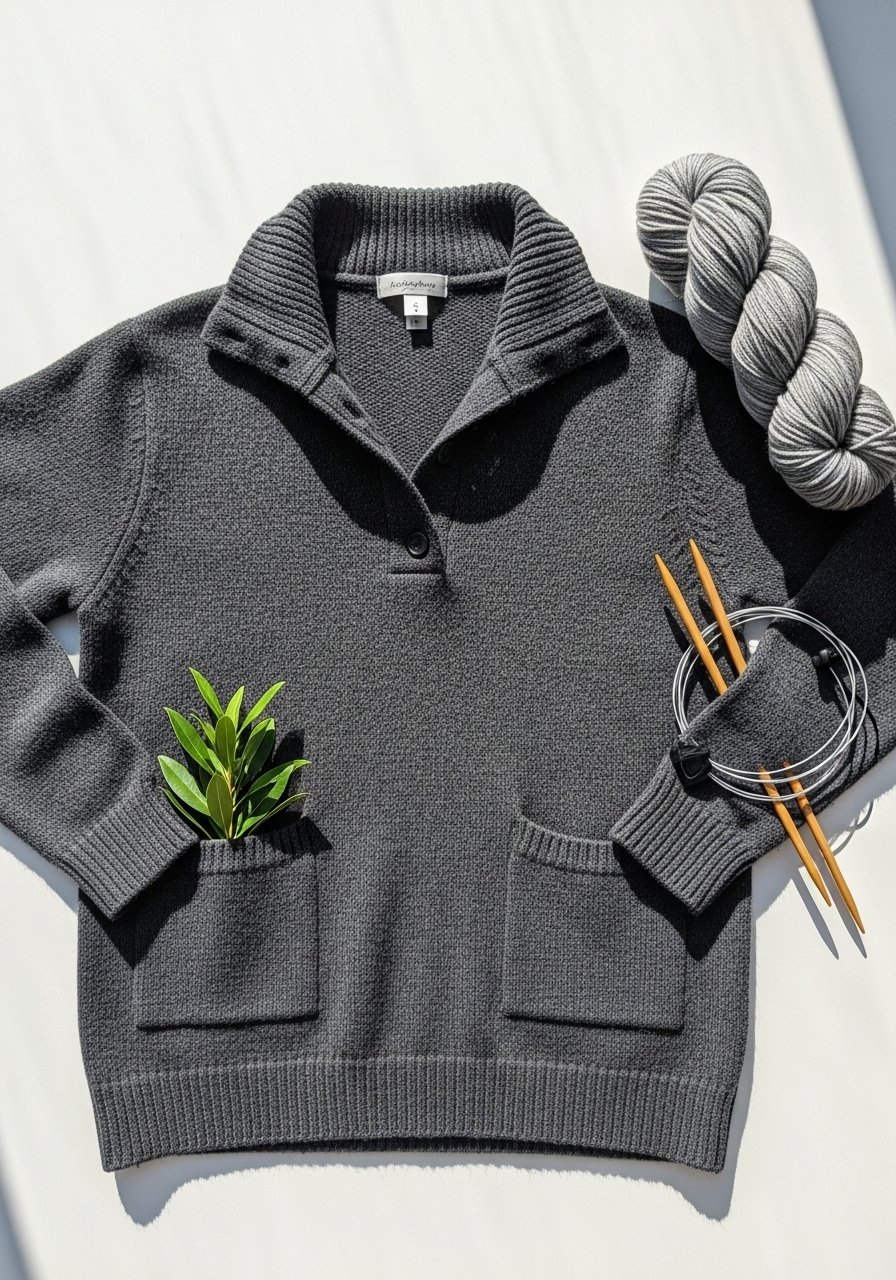
Adding pockets is simple and very satisfying—use small rectangles knit separately and seamed on.
Materials
- Yarn: 8 skeins worsted (#4), approx 1000 yards
- Needles: US 8 / 5mm circular (32")
- Notions: tapestry needle, stitch markers, small sewing needle for attaching pockets
- Gauge: 18 sts x 24 rows = 4 in
- Finished bust: 38–46 in
- Time: 14–20 hours
Instructions
- Knit pullover body until pocket placement point. Continue body.
- For each pocket, cast on 24–28 sts, work in stockinette for 6–7 in, bind off.
- Position pockets evenly on front and sew using mattress stitch so top edge remains open.
- Finish sleeves and hem; block and press; allow 24 hours to dry.
How to Display or Gift It
Fold with pockets tucked outward to display functionality. A small gift tag set adds charm.
- Minimalist Cocoon Cardigan
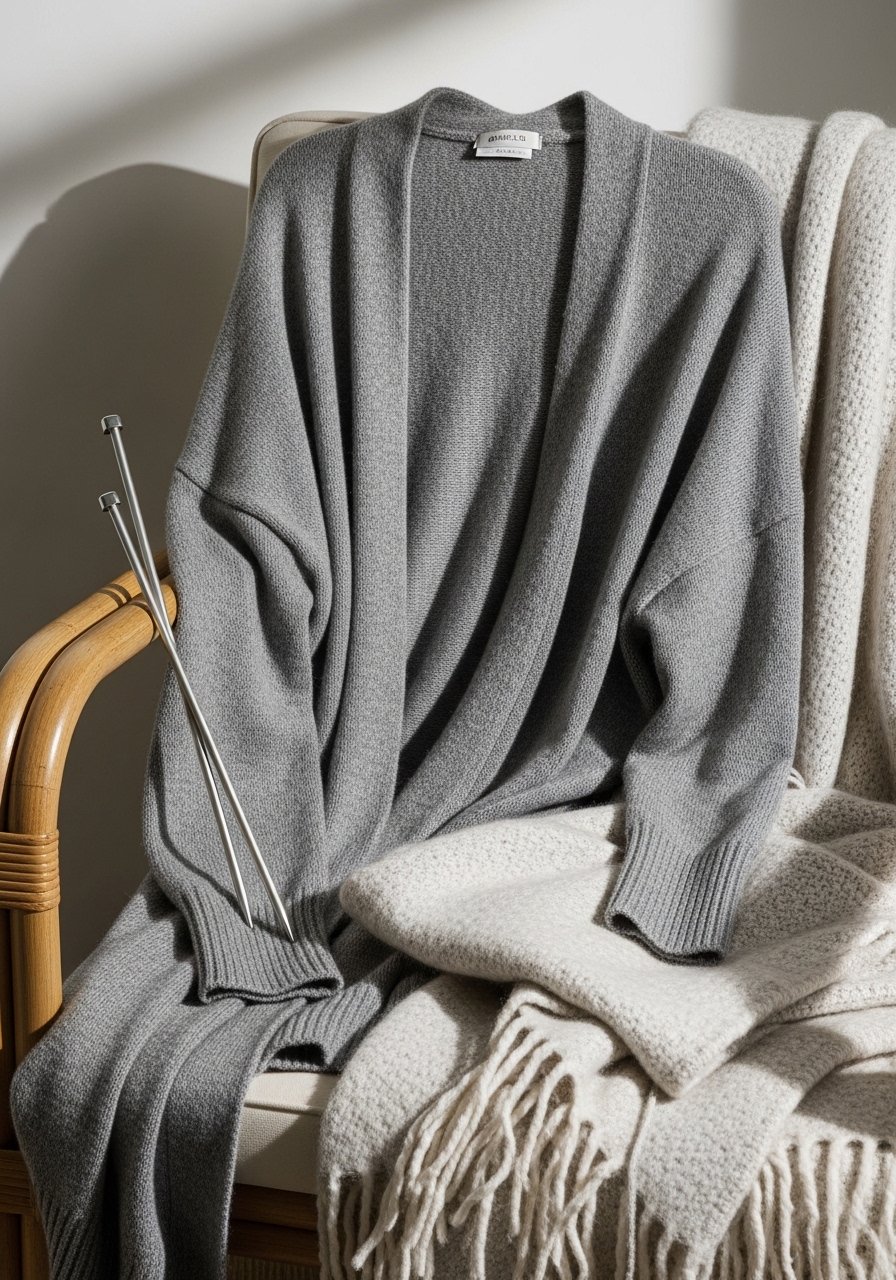
Cocoon cardigans use curved shaping to create a roomy silhouette—no darts or complex sleeve caps.
Materials
- Yarn: 10 skeins aran (#5), approx 1400 yards
- Needles: US 9 / 5.5mm circular (40")
- Notions: tapestry needle, stitch markers, blocking pins
- Gauge: 16 sts x 22 rows = 4 in
- Finished bust: 42–56 in (draped cocoon)
- Time: 18–26 hours
Instructions
- Cast on 200 sts. Work bottom hem 2 in in rib.
- Shape cocoon by working elongated back and slightly shorter front panels—use short rows or simple increases/decreases to create curve.
- For sleeves, knit in the round and set into wide openings.
- Block on a curve if possible; allow 48 hours to set.
How to Display or Gift It
Display on an oversized hanger or folded over a bench. For gifting, include a soft throw blanket to complement the cozy vibe.
- Cozy Funnel-Neck Sweater
The funnel neck is shorter than a turtleneck but adds warmth and structure. Knit it as a continuous folded tube for a neat finish.
Materials
- Yarn: 8 skeins worsted (#4), approx 1100 yards
- Needles: US 8 / 5mm circular (32")
- Notions: stitch markers, tapestry needle, blocking mats
- Gauge: 18 sts x 24 rows = 4 in
- Finished bust: 36–44 in
- Time: 14–20 hours
Instructions
- Cast on 140 sts. Work body to underarm depth.
- Pick up neck sts or continue to knit funnel as a tube: work k2, p2 for stretch and fold later.
- Knit funnel to 6–8 in tall, fold inward and seam to create double layer.
- Finish sleeves and hem; block gently; allow 24–36 hours to dry.
How to Display or Gift It
Show the funnel neck folded slightly for a relaxed look. Wrap with a kraft band and tuck in a small wool wash sample for care instructions.
- Weekend Cocoon Pullover (easy seaming)
Seaming can intimidate beginners, but a relaxed cocoon pullover uses straightforward mattress stitch and large seams that are forgiving. Knit panels flat and seam for a weekend project.
Materials
- Yarn: 9 skeins worsted (#4), approx 1200 yards
- Needles: US 8 / 5mm straight needles or circular for flat knitting
- Notions: tapestry needle, stitch markers, blocking mats, sewing pins
- Gauge: 18 sts x 24 rows = 4 in
- Finished bust: 40–52 in
- Time: 12–20 hours
Instructions
- Knit back panel: cast on 100 sts, work in stockinette until desired length (20–24 in), bind off.
- Knit two front panels: cast on 60 sts each, work same length.
- Seam shoulders using mattress stitch with tapestry needle.
- Pick up stitches for sleeves or knit separate sleeves and seam into armholes.
- Seam sides, leaving optional side slits by stopping seam 6 in from hem.
- Block panels flat and let seams relax for 24–48 hours.
How to Display or Gift It
Fold to show the neat seams, or hang on a sturdy wooden hanger. Use a sewing pin set for neat presentation if gifting.
Thanks for knitting along—22 cozy possibilities later, you’ve got options for every season, style, and skill level. These projects cover the core beginner techniques—casting on, stockinette, garter, simple increases, and basic finishing—so you’ll build confidence stitch by stitch. Save this post to Pinterest so you can return to favorite patterns. Which sweater will you knit first? Share a photo when you finish, or tag a friend who’d love a starter project.
Trust me, a quality pair of circular needles makes a big difference across these patterns — they keep joins smooth and your knitting faster. Consider grabbing a versatile Addi Turbo circular needle set if you plan to knit most of these sweaters.


