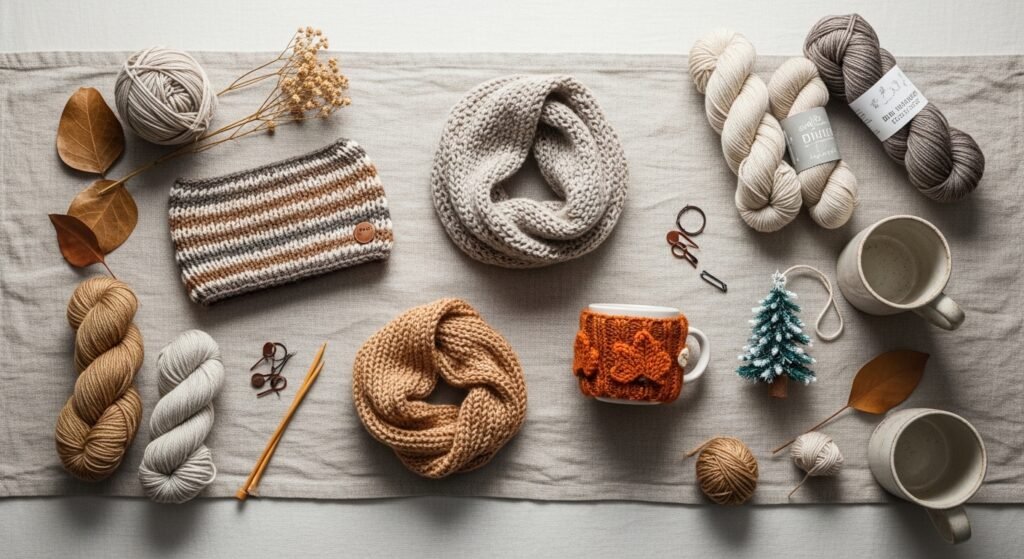
Welcome — and yes, you can knit your way through the whole year. These 25 seasonal knitting projects for beginners are small, satisfying, and designed so you finish quickly and learn one new skill per project. You'll find projects for spring florals, breezy summer accessories, cozy autumn warmers, and tiny winter gifts. Each project lists precise materials, exact yarn weights, needle sizes, realistic drying/blocking times, and step-by-step instructions so you won't get stuck.
I keep a simple set of circular needles and a wooden stitch marker tin on my table; they make switching between patterns painless. If you want neat seams and easy finishing, I use a set of Clover tapestry needles for weaving in ends. For measuring, a flexible sewing tape measure saves a lot of guesswork.
Flip through, pick a season, and pin any project you like. Each one is beginner-friendly, uses common yarns (worsted and DK), and includes a photo prompt so you can create a Pinterest-ready shot of your finished work.
1. Spring Blossom Headband — seasonal knitting projects for beginners
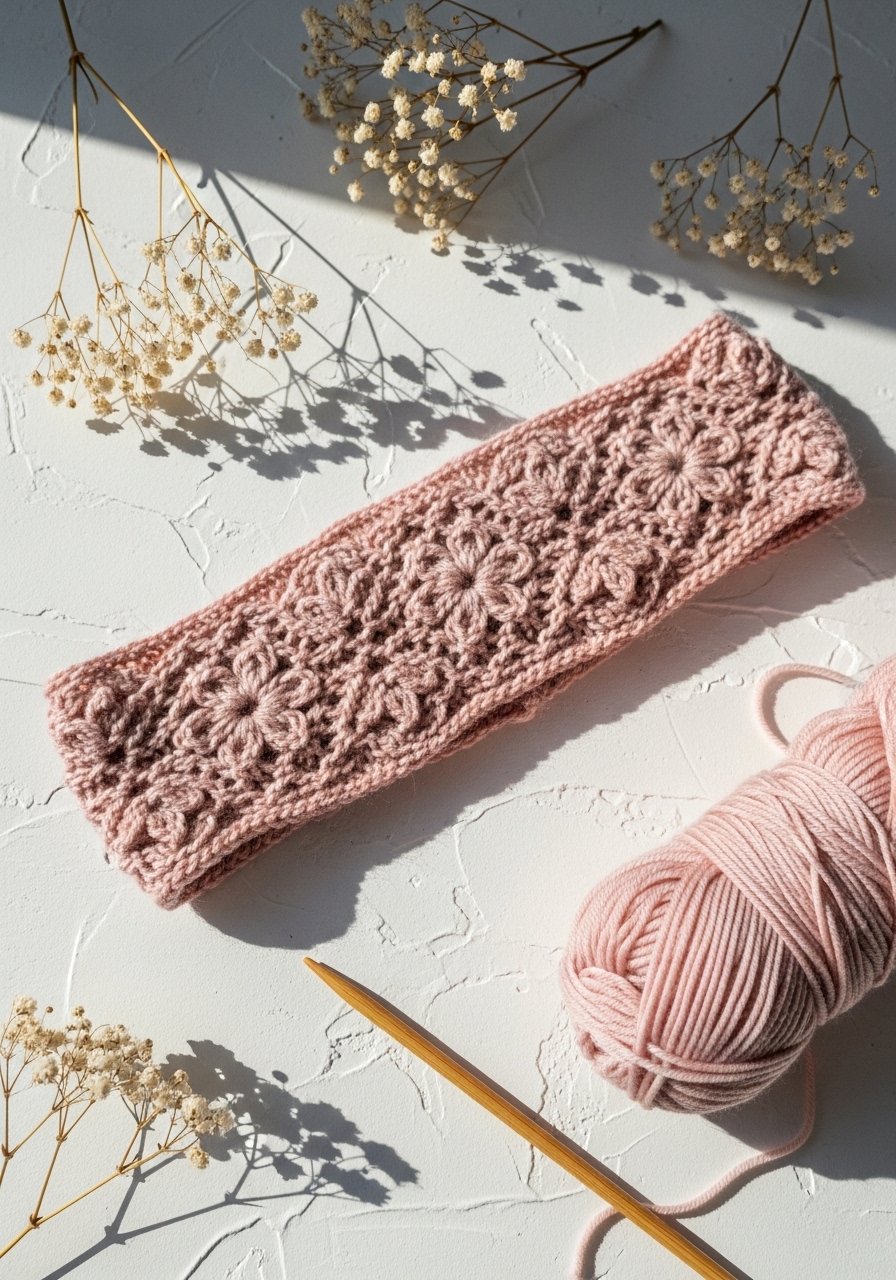
This spring blossom headband uses simple ribbing and an attached embroidered flower. It packs floral charm into a 30-minute knit and is perfect for beginners who want a wearable spring accessory. The headband feels soft and stretchy, and the sewn-on blossom adds texture.
Materials
- DK weight yarn, 60 yards (1 skein) in blush pink
- Small contrast DK yarn, 10 yards in yellow for flower center
- US 8 / 5.0 mm straight needles or small 16" circular
- Clover tapestry needle
- Scissors
- Small pom-pom maker (optional, for flower petals)
- Stitch marker
Instructions
- Cast on 60 stitches with DK yarn on US 8 needles. Join if using circular, being careful not to twist.
- Work 2×2 rib (k2, p2) for 4 inches. This creates a comfortable stretch.
- Bind off loosely in pattern.
- Fold headband so edges meet and seam with mattress stitch using tapestry needle. Seam length = 4 inches.
- For blossom: with contrast yarn, cast on 6 stitches, knit a small i-cord of 6 stitches x 4 rows and form loops into petals, securing each with a needle. Alternatively, use pom-pom maker to shape petals.
- Sew blossom to one side, anchoring center with yellow yarn and a few whip stitches.
- Weave in ends; trim.
How to Display or Gift It
- Tie it around a kraft gift box with a dried sprig for a handmade present.
- Display on a small wooden head mannequin or stacked with other headbands in a basket.
- Store flat in a fabric-lined drawer or a labeled craft organizer tray like this craft organizer.
2. Lightweight Summer Neck Cowl
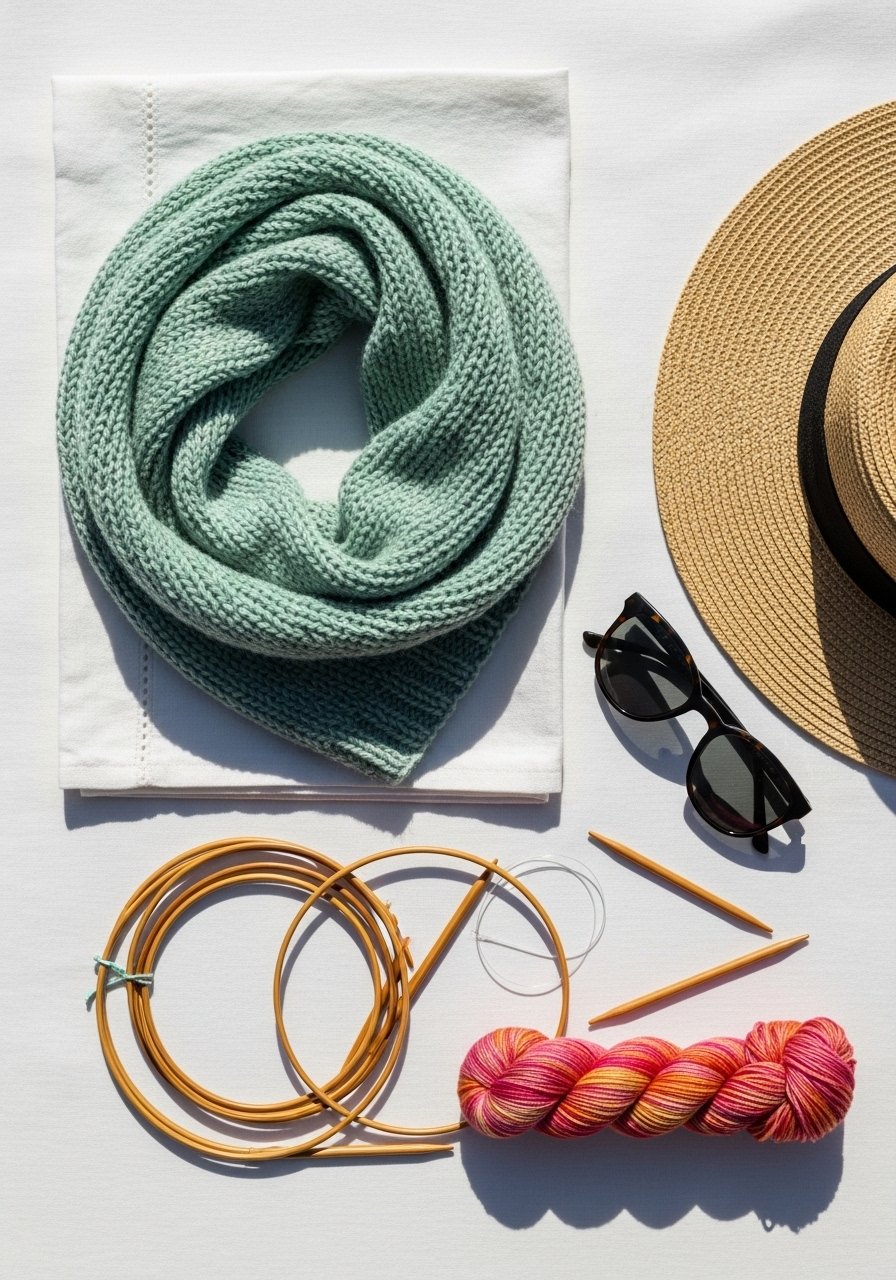
A breezy cowl in fingering or light DK weight is ideal for warm evenings. This pattern uses simple garter and eyelet rows to create texture and airflow. Beginners will practice increases and yarn overs without the weight of bulky yarn.
Materials
- Fingering weight yarn, 220 yards (approx. 2 skeins)
- US 6 / 4.0 mm 24" circular needles
- Stitch markers
- Tapestry needle
- Scissors
Instructions
- Cast on 160 stitches loosely on 24" circular needles. Place marker and join.
- Row 1–4: Knit (garter stitch in the round by alternating rows of knit/purl on circulars).
- Row 5: K2tog, yo across to create eyelets.
- Repeat Rows 1–5 until cowl measures 10 inches from cast-on.
- Work 4 garter rows, then bind off loosely.
- Block gently: pin to shape and steam or wet block. Dry for 12–24 hours until fully set.
- Weave in ends.
How to Display or Gift It
- Fold and tuck into a gift bag with a matching pair of sunglasses for a summer gift.
- Hang on a scarf rack or round hook for an airy display.
- Store in a breathable cotton bag to keep the fibers fresh.
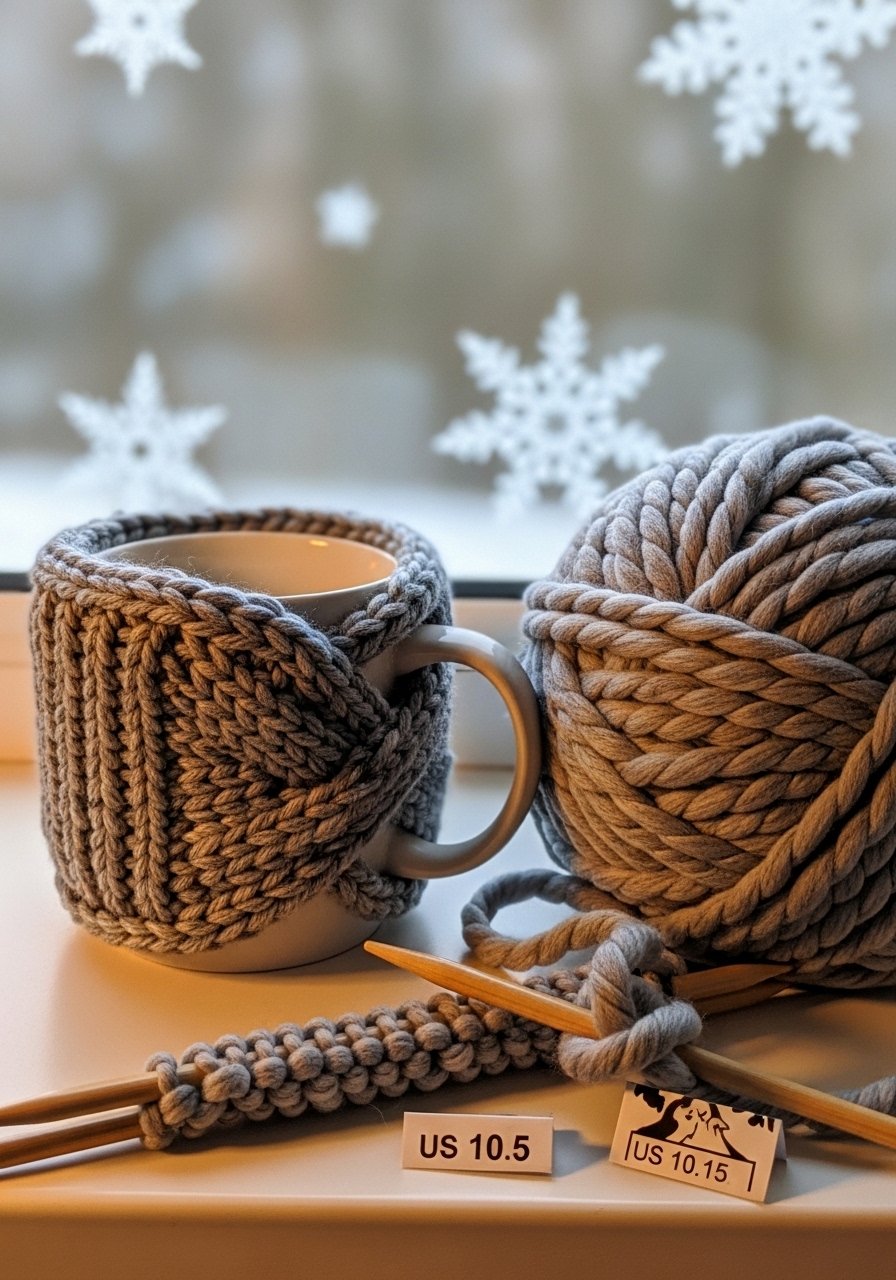
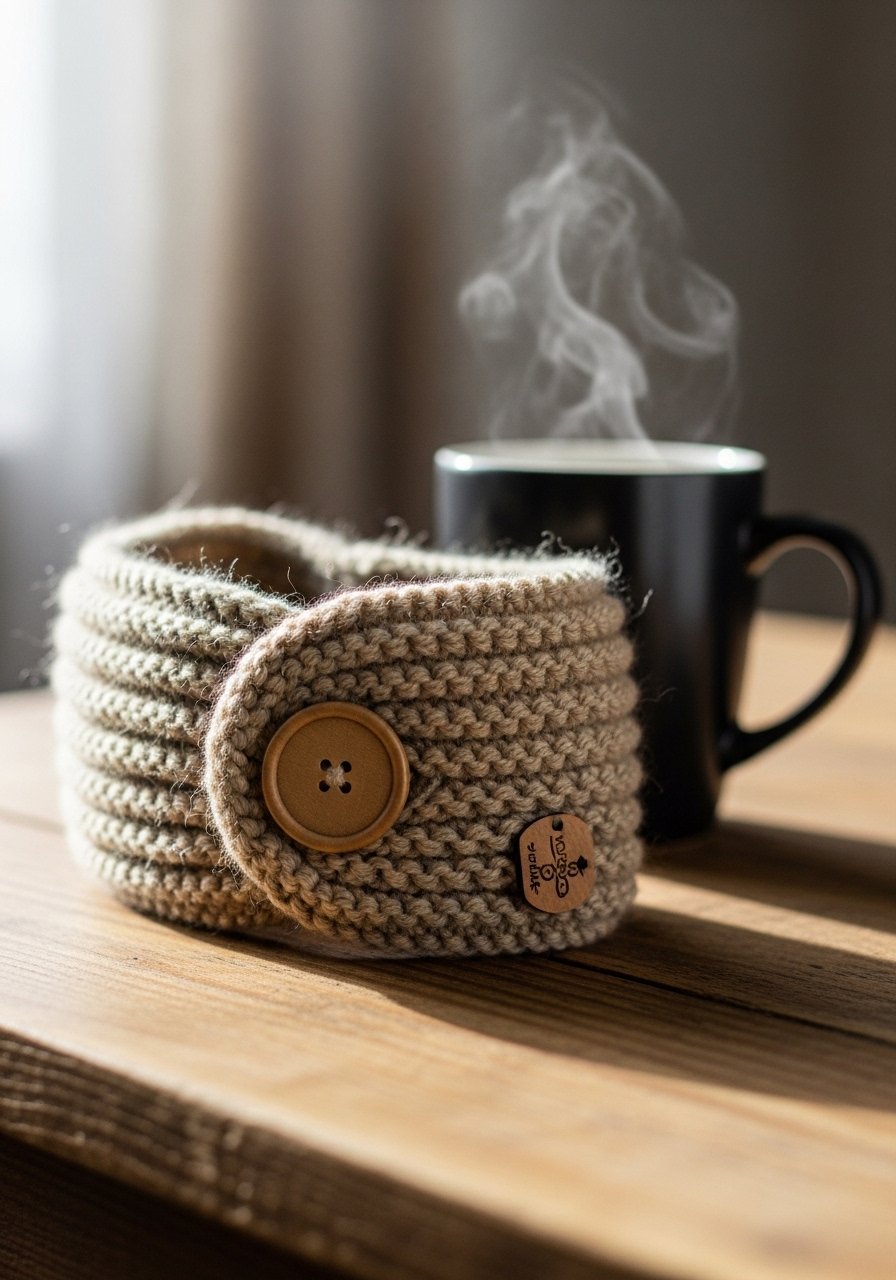
3. Chunky Autumn Mug Cozy — seasonal knitting projects for beginners
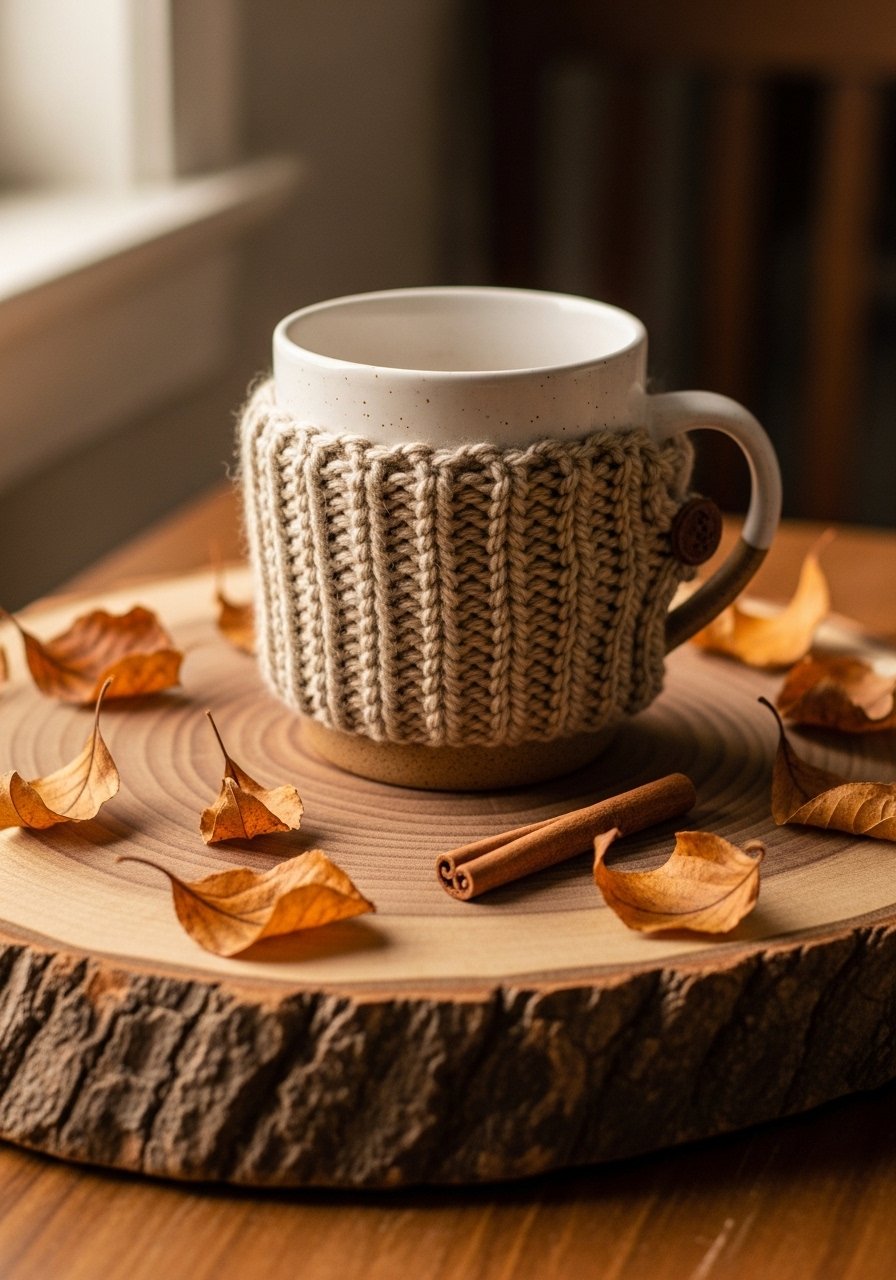
Mug cozies are fast, portable projects—great for practicing color changes and button closures. This chunky cozy knits up in an hour with bulky yarn and makes an excellent fall craft fair item.
Materials
- Bulky weight yarn (Bulky/5), 60 yards
- US 10.5 / 6.5 mm needles (double-pointed or 16" circular)
- One 1" wooden button
- Yarn needle
- Measuring tape
- Stitch marker
Instructions
- Cast on 28 stitches with bulky yarn.
- Work Seed stitch (k1, p1) for 1.5 inches.
- Switch to garter: knit every row for 2.5 inches.
- Cast off. Fold and measure around your favorite mug — seam should be snug.
- Sew long edge together with mattress stitch.
- Sew on button and create a small loop with yarn to fasten. Knot and weave in ends.
- Flatten cozy and steam lightly; button should fit without stretching.
How to Display or Gift It
- Pair with a bag of artisan tea in a kraft box. Wrap with twine.
- Stack a few cozies on a small wooden tray for a café-style display.
- Keep extras in a clear mason jar for gift-ready storage.
4. Picnic-Ready Dishcloth (Summer)
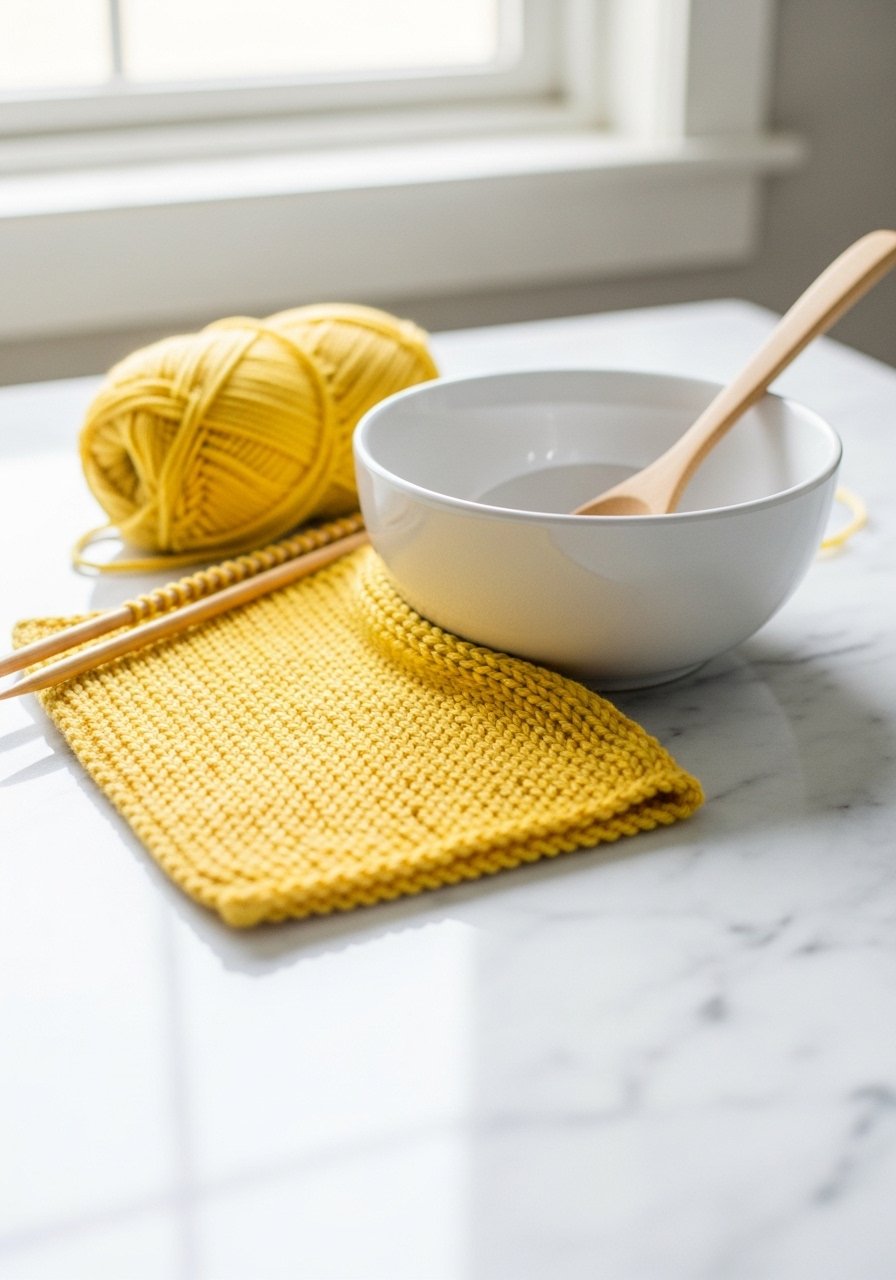
Dishcloths are classic beginner projects that teach gauge and texture. Use 100% cotton for absorbency and durability—great for summer picnic cleanups.
Materials
- 100% cotton worsted (weight 4), 110 yards (one skein)
- US 7 / 4.5 mm straight needles
- Scissors
- Tapestry needle
- Blocking pins (optional)
Instructions
- Cast on 44 stitches.
- Rows 1–2: K4, p4 across to create a basketweave texture.
- Repeat pattern until cloth measures 9 x 9 inches.
- Cast off in pattern.
- Wet block, pin to square, and allow to dry 12 hours.
- Trim loose ends after drying.
How to Display or Gift It
- Bundle with a small bottle of dish soap in a cello bag and tie with twine.
- Roll and tuck into a shallow basket near the sink.
- Store flat in a stackable craft box to avoid mildew.
5. Quick Spring Baby Booties — seasonal knitting projects for beginners
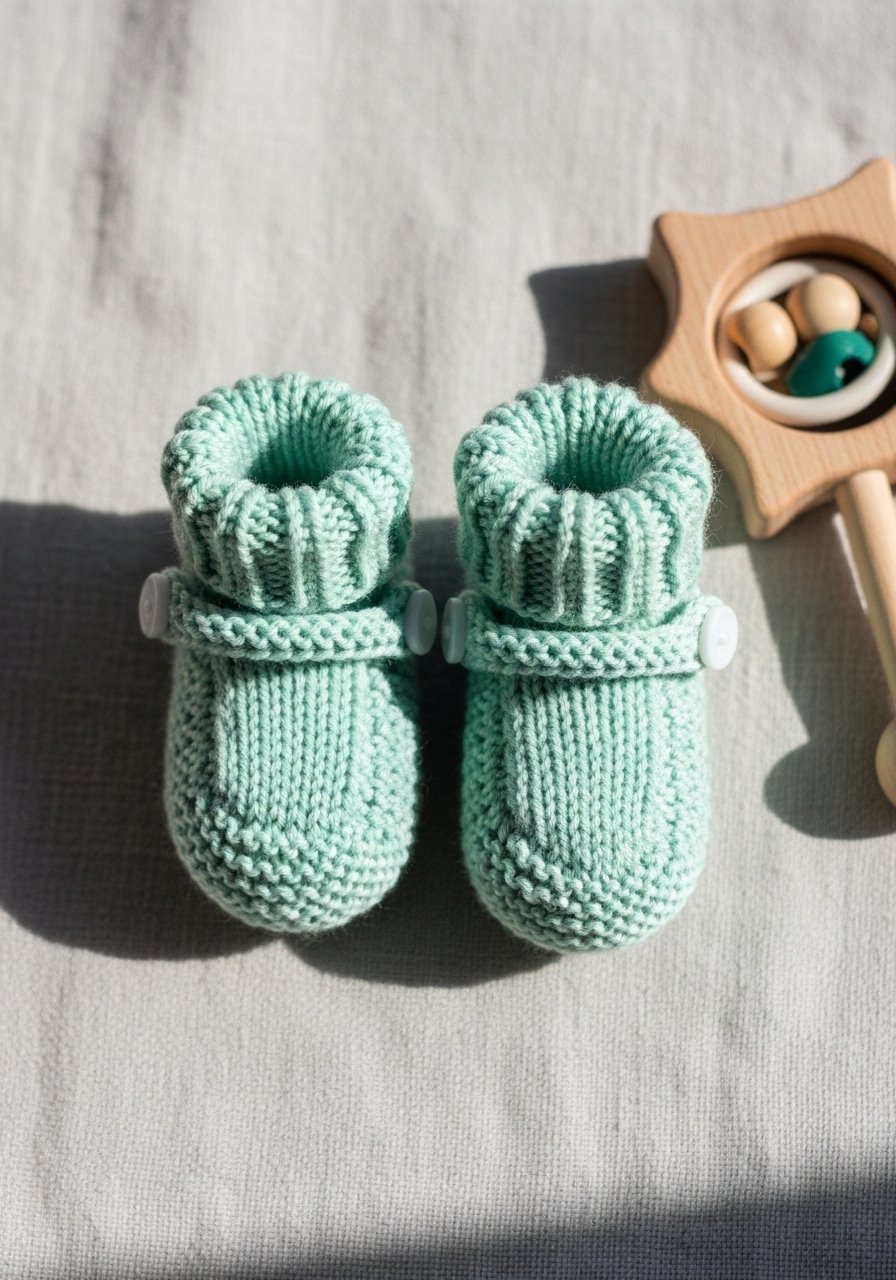
Tiny booties teach short rows and seaming. Made in worsted weight yarn, these are soft and quick—excellent as a last-minute baby shower gift.
Materials
- Worsted weight yarn, 60 yards (contrasting sole color optional)
- US 6 / 4.0 mm double-pointed needles (DPNs) or 16" circular for magic loop
- Stitch markers
- Tapestry needle
- Measuring tape
Instructions
- Cast on 36 stitches distribute on 3 DPNs (12/12/12).
- Work Knit 1, Purl 1 rib for 10 rows to form cuff.
- Switch to stockinette: knit rounds for 20 rounds.
- Begin toe decreases: K10, k2tog repeat across; continue decreasing every other round until 12 stitches remain.
- Break yarn and thread through remaining stitches, pull tight and secure.
- Sew back seam and weave in ends. Block lightly and let dry 2–4 hours.
How to Display or Gift It
- Tie pair together with ribbon and attach a kraft tag.
- Place in a small gift box with a hand-written note.
- Store in a labeled fabric box until needed.
6. Beach Tote Handle Wraps (Summer)
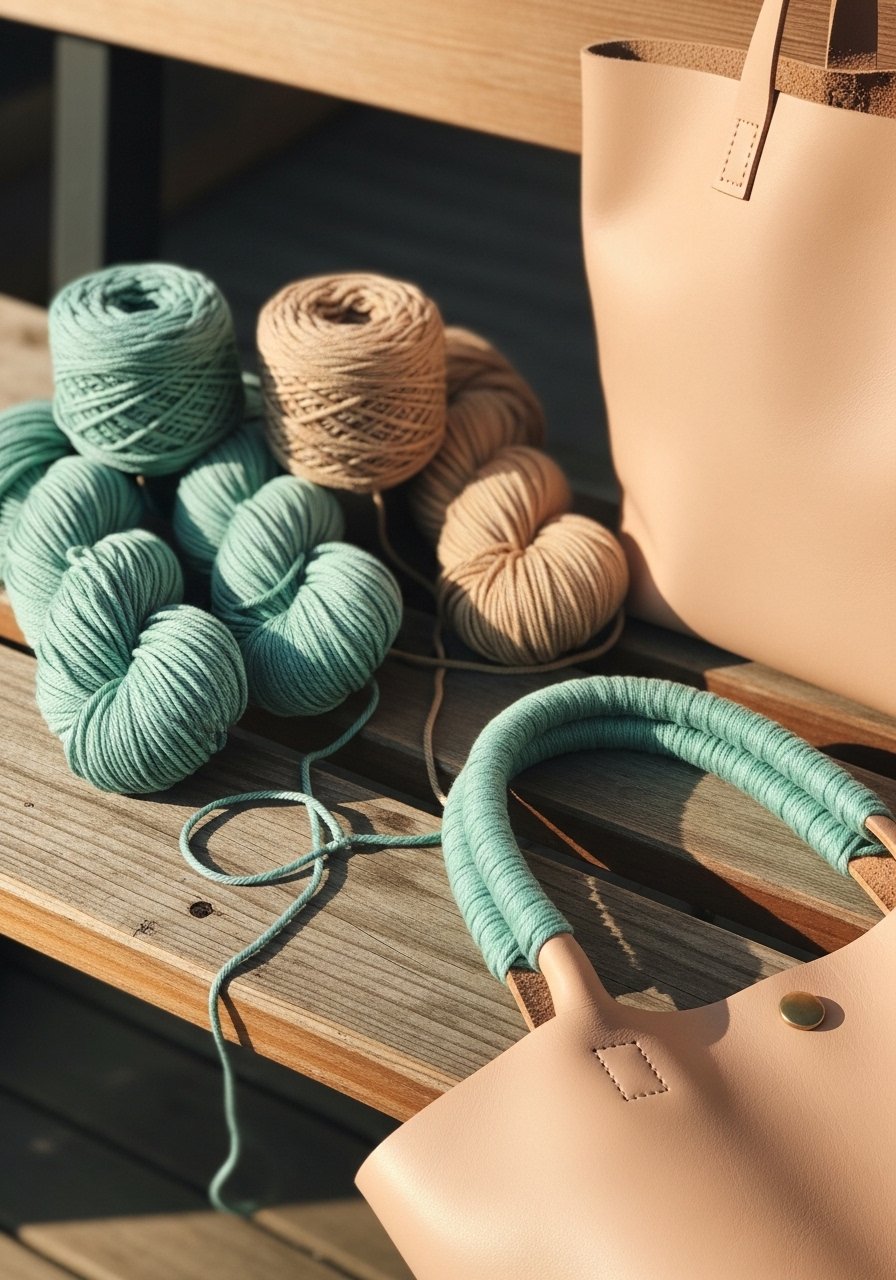
These handle wraps protect bags from wear and add a handmade pop. They teach you knitting in the round on small circumferences and finishing with snaps or buttons.
Materials
- Cotton sport weight yarn, 40 yards
- US 4 / 3.5 mm double-pointed needles
- Two snap fasteners or small buttons
- Tape measure
- Sewing awl or snap tool
- Tapestry needle
Instructions
- Measure handle circumference and desired wrap length (usually 6–8 inches).
- Cast on 28 stitches and join to work in the round.
- Work 1×1 rib for added grip until wrap measures chosen length.
- Bind off loosely. Sew snap fasteners in place, aligning ends with handle.
- Attach to tote and test fit. Snap should hold without stretching.
How to Display or Gift It
- Gift as a set with a small beach towel and sunscreen in a mesh bag.
- Slide onto display tote or hang on a peg rack.
- Store flat to prevent snaps from bending.
7. seasonal knitting projects for beginners — Spring Table Runner Accent (Napkin Rings)
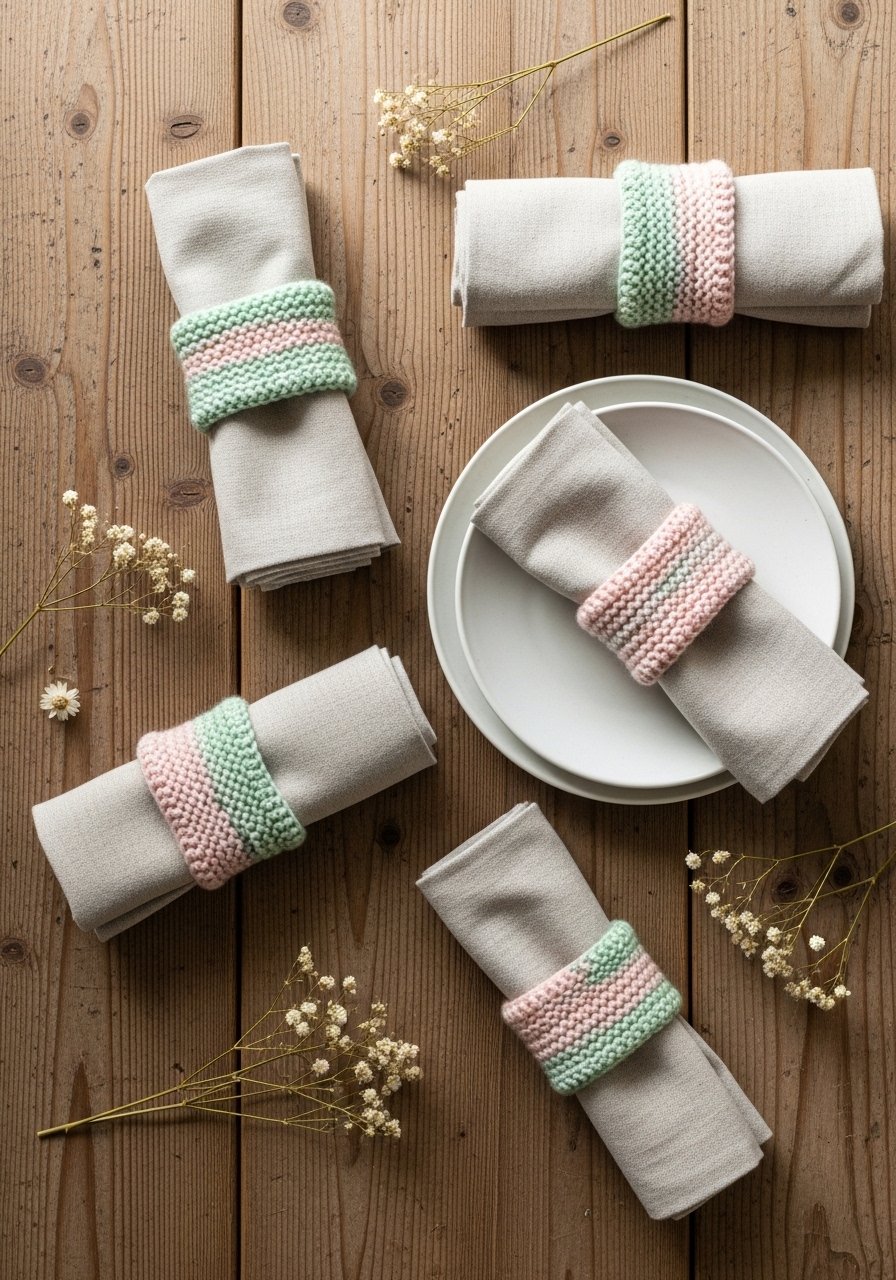
Tiny napkin rings let you practice circular knitting and simple colorwork. Use DK yarn for a refined look that complements a spring tablescape.
Materials
- DK weight yarn, 20 yards per ring
- US 6 / 4.0 mm double-pointed needles
- Small buttons or beads, 4 pieces
- Tapestry needle
- Scissors
Instructions
- Cast on 40 stitches, join in the round.
- Work 1×1 rib for 1.25 inches.
- Bind off loosely. Sew a small button to secure ring or sew ends together.
- Repeat for a set of four.
- Block gently if needed; dry 6–8 hours.
How to Display or Gift It
- Slide around napkins at a spring brunch table.
- Tie a set with ribbon as a hostess gift and tuck into a kraft bag.
- Store in a small wooden box between uses.
8. Festival Flower Garland (Summer)
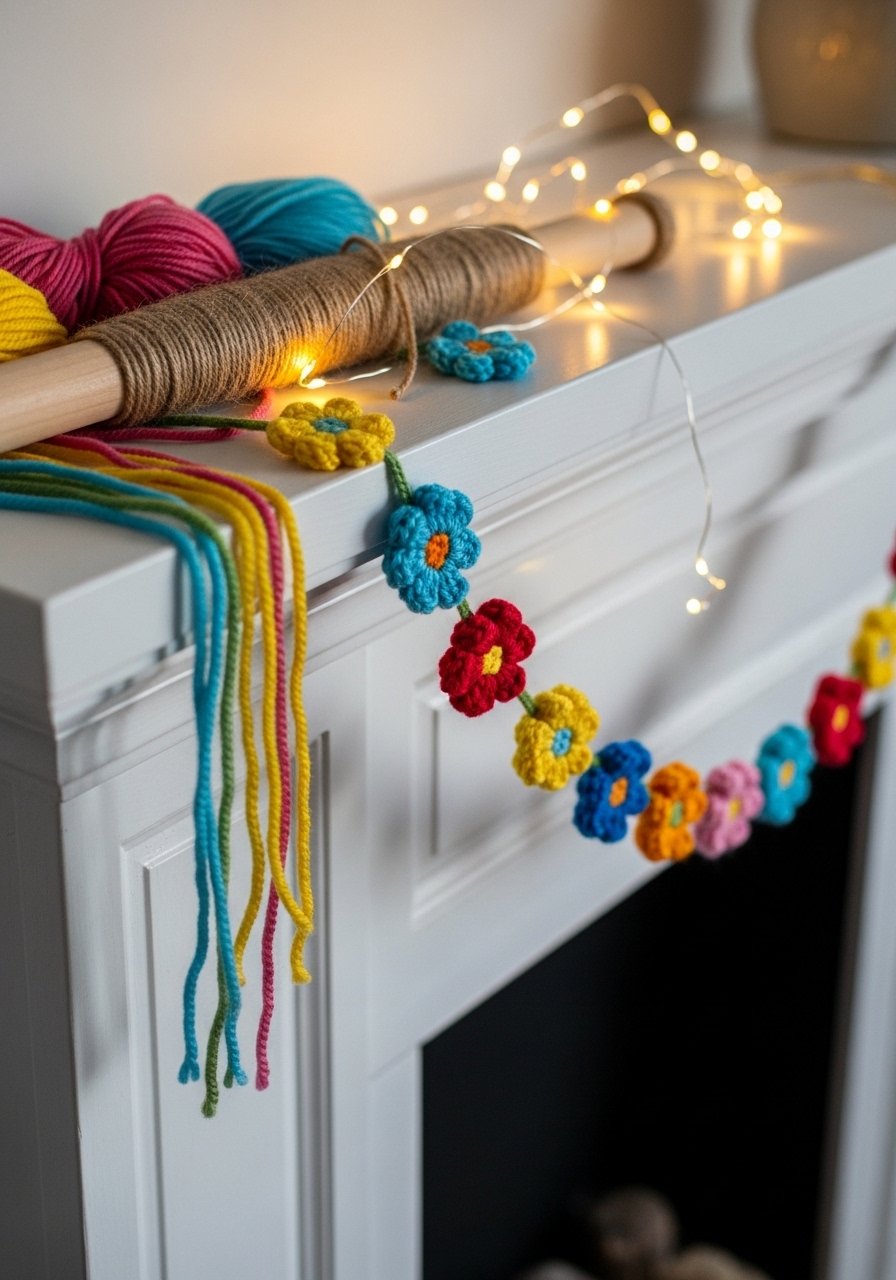
A cheerful garland of small knitted flowers brightens a patio or party. This project is great for practicing tiny motifs and seaming into shapes.
Materials
- DK weight scrap yarns, total 100 yards
- US 5 / 3.75 mm needles
- Wooden dowel, 12 inches
- Cotton twine, 2 yards
- Tapestry needle
- Stitch markers
Instructions
- For each flower, cast on 8 stitches, knit an i-cord of 4 rows, fold and sew loops to form 5 petals.
- Make 10–12 flowers in assorted colors.
- Thread flowers onto twine and space evenly along 24 inches.
- Tie twine ends to the dowel and attach to wall with removable hooks.
- Steam lightly to set shape; allow to cool.
How to Display or Gift It
- Drape over a gazebo or hang across a dessert table.
- Roll gently and place in a gift tube for safe shipping.
- Store in a shallow box with tissue paper.
9. Cozy Fall Headband with Cable Accent

This headband introduces a simple cable pattern. Cables add texture and look intricate but are easy once you learn to cross stitches with a cable needle.
Materials
- Bulky yarn, 80 yards
- US 9 / 5.5 mm needles
- Cable needle
- Stitch markers
- Tapestry needle
- Measuring tape
Instructions
- Cast on 28 stitches.
- Work 1.5 inches of 2×2 rib.
- Set cable panel: center 8 stitches for cable, purl 4 on each side.
- Cable every 6th row for 3 inches.
- Continue to a total length of 4.5 inches then bind off loosely.
- Seam ends with mattress stitch. Block slightly; dry 6–12 hours.
How to Display or Gift It
- Place on a small wooden head form or a hook on a hall board.
- Wrap with a kraft band and add a dried oak leaf for presentation.
- Store flat in a drawer organizer to keep the cable crisp.
10. Lightweight Market Bag (Summer)
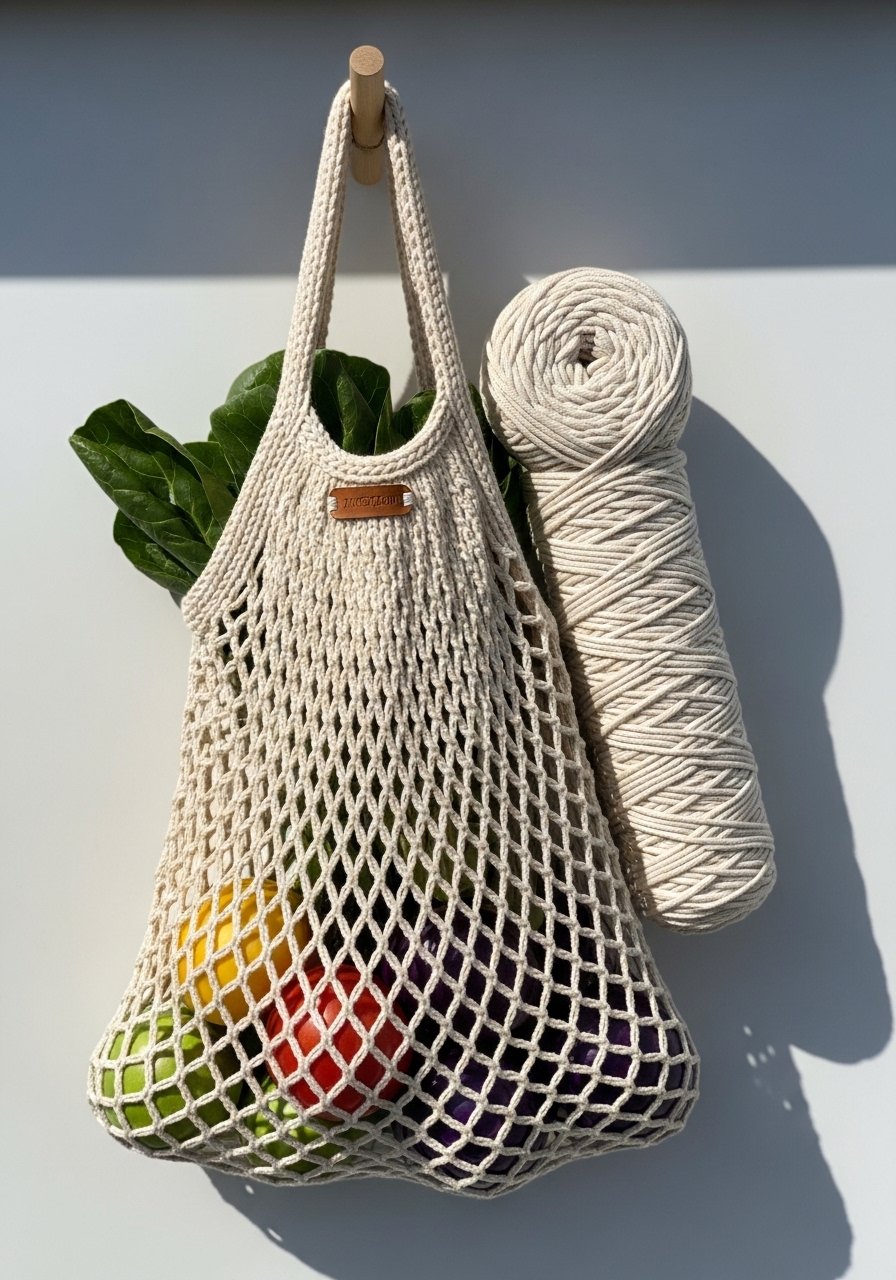
A mesh market bag is practical and eco-friendly. Using cotton yarn and larger needles creates a breathable, stretchy bag ideal for summer produce.
Materials
- Cotton worsted yarn, 400 yards
- US 7 / 4.5 mm circular needles (32" for body)
- Stitch markers
- Tapestry needle
- Measuring tape
Instructions
- Cast on 80 stitches and join.
- Work 4 rounds of garter to form base.
- Switch to mesh: k1, yo, k2tog repeat to create openness.
- Continue until bag measures 16 inches from base.
- Work 6 rounds of tighter rib to form handles; divide and knit two handles separately, each 12 inches long.
- Bind off and sew handle bases securely. Stretch and block; allow 24 hours to fully set.
How to Display or Gift It
- Fill with farmer’s market produce and tie with twine for a gift.
- Hang on a peg in entryway for quick grab-and-go.
- Fold and store in a breathable cotton pouch between uses.
11. Light & Lacy Shawlette (Spring)
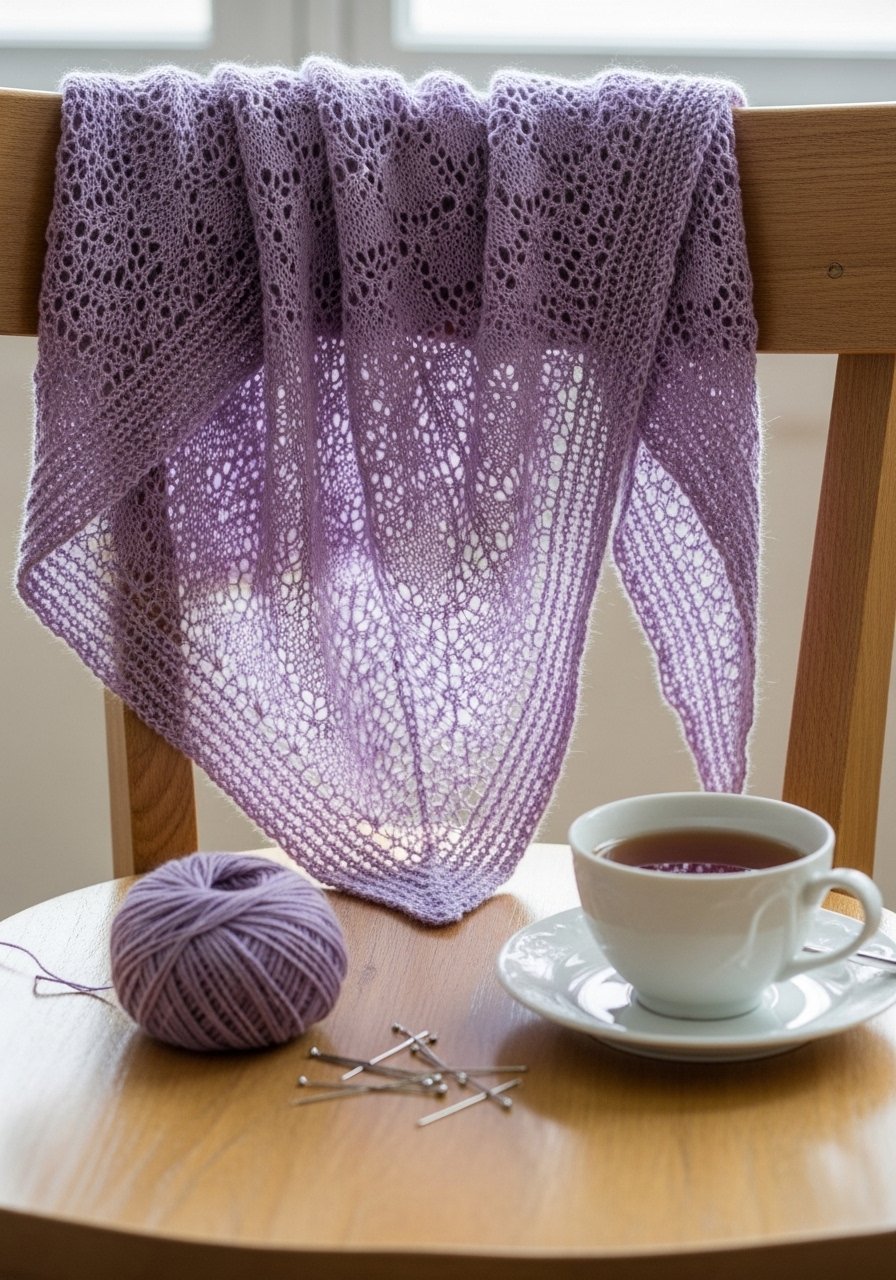
Lace shawlettes use yarn overs and decreases to create airy patterns. This small triangle teaches reading charts or simple written lace repeats.
Materials
- Laceweight or fingering yarn, 400 yards
- US 5 / 3.75 mm circular needles (24")
- Blocking wires and pins
- Stitch markers
- Tapestry needle
Instructions
- Cast on 3 stitches.
- Row 1: K1, yo, k1 — increase row to shape triangle.
- Continue lace repeat (for example, yo, k2tog, yo, ssk) until piece measures 48 inches wingspan.
- Bind off loosely.
- Wet block with blocking wires to open lace; pin to desired shape. Dry 24 hours.
How to Display or Gift It
- Drape over shoulders for weddings or spring evenings.
- Box with a note and a silk scarf bag for gifting.
- Store folded in acid-free tissue to protect delicate yarns.
12. Cozy Pumpkin Potholder (Autumn)
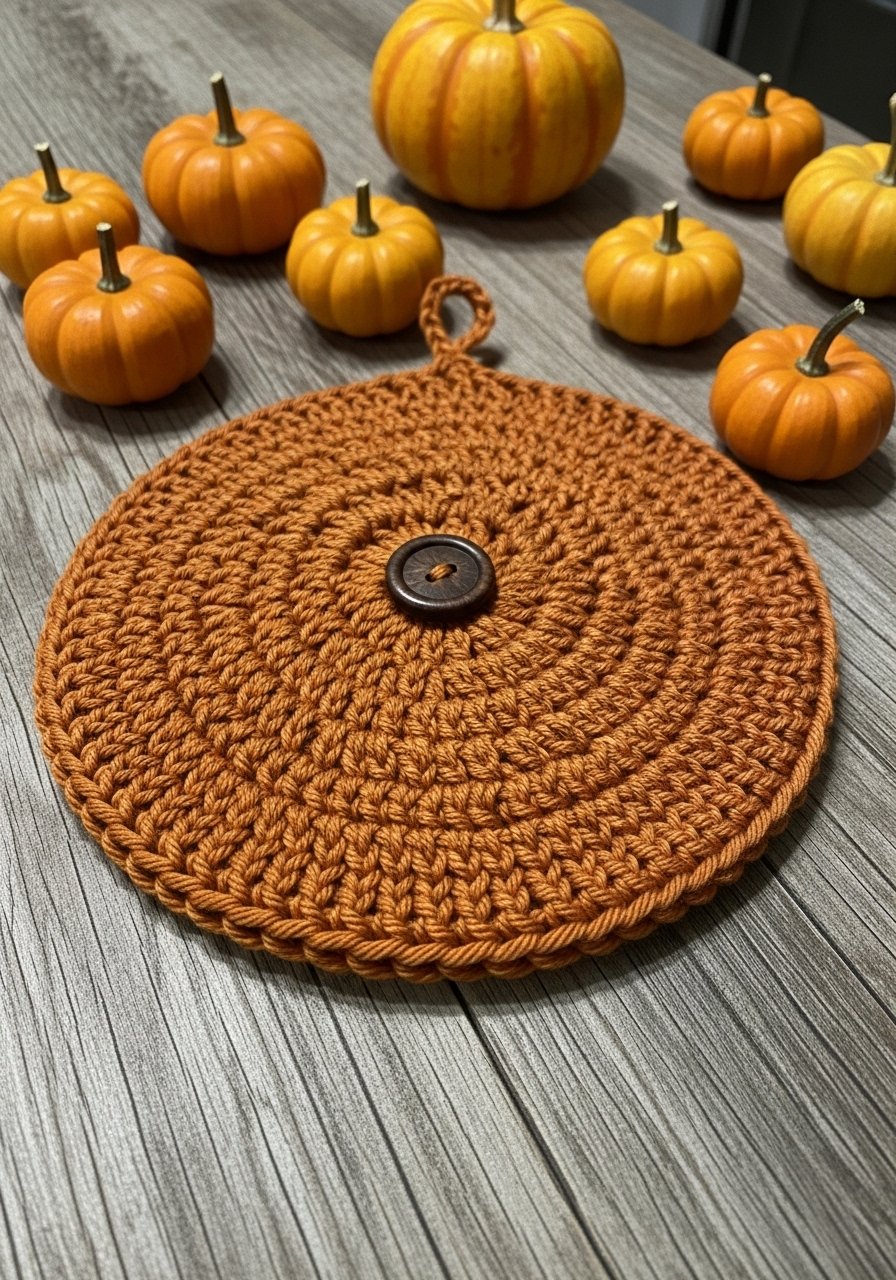
Potholders protect surfaces and let you try knit-in-the-round and color changes. Use cotton yarn and double thickness for heat protection.
Materials
- 100% cotton worsted, 120 yards orange + 10 yards brown
- US 8 / 5.0 mm double-pointed needles
- Small wooden button
- Tapestry needle
- Scissors
Instructions
- Cast on 36 stitches, distribute on 3 DPNs, join.
- Work in stockinette for 6 inches to form circle.
- Decrease by knitting two together evenly until 6 stitches remain.
- Pull yarn through remaining stitches, secure.
- Fold and sew a small brown stem with a wooden button on top.
- For extra protection, fold two potholders and sew edges to make a double-layer; allow any seams to rest and set overnight.
How to Display or Gift It
- Bundle with seasonal tea towels and tie with twine.
- Stack in a kitchen display or hang by a loop on a peg.
- Store flat in a drawer to keep shape.
13. seasonal knitting projects for beginners — Mini Holiday Tree Ornaments (Winter)
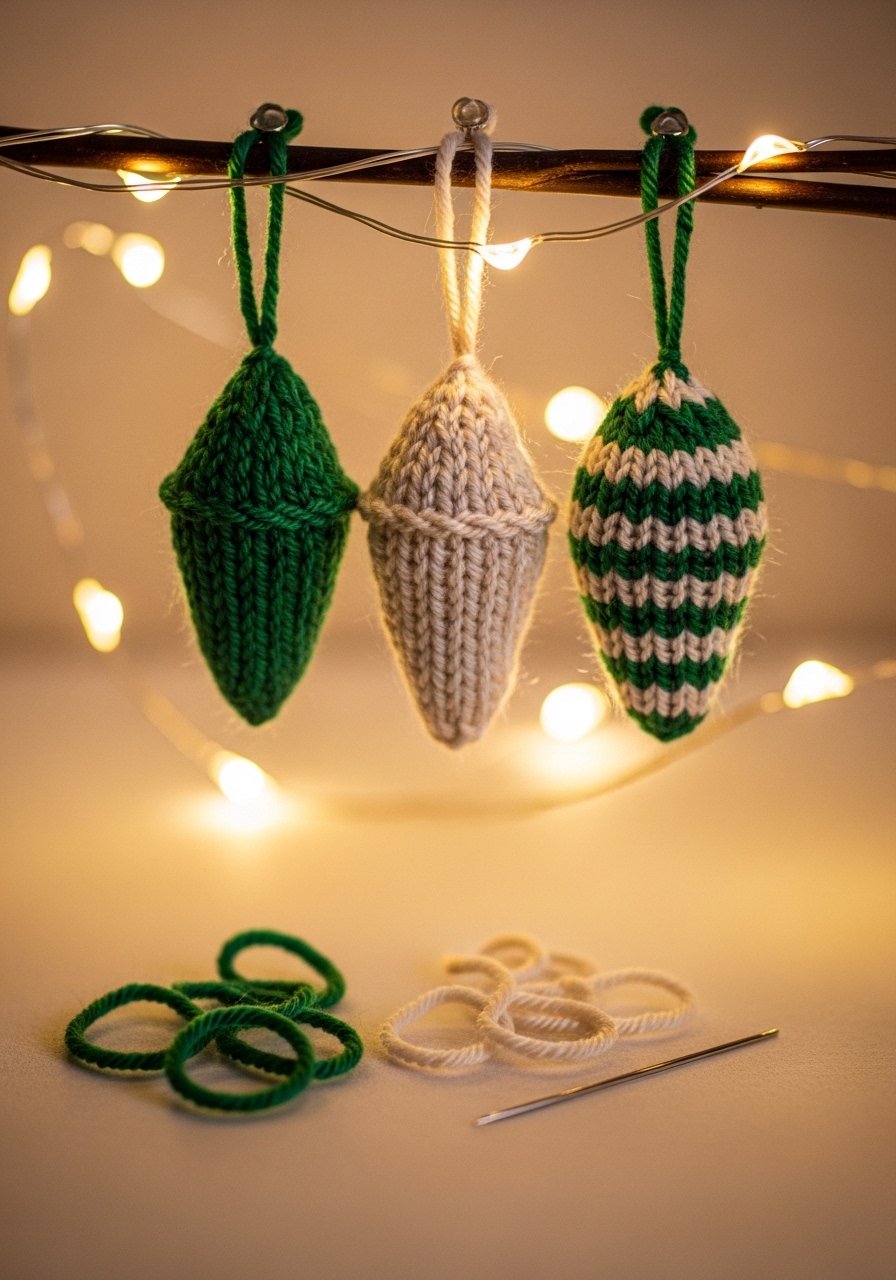
These tiny trees are quick to knit and perfect for stocking stuffers. They introduce simple shaping and light stuffing for a 3D result.
Materials
- Worsted weight yarn, 30 yards green + 10 yards contrast
- US 5 / 3.75 mm DPNs
- Polyfill stuffing, small pinch
- Tapestry needle
- Ribbon or twine for hanger
- Small sewing needle for embroidery
Instructions
- Cast on 24 stitches, knit in the round for 2 inches.
- Decrease every other round until 6 stitches remain.
- Stuff lightly, close with tapestry needle.
- Embroider tiny garlands with contrast yarn.
- Attach a 3-inch ribbon loop at the top.
- Trim any loose fibers; allow work to rest before hanging.
How to Display or Gift It
- Hang on a miniature tree or use as package toppers.
- Place in a glass ornament box for gifting.
- Store in a small craft organizer drawer to keep ornaments safe.
14. Simple Headband Ear Warmers (Winter)
Ear warmers are fast and practical. This one uses garter and seed stitch for structure and stretches comfortably over the ears.
Materials
- Bulky yarn, 80 yards
- US 10.5 / 6.5 mm needles
- Stitch markers
- Tapestry needle
- Measuring tape
Instructions
- Cast on 32 stitches.
- Work seed stitch (k1, p1 across) for 4 inches.
- Bind off and seam with mattress stitch.
- Add a twisted knot or sewn overlap for a finished look.
- Block gently; dry 6–8 hours.
How to Display or Gift It
- Pair with a matching hat in a small box.
- Display on a hook with winter accessories.
- Store rolled in a drawer organizer to keep shape.
15. Autumn Fair Isle Coasters
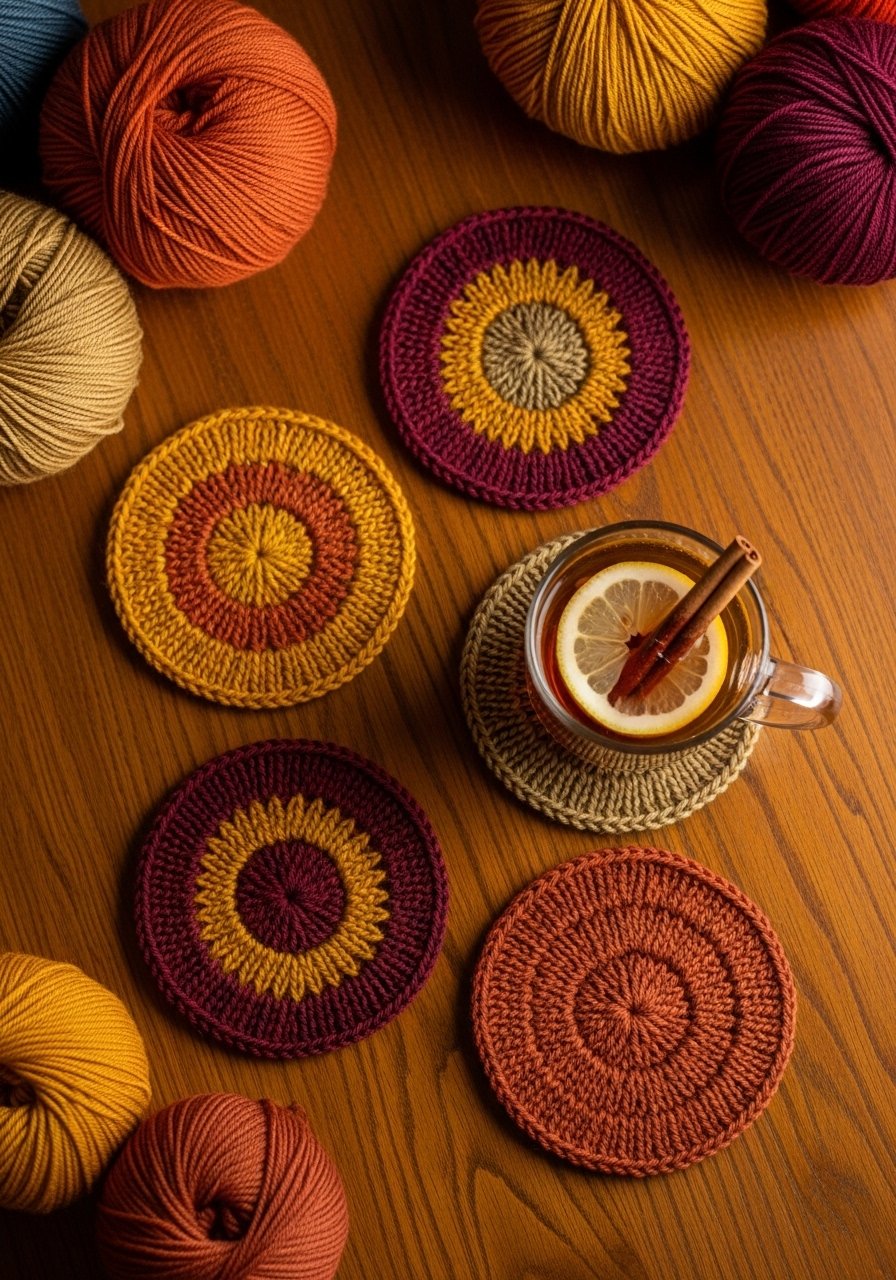
Coasters are a friendly introduction to stranded colorwork. Use two colors per coaster and carry floats loosely on the back for stability.
Materials
- Worsted weight yarn, 20 yards each of 2 colors per coaster
- US 7 / 4.5 mm circular needles (9" or use DPNs)
- Tapestry needle
- Scissors
- Blocking pins
Instructions
- Cast on 36 stitches in main color; join for working in the round.
- Work k2, p2 rib for 0.5 inch.
- Follow a simple 8-stitch stranded pattern for 3 inches.
- Finish with 0.5 inch rib and bind off.
- Block to flatten and open floats; dry 12 hours.
How to Display or Gift It
- Stack tied with ribbon and tuck in a small mug for gift sets.
- Keep in a living room basket or under a lamp base.
- Store flat between layers of tissue.
16. Spring Seed Stitch Pillow Cover
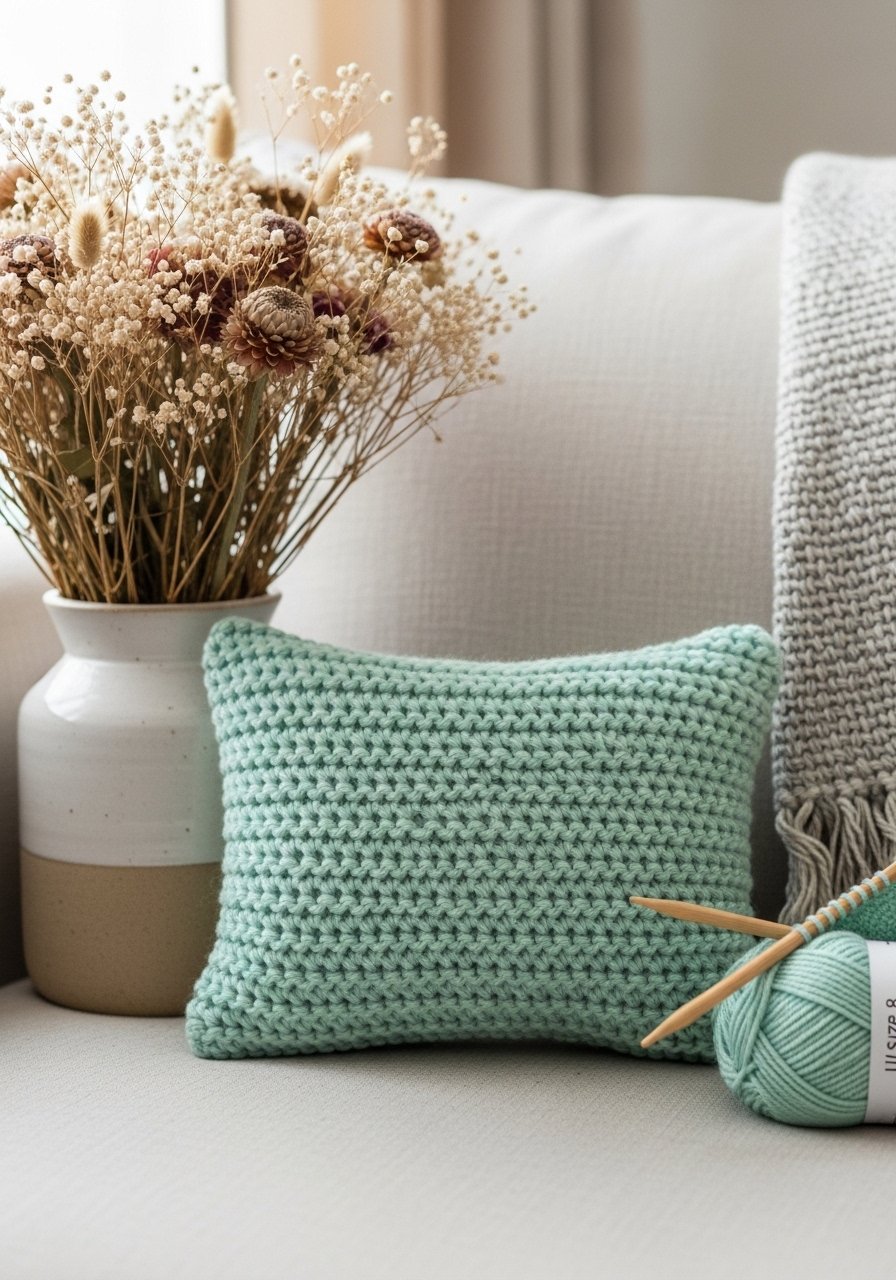
A small pillow cover teaches seaming and consistent stitch tension. Seed stitch gives a tactile, elegant result suitable for cottagecore or farmhouse styles.
Materials
- Worsted yarn, 300 yards
- US 8 / 5.0 mm needles
- 18 x 18 inch pillow insert
- Tapestry needle
- Stitch markers
Instructions
- Cast on 72 stitches for a square; work seed stitch (k1, p1) until piece measures 18 inches.
- Bind off and make a matching piece for back or work a buttoned flap (cast on 40 stitches for flap).
- Seam three sides with mattress stitch; insert pillow and finish last side.
- Block if needed; dry 12–24 hours.
How to Display or Gift It
- Use as a couch accent and pair with other neutrals.
- Box with a note and send as a housewarming gift.
- Store folded in a breathable cotton bag when not in use.
17. Easy Knit Headband with Button Closure
Button closures help beginners practice finishing and make headbands adjustable. The headband feels soft and rustic.
Materials
- Worsted yarn, 70 yards
- US 8 / 5.0 mm needles
- One 1.25" button
- Tapestry needle
- Scissors
Instructions
- Cast on 20 stitches, work 2×2 rib for 18 inches (measure around head minus 1 inch for stretch).
- Bind off, fold and sew short ends together to form loop.
- Create a small buttonhole by leaving 3 stitches open on one side when seaming.
- Attach button; weave ends.
- Steam lightly and let cool.
How to Display or Gift It
- Attach to a gift card or tuck into a winter care package.
- Hang on a decorative peg near your entry for convenience.
- Store on a small wooden hanger to keep shape.
18. Summer Ice-Cream Cone Toy (Kid-Friendly)

This small toy uses simple shaping and light stuffing—great for practicing increases and decreases and making a quick gift for kids.
Materials
- Worsted yarn, 40 yards cream + 30 yards color
- US 6 / 4.0 mm DPNs
- Polyfill stuffing
- Tapestry needle
- Safety eyes (optional) or embroidery thread
Instructions
- Cast on 24 stitches and knit in the round for 3 inches for cone.
- Decrease gradually to close cone and stuff.
- For scoop, pick up stitches and knit a small dome, stuff lightly, and attach to cone.
- Embroider sprinkles with contrast yarn.
- Secure all ends; let toy rest for 1 hour to settle stuffing.
How to Display or Gift It
- Pair with a small board book for a baby gift.
- Package in a cello bag with a ribbon.
- Store in a labeled toy box or soft cloth bag.
19. Simple Boot Cuffs (Autumn)

Boot cuffs add warmth and style, and they teach short-row shaping and ribbing. They're portable and quick, perfect for fall crafts.
Materials
- Worsted yarn, 80 yards
- US 8 / 5.0 mm needles
- Stitch markers
- Tapestry needle
Instructions
- Cast on 48 stitches.
- Work 2×2 rib for 3.5 inches (adjust to boot height).
- Bind off loosely and seam.
- Block lightly; dry 6–8 hours.
How to Display or Gift It
- Stack with a small pair of socks and wrap in tissue for gifting.
- Slide into boots and display on a shoe rack at craft fairs.
- Store rolled in a drawer organizer.
20. Nordic-Inspired Neck Warmer (Winter)
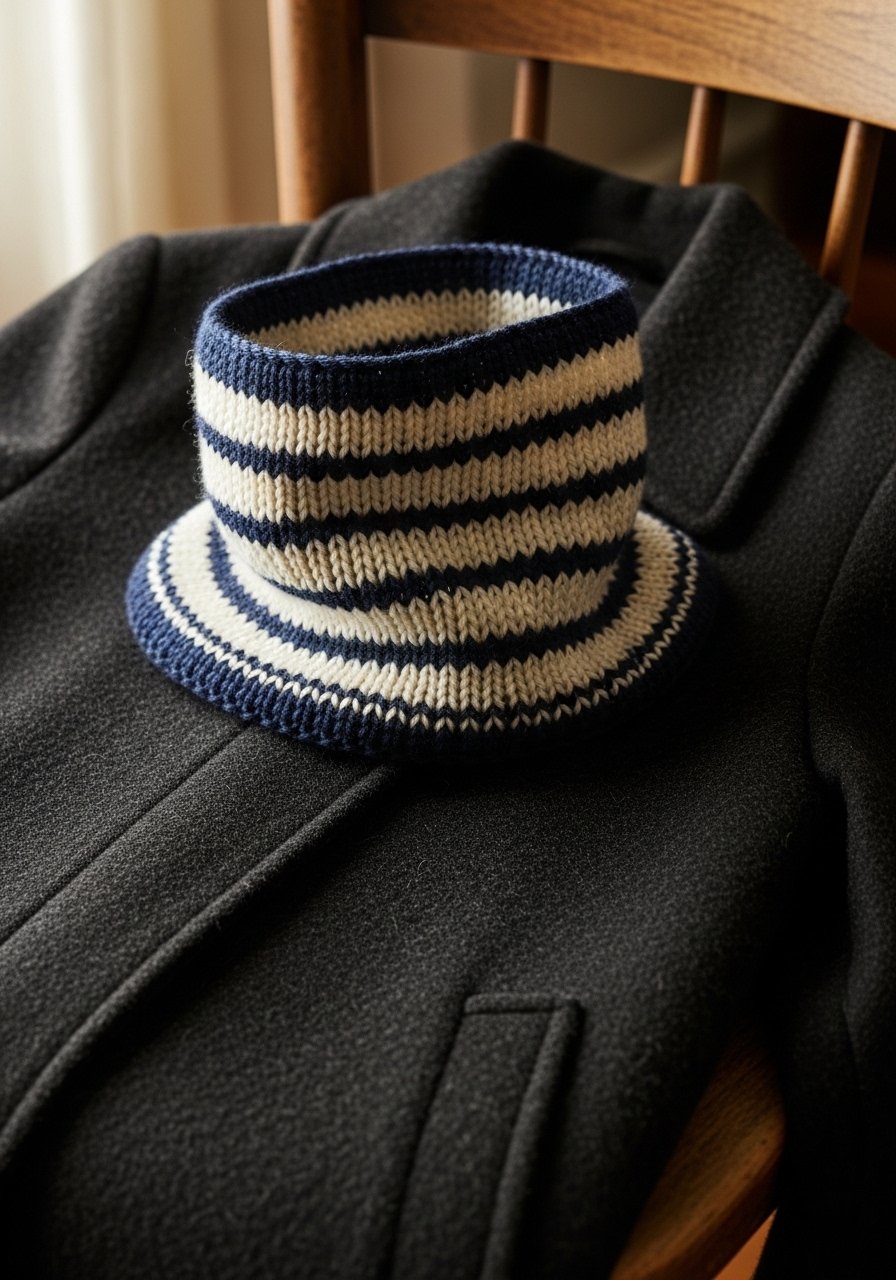
A small circular neck warmer introduces stranded knitting and color contrast without a huge commitment. Use DK yarn for drape.
Materials
- DK yarn, 150 yards main + 100 yards contrast
- US 6 / 4.0 mm circular needles (16")
- Stitch markers
- Tapestry needle
Instructions
- Cast on 160 stitches, join for working in the round.
- Work 1 inch of rib, then follow a simple 12-stitch color chart for 4 inches.
- Finish with 1 inch rib and bind off.
- Block to even tension; dry 12–24 hours.
How to Display or Gift It
- Fold and tuck into a winter gift basket.
- Hang on a hook near an entryway for quick access.
- Store in a breathable bag to protect fibers.
21. Baby Lovey with Crochet Border (Spring)
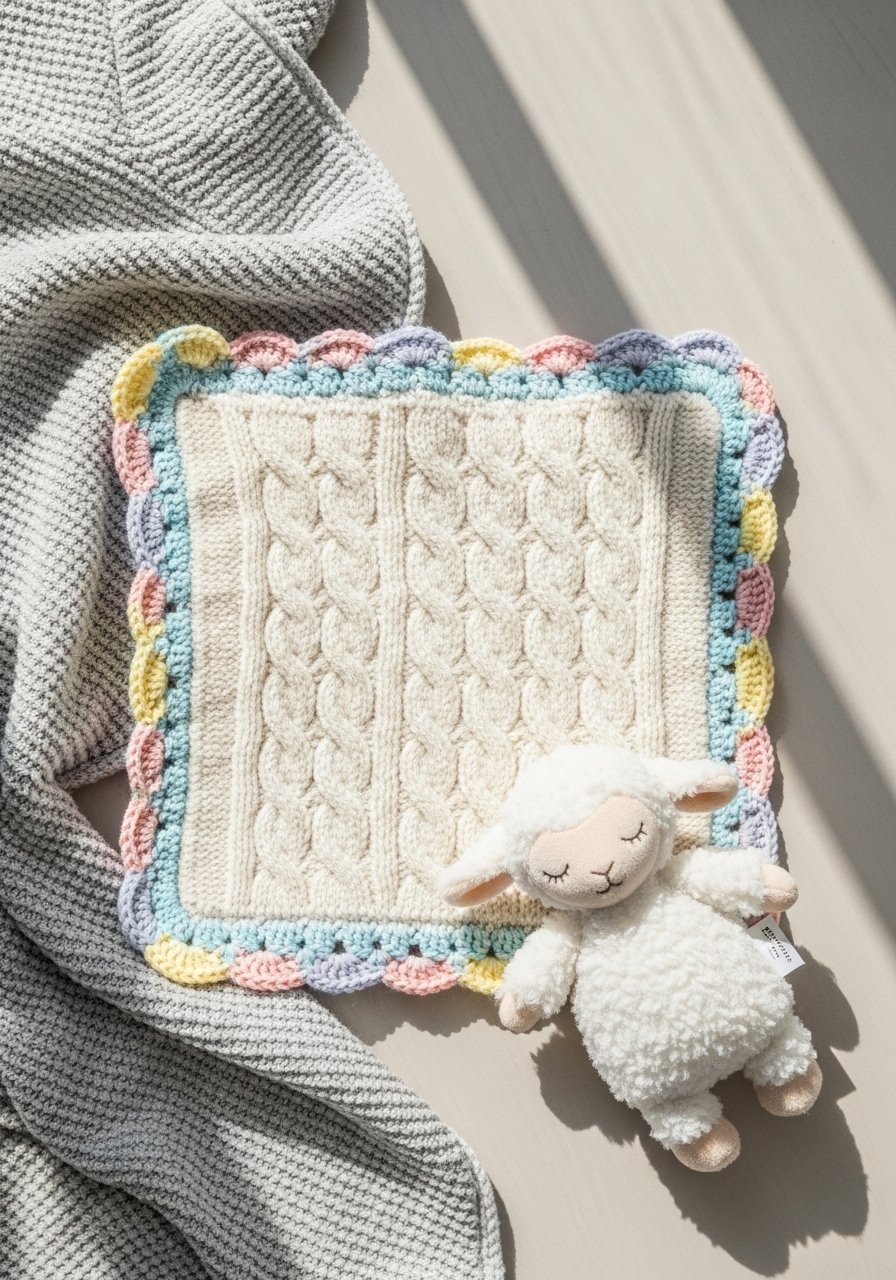
Loveys combine knitting and a little crochet edging to create a polished finish. They teach even tension across a square and neat finishing with a crochet hook.
Materials
- Worsted baby yarn, 350 yards
- US 7 / 4.5 mm needles
- Crochet hook size G/6 (4.0 mm) for border
- Tapestry needle
- Scissors
Instructions
- Cast on 80 stitches and work garter stitch for 32 inches (square).
- Bind off and block to square; dry 24 hours.
- Using crochet hook, add single crochet border around edges for neatness.
- Weave in ends and lightly steam for a soft finish.
How to Display or Gift It
- Package with a small stuffed toy in a baby gift box.
- Use a ribbon and kraft tag for a sweet presentation.
- Store in a breathable cotton drawer to protect softness.
22. Cabled Wrist Warmers (Autumn)
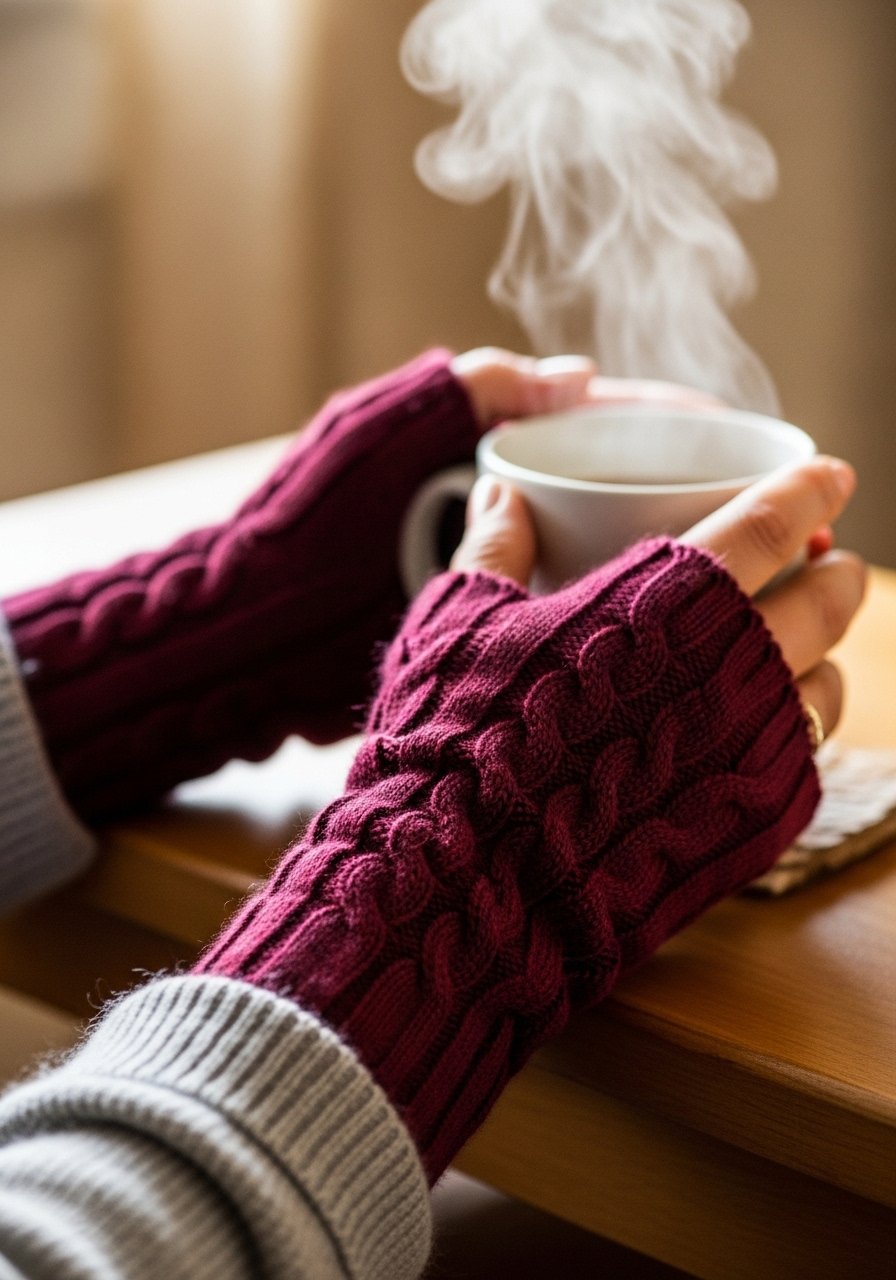
Wrist warmers are compact and teach cables and thumb gusset shaping. They make great market items because they use little yarn but look sophisticated.
Materials
- Worsted yarn, 120 yards
- US 7 / 4.5 mm DPNs or small circular
- Cable needle
- Stitch markers
- Tapestry needle
Instructions
- Cast on 36 stitches.
- Work 1.5 inches of rib.
- Cable panel: place 8 stitches for cable, work pattern while purling borders.
- At 2.5 inches, create thumb gusset by picking up extra stitches, then finish.
- Bind off and weave in ends. Block slightly; dry 6–8 hours.
How to Display or Gift It
- Pair with fingerless mitts for a set.
- Fold and present in a small box with a note.
- Store flat to maintain cable definition.
23. Knit Beanie with Pom-Pom (Winter)
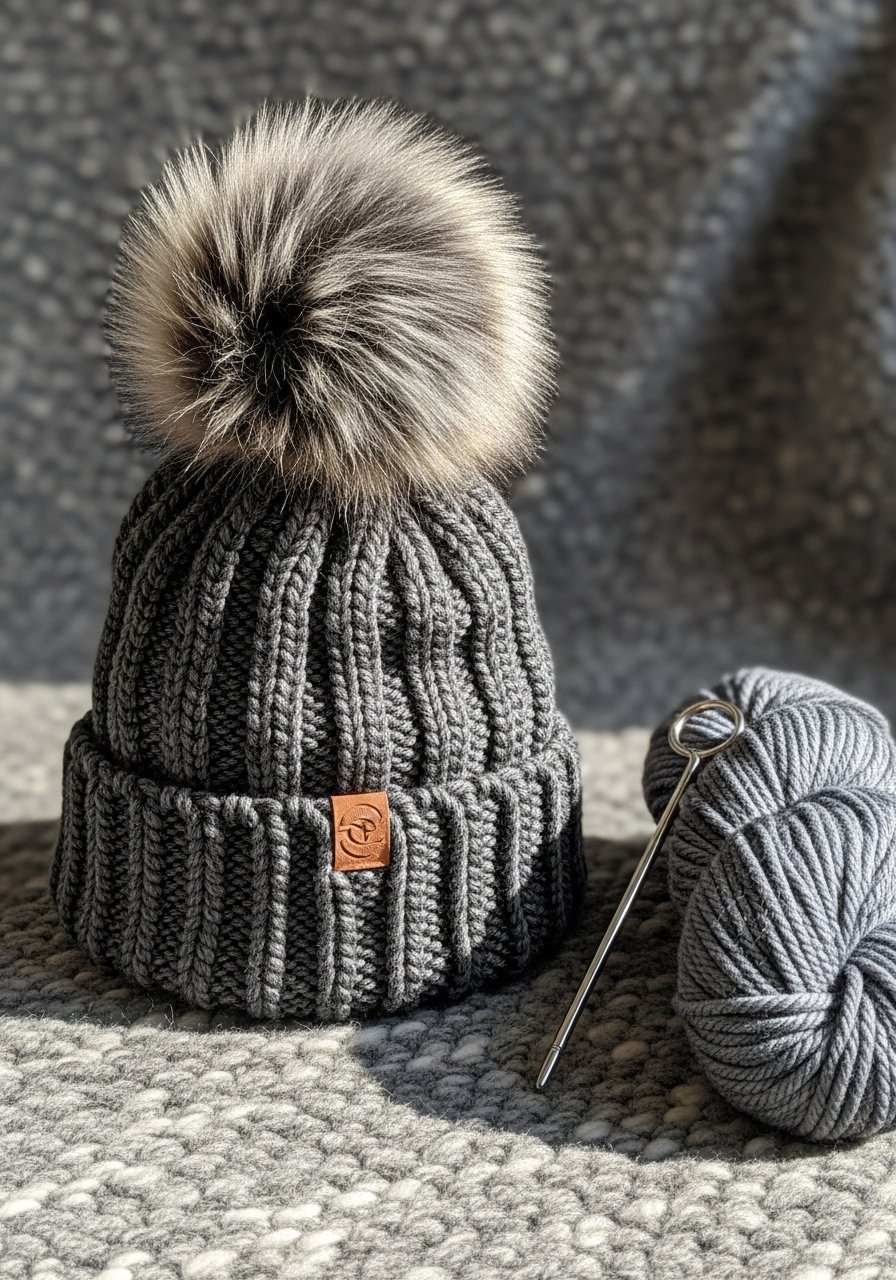
Beanies help you learn decreases and shaping for a hat. Add a pom-pom for a fun finishing touch—use a pom-pom maker to make even poms.
Materials
- Bulky yarn, 120 yards
- US 10.5 / 6.5 mm circular needles (16")
- Pom-pom maker or pre-made faux fur pom
- Stitch markers
- Tapestry needle
Instructions
- Cast on 80 stitches and join for the round.
- Work 2×2 rib for 2.5 inches.
- Switch to stockinette and knit until hat measures 8 inches from cast-on.
- Decrease evenly (k8, k2tog) then (k7, k2tog) continuing until 8 stitches remain.
- Pull through and secure. Attach pom-pom.
- Block lightly if needed; dry 6–8 hours.
How to Display or Gift It
- Add to a winter gift basket with mittens.
- Display on a wooden hat block or shelf.
- Store stacked with other hats in a breathable bag.
24. Quick Knit Tea Cozy (Autumn/Winter)
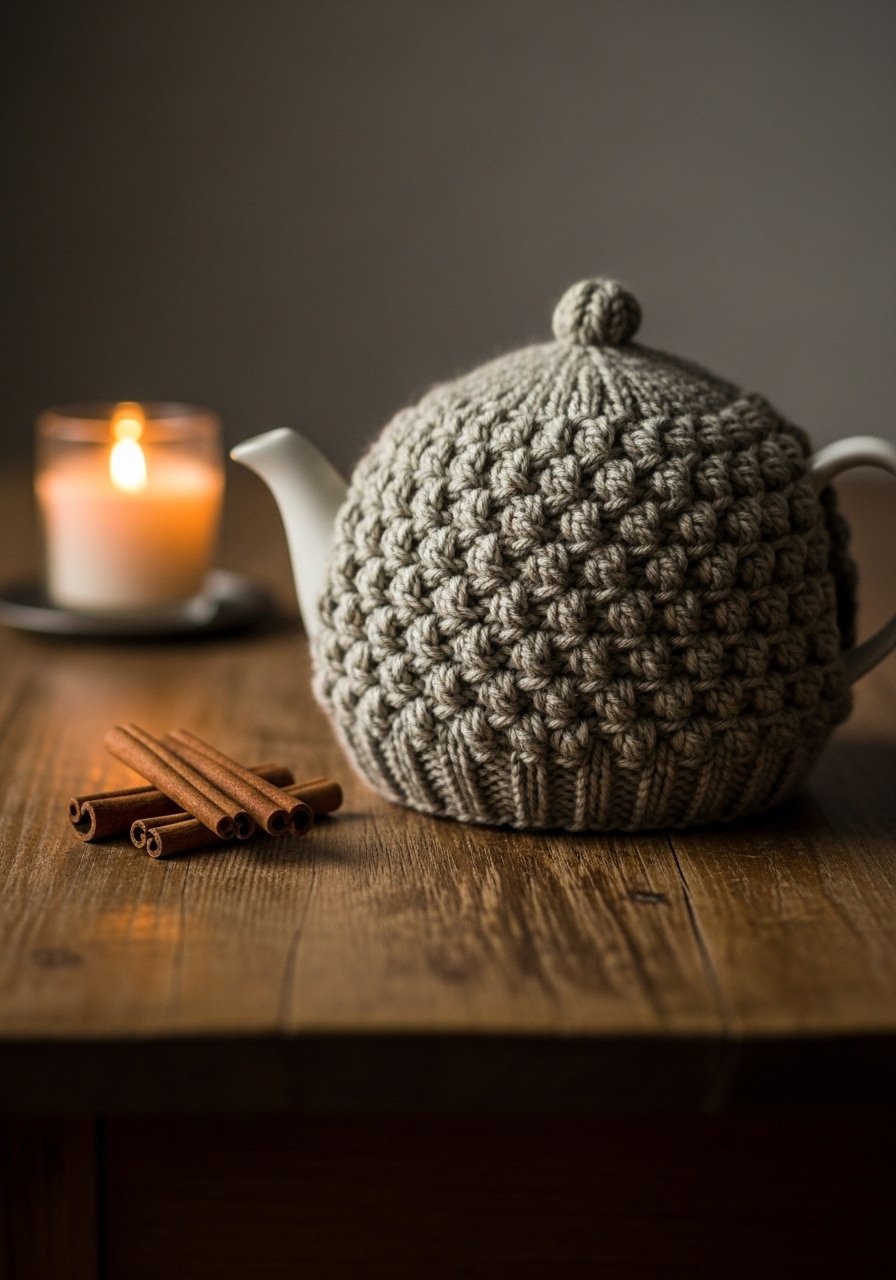
Tea cozies are functional and let you practice shaping and stitch texture. Use worsted yarn and a bit of seaming.
Materials
- Worsted yarn, 200 yards
- US 8 / 5.0 mm needles
- Tapestry needle
- Scissors
- Measuring tape
Instructions
- Measure teapot circumference and height; add 1 inch for ease.
- Cast on stitches matching circumference (for example, 80 stitches).
- Work moss stitch (k1, p1 on odd rows; p1, k1 on even) until height equals teapot height + 1 inch.
- Bind off and seam back and top. Create a small opening for the pot handle if needed.
- Block lightly; dry 12–24 hours.
How to Display or Gift It
- Pair with loose-leaf tea in a mason jar for a cozy gift.
- Drape over a teapot on an open shelf for a vignette.
- Fold and store in a tea drawer between uses.
25. Beginner Fingerless Mitts (Winter)
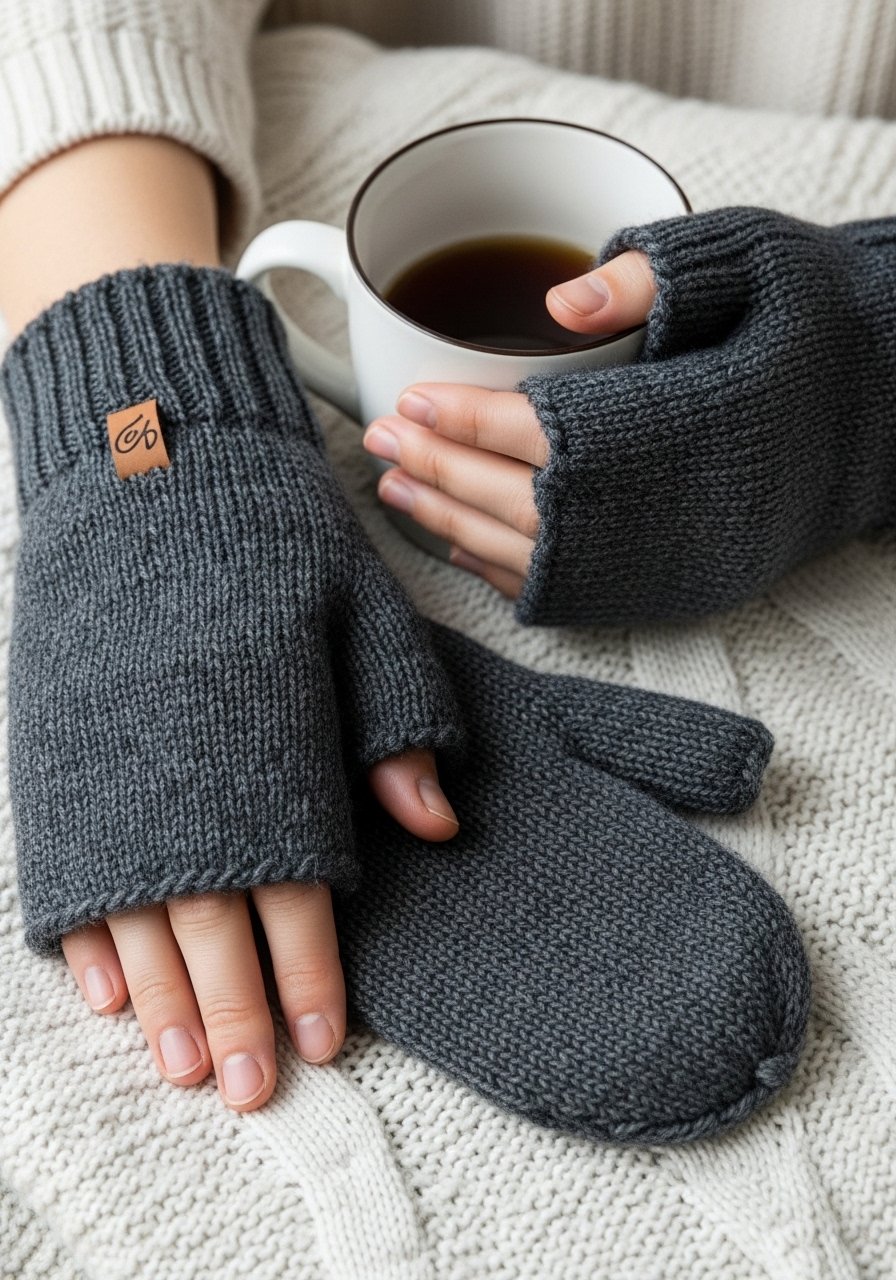
Fingerless mitts are quick and practical. They use simple thumb gusset shaping and are great for commuting or chilly offices.
Materials
- Worsted yarn, 150 yards
- US 7 / 4.5 mm DPNs
- Stitch markers
- Tapestry needle
- Measuring tape
Instructions
- Cast on 44 stitches and join.
- Work 1.5 inches of 2×2 rib.
- Continue in stockinette for 3 inches.
- For thumb gusset, increase 1 stitch each side of a marker every other round until 12 extra stitches formed. Place these on scrap yarn for thumb.
- Continue body until 7.5 inches from cast-on, then bind off.
- Pick up thumb stitches and knit 6 rounds, bind off.
- Weave in ends. Block lightly; dry 6–8 hours.
How to Display or Gift It
- Tuck into a gift box with a matching beanie.
- Use as a practical present for commuters.
- Store flat to keep rib elasticity.
Warm up your needles and pick one project to try this week. You’ve got quick wins for every season that teach a new technique while creating things you’ll actually use and share. Save this list to your Pinterest board so you can grab a pattern when the mood strikes. Which season are you knitting for first — spring florals, summer markets, cozy autumn warmers, or tiny winter gifts? Share your pick and tag a friend to knit it with you.
Trust me, upgrading to a reliable pair of circular needles with interchangeable tips made many of these projects faster and neater — no more swapping needles mid-row. If you’re curious, check out interchangeable knitting needles that I use for most small projects.


