If you love tiny, handmade gifts that carry real meaning, these inspirational stone painting ideas are for you. Picture a pocket-sized reminder left on a windowsill, a beach-stone centerpiece, or a trio of painted rocks tucked into a care package. Each project here is designed to be achievable, giftable, and packed with personality.
You’ll find 25 different ways to paint positive messages, pretty patterns, and tactile textures. I included projects for beginners, kids crafting days, and careful makers who want a gallery-ready finish. I also weave in troubleshooting tips—like how to avoid chipping, which sealers hold up outdoors, and how to get crisp lettering every time.
I usually start with a reliable acrylic set and a fine brush. I love the control of my fine detail brush set and reach for an acrylic paint set with both matte and metallic shades. Keep this list handy while you pin your favorites — each project includes exact materials, step-by-step instructions, drying times, and simple display ideas.
- Tiny Encouragement Pebbles — Perfect Starter Stones
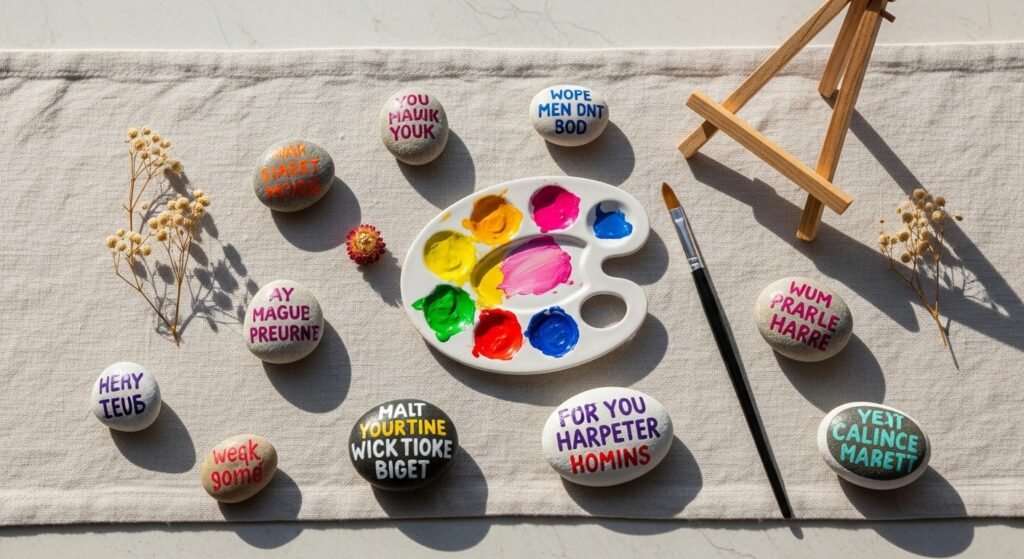
These pocket-sized pebbles are a beginner-friendly way to practice lettering and color blocking. The simple script and high-contrast backgrounds make the words pop. Kids and adults both love how these feel warm and smooth in the palm. The matte finish looks modern and feels velvety after sealing with a spray sealer like acrylic sealer spray matte.
Materials
- 6 smooth river pebbles, 2–3 cm each
- Acrylic craft paint, assorted small tubes
- White paint pen, 0.7 mm tip
- Fine detail brush, 0/2 size
- Sandpaper, 220 grit
- Rubbing alcohol, 1 tsp
- Matte spray sealer, 1 can
- Paper towels
Instructions
- Wash stones and let air dry. Wipe with rubbing alcohol and let evaporate.
- Lightly sand any rough spots for paint adhesion.
- Apply a base coat with a foam brush; two thin coats give best coverage. Dry 15–20 minutes between coats.
- Sketch words lightly with pencil if desired.
- Paint letters with the white paint pen or small brush. Take breaks so lines stay steady.
- Allow paint to dry 30 minutes to touch, 24 hours to fully set.
- Spray two light coats of matte sealer. Hold can 8–10" away and let dry 15 minutes between coats.
- After final coat, cure 24 hours before gifting.
How to Display or Gift It
Tuck a trio into a small kraft gift box with tissue paper and a dried lavender sprig. Display a single stone on a small wooden easel for a desk reminder. Store extras flat in a stackable craft organizer until sealed.
- Ocean Message Stones — inspirational stone painting ideas for beach lovers
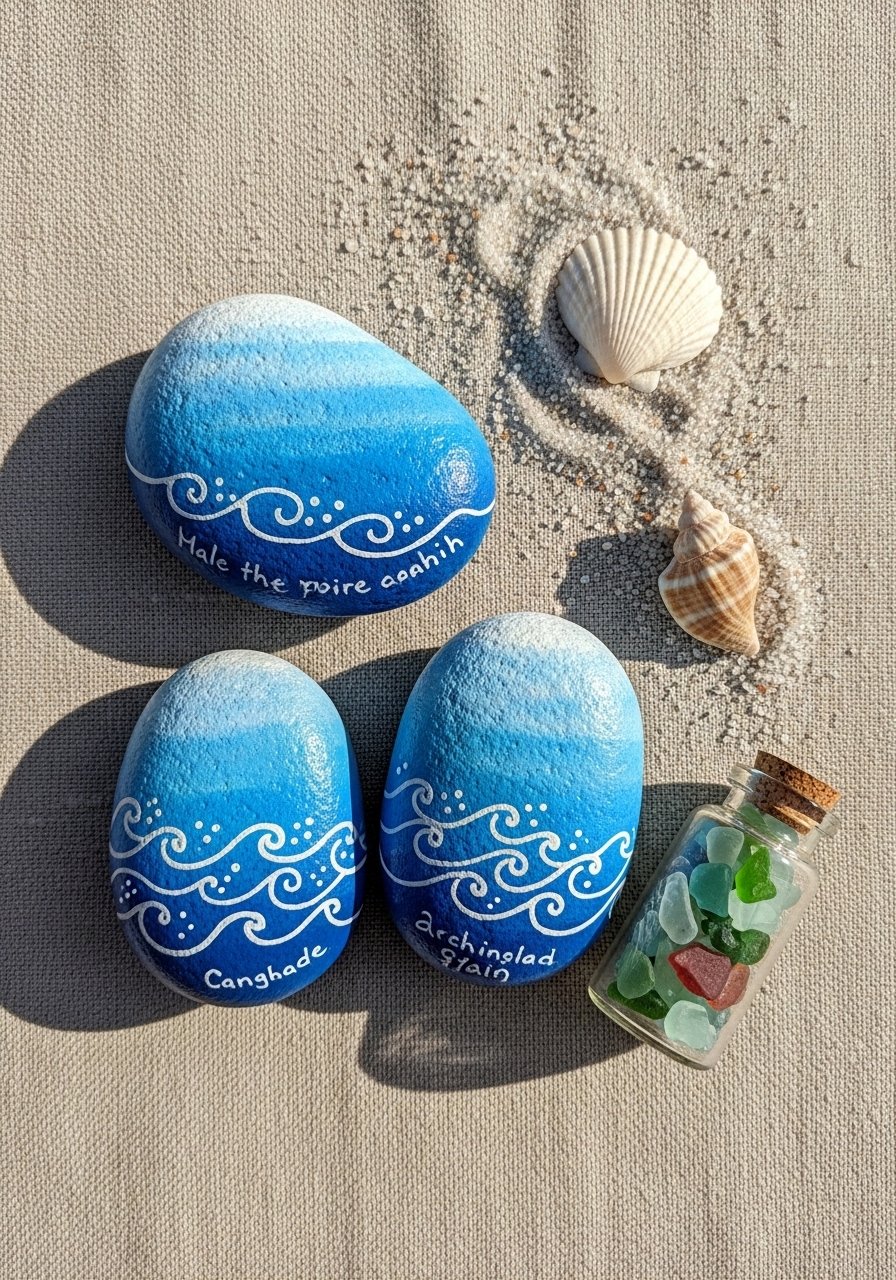
Bring the beach home with soft blues, white highlights, and tiny handwritten notes. These use a wet-on-wet blending technique to mimic sea foam. They make heartfelt gifts for friends who love the coast. I like using a soft synthetic brush for blending—the result looks smooth and almost watercolor-like.
Materials
- 4 flat stones, 3–5 cm across
- Acrylic paint in cadmium blue, turquoise, white
- Soft synthetic blending brush, size 6
- Fine white paint pen
- Sea-sponge piece, 1 in.
- Palette or disposable tray
- Matte outdoor sealer, 1 can
- Paper towels
Instructions
- Clean stones and let dry fully.
- Lay down a light turquoise base coat. Dry 20 minutes.
- While base is tacky, dab a second shade of blue and blend gently with the synthetic brush for a gradient.
- Use the sea-sponge to stamp a rough foam texture near the edge.
- Once dry, write your message with the white paint pen. Let ink sit 30 minutes.
- Add small white highlights with a fine brush for wave tips.
- Spray two coats of outdoor sealer for UV resistance; dry 15 minutes between coats.
- Cure 24 hours before packing for gifting.
How to Display or Gift It
Tie three stones together on a thin jute cord as a hanging ornament for a porch, or present them in a small glass jar filled with sand and a shell. For gifting, place in a kraft box with a printed tag that explains the coastal color blend.
- Mandala Affirmation Stones — inspirational stone painting ideas with dotted mandalas
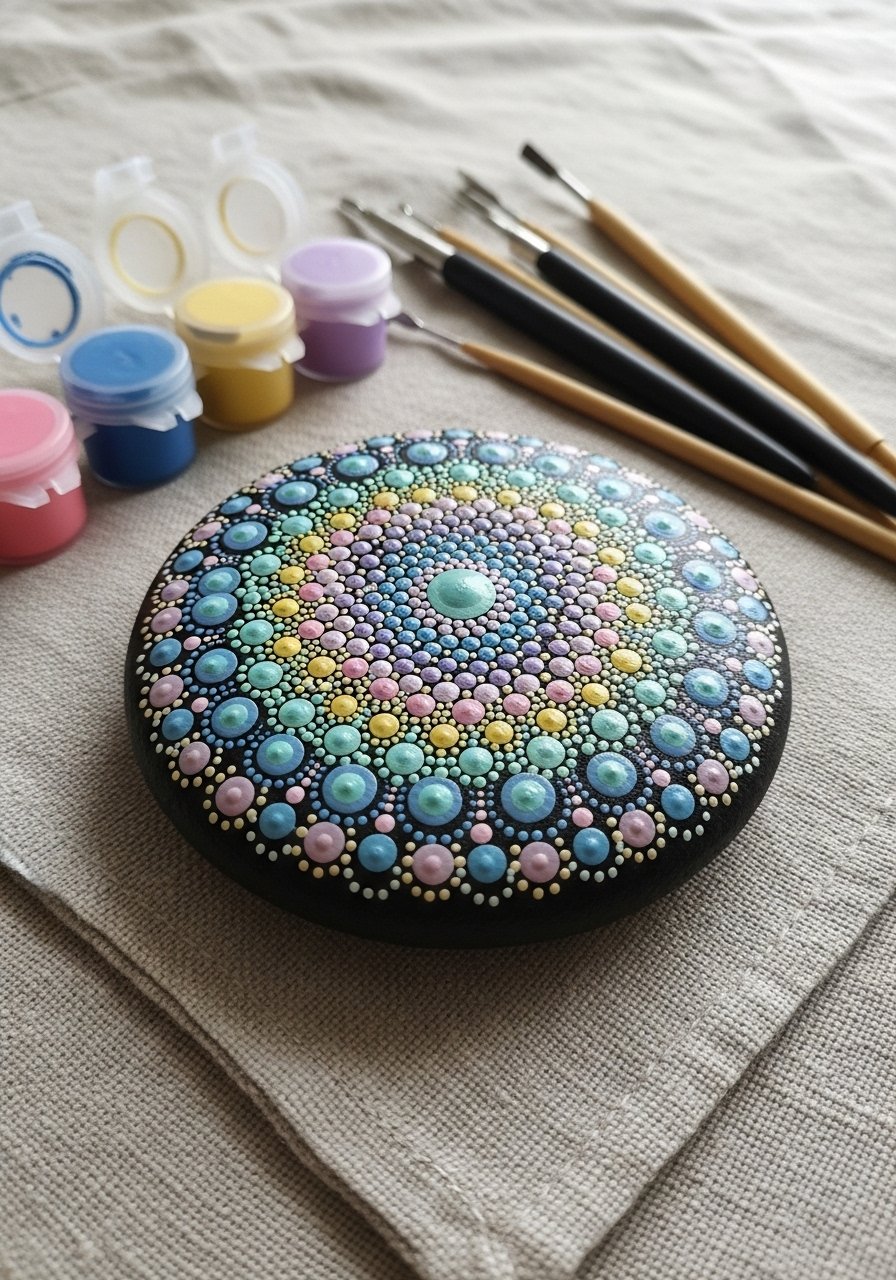
Dot mandalas are calming to paint and look hypnotic on a black or navy base. Tiny dots catch the light and make each stone feel like a miniature talisman. This project teaches patience and control and is ideal if you enjoy repeatable patterns. I use a set of dotting tools for even dots.
Materials
- 1 flat oval stone, 4–6 cm
- Acrylic paint (metallic + pastel), small amounts
- Dotting tool set with multiple tip sizes
- Black gesso or black craft paint for base
- Ruler and a washable pencil for centering
- Matte sealer spray
- Toothpicks for tiny dots
Instructions
- Clean and prime the stone with black gesso. Let dry 1 hour.
- Mark the center lightly with a pencil and use a ruler to note concentric guides.
- Dip the appropriate dotting tool into paint; start from the center and work outward.
- Use progressively larger tools for larger rings. Keep dot distances even.
- Let each color ring dry 10–15 minutes before adding the next to avoid smearing.
- Touch up any dots with a toothpick.
- Apply two thin coats of matte sealer. Dry between coats 15 minutes.
- Cure 24 hours before handling.
How to Display or Gift It
Line several mandala stones in a shallow wooden tray on a side table or gift a set inside a felt pouch. Add a printed card explaining the color meanings for a personal touch.
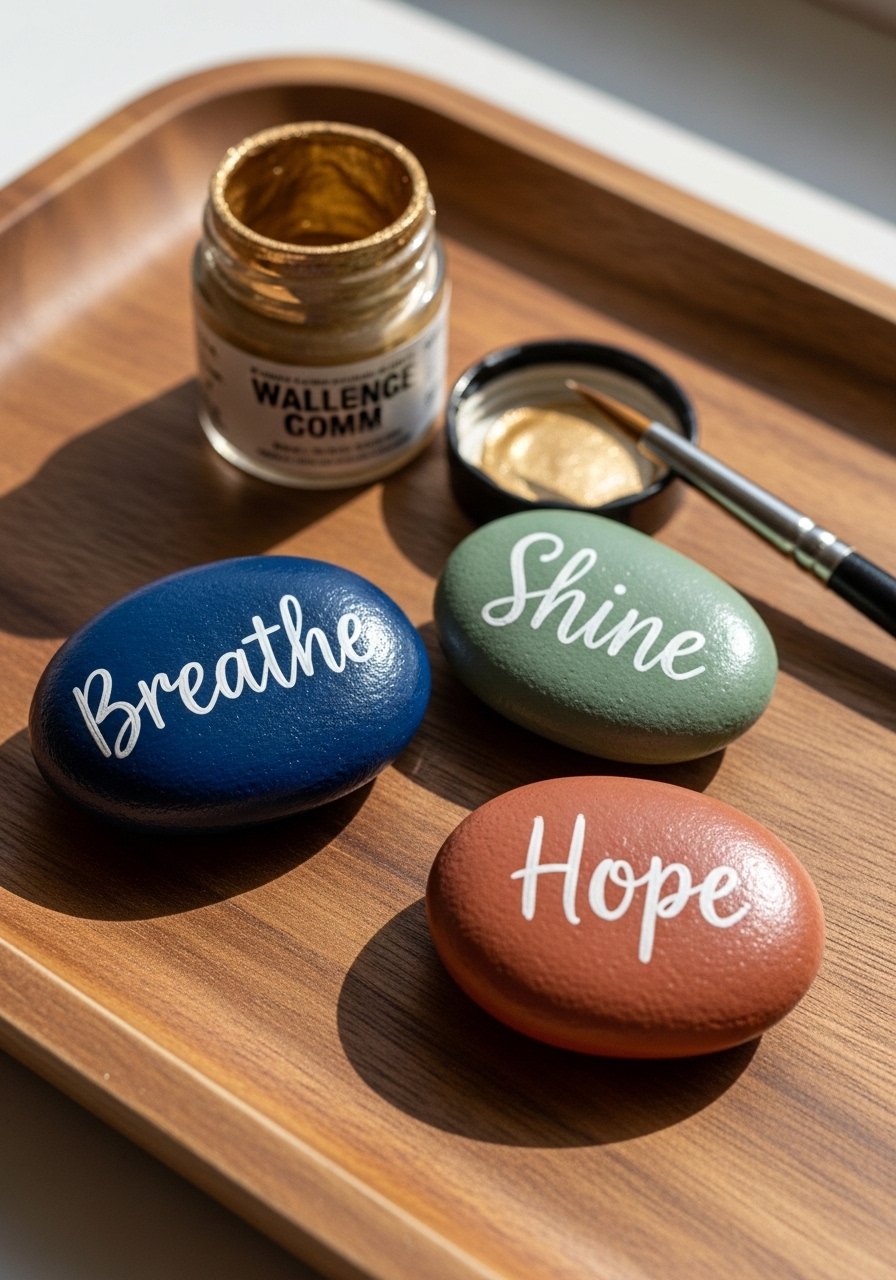
- Gold-Edge Kindness Stones — simple metallic trim accents
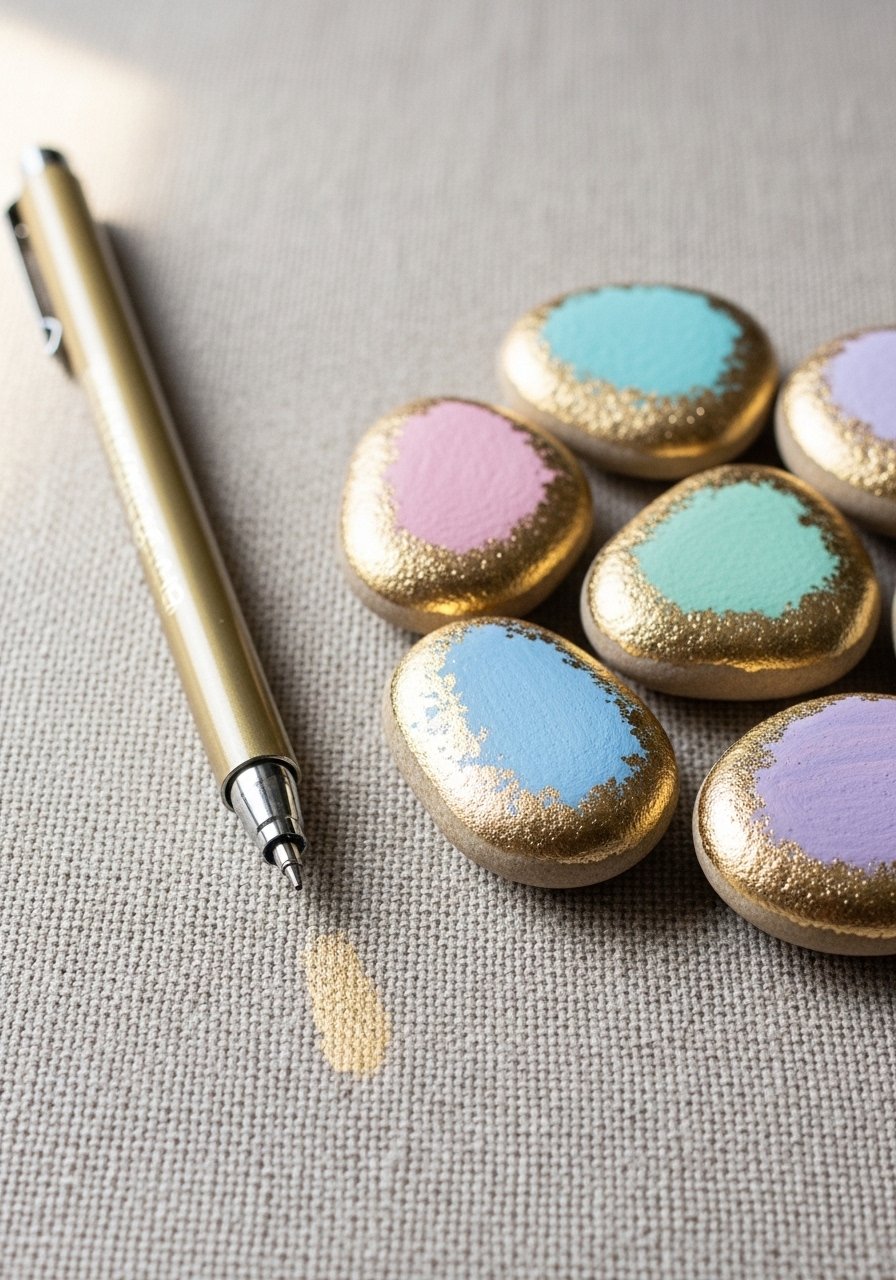
A thin metallic outline instantly makes a painted phrase look polished and special. This technique works well on lighter stones, where the shimmer pops. It’s a great quick project if you want something that looks luxe but is fast to make.
Materials
- 5 flat stones, 2–4 cm
- Chalky acrylic paint (pastel shades)
- Metallic gold paint pen
- Fine liner brush, size 00
- Sandpaper, 220 grit
- Matte sealer or gloss depending on desired shine
- Cotton swabs
Instructions
- Wash and sand stones, then apply 1–2 coats of chalk paint. Dry 20 minutes between coats.
- Paint your lettering with a fine brush and opaque color. Let dry 30 minutes.
- Trace the stone’s edge with the metallic paint pen. Keep a steady hand and rotate the stone.
- If paint pools, dab gently with a cotton swab.
- Add a second metallic pass if needed for full coverage.
- Seal with a gloss or matte spray depending on finish. Dry 15 minutes between coats.
- Cure 24 hours before gifting.
How to Display or Gift It
Pair a gold-edge stone with a small card and tie together with a ribbon. For bedside displays, place on a small wooden stand or in a jewelry dish for a luxe bedside token.
- Chalkboard Quote Rocks — erasable message stones for rotating reminders
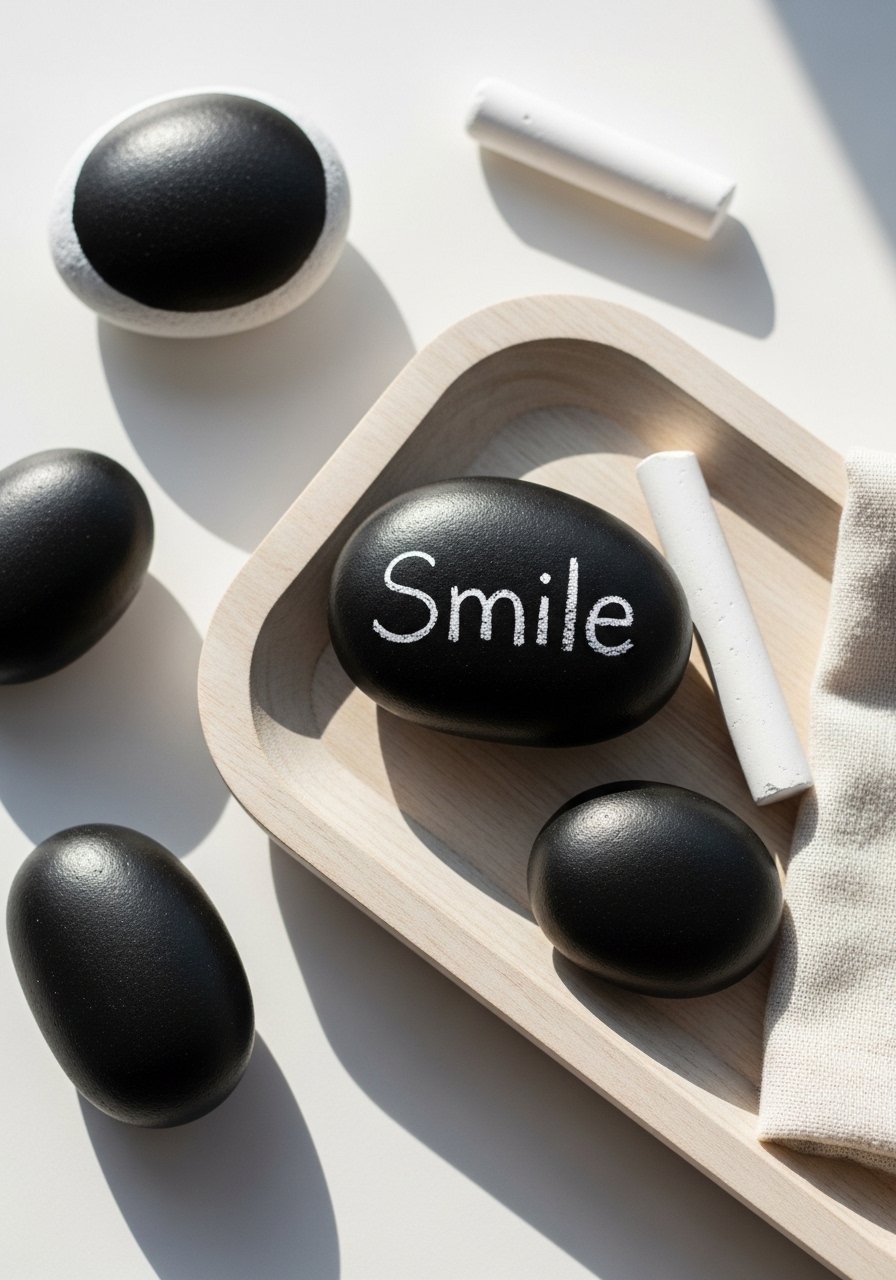
Chalkboard-finish stones let you change messages often—perfect for shared spaces or teachers. The textured matte finish feels tactile and rustic. Use a small chalk marker for crisp letters, then wipe clean with a damp cloth.
Materials
- 6 stones, mixed sizes
- Chalkboard paint, 1 small bottle
- Chalk markers or standard chalk
- Foam brush for smooth coats
- Sandpaper, 220 grit
- Damp cloth for erasing
- Sealant (optional for chalk marker longevity)
Instructions
- Clean stones and sand lightly.
- Apply two thin coats of chalkboard paint, letting 30 minutes dry between coats.
- Season the surface by rubbing full chalk stick over the stone and wiping off.
- Write messages with chalk marker or chalk stick.
- Wipe clean with damp cloth to change the message.
- If you want longer-lasting chalk marker, add a light coat of matte sealer after writing and let dry 2 hours.
How to Display or Gift It
Bundle a set with a mini chalk stick and instructions for changing messages. These are perfect for classroom desks or a rotating kitchen reminder. Store extras in a small craft bin.
- Botanical Pressed-Flower Stones — natural and romantic
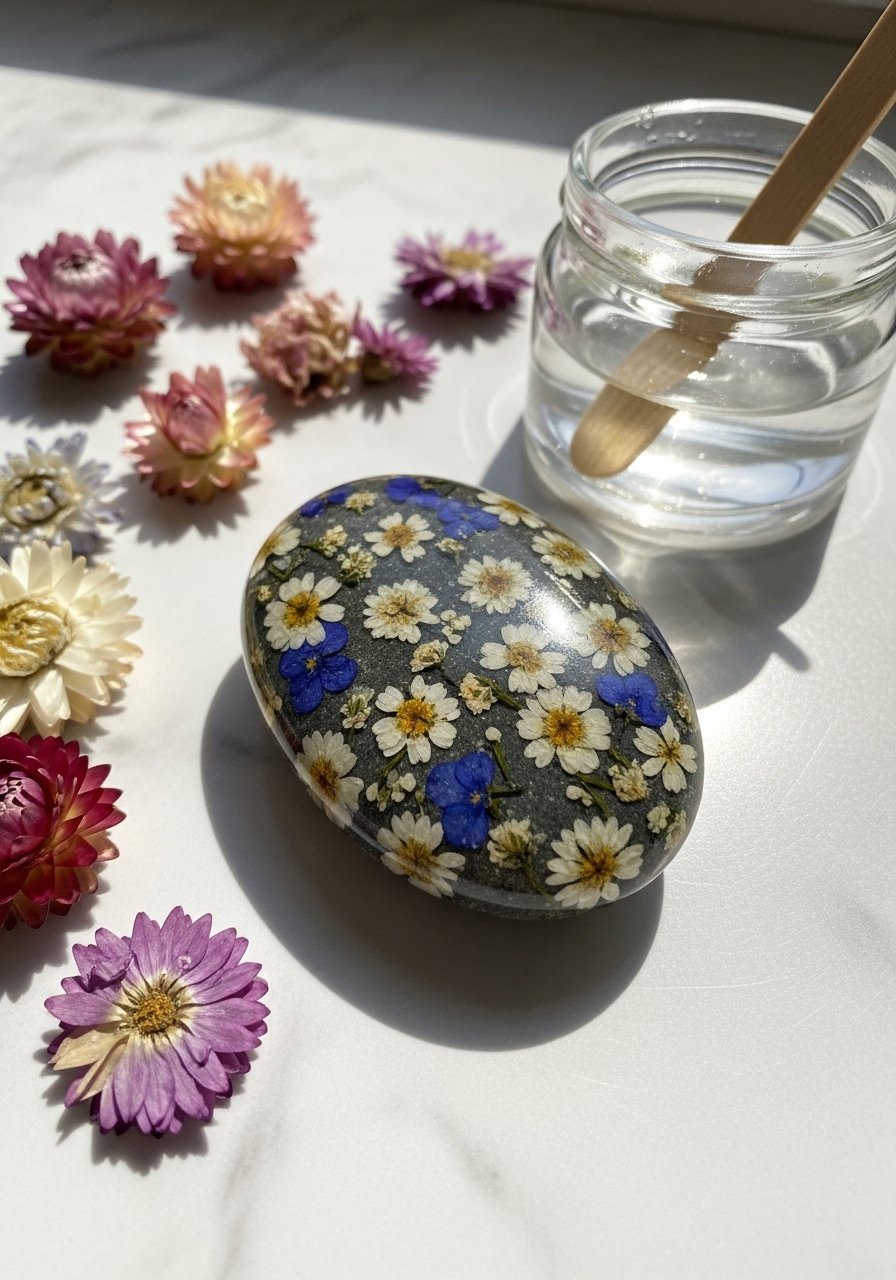
Pressed flowers embedded in a crystal-clear resin overlay turn stones into keepsakes. This is a thoughtful gift for birthdays or anniversaries. The resin preserves delicate petals and makes the stone glossy and durable.
Materials
- 1–4 flat stones, 4–6 cm
- Dried pressed flowers, assorted small blooms
- Clear epoxy resin kit, 1 kit (covers project)
- Mixing cups and stir sticks
- Nitrile gloves
- Small disposable brush to position flowers
- Heat gun or torch to remove bubbles (optional) like a resin heat gun
Instructions
- Ensure flowers are fully dried. Clean stones and work on a level surface.
- Mix resin per manufacturer instructions. Mix slowly to reduce bubbles.
- Pour a thin base layer (~1–2 mm) on stone and let tack 5–10 minutes.
- Place flowers gently with a disposable brush. Press lightly.
- Pour a top layer to encapsulate petals; remove bubbles with brief heat gun passes.
- Cure 24–72 hours depending on resin. Avoid touching during cure.
- Lightly sand edges with fine sandpaper if needed and wipe clean.
How to Display or Gift It
Nestle a botanically sealed stone inside a small wood box or alongside a handwritten note about the flower significance. For storage, keep out of direct sun to preserve flower color.
- Mini Vision-Board Rocks — inspirational stone painting ideas for goal-setting
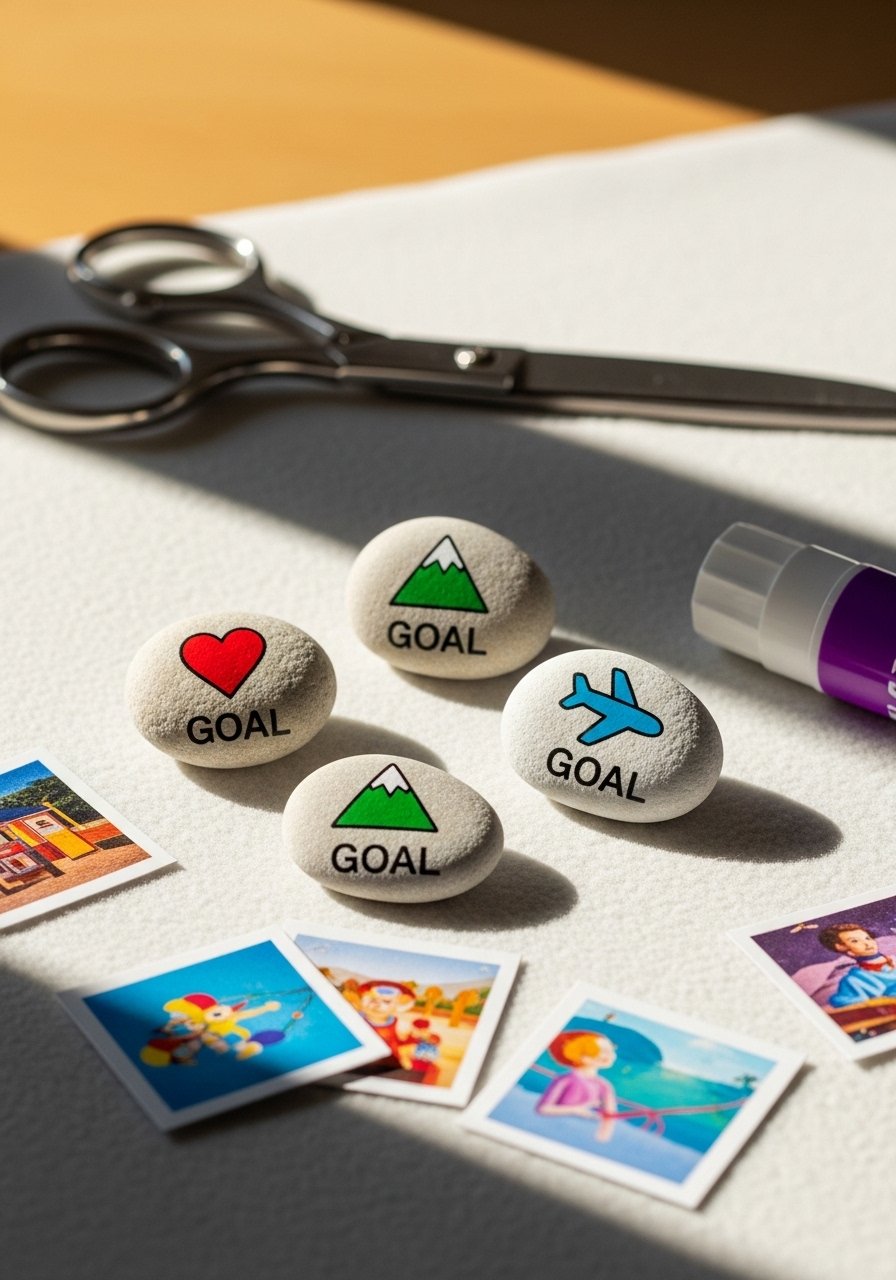
Use tiny symbols or single-word goals to create mini vision stones. These are powerful to carry in a purse or leave on your workspace. They’re straightforward to paint and make excellent group craft session projects.
Materials
- 10 small stones, 2–3 cm
- Acrylic paints (primary colors + black/white)
- Fine tip paint pens
- Small printed icon templates (optional)
- Mod Podge matte for decoupage, 1 bottle
- Foam brush
- Tweezers for tiny paper placement
Instructions
- Clean stones, apply base coat and let dry 20 minutes.
- If using paper icons, brush a thin coat of Mod Podge, place icon, and smooth with tweezers.
- Let Mod Podge dry 30 minutes, then brush a top coat to seal.
- For painted icons, sketch lightly and fill with paint or paint pen.
- Apply two coats of Mod Podge over painted areas if you want a unified finish.
- Let cure 24 hours before handling.
How to Display or Gift It
Put a set in a small jar with a label: "Daily Focus." These also make great desk companions inside a tiny easel.
- Watercolor-Look Pebbles — soft gradients that mimic watercolor

Thin acrylic washes or watered-down craft paints create a soft, watercolor look on stones. The delicate effect is airy and pairs well with hand-lettered gold accents. A brayer roller helps flatten any brush streaks on larger stones.
Materials
- 6 smooth stones, 3–4 cm
- Acrylic paints thinned with water
- Flat wash brush, size 10
- Brayer roller (small)
- Paper palette
- Fine gold paint pen for accents
- Matte sealer spray
Instructions
- Prime stones with a light gesso base; let dry 20 minutes.
- Mix thin glazes of color. Apply in layers, letting each layer dry 10–15 minutes.
- Smooth with a light pass of a brayer if brush strokes are visible.
- Add highlights with a small brush or metallic pen.
- Seal with two coats of matte sealer; dry 15 minutes between coats.
- Cure 24 hours.
How to Display or Gift It
Group several watercolor stones in a shallow ceramic dish for a coffee table vignette. Wrap single stones in tissue and tuck into kraft gift boxes for a soft, handmade present.
- Inspirational Garden Markers — weatherproof positivity for outdoor spaces
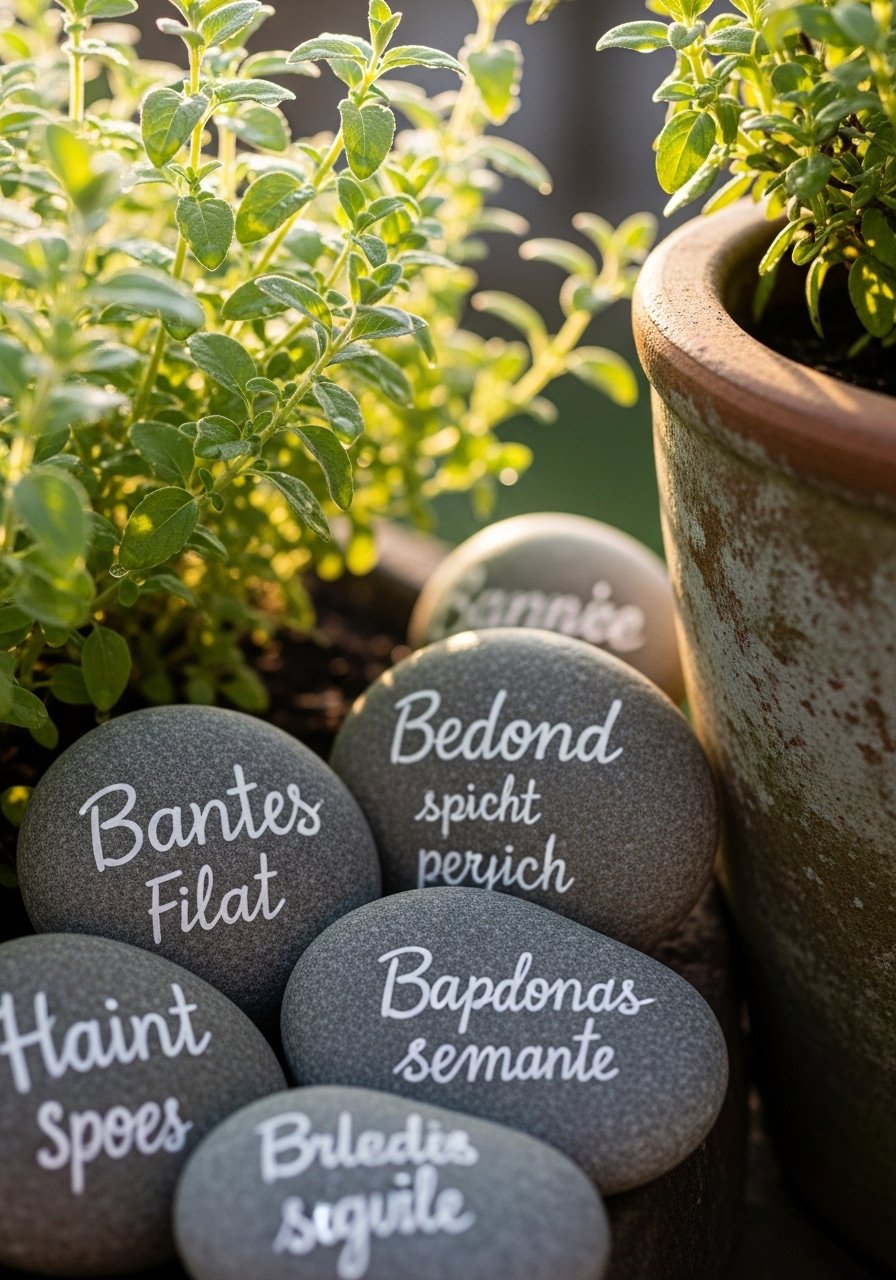
Durable markers with bold letters add charm to herb pots and outdoor planters. Use outdoor acrylics and multiple sealing coats for weather resistance. These make cheerful gifts for gardeners.
Materials
- 8 larger flat stones, 5–7 cm
- Outdoor acrylic paints
- Bold paint pens for lettering
- Sandpaper, 220 grit
- Outdoor sealer spray, 1 can
- Disposable gloves
Instructions
- Clean stones and sand lightly.
- Apply base coat of outdoor paint; two thin coats with 20 minutes drying between.
- Paint plant names or full words in bold script using paint pens.
- Let ink set 30 minutes, then apply three thin coats of outdoor sealer for durability.
- Let final coat cure 24–48 hours before placing outdoors.
- If sealant hazes, wipe gently after full cure.
How to Display or Gift It
Stick markers around potted herbs or lay them flat in a planter bed. For gifting, pair stones with a small potted herb and tie with twine.
- Happy Faces for Kids — playful stones for small hands
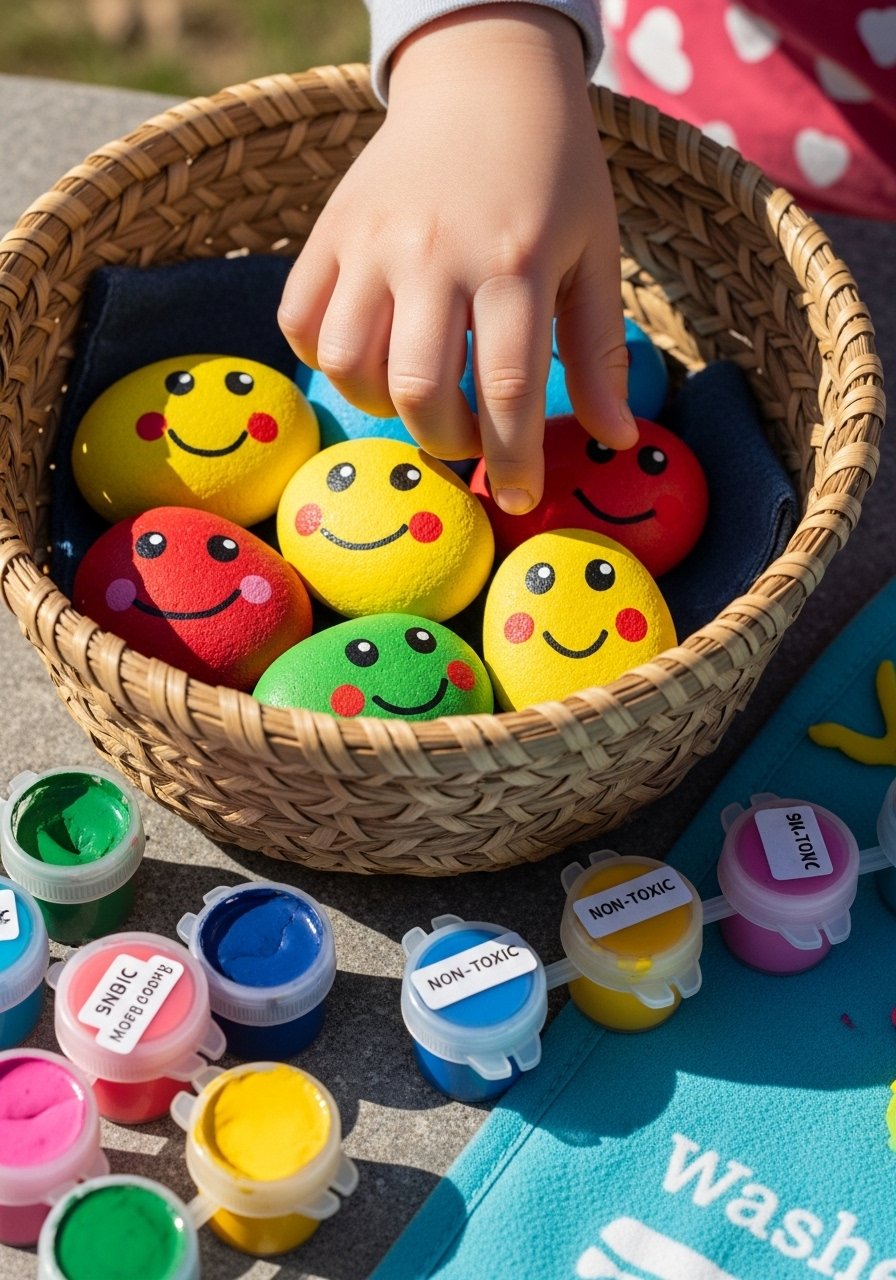
Simple smiley faces are a quick, joyful craft for kids. Use washable, non-toxic paints and chunky brushes for easy handling and a soft, tactile finish.
Materials
- 12 small stones, 2–3 cm
- Non-toxic acrylic paints
- Round sponge brushes
- Small paint pens for faces
- Sealant spray (optional)
- Tray for drying
Instructions
- Clean stones thoroughly.
- Paint base colors using sponge brushes for speed. Dry 15 minutes.
- Add faces with paint pens or small brushes.
- Let dry 30 minutes before sealing.
- For outdoor play, add one light coat of sealer. Dry 15 minutes.
- Store on a tray until gifting.
How to Display or Gift It
Package in a colorful drawstring bag for party favors or place a few in a child's lunchbox for a surprise note. Keep extras in a sorted craft box.
- Metallic Script Stones — sleek and modern desk reminders
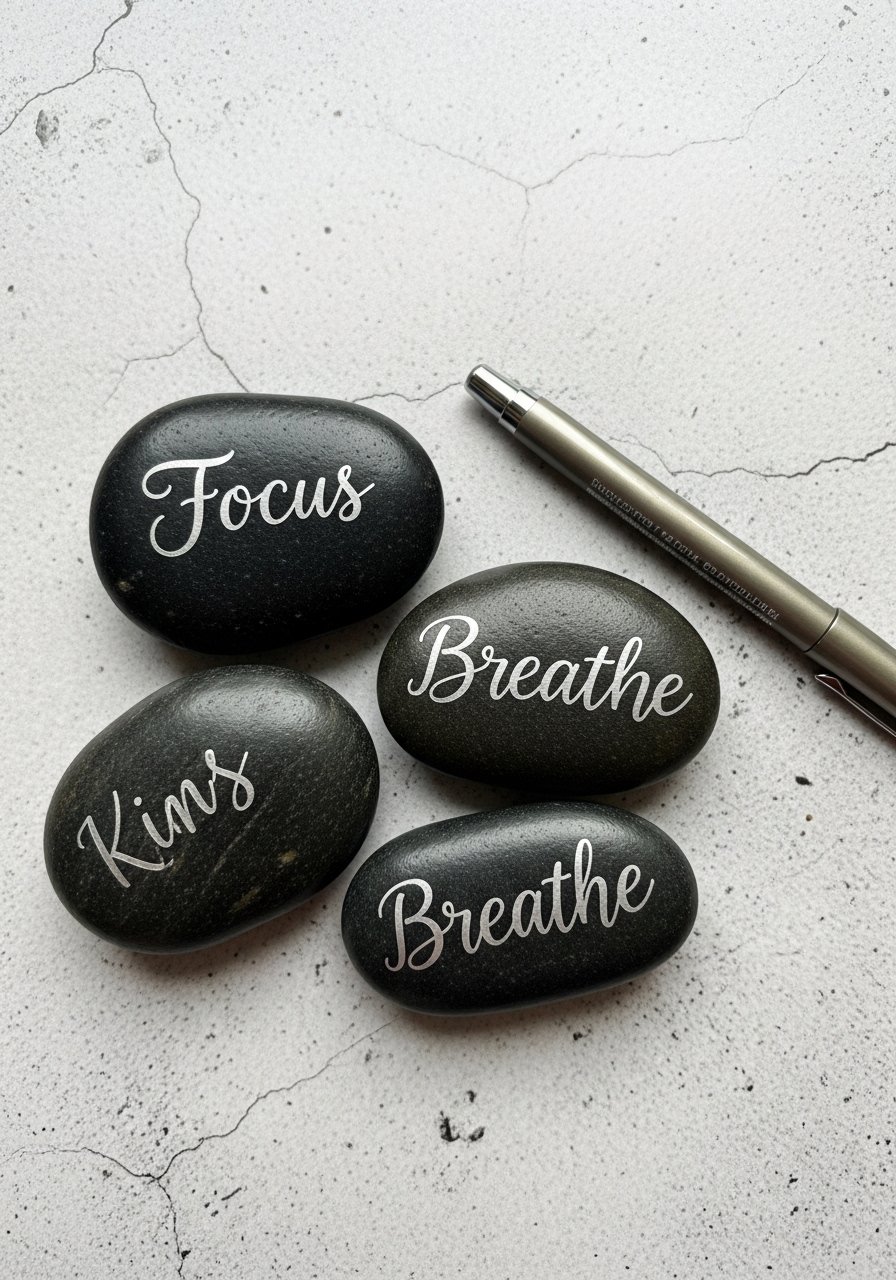
Metallic pens on dark bases read like tiny little trophies. These stones are refined and perfect for a sleek office desk. Use a metallic pen with a fine tip for clean script.
Materials
- 4 dark gray stones, 3–5 cm
- Black or slate acrylic for base
- Metallic paint pen (silver, gold)
- Fine liner brush for touchups
- Matte sealer (optional)
- Gloves
Instructions
- Prime stones with black or slate paint; two coats may be needed. Dry 20 minutes each.
- Letter with the metallic pen; keep lines steady.
- Clean up edges with a fine liner brush dipped in base color.
- Allow metallic ink to set 30 minutes.
- Seal lightly with matte sealer to prevent rubbing.
- Let cure 24 hours.
How to Display or Gift It
Place one on a desk with a small wooden easel for a curated look. For gift sets, tuck into kraft boxes with tissue and a ribbon.
- Story Stones — inspirational stone painting ideas that spark creativity
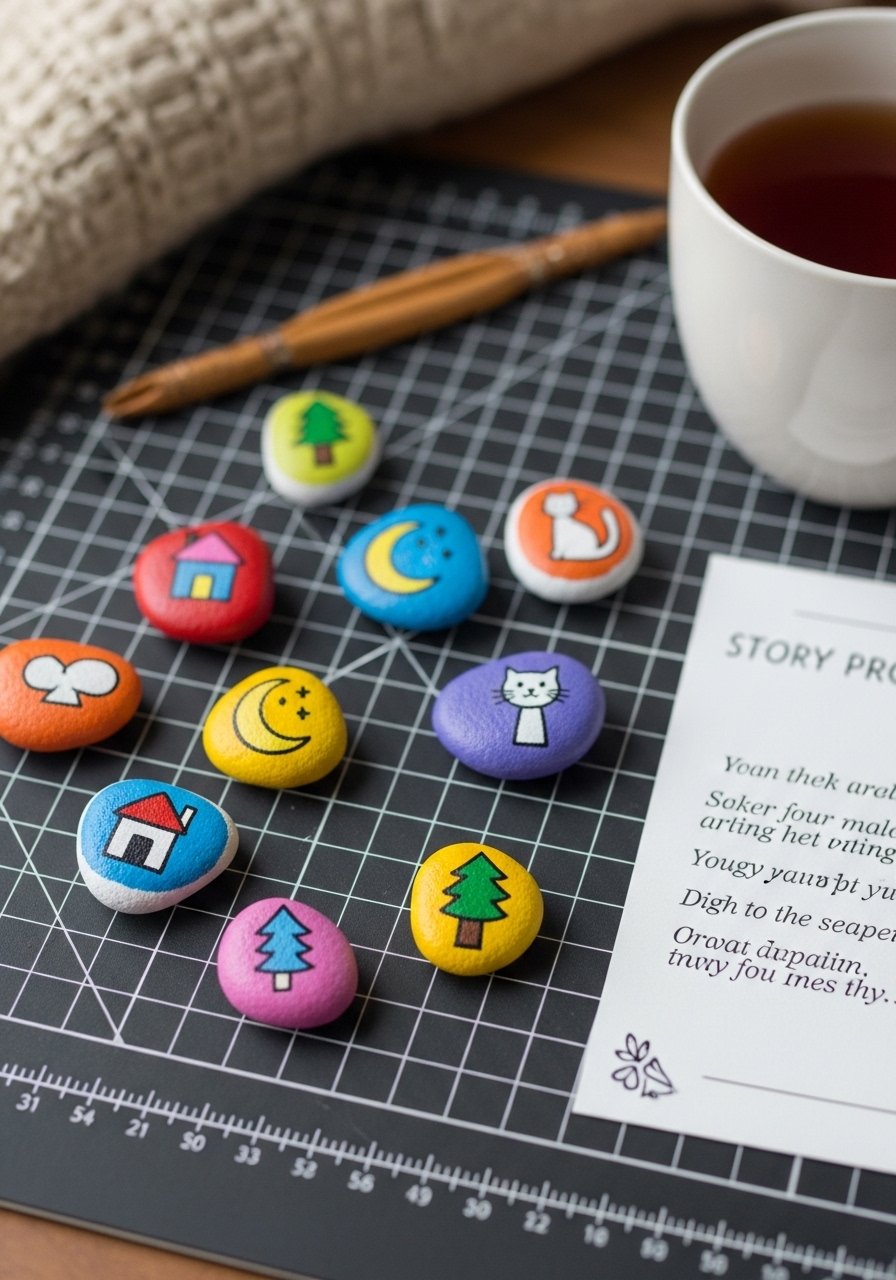
Story stones help prompt storytelling and imaginative play. Each stone has a clear icon or word to inspire a short tale. These are ideal for family time, classrooms, or as meaningful gifts.
Materials
- 20 small stones, 2–3 cm
- Acrylic paints (varied colors)
- Fine paint pens for small icons
- Pencil for sketching
- Storage bag or small wooden box (for the set)
- Matte sealer
Instructions
- Sort stones by size; wash and dry.
- Sketch icons lightly in pencil.
- Paint icons using small brushes or paint pens. Dry 10–15 minutes between colors.
- After painting, seal with a light coat of matte sealer.
- Allow 24 hours to fully cure before storing in a box.
- Create a simple prompt card pack to go with the stones for gift giving.
How to Display or Gift It
Include a small booklet of story prompts and tuck stones into a drawstring bag. These are perfect for quiet time or travel entertainment.
- Mandala Heart Love Stones — tiny vow tokens
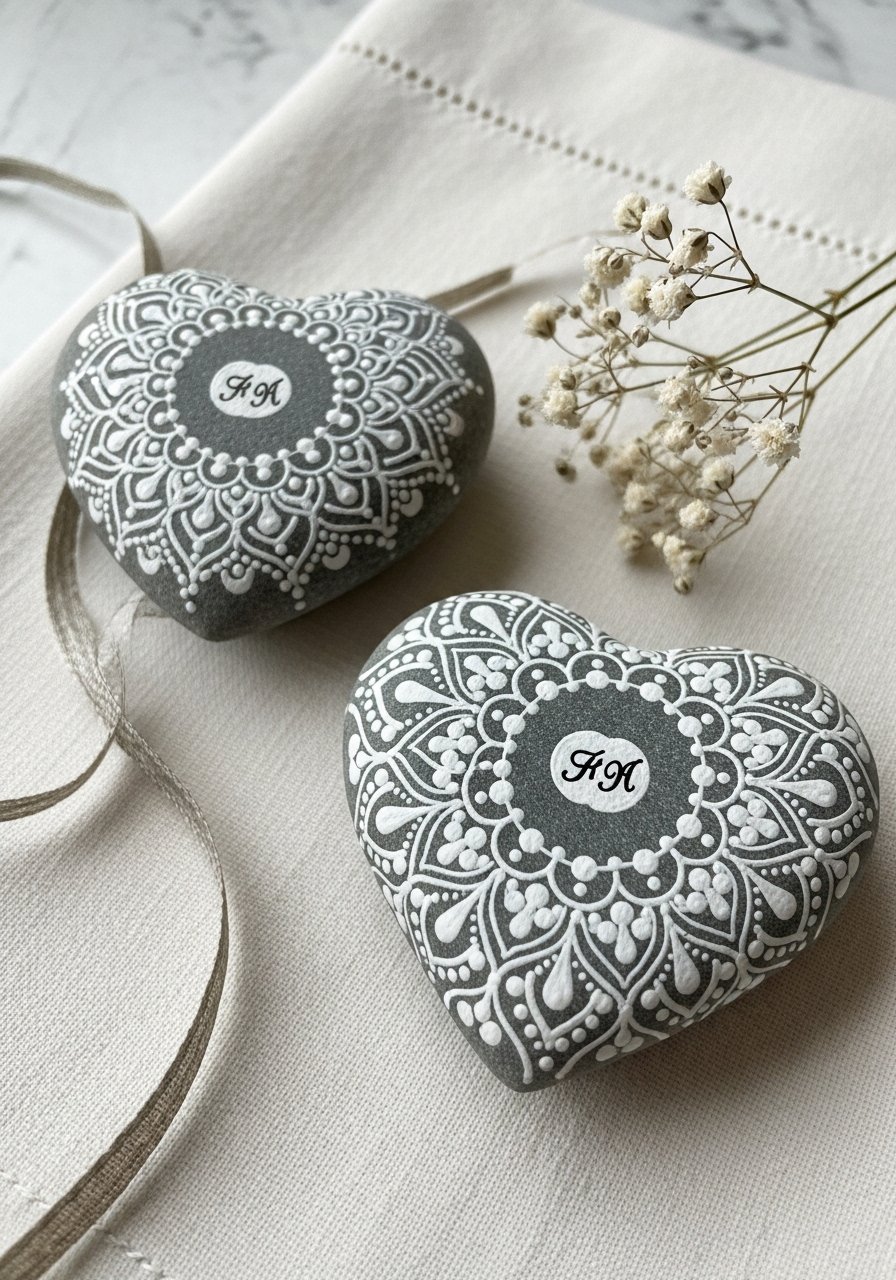
Mandala hearts make intimate wedding favors or anniversary tokens. The detailed center can host initials or a short date. Use metallic paints for subtle shimmer.
Materials
- 2 heart-shaped stones, 3–5 cm
- Acrylic metallic paints
- Dotting tool set
- Pencil for center marks
- Matte sealer spray
- Small gift boxes
Instructions
- Prime stones if needed.
- Mark the center and map out concentric rings with a pencil.
- Use dotting tools and metallic paints to build mandala patterns.
- Let each ring dry 10 minutes to avoid smudging.
- Add initials in the center with a fine paint pen.
- Seal with a matte spray and let cure 24 hours.
How to Display or Gift It
Place each in a tiny kraft box with a ribbon and place on guest tables or include with cards. Store extras flat to avoid nicking.
- Travel-Quote Stones — inspirational stone painting ideas for wanderlust gifts
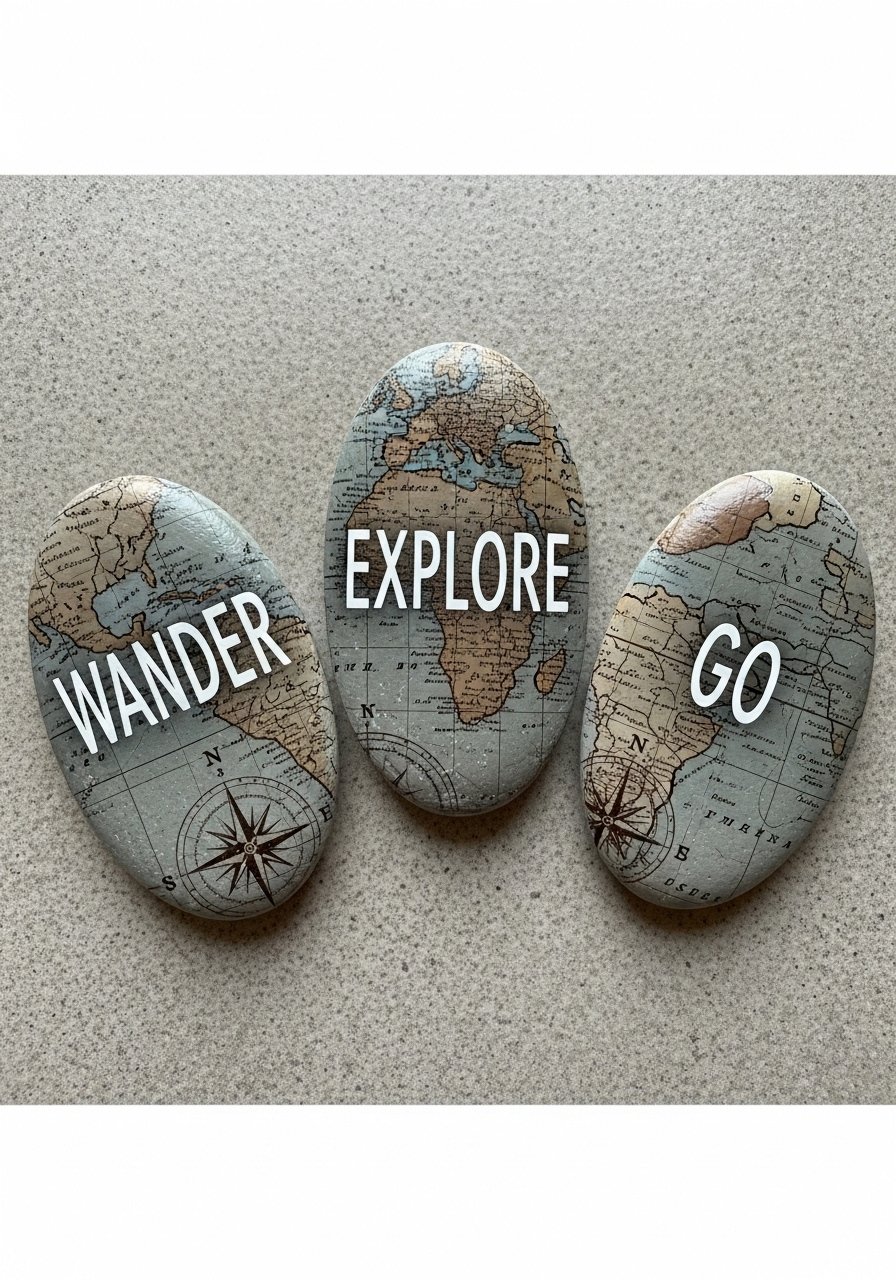
Give a tiny nudge to someone with wanderlust by pairing an uplifting travel quote with map-inspired backgrounds. These stones are great as luggage tokens or in travel journals.
Materials
- 3 flat stones, 3–4 cm
- Acrylic paints in earth tones
- Fine white paint pen
- Decoupage glue for map paper (optional)
- Foam brushes
- Outdoor sealer if used for travel
Instructions
- Paint base with muted earth tones and allow to dry 20 minutes.
- Letter with a fine white paint pen or decoupage a tiny map piece.
- Seal with a coat of sealer for handling.
- Let set 24 hours before gifting or placing in luggage.
How to Display or Gift It
Wrap in tissue and add to a travel notebook, or glue to a magnetic strip for a fridge reminder to plan trips.
- Rainbow Affirmation Stack — colorful stacked stones
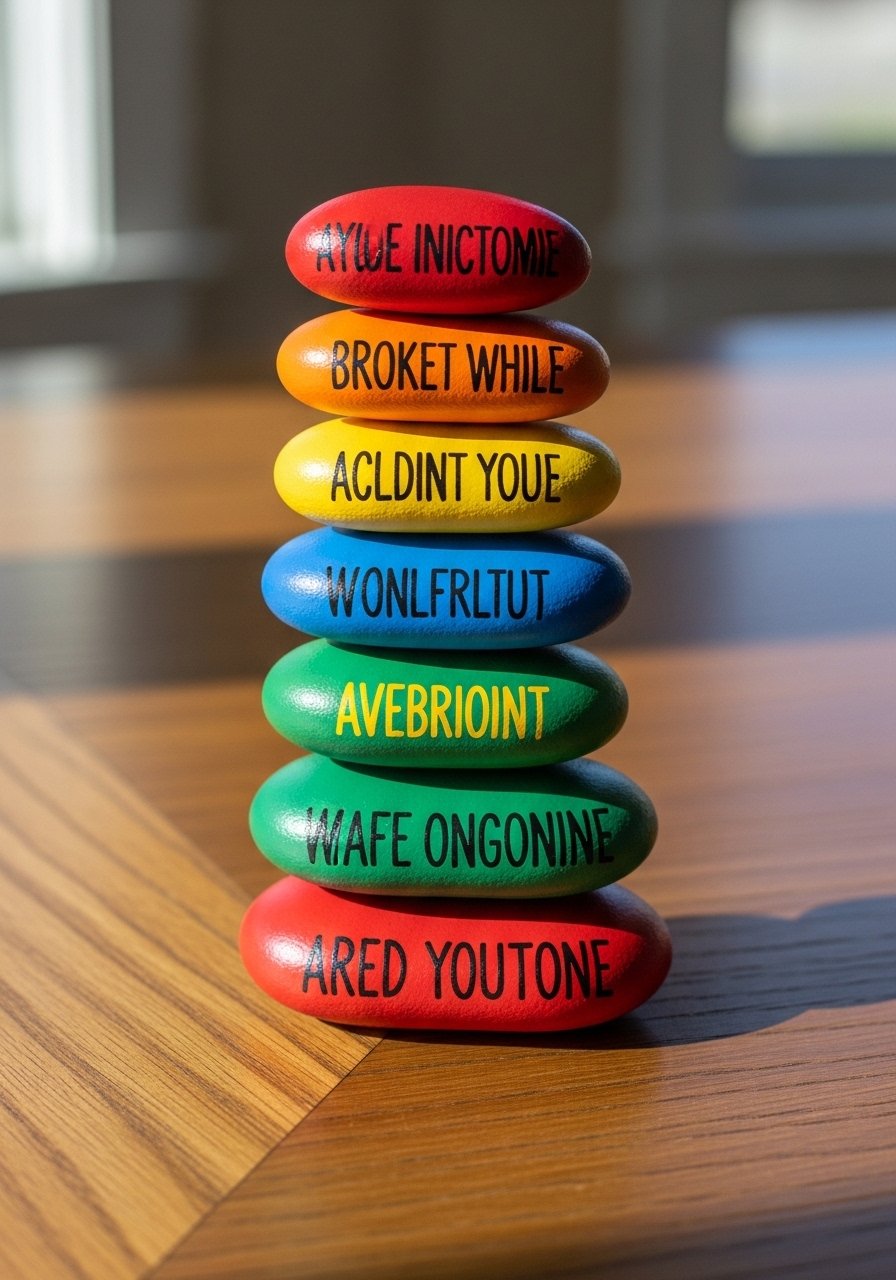
Build a stacked set of affirmations that read from top to bottom. The tactile stack is soothing and doubles as colorful decor.
Materials
- 7 small stones, 2–3 cm (one per color)
- Acrylic paint in rainbow colors
- Fine-tip paint pen for letters
- Mod Podge for sealing between stones (optional)
- Clear outdoor sealer
- Tweezers for placement
Instructions
- Paint each stone a different rainbow color; two coats may be needed. Dry 15 minutes between coats.
- Write a one-word affirmation on each.
- To stabilize a stack for gifting, add a small dab of glue or Mod Podge between stones.
- Seal the top stone with outdoor sealer. Dry 15 minutes between light coats.
- Let entire stack cure 24 hours before handling.
How to Display or Gift It
Place the stack on a bedside table or gift it in a tall kraft box. For travel, don’t glue—let the recipient stack them themselves.
- Word-Collage Stones — mixed-media inspirational stones
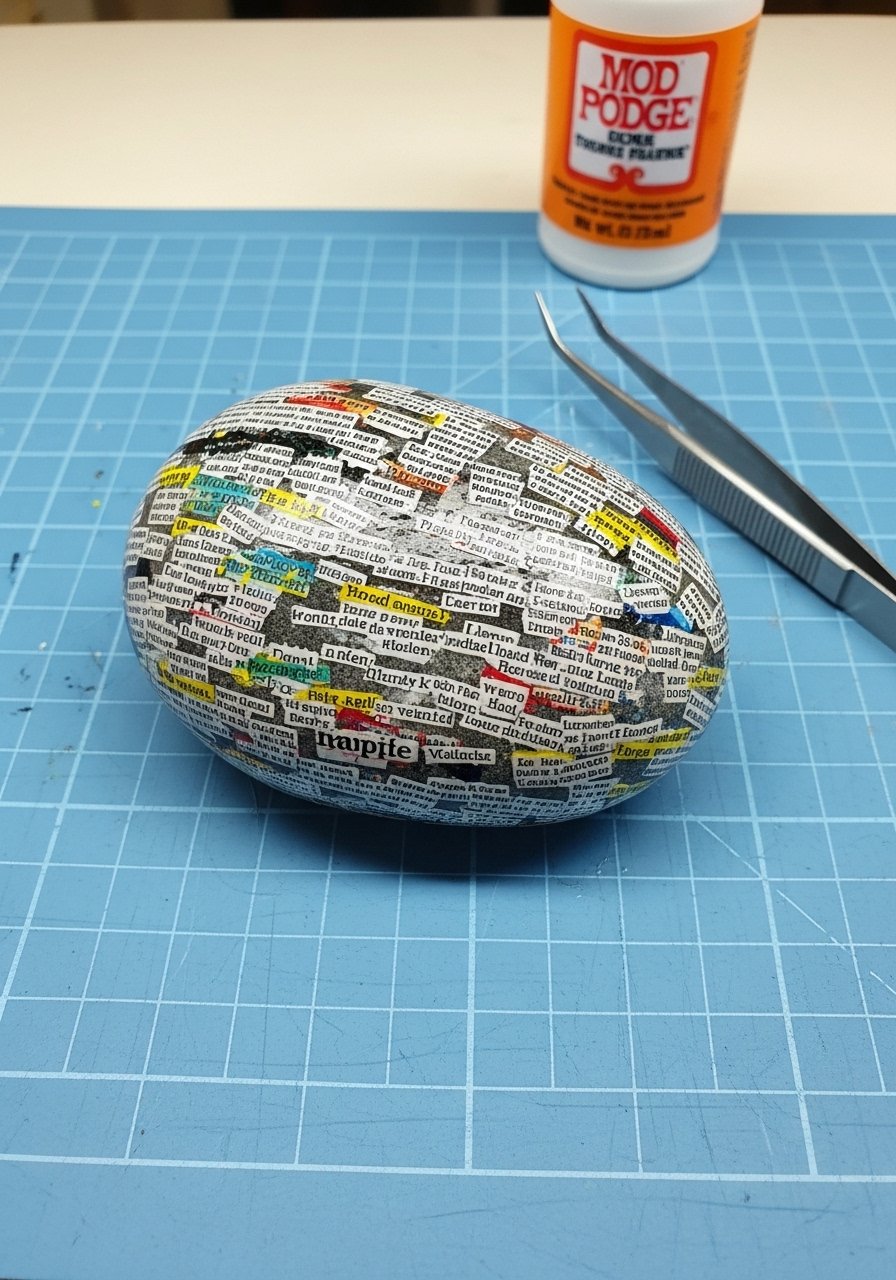
Combine painted backgrounds with tiny cut-out words glued and sealed for a collage effect. This mixed-media look feels artsy and modern.
Materials
- 3 flat stones, 4–6 cm
- Small printed words on thin paper
- Mod Podge satin
- Fine scissors or craft knife
- Acrylic paint for background
- Small foam brush
Instructions
- Paint a light background and let dry 20 minutes.
- Cut tiny words and brush a thin coat of Mod Podge onto the stone.
- Place the word with tweezers and smooth gently.
- Seal over the top with two coats of Mod Podge. Let dry 30 minutes between coats.
- For extra protection, add a final clear coat sealer. Cure 24 hours.
How to Display or Gift It
Frame a single collage stone in a small shadowbox, or give a collection in a gift tin.
- Galaxy Stones — starry inspiration for dreamers
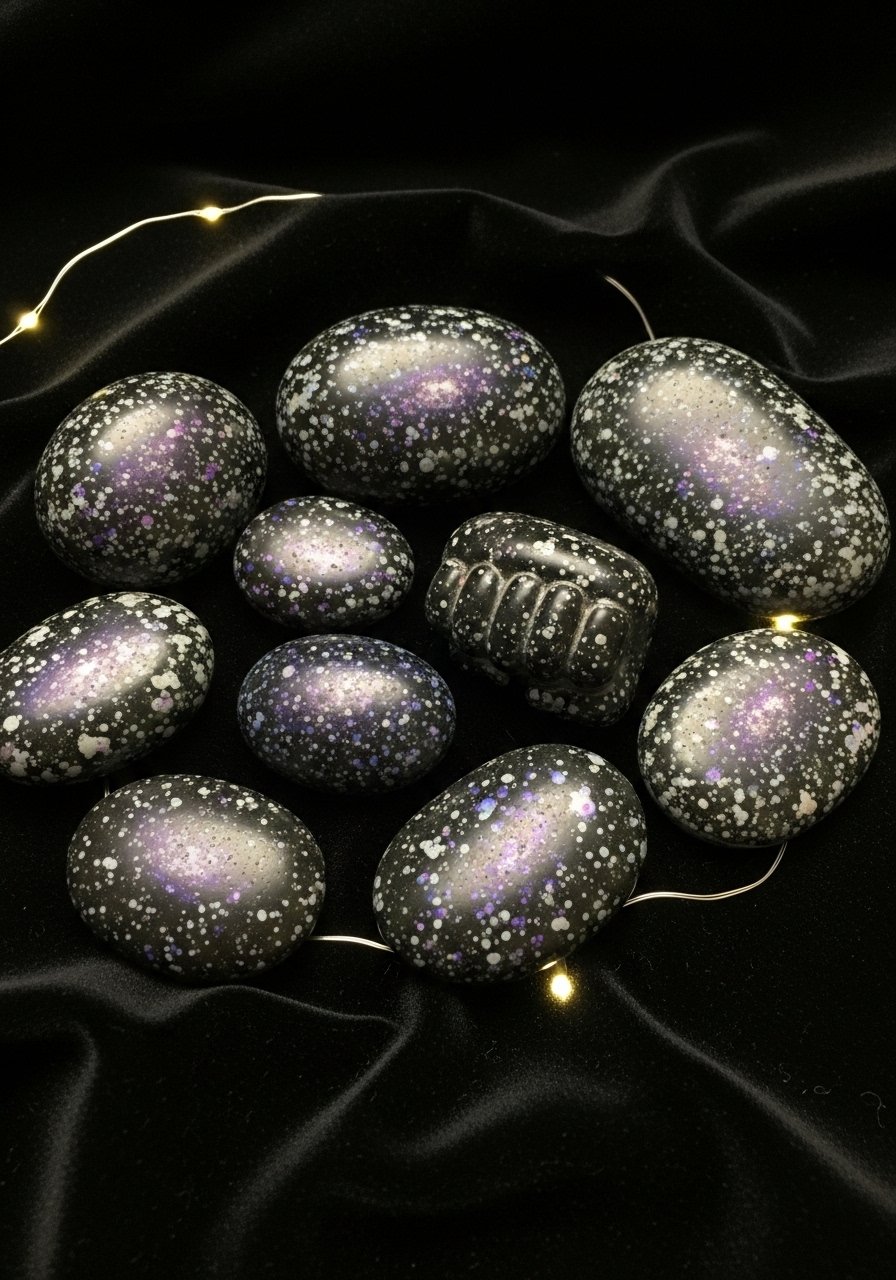
Turn dark stones into miniature galaxies using spatter techniques and metallic highlights. These feel dreamy and are great as nightly reminders.
Materials
- 4 dark stones, 3–5 cm
- Black acrylic base
- Metallic paint pens (silver, white)
- Small stiff-bristle brush for splatter
- Purple and blue acrylics for nebula washes
- Matte sealer
Instructions
- Prime stones black. Dry 20 minutes.
- Add nebula washes with thin purple and blue paint; blend softly.
- Flick white paint with a stiff brush for star splatter—practice first on scrap.
- Add larger stars and tiny dots with metallic pens.
- Seal with matte sealer. Cure 24 hours.
How to Display or Gift It
Group several galaxy stones in a shallow glass bowl with a strand of fairy lights for an enchanting display.
- Pet Tribute Stones — memorial tokens with paw prints
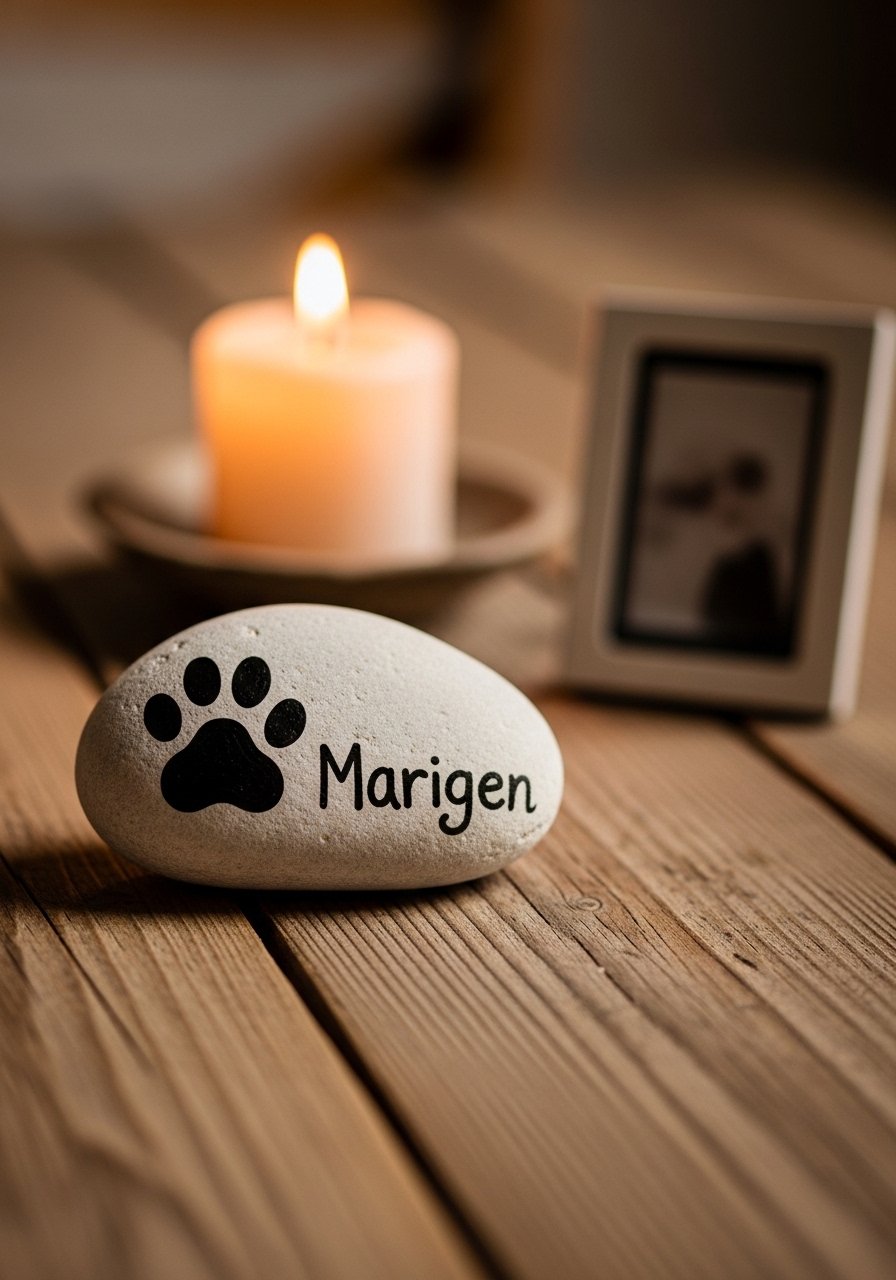
Create commemorative stones with paw prints and a name. These are gentle keepsakes for pet loss or birthday remembrances.
Materials
- 1–2 medium flat stones, 4–6 cm
- Neutral acrylic paint
- Fine brush and paint pen
- Small rubber stamp for paw print (or painted freehand)
- Matte sealer spray
- Soft cloth for wrapping
Instructions
- Paint base in a neutral tone; dry 20 minutes.
- Add paw print with a stamp or tiny brush.
- Write pet’s name with a fine paint pen.
- Seal with two coats of matte sealer; dry 15 minutes between coats.
- Let cure 24 hours before gifting.
How to Display or Gift It
Wrap in tissue, include a photo of the pet, and place in a small wooden box for safe keeping.
- Inspirational Magnets — magnetic stones for the fridge
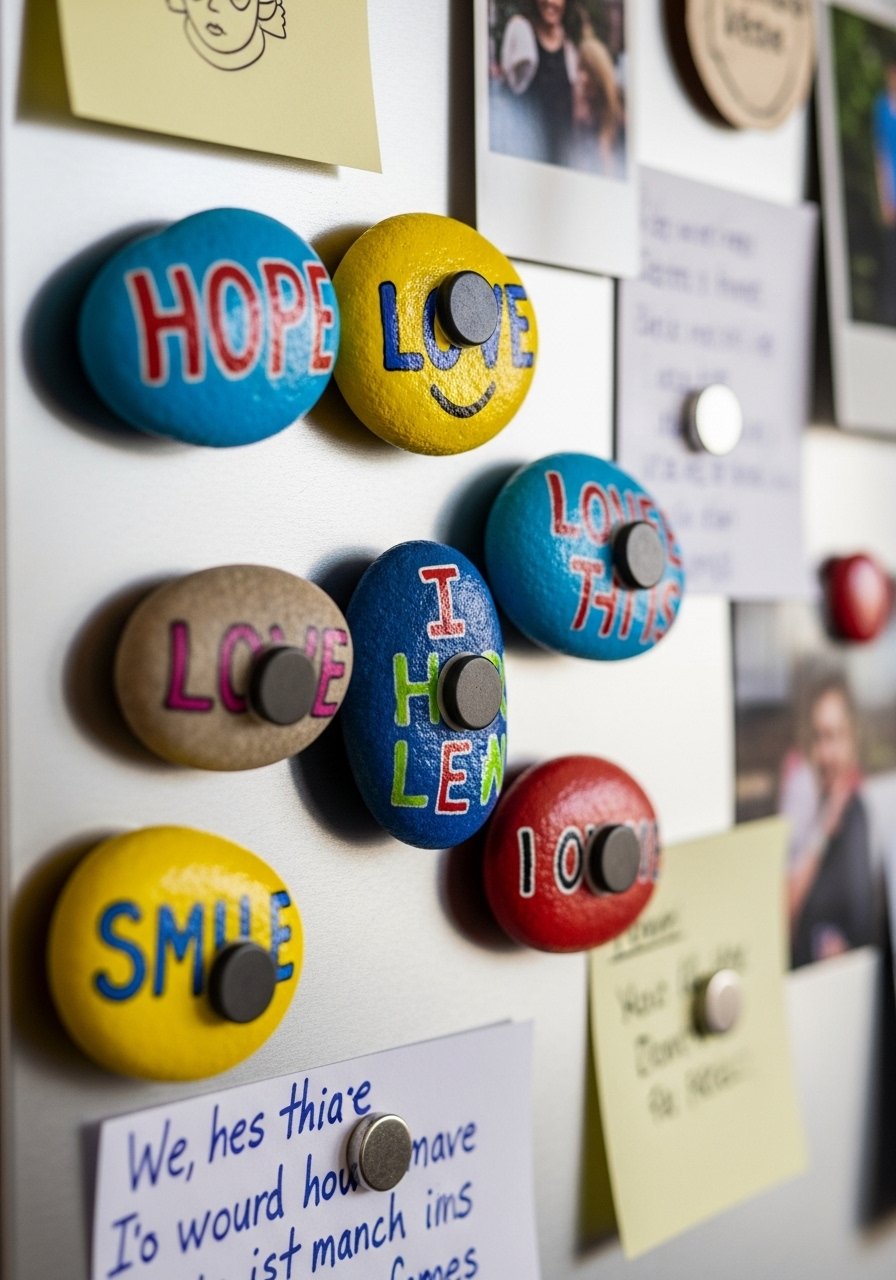
Add small disc magnets to the back for fridge art that also shares reminders. Strong neodymium magnets hold small stones securely.
Materials
- 6 small flat stones, 2–3 cm
- Acrylic paints and paint pens
- Small disc magnets (neodymium), 6
- Strong epoxy glue (E6000 or similar)
- Sandpaper
- Mod Podge or sealer
Instructions
- Paint stones and let dry 20 minutes.
- Seal painted surface with a thin coat of Mod Podge. Dry 20 minutes.
- Roughen the back of the stone with sandpaper to improve adhesion.
- Glue a small disc magnet to each back and press firmly. Let glue cure per manufacturer (usually 24 hours).
- Test magnet strength once glue fully sets.
How to Display or Gift It
Attach to fridge with a small note or include in a magnet board gift set. Store spares in a small craft drawer.
- Sunrise Affirmation Rocks — inspirational stone painting ideas that brighten mornings
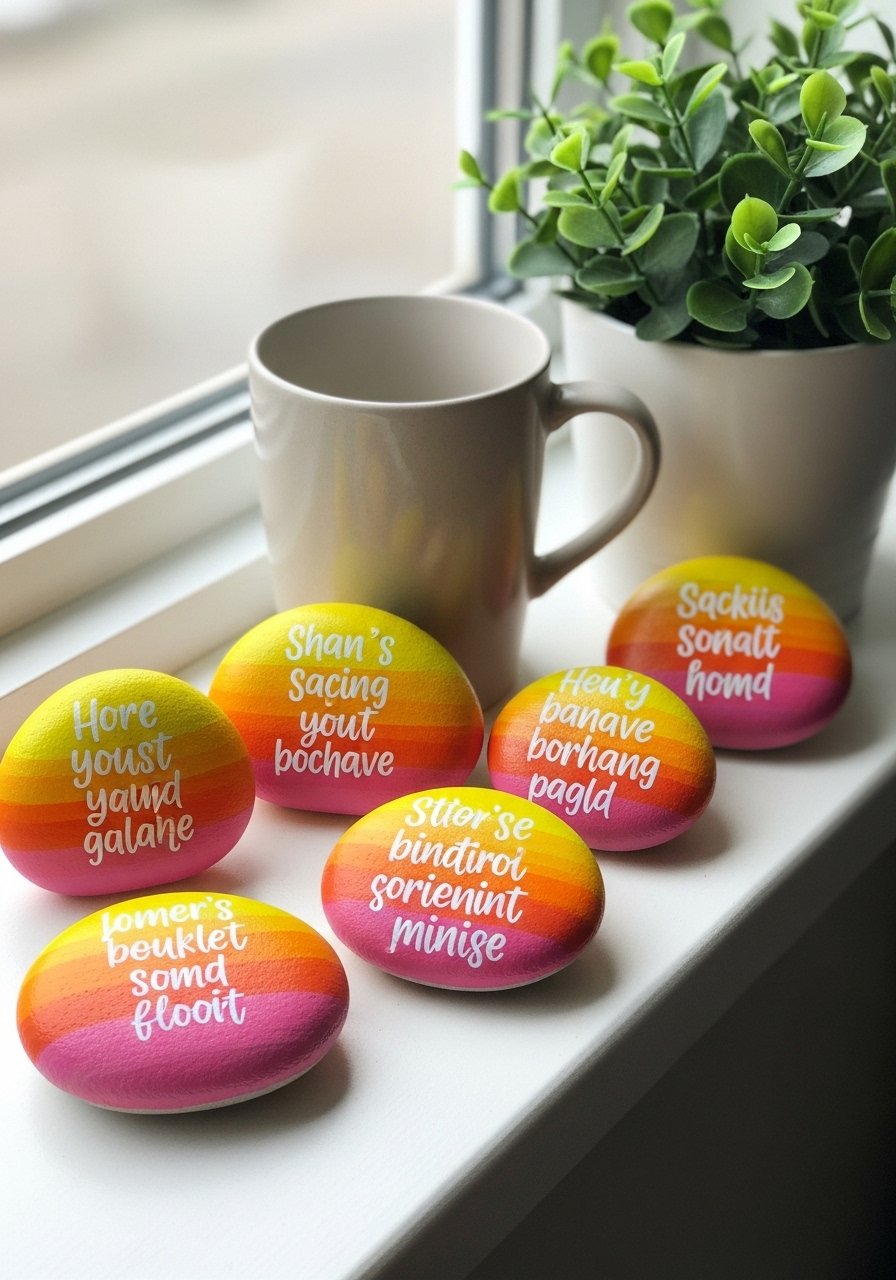
Bright, sunrise-colored stones are cheerful morning prompts. Use gradient blending and finish with crisp white lettering. They make thoughtful gifts for morning people.
Materials
- 5 flat stones, 3–5 cm
- Acrylic paints in pink, orange, yellow
- Soft blended brush and fine white paint pen
- Foam brush for base coats
- Matte sealer spray
Instructions
- Prime stones and paint the gradient using thin layers, letting each layer dry 10–15 minutes.
- blend colors while they’re still tacky for smooth transitions.
- Once base is dry, add white affirmations with a paint pen.
- Seal with two coats of matte sealer; dry 15 minutes between coats.
- Cure 24 hours before placing with other morning items.
How to Display or Gift It
Place a stone on a breakfast tray beside a mug, or tuck one into a bedside drawer labeled “Open in the morning.”
- Minimalist Line Art Stones — sleek single-line drawings
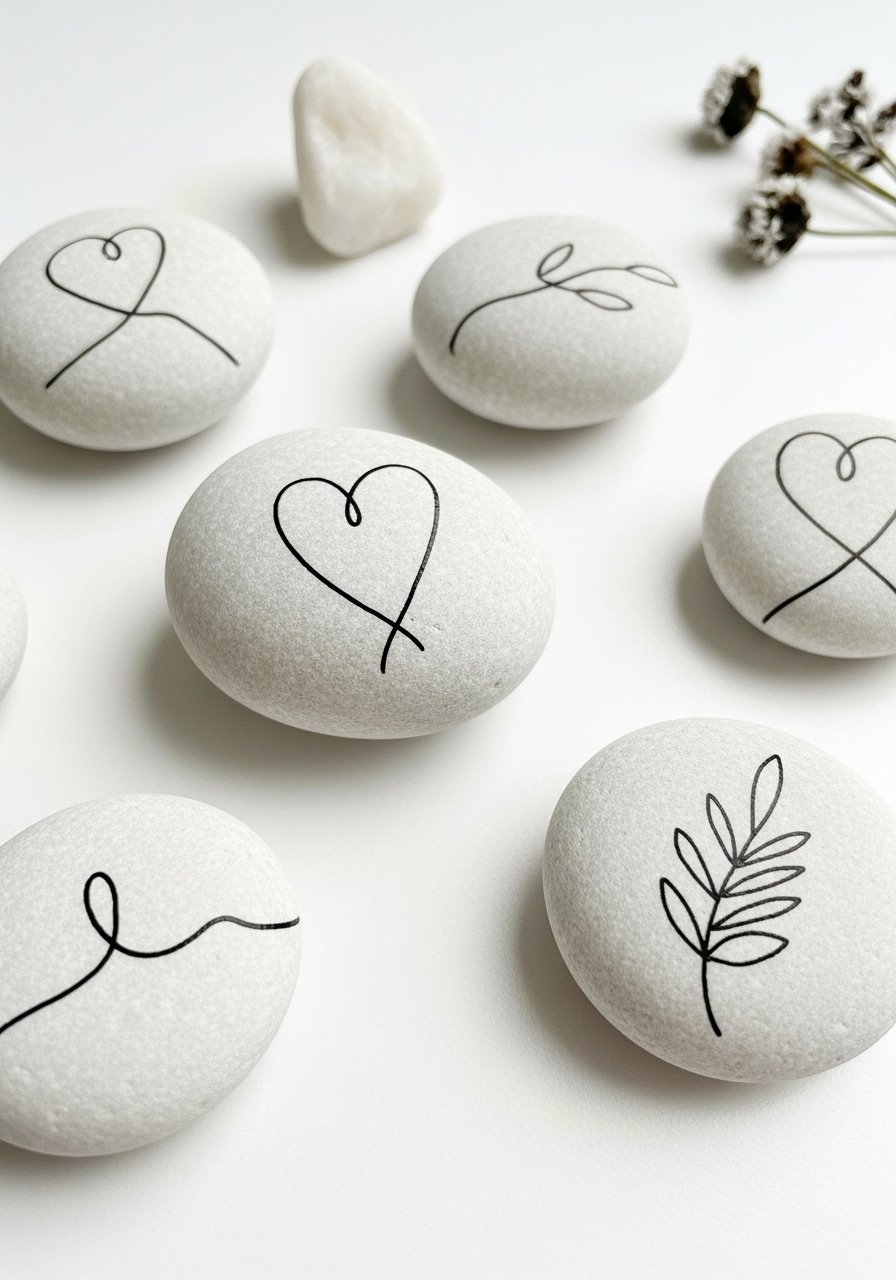
Minimal single-line art feels modern and chic. These stones work well in neutral interiors and suit minimalists perfectly.
Materials
- 6 smooth stones, 2–4 cm
- Neutral acrylic base (white, cream)
- Fine black paint pen, 0.3–0.5 mm
- Pencil for practice sketches
- Matte sealer
Instructions
- Paint base coat and dry 20 minutes.
- Practice the single-line design on paper before transferring.
- Draw directly with the fine black pen in one continuous motion.
- Let ink set 30 minutes then seal lightly.
- Cure 24 hours for handling.
How to Display or Gift It
Display a trio on open shelving or give as a set in a slim kraft box with small ribbon.
- Joyful Word Stones — chunky block-letter typography
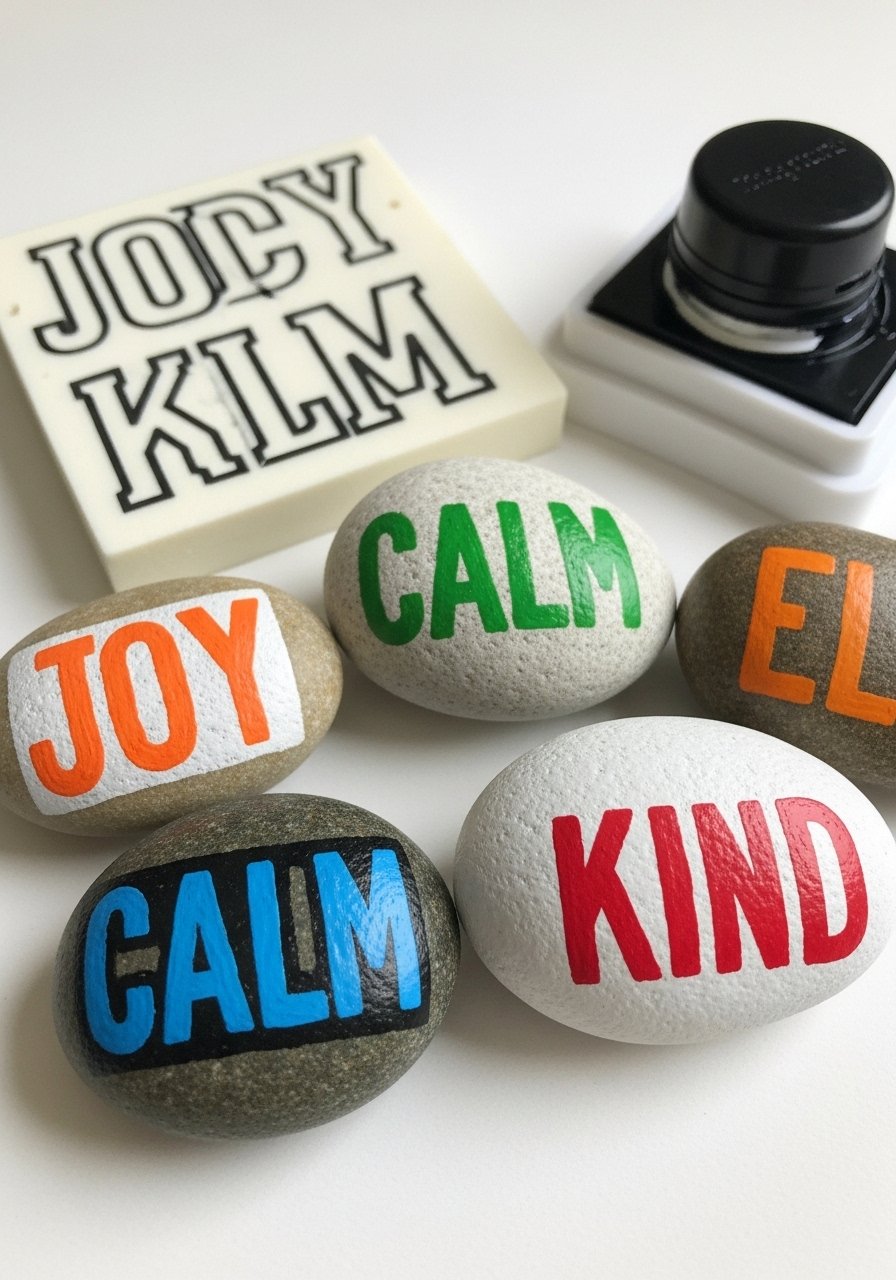
Bold block letters read from across a room, making these stones great little shelf decorations or desk boosters. Use a stencil if you want razor-clean edges.
Materials
- 6 stones, 3–4 cm
- Bright acrylic paints
- Letter stencils or painters tape for masks
- Flat foam brush
- Fine brush for touch-ups
- Matte sealer
Instructions
- Prime stones if needed.
- Position stencil and dab paint gently with a foam brush.
- Remove stencil carefully once paint becomes tacky.
- Touch up edges with a small brush.
- Seal with matte sealer; dry 15 minutes between coats.
- Let cure 24 hours.
How to Display or Gift It
Line a set on a windowsill or toss into a decorative bowl. For gifting, add a small printed card with the meaning of each word.
- Resin-Inlay Quote Stones — glossy, engraved-look finish
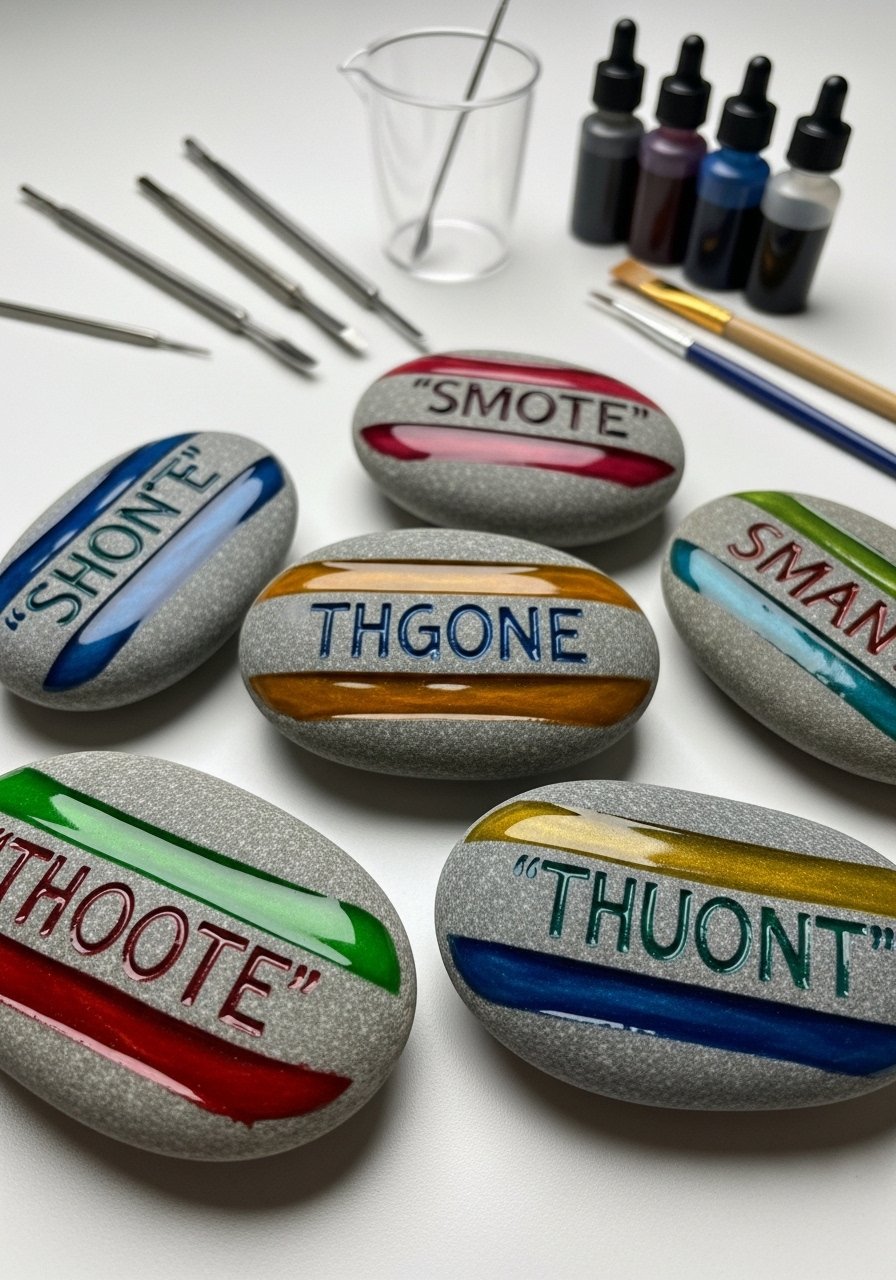
Carving a shallow groove and inlaying colored resin gives a carved, professional look. The glossy finish reads like jewelry and lasts.
Materials
- 2 larger flat stones, 5–7 cm
- Small rotary tool or carving blade (work carefully)
- Colored epoxy resin or resin pigments
- Mixing cups and stir sticks
- Gloves and respirator if needed
- Fine sandpaper to finish edges
Instructions
- Sketch your lettering; carefully carve a shallow groove with a rotary tool. Work slowly.
- Clean dust from grooves.
- Mix a small batch of tinted resin and carefully fill grooves.
- Remove bubbles with a quick heat gun pass.
- Let resin cure 24–72 hours depending on product.
- Sand any rough edges and polish if desired.
How to Display or Gift It
A resin-inlay stone looks gorgeous in a shadowbox or on a desk. Include care instructions to avoid heavy knocks.
- Inspirational Tree of Life Stones — symbolic and grounding
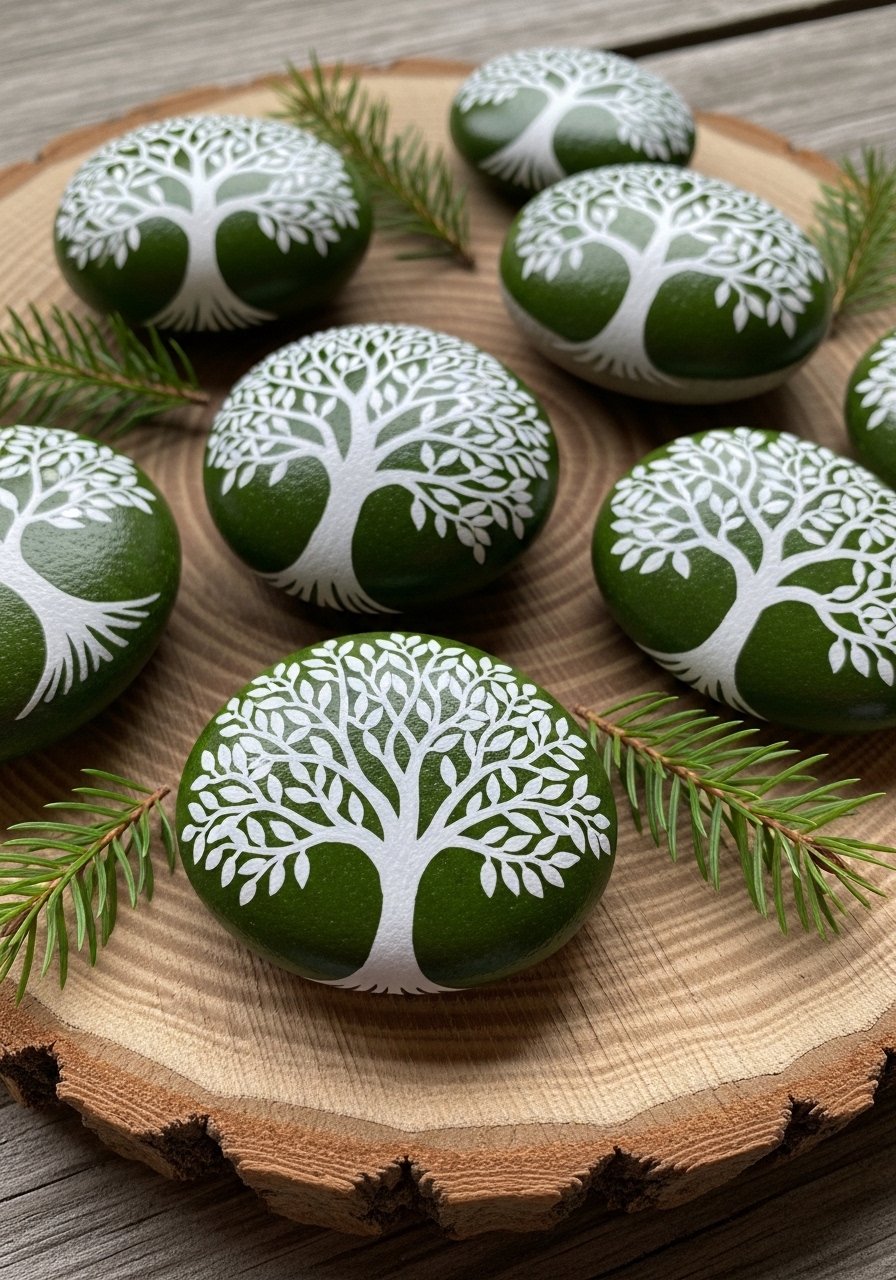
The tree-of-life motif is timeless and grounding. These stones are perfect for nature lovers and meditative spaces.
Materials
- 3 smooth stones, 3–5 cm
- Moss-green acrylic base
- Fine white paint pen or small brush
- Pencil for sketching tree silhouette
- Matte sealer
Instructions
- Paint base color and let dry 20 minutes.
- Sketch the tree silhouette lightly in pencil.
- Fill with white paint using a fine brush or pen.
- Allow paint to dry 30 minutes then seal with matte spray.
- Cure 24 hours before grouping.
How to Display or Gift It
Place in a zen garden tray, or gift with a small guide for a simple mindfulness practice.
- Custom Name Story Tokens — personalized gifts they’ll keep forever

Personalized name stones are thoughtful for weddings, teachers, or friend groups. They’re quick to customize and feel intimate.
Materials
- Several stones, 3–5 cm
- Acrylic paint for base
- Fine script paint pen or brush pen
- Small kraft gift boxes and tissue
- Matte sealer
Instructions
- Prime stones and paint base color; dry 20 minutes.
- Letter name with a steady hand using a script pen.
- Add small decorative dots or hearts if desired.
- Seal with a light coat of matte sealer.
- Pack each stone in its box with tissue. Let cure 24 hours before shipping.
How to Display or Gift It
Place one in a guest welcome box, at place settings, or tuck into a bouquet for a unique keepsake.
These projects are meant to be gentle and joyful—so pick a few that match your mood and supplies. If you’re planning multiple gifts, batch the base coats, then do lettering in one sitting for efficiency. For most painted stones, two coats of paint and two light coats of sealer are a safe baseline.
Trust me, picking up a quality hot glue gun with temperature control and a dependable fine detail brush set changed how fast and clean my stone projects came together — less stringing, clearer edges, and neater letters.
Which of these inspirational stone painting ideas are you most excited to try? Save or pin this article for later gifting seasons, and share a photo when you finish — I’d love to see which phrases and colors you choose.


