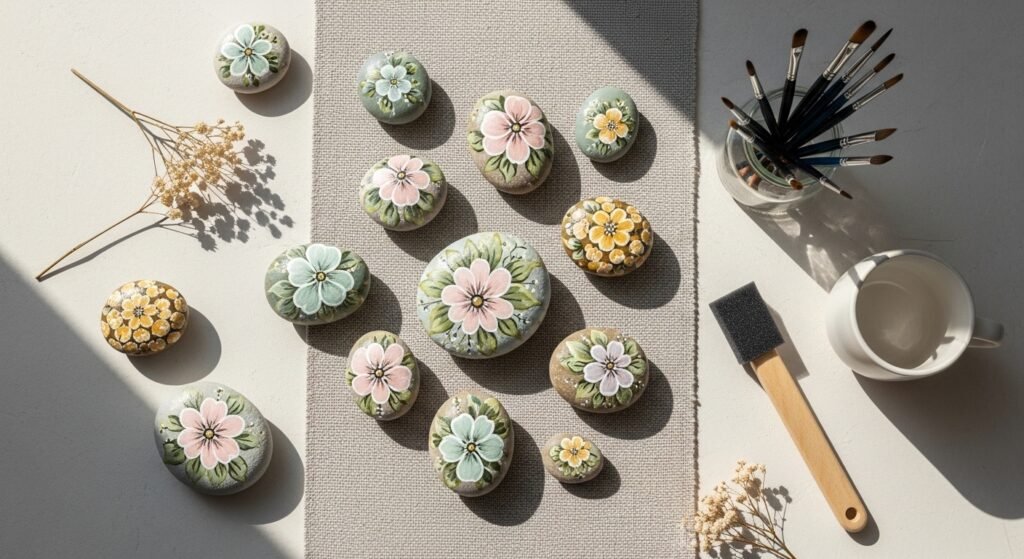
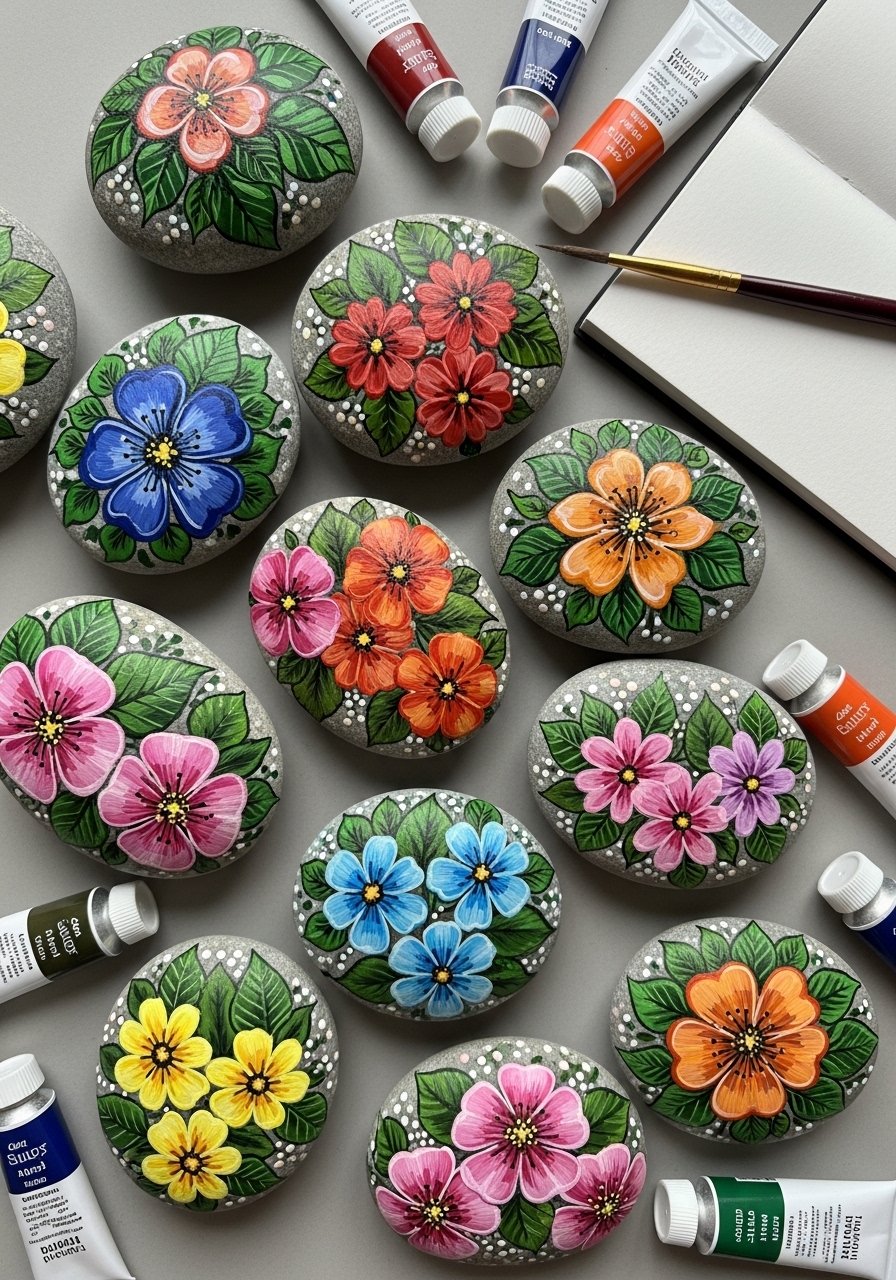
Sweet little stones with hand-painted florals are everywhere on Pinterest right now—and for good reason. Floral stone painting ideas are perfect when you want a tiny, satisfying project that looks charming on a shelf, windowsill, or as a thoughtful handmade gift. Whether you love cottagecore florals, moody Japandi botanicals, or bright boho blooms, these 22 projects give you fresh directions for color, texture, and display.
I keep a small set of round brushes and a pack of foam brushes in my studio because precise lines and smooth base coats make these floral stones sing. Try my go-to gloss sealer for weatherproof garden markers or the ArtResin epoxy resin for pieces you want glossy and glass-like. Below you’ll find 22 step-by-step floral stone painting ideas with full materials lists, drying and curing times, troubleshooting tips, and simple display or gifting suggestions.
- Mini Cottagecore Daisy Stones
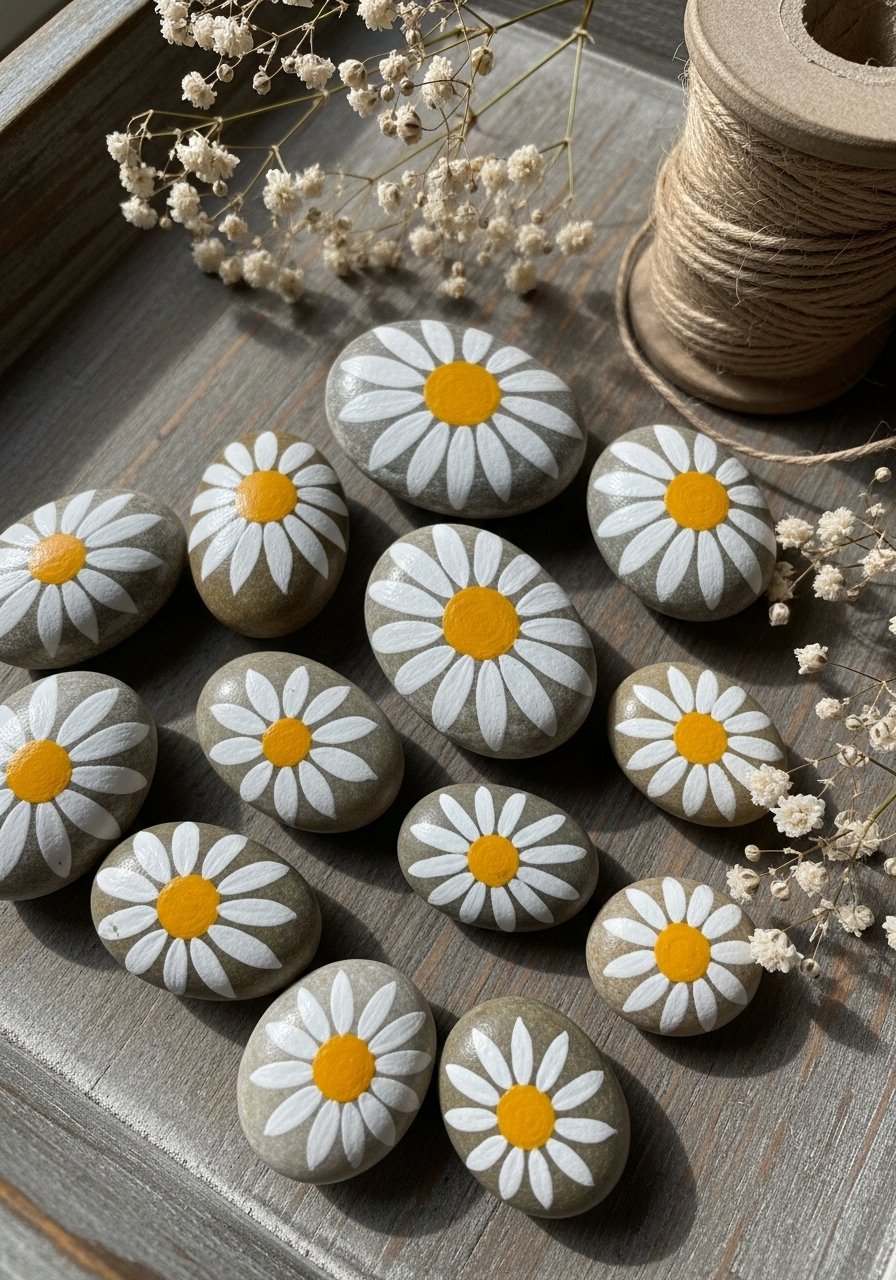
These dainty daisy-painted stones feel like a pocket-sized bit of cottagecore. The matte acrylic base and tiny detail brush lines give a soft, handcrafted look. Great for beginners and kids with steady hands.
Materials
- 10 small river stones (2–3 inches each), cleaned
- Acrylic craft paints: titanium white, cadmium yellow, sap green, raw umber (10 ml each)
- Fine round detail brush (size 0 or 1)
- Flat foam brush (1-inch) for base coats
- Matte acrylic sealer, 2 coats
- Paper towel and rubbing alcohol for prep
- Palette or disposable plate
- Small cup of water
Instructions
- Wipe stones with rubbing alcohol and let dry 10 minutes.
- Use the foam brush to apply a thin base coat (one color per stone). Let dry 20–30 minutes to touch.
- Paint small yellow dots for centers with a round brush. Dry 5 minutes.
- Using the fine round detail brush and white paint, add 6 tiny petals around the center. Keep strokes light and quick.
- Add small green leaves with a tiny pull stroke. Let dry 30 minutes.
- Apply 2 thin coats of matte sealer, waiting 15 minutes between coats. Fully cure 24 hours before handling.
How to Display or Gift It
- Cluster three stones in a shallow ceramic dish near a windowsill.
- Tie a small set with twine and tuck in kraft tissue for a garden-lover’s gift.
- Store extras flat in a stackable craft organizer until fully cured.
- For outdoor use, replace matte sealer with outdoor Mod Podge and let cure 72 hours.
- Watercolor-Style Bleed Floral Stones
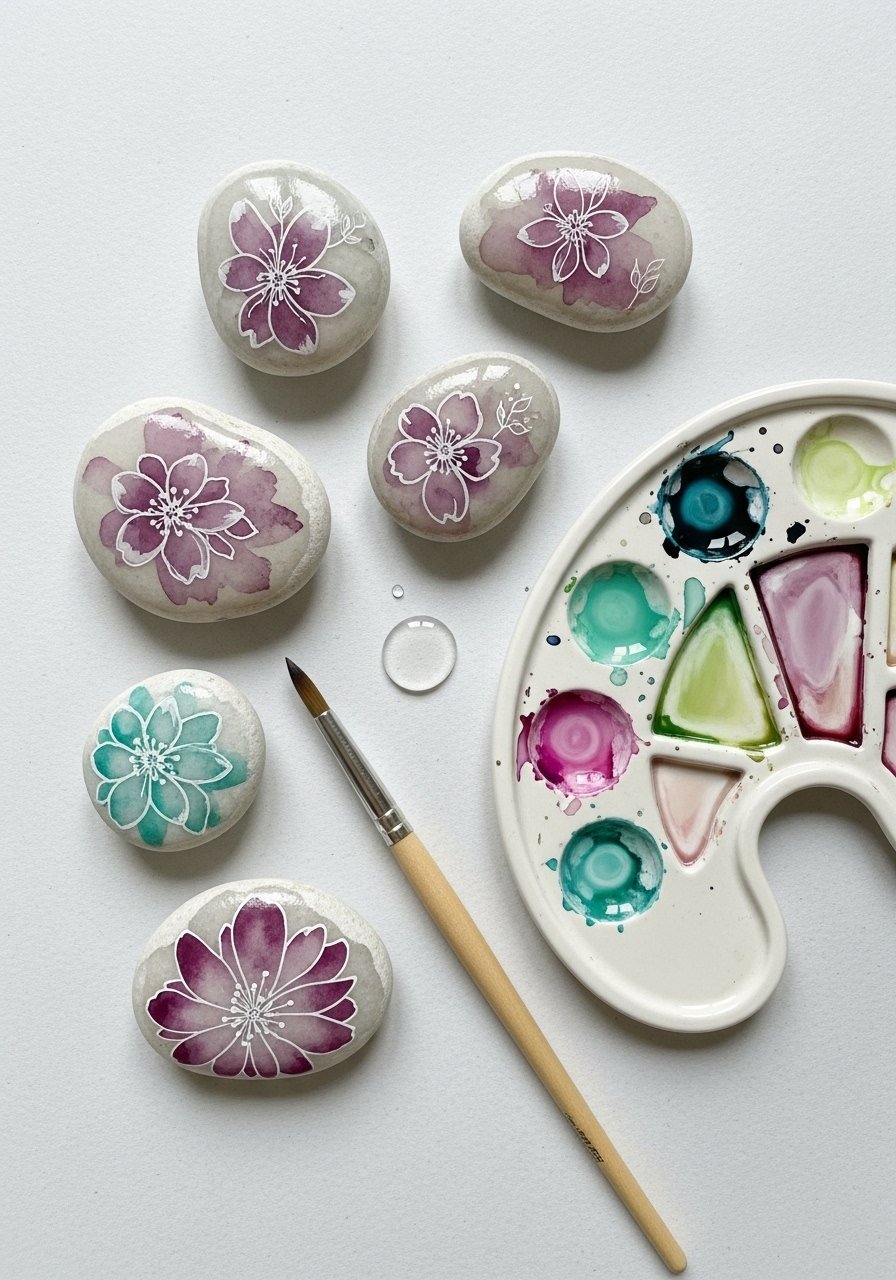
These stones mimic watercolor with diluted acrylics and a soft blending technique. The effect is ethereal—like tiny botanical paintings you can hold. Perfect for slow craft nights.
Materials
- 12 flat pebble stones (2–3 inches)
- High-flow acrylics or watered-down acrylic paints, 10–15 ml per color
- Soft round watercolor brush (size 6)
- Spray bottle with distilled water
- Palette for mixing
- Matte varnish (spray or brush-on)
- Paper towel
Instructions
- Clean stones; prime with one thin coat of white gesso. Dry 30 minutes.
- Lightly mist stone with water using spray bottle.
- Load brush with high-flow acrylic and touch the surface—colors will bleed softly.
- Layer colors while wet for soft blooms. Blot with paper towel to lift color if needed.
- Let stones dry flat 2–3 hours until paint is fully dry.
- Seal with one to two coats of matte varnish; dry 24 hours.
How to Display or Gift It
- Group in a shadowbox with dried pressed flowers for a framed piece.
- Attach a magnet to the back with E6000 adhesive for fridge art.
- Make a set of three in coordinating palettes and gift in a kraft box with tissue.
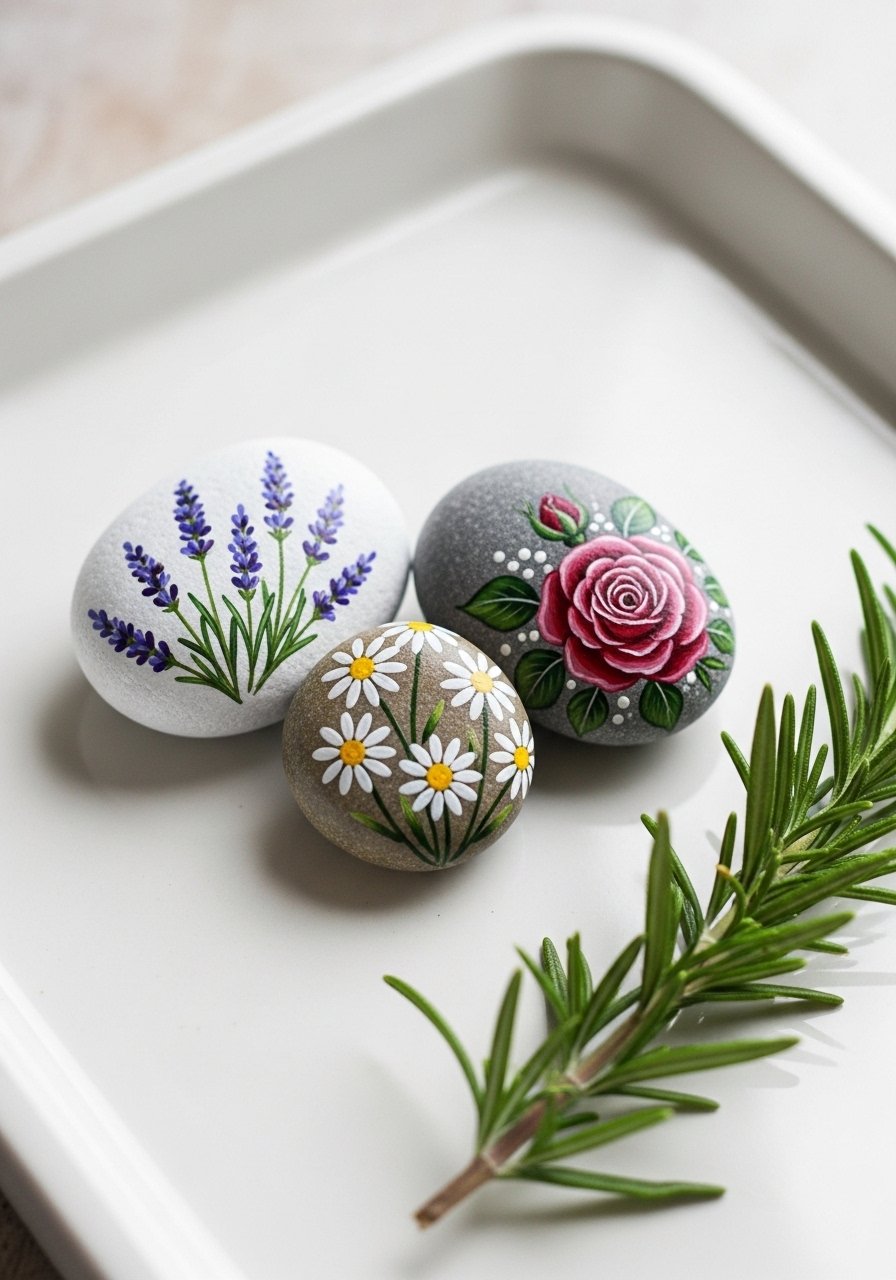
- Tiny Rosebud Accent Stones (floral stone painting ideas)

Perfect for when you want refined floral detail, these rosebud stones use fine liners and layering. They read delicate and look elegant grouped on a mantel.
Materials
- 6 smooth tumbled stones (1.5–2.5 inches)
- Acrylic paint in blush pink, rose red, sage green, and ivory
- Ultra-fine liner brush (size 00)
- Round sable detail brush
- White gesso for priming
- Gloss sealer for a soft sheen
- Toothpick for dotting
Instructions
- Prime stones with gesso; dry 30 minutes.
- Paint a soft blush base; let dry 20 minutes.
- Use liner brush to sketch a tiny spiral rosebud with rose red.
- Soften edges by lightly dragging a damp brush for a petal blur.
- Add thin twig and leaves with sage green. Touch dry 10 minutes.
- Protect with gloss sealer; apply 2 coats, 15 minutes apart. Cure 24 hours.
How to Display or Gift It
- Place single rosebud stones on spot plates or tea trays.
- Glue to small wooden easels for a mini gallery display using a small wooden easel.
- Wrap in tissue and add a sprig of dried lavender for gifting.
- Bold Boho Sunflower Pebbles
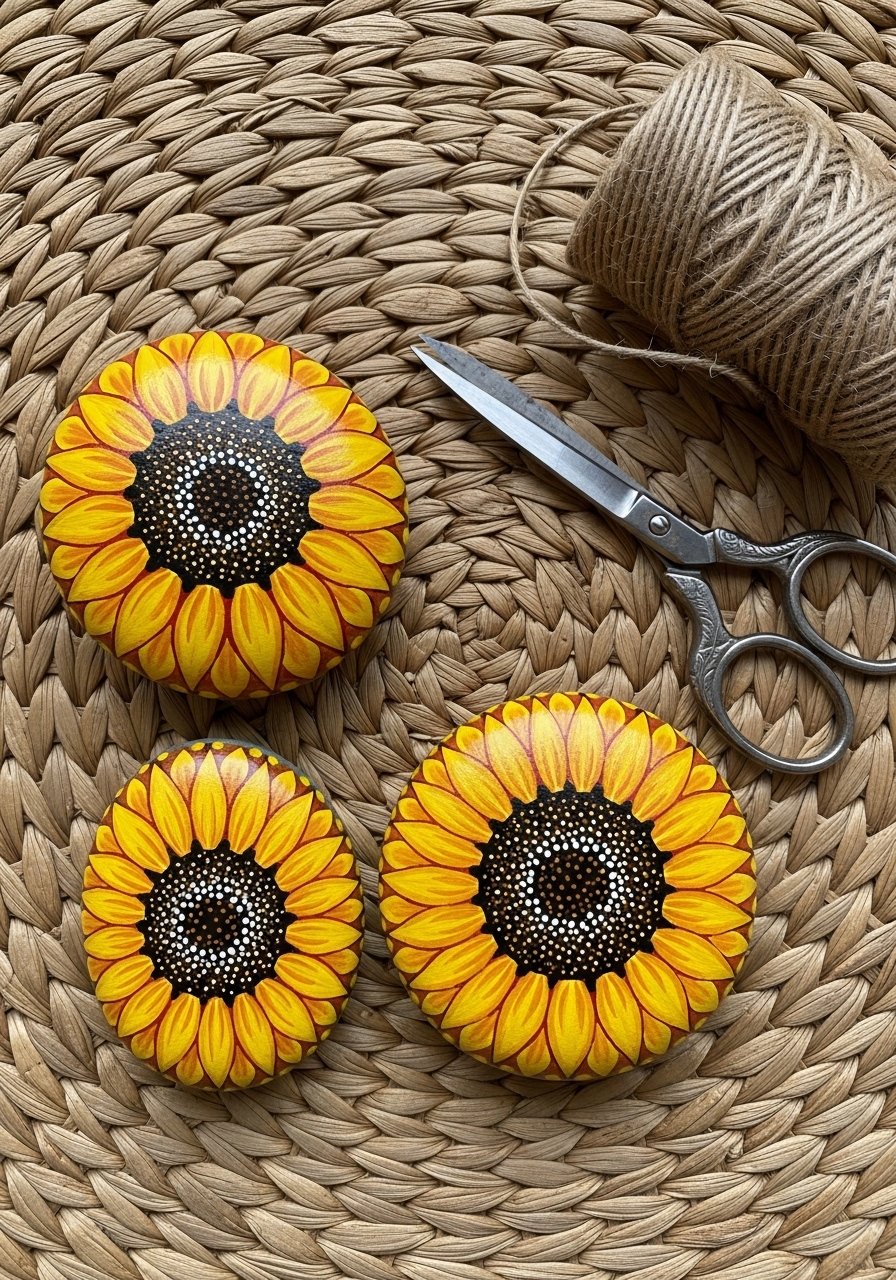
These sunflowers are bright and cheerful, with a textured dot center that adds a tactile element. Use a dotting tool for the center to keep dots uniform.
Materials
- 8 round stones (2–3 inches)
- Acrylic paints: mustard yellow, burnt orange, brown, black
- Dotting tool set (various sizes)
- Flat brush for base
- Acrylic gel medium for texture (optional)
- Gloss varnish
Instructions
- Apply base coat with flat brush; dry 30 minutes.
- Paint petal shapes with mustard yellow, layering a second coat if needed.
- Use a dotting tool to stipple a textured brown center; add small black dots for depth.
- If you want extra texture, mix acrylic gel medium into brown paint and dot again; dry 1–2 hours.
- Seal with gloss varnish 2 thin coats, 15 minutes apart. Full cure 24 hours.
How to Display or Gift It
- Arrange on a mantle with small glass bud vases.
- Affix felt pads to bases and use as paperweights.
- Bundle three together with jute and include planting seeds as a spring gift.
- Japandi Monochrome Floral Stones
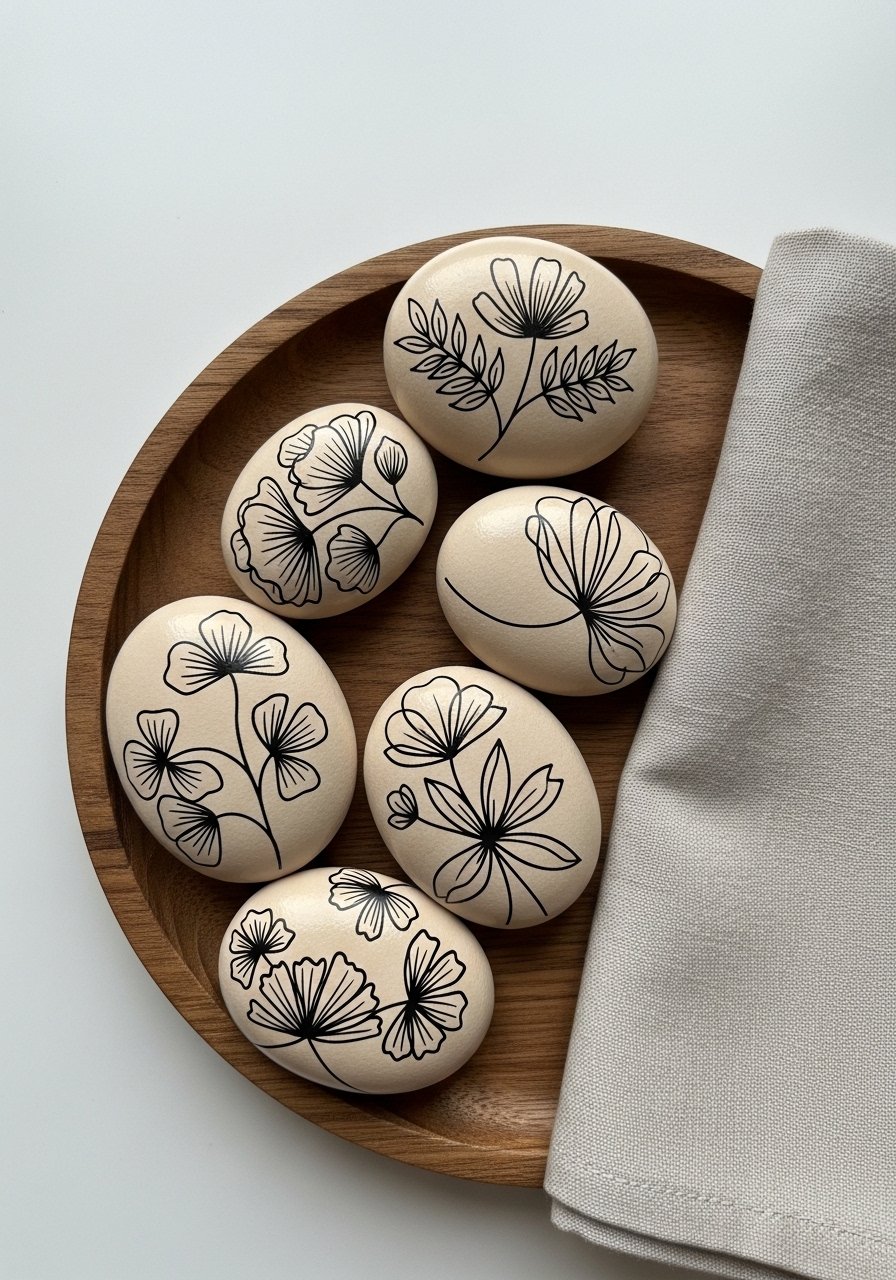
Japandi style favors restraint—simple single-line blooms on neutral bases. These stones are calming and make a subtle statement.
Materials
- 10 oval stones (2–3 inches)
- Acrylic paint in warm beige or taupe
- Black acrylic ink or paint for linework
- Fine liner brush (size 0)
- Sanding paper (220 grit)
- Matte sealer
Instructions
- Sand stones lightly to help paint adhere; wipe clean.
- Base coat with warm beige; dry 30 minutes.
- With a fine liner, draw single continuous line florals. Keep lines confident.
- If mistakes happen, sand lightly and repaint base.
- Seal with matte sealer, 2 coats, 15 minutes apart. Cure 24 hours.
How to Display or Gift It
- Line along a narrow shelf or windowsill for a minimalist vignette.
- Gift as a set wrapped in kraft paper and tied with black twine.
- Store unused pieces flat in a craft organizer drawer.
- Pressed Flower Resin Stones (floral stone painting ideas)
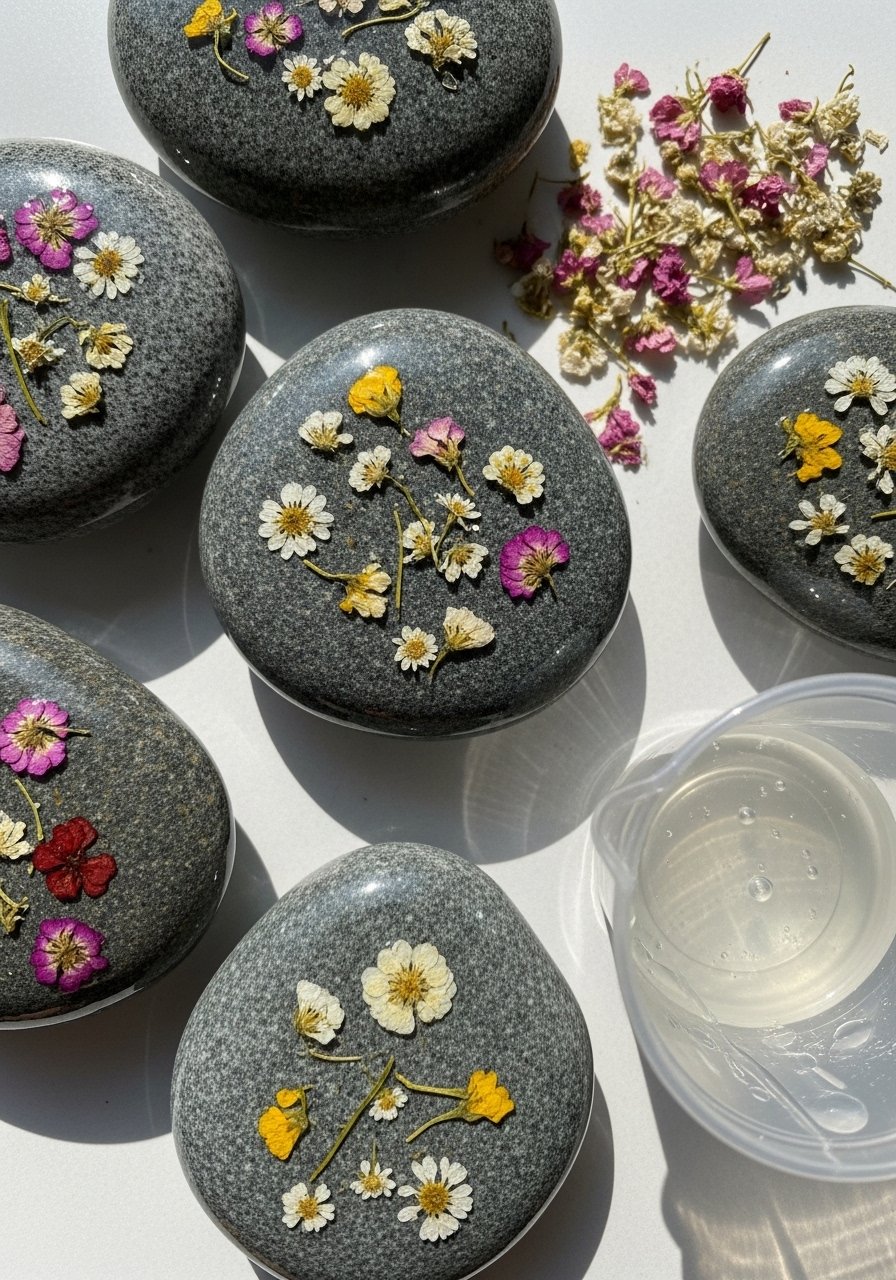
Pressed flowers under resin look like miniature preserved gardens. Use a clear epoxy resin for a glassy finish.
Materials
- 10 flat stones
- Pressed flowers (dried and flattened)
- Two-part clear epoxy resin kit (measures for small batches)
- Mixing cups and stir sticks
- Disposable gloves and silicone mat
- Small artist brush to position flowers
- Sandpaper (400 grit) for finishing
Instructions
- Clean stones and arrange flowers on dry stones to test layout.
- Mix small resin batch per manufacturer instructions. Work in a ventilated space.
- Pour a thin layer of resin 1–2 mm on stone, let tack 5–10 minutes.
- Use brush to place pressed flower gently, avoiding bubbles.
- Pour a second resin layer to fully cover; pop bubbles with a heat gun for 5 seconds.
- Cure 24–72 hours depending on resin. Sand edges if needed.
How to Display or Gift It
- Set on a small wooden easel to show resin shine.
- Wrap in tissue for a glossy gift; include care note to avoid harsh cleaners.
- For storage, keep flat and upright until resin is fully cured.
- Shabby Farmhouse Lace-Impression Stones
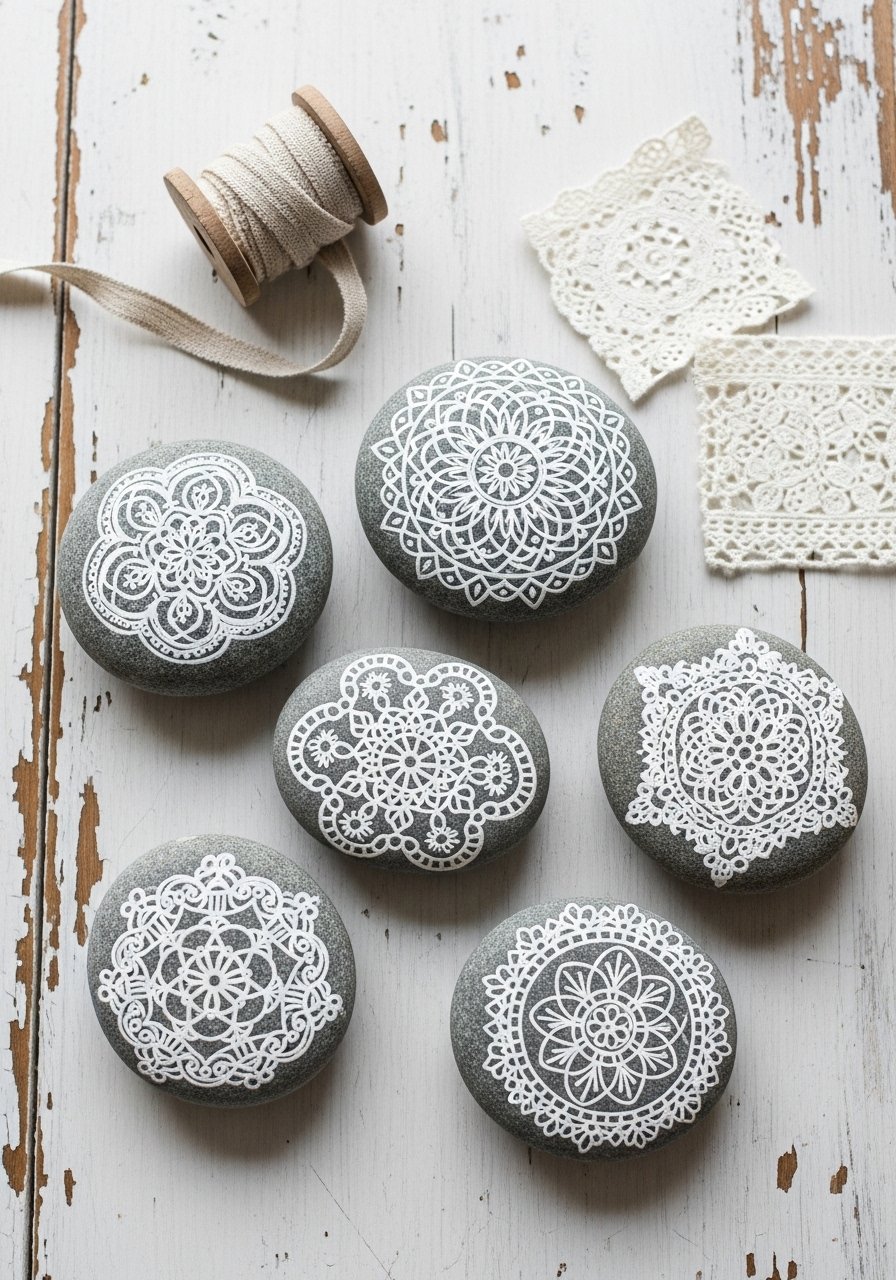
Use real lace to create textured floral impressions for a vintage farmhouse feel.
Materials
- 12 medium stones
- Fabric lace scraps
- Acrylic paint in antique white and blush
- Fabric medium (optional to soften paint)
- Stiff bristle brush
- Flat foam brush
- Matte sealer
Instructions
- Prime with antique white base; dry 30 minutes.
- Lay lace over stone and dab paint over lace with stiff brush.
- Lift lace carefully to reveal impression. Reposition for repeated patterns.
- If colors bleed, blot immediately. Let dry 1 hour.
- Seal with matte sealer 2 coats, 15 minutes apart. Cure 24 hours.
How to Display or Gift It
- Use as vase fillers or scatter on a farmhouse table.
- Tie a small set with linen ribbon and tuck in a handwritten note.
- Store lace and stones together in a compartmentalized craft organizer.
- Tiny Bouquet Cluster Stones
These stones work together as a trio—each painted to represent part of a small bouquet. They’re playful and nice to arrange in different combos.
Materials
- Set of 3 stones per bouquet
- Acrylic paints in lilac, yellow, pink, and greens
- Round detail brush (sizes 0–2)
- Toothpick or dotting tool
- Gesso
- Gloss sealer
Instructions
- Prime with gesso; base coat each stone different pastel shades. Dry 30 minutes.
- Plan bouquet composition: one stone gets stems, one gets blooms, third adds accents.
- Paint stems first, add floral shapes, then tiny center dots.
- Let dry 30 minutes, then add tiny highlight dots with white.
- Seal with gloss 2 coats and let cure 24 hours.
How to Display or Gift It
- Place as a set on a small wooden dish.
- Use as place-card holders by writing names on the underside with a paint pen.
- Pack sets into small kraft boxes for bridal shower favors.
- Vintage Postcard Transfer Floral Stones
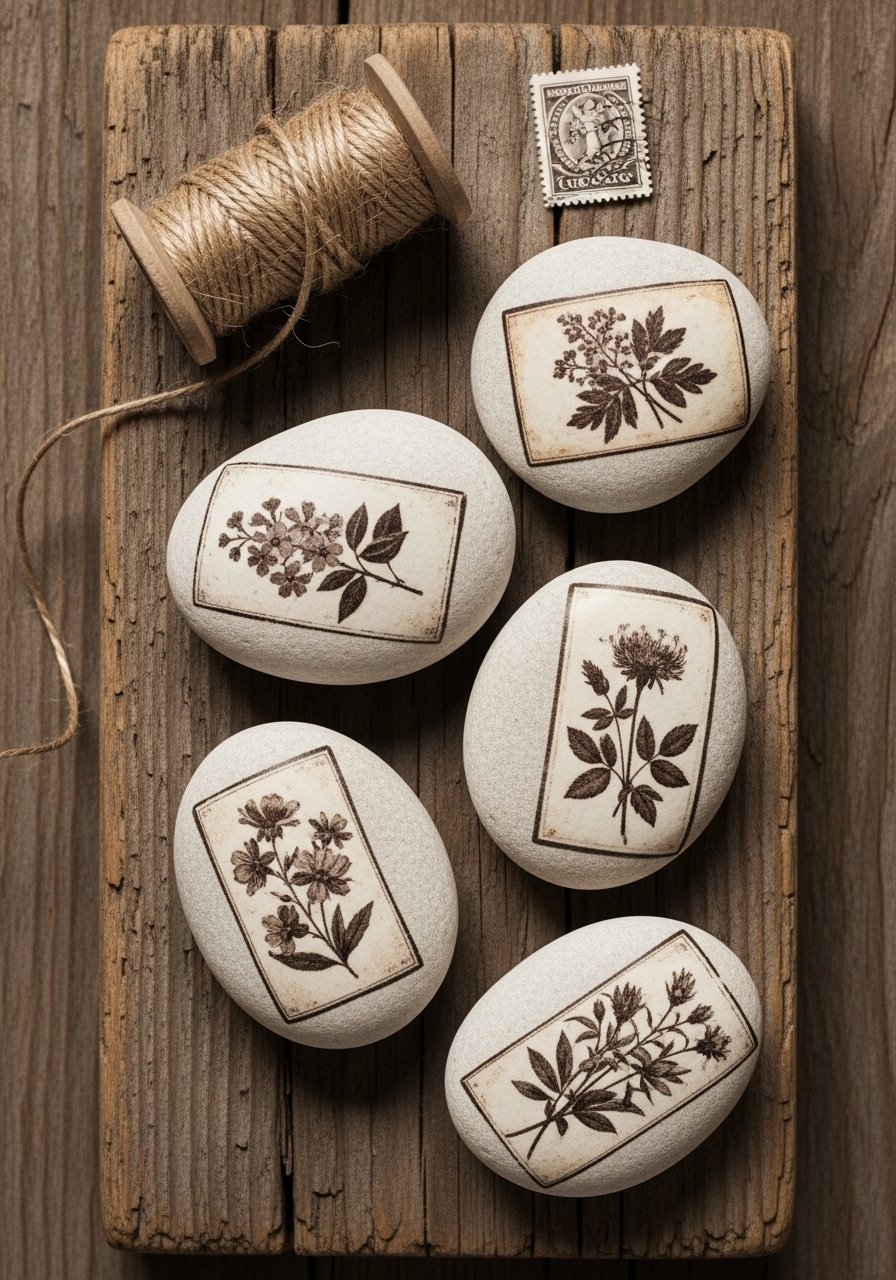
Transfer images onto stones for a nostalgic vibe. Use printed floral images and a transfer medium.
Materials
- 8 flat stones
- Laser-printed floral images reversed if needed
- Acrylic gel medium for transfers
- Foam brush
- Spray bottle for moistening paper
- Fine sandpaper
- Matte varnish
Instructions
- Apply gel medium to the stone surface and press printed side of image down. Let dry 1–2 hours.
- Dampen paper with spray bottle and gently rub to remove paper fibers, exposing image.
- Smooth with a damp cloth and let fully dry overnight.
- If rough edges, lightly sand and touch up with paint.
- Seal with matte varnish 2 coats, with 15-minute dries. Cure 24 hours.
How to Display or Gift It
- Cluster with antique frames and postcards for a vintage shelf.
- Create a set of “message stones” with short typed texts transferred.
- Store transfers flat in a shallow box until varnish cures completely.
- Metallic Edge Floral Accented Stones
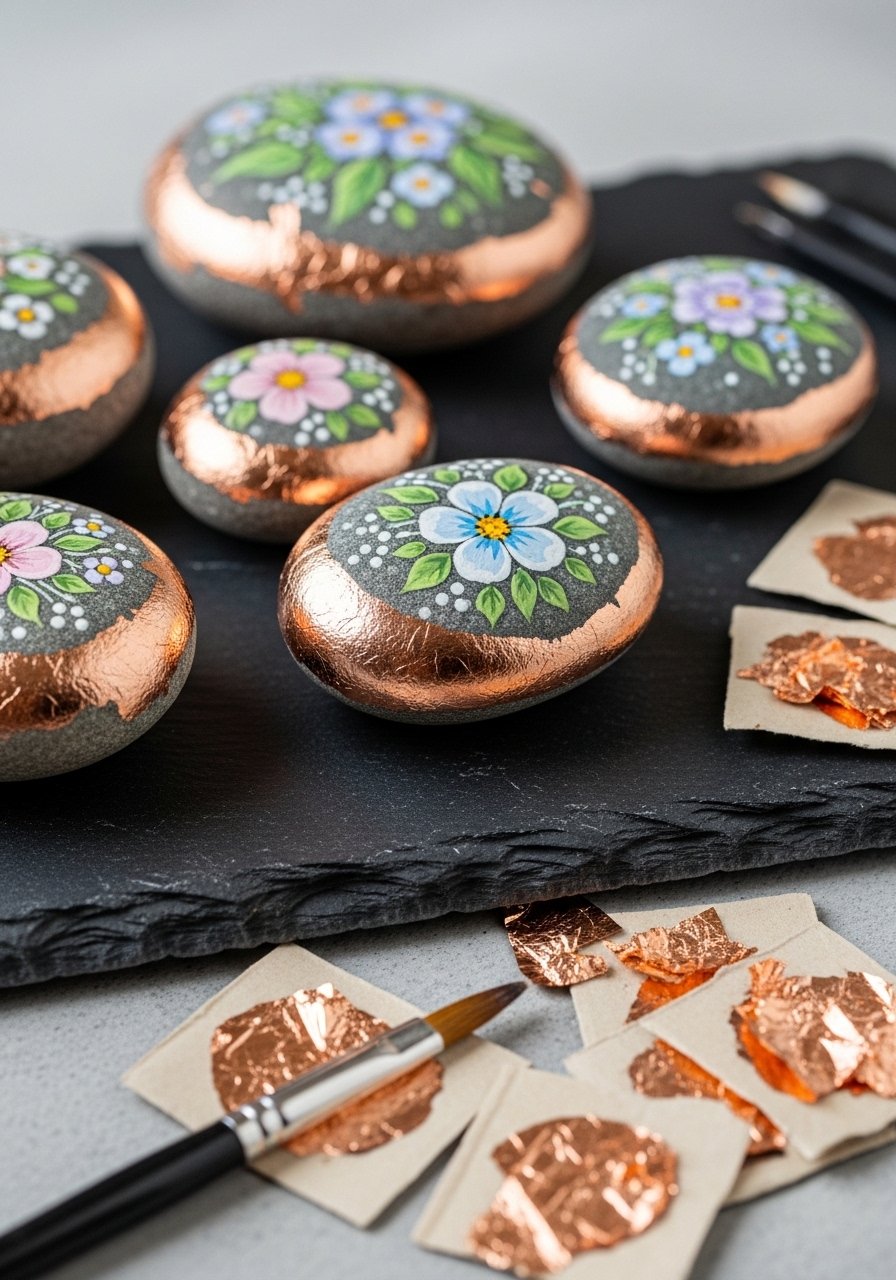
A thin metallic rim upgrades a simple floral stone. Use leafing pens or copper leaf for shine.
Materials
- 10 small stones
- Acrylic paints for florals
- Gold or copper leaf sheets or leafing pen
- Adhesive size for leaf
- Small soft brush
- Gloss sealer
Instructions
- Paint florals and let dry 30 minutes.
- Apply adhesive size to the stone edge. Wait until tacky (per product, usually 10–15 minutes).
- Press leaf gently and brush away excess with soft brush.
- Seal edges and painted face with gloss sealer 2 coats. Cure 24 hours.
How to Display or Gift It
- Place on a black slate tray to highlight metallic edges.
- Pair with small votives for a warm evening table.
- Gift wrapped in tissue that contrasts with metal (navy or charcoal).
- Pastel Ombre Floral Stones
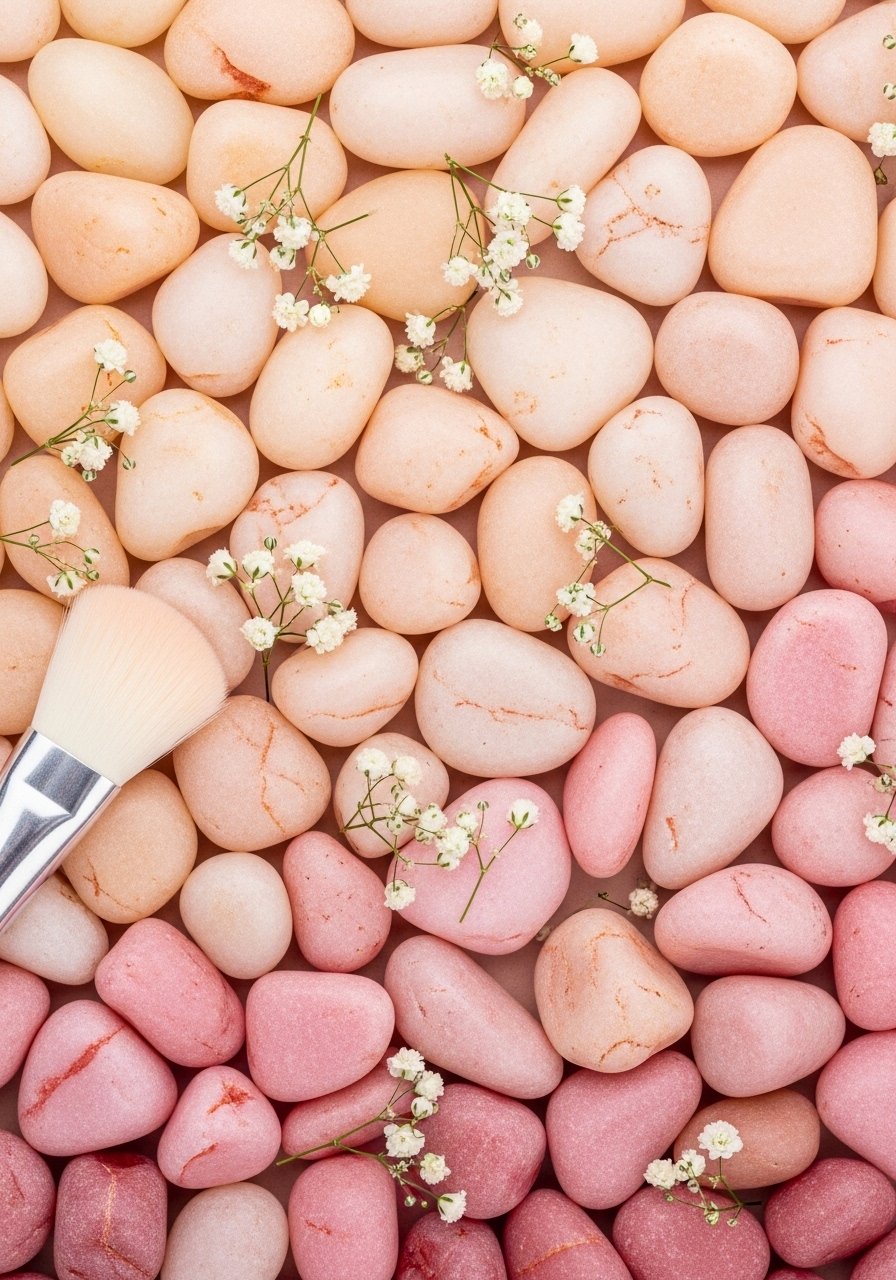
Ombre bases make delicate florals pop. Use sponges or foam brushes to blend smooth transitions.
Materials
- 12 smooth stones
- Acrylics in 3 coordinated pastels
- Foam blending sponge
- Detail brush
- Gesso
- Matte varnish
Instructions
- Prime stones then sponge first pastel at one edge.
- Clean sponge and add second color, overlapping to blend. Repeat for third color.
- Let base dry 30–60 minutes.
- Paint fine white florals on top with a detail brush.
- Seal with matte varnish 2 coats, 15 minutes apart. Cure 24 hours.
How to Display or Gift It
- Stack in a gradient on a bookshelf.
- Use as a set of colorful paperweights.
- Pack in a pastel-toned gift box for birthdays.
- Pocket-Sized Botanical Keepsakes (floral stone painting ideas)
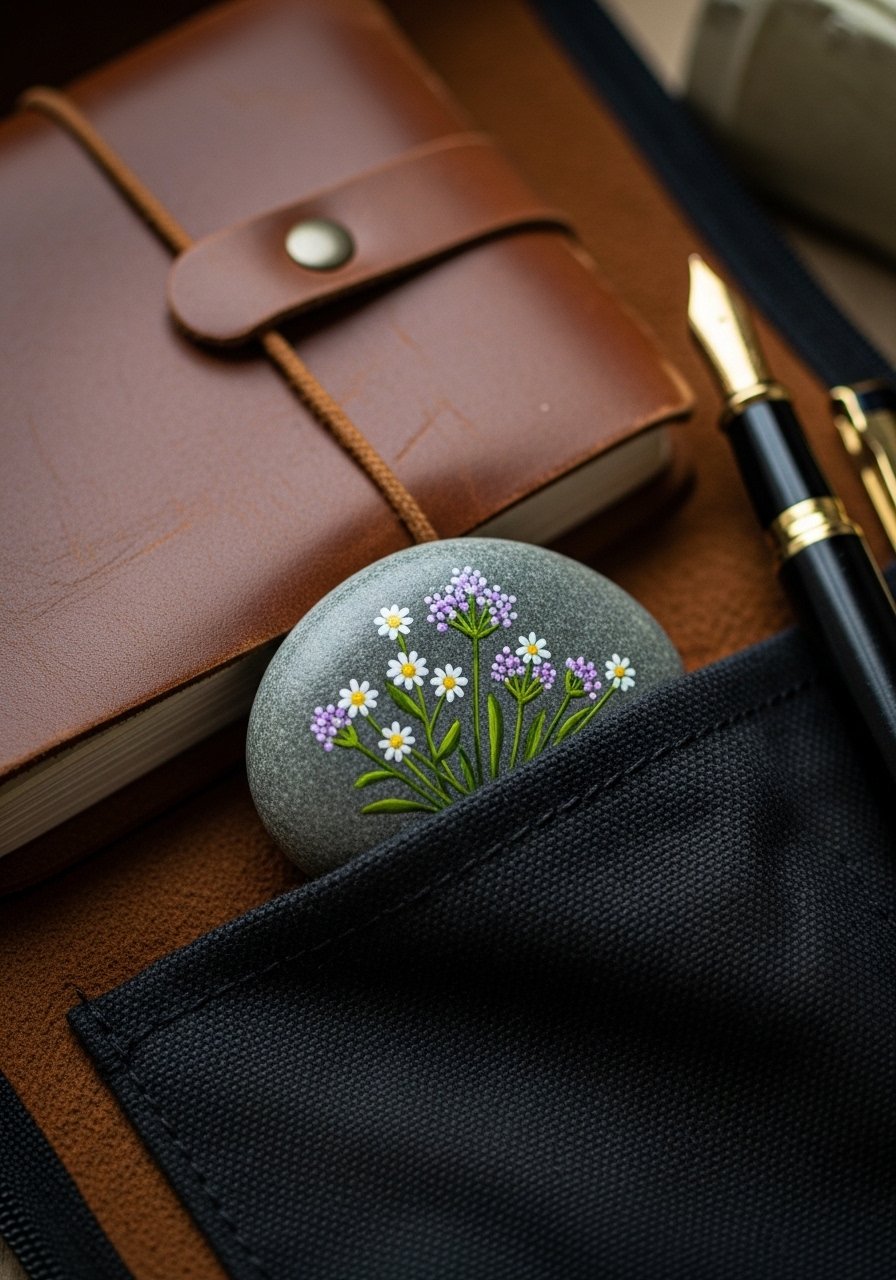
Paint tiny botanicals meant to be carried in a pocket or journal. Durable sealer keeps them safe.
Materials
- 6 pocket stones (fits palm)
- Fine brushes (sizes 0–2)
- Acrylic paints
- Gloss sealer for durability
- Small drawstring pouch for gifting
- Tweezers for handling small stones while sealing
Instructions
- Paint detailed small botanicals using reference photos.
- Let layers dry between colors (10–20 minutes).
- Protect with gloss sealer 2 coats, allowing 15 minutes between coats. Fully cure 24 hours.
- Place in a small drawstring pouch for carrying.
How to Display or Gift It
- Slip into a journal pocket as a keepsake.
- Gift as a "happy thought" token in a pocket-sized pouch.
- Store in a labeled craft organizer box when not in use.
- Garden Marker Flower Stones
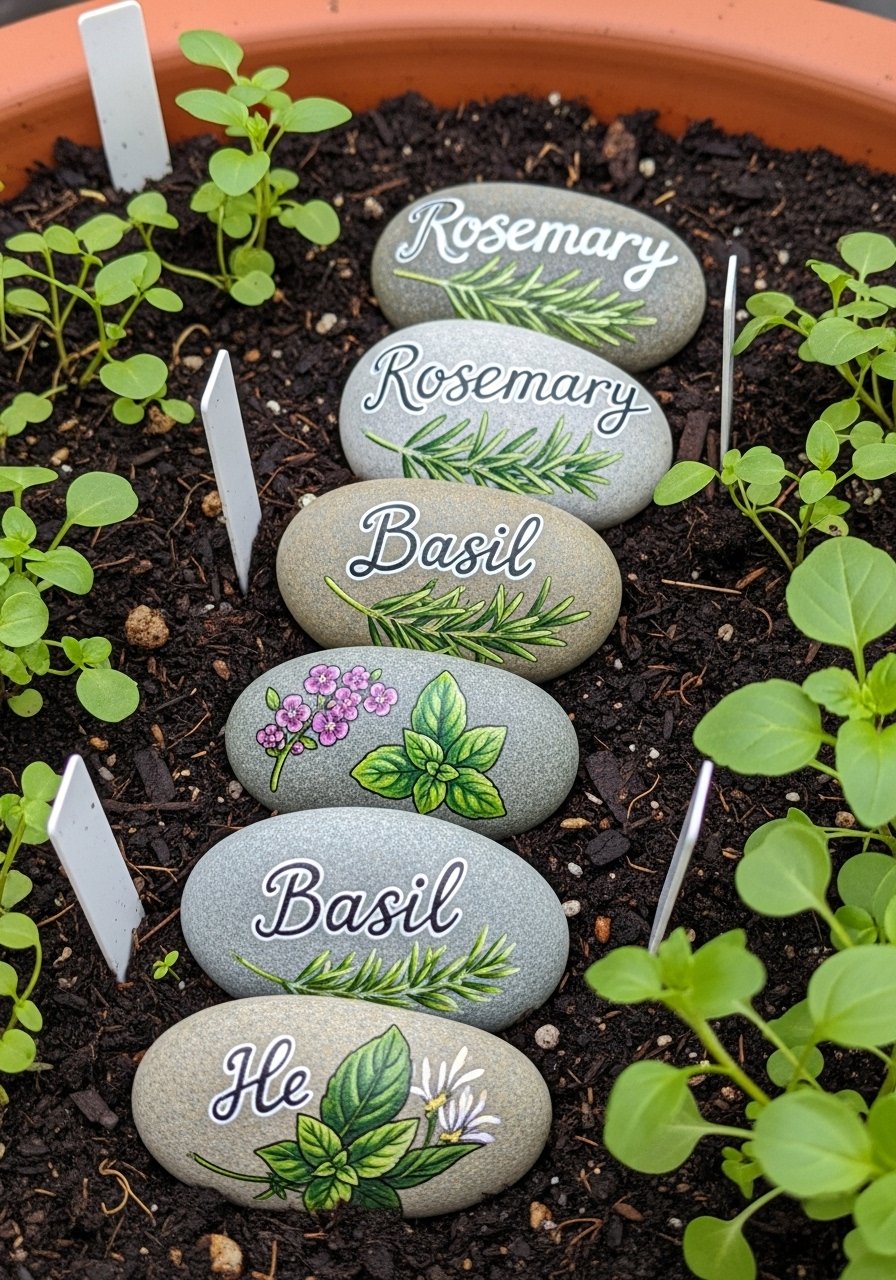
Turn painted stones into durable garden markers. Use outdoor-friendly sealers and bold lettering for legibility.
Materials
- 6 large flat stones (3–4 inches)
- Acrylic paint pens (weatherproof)
- Outdoor Mod Podge or outdoor varnish
- Small paintbrush for florals
- Clear epoxy spray (optional)
- Permanent marker (archival)
Instructions
- Paint a simple floral on one side and plant name in bold letters on the other.
- Allow paint to dry 24 hours for best adhesion.
- Coat with outdoor sealer; allow cure 72 hours before burying outdoors.
- Reapply sealer yearly for outdoor exposure.
How to Display or Gift It
- Insert into potted herbs or vegetable beds.
- Gift as a starter set with small seed packets.
- Store spare markers in a garden tool organizer between seasons.
- Moroccan Tile Inspired Floral Stones
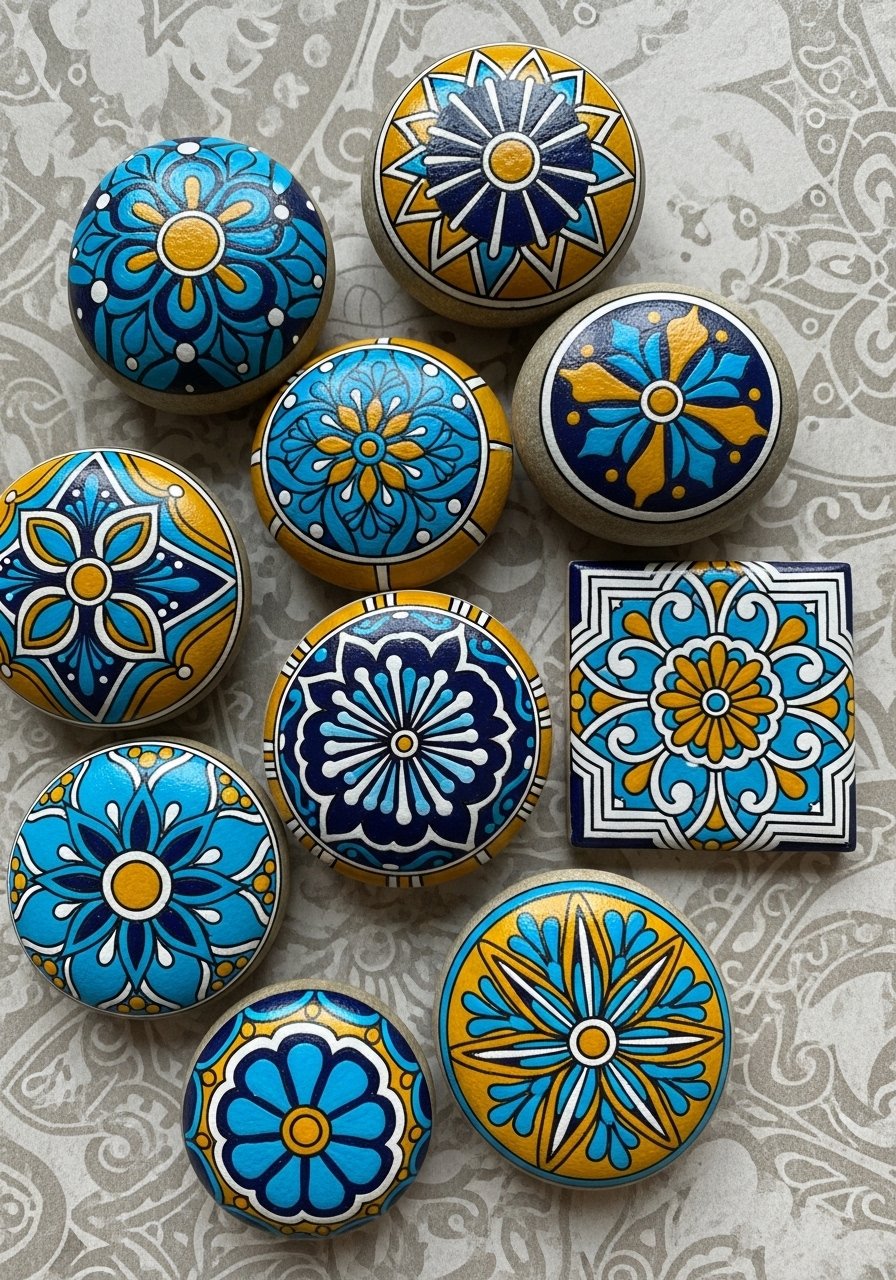
Mix florals with geometry for a Moroccan tile vibe. Templates or a steady hand give best results.
Materials
- 9 medium stones
- Acrylic paints in turquoise, navy, mustard, white
- Fine liner brush
- Stencil (optional)
- Gesso
- Gloss sealer
Instructions
- Prime stones then block in geometric background shapes. Dry 30 minutes.
- Use stencil or freehand to add floral motifs with a fine liner brush.
- Clean edges with a small damp brush.
- Seal with gloss sealer 2 coats. Cure 24 hours.
How to Display or Gift It
- Arrange like tiles on a tray or adhesive museum putty on a wall.
- Pair with Moroccan textiles for a themed gift package.
- Keep wrapped in fabric inside a shallow box for transport.
- Pebble Magnets with Floral Faces
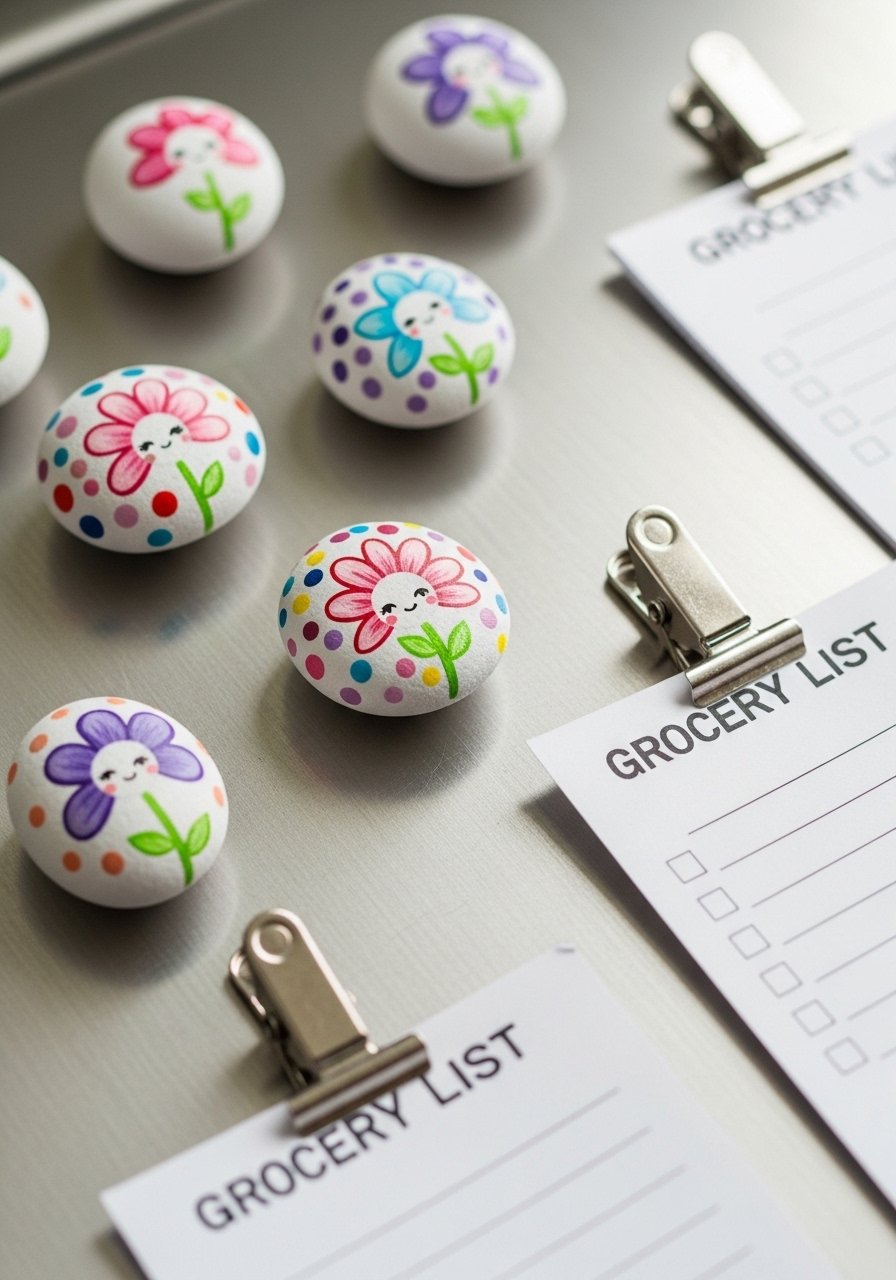
Add magnets to the back and display on the fridge. Use strong disc magnets and an industrial adhesive.
Materials
- Small pebbles (1–2 inches)
- Acrylic paints
- Small disc magnets
- E6000 adhesive for bonding
- Detail brush
- Matte sealer
Instructions
- Paint florals and dry 30 minutes.
- Glue magnet on back with E6000 and let set 24 hours.
- Seal the painted face with matte sealer 2 coats, fully cure 24 hours.
How to Display or Gift It
- Stick to the fridge as a functional art set.
- Package as a set of six in a small kraft box for hostess gifts.
- Store magnets in a labeled compartment box to avoid loss.
- Alcohol Ink Marbled Floral Stones
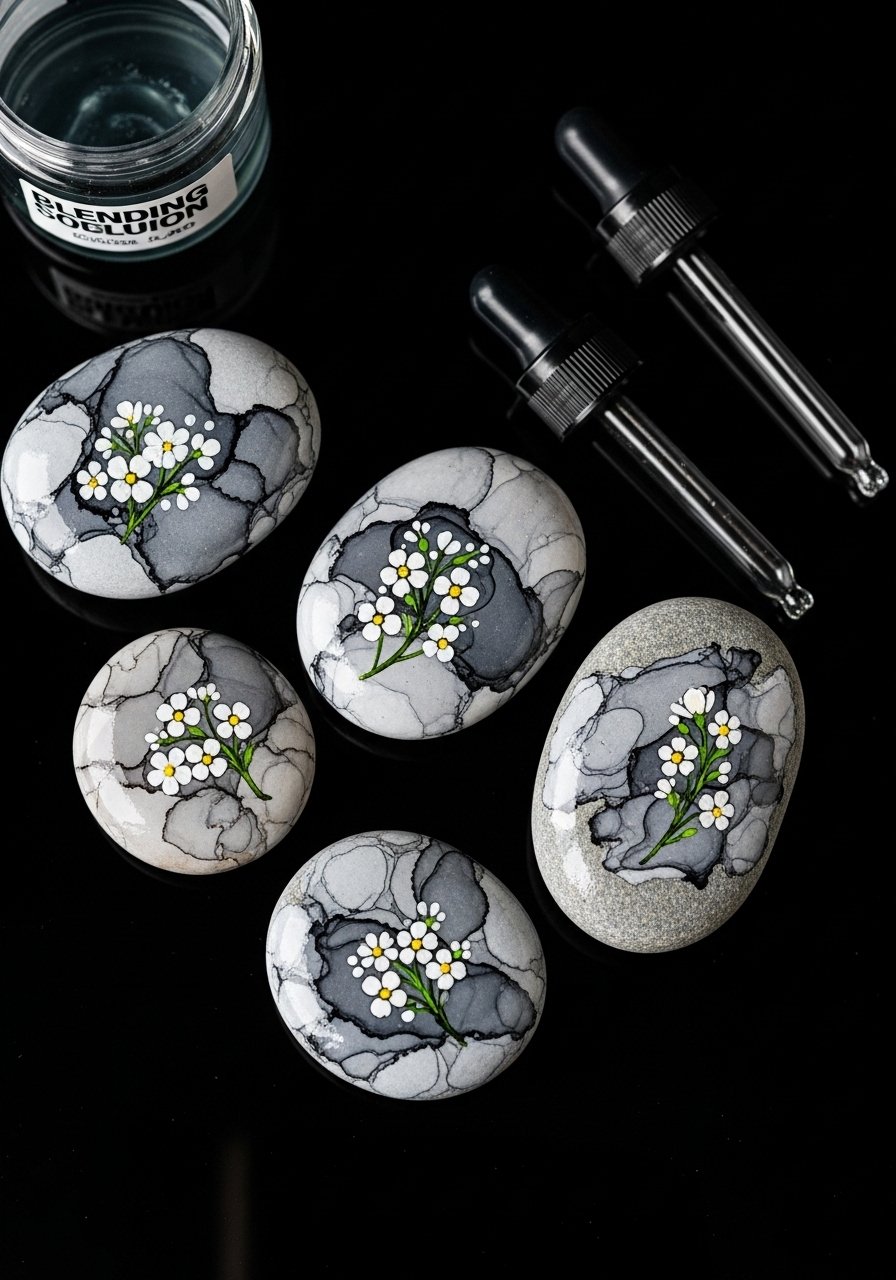
Alcohol inks give vibrant, flowing backgrounds perfect for adding simple white florals on top.
Materials
- Flat stones
- Alcohol ink set
- Isopropyl alcohol and blending solution
- Dropper pipettes
- White acrylic ink or paint pen
- Nitrile gloves
- Gloss resin or varnish for sealing
Instructions
- Work on a glossy surface; apply drops of alcohol ink and tilt stone to move color.
- Once background is fully dry (5–20 minutes), paint small white florals.
- Protect with a gloss resin or spray varnish. Resin cure 24–48 hours.
How to Display or Gift It
- Display on black slate to enhance color.
- Wrap carefully in tissue and foam for shipping.
- Store in a ventilated box to avoid resin fumes lingering.
- Chalkboard Floral Pebbles for Notes
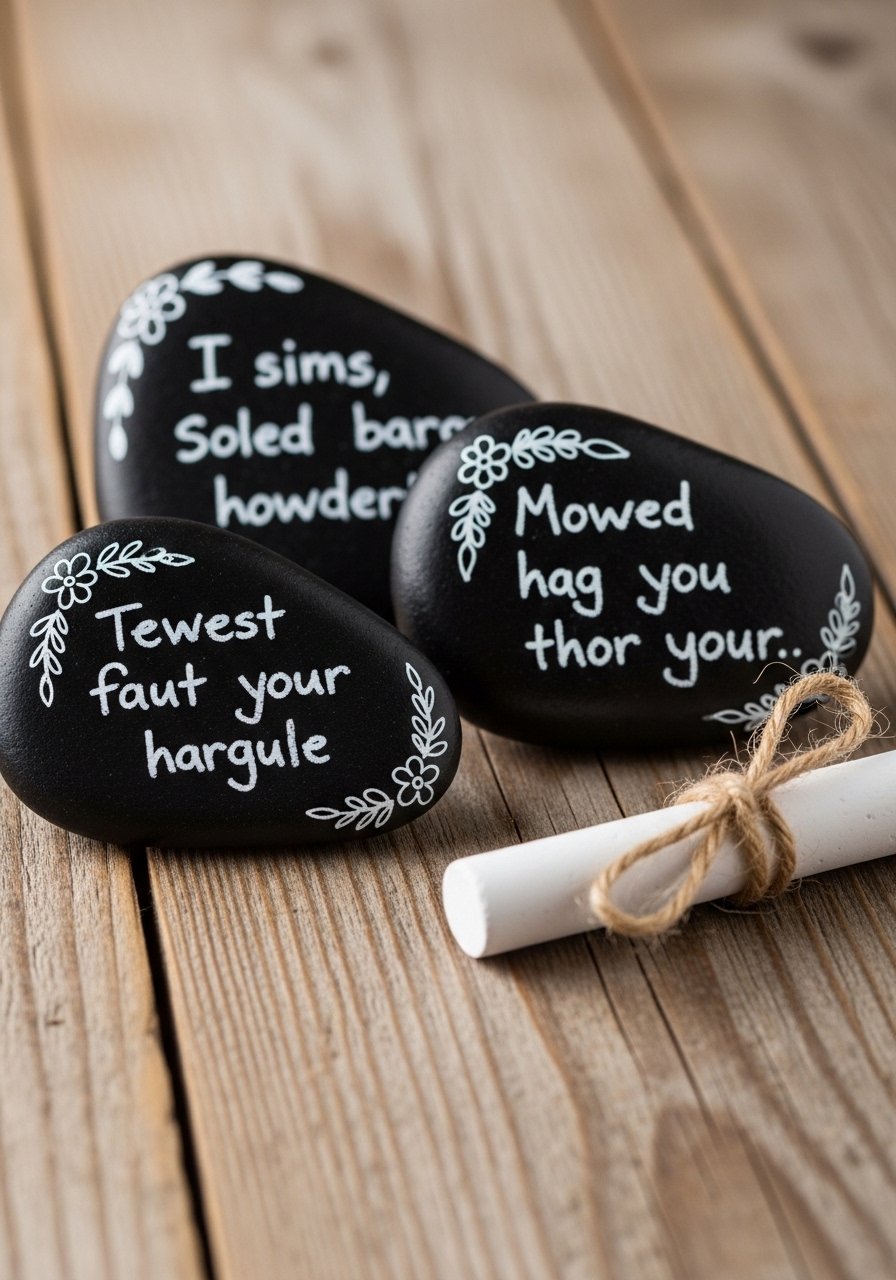
Chalkboard paint turns stones into erasable message stones with floral corners for charm.
Materials
- 12 stones
- Chalkboard paint
- Acrylic paints for corner florals
- Chalk markers
- Foam brush
- Matte sealer (optional for florals)
Instructions
- Apply two thin coats of chalkboard paint; dry 30 minutes between coats.
- Paint small floral corners in acrylic; dry 15 minutes and seal those areas if desired.
- Let chalkboard cure 24–48 hours before writing.
- Wipe with damp cloth to erase.
How to Display or Gift It
- Keep in the kitchen for quick notes or reminders.
- Bind three with twine for a rustic note set.
- Store in a small basket by the door.
- Layered Gouache Floral Stones
Gouache gives an opaque, painterly finish different from acrylics. Great for subtle matte florals.
Materials
- 10 flat stones
- Gouache paint set
- Synthetic round brushes
- Gesso for priming
- Matte fixative spray
- Water cup and palette
Instructions
- Prime stones with gesso; let dry 30 minutes.
- Paint floral shapes with gouache, layering opaque colors. Gouache reactivates with water—work carefully.
- Allow to dry fully 1–2 hours.
- Mist with matte fixative to protect. Cure 24 hours.
How to Display or Gift It
- Display on a watercolor-blocked frame for artistically themed decor.
- Gift with a small envelope of gouache samples.
- Keep pieces flat and covered until fixative fully cures.
- Geode Floral Accent Stones
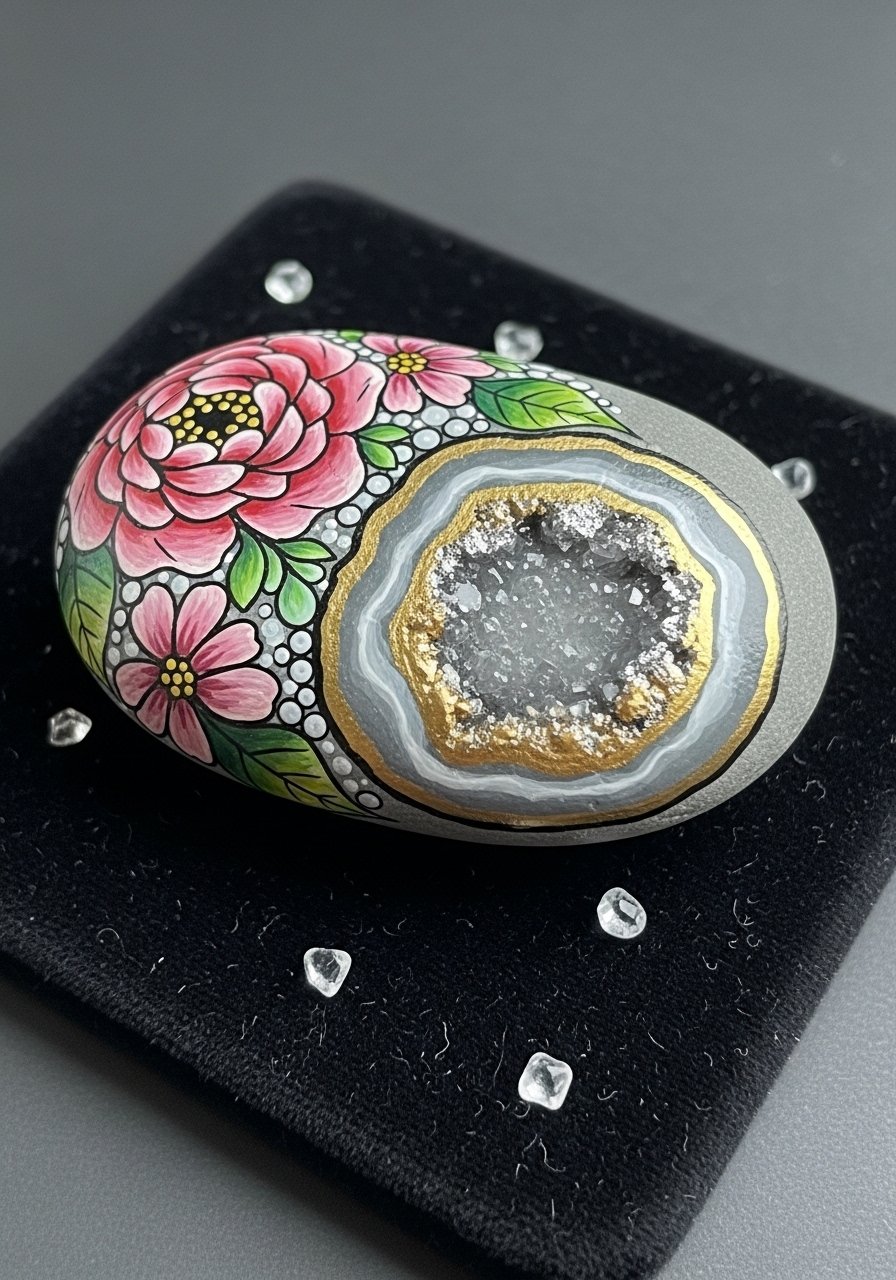
Combine florals with a faux geode edge for something modern and luxe. Use metallic paints sparingly.
Materials
- 8 medium stones
- Acrylic metallic paints (gold, rose gold)
- Fine liner brushes
- Acrylic stones or mica powder (optional)
- Gloss varnish
- Adhesive for mica
Instructions
- Paint floral composition and allow to dry 30 minutes.
- Add geode slice edge with metallics and mica powder; fix with adhesive if using loose mica.
- Seal with gloss varnish 2 coats, cure 24 hours.
How to Display or Gift It
- Mix with small crystal clusters in a display bowl.
- Gift with a small card explaining stone inspiration.
- Store with padding to protect metallic finish.
- Painted Heart Garden Stones for Weddings
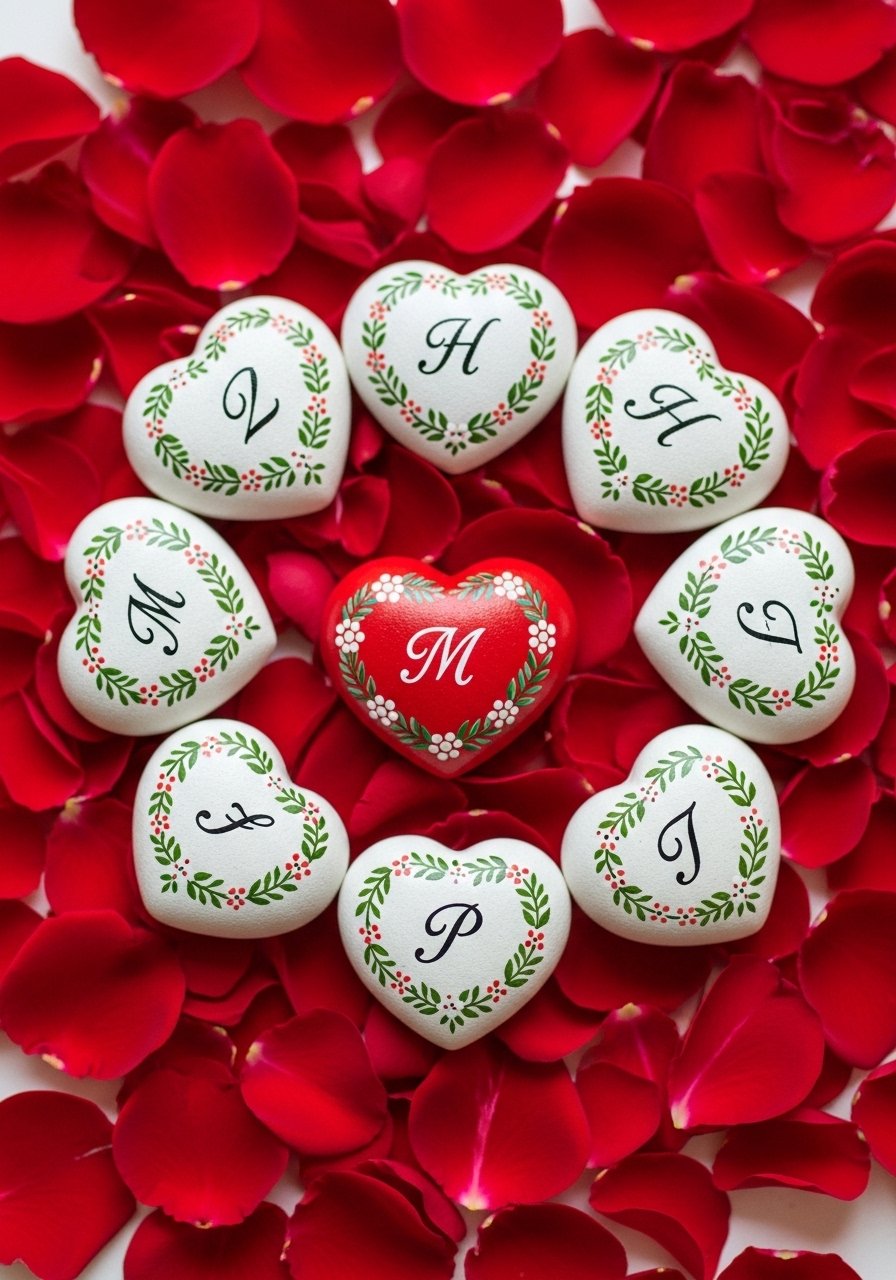
These heart stones make sweet wedding favors or guestbook alternatives. Paint initials and tiny floral wreaths.
Materials
- 12 heart-shaped stones
- Acrylic paints in blush, white, green
- Fine liner brush
- Paint pen for initials
- Small organza gift bags
- Matte varnish
Instructions
- Base coat heart stones and let dry 30 minutes.
- Paint tiny wreaths with sage leaves and dot tiny flowers.
- Add initials with paint pen; allow to dry 20 minutes.
- Seal with matte varnish 2 coats. Cure 24 hours.
How to Display or Gift It
- Place at each guest seat as a favor.
- Collect in a decorative bowl for guests to sign on the back.
- Store in organza bags for easy distribution.
- Pint-Sized Floral Coasters (set of 4)
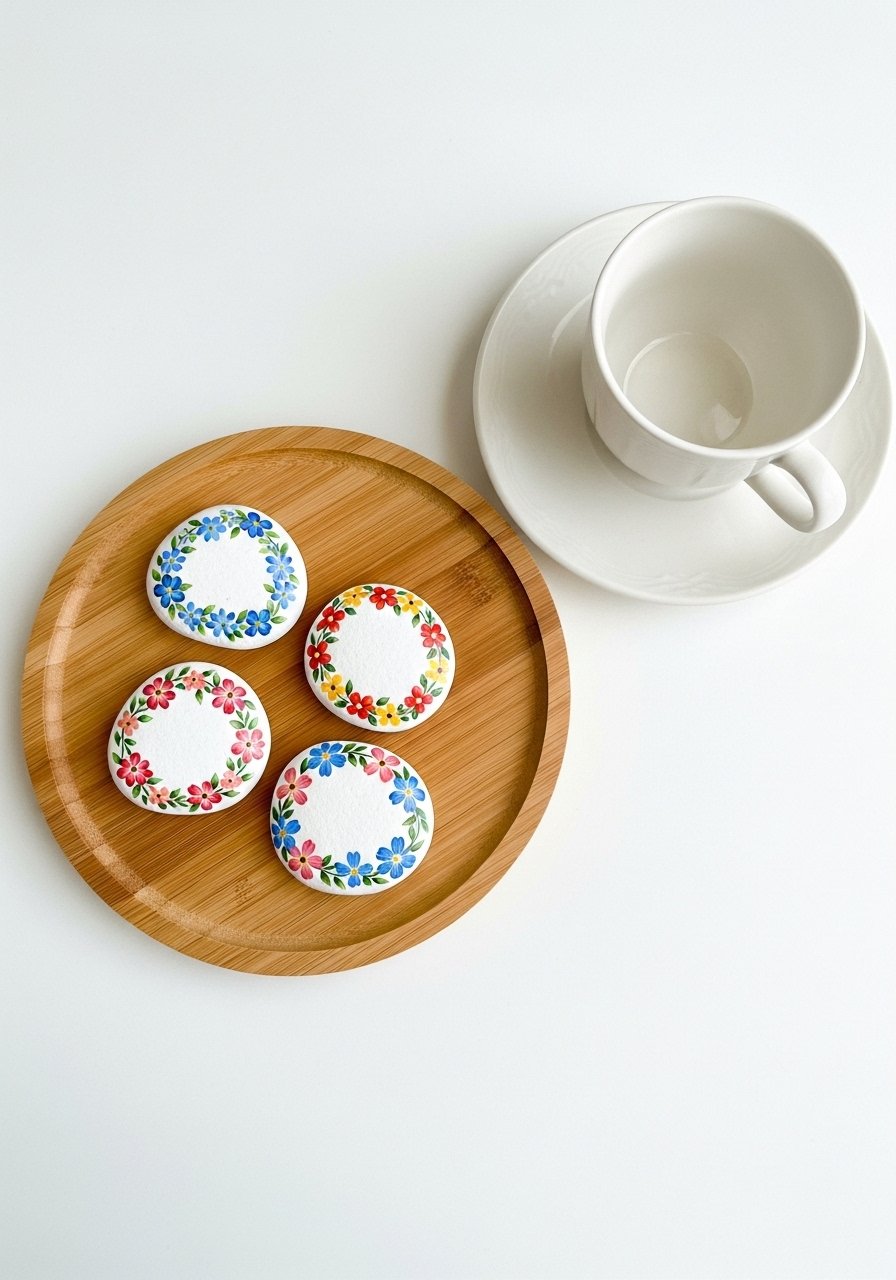
Turn 4 larger flat stones into a coaster set with protective seal and felt pads on the bottoms.
Materials
- 4 flat stones (4 inches)
- Acrylic paints
- Felt pads for bases
- Food-safe resin or heavy-duty varnish for sealing
- Round brushes
- Tape for edge masking (optional)
Instructions
- Paint coordinating florals on each coaster; dry 1 hour.
- Apply resin per manufacturer directions for food-safe finish; cure 24–72 hours.
- Stick felt pads on bottom corners for surface protection.
- Store flat until resin is fully cured.
How to Display or Gift It
- Stack and wrap with ribbon as a housewarming gift.
- Show on a tea cart or coffee table.
- Keep in a coaster holder when not in use.
- Midnight Garden Nightlight Stones
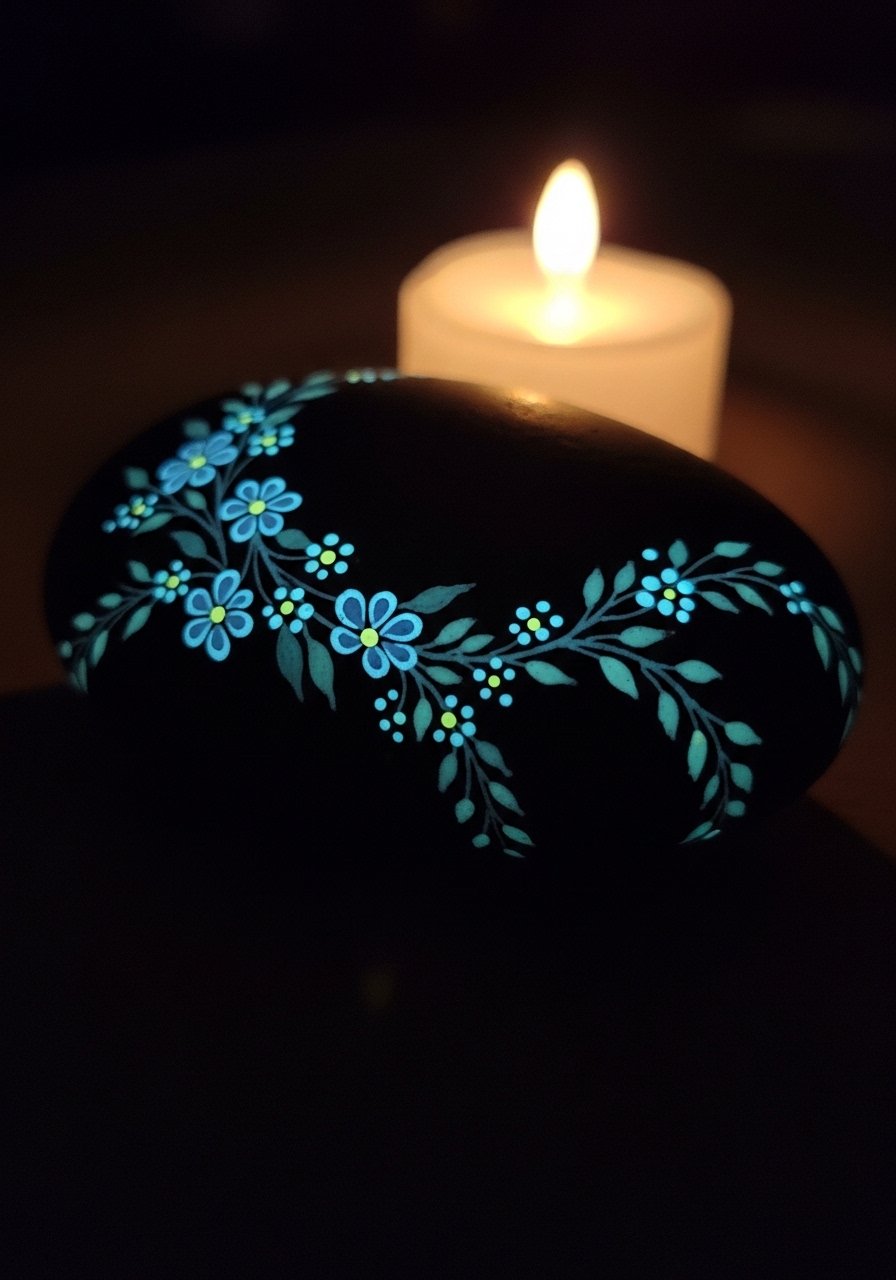
Use glow-in-the-dark paint for subtle nighttime accents. These stones look magical on a bedside table.
Materials
- 6 medium stones
- Acrylic base paints in dark blue or charcoal
- Glow-in-the-dark acrylic paint
- Small round brushes
- Matte varnish
- Battery tealight (for pairing)
Instructions
- Paint dark base coat and let dry 30 minutes.
- Add floral accents with glow paint; allow to charge under a lamp for 10–15 minutes.
- Seal with matte varnish 2 coats, careful not to dull glow paint—test with small section first.
- Place near a battery tealight for added ambiance.
How to Display or Gift It
- Tuck by a bedside lamp or on a nursery shelf.
- Pair with a battery tealight and gift in a small box.
- Store away from direct sunlight to preserve glow paint longevity.
I’m so glad you stuck through this collection—22 very different floral stone painting ideas that range from quick daisy paint nights to resin-encased pressed-flower keepsakes. Try a few styles that match your home’s aesthetic—cottagecore daisies, Japandi single-line botanicals, or bold boho sunflowers. Pin this list for later and pick one project to try this weekend. Which one will you paint first?
If you’ll be painting multiple stones, trust a quality hot glue gun with temperature control for attaching magnets or easel bits—it speeds assembly and reduces stringing. Share your favorite finished stones with friends or use them as small gifts that feel thoughtful and handmade.


