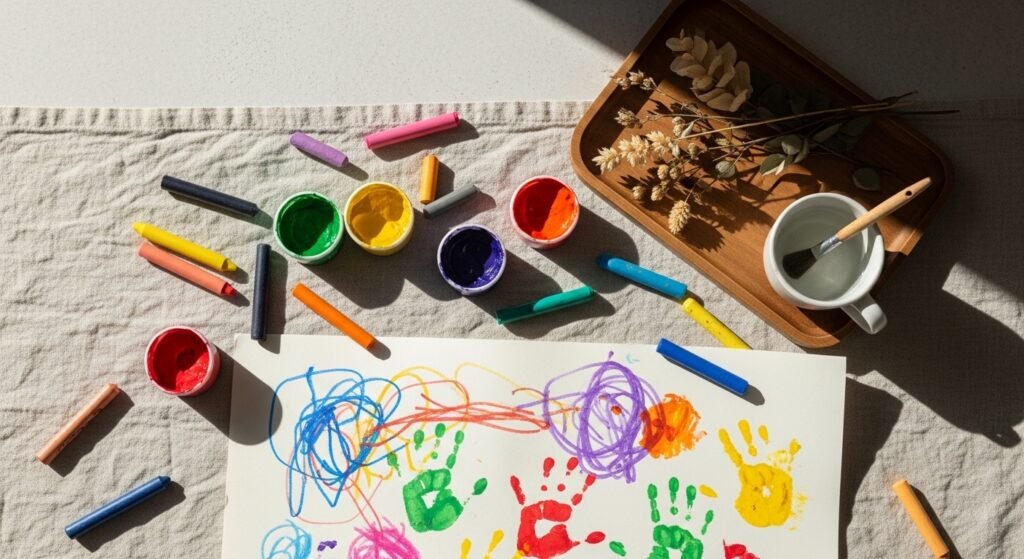
Toddlers are tiny tornadoes of color, texture, and joy — and you probably want drawing ideas for toddlers that feel simple, safe, and actually fun to set up. These 21 projects are built for sticky fingers, short attention spans, and big creative hearts. You'll find ideas that use washable paints, jumbo crayons, dot markers, and lots of sensory-friendly techniques so the mess is manageable and the results are frame-worthy.
Each project includes exact materials, step-by-step instructions, drying times, and easy display or gifting tips. I often keep a pack of Crayola Washable Kids’ Paints and a set of Melissa & Doug Jumbo Crayons on hand — they make every toddler art session calmer and more colorful. Ready for playful, low-stress drawing ideas for toddlers that fit tiny hands and big imaginations? Let’s go.
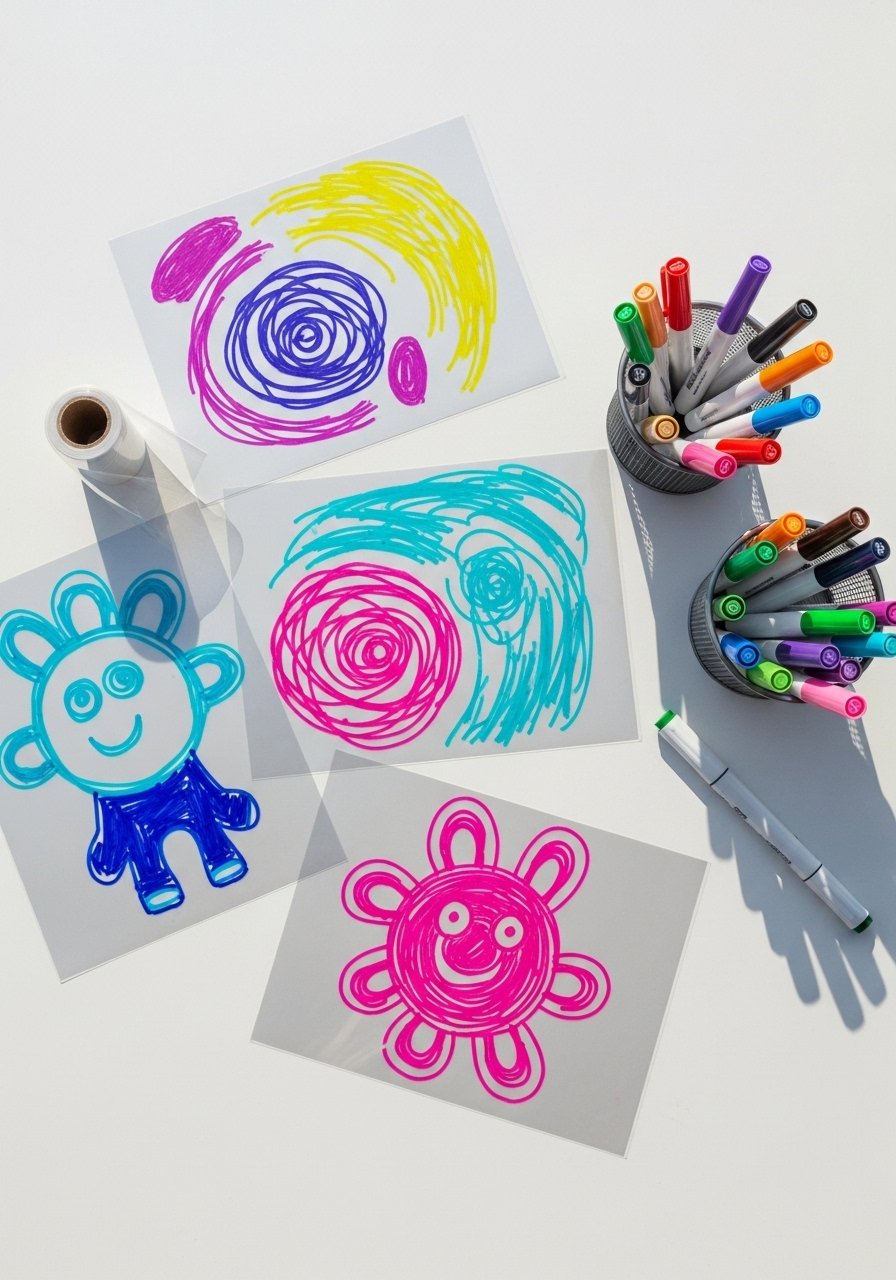
1. Scribble-to-Picture Jumbo Crayon Art
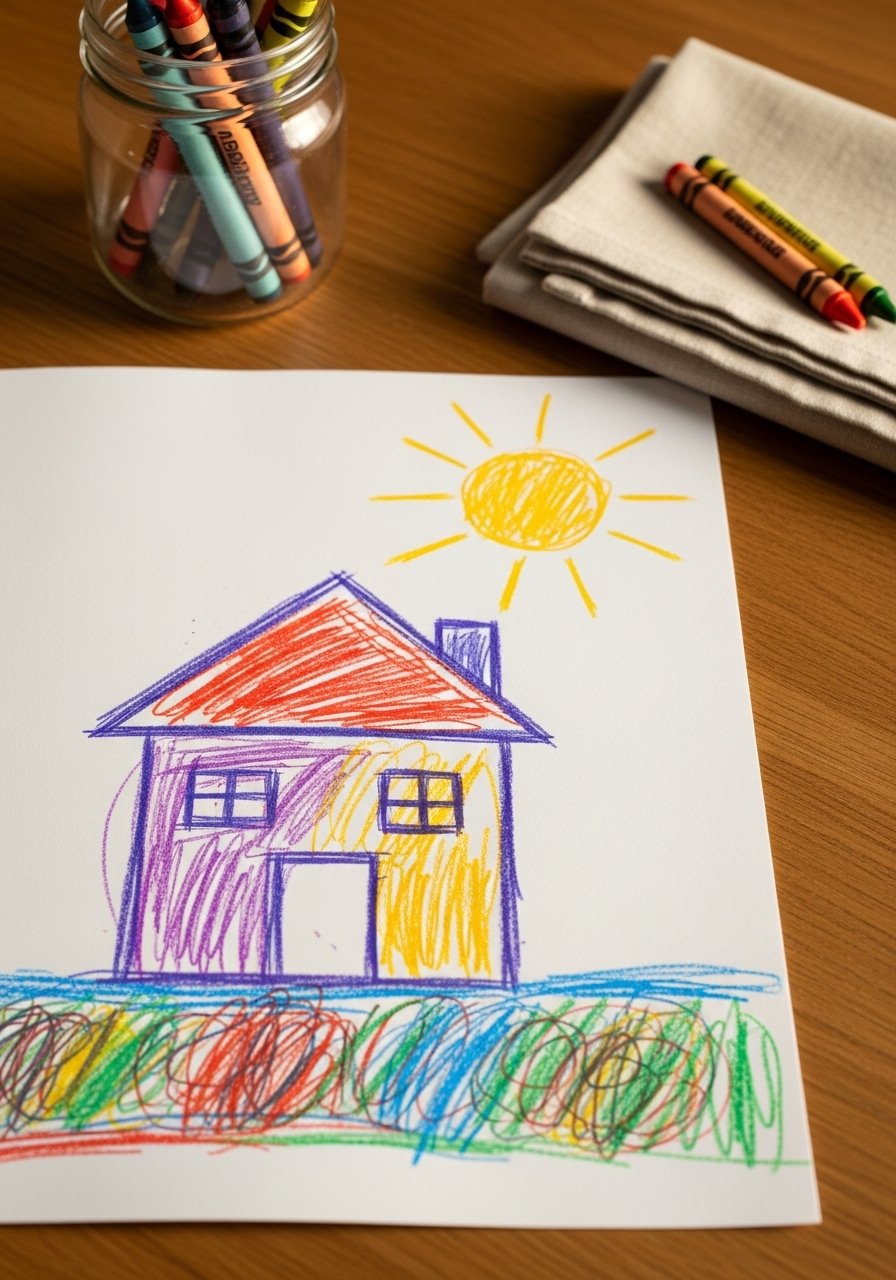
This takes a toddler's energetic scribble and turns it into something sweet and recognizable. You’ll love how a few guided strokes make a scribble feel intentional. The texture stays thick and waxy thanks to jumbo crayons, which are perfect for tiny grips and bold color.
Materials
- 1 pad of 9" x 12" heavyweight drawing paper (25 sheets)
- 12-pack jumbo crayons (e.g., Melissa & Doug) — 1 pack
- Washable black marker (for outlining) — 1
- Painter’s tape (for holding paper) — 1 roll
- Small sponge or cloth for quick cleanups — 1
- Optional: sticker eyes or foam shapes — 1 pack
Instructions
- Tape a sheet of drawing paper to the table edges with painter’s tape so it won’t move.
- Let your toddler scribble freely with jumbo crayons for 3–5 minutes.
- Look for big shapes in the scribble together (a round sun, a hill, a cloud).
- Use a crayon or washable marker to trace over those shapes and turn them into a house, animal, or flower.
- Add simple details like windows or a smile. Keep lines bold — toddlers love bold.
- Remove tape carefully. If wax smears, wipe with a cool damp cloth.
How to Display or Gift It
- Frame single sheets in lightweight frames or display them on a small wooden easel for a playroom shelf.
- Tie a stack with twine and tuck in a dried sprig for a simple handmade gift.
- Store extra sheets flat in a clear craft organizer until you’re ready to display.
2. Edible Yogurt Finger Paints (Tot-Safe)
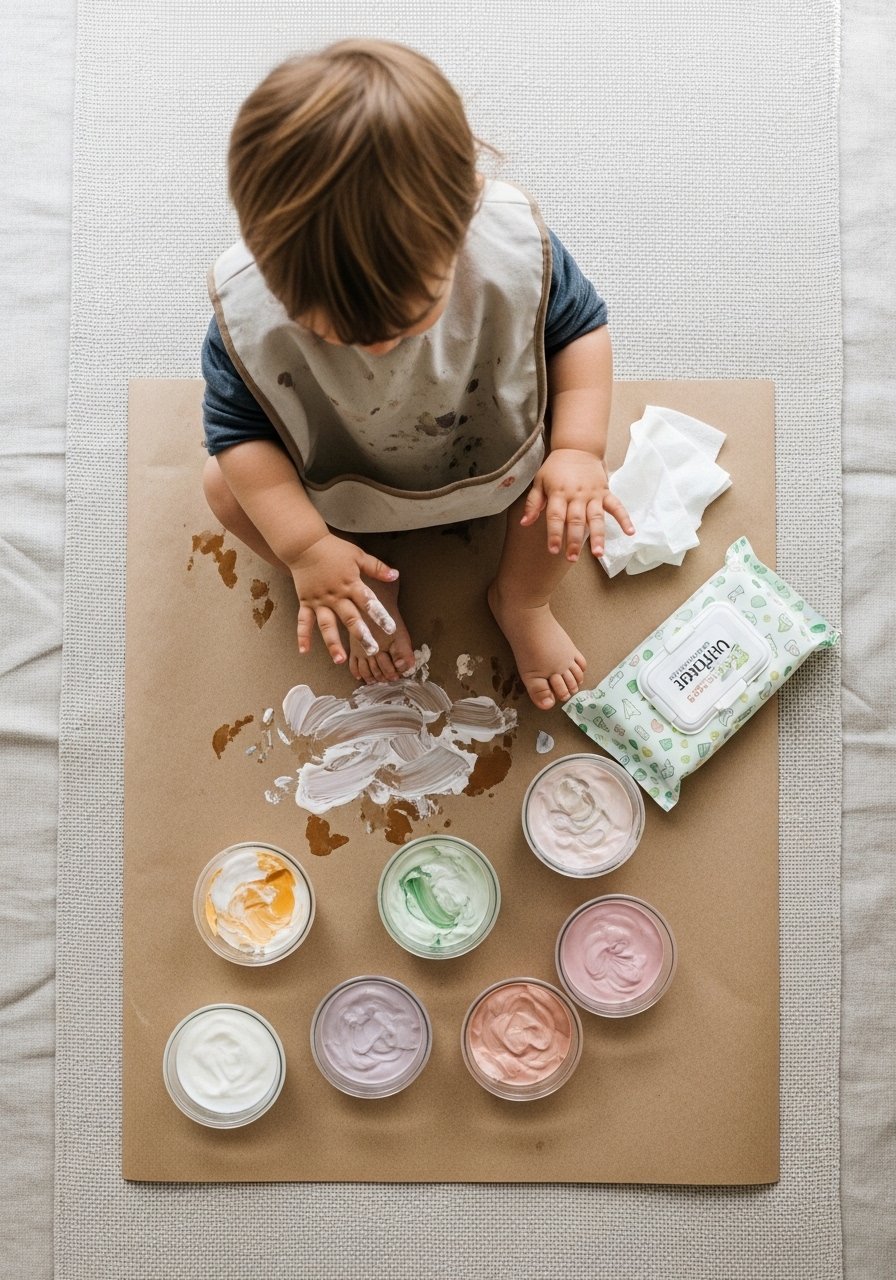
Great for the youngest artists who still put everything in their mouths. This edible paint uses plain yogurt and food coloring for short sessions of sensory play. It feels cool and creamy and washes out of clothes easily if you act fast.
Materials
- Plain yogurt (full-fat or Greek) — 1 cup
- Food coloring (gel or liquid) — 3–4 drops/color
- Small glass ramekins — 3–4
- Kraft paper roll or butcher paper — 1 roll
- Plastic bib or smock — 1
- Baby wipes or damp cloths — a few
Instructions
- Lay out a 2–3 foot section of kraft paper and tape the ends so it won’t move.
- Spoon about 1–2 tablespoons of yogurt into each ramekin and tint with food coloring.
- Let your toddler dip fingers and make marks. Sessions of 10–15 minutes are ideal.
- When finished, wipe hands and face with wipes. Don’t leave yogurt paints at room temp for more than 30 minutes.
- Discard any leftover yogurt after the session — don’t refrigerate once used.
- Rinse surfaces promptly to avoid stickiness.
How to Display or Gift It
- Photograph finished pieces and print them for a mini gallery wall.
- Add a label and roll the art into a tube for gifting.
- Store leftover kraft paper in a craft paper roll holder.
3. Dot Marker Animal Friends
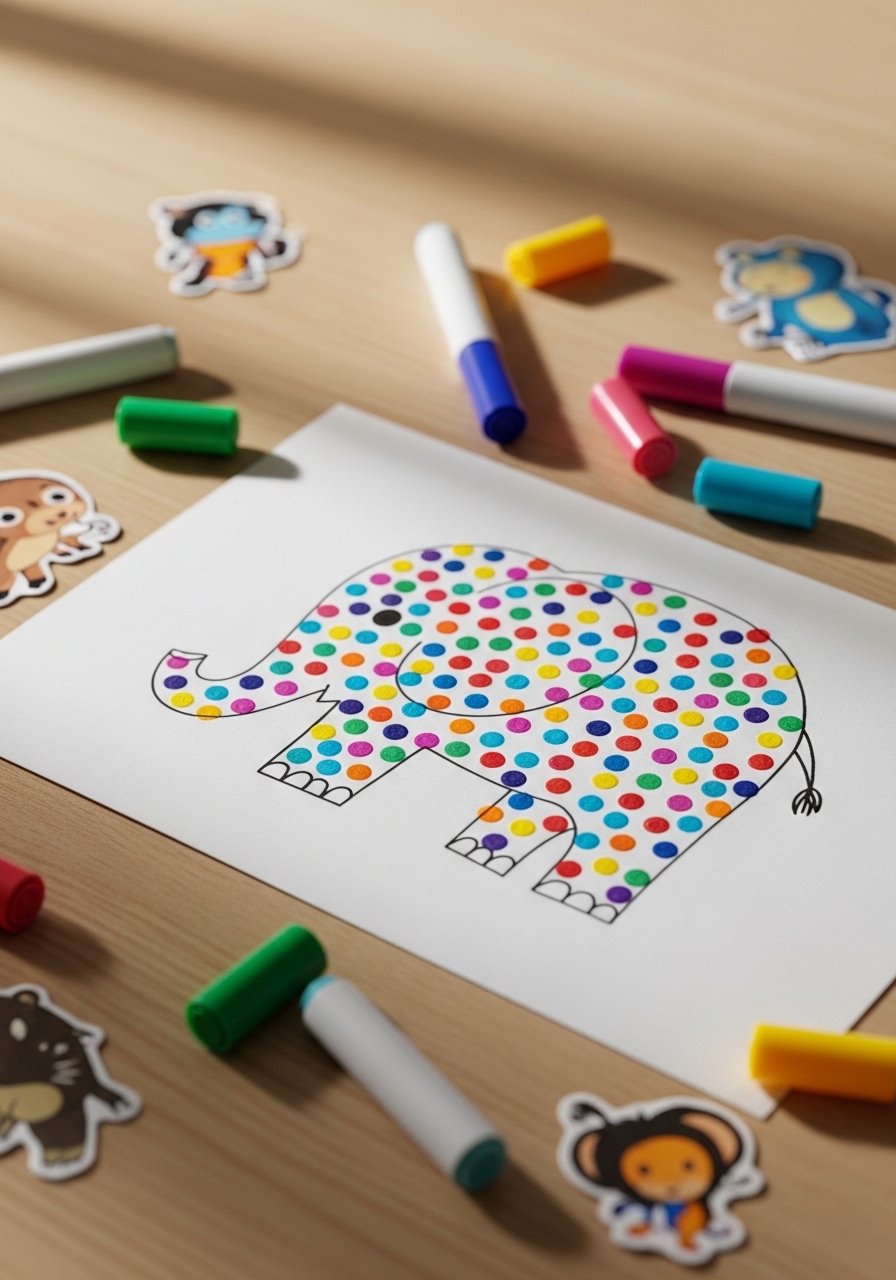
Dot markers are great for little hands and early coordination. This project pairs large dot marks with simple drawn features to create cute animal friends. The polka-dot texture is satisfying and forgiving.
Materials
- Dot markers (washable, jumbo) — 4–6 markers
- Heavyweight cardstock (8.5" x 11") — 10 sheets
- Black washable marker for features — 1
- Animal template or simple printout — 1
- Wet wipes and mat — 1
- Optional: foam stickers — 1 pack
Instructions
- Place a sheet of cardstock on a protected surface.
- Show your child how to press the dot marker gently to make circles.
- Make a background pattern of dots where you'll later add features.
- Once dots have dried (about 10–15 minutes), draw eyes, trunks, or legs with a marker.
- Add stickers for texture if you like.
- Let the ink dry fully (about 15 minutes) before stacking.
How to Display or Gift It
- Punch a hole and string several onto a ribbon to make a colorful banner.
- Mount on a small wooden clipboard for an instant display.
- Keep extras in a cardstock storage box.
4. Bubble Wrap Printing
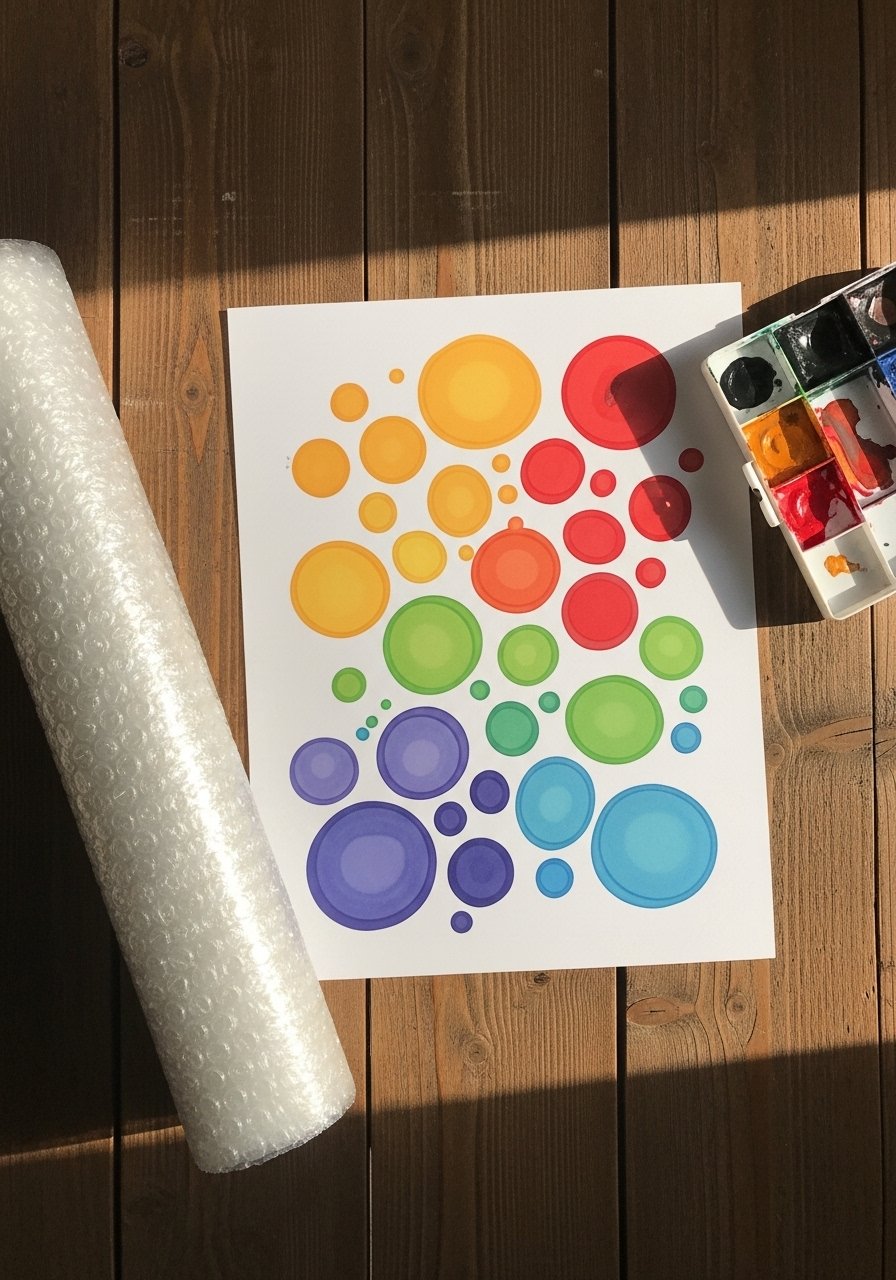
Bubble wrap printing creates delightful textured dots and is an affordable stamp tool. Toddlers love the popping feel and the unpredictability of prints.
Materials
- Bubble wrap (small bubble size) — 1 sheet (12" x 12")
- Tempera or acrylic craft paint (washable) — 3 colors, 2 oz each
- Foam brush or roller — 1
- 9" x 12" paper pad — 1
- Painter’s tape — 1 roll
- Wet wipes — a few
Instructions
- Cut a 6" x 6" square of bubble wrap for easier handling.
- Tape the paper to the table so it won’t slide.
- Dab paint onto bubble wrap with a foam brush or roller — thin coat.
- Press the bubble wrap, bubble-side down, onto paper. Press gently.
- Lift straight up; allow prints to dry for 20–30 minutes.
- Repeat with different colors, cleaning between colors to avoid mud.
How to Display or Gift It
- Use prints as wrapping paper for small gifts.
- Trim into bookmarks and laminate using a home laminator.
- Store rolls of bubble wrap in a utility bin.
5. Potato Stamp Shapes
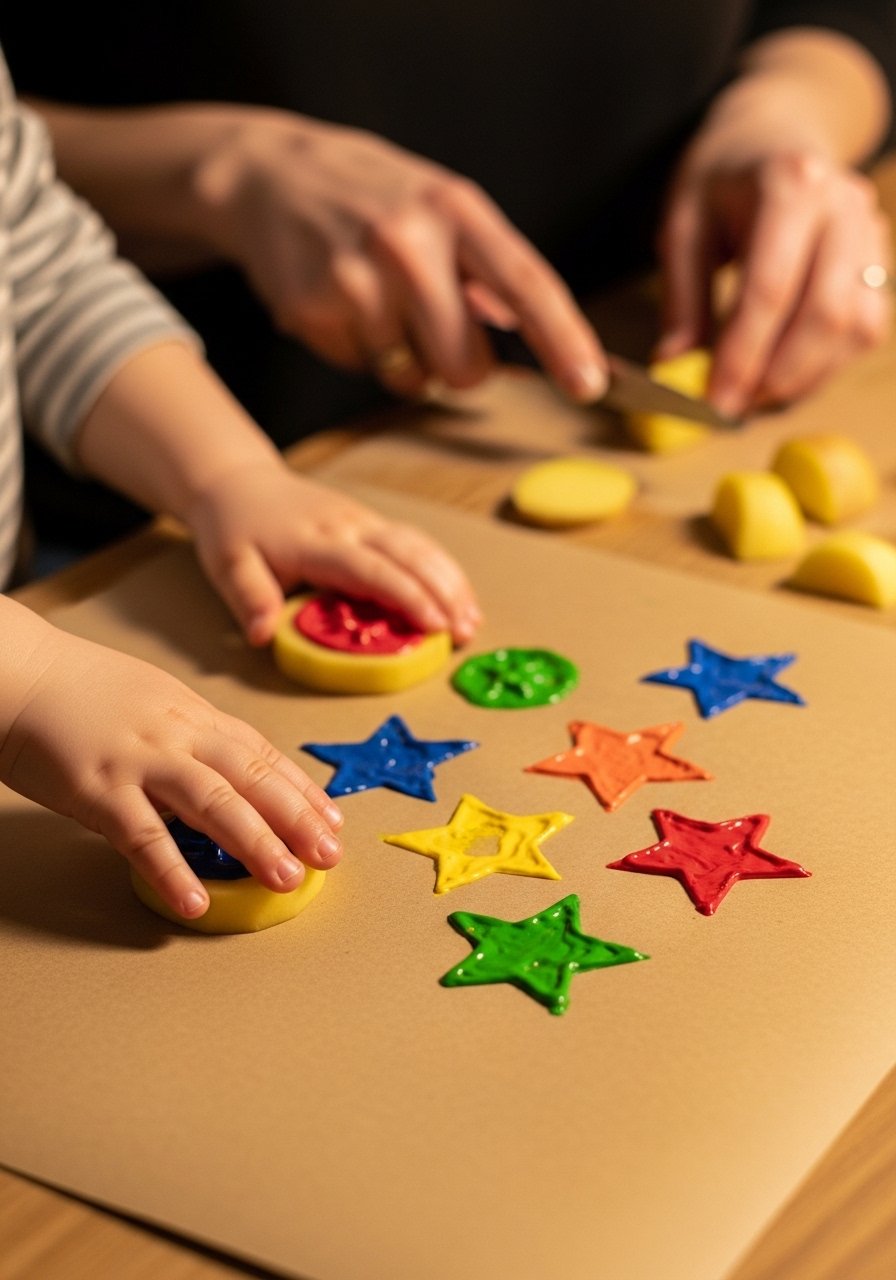
Potato stamps are classic and simple. Cut shapes into halved potatoes and let toddlers stamp repeating patterns. An adult should cut the potatoes beforehand.
Materials
- Large potatoes — 2
- Child-safe knife for adult use — 1
- Acrylic craft paint (washable) — 3 colors, 2 oz each
- Small paint trays — 2
- Heavyweight paper or fabric napkins — 10
- Paper towels for cleanup — a few
Instructions
- As an adult, cut potatoes in half and carve simple shapes (circle, star, heart).
- Pour paint into trays and dip the potato flat side lightly.
- Demonstrate stamping with firm, even pressure.
- Let toddlers make repeated patterns across the paper.
- Clean stamps between colors and let prints dry 20–30 minutes.
- Dispose of used potato halves in compost or trash when done.
How to Display or Gift It
- Turn stamped sheets into homemade stationery.
- Press into fabric napkins and heat-set if using fabric paint (follow paint instructions).
- Keep stamped sheets flat in a paper storage portfolio.
6. Leaf and Nature Rubbings
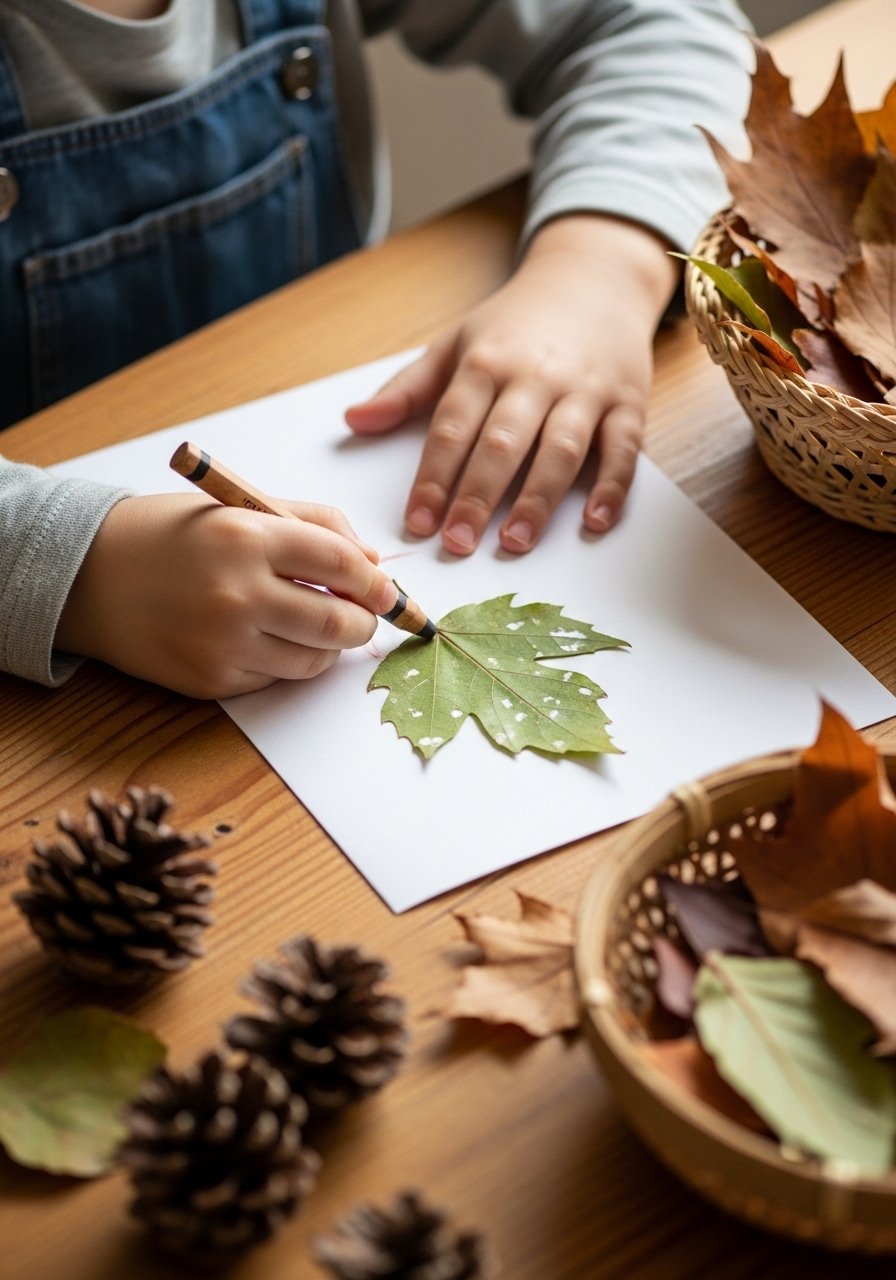
Nature rubbings connect kids to the outdoors and introduce textures. Big crayons or oil pastels capture fine vein details beautifully.
Materials
- Collection of leaves, bark, or textured items — a handful
- Large crayons or oil pastels — 6–8
- Heavyweight drawing paper — 10 sheets
- Masking tape to hold items — 1 roll
- Small basket for collecting treasures — 1
- Wet wipes for hands — a few
Instructions
- Go on a short nature walk to collect leaves and small textured finds.
- Tape a leaf with the textured side up on the table.
- Place paper over leaf and hold steady.
- Hold a crayon sideways and rub gently over the leaf to reveal the texture.
- Repeat with different leaves and colors.
- Let artwork air-dry if using oil pastel sheen (not required).
How to Display or Gift It
- Make a nature book by stapling rubbings into a simple booklet.
- Laminate favorites and use as placemats.
- Store treasures in a small basket for future sessions.
7. Sticker-Scene Collage
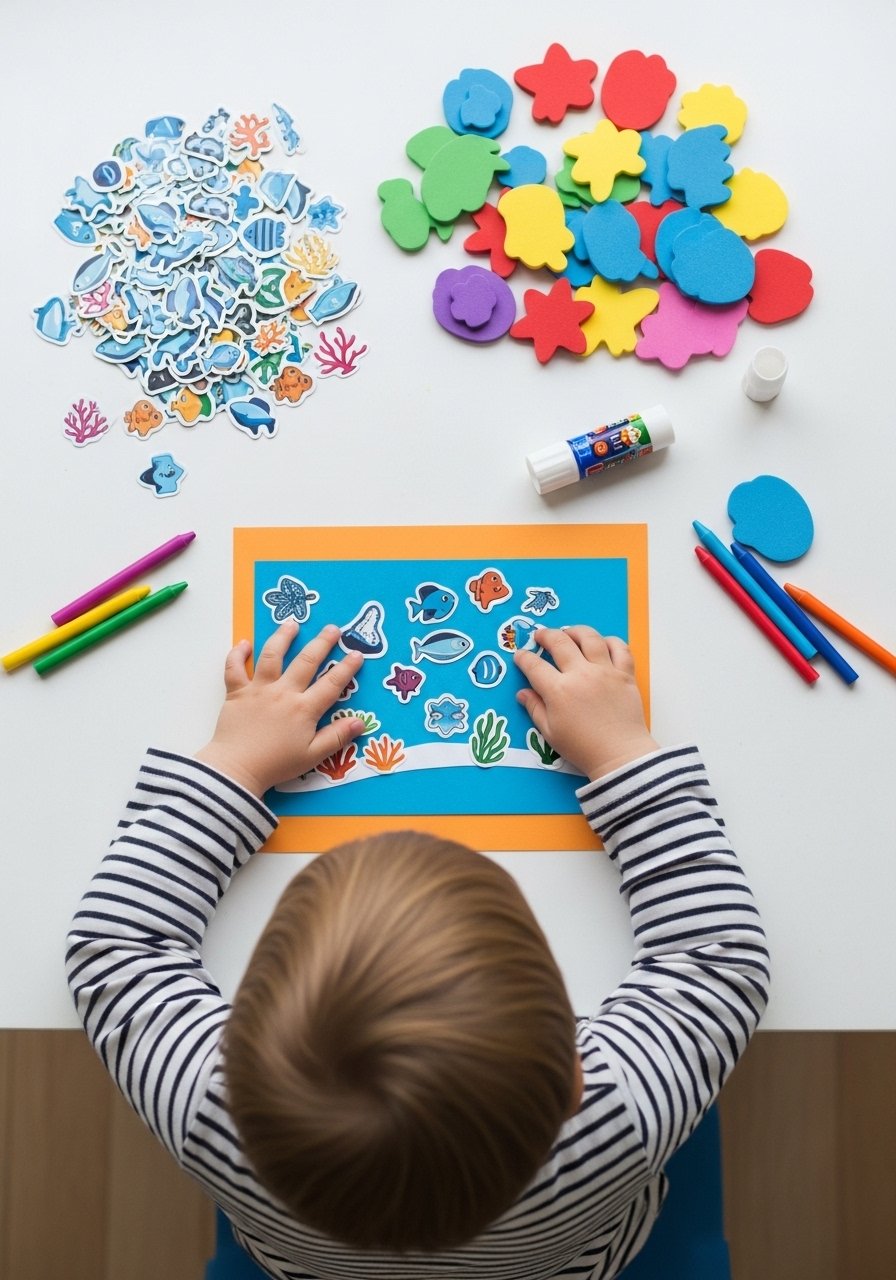
Stickers help little hands practice placement and make immediate scenes without cutting. Combine stickers with simple drawn details to spark storytelling.
Materials
- Assortment of toddler-safe stickers (foam and paper) — 1-2 packs
- Colored cardstock (8.5" x 11") — 10 sheets
- Washable glue stick — 1
- Jumbo crayons or markers — 1 pack
- Optional: washi tape for borders — 1 roll
- Small tray for stickers — 1
Instructions
- Give your toddler a sheet of cardstock and a tray of stickers.
- Encourage them to place stickers to create a scene (ocean, farm, space).
- Add drawn lines or faces with crayons or washable markers.
- Use a glue stick for any loose foam stickers.
- Let glued areas dry for 5–10 minutes before moving.
- Turn finished sheets into stories by asking your child to name characters.
How to Display or Gift It
- String several scenes on yarn as a mini banner.
- Mount on a magnetic board using small magnets.
- Put stacks in a clear portfolio for a keepsake.
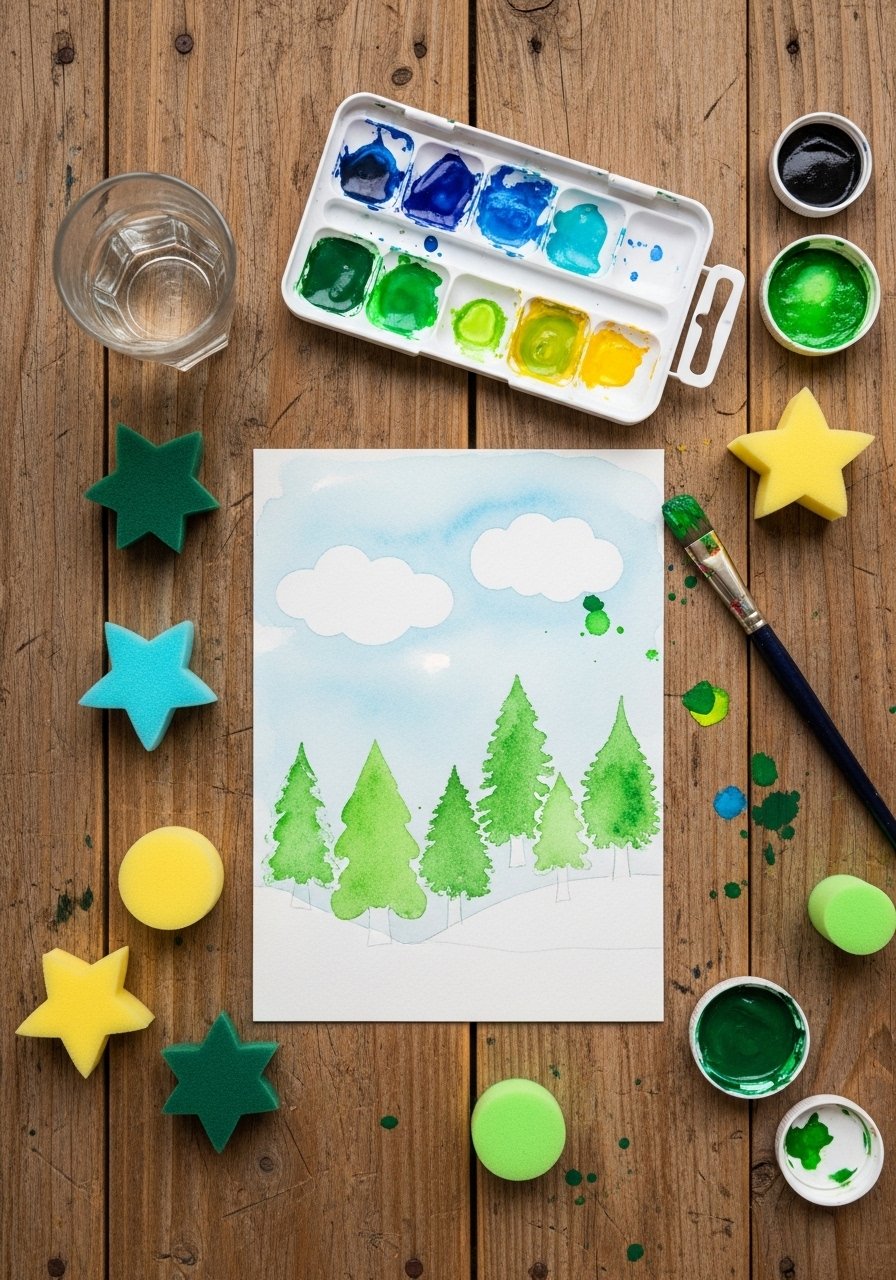
8. Tape-Resist Cityscape (drawing ideas for toddlers)
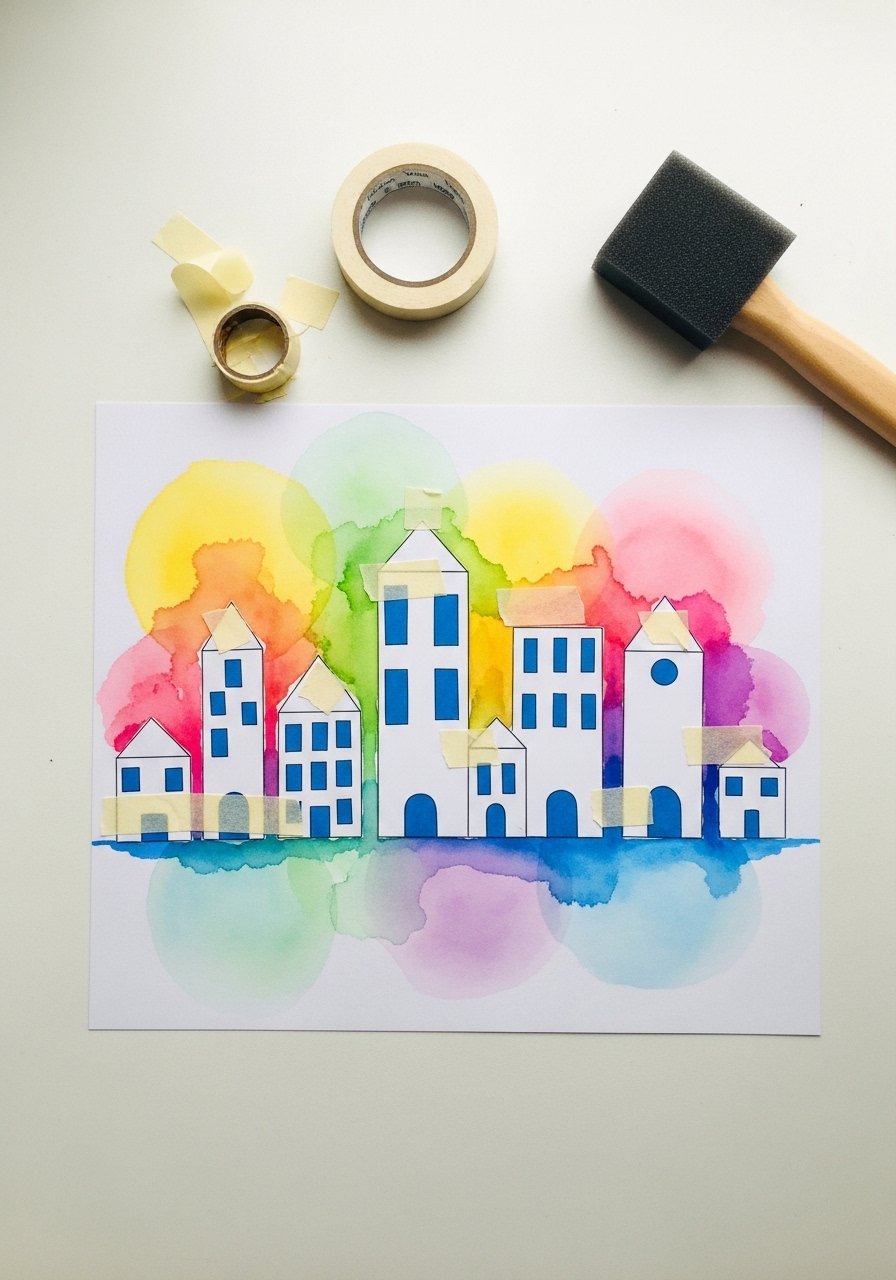
Tape-resist gives crisp lines without precision drawing. Toddlers can paint broad washes and then you add details for buildings and windows later. Painter’s tape is key for clean edges.
Materials
- Painter’s tape (1/2" width) — 1 roll
- Watercolor paint set (washable) — 8 colors
- Thick watercolor paper (9" x 12") — 10 sheets
- Foam brush or wide brush — 1
- Black washable marker for windows — 1
- Small cup of water and sponge — 1
Instructions
- Tear short pieces of painter’s tape and press them onto paper to form building outlines.
- Let your toddler paint over the whole page with broad strokes—bright colors work well.
- Allow paint to dry 30–45 minutes.
- Remove tape to reveal white building shapes.
- Draw windows, doors, and little details with a black marker.
- Let marker ink dry 10–15 minutes before stacking.
How to Display or Gift It
- Arrange several cityscapes in a row on a hallway shelf.
- Mount on wooden blocks for a toddler-friendly mini-display.
- Store flat in a document file.
9. Chalkboard Easel Scribble Time
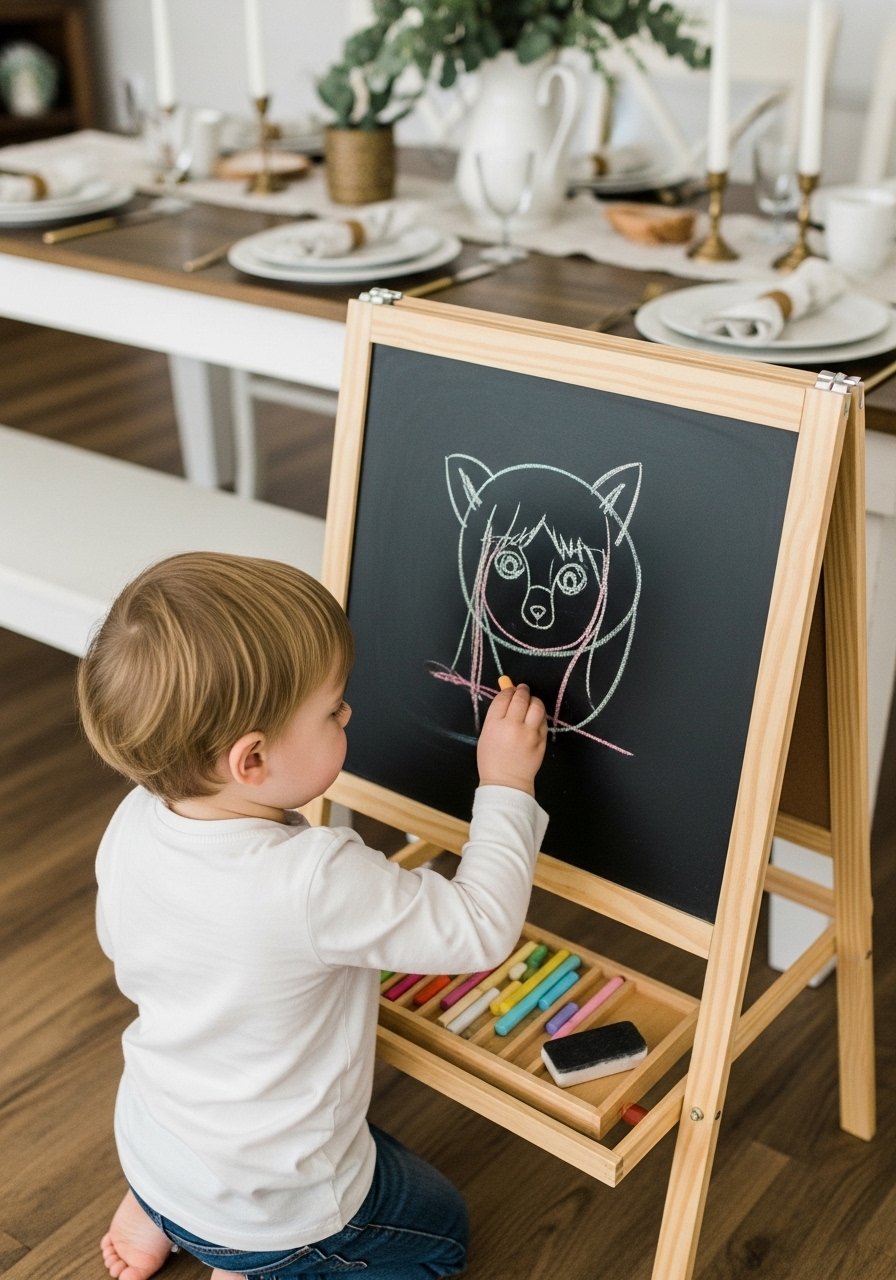
An easel feels important and upright drawing helps early motor skills. Chalk is tactile and wipes off easily.
Materials
- Toddler chalkboard easel (double-sided) — 1
- Colored chalk sticks (jumbo) — 1 pack
- Felt eraser or damp cloth — 1
- Washable paint for easel trim (optional) — 1 small bottle
- Floor mat for crumbs — 1
Instructions
- Set up the easel at toddler height and supply jumbo chalk.
- Demonstrate making simple shapes and lines.
- Let them draw for 10–20 minutes. Chalk dust cleans quickly with a damp cloth.
- Rinse the eraser periodically to keep lines clean.
- Encourage vertical drawing to help shoulder development.
- Wipe board dry after cleaning before next use.
How to Display or Gift It
- Rotate drawings by photographing them and keeping a digital album.
- Pair the easel with a small stool for a gift set.
- Keep chalk in a chalk caddy.
10. Q-Tip Pointillism Flowers

Pointillism with Q-tips creates controlled dots that build fine motor skills. The method is calming and great for pattern practice.
Materials
- Q-tips (cotton swabs) — 1 box
- Tempera paint (washable) — 3 small jars
- Small paint tray or palette — 1
- Heavyweight paper — 10 sheets
- Pencil for faint outlines — 1
- Cup of water and paper towel — 1
Instructions
- Lightly draw a flower outline on paper with a pencil.
- Dip a Q-tip in paint and dot along the pencil line to fill petals.
- Use different colors for center and background.
- Allow dots to dry 15–20 minutes.
- Add extra layers for denser color — allow another 10 minutes drying between layers.
- Clean Q-tips between colors or use separate Q-tips per color.
How to Display or Gift It
- Glue finished pieces to a folded cardstock and turn into notecards.
- Clip to a string with mini clothespins for a cheerful garland.
- Store in a flat art portfolio.
11. Sidewalk Chalk Murals
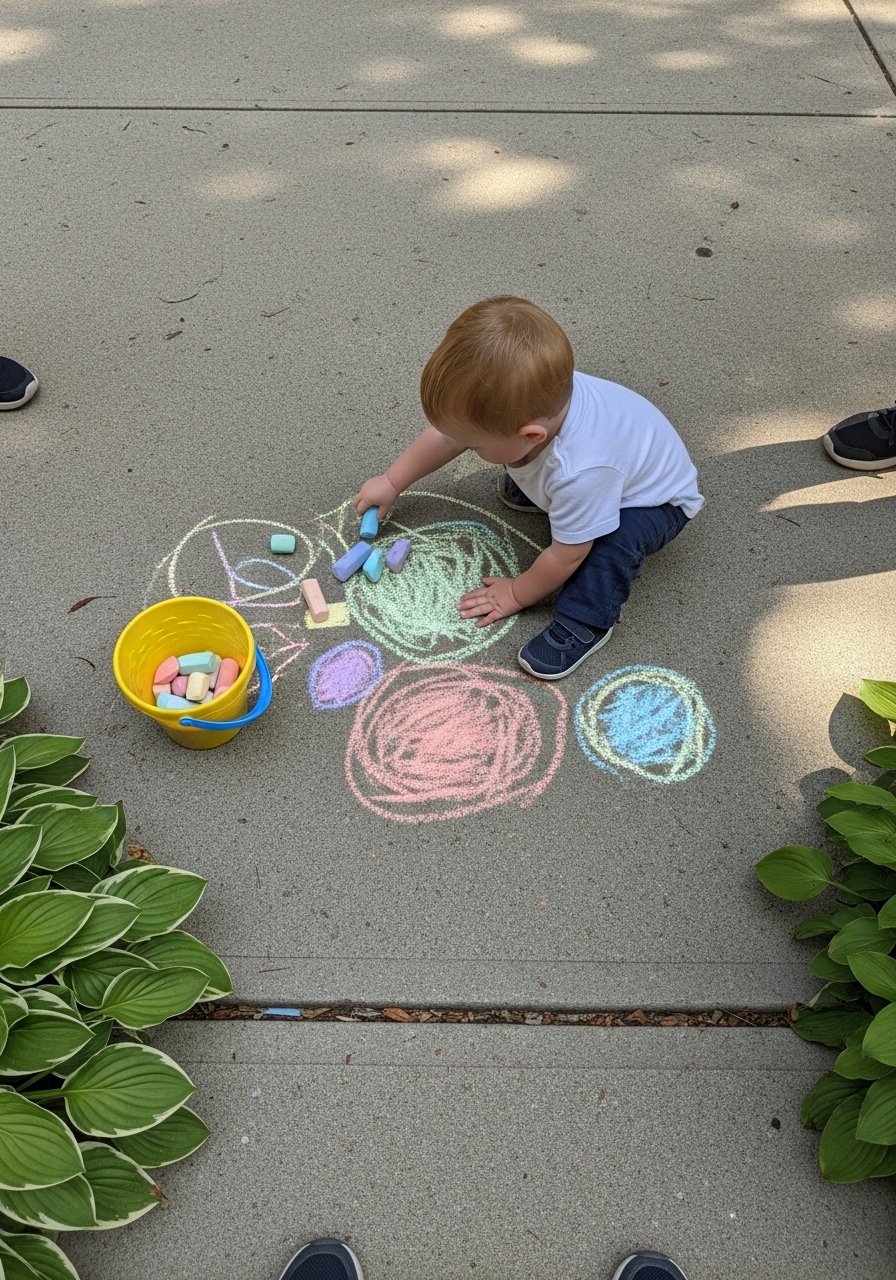
Big, outdoor drawing sessions are freeing and washable. Toddlers can experiment with scale and their whole body.
Materials
- Sidewalk chalk set (large sticks) — 1 box
- Bucket or caddy for chalk — 1
- Water spray bottle for blending — 1
- Chalk holder (optional for less dust) — 1
- Bare pavement space — location
- Wet cloth for cleanup — 1
Instructions
- Choose a smooth, dry pavement area.
- Give your toddler a few chalk colors and let them explore.
- Use the spray bottle for a watercolor chalk effect — spray lightly.
- Encourage big arm motions for broad strokes.
- Photos are best taken right away; rain or hose will wash away the art.
- Rinse pavement when play is done.
How to Display or Gift It
- Photograph large murals and make a photo book.
- Use prints as seasonal art when displayed in a hallway gallery frame.
- Store chalk outdoors in a weatherproof caddy.
12. Crayon-Resist Watercolor Rainbows

Crayon-resist uses wax to repel watercolor, teaching cause-and-effect while producing vibrant, glossy lines.
Materials
- White crayon or oil pastel — 1
- Watercolor set (pan) — 1
- Watercolor paper (9" x 12") — 10 sheets
- Round watercolor brush size 6 — 1
- Cup of water and paper towel — 1
- Painter’s tape to secure paper — 1 roll
Instructions
- Draw a simple rainbow or shapes with a white crayon on watercolor paper.
- Tape paper down to avoid buckling.
- Wet brush and sweep watercolor over crayon lines — the wax will resist paint.
- Rinse brush between colors.
- Let dry 30–45 minutes; remove tape for crisp edges.
- Add outlines or glitter glue if desired (use sparingly).
How to Display or Gift It
- Make a bright gallery wall with several rainbow pieces.
- Mount into a homemade frame with matting.
- Store in a portfolio folder.
13. Handprint Animal Parade (drawing ideas for toddlers)
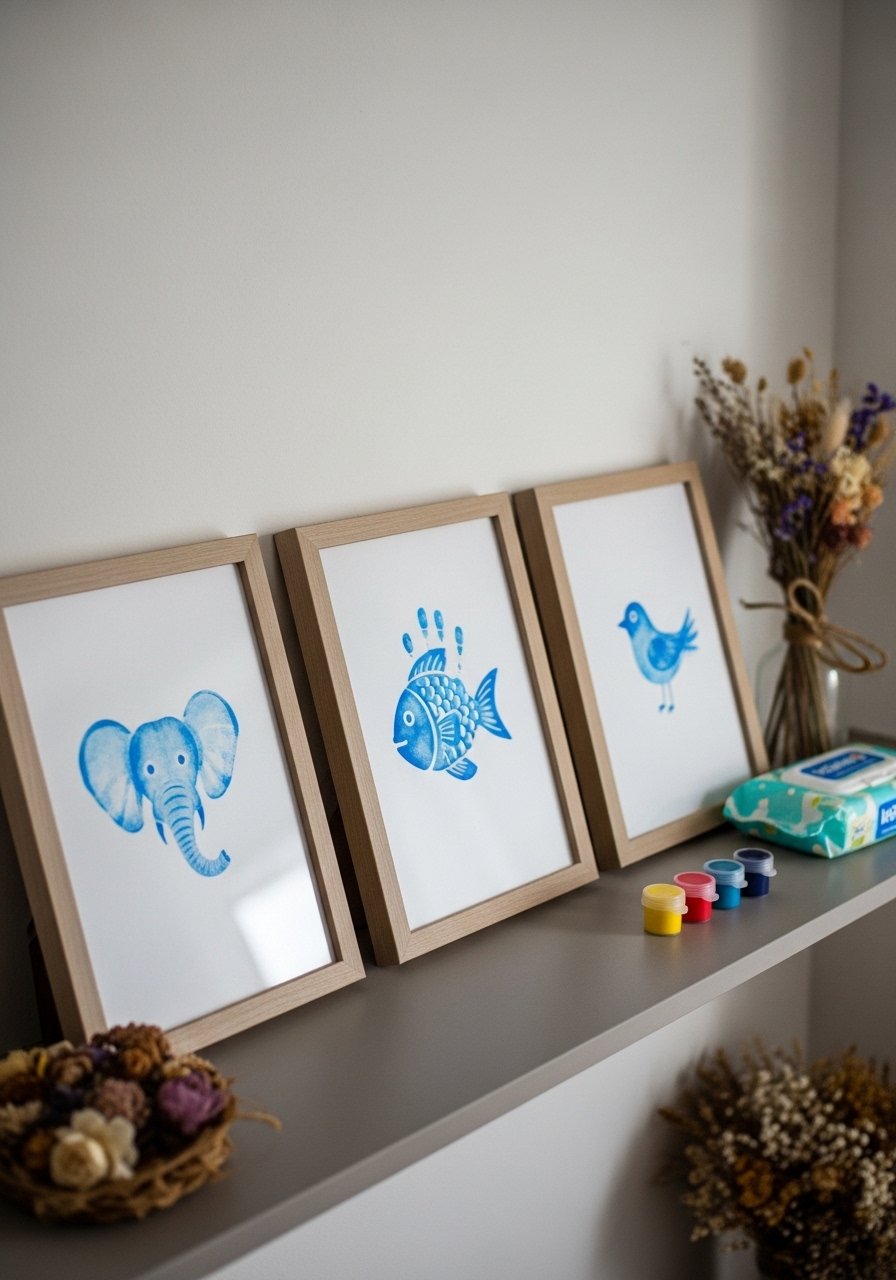
Handprints turned into animals are keepsakes and learning tools. Each print becomes a character after you add simple drawn features.
Materials
- Washable tempera paint (2 oz jars) — 3 colors
- Large paper or canvas panel (11" x 14") — 1
- Paper towels and wet wipes — plenty
- Black washable marker for details — 1
- Smock or old shirt — 1
- Small tray for paint — 1
Instructions
- Paint your toddler’s palm with a thin layer of washable tempera.
- Press palm gently onto the paper and lift straight up.
- Use a marker to add ears, eyes, beaks, trunks — keep designs simple.
- Allow paint to dry 30–45 minutes.
- Repeat for a parade of animals on one sheet or multiple sheets.
- Frame or scan handprints for a long-term keepsake.
How to Display or Gift It
- Frame a single handprint animal for grandparents.
- Make a family set and bind into a book.
- Keep prints safe in a frame-ready portfolio.
14. Salt Painting Sunshine
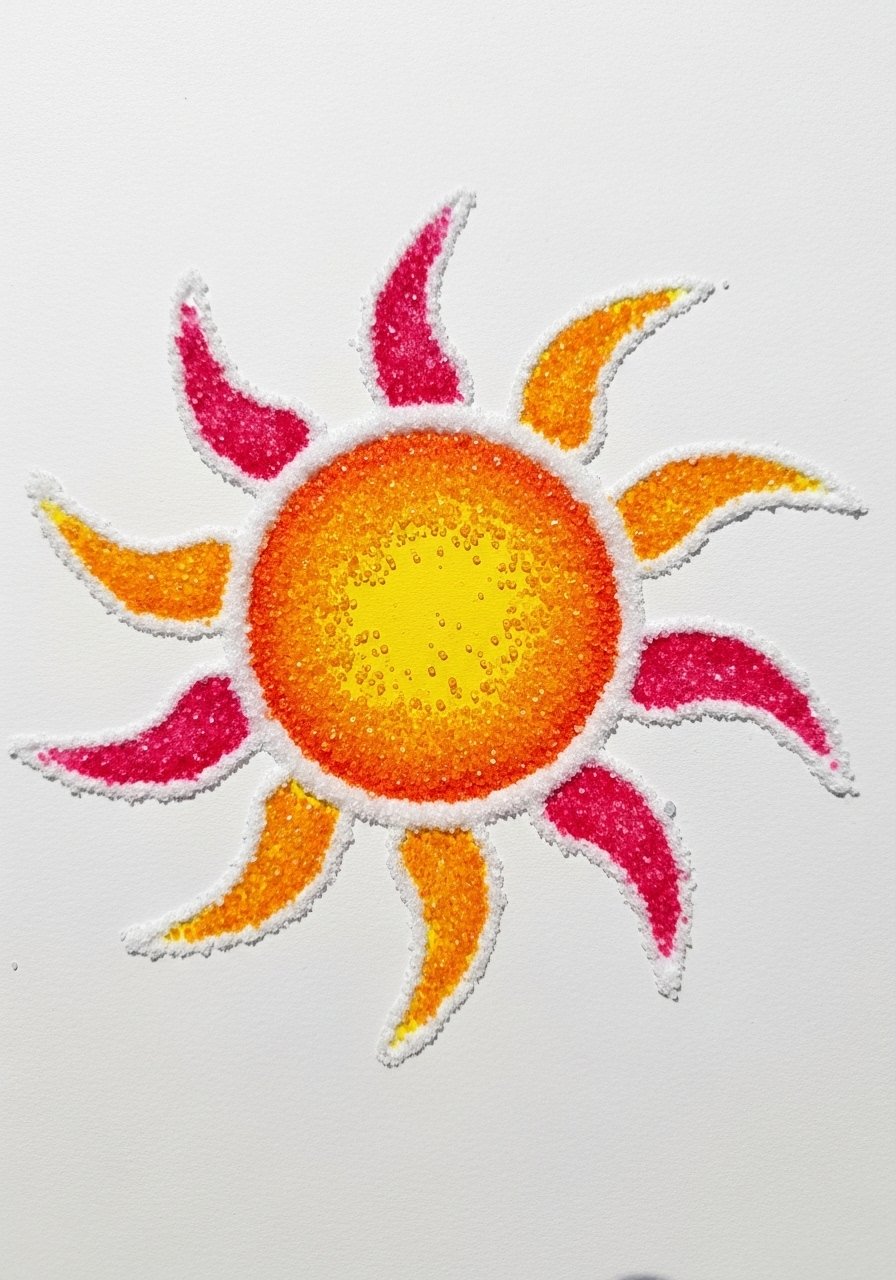
Salt painting adds sparkle and texture. It's a bit messier but low-risk for toddlers when supervised.
Materials
- White glue (school glue) — 1 bottle
- Table salt — 1 small box
- Liquid watercolors or diluted acrylic ink — 3 drops/color
- Heavyweight paper — 10 sheets
- Small spoon for sprinkling salt — 1
- Paper towels — a few
Instructions
- Draw a simple sun or pattern with glue directly onto paper.
- Sprinkle salt generously over wet glue; tap off excess.
- Use a dropper to touch liquid watercolor to salt lines — colors will wick.
- Work in small sections; drying takes 30–60 minutes.
- When totally dry, gently brush off loose salt.
- Seal with a light spray sealer if desired (adult use).
How to Display or Gift It
- Place salt paintings in a shadow box or tray frame.
- Use as a cover for a toddler art journal.
- Store flat in a document sleeve.
15. Sponge Stamping Play (drawing ideas for toddlers)
Sponge stamping encourages pattern-making without tiny parts. Pre-cut sponges are soft on hands and soak up lots of paint.
Materials
- Kitchen sponges (cut into shapes) — 6
- Washable acrylic or tempera paint — 3 colors
- Small paint trays — 2
- Heavyweight paper — 10 sheets
- Scissors for adult to cut sponges — 1
- Wet wipes — a few
Instructions
- Cut sponges into simple shapes (circle, star, heart) — adult step.
- Pour small amounts of paint into trays.
- Dip sponge lightly and stamp onto paper with firm pressure.
- Rinse sponge between colors to avoid muddying.
- Allow to dry 20–30 minutes.
- Add drawn details with a marker once dry.
How to Display or Gift It
- Make a set of stamped notecards and tuck them into a kraft gift box.
- String tiny stamped squares as a mobile for a nursery.
- Store sponges in a plastic bin for future play.
16. Pom-Pom Drop Painting

This is a contained, exciting way to create splatter patterns while limiting mess. Use a shallow box to keep pom-poms from rolling everywhere.
Materials
- Small pom-poms (soft) — 1 bag
- Cardboard box lid or pizza box — 1
- Washable paint (3 colors) — 2 oz each
- Clothespins to grip pom-poms — 6
- Heavyweight paper cut to box size — 5 sheets
- Wet wipes — lots
Instructions
- Line the box with a sheet of paper.
- Attach a pom-pom to a clothespin for easy dipping.
- Dip pom-pom into paint then drop or shake over paper for splatter.
- Rotate colors and layer until happy.
- Let dry 30–45 minutes before removing from box.
- Clean pom-poms and clothespins promptly.
How to Display or Gift It
- Mount on cardstock for framed modern art.
- Bundle several sheets into a journal cover.
- Store finished sheets in a flat file organizer.
17. Washable Marker Doodle Boards
Turn doodles into reusable practice boards by laminating or using clear page protectors. Great for tracing and repeated play.
Materials
- Washable markers (broad tips) — 1 pack
- Clear page protectors or laminating sheets — a few
- Heavyweight paper for inserts — 10 sheets
- Cloth for erasing — 1
- Optional: sticker laminate for personalization — 1 pack
Instructions
- Draw or let your toddler doodle on heavyweight paper.
- Slide papers into page protectors or laminate them (adult step).
- Use washable markers to trace over laminated sheets again and wipe clean.
- Practice shapes, letters, or simply color over.
- Wipe with damp cloth; allow to dry 5 minutes.
- Store in a binder for easy reuse.
How to Display or Gift It
- Bind sheets into a reusable art book and gift with a marker set.
- Keep in a small travel pouch for car trips.
- Store extra protectors in a binder organizer.
18. Stencil Shape Tracing Cards
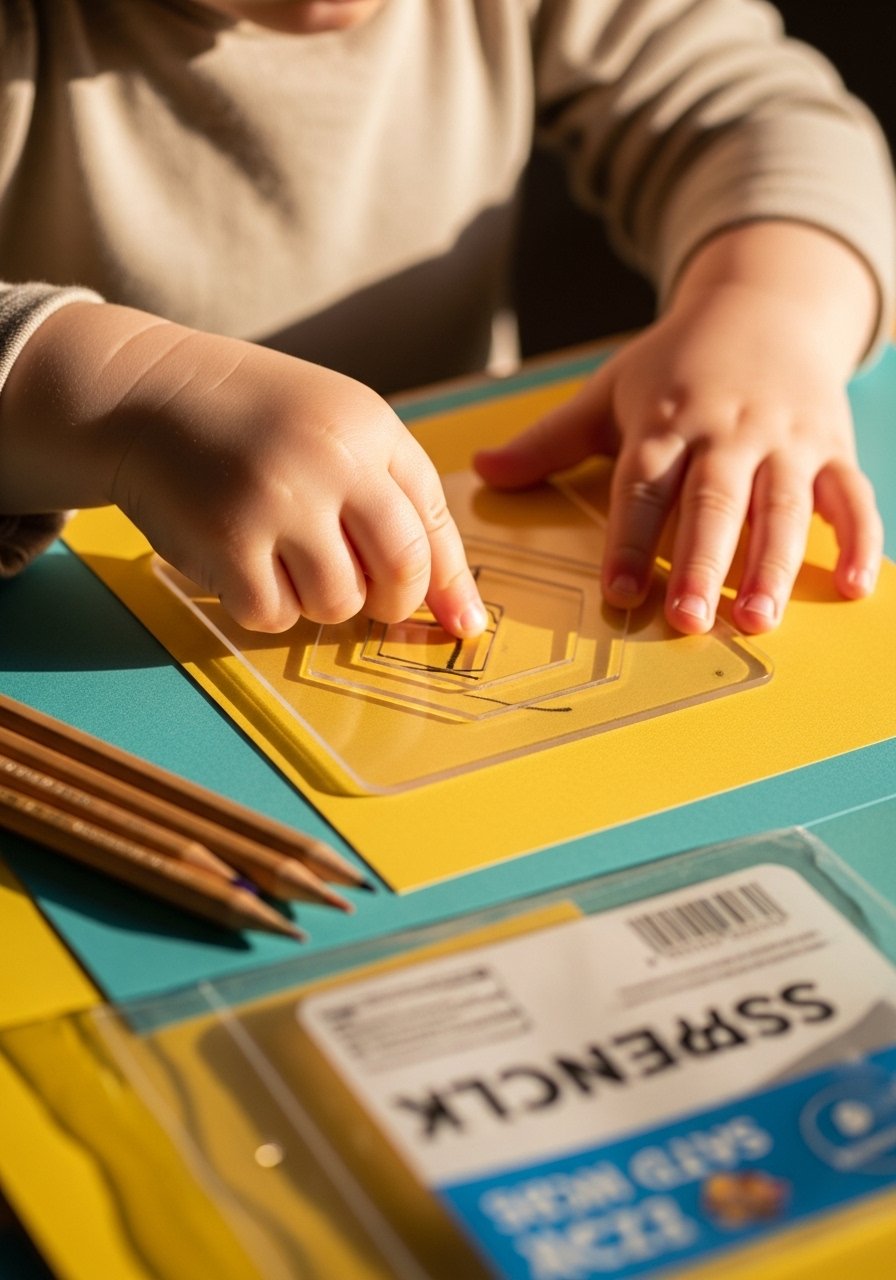
Stencils help with hand control and shape recognition. Use thick plastic toddler-friendly stencils with large openings.
Materials
- Thick plastic shape stencils (large) — 1 set
- Colored cardstock (assorted) — 20 sheets
- Toddler-safe pencils or jumbo markers — 1 pack
- Painter’s tape to secure stencil — 1 roll
- Eraser for adult-corrected lines — 1
Instructions
- Tape stencil to cardstock to prevent slipping.
- Show your toddler how to trace the inside edge with a pencil or jumbo marker.
- Repeat with different shapes and colors.
- Combine traced shapes into simple scenes (a house from a square + triangle).
- Let ink dry 5–10 minutes.
- Store stencils flat to avoid bending.
How to Display or Gift It
- Punch holes and bind into a tracing practice book.
- Frame a favorite traced collage for a playroom wall.
- Keep stencils in a stencil storage folder.
19. Puff-Paint Puffy Clouds (Baking Soda Paint)
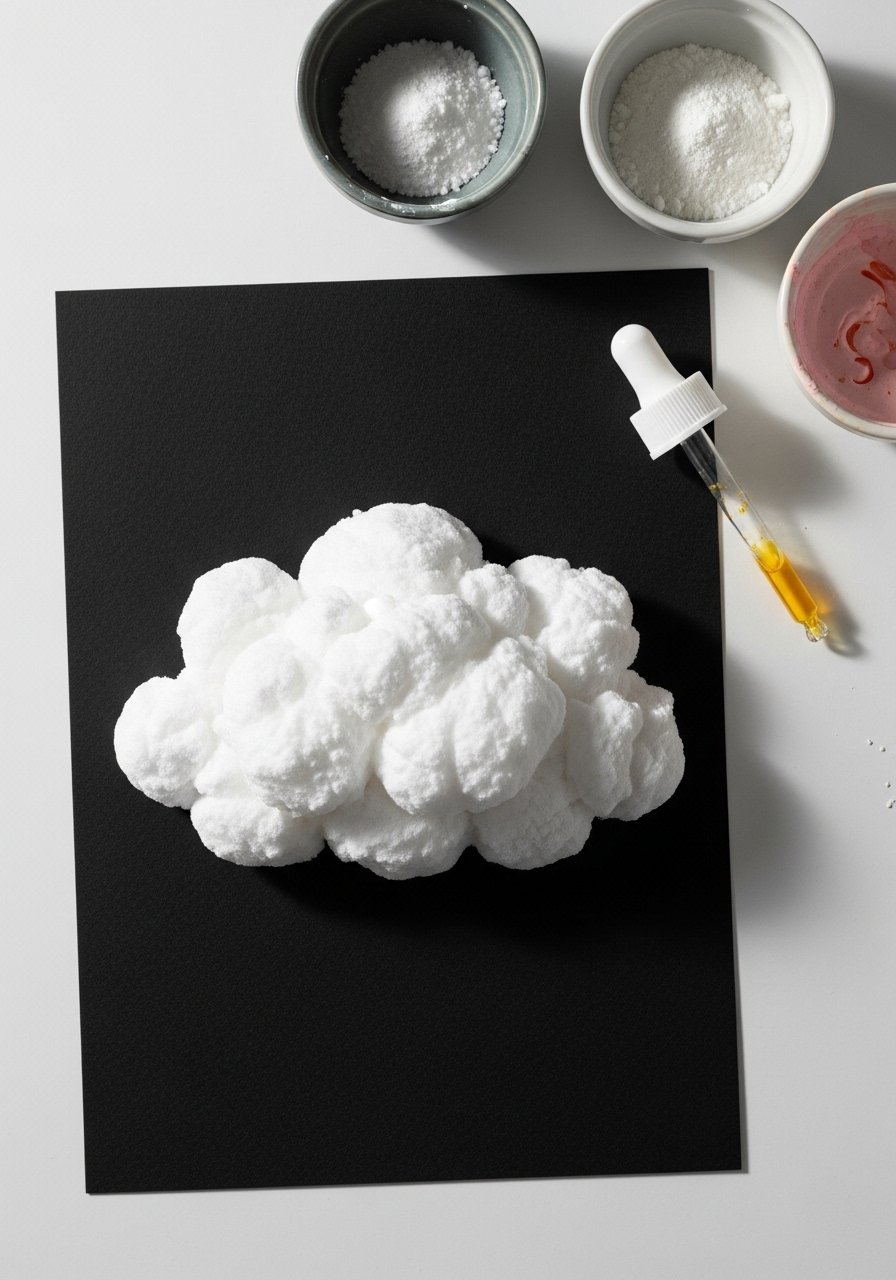
This sensory paint uses baking soda and glue for a puffy texture. It’s fun to touch once dry and great for tactile exploration.
Materials
- Baking soda — 1/4 cup
- White glue — 2 tbsp
- Foam brush — 1
- Liquid watercolor or food coloring — a few drops
- Black cardstock — 5 sheets
- Small mixing bowl — 1
Instructions
- Mix 1/4 cup baking soda with 2 tbsp glue and a little water to reach toothpaste consistency.
- Tint with washable liquid watercolor.
- Apply thickly with a foam brush to create cloud shapes.
- Let dry 12–24 hours for full puffiness.
- Once dry, texture will be slightly springy and matte.
- Avoid ingesting; supervise closely during play.
How to Display or Gift It
- Glue onto a framed plain background for a tactile nursery print.
- Make into a set of tactile cards and store in a small box.
20. Nature Paint Brushes (Stick & Leaf Brushes)
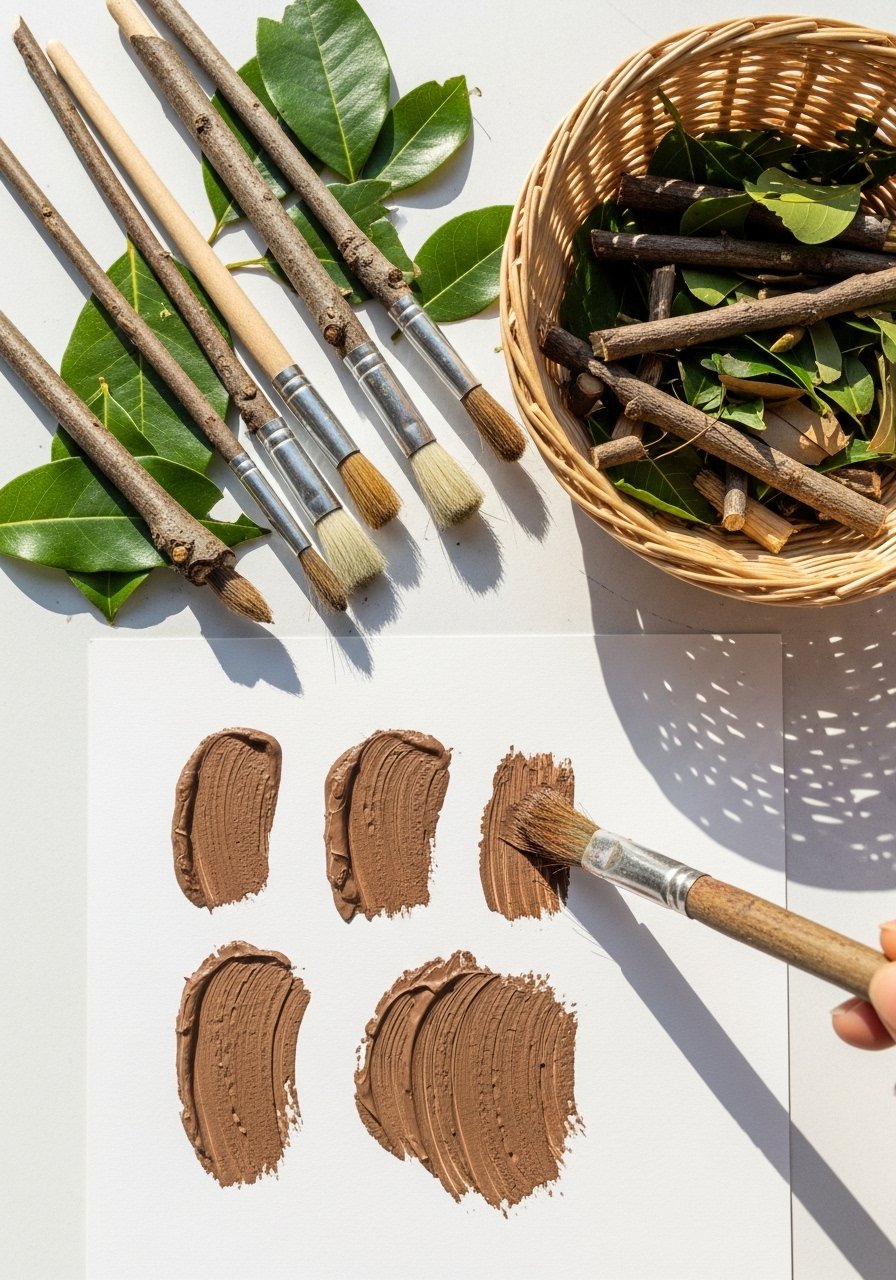
Make brushes from found twigs and leaves for unique textures. It’s a great way to combine a nature walk with art.
Materials
- Small sticks (smooth) — 6
- Leaves, grasses, pine needles — a handful
- Twine or masking tape to secure — 1 roll
- Tempera paint set — 3 small jars
- Heavyweight paper — 10 sheets
- Small tray for mixing paint — 1
Instructions
- Gather sticks and a variety of natural fibers.
- Tie leaves or grasses to one stick end with twine or tape.
- Dip into paint and drag across paper for organic marks.
- Experiment with different pressures for fine or bold textures.
- Rinse brushes and dry thoroughly to prevent mold.
- Let paintings dry 30–45 minutes.
How to Display or Gift It
- Bundle a set as a nature art kit in a gift box.
- Frame small experiments as a textured set.
- Store brushes in a dry airtight container.
21. Recycled Box Monster Faces

Turn clean recycling into big canvases for decorating with drawing tools. Big surfaces let toddlers experiment with scale and mixed media.
Materials
- Small clean cardboard boxes — 3–5
- Jumbo crayons or washable markers — 1 pack
- Glue stick or washable craft glue — 1
- Large googly eyes (supervised use) or paper circles — 1 pack
- Painter’s tape for holding bits — 1 roll
- Scissors for adult to trim — 1
Instructions
- Flatten and restack boxes to create a working surface or keep them box-shaped.
- Let toddlers draw faces using jumbo crayons first.
- Add glued features like paper teeth or big eyes.
- Use tape to add a hat or hair using scrap paper.
- Let glue dry 15–30 minutes.
- Use boxes for role play, then recycle when outgrown.
How to Display or Gift It
- Turn into a playtime prop shelf for dress-up or a gift box for small toys.
- Photograph for a memory album and then recycle.
- Store small craft leftovers in a recycling bin.
Toddlers thrive with predictable setups and lots of praise. These 21 drawing ideas for toddlers mix easy setup with playful outcomes, using washable paints, jumbo tools, and a few simple adult steps so you’re never overwhelmed. Save or pin this list to keep nearby for rainy afternoons or quick creative bursts. Which project will you try first — the edible yogurt paints, the tape-resist cityscape, or the handprint animal parade? Share a photo with a friend, and don’t be shy about gifting a framed piece to family — it’s the kind of present everyone lights up over.
Trust me, picking up a reliable low-temp hot glue gun for older-kid and adult steps can make assembly faster and cleaner — fewer strings, less mess. If you liked these, pin it for later and come back when messy play calls.


