If your fridge is running out of space and your kids keep bringing home increasingly bold scribbles, this list is for you. These 28 abstract drawing ideas for kids turn freeform marks into keepable art. You’ll find playful techniques that celebrate color, texture, and happy accidents—perfect for rainy afternoons, birthday craft stations, or quiet creative time.
Each project keeps things simple with accessible supplies and clear steps. Try watercolor resist scribbles, salt-sprinkle galaxy pages, or bold tape-masked stripes. I mention tools that save time (a washable marker set speeds up cleanup) and ones that make finishes neater (I love a basic foam brush set for even glue application). These abstract drawing ideas for kids balance mess with magic so you can relax and let them experiment.
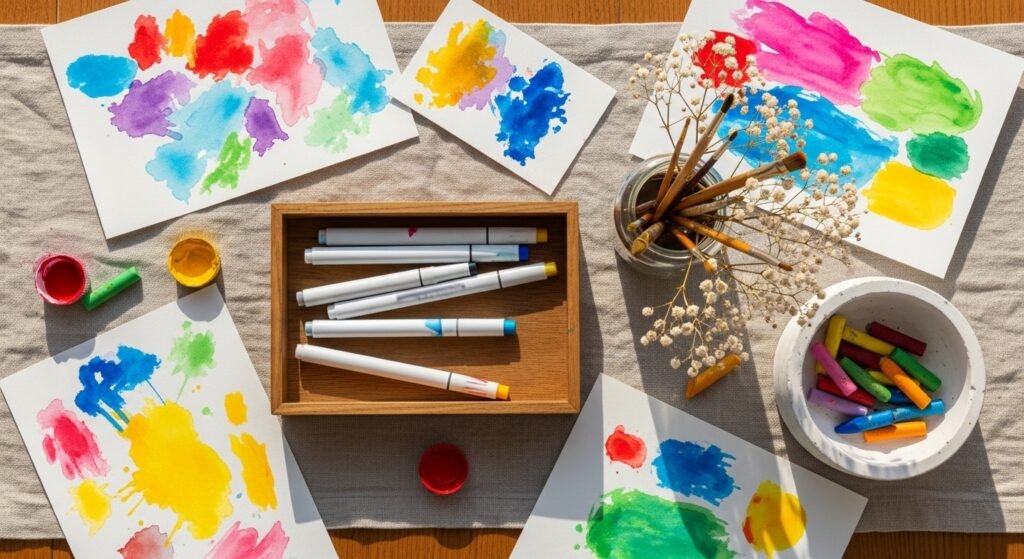
Grab a pad of heavyweight paper and a plastic apron, and keep a jar of water nearby. Ready? Let’s make lots of playful lines and surprising color mixes.
- Rainbow Scribble Collage

A joyful project that turns scribbles into layered abstract art. Kids scribble freely, then you cut or tear favorites into shapes. The collage builds color depth and texture, and it looks like modern art framed on a shelf. Great for beginners and preschoolers who love bright color.
Materials
- 8–12 sheets heavyweight drawing paper (9" x 12")
- Crayon set (16–24 colors, washable)
- Child-safe scissors
- School glue stick (1 large)
- Small wooden frame (5" x 7")
- Scrap cardstock backing (5" x 7")
- Pencil for light marking
- Optional: washi tape rolls (3 designs)
Instructions
- Give each child 2–3 sheets of paper and a crayon set. Let them scribble large, sweeping strokes.
- Once scribbles are full-coverage (5–10 minutes), let papers dry if using any wet media (not needed for crayons).
- Tear or cut papers into varied shapes—squares, triangles, curvy strips.
- Arrange shapes on the cardstock backing until the composition feels balanced.
- Glue pieces down with a glue stick in thin even layers. Press out wrinkles.
- Trim any overhang, insert into frame, and press the backing closed. Let set 10 minutes.
How to display or gift it
Frame on a small wooden easel for a kid’s dresser. Add a tiny name tag on the back and wrap in kraft tissue for gifting. Store extra scribble pages flat in a shallow craft tray until you’re ready to make more.
- Watercolor Resist Scribble (abstract drawing ideas for kids)
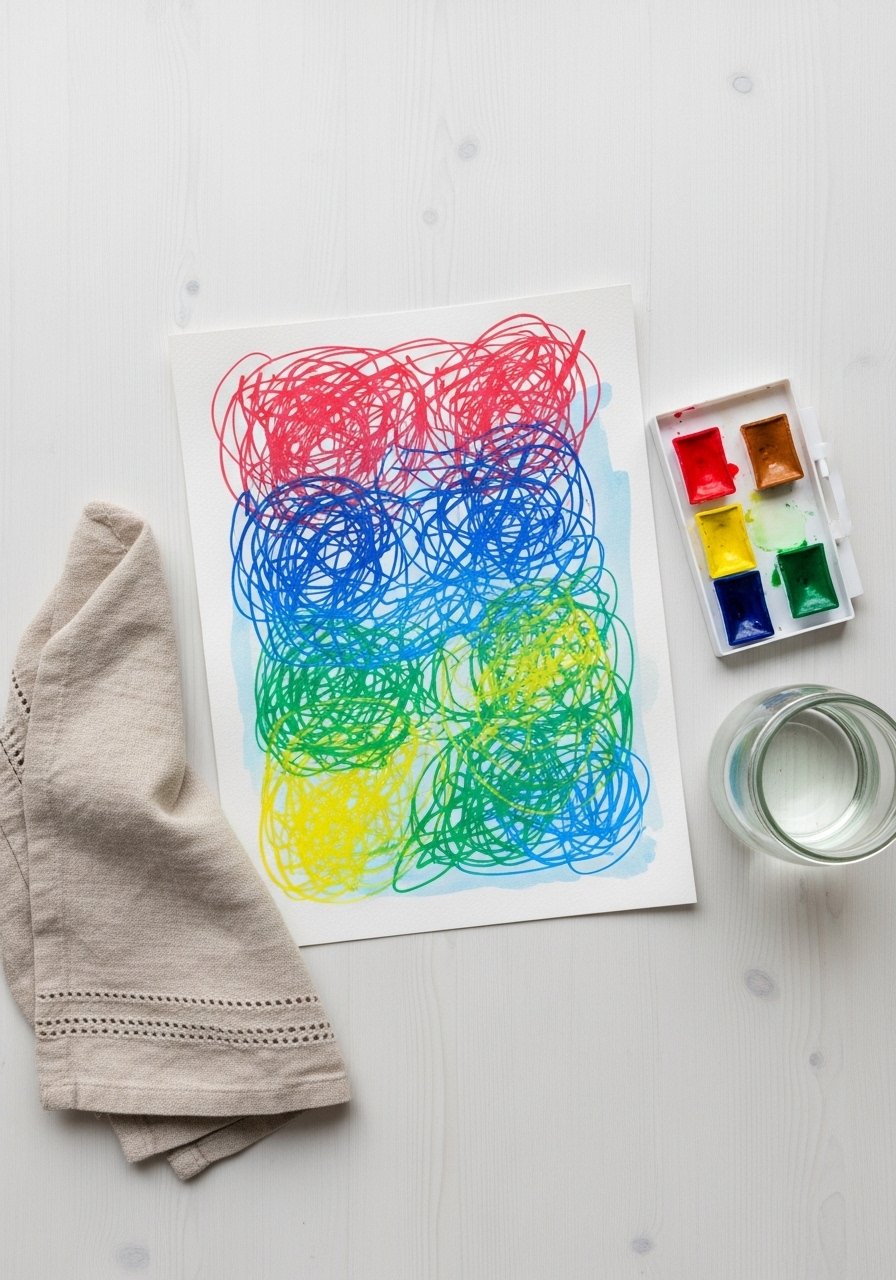
This classic teaches cause-and-effect: make marks with a waxy tool, then wash watercolor over them. The wax repels paint and the scribbles pop. It’s great for early drawing exploration and for kids who like mixing colors. A cheap set of watercolors stretches across many sessions.
Materials
- Watercolor paper pad (9" x 12", 140 lb)
- White wax crayon (1–2)
- Washable markers (6–12)
- Watercolor pan set (12 colors)
- Round watercolor brush (size 6)
- Jar of water
- Paper towels
- Palette or ceramic saucer
Instructions
- Draw bold scribbles with the white wax crayon across the paper.
- Add colorful marker details right over the crayon lines.
- Wet your brush and pick up a paint color. Lay a thin wash across the page.
- Rinse brush when switching colors. Paint blends will form—let kids explore.
- Allow paper to dry flat 30–45 minutes.
- Flatten under books if the paper curls.
How to display or gift it
Trim and mount into a simple mat for a gallery wall. Use a small wooden easel to showcase rotating pieces. Make a batch and staple into a handmade mini book.
- Splat-and-Spin Abstract Wheel
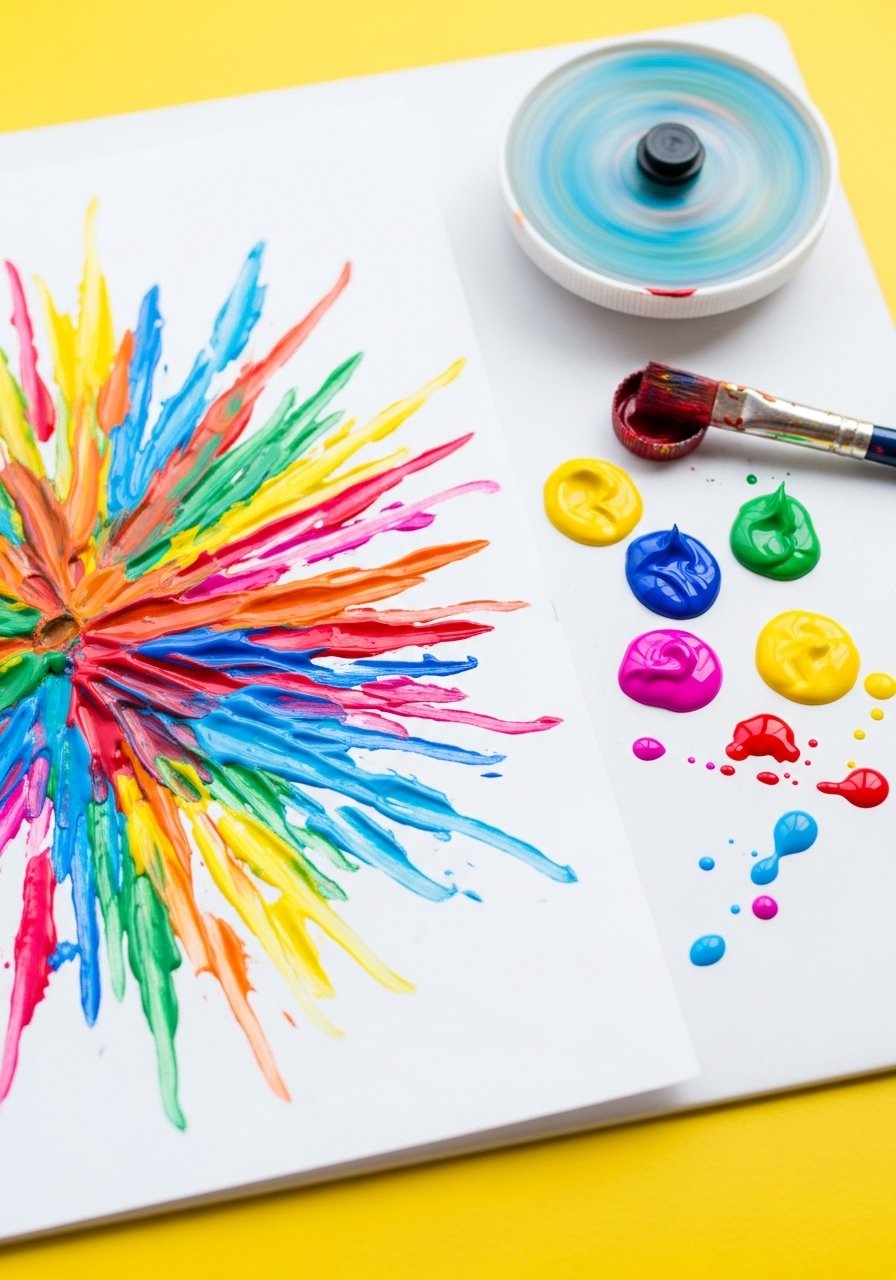
Make dizzying radial abstracts using a spin technique. Kids fling paint onto a rotating paper for fireworks-like bursts. It’s messy, loud, and ridiculously fun. Works well with bold acrylics on heavyweight cardstock. Use a turntable or lazy Susan for controlled spins.
Materials
- Heavyweight cardstock (8" round or square)
- Acrylic craft paint (basic 6-color set)
- Disposable squeeze bottles (3 small)
- Lazy Susan or pizza pan
- Old toothbrush for fine splatter
- Protective table cover
- Apron
- Paper clips to secure paper
Instructions
- Secure paper to the lazy Susan with paper clips.
- Thin acrylic paint with 1–2 teaspoons water and pour into squeeze bottles.
- Ask kids to squeeze drops into the paper center.
- Gently spin the turntable by hand for 3–6 seconds to spread paint.
- Use a toothbrush to flick fine speckles across the spinning piece.
- Let fully dry 1–2 hours depending on paint thickness.
How to display or gift it
Mount in a round frame or hang with binder clips on a clothesline. A set of three becomes a colorful triptych. Wrap in tissue and tuck in a kraft box for a handmade gift.
- Tape-Stripe Block Prints
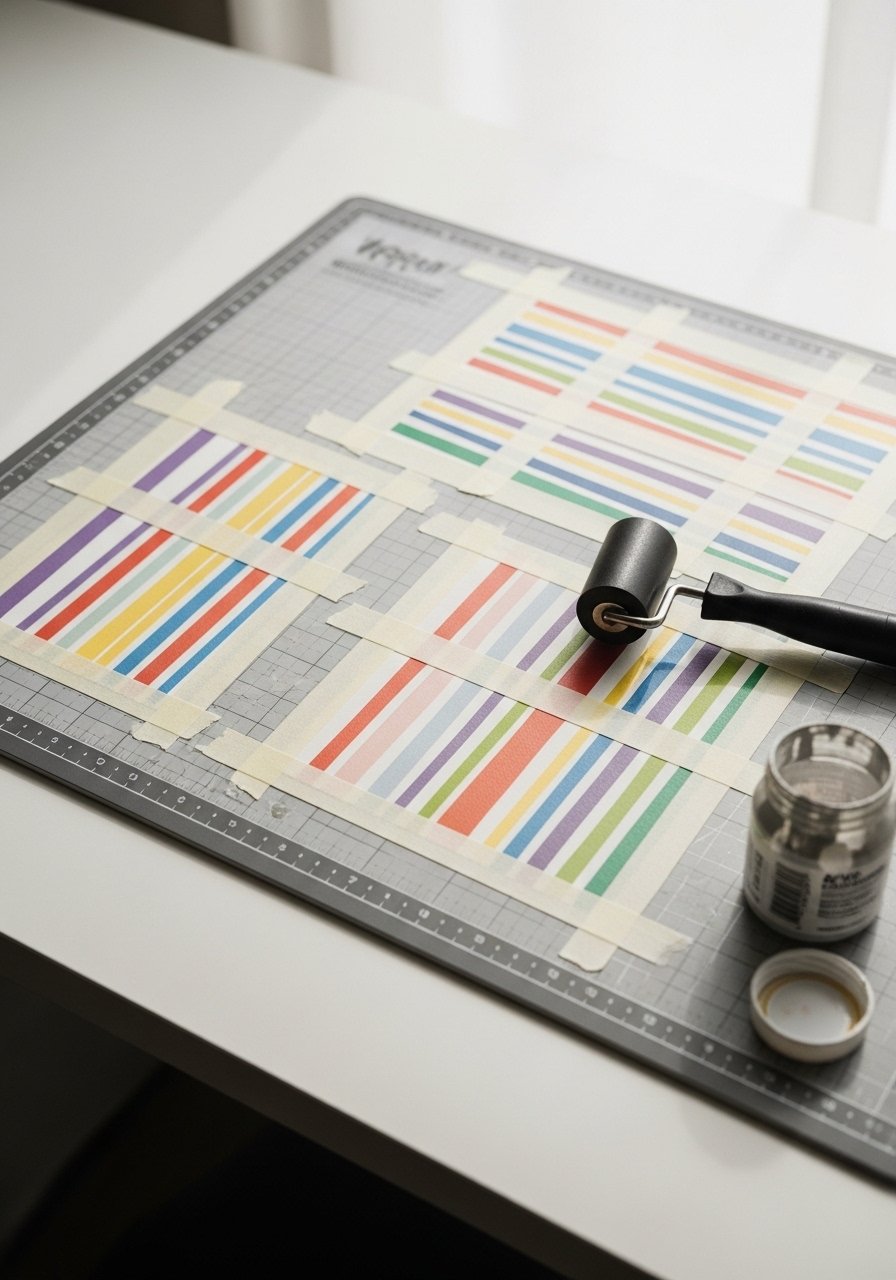
Create crisp, geometric abstracts using painter’s tape and block printing. Kids paint over tape, peel to reveal clean stripes, then stamp with sponges or stamps. This project teaches positive/negative space while keeping edges tidy.
Materials
- Mixed-media paper (9" x 12")
- Painter’s tape (1/2" and 1")
- Acrylic craft paint (tubes, 6 colors)
- Brayer roller
- Foam stamp blocks or sponges
- Paper plates for palettes
- Palette knife or popsicle sticks
Instructions
- Lay paper flat and press painter’s tape in parallel or angled stripes.
- Squeeze paint onto a plate; spread with a brayer for thin even coats.
- Roll paint over the taped paper or use a foam roller to cover.
- Let paint dry to touch (15–20 minutes).
- Carefully peel tape back to reveal white stripes.
- Add sponge stamps or dots for texture. Let cure 1 hour.
How to display or gift it
Use a matte frame to emphasize the clean lines. Put several prints in a portfolio sleeve for a DIY art book. Store extra tape in a small craft organizer drawer.
- Crayon Melt Abstract Board (abstract drawing ideas for kids)
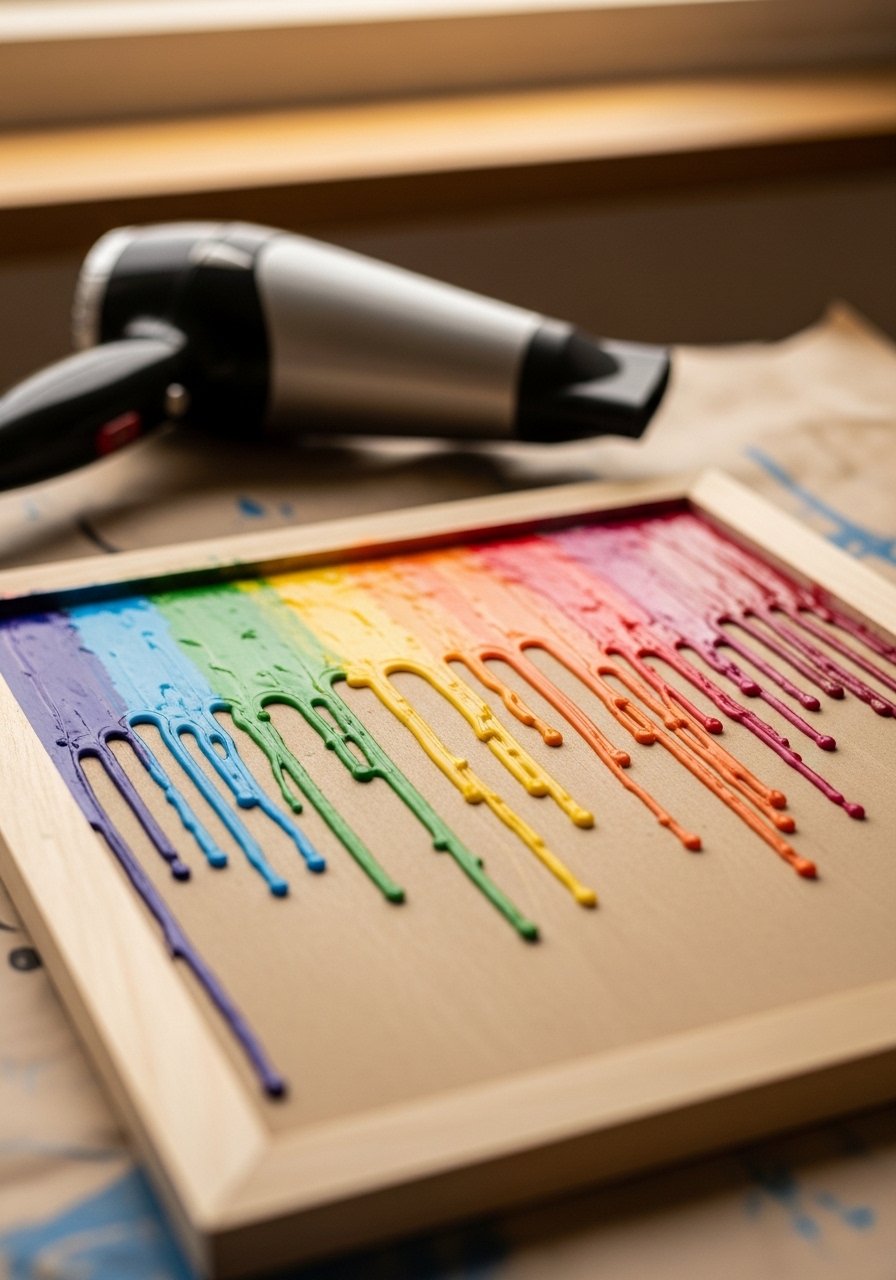
Melt crayons slightly to create layered drips and pools. Kids can arrange colors, then you briefly warm with a hair dryer. It’s controlled chaos—super colorful and tactile. Adult supervision recommended for the heat step.
Materials
- Wooden board (8" x 10")
- Box of crayons (24 colors)
- Hot glue gun (low-temp)
- Protective paper (newspaper)
- Hair dryer (high-heat setting)
- Old jar lid for catching shavings
- Safety gloves for adult
Instructions
- Peel crayon wrappers and break into small pieces. Glue at top edge of board.
- Place board on protective paper, tilt slightly.
- Warm with a hair dryer at medium heat from 6–8 inches away.
- Watch crayons melt and drip; move dryer to guide flow.
- When satisfied, turn off heat and let wax cool 15–30 minutes.
- Trim any excess hardened drips if needed.
How to display or gift it
Hang on a small nail or prop on a shelf. Wrap in cellophane and add a ribbon for a bright gift. Store unused crayons in a craft organizer jar.
- Salt Galaxy Watercolor
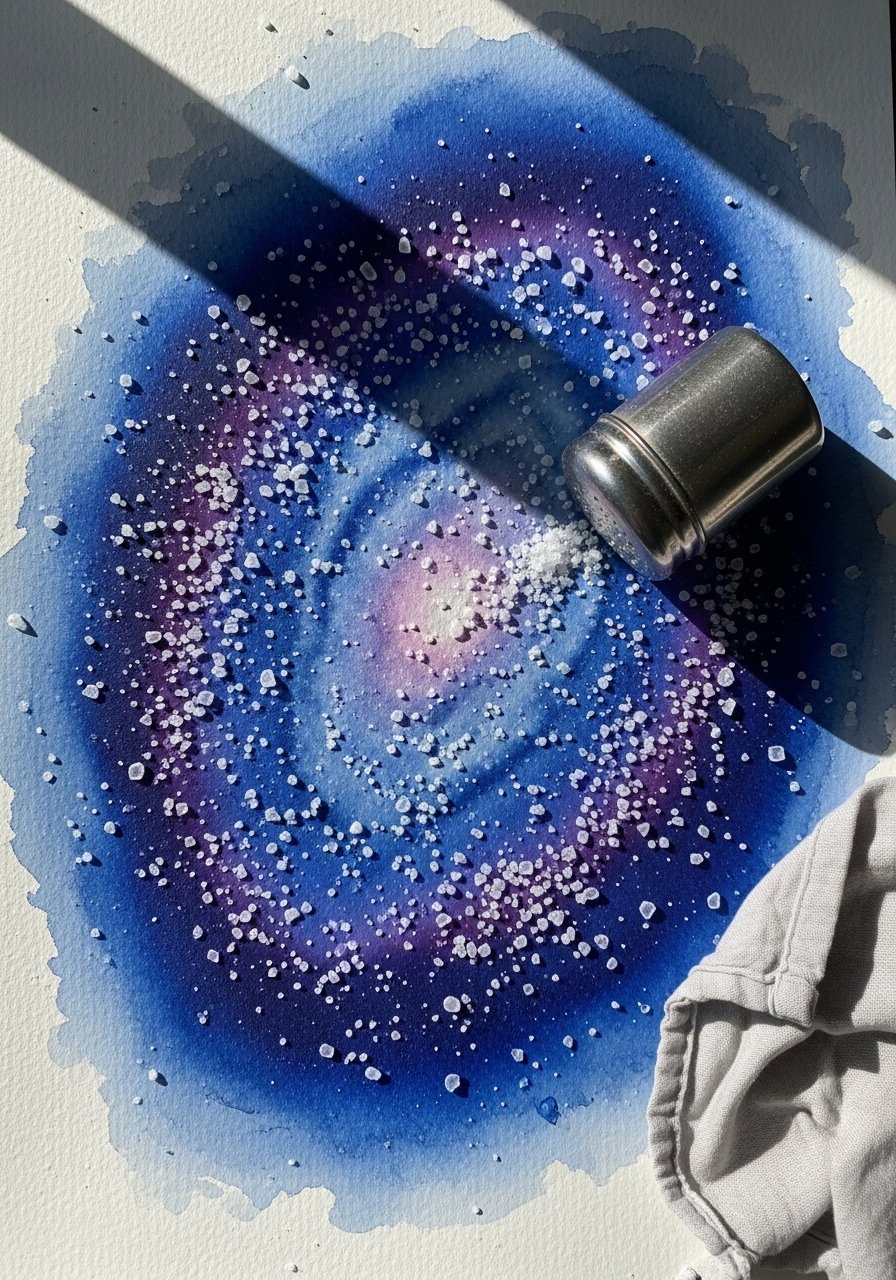
Salt creates magical textures in wet watercolor washes. The paint pushes away from salt grains, leaving star-like specs—perfect for night-sky abstracts. Kids love sprinkling salt and watching the pattern appear.
Materials
- Watercolor paper (9" x 12", 140 lb)
- Watercolor pan set (12 colors)
- Round brush (size 8)
- Table salt (fine)
- Spray bottle for water
- Paper towel
- Palette
Instructions
- Wet the paper with clean water for a loose wash.
- Drop deep blues and purples, letting colors blend.
- While paint is wet, sprinkle a pinch of salt over sections.
- Let dry completely 1–2 hours; salt will create textures.
- Gently brush off salt to reveal the pattern.
- Add white paint dots for stars if desired and let dry 15 minutes.
How to display or gift it
Mat and frame a single piece or make a series for a mini gallery. Store finished sheets in a flat portfolio folder to avoid bending.
- Scribble-to-Shapes Storyboard
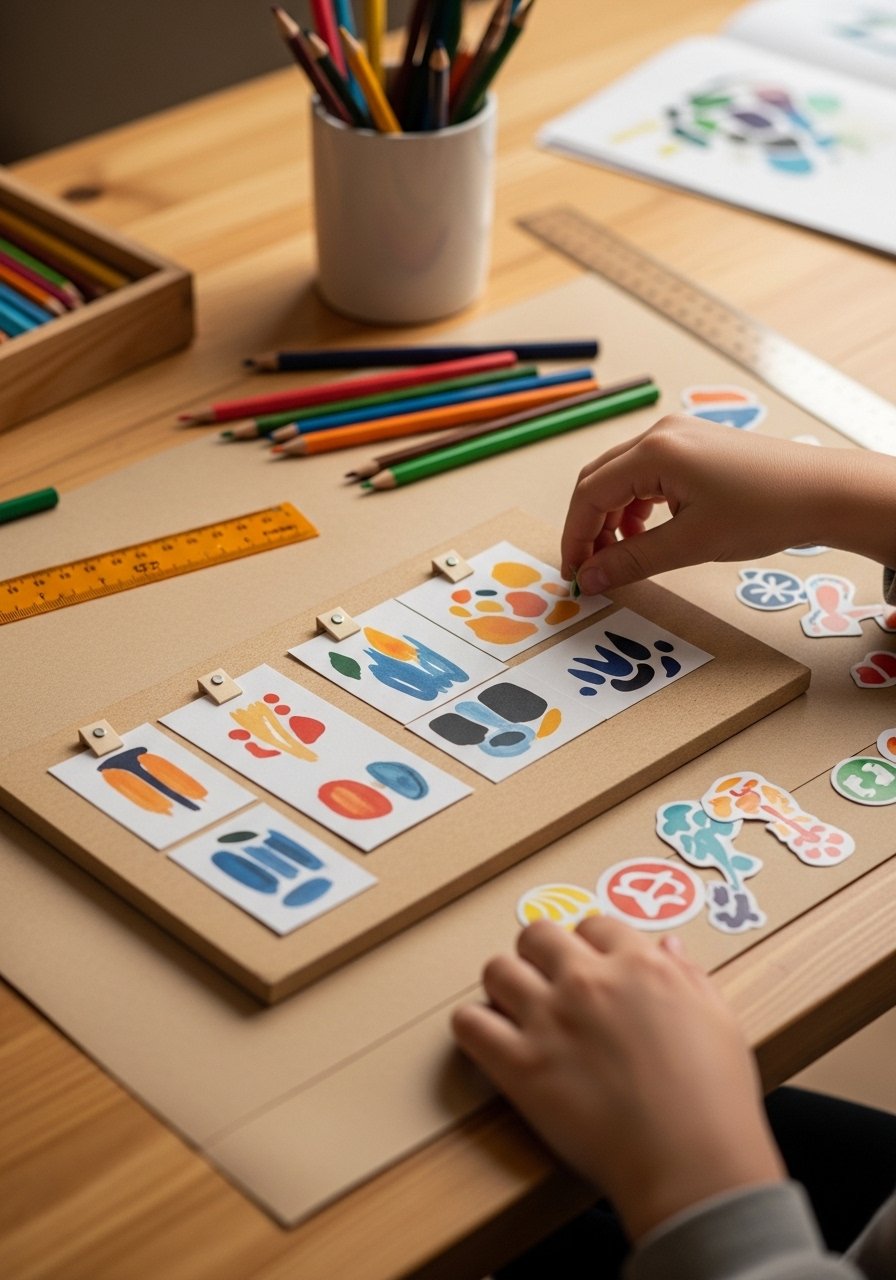
Turn random scribbles into visual stories by trimming them into panels and arranging sequences. Kids create emotions or scenes from abstract marks—great for building narrative skills and confidence.
Materials
- Mixed-media paper (4 sheets 6" x 6")
- Colored pencils (set of 12)
- Stickers and washi tape
- Glue stick
- Scissors
- Kraft cardstock (8" x 10")
- Fine-tip black pen
Instructions
- Let kids fill each small paper with loose scribbles and color blocks.
- Cut or trim edges to make matching panels.
- Arrange panels on kraft cardstock to create a flow.
- Glue in place and add stickers or washi tape accents.
- Use a fine-tip pen to write a one-line title below each panel.
- Let glue set 10 minutes and display.
How to display or gift it
Punch a hole and add twine to make a mini hanging mobile. Mount on a clipboard for easy rotation. Store panels in a clear craft sleeve.
- Bubble-Paint Prints
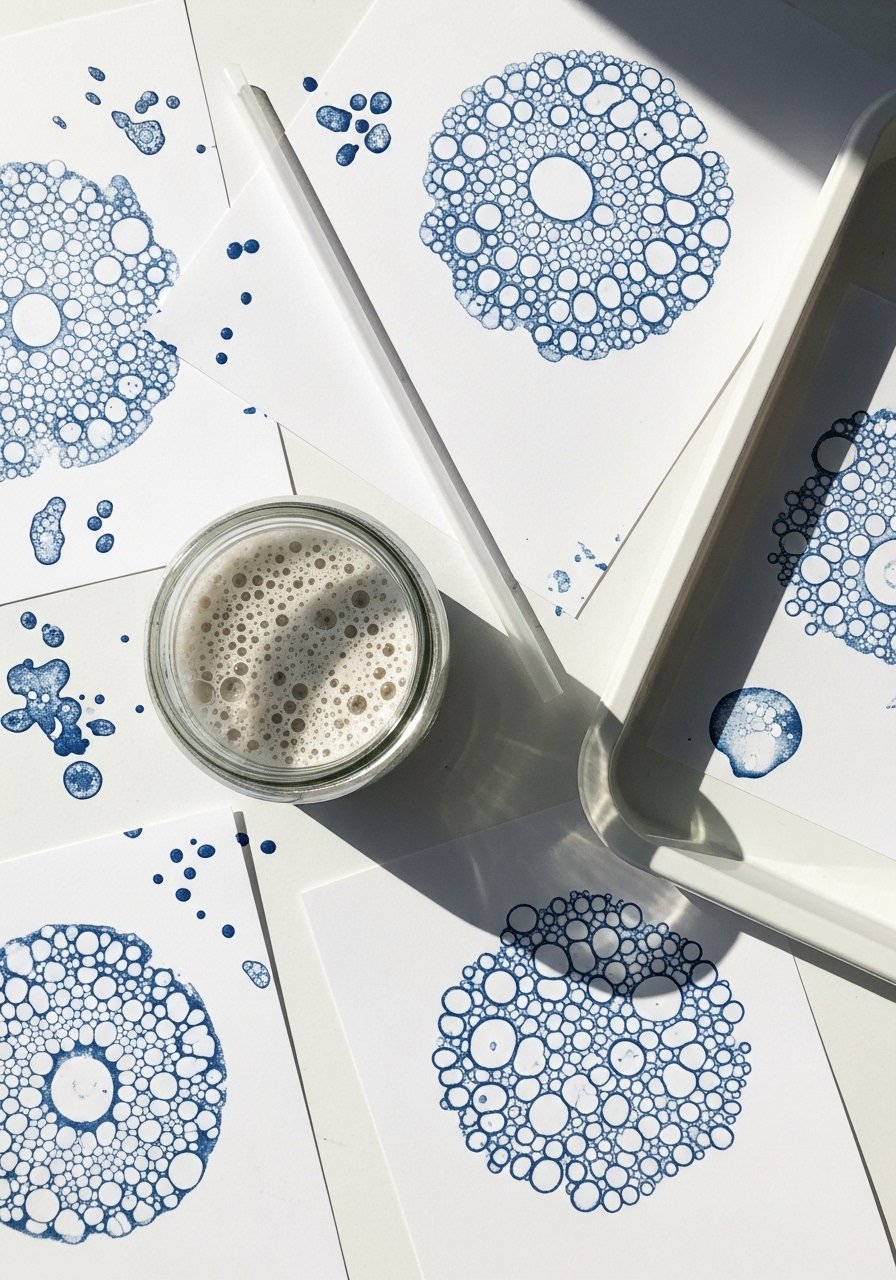
This gooey process mixes soap and paint to create bubbly textures you then stamp onto paper. The outcome is organic and unpredictable—a lovely abstract surface that’s tactile and fun.
Materials
- Tempera or acrylic paint (6 colors)
- Dish soap
- Straws
- Shallow cups or jars
- Printer paper or mixed-media paper
- Old tray
- Apron
Instructions
- Mix 1 tbsp paint + 1 tsp dish soap + 2 tbsp water in cups.
- Stir and blow through a straw to create bubbles.
- Press paper onto bubbles or scoop bubbles onto paper with a spoon.
- Repeat with different colors, letting layers overlap.
- Let dry flat 30–60 minutes.
- When dry, flatten under books if paper warped.
How to display or gift it
Turn vibrant sheets into greeting cards. Slip into clear sleeves and store in a small craft organizer.
- Chalk-Pastel Smudge Art
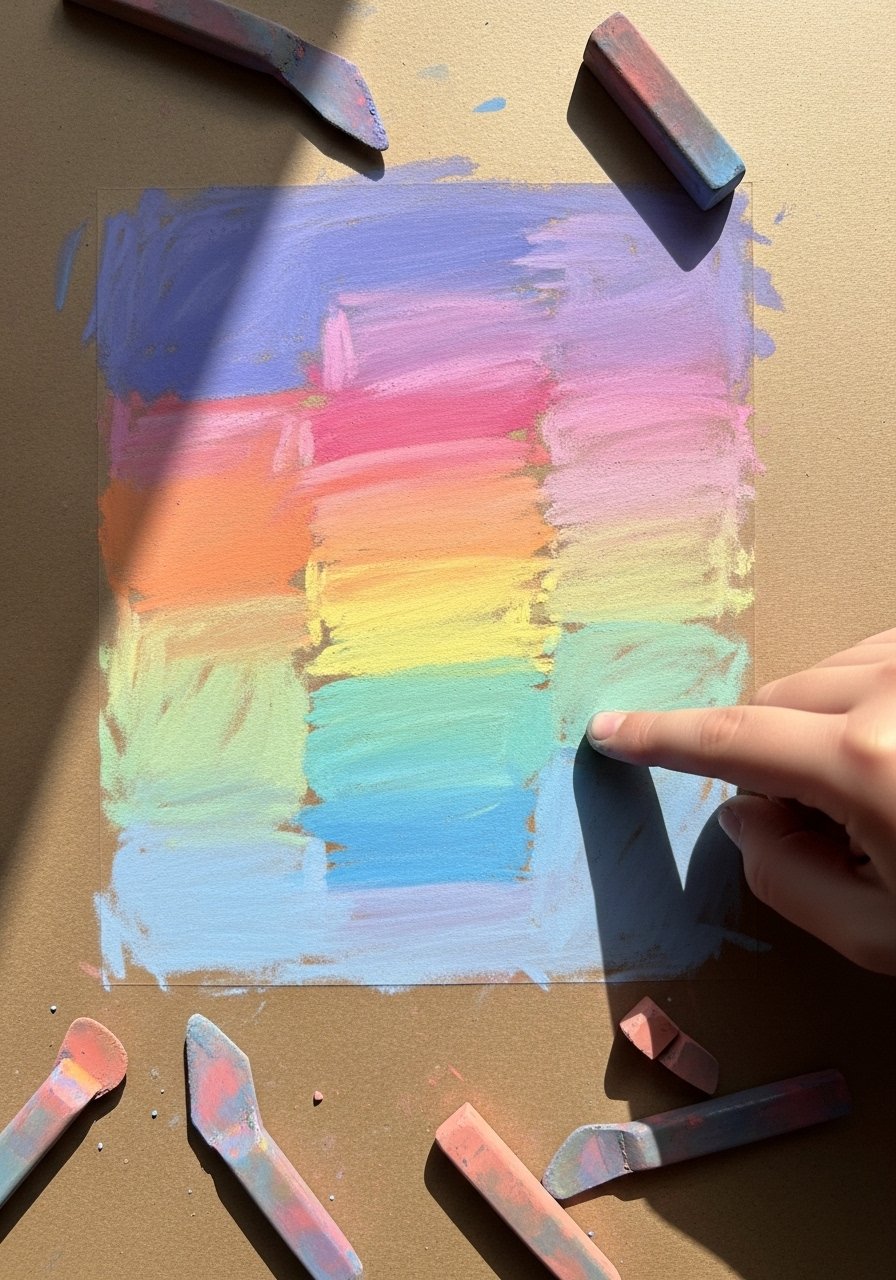
Chalk pastels are ideal for blending and building soft color fields. Kids draw bold marks and then smudge with fingers or blending stumps for dreamy abstracts. Fix with a light sealer to keep dust minimal.
Materials
- Soft chalk pastels (12-color set)
- Pastel paper (9" x 12, textured)
- Blending stumps or cotton buds
- Kneaded eraser
- Fixative spray (work outdoors)
- Gloves or apron
Instructions
- Draw bold shapes or scribbles with pastels.
- Use fingers or stumps to smudge and blend.
- Layer darker tones for depth.
- Erase small highlights with a kneaded eraser.
- Lightly mist with fixative outdoors, 12–18 inches away.
- Let cure 10 minutes before handling.
How to display or gift it
Mount behind glass to protect from dust. Package in a kraft portfolio and secure with ribbon for gifting.
- Tape-Resist Watercolor Doodles
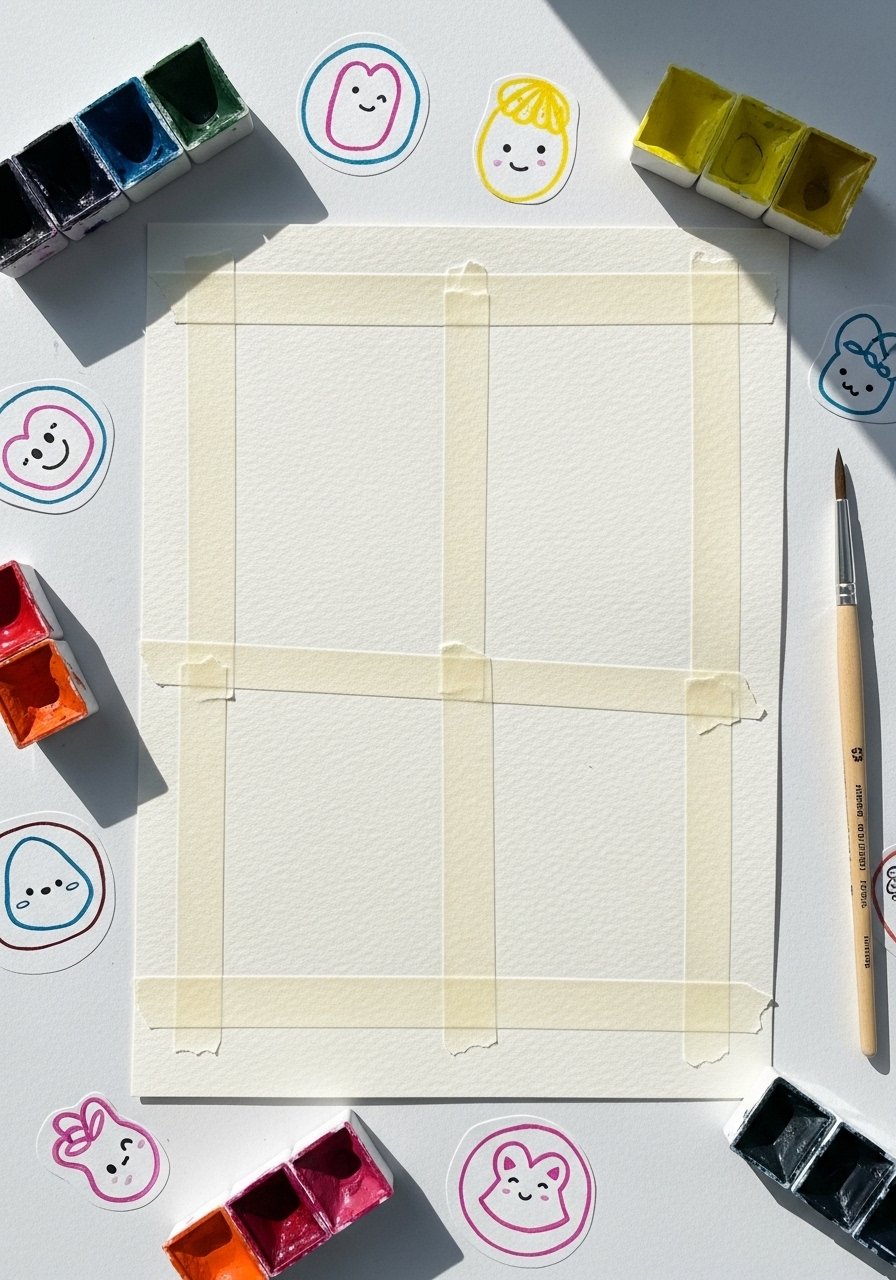
Use torn painter’s tape to mask shapes, then watercolor over the page. Remove tape to reveal crisp negatives that contrast with loose washes. Kids love the reveal.
Materials
- 140 lb watercolor paper (9" x 12")
- Painter’s tape
- Watercolor set
- Flat wash brush (1")
- Scissors
- Paper towels
- Palette
Instructions
- Tear and place tape randomly on paper, pressing firmly.
- Paint broad washes across paper.
- Add extra layers for deeper color; let dry 15–30 minutes.
- Peel tape to reveal white lines.
- Add doodles with a fine pen if desired.
- Let fully dry before framing.
How to display or gift it
Make matching cards from offcuts. Keep finished sheets flat in a stackable craft organizer.
- Marbled Shaving Cream Abstracts
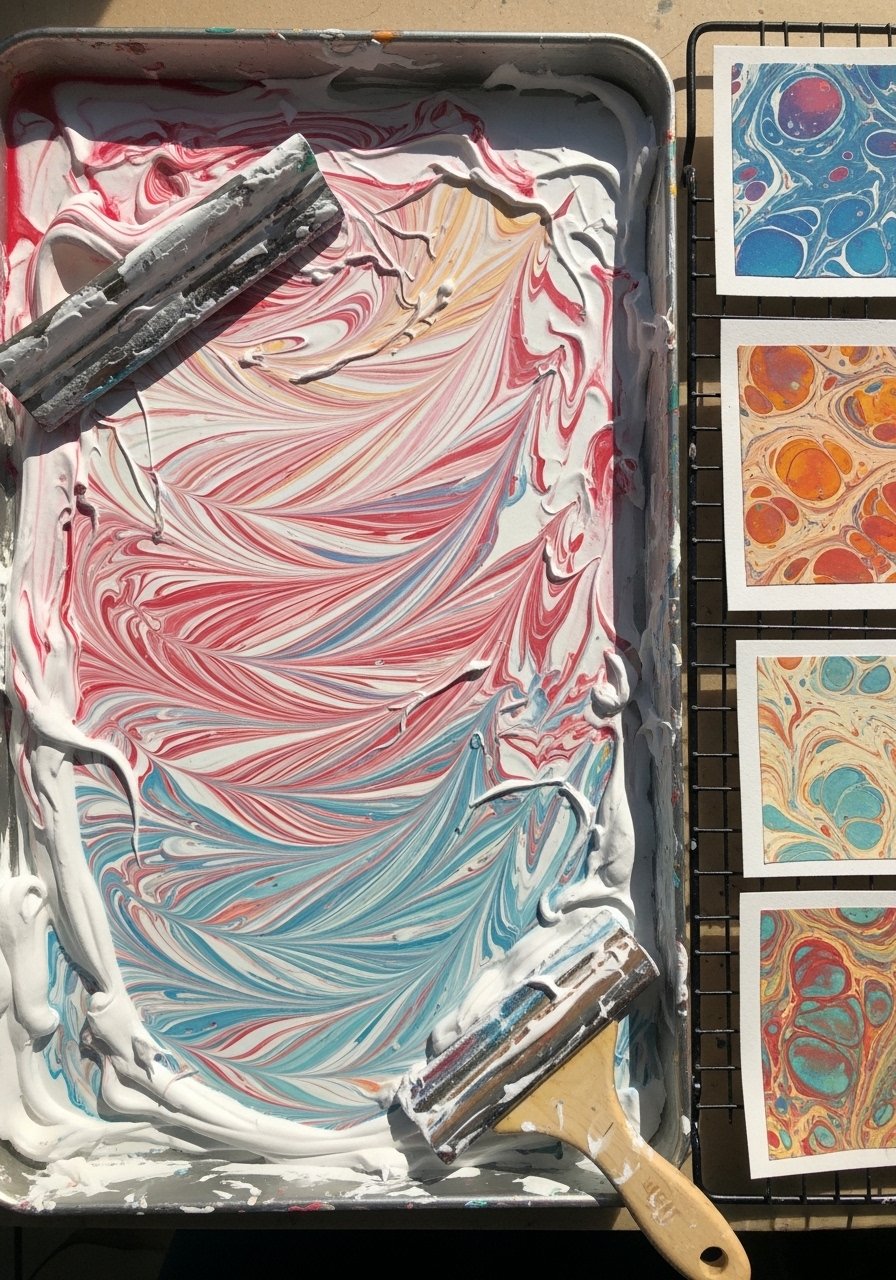
Shaving cream marbling creates swirls and soft, abstract patterns with minimal skill. Use liquid watercolors or diluted acrylics for intense color. It’s sensory and surprising.
Materials
- Shaving cream (foam, not gel)
- Liquid watercolors or acrylic ink (3–5 colors)
- Baking sheet
- Squeegee or ruler
- Heavyweight paper (9" x 12")
- Gloves
- Paper towels
Instructions
- Spread a 1/2" layer of shaving cream on a baking sheet.
- Drop a few drops of liquid color on the foam.
- Swirl with a stick to marbleize.
- Press paper onto the foam, lift, and scrape excess with a squeegee.
- Rinse gently under water and lay flat to dry 30–60 minutes.
- Trim edges if needed.
How to display or gift it
Pair with kraft frames for a soft, modern look. Store extras in a clear portfolio sleeve.
- Foil-Resist Metallic Scribbles

Add shiny accents with adhesive foil. Kids draw with glue, press foil, and lift to leave metallic patterns—a quick way to make abstracts feel special and gift-ready.
Materials
- Dark construction paper (9" x 12")
- Glue stick or tacky glue
- Gold/silver foil sheets
- Paint pens (white or neon)
- Fine detail brush for glue
- Scissors
Instructions
- Draw patterns with glue and let become tacky (~2 minutes).
- Press foil onto tacky glue and rub with a soft cloth.
- Peel foil to reveal metallic patterns.
- Add paint-pen details for contrast.
- Let glue fully set 20 minutes.
- Trim and mount if desired.
How to display or gift it
Frame in a floating frame to show off the sheen. Slip into a gift envelope with black tissue.
- Sticker-Blocked Color Fields
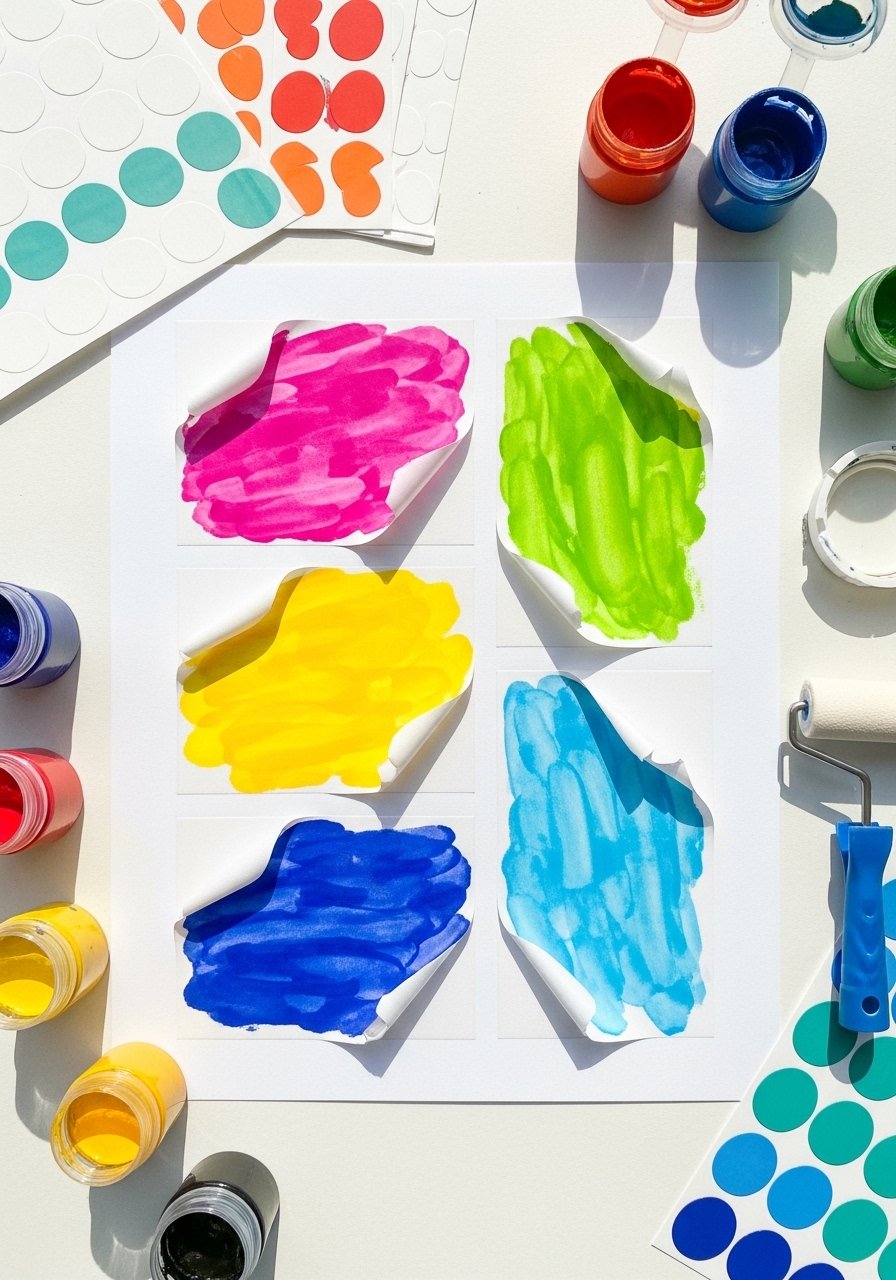
Use removable stickers as masks. Paint over them, let dry, then peel to reveal playful shapes. Instant modern abstracts with minimal fuss—great for small hands.
Materials
- Sticker sheets (assorted shapes)
- Acrylic or tempera paint (tubes)
- Paint roller (small brayer)
- Mixed-media paper
- Paper plate palettes
- Tweezers for small stickers
Instructions
- Stick shapes onto paper firmly.
- Roll paint over the surface with a brayer.
- Wait 10–15 minutes for paint to dry to touch.
- Carefully peel stickers to reveal negative shapes.
- Add details with markers if desired.
- Let cure 30 minutes before framing.
How to display or gift it
Make sets in matching palettes and stack in clear sleeves. A small wooden easel works well for display.
- Collagraph Texture Rubbing

Create textured plates from recycled cardboard and press paper over them with crayons for embossed abstract patterns. It’s great for exploring texture and pattern.
Materials
- Cardboard scraps
- Glue (craft glue)
- Found objects (buttons, bubble wrap, cardboard strips)
- Wax crayons
- Mixed-media paper
- Scissors
- Heavy books for pressing
Instructions
- Glue objects onto cardboard to build a low-relief plate.
- Let glue dry 30 minutes or longer for thick bits.
- Place paper over the plate and gently rub with the side of a crayon.
- Layer colors to create depth.
- Press under books to flatten if needed.
- Trim and mount.
How to display or gift it
Frame in a float frame to highlight the texture. Store plates flat between projects.
- Puffy Paint Abstract Buttons
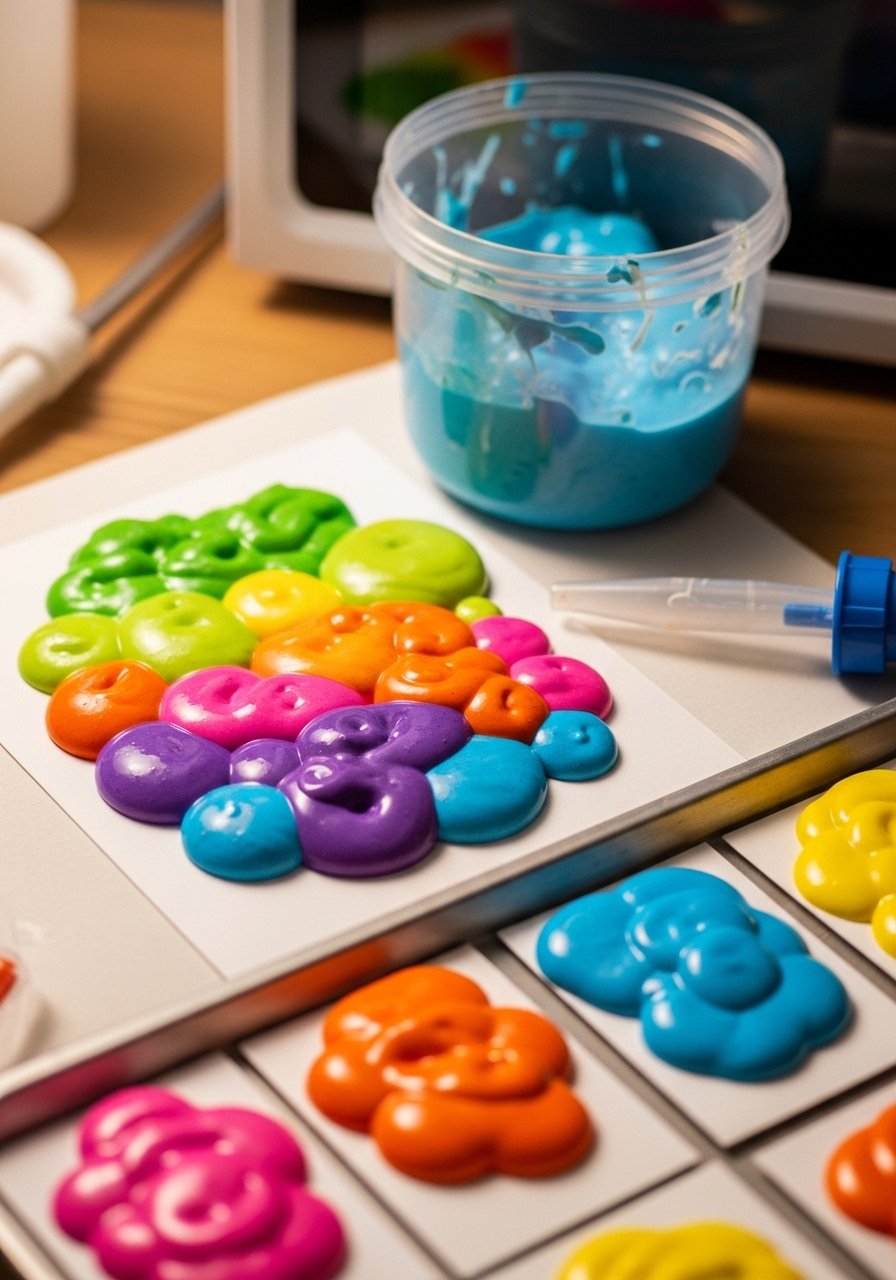
Make puffy paint with shaving cream and glue, then pipe blobs that dry with a raised texture. They’re tactile and colorful—kids love the three-dimensional result.
Materials
- White school glue (1 cup)
- Shaving cream (1 cup)
- Food coloring or liquid watercolor
- Pipettes or squeeze bottles
- Cardstock (8" x 10")
- Tray for drying
Instructions
- Mix equal parts glue and shaving cream in bowls.
- Add color drops and stir gently.
- Spoon into squeeze bottles or pipettes.
- Pipe shapes and blobs onto cardstock.
- Let dry fully 12–24 hours until firm.
- Add small embellishments like sequins if desired.
How to display or gift it
Glue onto a canvas panel for a durable keepsake. Pack in a shallow box for gifting.
- Resist Tape Maze with Paint Pens
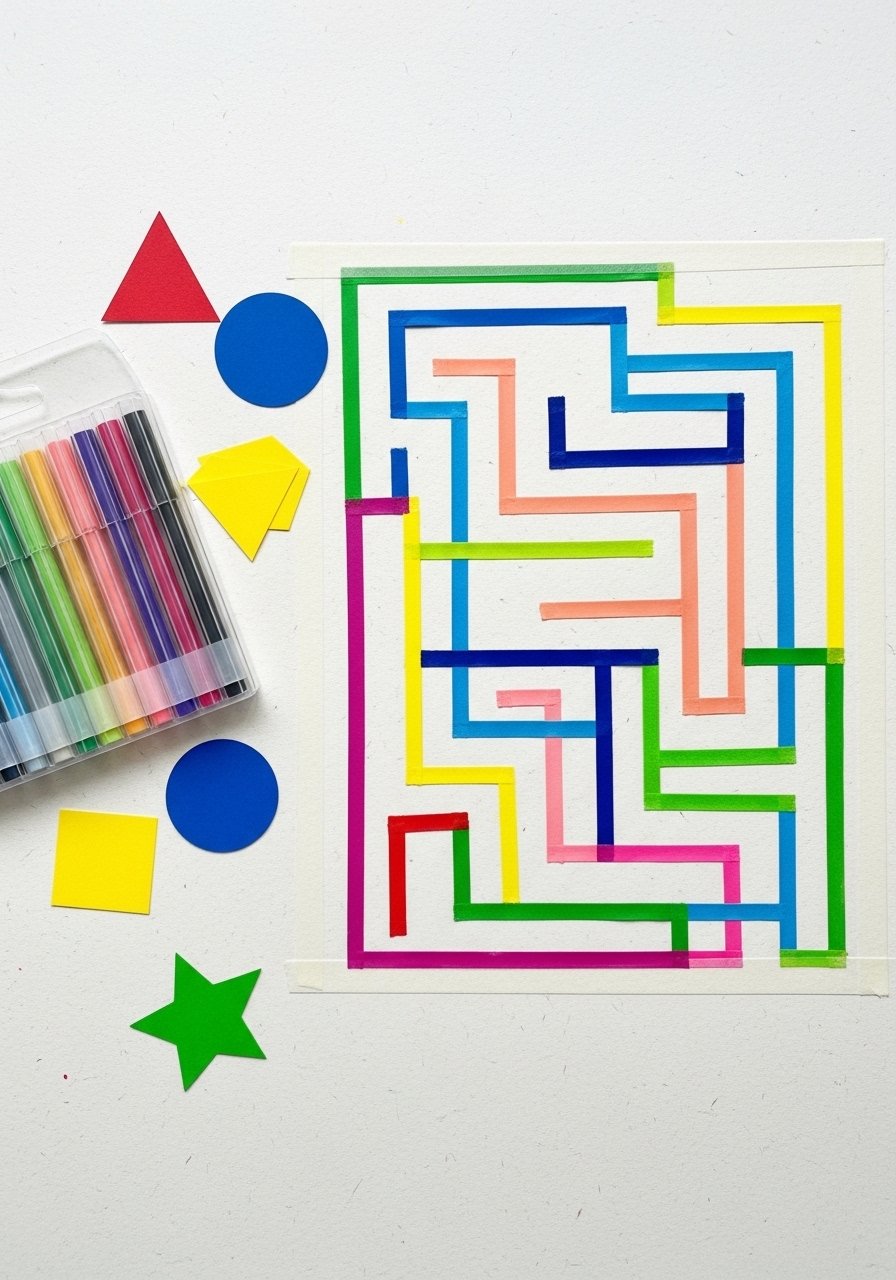
Use thin tape to create a maze of white lines, then fill spaces with paint-pen color for glossy, controlled abstracts. Great for older kids who like precision.
Materials
- Bristol board (9" x 12")
- Thin painter’s tape
- Paint pens (opaque set)
- Ruler
- Pencil
- Craft knife (adult use)
Instructions
- Plan a maze with pencil and ruler, then apply tape along the planned lines.
- Color each open segment with paint pens.
- Carefully peel tape for clean white lines.
- Touch up edges with a small brush if needed.
- Let ink cure 20 minutes.
- Frame or mount.
How to display or gift it
Insert into a clear frame and hang in a playroom. Store pens in a pen organizer.
- Blocky Collage with Recycled Papers

Cut recycled magazines and colored paper into blocks and arrange as abstract color fields. It’s eco-friendly and trains composition skills.
Materials
- Old magazines
- Colored construction paper
- Glue stick
- Ruler
- Craft scissors
- Kraft backing board
- Bone folder for smoothing
Instructions
- Cut rectangles and squares from magazines and colored paper.
- Arrange into a grid or loose composition.
- Glue pieces down starting from the center.
- Smooth seams with a bone folder.
- Trim edges and mount.
- Let glue set 10–15 minutes.
How to display or gift it
Make sets and bind into a collage book. Wrap in kraft paper and tie with twine.
- Monochrome Ink Blot Symphony
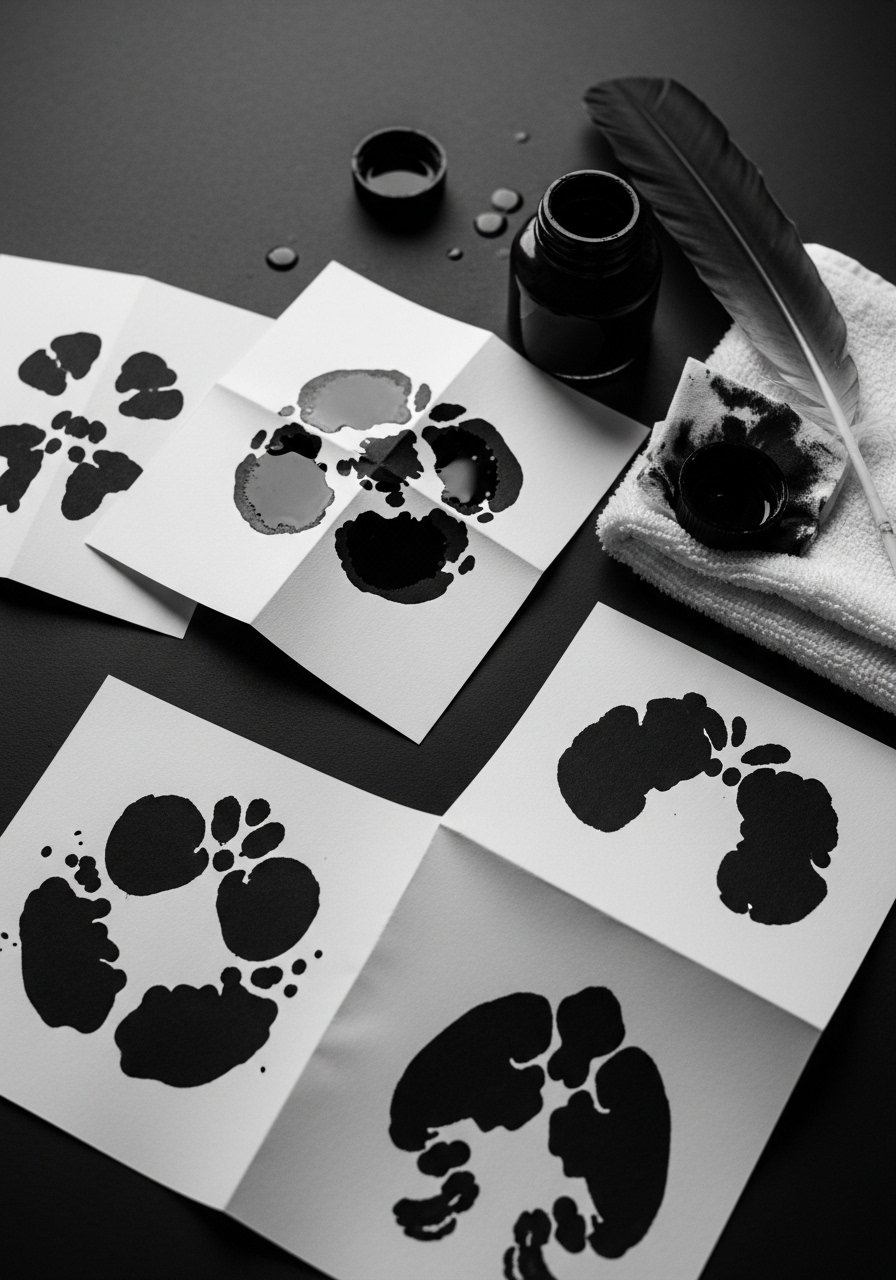
Folded ink blots create symmetrical abstracts that spark imagination. Kids experiment with pressure and symmetry to make expressive motifs.
Materials
- Ink bottle (waterproof black)
- Mixed-media paper
- Dropper
- Palette knife
- Paper towels
- Flat board
Instructions
- Fold paper in half and open it.
- Drop ink onto one side with a dropper.
- Fold back and press to transfer, then open.
- Repeat with smaller drops for detail.
- Let dry flat 30–60 minutes.
- Add highlights with white paint pen if desired.
How to display or gift it
Frame as a modern pair and discuss what shapes you both see. Store in a dry folder.
- Nature-Print Abstracts
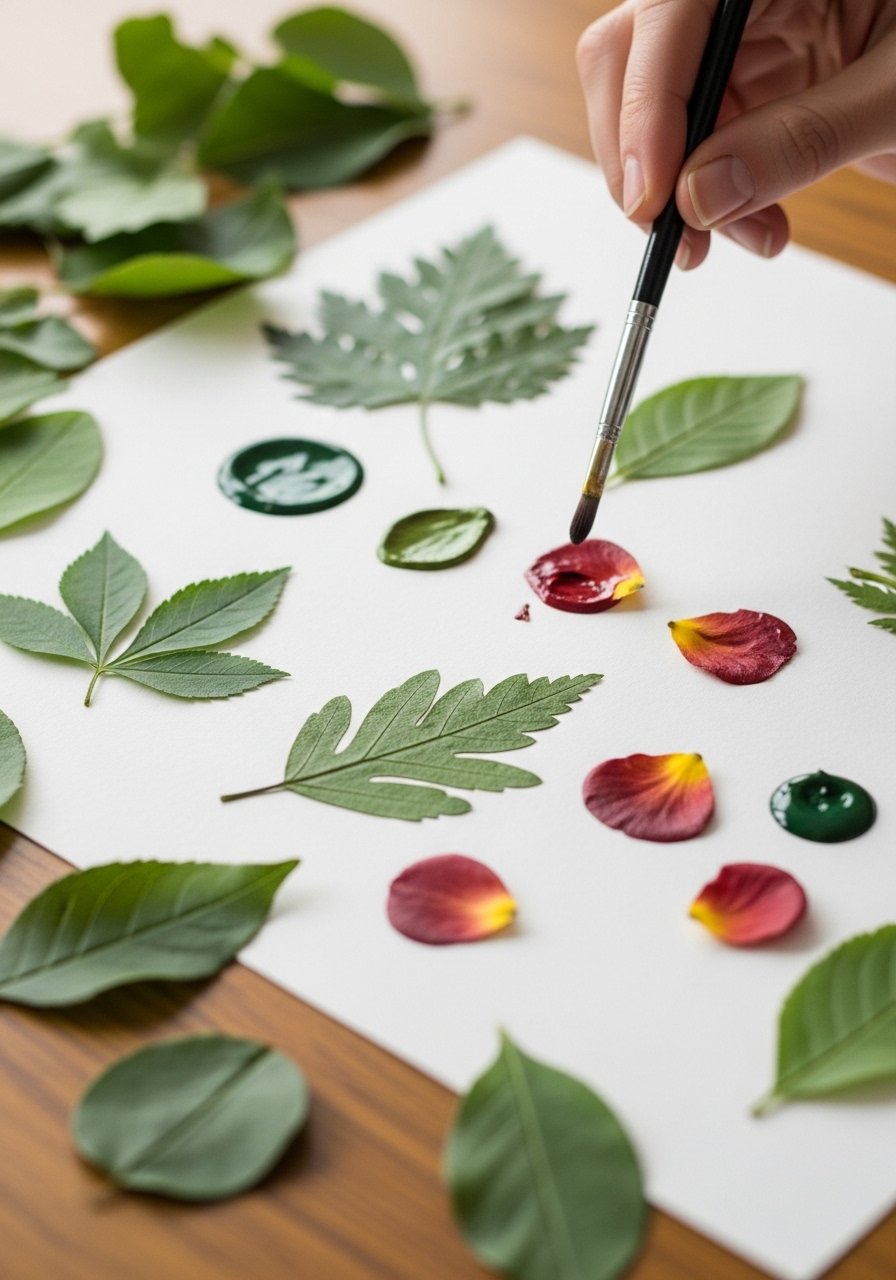
Use leaves, petals, and twigs as stamps to create organic abstracts. The textures and veins leave delicate impressions—perfect for a cottagecore aesthetic.
Materials
- Acrylic or tempera paints
- Leaves, flowers, thin twigs
- Brayer or flat brush
- Mixed-media paper
- Paper towels
- Tray for arranging nature bits
Instructions
- Paint one side of a leaf with a thin coat of paint.
- Press painted side onto paper and rub gently.
- Lift leaf to reveal the print.
- Repeat with petals and other shapes, layering colors.
- Let dry 20–30 minutes.
- Press flat under books if warped.
How to display or gift it
Frame with a thin wood frame for a natural look. Bundle prints with twine for a rustic gift.
- Scratch-Art Abstract Panels
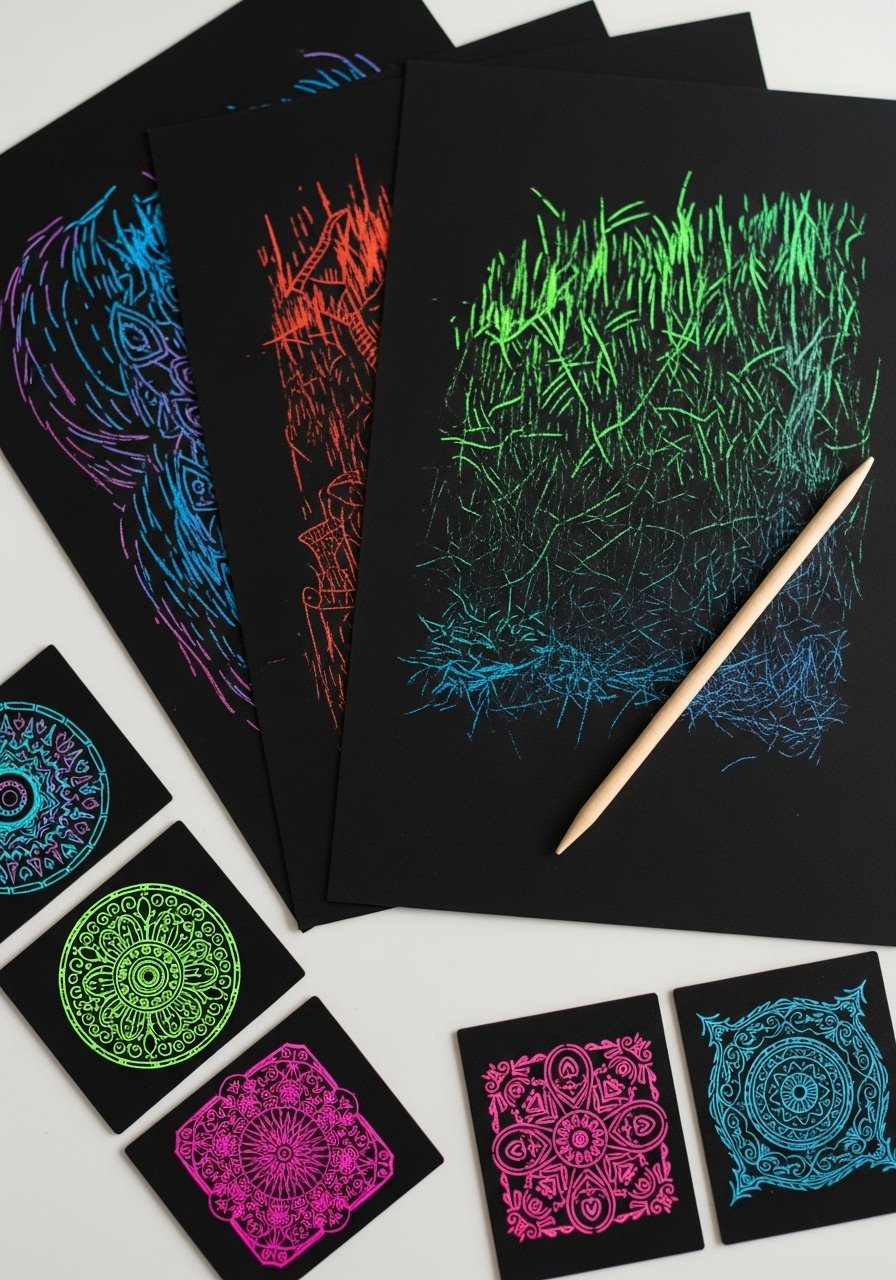
Scratch art uses a black surface over bright underlayers. Kids scratch lines to reveal neon colors—so satisfying and bold.
Materials
- Scratch art paper (10 sheets)
- Wooden styluses (pack)
- Ruler
- Pencil
- Small easel for display
Instructions
- Sketch a loose composition lightly with pencil.
- Scratch through the black coating with a stylus following the sketch.
- Vary pressure for thin and thick lines.
- Fill areas to reveal color blocks.
- Brush off debris gently.
- Frame or prop when done.
How to display or gift it
Frame in a black frame to make colors pop. Store extras in a shallow drawer.
- Pollock-Inspired Splatter Canvas
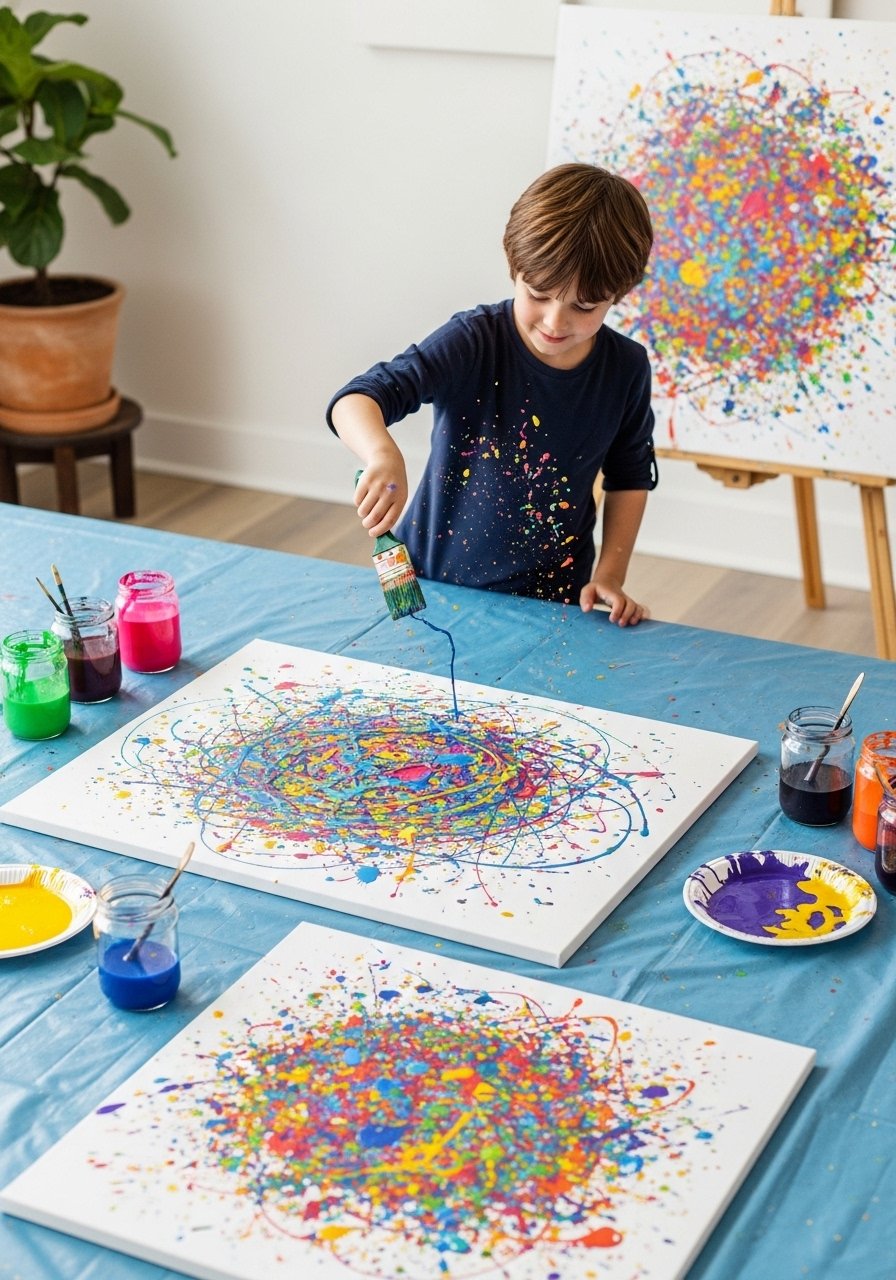
Let kids channel abstract expressionism by flicking paint onto a canvas. It’s expressive and great for older children who can handle more kinetic motion.
Materials
- Small canvas (8" x 10")
- Acrylic craft paint
- Large round brushes
- Disposable cups for thinning paint
- Protective floor cover
- Gloves or smock
Instructions
- Thin paint with 10–20% water for splatterability.
- Dip brush and flick paint over the canvas with a wrist motion.
- Layer contrasting colors, letting each dry 20–30 minutes.
- Use a toothbrush for fine speckles.
- Stop when composition feels balanced.
- Let cure 24 hours for full hardness.
How to display or gift it
Hang on a mini gallery wall with other small canvases. Slide into a shallow box for a lively present.
- Tissue-Paper Stained-Glass Abstract
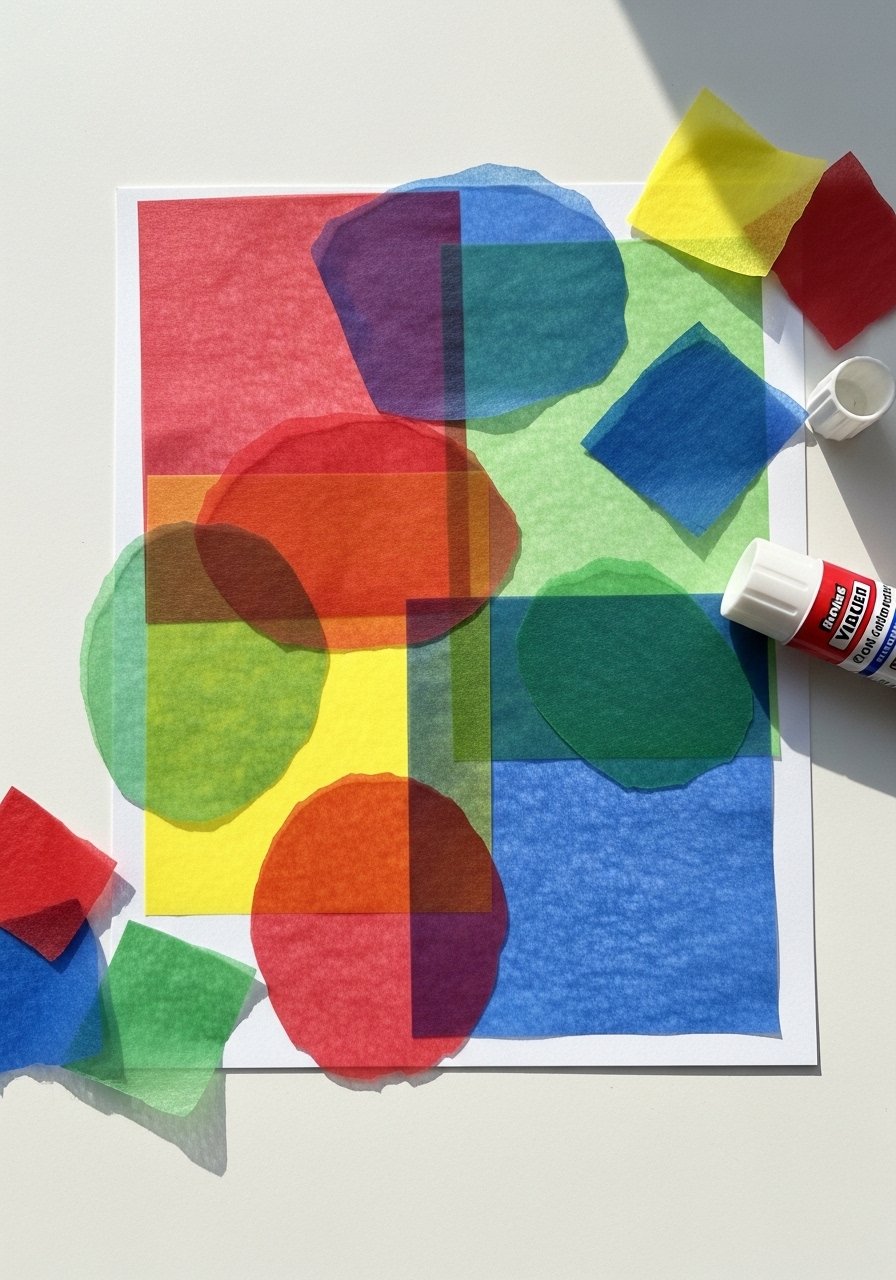
Overlapping tissue paper layers create luminous color mixes. A glue stick keeps things simple for little hands and the result looks like modern stained glass.
Materials
- Colored tissue paper (assorted sheets)
- White cardstock
- Glue stick
- Scissors
- Waxed paper (to protect work surface)
- Small paint brush for smoothing
Instructions
- Cut or tear tissue into varied shapes.
- Arrange and overlap pieces on cardstock.
- Apply glue sparingly with a brush to avoid wrinkling.
- Smooth pieces flat as you go.
- Trim edges and let dry 10–15 minutes.
- Attach a string to hang in a sunny window.
How to display or gift it
Hang in a sunny window to let colors glow. Pack flat with waxed paper between pieces for safe transport.
- Negative Space Chalkboard Doodles
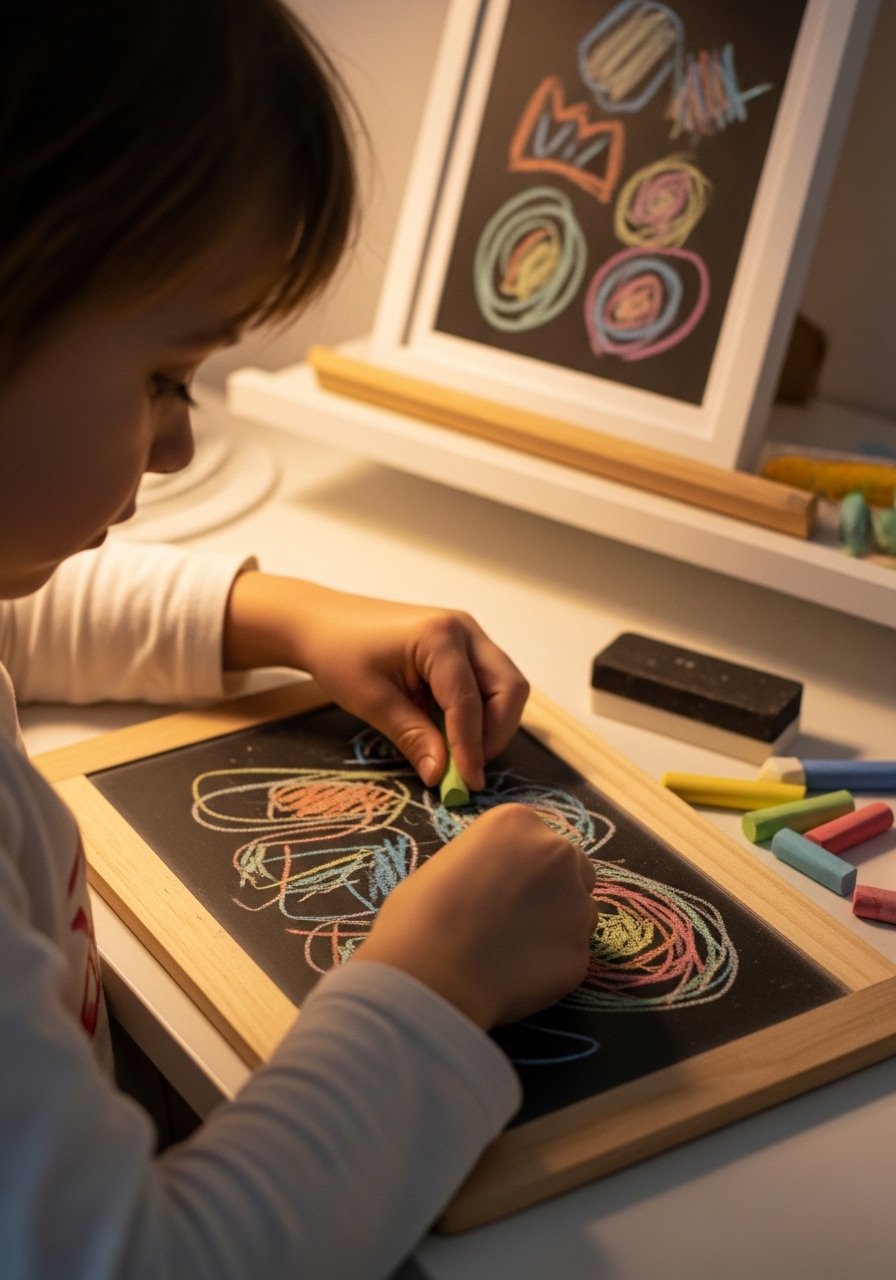
Use a small chalkboard for erasable abstract play. Kids layer chalk, then wipe sections to reveal negative shapes. It’s reusable and endlessly playful.
Materials
- Small chalkboard (8" x 10")
- Colored chalk set
- Chalk eraser
- Microfiber cloth
- Chalk fixative spray (optional)
- Mini easel for display
Instructions
- Draw large colorful marks with chalk.
- Use an eraser to remove shapes and create negative space.
- Layer new colors over erased areas.
- For semi-permanent display, mist with chalk fixative outdoors.
- Wipe clean to restart another day.
- Store chalk in a small jar.
How to display or gift it
Prop on a child’s desk or shelf. Package a chalkboard with a tin of chalk for a simple present.
- Marbleized Nail-Polish Dots
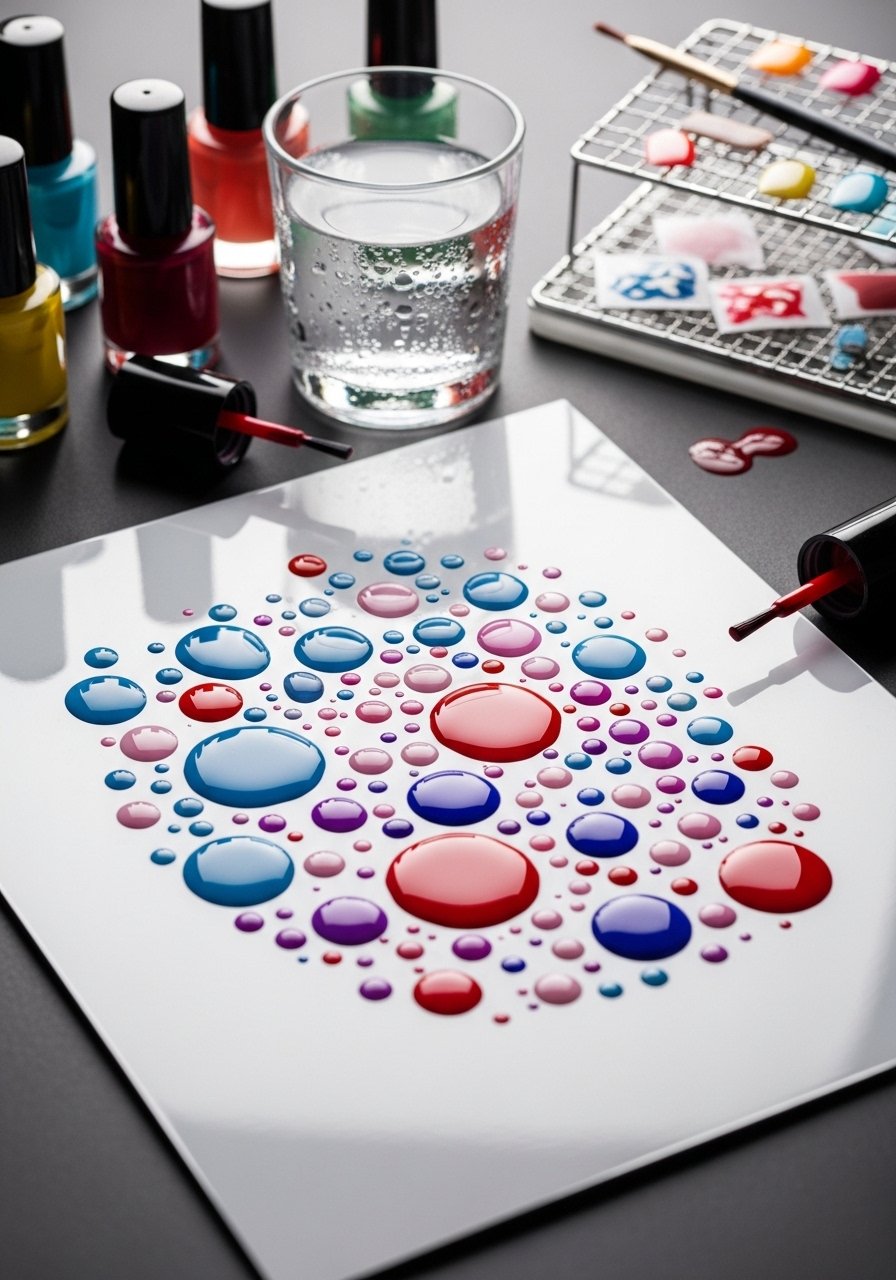
Quickly create glossy dots and swirls using a touch of nail polish on a glossy cardstock. Very shiny and dramatic—best with older kids and under supervision.
Materials
- Glossy cardstock
- Nail polish (3–4 colors)
- Small glass of water
- Toothpicks
- Tweezers
- Protective gloves
Instructions
- Drop tiny drops of polish onto the water surface and swirl with a toothpick.
- Dip the cardstock to pick up color patterns.
- Repeat with different colors, letting layers dry 15–30 minutes.
- Wipe any polish off hands immediately with remover.
- Let fully cure 24 hours for no-tack finish.
- Trim and mount.
How to display or gift it
Frame behind glass to keep glossy shine safe. Wrap in tissue paper for gifting.
- Yarn-Resist Color Fields
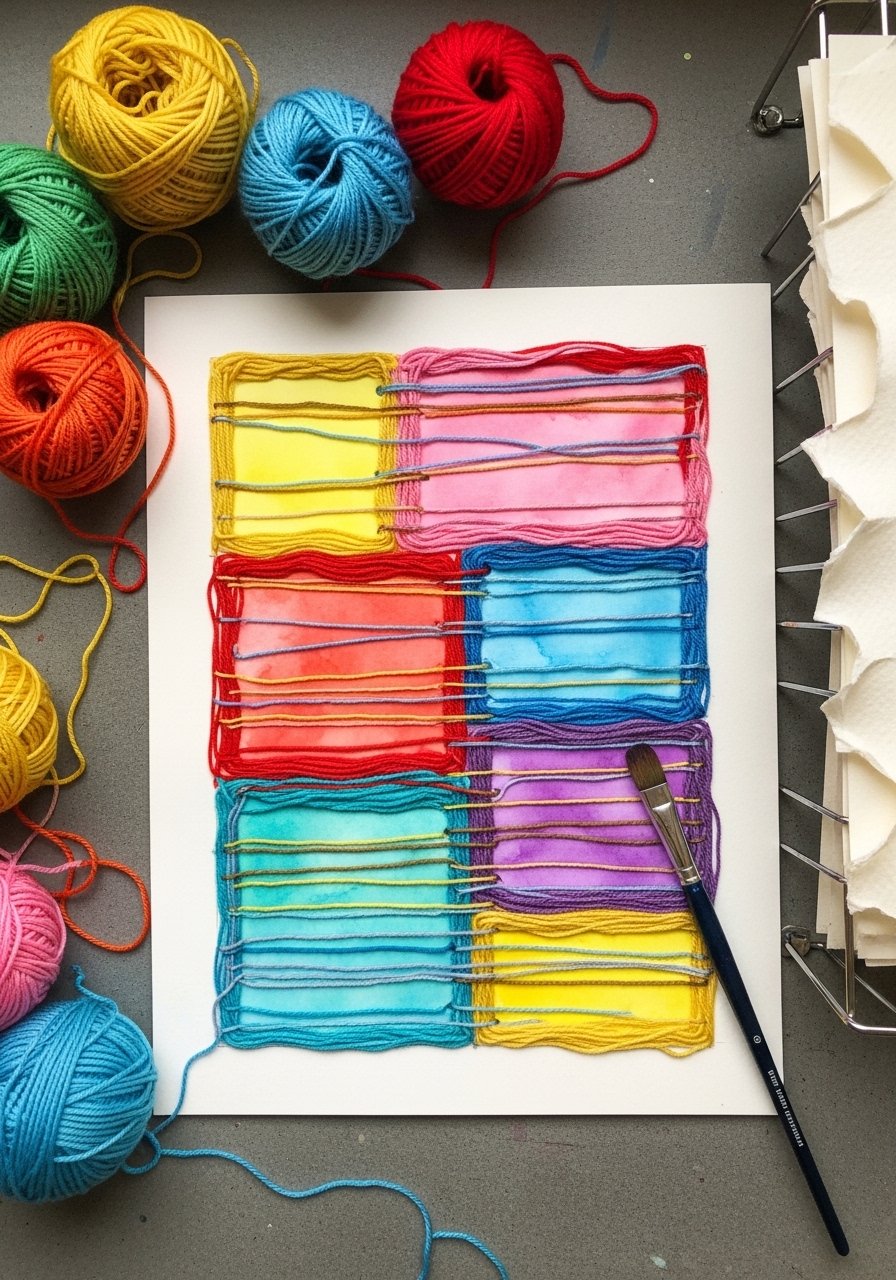
Lay yarn on paper, paint around it, and when removed, yarn leaves crisp lines. It’s a great way to introduce negative space and rhythm to composition.
Materials
- Cotton yarn (3mm, several colors)
- Mixed-media paper
- Acrylic craft paint
- Small flat brush
- Glue dots (optional to hold yarn)
- Scissors
Instructions
- Arrange yarn on paper in loops or straight lines; secure with tiny glue dots.
- Paint around yarn with flat brush, covering gaps.
- Let paint dry 20–30 minutes.
- Gently remove yarn to reveal lines.
- Add small details with a fine brush if needed.
- Let cure 1 hour.
How to display or gift it
Mount on a wooden board for a tactile canvas. Pack with a small ball of yarn as a gift tag.
- Collage with Transparent Overlays
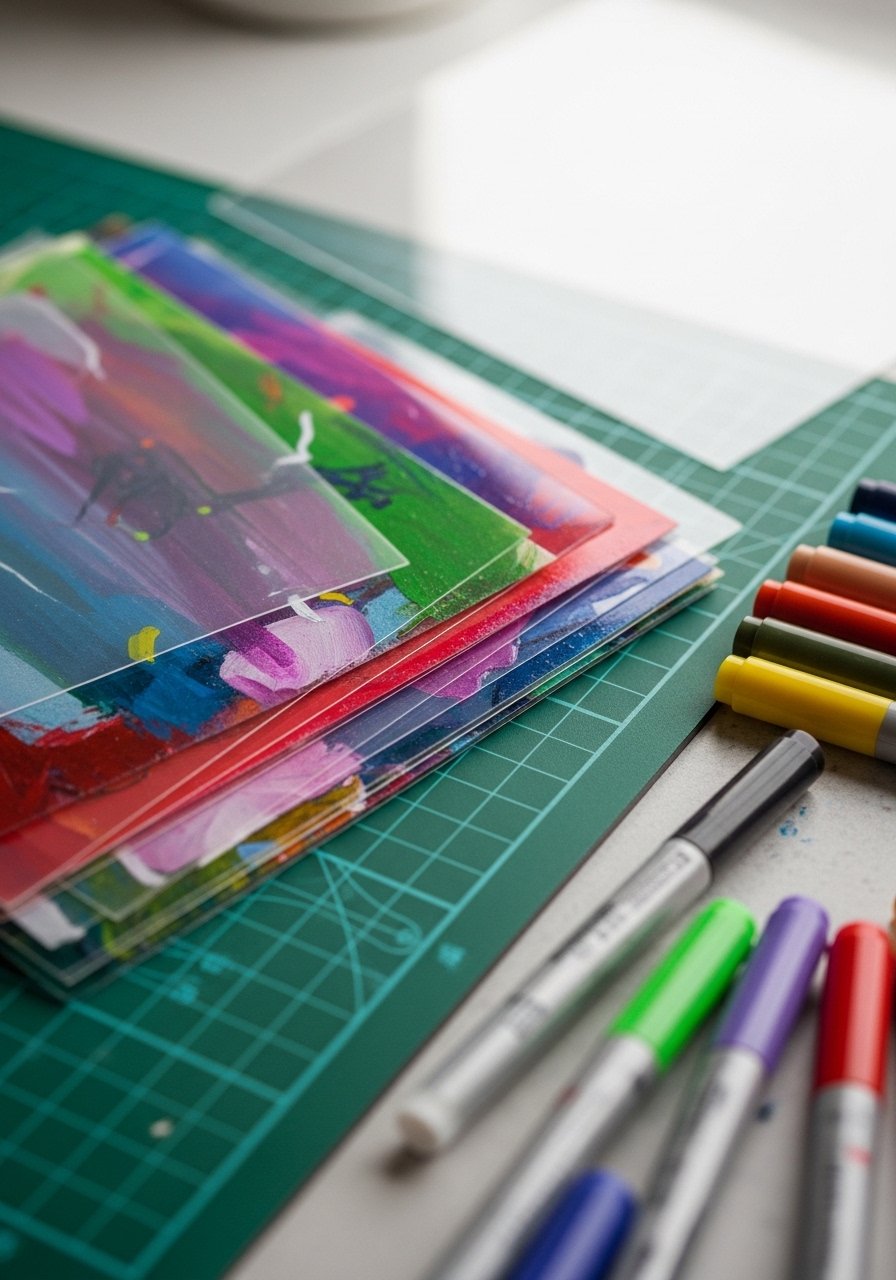
Use acetate sheets to layer painted pieces for depth. Overlays can be drawn on with paint pens for a floating effect—very modern and gallery-ready.
Materials
- Clear acetate sheets (8" x 10")
- Acrylic paints
- Paint pens
- Mixed-media paper
- Binder clips
- Ruler
- Self-healing cutting mat
Instructions
- Paint abstracts on paper and on acetate with paint pens.
- Cut to size and layer acetate over paper, experimenting with order.
- Secure layers with binder clips or mount in a frame.
- Add painted details between layers if desired.
- Let any wet paint on acetate dry 10–15 minutes.
- Display as a layered panel.
How to display or gift it
Use a floating frame to show depth. Deliver as a set with a small instruction note.
- Finger-Paint Color Fields
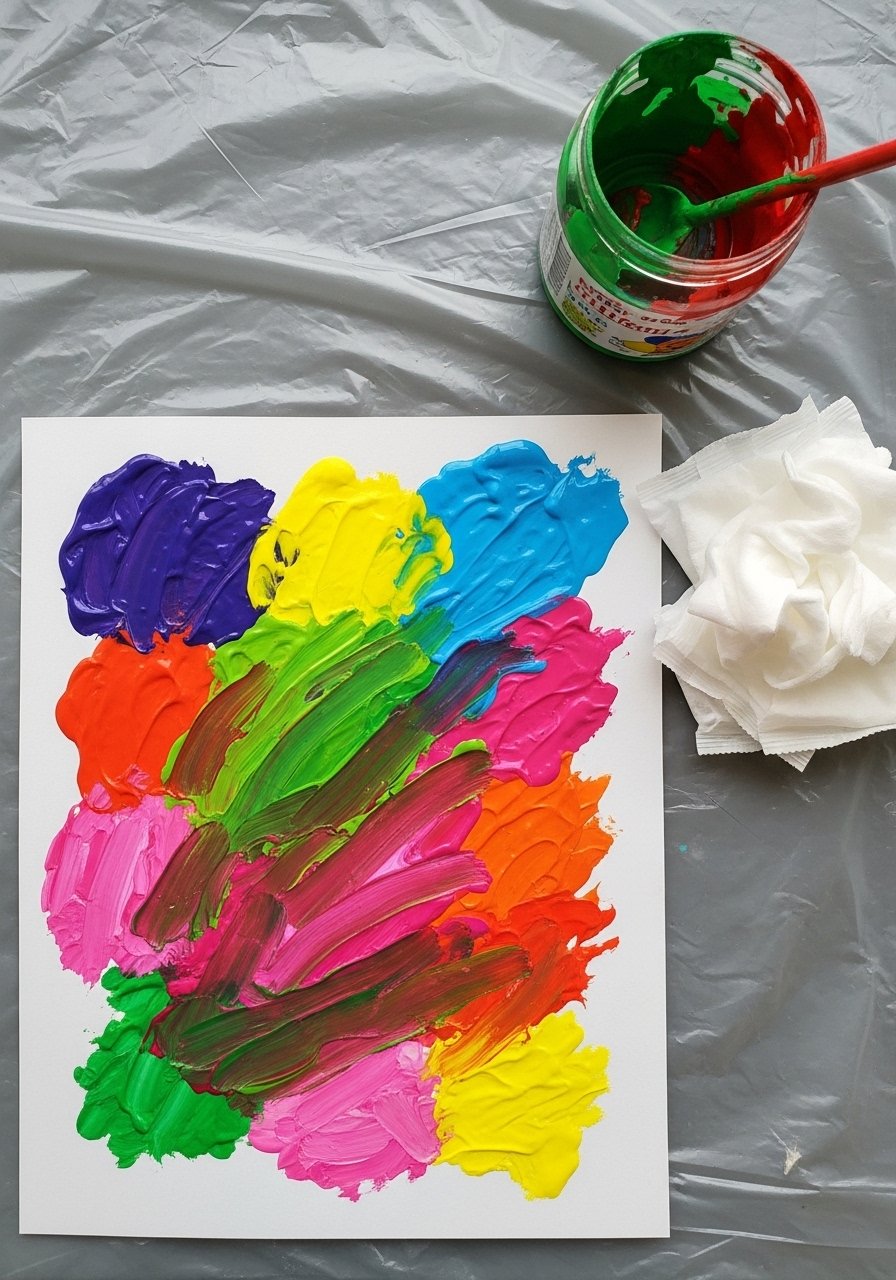
Finger-painting keeps things tactile and direct. Kids blend hues with fingertips for organic abstract fields—perfect for sensory play.
Materials
- Washable finger paints (6 colors)
- Heavyweight paper
- Apron
- Wet wipes
- Tray for mixing
- Paper towels
Instructions
- Squeeze paint onto a tray in separate pools.
- Encourage kids to dab and smear with fingers.
- Mix small areas to create gradients.
- Rinse hands frequently to avoid muddying colors.
- Let dry flat 1–2 hours.
- Store leftover paint in airtight containers.
How to display or gift it
Laminate small sections into placemats. Roll larger sheets and tie with ribbon for gifting.
- Glow-in-the-Dark Abstract Panels
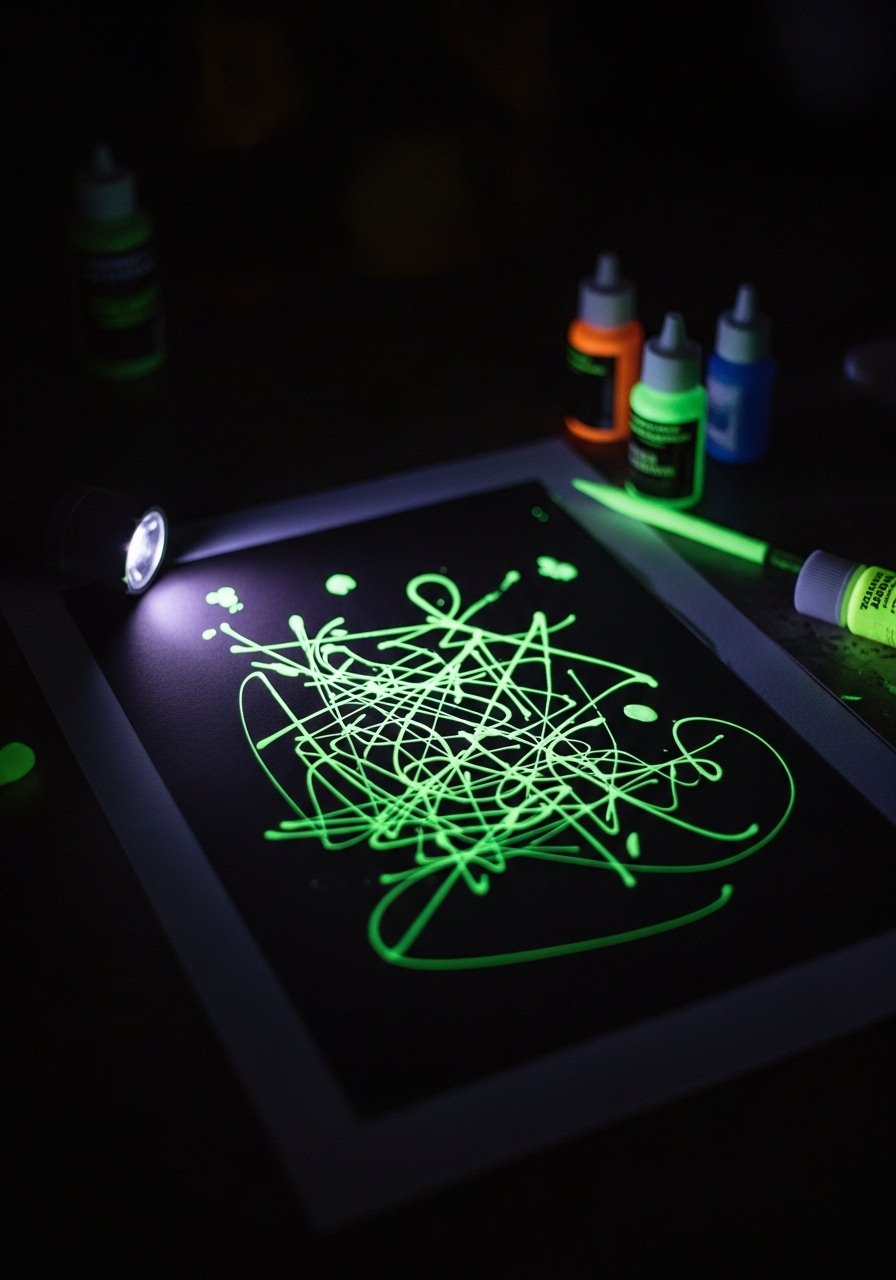
Use glow-in-the-dark paint to make nocturnal abstracts that come alive in dim light. Kids paint bright shapes by day, then watch them glow after lights out.
Materials
- Glow-in-the-dark acrylic paint
- Black or dark cardstock
- Fine-tip and flat brushes
- Small mixing palette
- LED flashlight to test glow
- Drying rack
Instructions
- Paint bold shapes with glow paint on dark cardstock.
- Layer two coats for brighter glow; let each coat dry 15–20 minutes.
- Charge paint under a lamp for a few minutes, then test with a flashlight.
- Add accents with white paint if desired.
- Let fully cure 24 hours.
- Store flat to avoid scratches.
How to display or gift it
Present as a bedside nightlight panel. Package with a small LED light for charging.
These 28 abstract drawing ideas for kids cover tactile effects, clever resist techniques, and simple tools that make creativity feel big even when supplies are small. Try a quick tape-resist session today, or set up a messy marbling station for a weekend project. Pin this page so you can come back when the next rainy afternoon hits. Which project will you try first—bubble prints or crayon melts? Share your favorite with a friend and consider grabbing a reliable hot glue gun for projects that benefit from quick holds—it's been my go-to for so many kids’ crafts.
Happy crafting!


