You know that thrill when a tiny, handmade item looks like it came from a boutique but cost almost nothing? That’s the exact vibe these budget knitting projects for beginners deliver. You’ll find 24 easy-to-follow patterns that use basic stitches, inexpensive yarn, and a few simple tools. Many projects finish in under an hour, and nearly all use leftover or budget-friendly yarn like Red Heart Super Saver yarn or a small skein from Lion Brand.
Every project lists realistic materials, step-by-step instructions with times, and display or gifting ideas so your final piece feels polished. Keep a set of blunt tapestry needles and a cheap set of bamboo needles like Boye bamboo knitting needles nearby — they make these projects smoother. Ready to knit on a budget and still have pieces that look high-end? Let’s go.
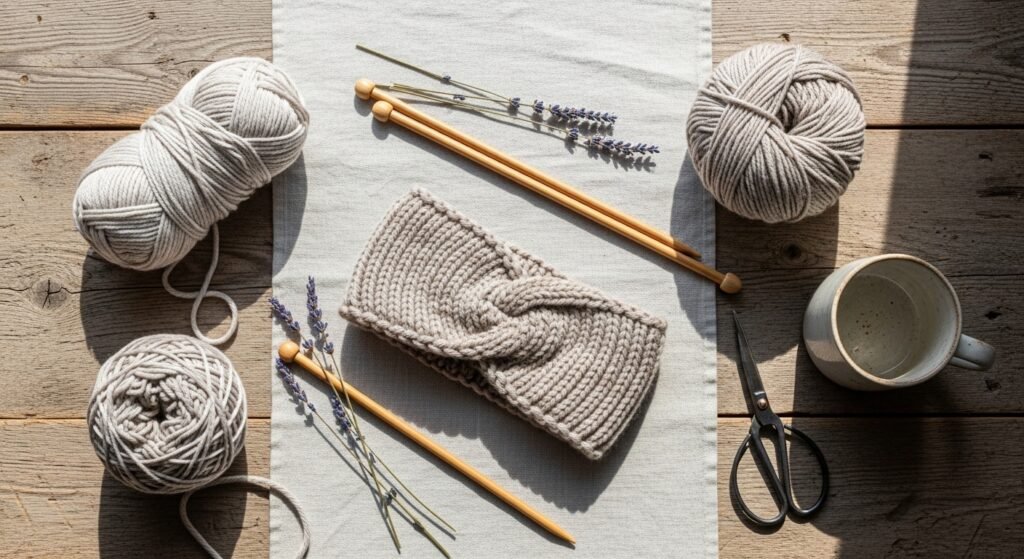
- Chunky Ribbed Headband (great for gifts)
Cozy, polished, and finished in an hour, this headband looks like boutique winter gear. It uses bulky yarn and a simple rib so the texture is pronounced. Beginners love it because the stitch pattern repeats and you can knit while watching a show. I like using an inexpensive 5mm circular needle for a neat, joined seam.
Materials
- Bulky yarn (weight 5), 80 yards (approx one small skein)
- 5 mm (US 8) circular needle or straight needles
- Tapestry needle (blunt) for seaming
- Scissors
- Measuring tape
- Stitch marker (optional)
Instructions
- Cast on 34 stitches using long-tail cast on.
- Join in round (if circular) or work flat for a seam; place marker.
- Work K2, P2 rib for 14 inches (or desired circumference).
- If working flat, bind off in pattern leaving a long tail.
- Fold and seam the short edges with tapestry needle using mattress stitch.
- Weave in ends; trim excess.
Completion cues: fabric should stretch comfortably around your head and keep rib definition; no holes at seam.
How to Display or Gift It
- Fold neatly and tuck into a kraft gift bag with a sprig of dried lavender.
- Display on a small hooks board or mannequin head for a boutique look.
- Store flat in a stackable craft organizer or drawer to keep rib crisp.
- Make several in complementary neutrals for holiday gift sets using a gift box set.
- Minimalist Mug Cozy — budget knitting projects for beginners
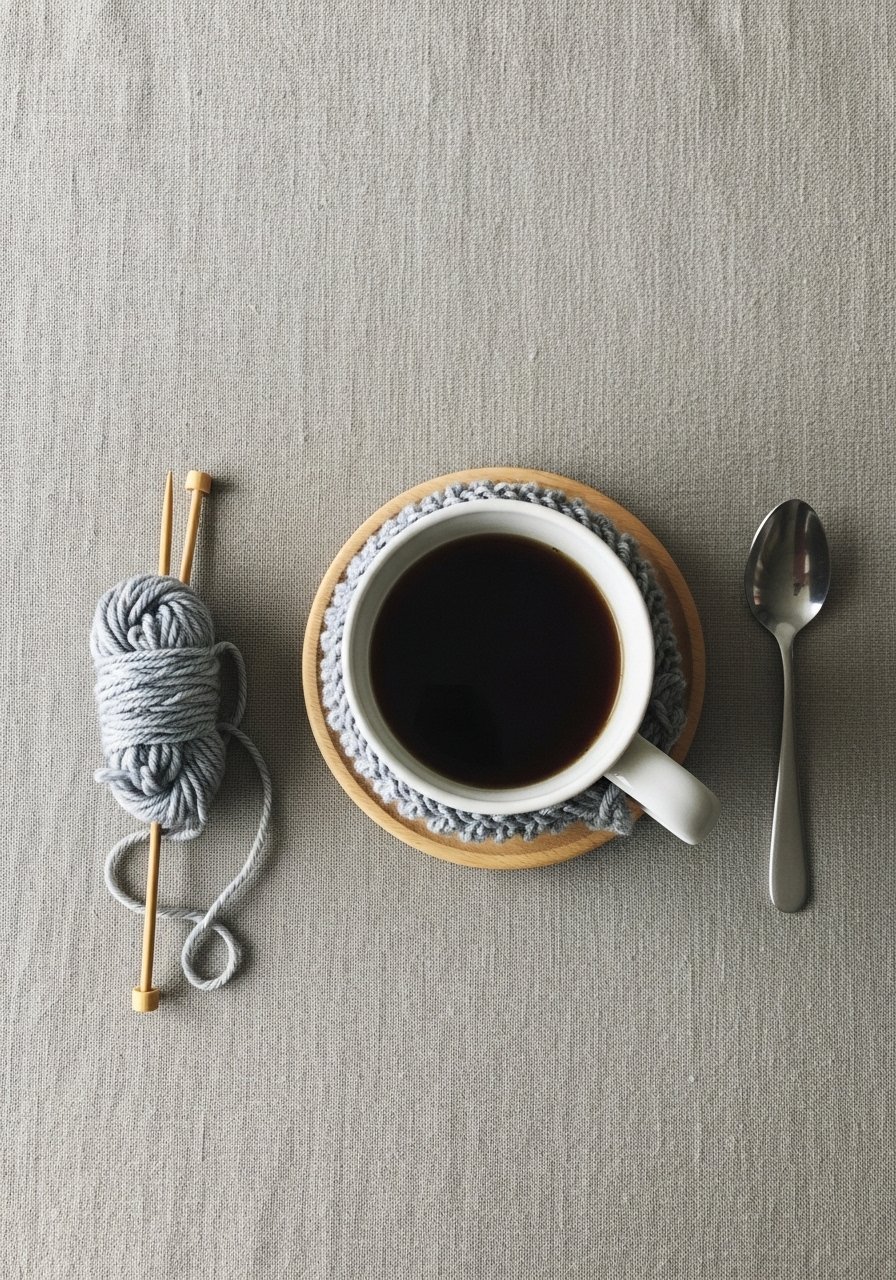
This mug cozy looks like it belongs in a chic café and keeps hands comfy. It’s a tiny project that uses scrap yarn and a few minutes. You’ll practice garter and simple decreases. I keep a small stitch marker set nearby to mark rows.
Materials
- Worsted weight yarn (medium, 4) — 25 yards
- 4.5 mm (US 7) straight needles or DPNs
- Tapestry needle
- Scissors
- Stitch markers
- Measuring tape
Instructions
- Cast on 20 stitches.
- Work garter stitch (knit every row) for 2.5 inches.
- Start decreases: K2tog across one row to reduce by half, then purl row.
- Continue until cozy width fits around mug snugly (approx 2 inches high).
- Bind off loosely. Fold and seam side edges with mattress stitch.
- Weave in ends.
Completion cues: cozy should slide gently over mug but not sag; texture feels dense.
How to Display or Gift It
- Pair with a thrifted mug and wrap in tissue for a small shop-style gift.
- Stack several coasters and mug cozies in a rustic basket for a market display.
- Store in a kitchen drawer or a mason jar for a charming countertop holder.
- Simple Seed-Stitch Coasters (set of 4)
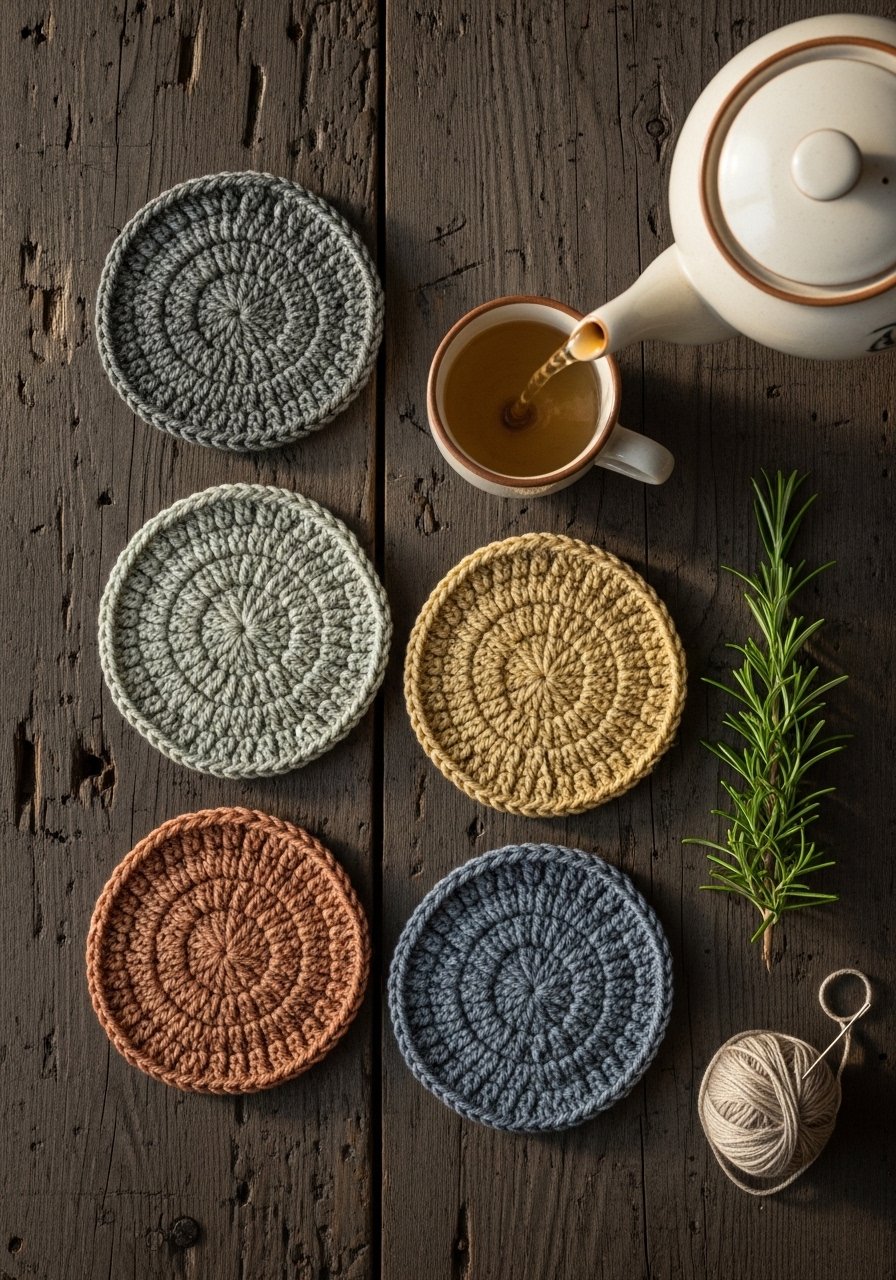
Tiny, tactile, and practical — seed stitch coasters look elegant and sell well at craft fairs. Each coaster uses minimal yarn and knits up fast. A square shape is forgiving for beginners. Grab a small yarn needle set for neat finishing.
Materials
- 2 skeins of worsted weight scrap yarn (20–30 yards each color)
- 4.5 mm (US 7) needles
- Tapestry needle
- Scissors
- Blocking mats (optional)
- Measuring tape
Instructions
- Cast on 30 stitches.
- Work seed stitch: Row 1 (RS) k1, p1 across; Row 2 (WS) p1, k1 across.
- Repeat seed stitch until piece measures 4.5 inches square (about 22–26 rows).
- Bind off in pattern.
- Block gently on blocking mat for 12–24 hours if edges look uneven.
- Weave in ends.
Completion cues: coaster should lie flat; seed texture feels squishy and dense.
How to Display or Gift It
- Tie sets of four with twine and a kraft tag.
- Display on a wooden tray or small easel using a small wooden easel.
- Store stacked in a shallow craft organizer drawer.
- Mason Jar Cozy (farmhouse vibe)
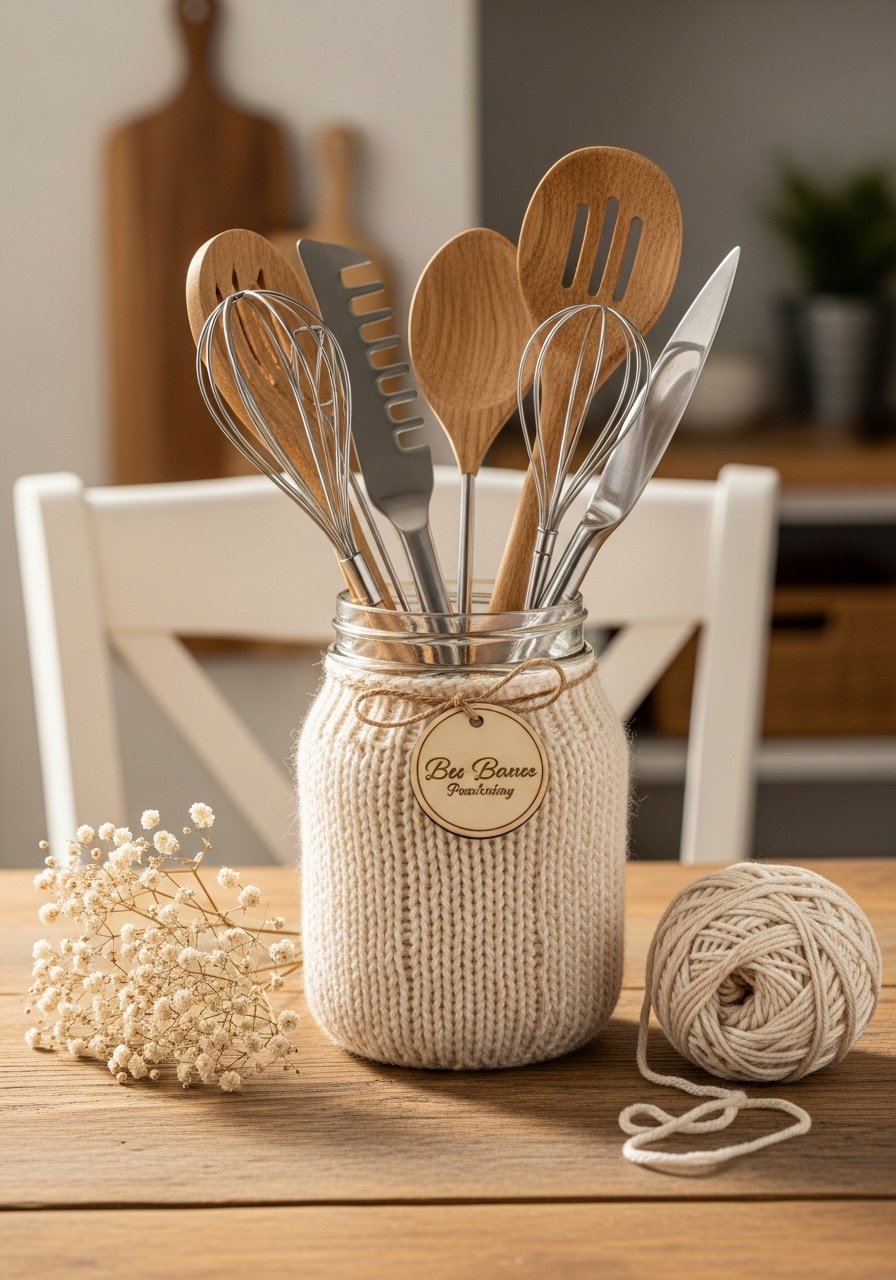
A mason jar cozy gives jars a textile makeover and hides imperfections. This project uses bulky yarn and garter/stockinette, so it’s quick. Use a yarn with good stitch definition for a crisp finish.
Materials
- Bulky yarn — 40 yards
- 6.5 mm (US 10.5) needles
- Tapestry needle
- Scissors
- Wooden tag or charm (optional)
- Measuring tape
Instructions
- Cast on 36 stitches.
- Work Garter stitch for 1 inch for border.
- Change to Stockinette for 3 inches.
- Add garter border for 1 inch.
- Bind off and seam short edge with mattress stitch; attach wooden tag.
- Slip onto mason jar.
Completion cues: cozy should fit snugly; top edge aligns with jar neck.
How to Display or Gift It
- Fill jar with baking utensils, pens, or flowers.
- Tie a ribbon and add a small gift tag for party favors.
- Store cozie-ready jars stacked in pantry or a craft organizer tray.
- Hot Pad Trivet (budget knitting projects for beginners)
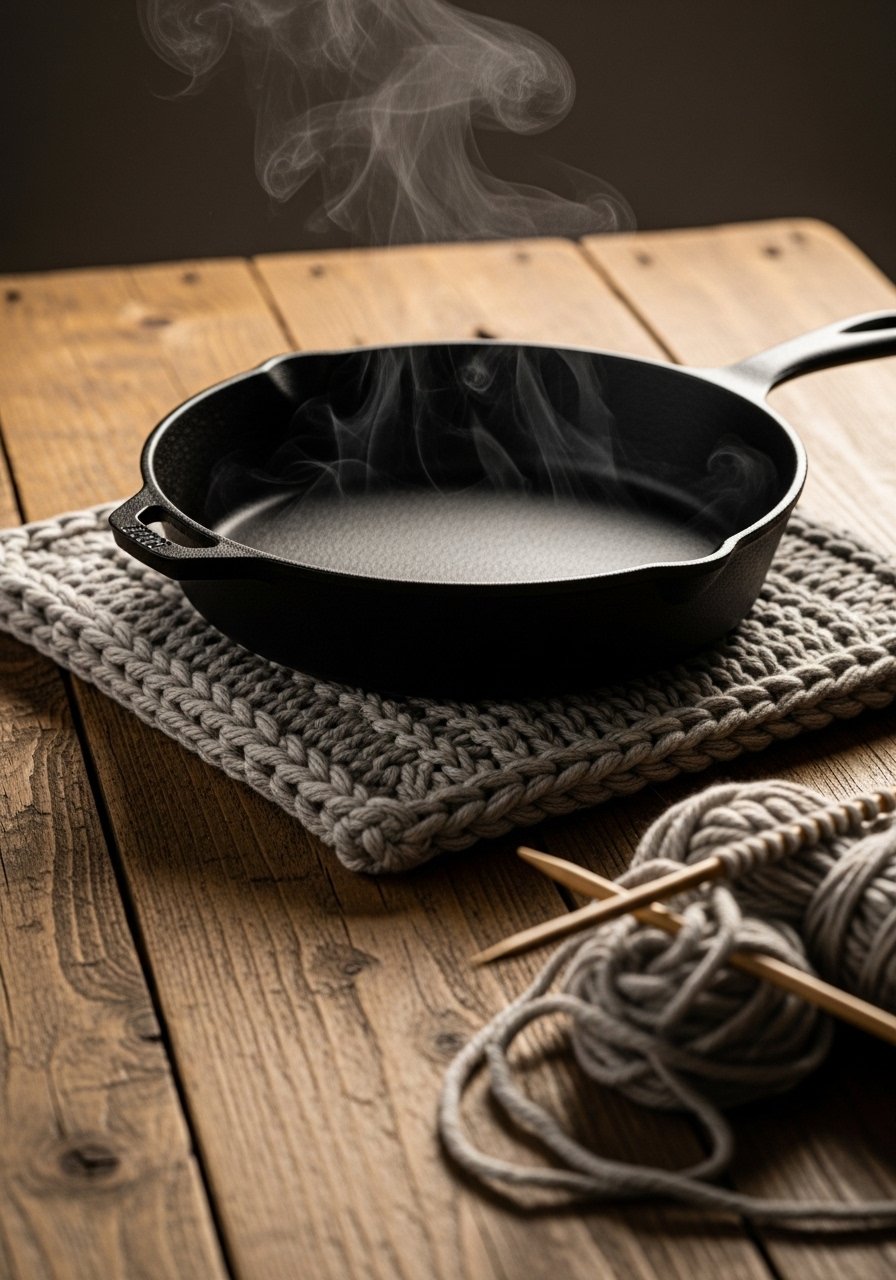
This thick trivet protects surfaces and looks handmade without fuss. Use worsted or cotton yarn for heat resistance. A cotton yarn multi-pack is ideal and inexpensive.
Materials
- Cotton worsted yarn — 60 yards
- 5 mm (US 8) needles
- Tapestry needle
- Scissors
- Measuring tape
- Heat-resistant surface for testing
Instructions
- Cast on 40 stitches.
- Work K1, P1 rib for 8 inches square, or until desired size.
- Bind off loosely.
- Block flat if needed; let dry 12–24 hours.
- Test with a warm pot to ensure stable structure.
- Weave in ends and trim.
Completion cues: trivet should sit flat and be thick enough to protect tabletop.
How to Display or Gift It
- Pair with a wooden spoon and wrap as kitchen gift.
- Stack under serving bowls at a dinner party for layered styling.
- Store in a kitchen drawer or a mason jar utensil holder.
- Quick Ribbed Wrist Warmers (fingerless)

Fingerless wrist warmers are practical and fancy-looking with vertical ribbing. Knit them flat and seam, or in the round. I often use a small set of double-pointed needles (DPNs) for a neater finish.
Materials
- Worsted weight yarn — 60 yards
- 4.5 mm (US 7) DPNs or circular 16-inch needle
- Stitch marker
- Tapestry needle
- Scissors
- Measuring tape
Instructions
- Cast on 36 stitches.
- Join in round and place marker.
- Work K2, P2 rib for 3.5 inches.
- Shape thumb hole: knit 18 stitches, bind off 6 stitches, knit remaining 12, resume next round casting on 6 stitches.
- Continue rib for 2 more inches.
- Bind off, weave in ends and finish thumb cast-on area with tapestry needle.
Completion cues: wrist warmer should stretch comfortably; thumb hole fits without gaping.
How to Display or Gift It
- Pair with a matching beanie and tie with twine.
- Display on a mannequin hand or tray.
- Store flat in a small accessory organizer.
- Beginner’s Slouch Beanie
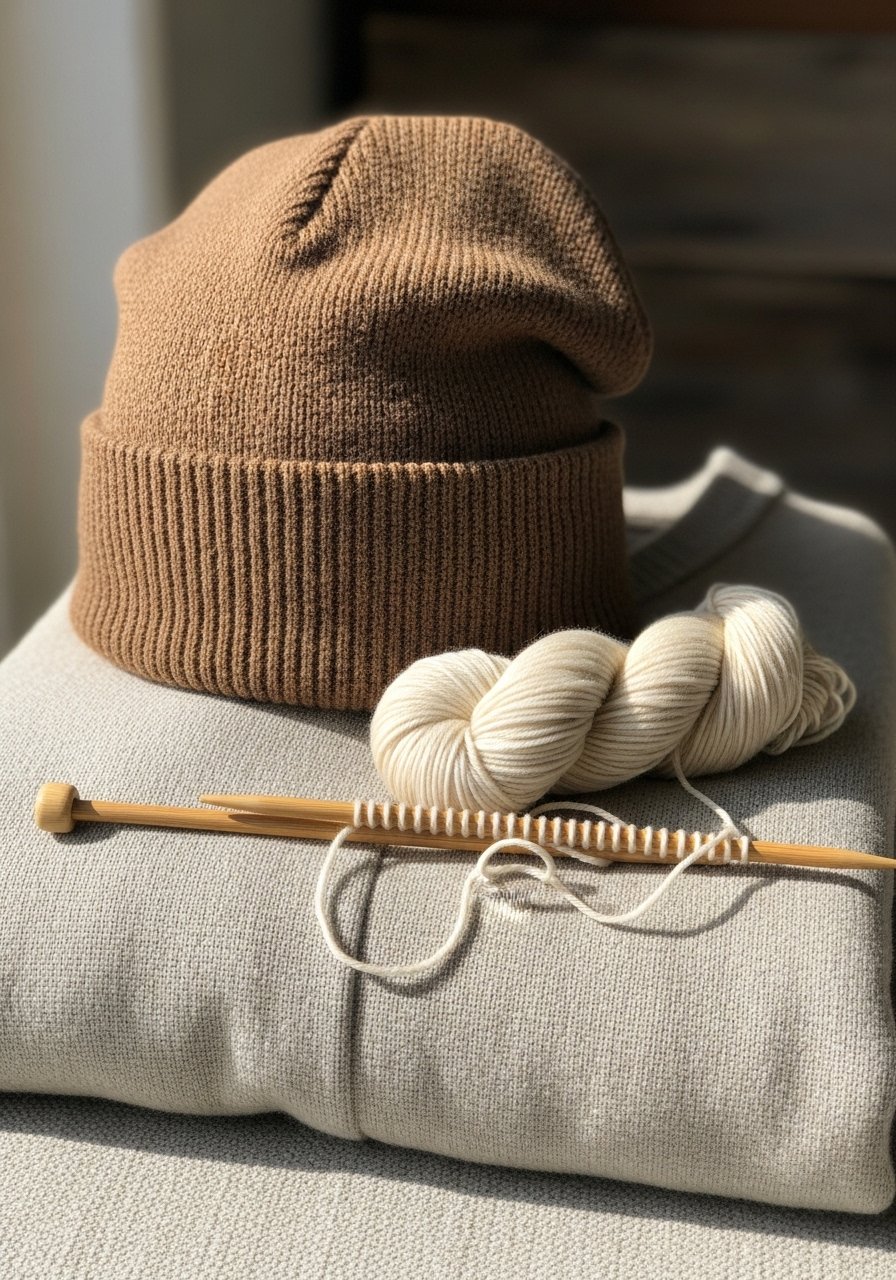
This slouchy beanie looks expensive thanks to loose stockinette and a subtle crown decrease. Bulky yarn keeps it quick. A circular needle set will make the rounds seamless.
Materials
- Bulky yarn — 120 yards
- 6.5 mm (US 10.5) circular needle (16-inch) and set of DPNs
- Stitch markers
- Tapestry needle
- Scissors
- Measuring tape
Instructions
- Cast on 72 stitches and join in round.
- Work stockinette (knit each round) until hat measures 8 inches from cast on.
- Begin crown decreases: K8, K2tog repeat, knit 1 round; continue decreasing every other round until 8–12 stitches remain.
- Switch to DPNs when needed and graft or draw yarn through remaining stitches.
- Weave in ends and block lightly for 1–2 hours to even stitches.
- Add optional pom-pom.
Completion cues: beanie should drape lightly at the crown and not be tight at the band.
How to Display or Gift It
- Place on a wooden hat stand or tuck into a simple gift box.
- Add a handmade leather tag for a boutique finish.
- Store stacked on a shelf or inside a breathable fabric bag.
- Simple Baby Blanket (mini or lap size)
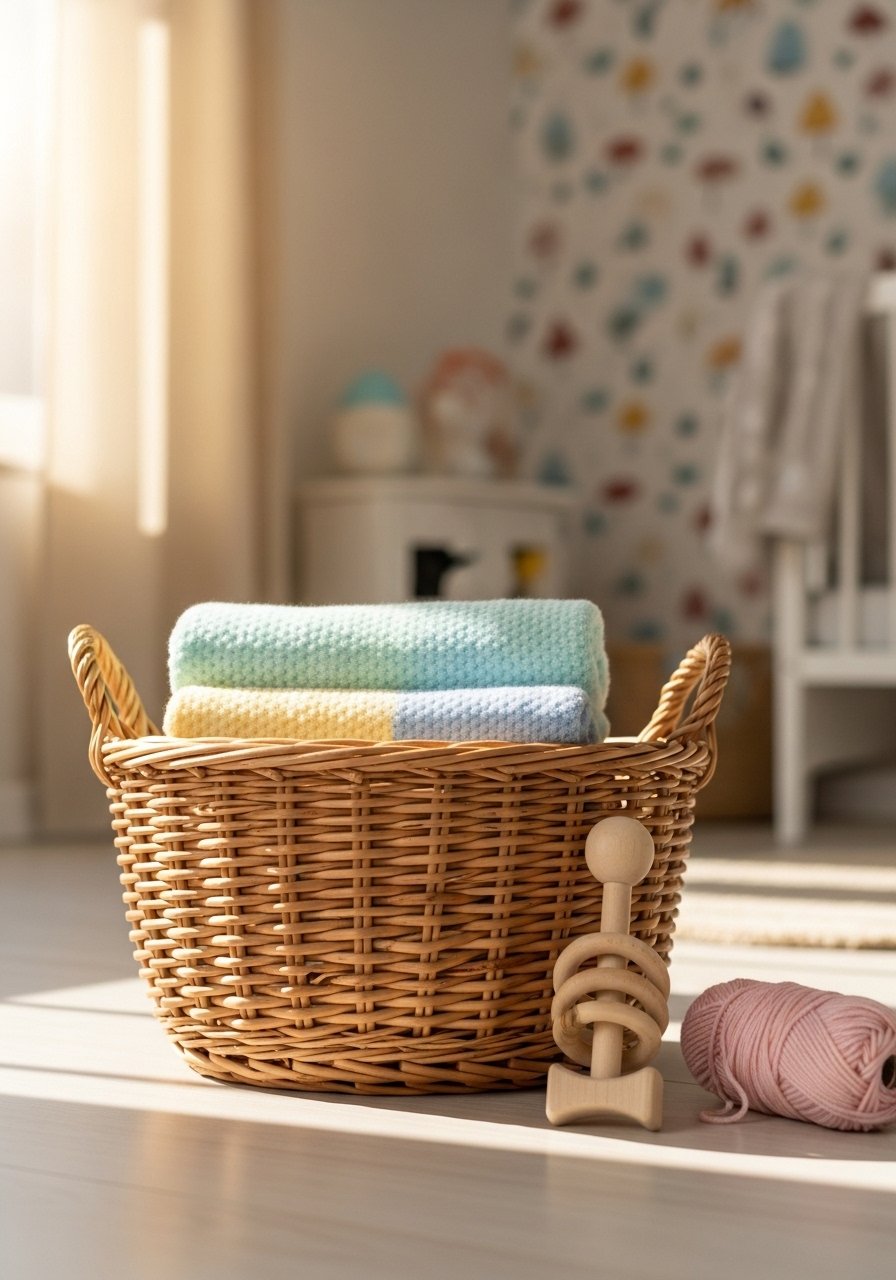
A garter-stitch baby blanket feels luxe but is uncomplicated. Use cheap acrylic yarn that’s washable and soft. An acrylic yarn multi-pack keeps costs low.
Materials
- Worsted acrylic yarn — 350–450 yards for mini blanket (30×36 inches)
- 5.5 mm (US 9) needles
- Tapestry needle
- Scissors
- Measuring tape
- Blocking mats (optional)
Instructions
- Cast on 120 stitches.
- Work garter stitch until piece measures 36 inches (about 110–130 rows).
- Bind off loosely.
- Block on mats for 12–24 hours if edges curl.
- Weave in ends.
- Check for even row count and correct any laddering before gifting.
Completion cues: blanket should be soft, even, and wash friendly.
How to Display or Gift It
- Fold and tie with a ribbon inside a kraft box for new-parent gifts.
- Store in a basket in the nursery or a woven storage bin.
- Make several in complementary neutrals for a cohesive baby shower set.
- Textured Throw Pillow Cover
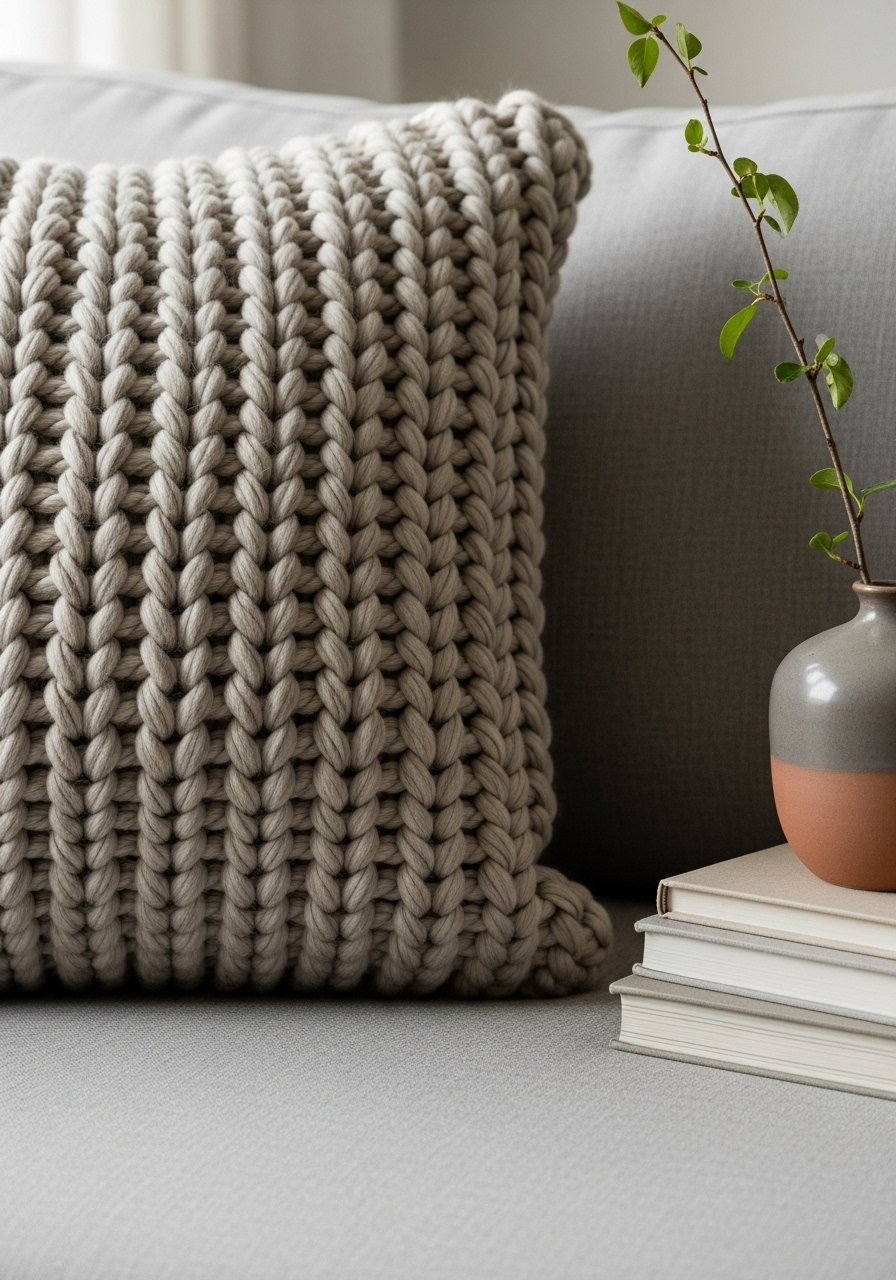
A pillow cover in seed or basket stitch instantly looks high-end. This project doubles as a small tapestry sewing job and knits up quickly with chunky yarn. Use a pillow insert from standard pillow inserts for a plush finish.
Materials
- Bulky yarn — 250 yards
- 6.5 mm (US 10.5) needles
- Tapestry needle
- Scissors
- Pillow insert 16×16 inches
- Measuring tape
- Buttons or zipper (optional)
Instructions
- Cast on 28 stitches.
- Work seed stitch until piece measures 16 inches.
- Bind off and knit a second panel for the back, or knit one piece wide enough to fold with an overlap.
- Seam three sides with mattress stitch; insert pillow.
- Finish remaining side with buttons or zipper or seam closed.
- Block lightly for 6–12 hours to even fabric.
Completion cues: pillow should look plump with no sagging corners.
How to Display or Gift It
- Style on a sofa with complementary textures.
- Include a small care card recommending gentle wash and reshape.
- Store extra covers in a fabric storage bag between seasons.
- Easy Knit Hair Scrunchie

This scrunchie uses tiny amounts of yarn and looks much fancier than elastic alone. It’s quick, portable, and perfect for using up leftovers. For joining and elastic, use a small elastic hair tie pack.
Materials
- Worsted yarn scraps — 10–15 yards
- 3.75 mm (US 5) double-pointed needles or small circular
- Elastic hair tie (1)
- Tapestry needle
- Scissors
- Stitch marker
Instructions
- Cast on 56 stitches and join in round.
- Work K2, P2 rib for 1.5–2 inches.
- Bind off loosely.
- Pull elastic through and sew ends together. Fold knitted tube over elastic and seam edges to encase.
- Weave in yarn ends.
- Trim any visible strands.
Completion cues: scrunchie should be stretchy and full.
How to Display or Gift It
- Bundle three colorways in a small jar for a shop display.
- Tuck into gift boxes with a matching headband.
- Store in a small jewelry dish or mason jar.
- Knit Market Tote (simple bag)
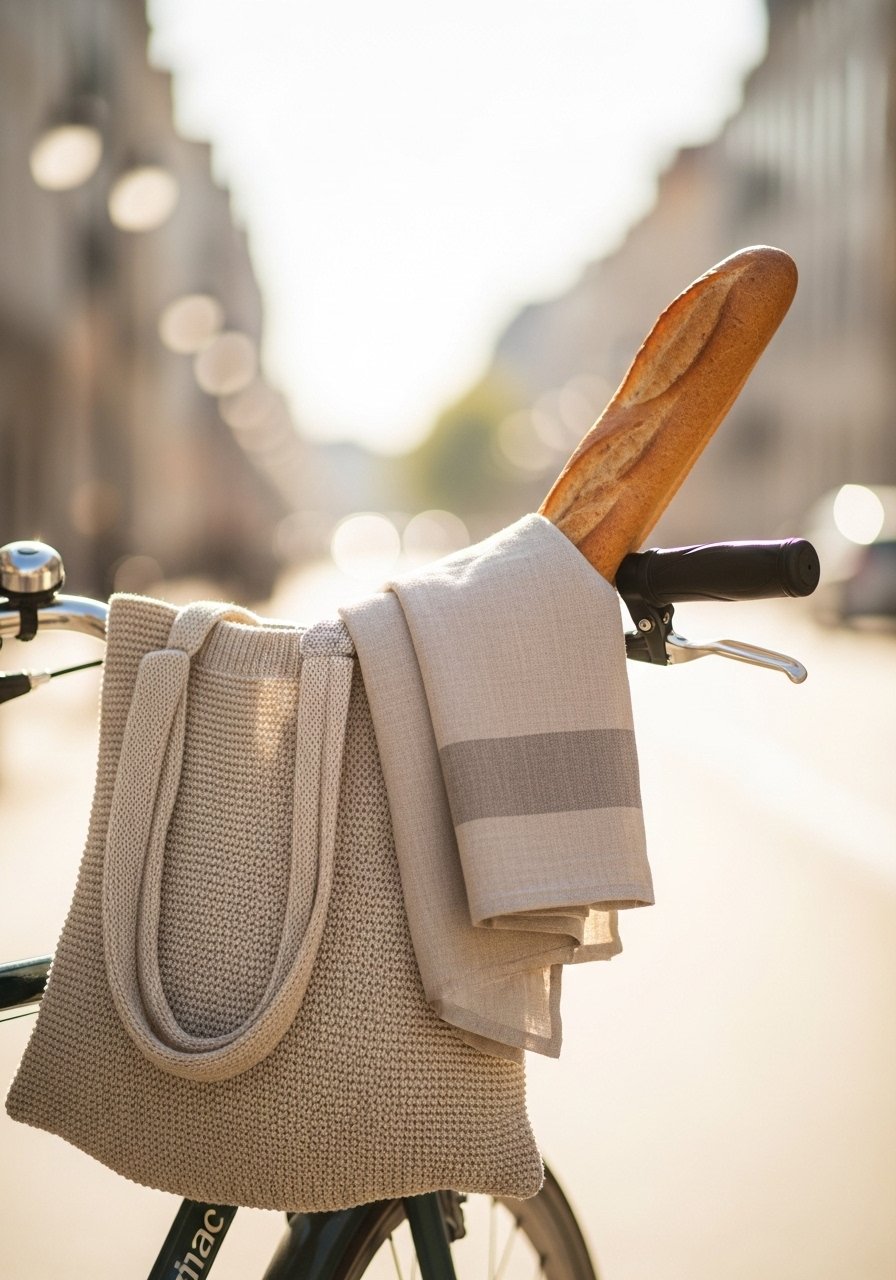
A market tote in simple stockinette or seed stitch reads boutique when paired with natural yarn. Use inexpensive worsted or cotton blend yarn for durability. A pair of sturdy wooden handles upgrades it further.
Materials
- Worsted weight yarn — 400–500 yards
- 5.5 mm (US 9) needles
- Tapestry needle
- Scissors
- Measuring tape
- Optional wooden handles or leather straps
Instructions
- Cast on 100 stitches.
- Work stockinette until piece measures 16 inches.
- Bind off and fold in half; seam sides with mattress stitch leaving top open.
- Add handles by sewing or using a simple strap attachment.
- Block gently for 12–24 hours to even stitches.
- Reinforce base with extra seaming if needed.
Completion cues: bag should hold light groceries and keep shape.
How to Display or Gift It
- Fill with produce or market goods for photos.
- Attach a small tag and hang on a pegboard for shop display.
- Store folded in a fabric storage basket.
- Rolled Edge Knit Bookmark — budget knitting projects for beginners
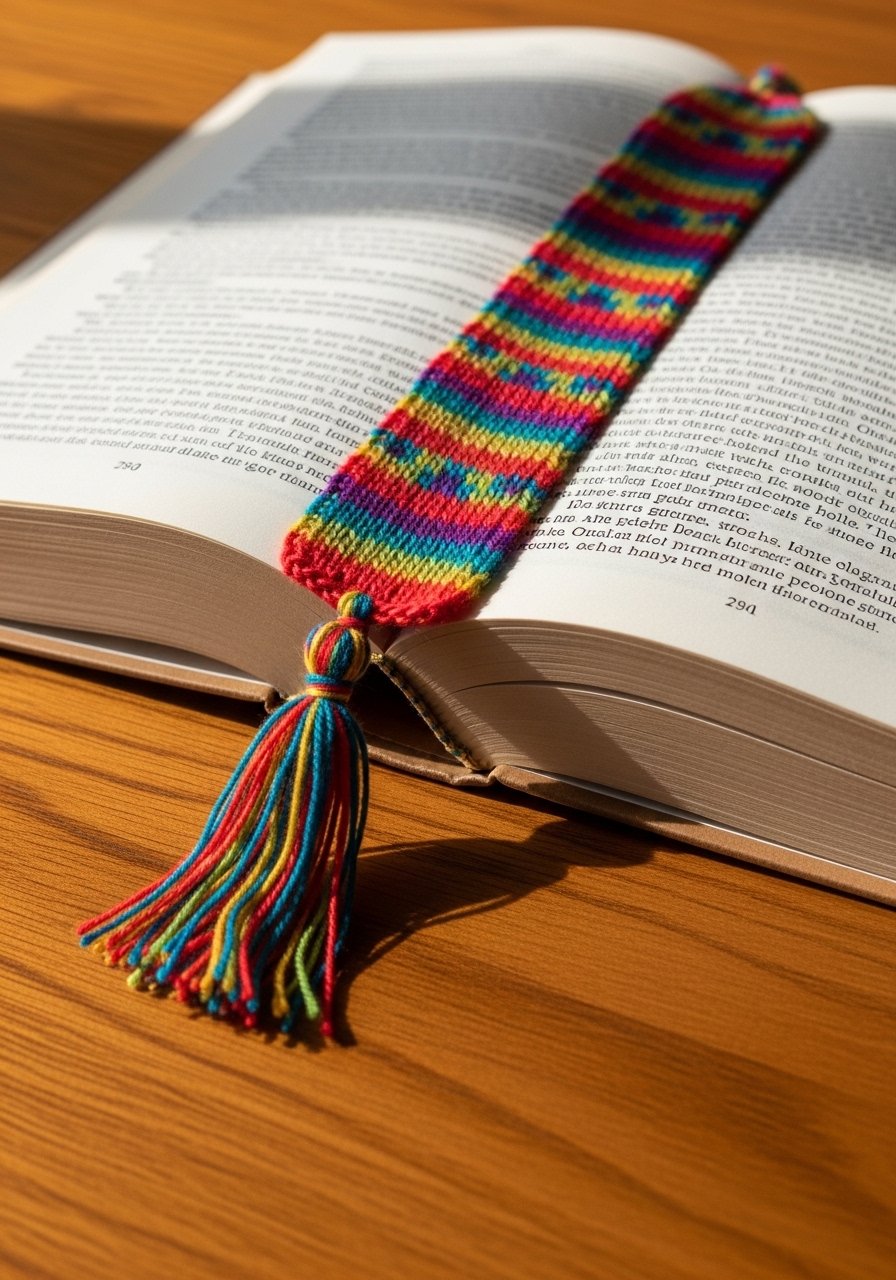
A tiny knitted bookmark feels elegant and is a perfect scrap-busting project. The rolled edge gives a refined look. Use a small tassel maker for a neat finish.
Materials
- Worsted yarn — 10–15 yards
- 4.0 mm (US 6) needles
- Tapestry needle
- Scissors
- Tassel maker or cardboard template
- Measuring tape
Instructions
- Cast on 15 stitches.
- Work stockinette for 6 inches.
- Bind off loosely.
- Make a tassel and attach with yarn tail.
- Weave in ends and trim.
- Block flat for 1–2 hours if curling bothers you.
Completion cues: bookmark should slide into pages without stretching.
How to Display or Gift It
- Slip into a used book for a vintage-style gift.
- Tie a small ribbon around a group for a reading club giveaway.
- Store in a narrow box or pencil tin.
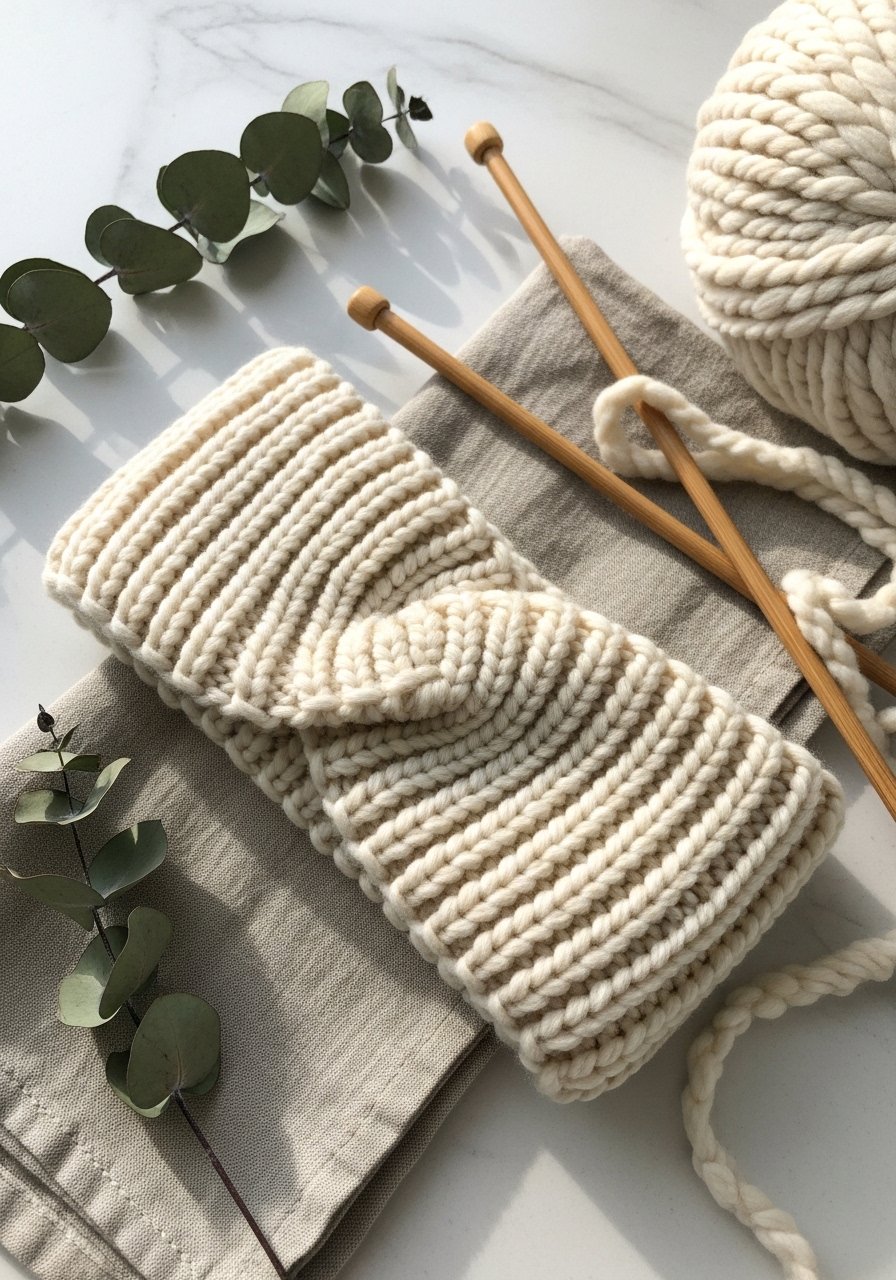
- Cable-Free Knit Head Wrap (turban style)
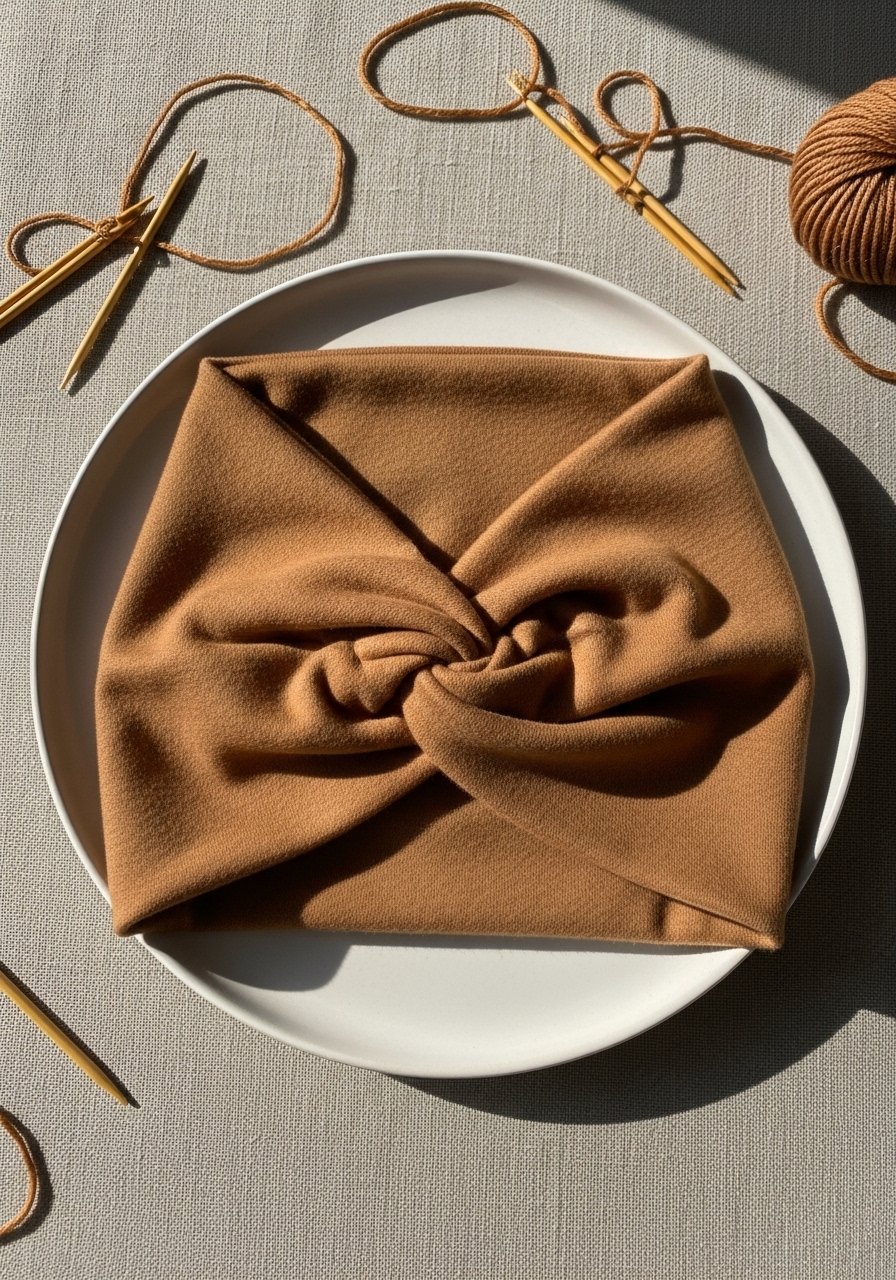
This twisted head wrap looks intricate but uses only decreases and short rows. It’s perfect for beginners wanting a high-end look. Use a measuring tape to measure head circumference accurately.
Materials
- Worsted yarn — 80 yards
- 5.0 mm (US 8) needles
- Stitch markers
- Tapestry needle
- Scissors
- Measuring tape
Instructions
- Cast on 40 stitches.
- Work seed stitch for 1.5 inches.
- Begin short-row shaping across center to create twist (wrap & turn every 8 stitches across 4 rows).
- Continue until piece measures 18 inches.
- Fold center and seam into a twist using mattress stitch.
- Weave in ends and block lightly 4–6 hours.
Completion cues: twist sits flat and front has neat fold.
How to Display or Gift It
- Place on a decorative hat stand or folded with card.
- Tie with a ribbon and include headcare note.
- Store in a small accessory container to keep shape.
- Knitted Plant Cozy (boho planter cover)
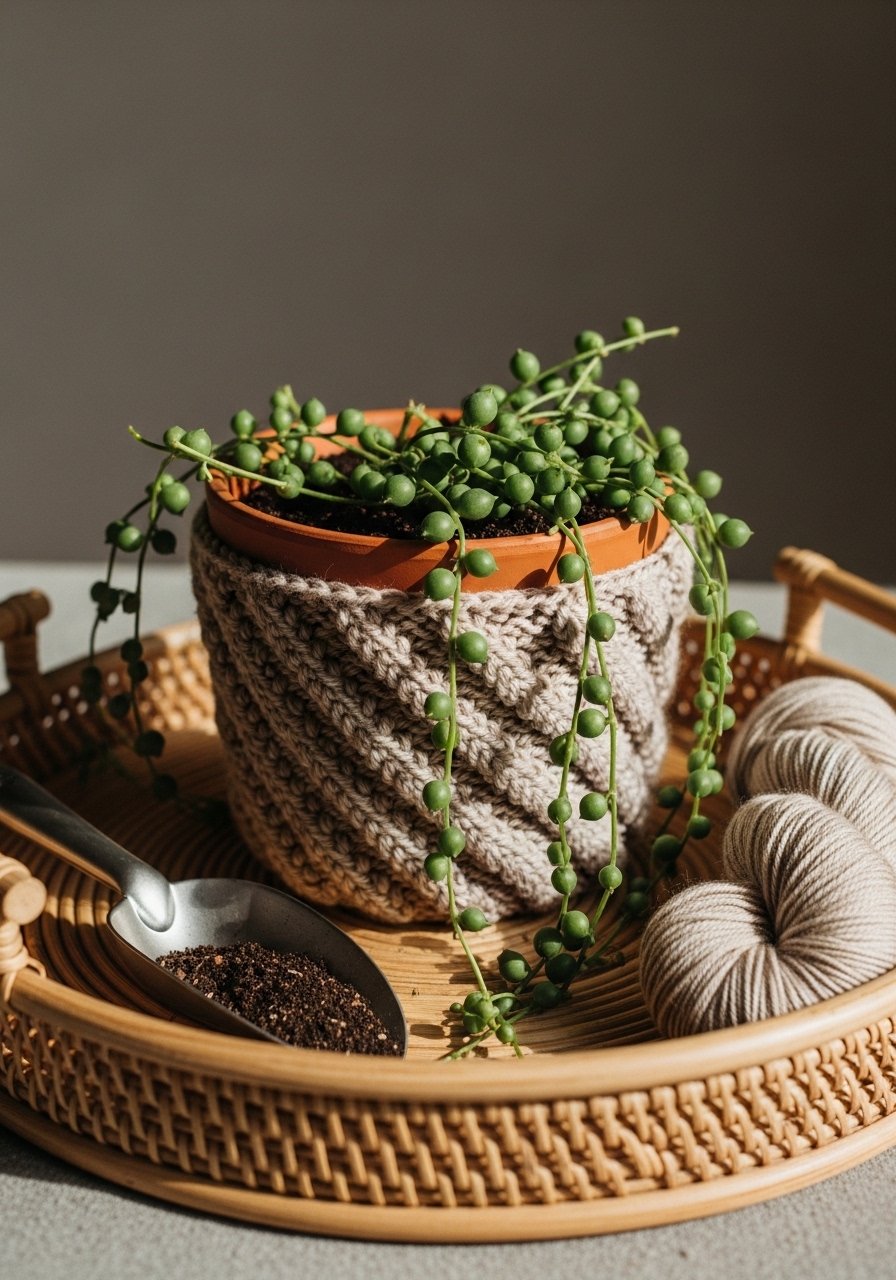
A plant cozy softens pots and reads crafted-chic. Cotton or acrylic works; add a macramé-style fringe if you like. Use a set of stitch markers while shaping.
Materials
- Worsted yarn — 50–80 yards
- 4.5 mm (US 7) needles
- Tapestry needle
- Scissors
- Measuring tape
- Optional fringe comb
Instructions
- Cast on 60 stitches.
- Work rib for 1 inch.
- Switch to stockinette and knit until piece measures pot height minus 0.5 inch.
- Bind off and seam edges.
- Add fringe or ties if desired; trim evenly.
- Slide over pot (use a plastic liner to protect cozy from water).
Completion cues: cozy fits snugly; fringe hangs evenly.
How to Display or Gift It
- Pair with a small plant and gift tag.
- Use on shelves grouped for an instant display.
- Store flat or drape over empty pots.
- Knit Scrunchy Headband with Button Closure
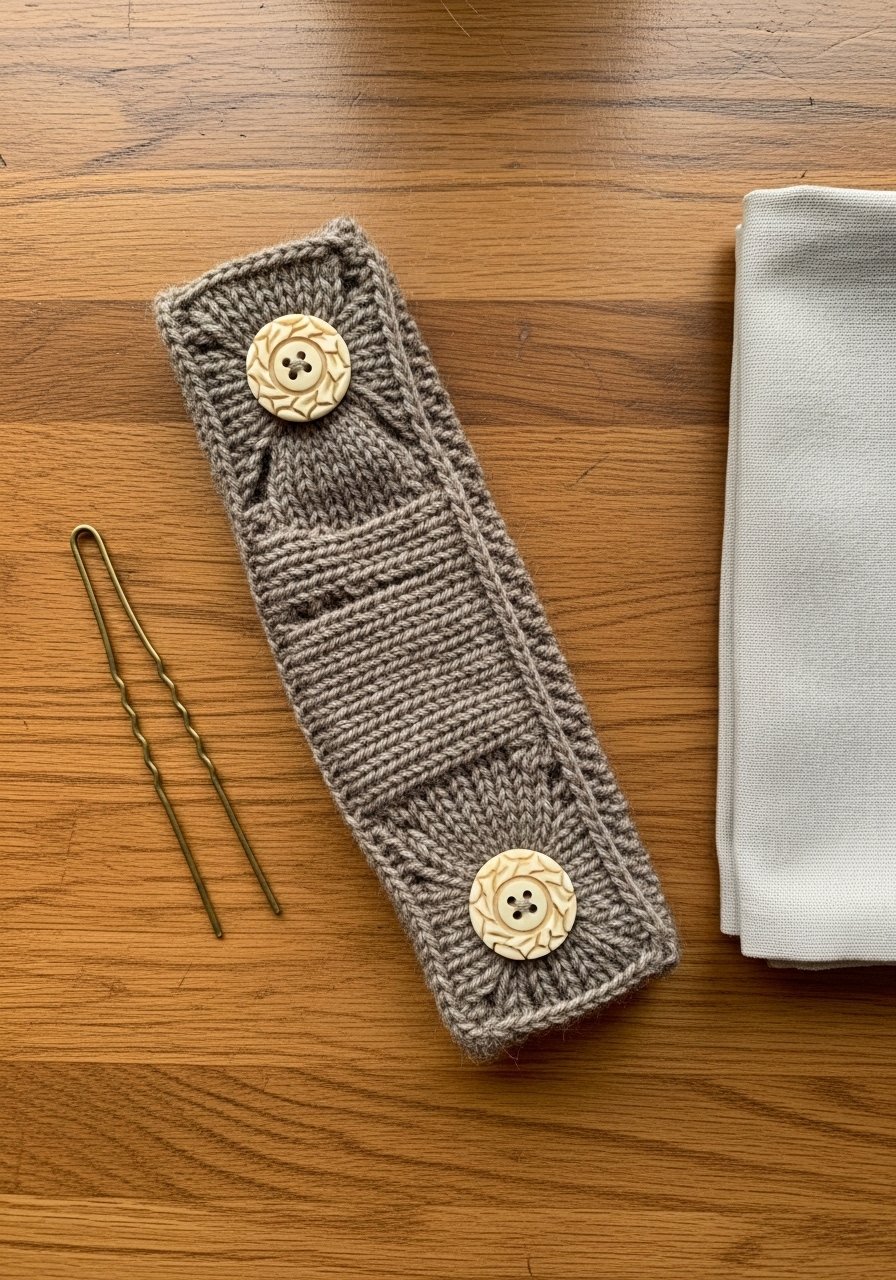
A button closure gives a polished finish and allows size adjustability. This quick piece uses minimal yarn and a decorative button. Pick a button set from vintage-style buttons.
Materials
- Worsted yarn — 30–40 yards
- 4.5 mm (US 7) needles
- 1 decorative button
- Tapestry needle
- Scissors
- Measuring tape
- Sewing needle for button
Instructions
- Cast on 22 stitches.
- Work seed stitch for 14 inches.
- Bind off; fold short ends to create overlap and sew one button on one end and make a button loop on other end.
- Sew ends securely and weave in.
- Test closure and adjust loop if needed.
- Trim excess threads.
Completion cues: headband should fasten comfortably and lie flat.
How to Display or Gift It
- Attach to a cardstock tag for retail-ready selling.
- Store on a ring or in a small jewelry dish to keep shape.
- Make coordinating sets with matching scrunchies.
- Simple Lacy Dishcloth (light and pretty)
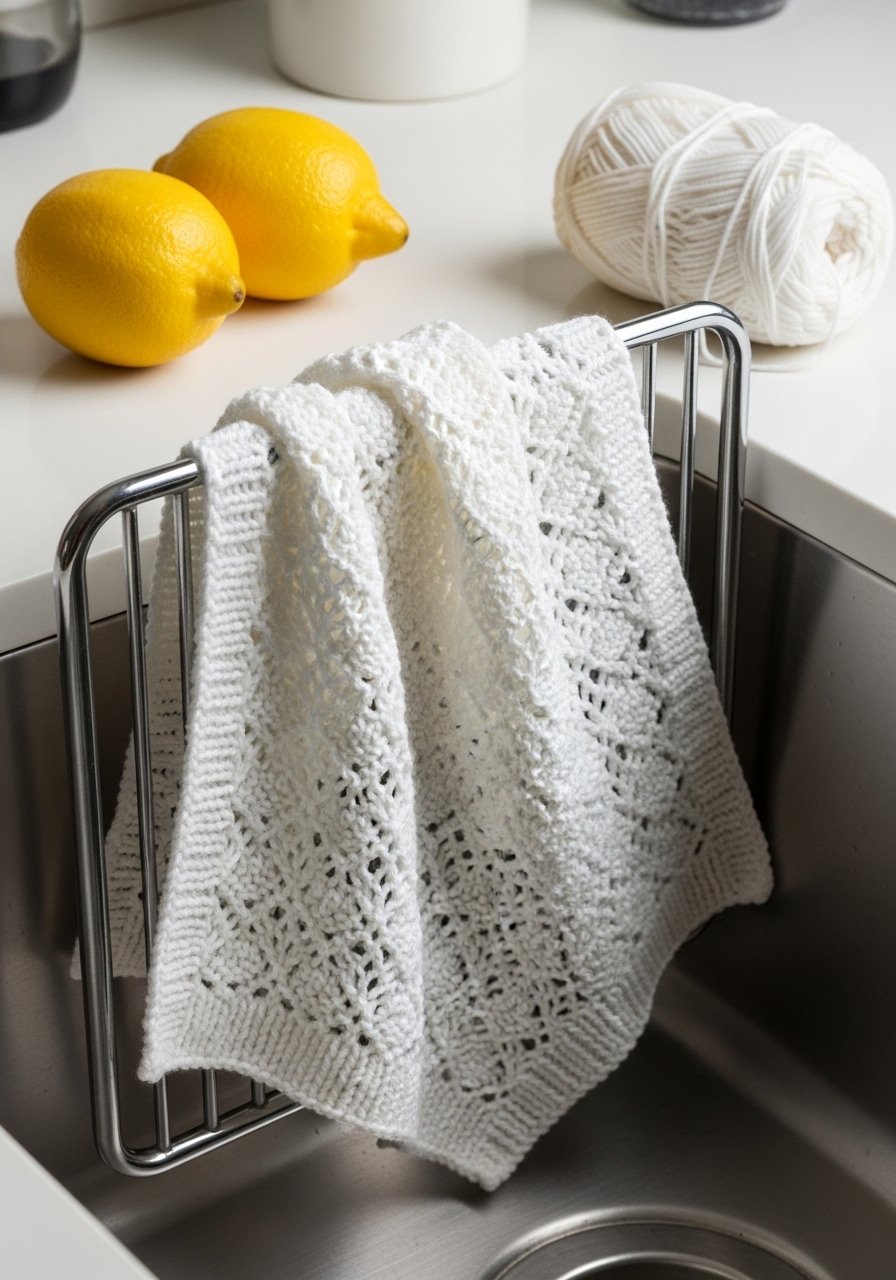
A lacy pattern gives a delicate look while cotton keeps it practical. This dishcloth is forgiving and machine-washable. I use a cotton yarn multi-pack for bright color options.
Materials
- Cotton yarn — 60–80 yards
- 4.0 mm (US 6) needles
- Tapestry needle
- Scissors
- Measuring tape
- Blocking mats (optional)
Instructions
- Cast on 36 stitches.
- Work garter border 4 rows.
- Begin lace pattern: K2tog, yarn over across to create airy holes.
- Continue lace until cloth measures 8 inches.
- Finish with garter border; bind off.
- Block on mats for 6–12 hours to open lace.
Completion cues: stitch pattern should have neat holes and lie flat.
How to Display or Gift It
- Roll with a wooden dish brush and tie with twine.
- Store in a kitchen drawer or hang on a peg.
- Pair with a small bottle of dish soap in a gift basket.
- Tiny Knit Pouch with Button
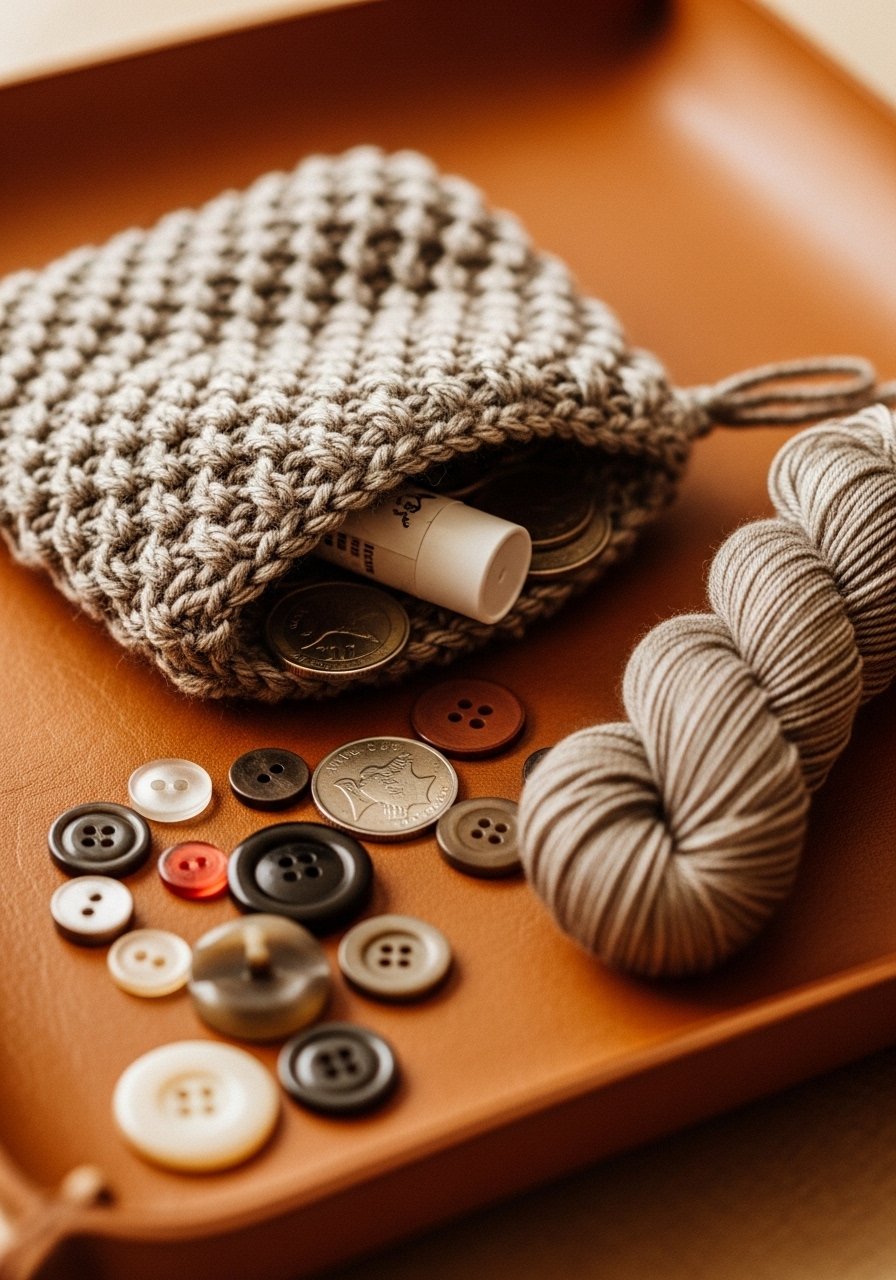
This tiny pouch is perfect for coins, earbuds, or rings. The button flap gives a refined finish. Use a small button assortment.
Materials
- Worsted yarn — 15–20 yards
- 3.75 mm (US 5) needles
- 1 small button
- Tapestry needle
- Scissors
- Measuring tape
- Sewing needle
Instructions
- Cast on 28 stitches.
- Work stockinette until piece measures 3.5 inches.
- Bind off and fold to create pouch; seam sides leaving top open.
- Create a flap and sew a button to the front.
- Weave in ends.
- Block 1–2 hours if needed.
Completion cues: pouch should close snugly and hold small items securely.
How to Display or Gift It
- Tuck a tiny gift inside and present in a kraft box.
- Store in a jewelry tray or small organizer drawer.
- Make multiples in different colors for a matching set.
- Ribbed Neck Warmer (small cowl)

A short cowl is quick to knit and looks boutique when using tonal yarns. The rib provides structure without bulk. Use Lion Brand Yarn for reliable colorways.
Materials
- Worsted yarn — 120 yards
- 5.5 mm (US 9) circular needle (16-inch)
- Stitch markers
- Tapestry needle
- Scissors
- Measuring tape
Instructions
- Cast on 80 stitches and join in round.
- Work K2, P2 rib for 8–9 inches height for a short cowl.
- Bind off in pattern.
- Block lightly for 2–4 hours if needed.
- Weave in ends.
- Check stretch and seam neatness before gifting.
Completion cues: cowl should slip over head and sit comfortably at neck.
How to Display or Gift It
- Fold and secure with a ribbon and label.
- Display on a scarf stand or in a basket.
- Store flat to maintain rib structure.
- Knit Eyeglass Case
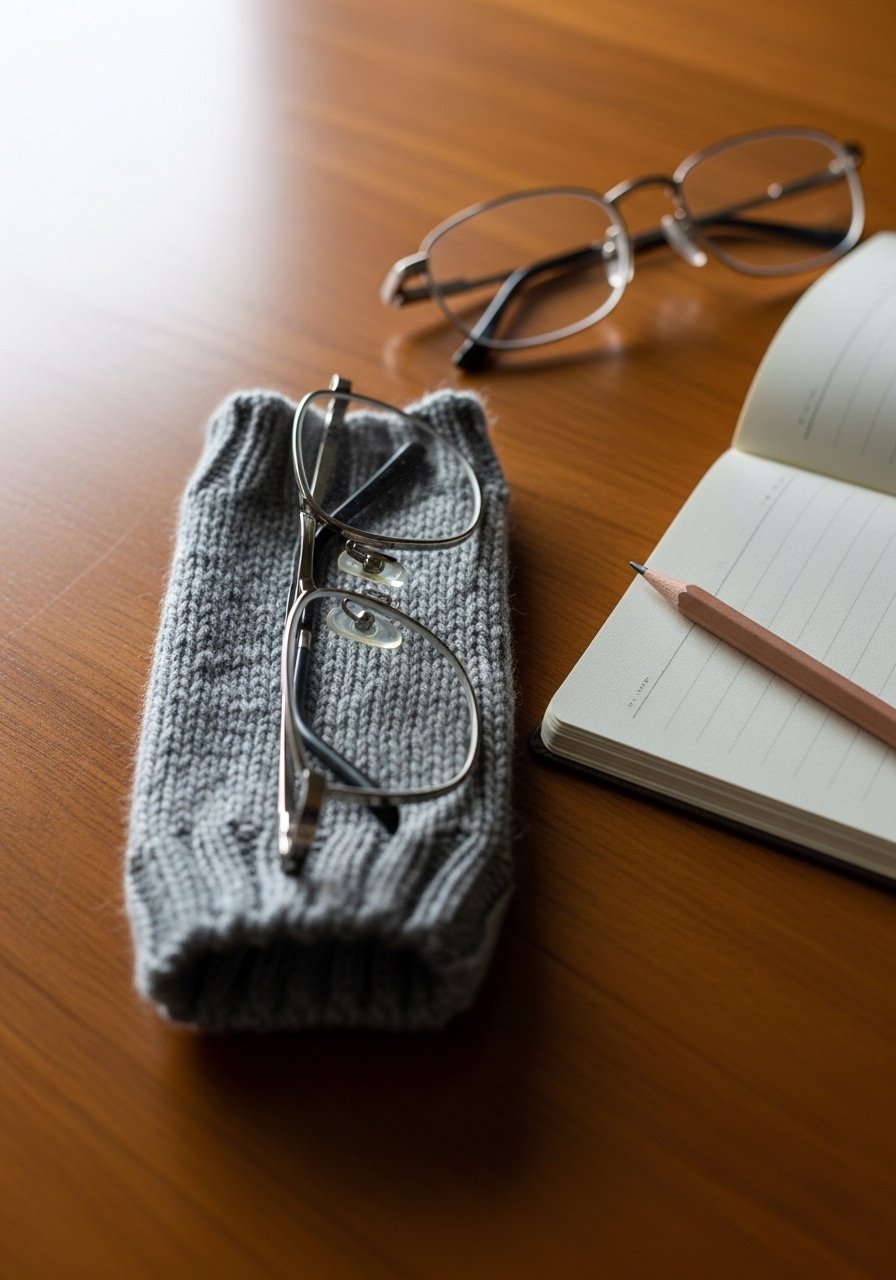
This eyeglass case protects lenses and looks polished with a neat stitch pattern. It’s an ideal scrap project. Use a soft brush cleaning cloth tucked inside when gifting.
Materials
- Worsted yarn — 15–20 yards
- 4.0 mm (US 6) needles
- Tapestry needle
- Scissors
- Measuring tape
- Microfiber cloth (optional)
Instructions
- Cast on 22 stitches.
- Work seed stitch until piece measures 7 inches.
- Bind off and seam three sides.
- Fold top edge inward for structure and sew hem.
- Insert cleaning cloth if gifting.
- Block gently 1–2 hours.
Completion cues: glasses should slide in snugly without excess stretch.
How to Display or Gift It
- Pair with a small bottle of lens cleaner and wrap.
- Store in a glasses drawer or bedside tray.
- Add a small tag with lens care tips.
- Knitted Garland (mini bunting)
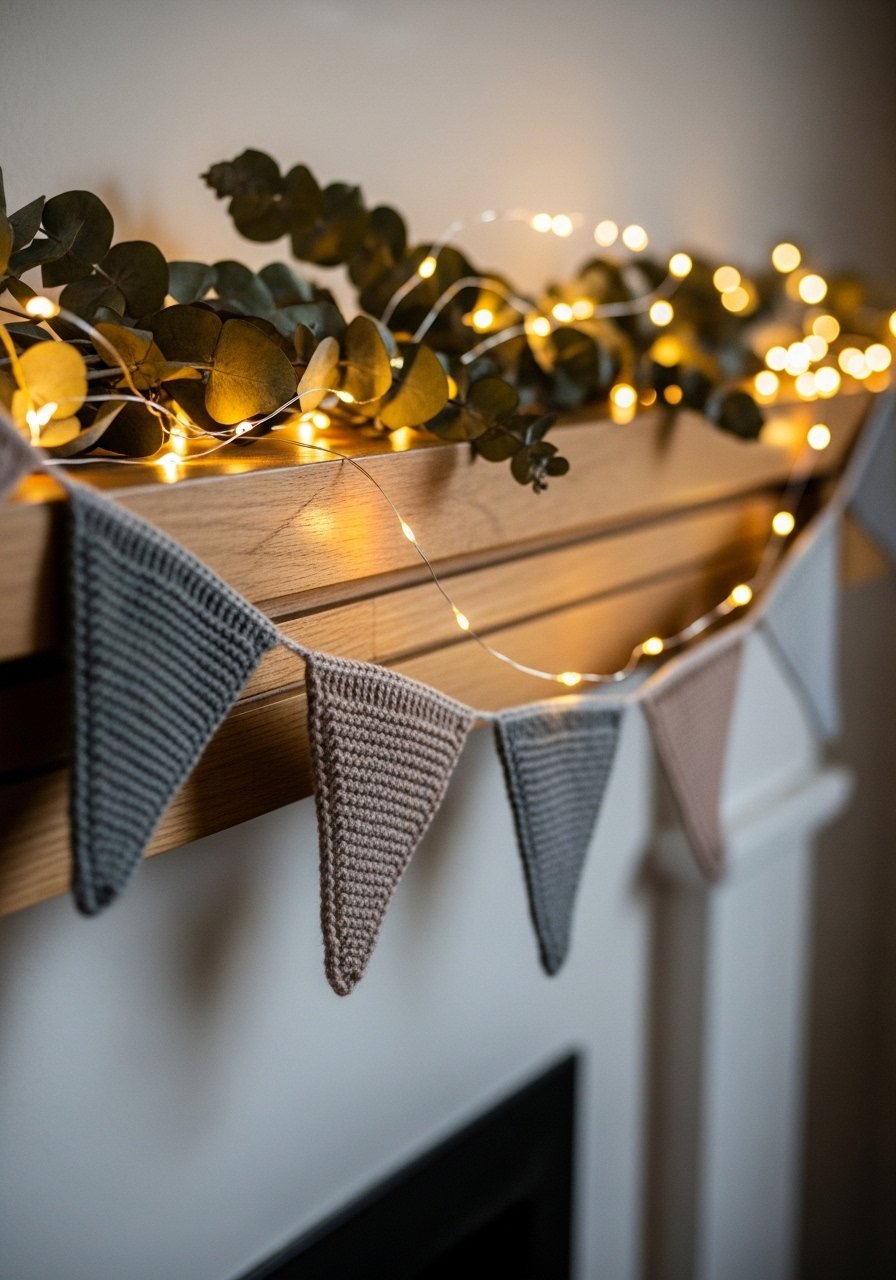
Tiny bunting looks like artisan shop decor but costs pennies. Knit small triangles and string together. Use leftover yarn and a twine roll to hang.
Materials
- Scrap yarn — 10–30 yards total
- 3.75 mm (US 5) needles
- Tapestry needle
- Scissors
- Twine — 3 yards
- Stitch markers (optional)
Instructions
- Cast on 11 stitches.
- Work garter stitch, decreasing 1 stitch at each end every 2 rows to form triangle.
- Bind off when 1 stitch remains.
- Make desired number of triangles (10–15).
- Use tapestry needle to thread twine through top edge of triangles.
- Hang and adjust spacing.
Completion cues: triangles should hang flat and spaced evenly.
How to Display or Gift It
- Drape across a mirror, mantel, or gift box.
- Tie ends with small bows for a festive look.
- Store rolled in a small craft tube for reuse.
- Simple Knit Belt (styling accessory)
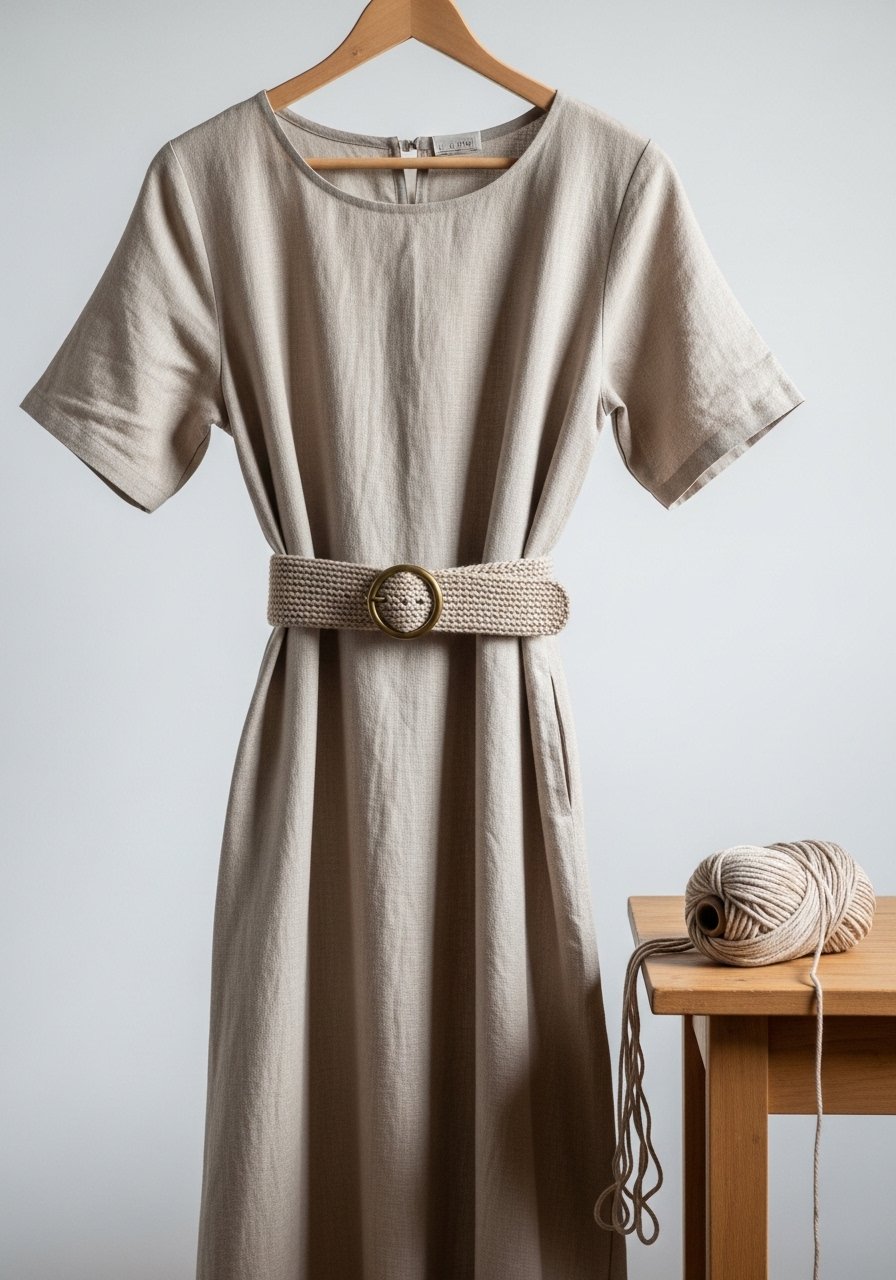
A knitted belt upgrades dresses and looks boutique with a leather buckle. Use sturdy worsted yarn and a leather buckle set for a polished finish.
Materials
- Worsted yarn — 80–100 yards
- 4.5 mm (US 7) needles
- Leather buckle or ring
- Tapestry needle
- Scissors
- Measuring tape
Instructions
- Cast on 12 stitches.
- Work Garter stitch until belt length is desired (approx 40–48 inches).
- Bind off and fold short ends to create buckle loop; sew securely.
- Attach leather buckle and reinforce with extra stitching.
- Trim and weave ends.
- Lightly block for 1–2 hours to straighten edges.
Completion cues: belt should be flexible but hold buckle weight.
How to Display or Gift It
- Roll and tuck into a gift box with care card.
- Hang on a peg with outfit pairing suggestions.
- Store in a narrow box to keep flat.
- Knit Cable-Look Headband (without cabling)
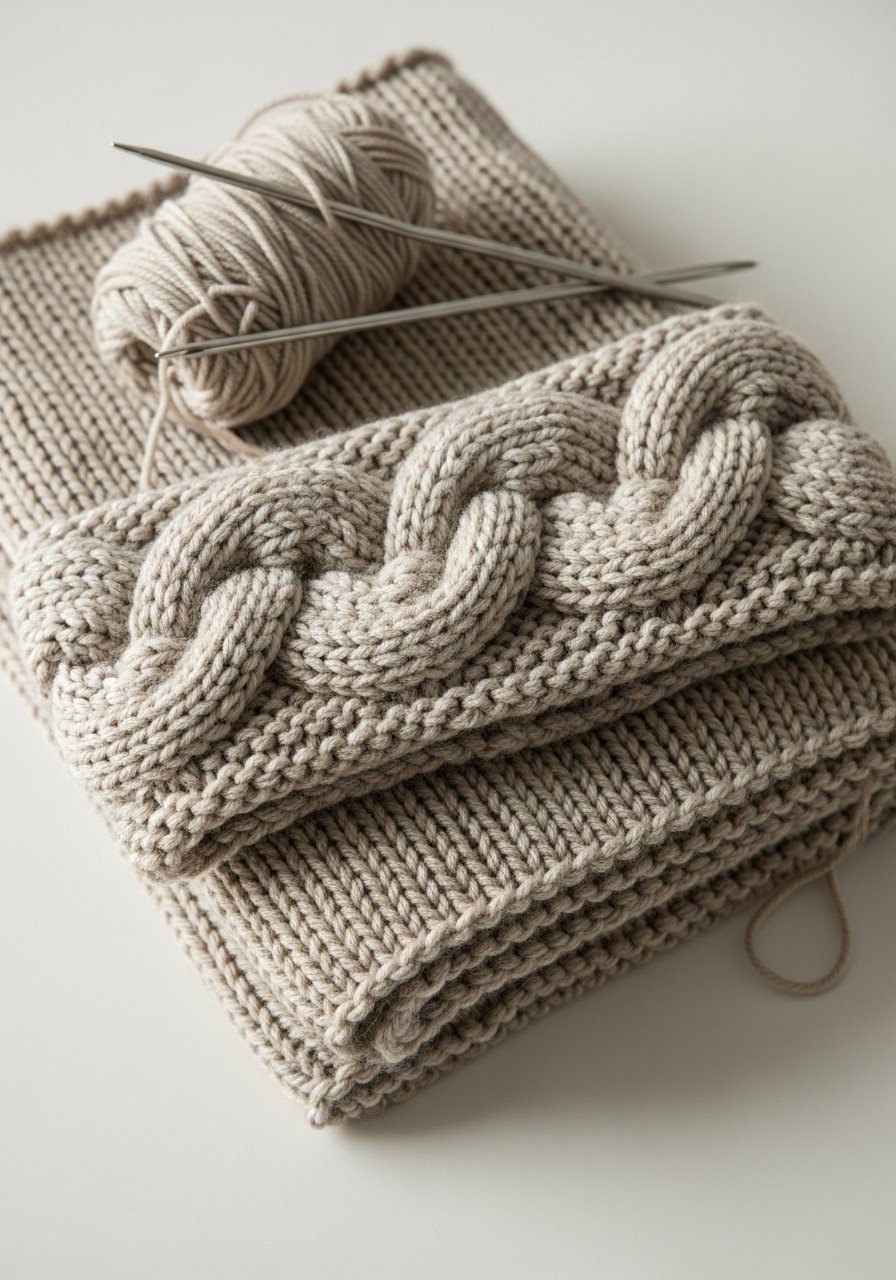
You get a cable look without cable knitting using twisted stitches—great for beginners who want a textured result. A cable needle set is optional for true cables, but not required here.
Materials
- Worsted yarn — 50 yards
- 4.5 mm (US 7) needles
- Stitch marker
- Tapestry needle
- Scissors
- Measuring tape
Instructions
- Cast on 28 stitches.
- Work K2, P2 for border 1 inch.
- Switch to pattern of twisted stitches: k2tbl, p2 across to simulate cable.
- Continue until band measures 18 inches.
- Bind off and seam edges with mattress stitch.
- Weave in ends and block 2–4 hours.
Completion cues: twisted columns should read like a cable and lie flat.
How to Display or Gift It
- Add a small leather tag for a branded look.
- Offer as a set with matching mitts.
- Store on a headband stand or in a small box.
- Knit Keychain Tassel
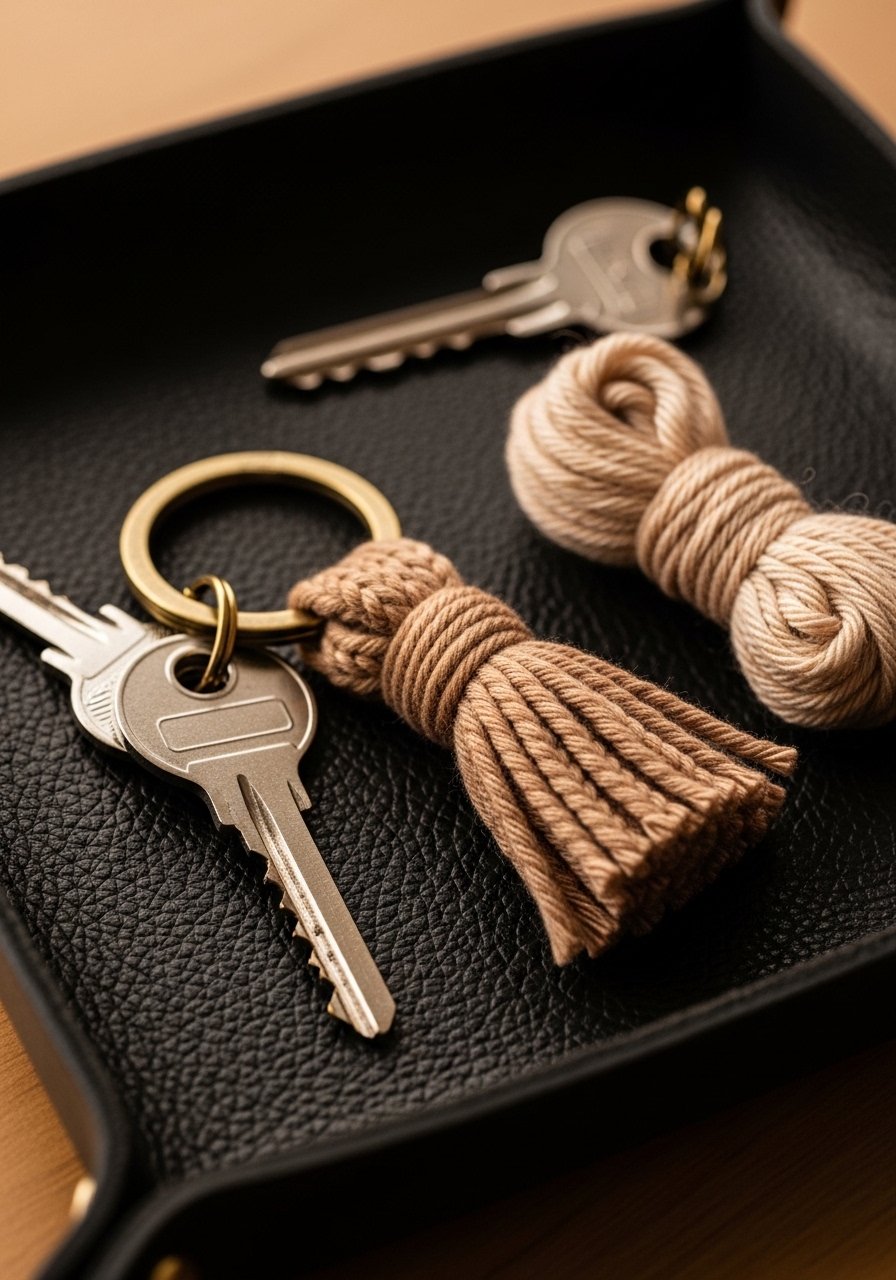
Make a tiny tassel keychain from leftover yarn for a boutique-feeling accessory. Add a brass ring for durability. Use a key ring pack.
Materials
- Leftover yarn — 5–10 yards
- 3.75 mm (US 5) needles
- Key ring
- Tapestry needle
- Scissors
- Small pliers (to attach ring)
Instructions
- Cast on 10 stitches.
- Work garter stitch for 1.5 inches.
- Bind off and fold to create tassel base.
- Trim yarn tails evenly and attach to key ring using pliers.
- Wrap yarn around top of tassel and secure with knot.
- Trim and tidy ends.
Completion cues: tassel should hang evenly and ring secure.
How to Display or Gift It
- Attach to gift tags or zipper pulls.
- Display on a small hook board.
- Package several on a kraft card for sale.
- Knit Sunglass Strap (simple cord)
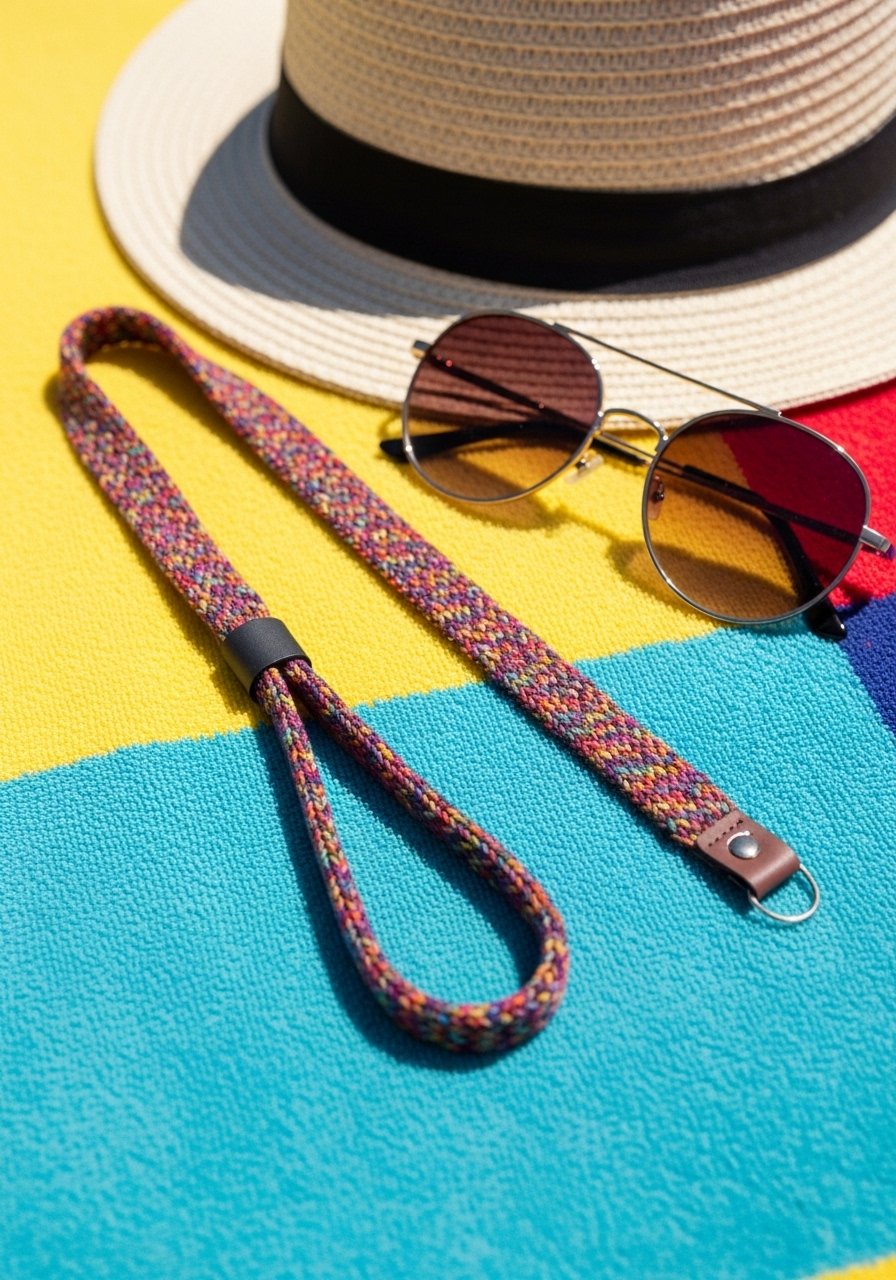
A sunglass strap keeps shades safe and looks boutique when knit in bright colors. I use a cord maker sometimes for tidy finishes.
Materials
- Worsted yarn — 30–40 yards
- 3.75 mm (US 5) needles
- Small rubber loop or leather ends to attach to glasses
- Tapestry needle
- Scissors
- Measuring tape
Instructions
- Cast on 6 stitches.
- Work I-cord for 22–28 inches.
- Bind off and attach tiny rubber loops or leather ends to each side.
- Secure attachments with stitching.
- Trim and finish.
- Test on sunglasses for fit.
Completion cues: strap should be long enough to rest around neck and hold glasses without slipping.
How to Display or Gift It
- Pair with sunglasses for a beach-ready gift.
- Display on pegboard with hats and small accessories.
- Store in a small sunglass pouch or container.
You just scrolled through 24 budget knitting projects for beginners that read high-end but cost almost nothing to make. There’s a mix of accessories, home decor, and tiny gifts designed to use scrap yarn, cheap skeins, and simple tools like blunt tapestry needles and affordable knitting needles. Try one tonight, pin this post for your weekend craft day, and share the link with a friend who loves handmade gifts. Which of these are you itching to try first? And if you want, grab a quality hot glue gun for finishing touches — it helps with attaching hardware and tidy seams when you need a fast hold: hot glue gun with temperature control.
Happy knitting — and may your leftover yarn pile quickly become a shelf full of boutique-looking creations.


