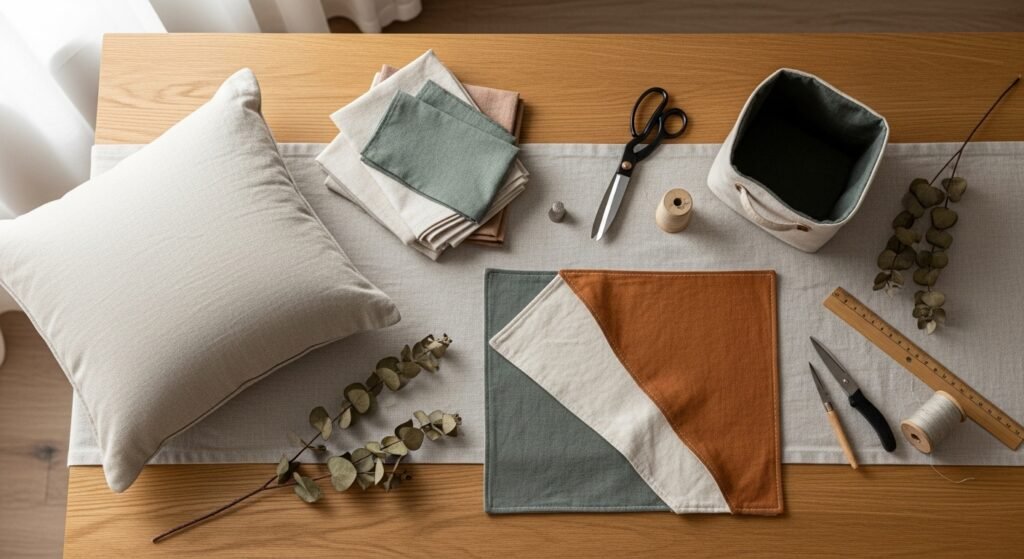
You love the look of a home filled with handmade touches, but you don't want projects that take days or need advanced skills. These 23 beginner sewing projects for the home are exactly the kind of quick wins that add warmth and personality to every room. Each project here keeps seams simple, supplies realistic, and results beautiful — from cushy pillow covers to useful storage bins and pretty napkins.
You’ll find step-by-step instructions, exact materials with measurements, drying or setting times when needed, and tiny troubleshooting tips that save time. I mention tools I actually use — like my Cricut Joy cutting machine for fast fabric cutting or a self-healing cutting mat for accurate trimming. Pin this for your next weekend of sewing and pick one project to try tonight — you’ll be surprised how much charm a single handmade piece brings.
- Easy Throw Pillow Covers — Beginner Sewing Projects for the Home
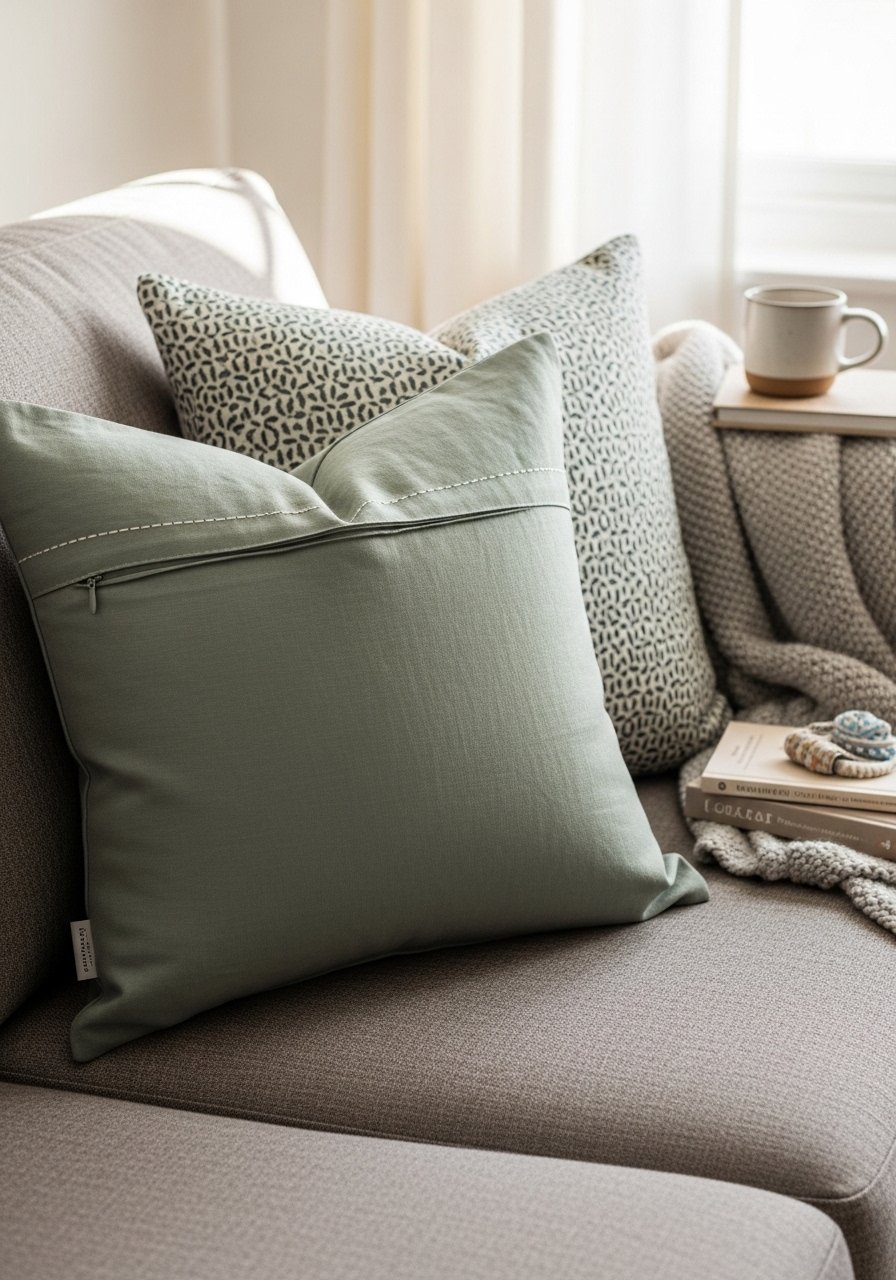
This pillow cover is the quickest way to change a room’s mood. The look is crisp linen with a clean topstitched seam and hidden zipper. Perfect for beginners, it teaches straight seams, measuring, and zipper insertion. If you don’t have a zipper foot, a standard zipper works fine too.
Materials
- 1 linen or cotton fabric, 18" x 18" cover: 1/2 yard
- 1 18" pillow insert
- 1 nylon invisible zipper, 18"
- Matching thread
- Straight pins
- Seam gauge or ruler
- Fabric shears
- Iron
Instructions
- Cut two fabric squares 19" x 19" (allow 1/2" seam allowance all around).
- Press edges 1/2" under on one square where zipper will sit.
- Pin zipper face down along the pressed edge; using a zipper foot sew zipper with 1/4" seam.
- Place right sides together, align edges, pin remaining three sides.
- Sew remaining sides with 1/2" seam allowance, leaving zipper partially open.
- Turn cover right-side out, push corners with a blunt tool, press seams flat, and topstitch 1/8" around for a finished look.
How to display or gift it
- Swap this cover seasonally for quick refreshes.
- Display on a small wooden bench or sofa; mix textures like velvet or knit.
- For gifting, wrap in tissue and tie with jute; include a care label.
- Store extras flat in a stackable fabric organizer for dust-free storage — I use a clear craft organizer tray set.
- No-Fray Fabric Placemats
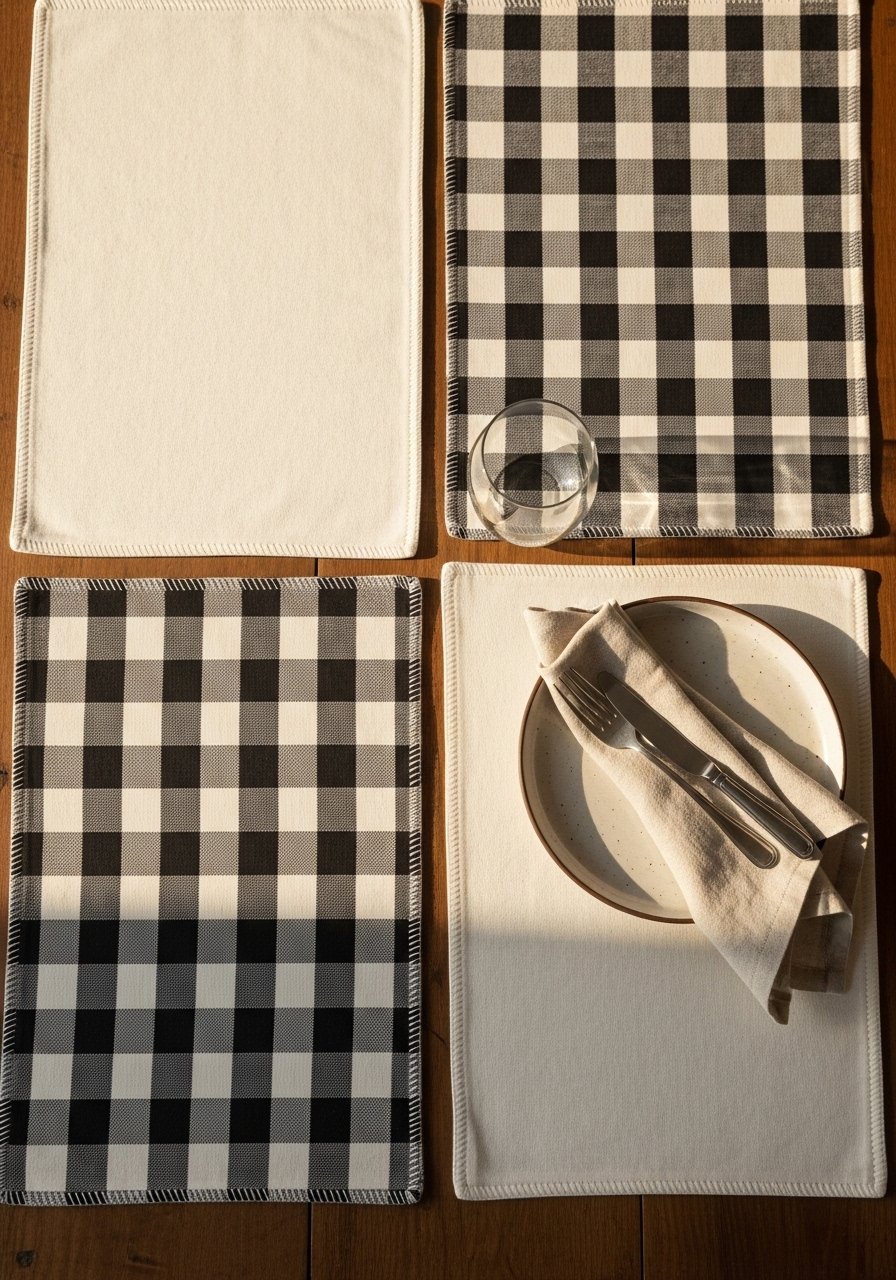
Placemats make dining feel intentional. These double-layered mats hide raw edges and resist fraying. They’re quick to sew, durable, and machine-washable — great for daily family use or kids’ craft days.
Materials
- 2 cotton fabric pieces per placemat, 14" x 18"
- 1 cotton batting piece per placemat, 14" x 18"
- Matching thread
- Rotary cutter and ruler
- Self-healing cutting mat
- Fabric clips or pins
- Iron and pressing cloth
Instructions
- Cut two fabric rectangles and one batting per placemat.
- Layer: wrong side of top fabric to batting, then wrong sides together with backing fabric.
- Pin or clip in place.
- Topstitch around perimeter with 1/4" seam, leaving a 2" gap for turning.
- Trim corners at a 45-degree angle without cutting the stitches.
- Turn right-side out, press, and hand-stitch or machine-stitch the opening closed.
- Optional: quilt vertical lines every 2" for stability.
How to display or gift it
- Stack placemats tied with twine and a sprig of dried lavender.
- Pair with matching napkins for host gifts.
- Keep extras in a kitchen drawer organizer for seasonal swaps.
- For crisp edges, press with a steam iron before storing.
- Simple Linen Napkins
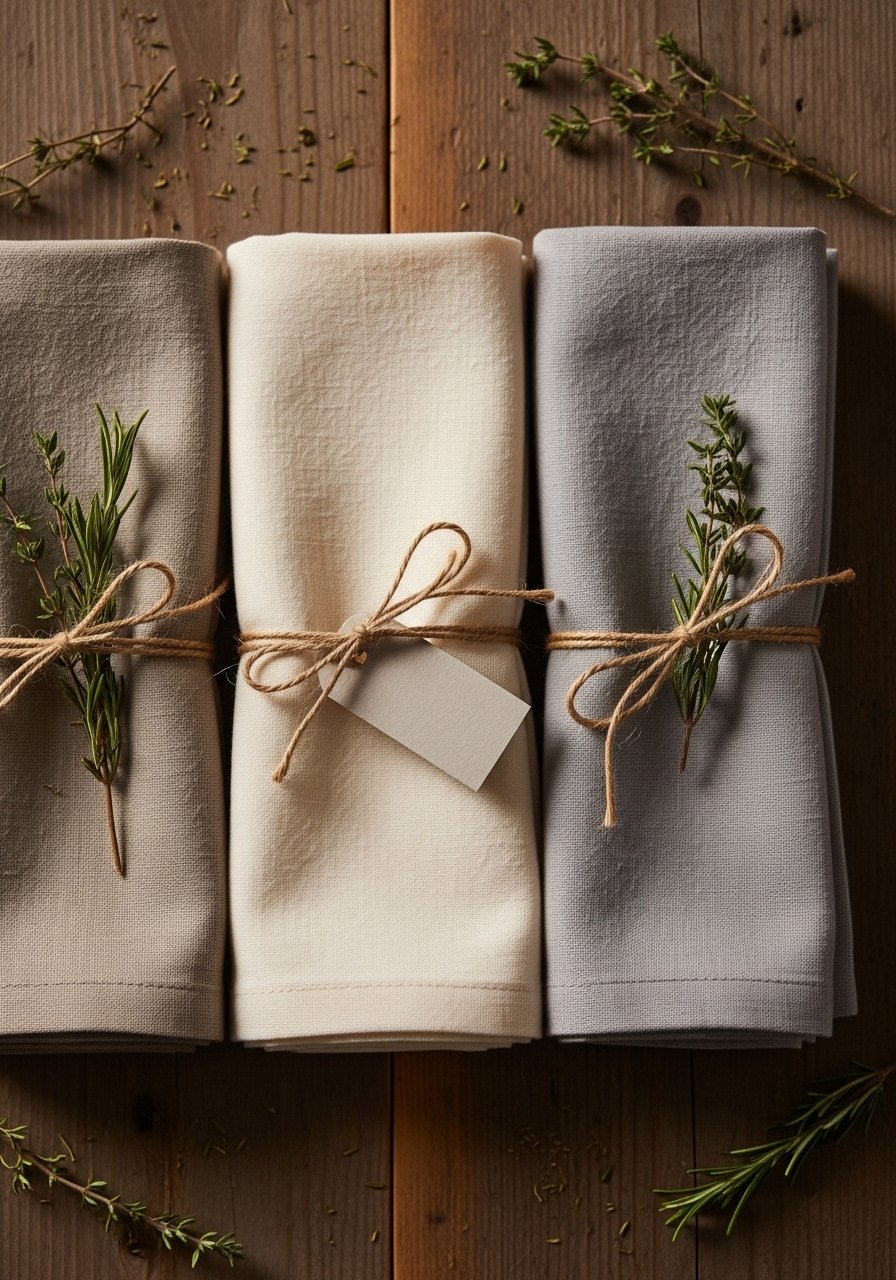
Napkins are beginner-friendly and add a handmade boutique feel to your table. These have mitered corners for a polished finish and soften with each wash.
Materials
- 1/2 yard linen or cotton for 4 napkins (approx 18" x 18" each)
- Matching thread
- Fabric shears or rotary cutter
- Iron and ironing board
- Seam gauge
- Pins
- Mitering triangle or ruler
Instructions
- Cut four squares 18" x 18".
- Press a 1/2" hem on all sides.
- At each corner, fold fabric diagonally to form a miter and press.
- Pin hem, then topstitch 1/8" from edge.
- Wash and press before first use to soften fibers.
How to display or gift it
- Tie a set with twine and a kraft tag for gifts.
- Store folded in a linen drawer or fabric storage box.
- Mix colors for seasonal tablescapes.
- Quilted Fabric Coasters
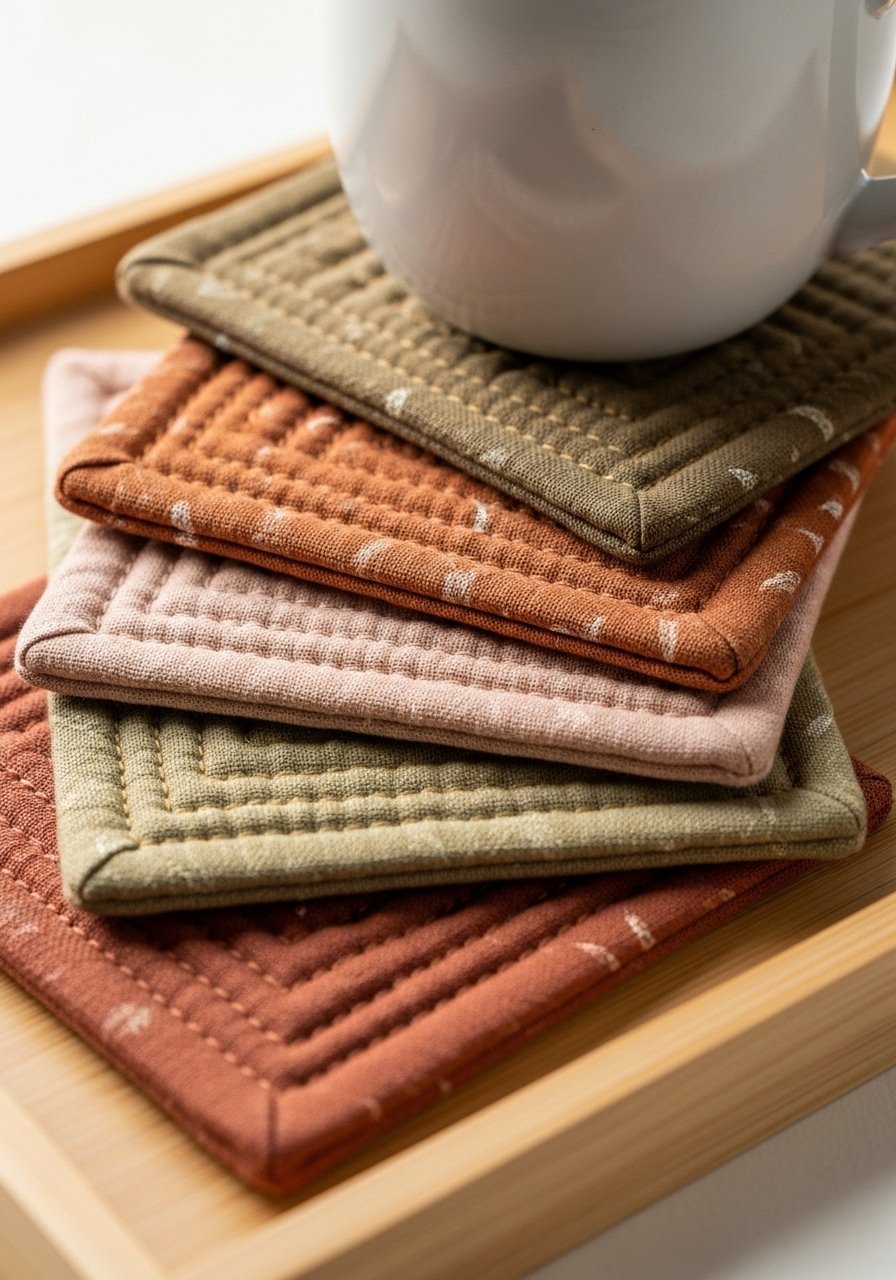
Coasters are tiny projects that teach quilting basics: layering, straight-line quilting, and binding. They make great hostess gifts and are forgiving if your lines aren’t perfect.
Materials
- 4 cotton squares, 5" x 5"
- 4 batting squares, 5" x 5" (thin cotton)
- 4 backing squares, 5" x 5"
- Bias binding, 5/8" width, 22" total
- Matching thread
- Rotary cutter and small ruler
- Quilting clips
Instructions
- Layer top, batting, and backing; baste with clips.
- Quilt straight lines every 1/2" or free-motion if confident.
- Trim edges to square.
- Attach bias binding: align raw edges, stitch, fold over, and hand-stitch or topstitch.
- Press flat for neat edges.
How to display or gift it
- Stack with a ribbon and a note about washing: machine wash cold, tumble low.
- Keep in a shallow tray on a coffee table.
- For storage, a small wooden tray display looks lovely.
- Reversible Table Runner
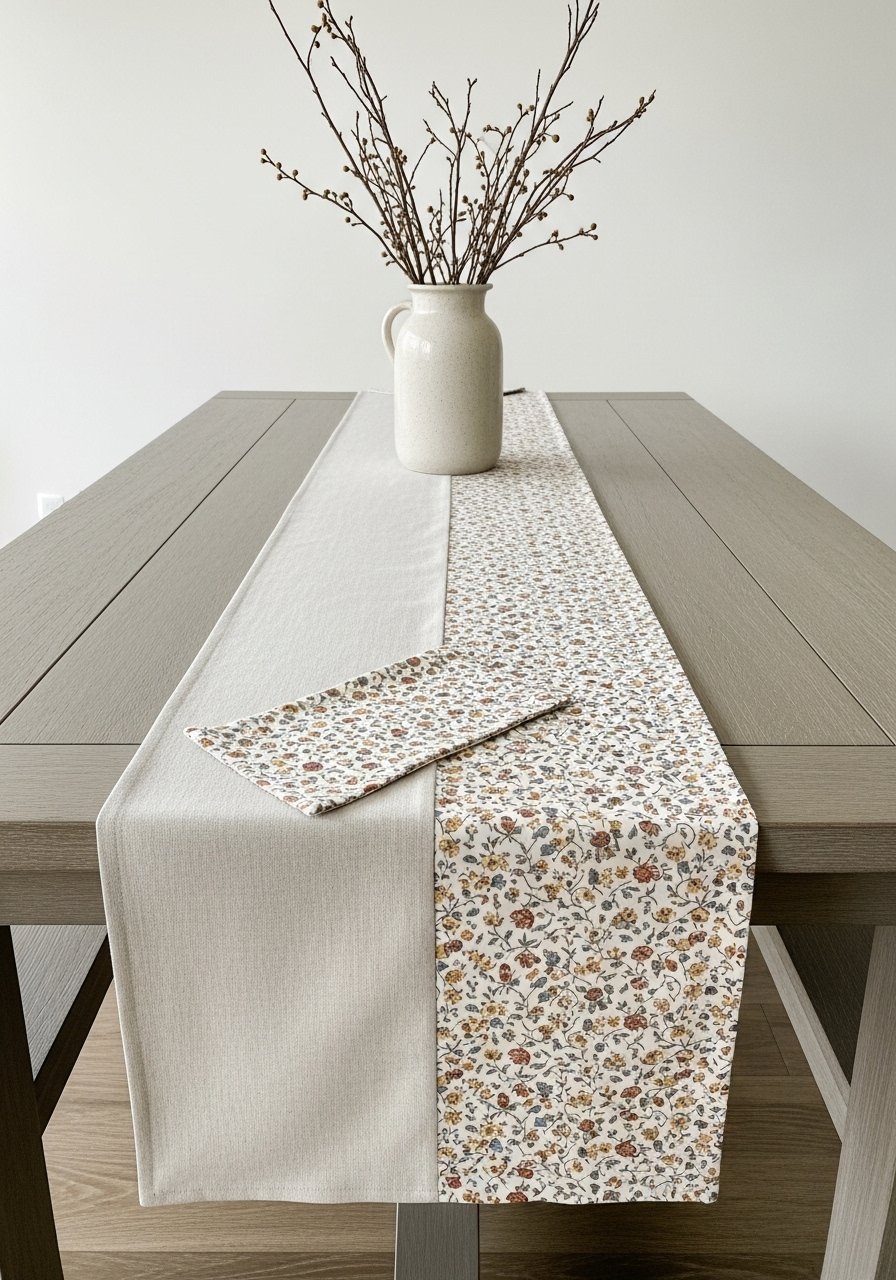
A reversible runner doubles styling options. This project teaches straight seams and edge finishing. It’s forgiving if you’re learning to match seams and press clean hems.
Materials
- 1/2 yard fabric A, 18" x 72"
- 1/2 yard fabric B, 18" x 72"
- 1 piece fusible interfacing (optional), 18" x 72"
- Matching thread
- Iron
- Rotary cutter and ruler
- Pins or clips
Instructions
- Cut both fabrics to 18" x 72".
- Optional: fuse interfacing to one long edge for structure.
- Place fabrics right sides together; pin long edges.
- Sew along both long edges with 1/2" seam allowance.
- Turn right-side out through a short open end; press seam flat.
- Hand-stitch opening closed and topstitch 1/8" from edge for crisp look.
How to display or gift it
- Flip to change the room mood—floral for spring, linen for winter.
- Pair with placemats and napkins for coordinated tables.
- Store rolled in a drawer or in a fabric storage tube.
- Oven Mitt with Insul-Bright
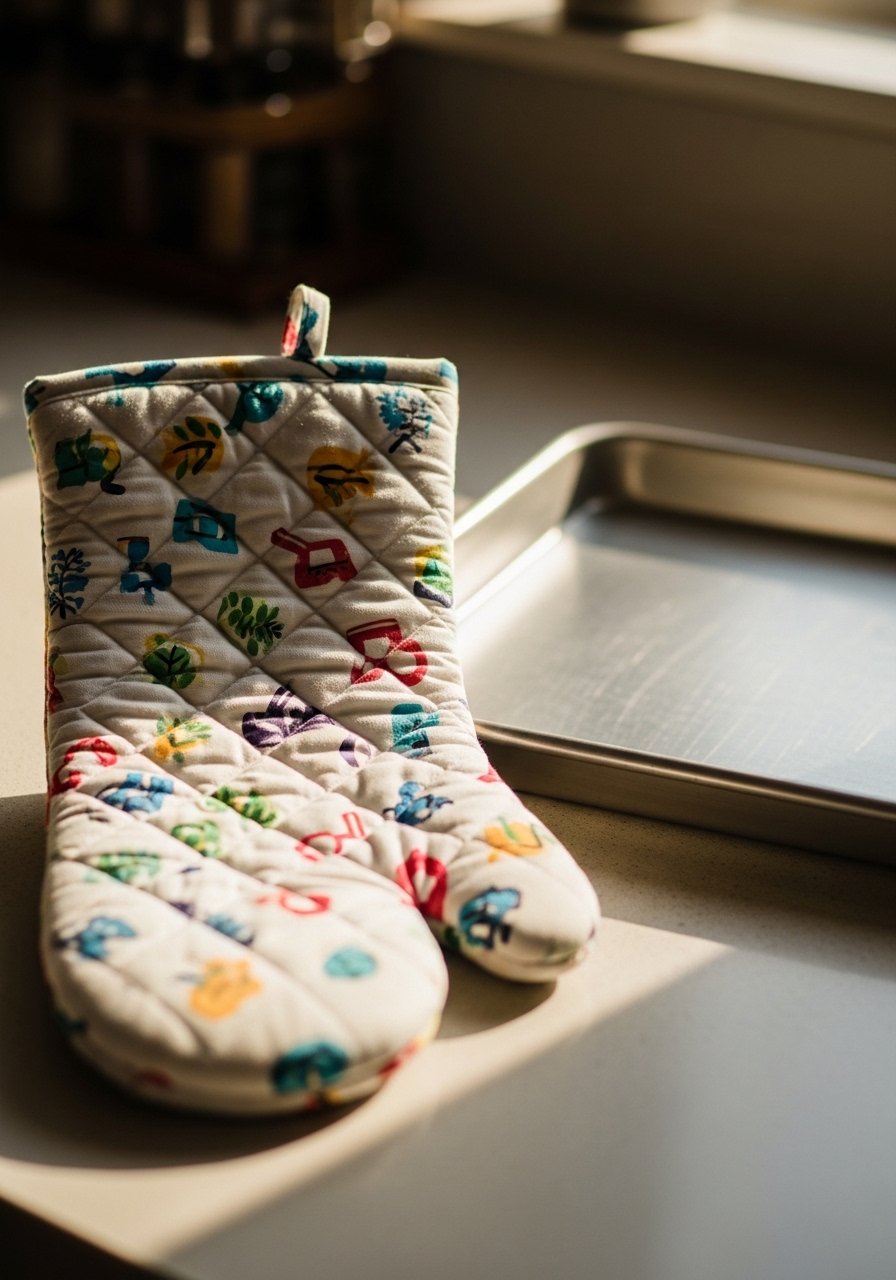
Sewing an oven mitt introduces working with heat-resistant batting like Insul-Bright and thicker layers. The result is practical and cozy for the home cook.
Materials
- 2 outer fabric pieces, 10" x 12"
- 2 lining fabric pieces, 10" x 12"
- 1 piece Insul-Bright**, 10" x 12"**
- Thread suitable for heavy sewing
- Rotary cutter and mat
- Pins or clips
- Sewing machine with heavy-duty needle
- Bias tape or fabric for loop, 6"
Instructions
- Cut outer, lining, and Insul-Bright pieces to pattern (template: 10" x 12").
- Layer outer, Insul-Bright, and lining; baste with clips.
- Quilt as desired (diagonal lines or concentric).
- Stack two quilted pieces, right sides together, leaving wrist opening.
- Sew around edges with 1/2" seam allowance; trim curves.
- Turn right-side out, press, and topstitch wrist edge; attach hanging loop.
How to display or gift it
- Hang on a pegboard or oven handle.
- Pair with kitchen towels and wrap as a hostess set.
- Store in a kitchen drawer organizer to keep shape.
- Machine-Sewn Fabric Storage Bins
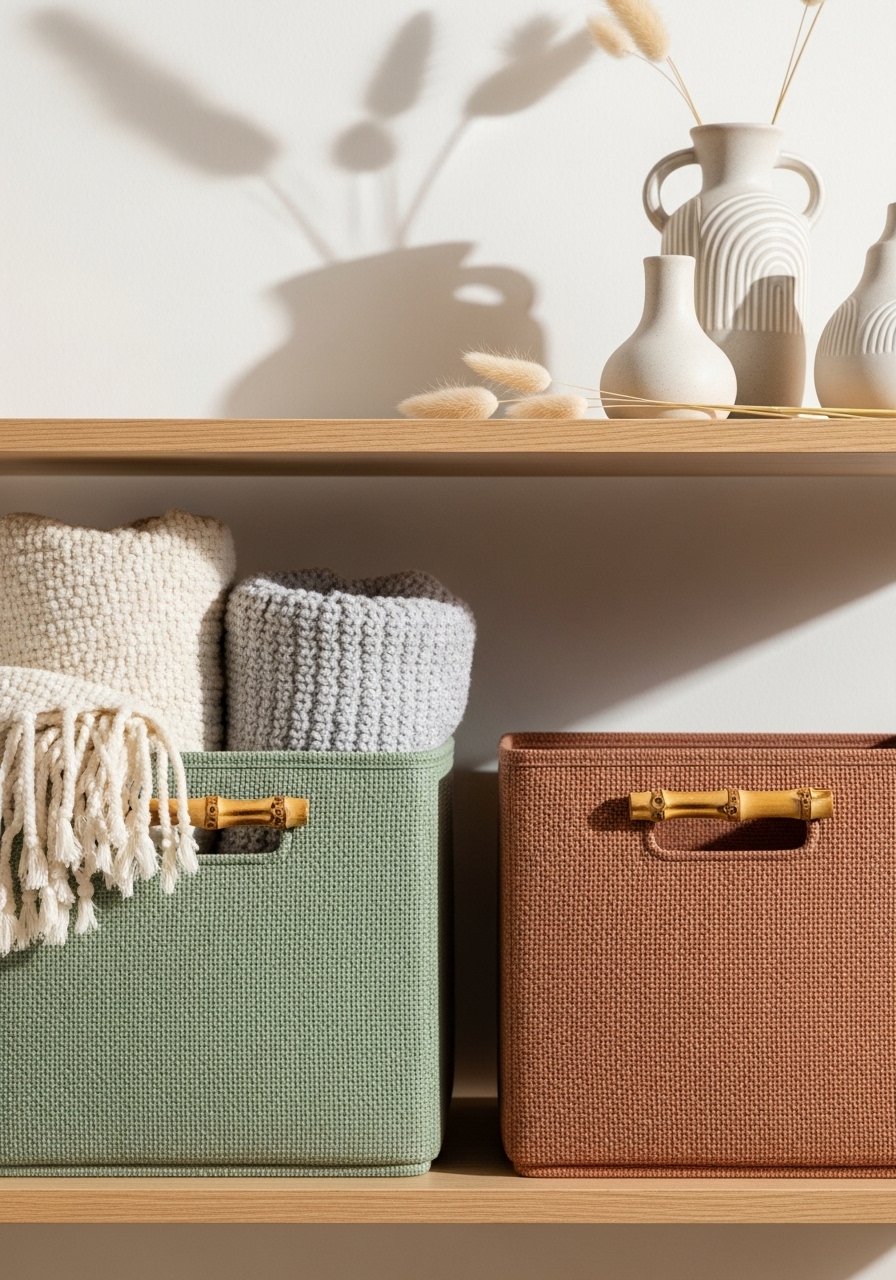
These bins teach box corners and adding structure with canvas or interfacing. They’re great for corralling toys, throws, or craft supplies.
Materials
- Outer fabric: 1/2 yard
- Lining fabric: 1/2 yard
- Interfacing: heavyweight fusible, 1/2 yard
- 2 bamboo or leather handles
- Matching thread
- Rotary cutter
- Fabric glue (optional)
- Sewing machine with walking foot (helpful)
Instructions
- Cut outer and lining rectangles: 18" x 36"; cut interfacing same size.
- Fuse interfacing to outer fabric per instructions (typically 5–10 seconds per area with hot iron).
- Fold into a tube, sew side seam with 1/2" allowance.
- Create boxed corners: measure 4" from corner, mark, sew across, trim.
- Repeat for lining, leaving a 4" gap to turn.
- Insert lining into outer, fold top edge, topstitch to secure, attach handles.
How to display or gift it
- Use on shelves or in closets for organized styling.
- Label with a removable tag or tuck in a craft organizer label set.
- Stack empty bins nested when not in use.
- Fabric Bunting Garland
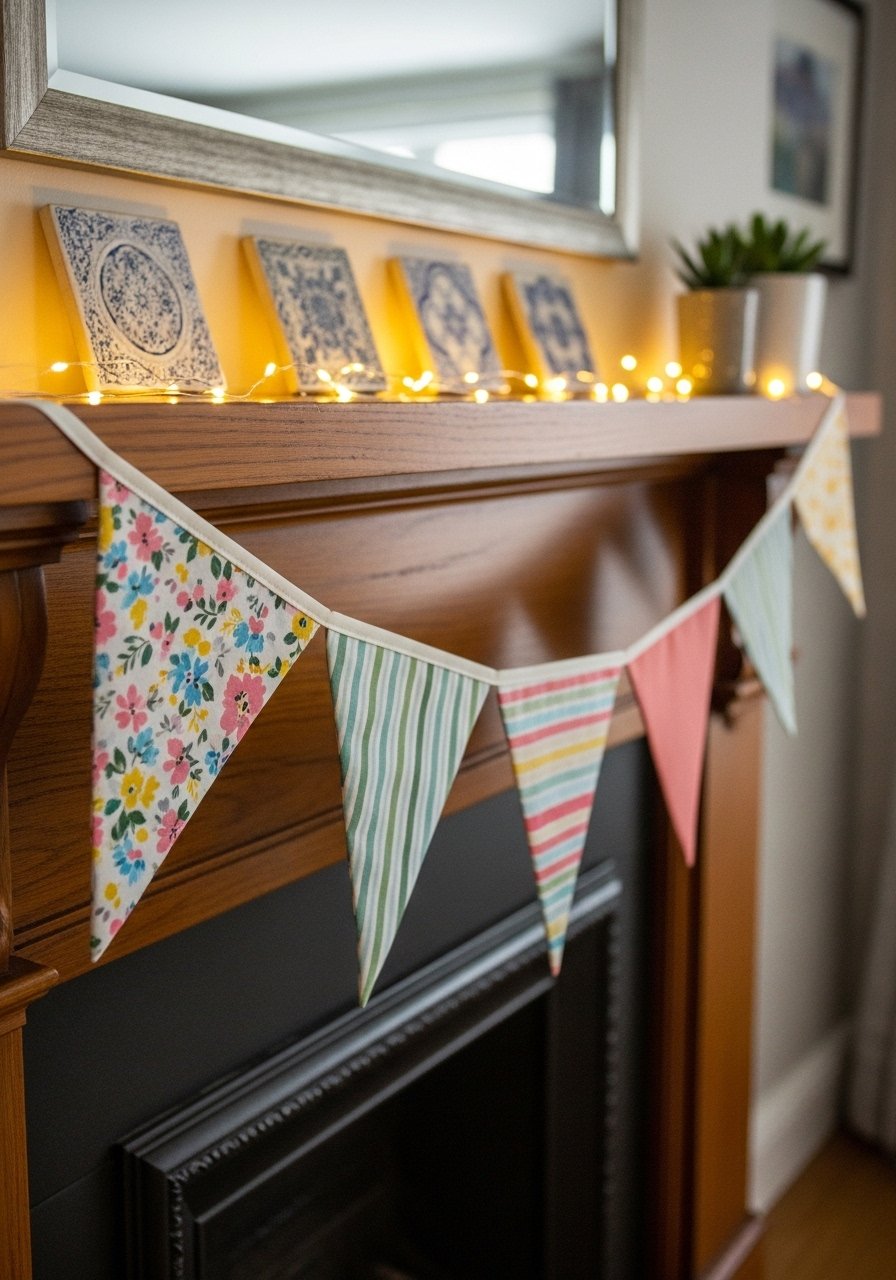
Bunting is a cheerful, low-stress sew that teaches repetitive sewing and accurate cutting. It’s perfect for seasonal decor or a kid’s room.
Materials
- Assorted cotton scraps, triangles 6" wide x 8" high, 10–12 pieces
- 1 cotton tape or bias binding, 7 ft
- Matching thread
- Rotary cutter and mat
- Iron
- Pins or clips
Instructions
- Cut triangles 6" x 8"; make two per pennant if you want double-sided.
- If double-sided, place right sides together and sew around leaving top open.
- Turn right-side out, press, and topstitch 1/8" from edge.
- Sandwich pennants into cotton tape, spacing as desired.
- Stitch along top edge to secure all pennants.
- Trim ends and knot or tie loops for hanging.
How to display or gift it
- Drape over a mantel, headboard, or party table.
- Store flat in a labeled tissue box between seasons.
- Include small clothespins for gifting or storage displays.
- Elastic-Waist Slipcovers for Dining Chairs
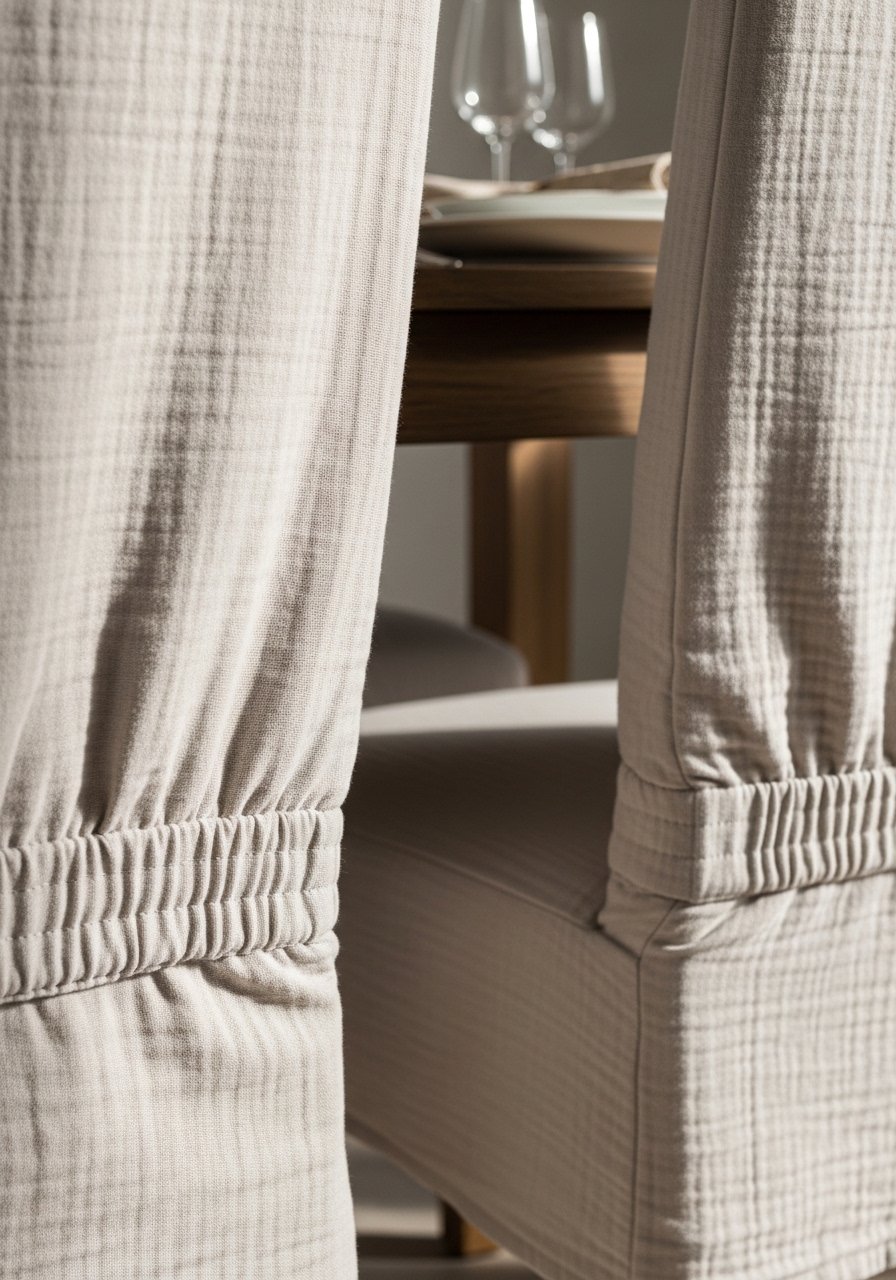
Slipcovers revive chairs without reupholstery. Elastic-waist designs are beginner-friendly and removable for washing.
Materials
- Chair seat measurements (measure width, depth, height)
- Cotton or muslin fabric, 1–2 yards depending on chair size
- 1 3/8" elastic**, length = seat circumference minus 2"
- Matching thread
- Safety pin
- Sewing machine
- Scissors
Instructions
- Measure seat top and drop height.
- Cut fabric: top + 2*(drop height + 1") + seam allowances.
- Hem edges, turn under 1/2".
- Create elastic casing at bottom (fold 1" and stitch leaving opening).
- Thread elastic with safety pin and adjust to fit snugly.
- Sew casing opening closed and tuck slipcover onto chair.
How to display or gift it
- Keep a spare set for spills — machine-wash cold.
- For gifting, include care instructions and a fabric swatch.
- Store spare slipcovers in a breathable fabric storage bag.
- Drawstring Laundry Bag
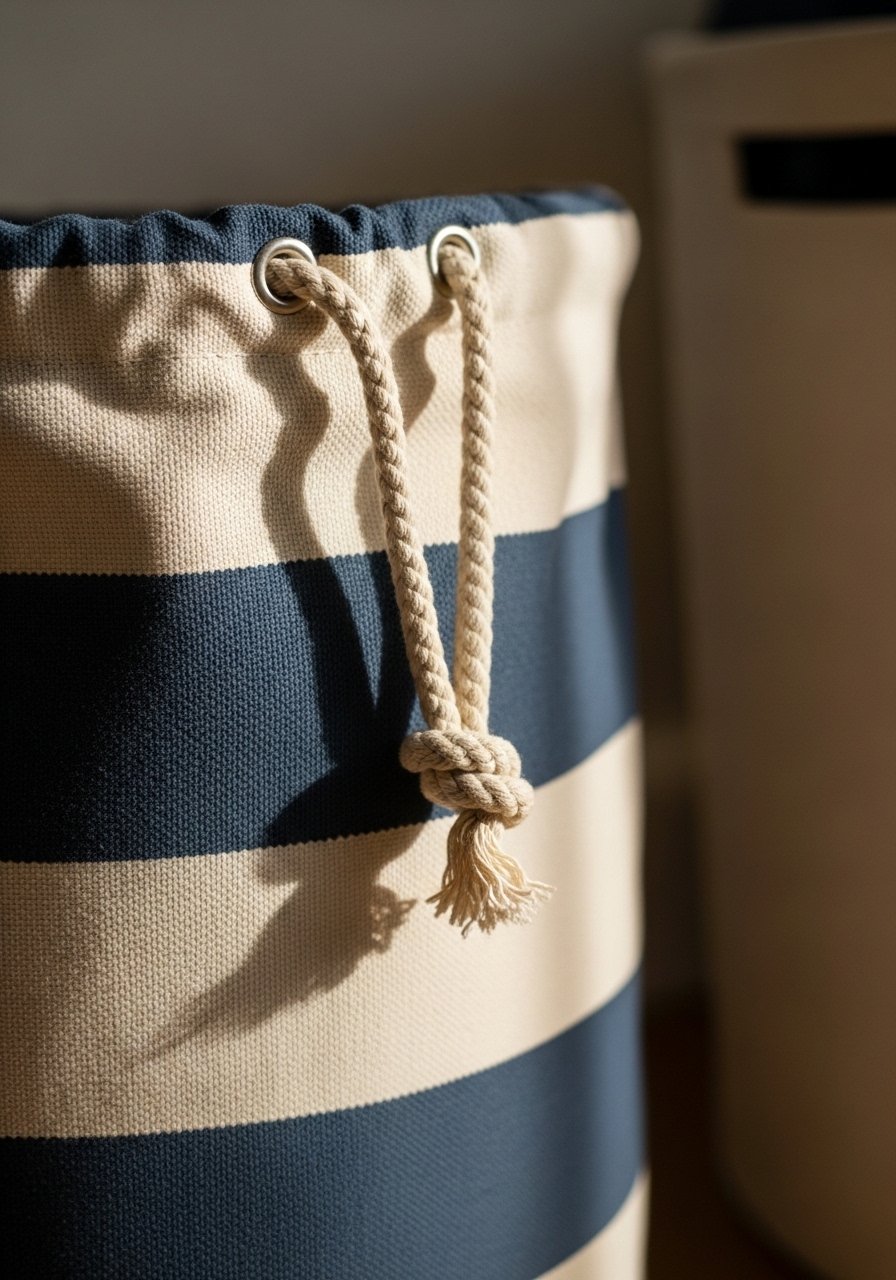
A drawstring bag is practical and portable. It’s excellent for traveling, dorms, or kids’ rooms and builds skills for casings and grommets.
Materials
- Canvas or muslin fabric, 1 yard (bag approx 18" x 24")
- 1 cord or rope, 60"
- 2 grommets (optional)
- Matching thread
- Sewing machine
- Safety pin
- Iron
Instructions
- Cut fabric 38" x 24" (includes seam allowances).
- Fold right sides together and sew long side with 1/2" seam.
- Fold bottom and sew across to close, leaving flat bottom or box the corners for depth.
- Fold top edge down 1.25" to create casing and stitch leaving a gap to thread cord.
- Attach grommets if using.
- Thread cord with safety pin, knot ends, and cinch.
How to display or gift it
- Keep one in laundry room or travel kit.
- Add a name tag for dorm use.
- Fold flat and store in a basket or mason jar for clothespins.
- Simple Curtains with Rod Pocket
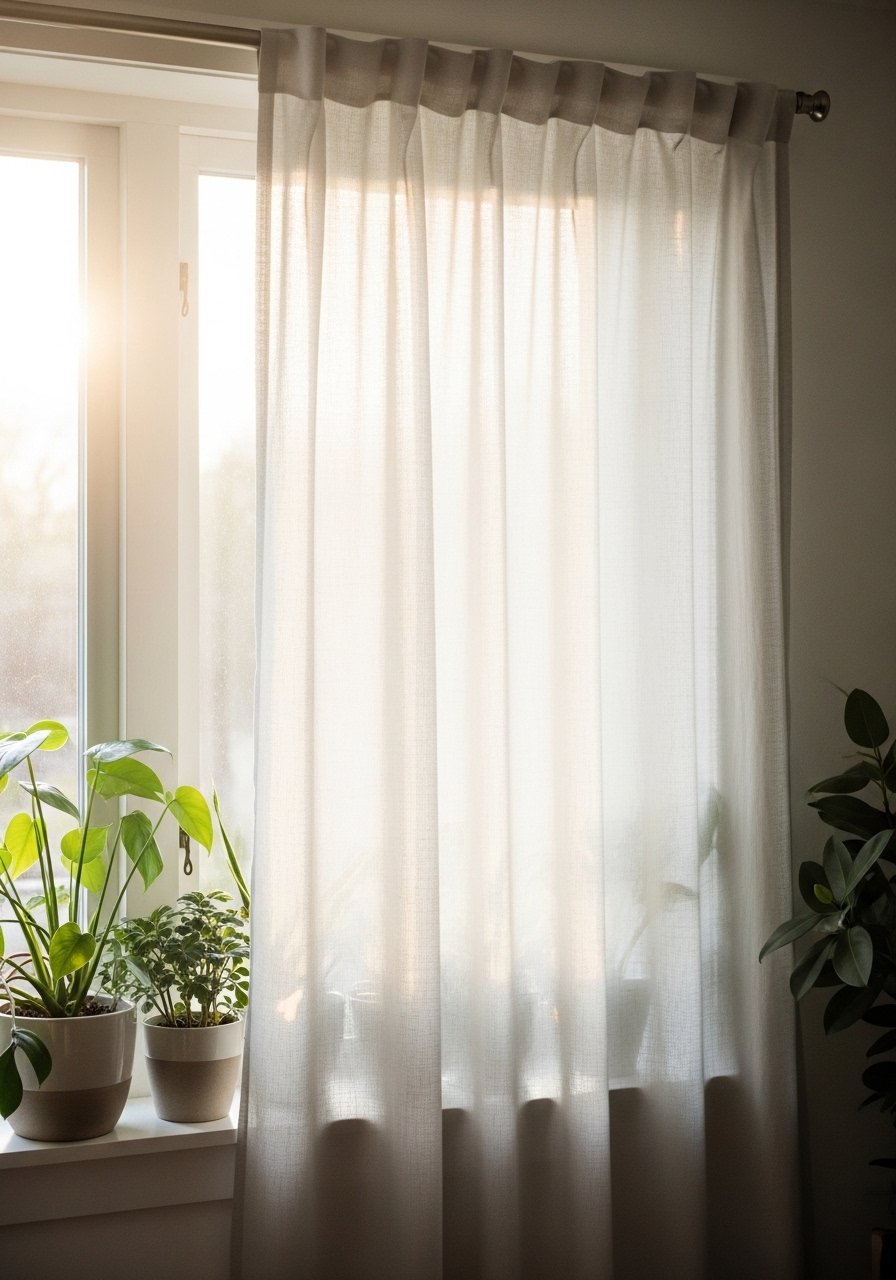
Rod-pocket curtains are easy to sew and hang. They give rooms a relaxed, cottagecore vibe and are a big-impact project for beginners.
Materials
- Fabric: measure width x drop; for one panel, allow 2x finished width plus seams
- Matching thread
- Sewing machine
- Measuring tape
- Iron
- Curtain rod and brackets
Instructions
- Measure window and add fullness (typically 1.5–2x).
- Cut fabric to final length plus 3" for hems and casing.
- Hem bottom 1", then another 1".
- Create top pocket: fold 2" then again to fit rod diameter, stitch leaving ends open.
- Hem sides 1/2" with double fold.
- Slide onto rod and hang.
How to display or gift it
- Pair with linen napkins or pillow covers for room sets.
- For storage, roll gently to prevent creases.
- Use a small wooden curtain rod for a polished finish.
- DIY Roman Shade — Beginner Sewing Projects for the Home
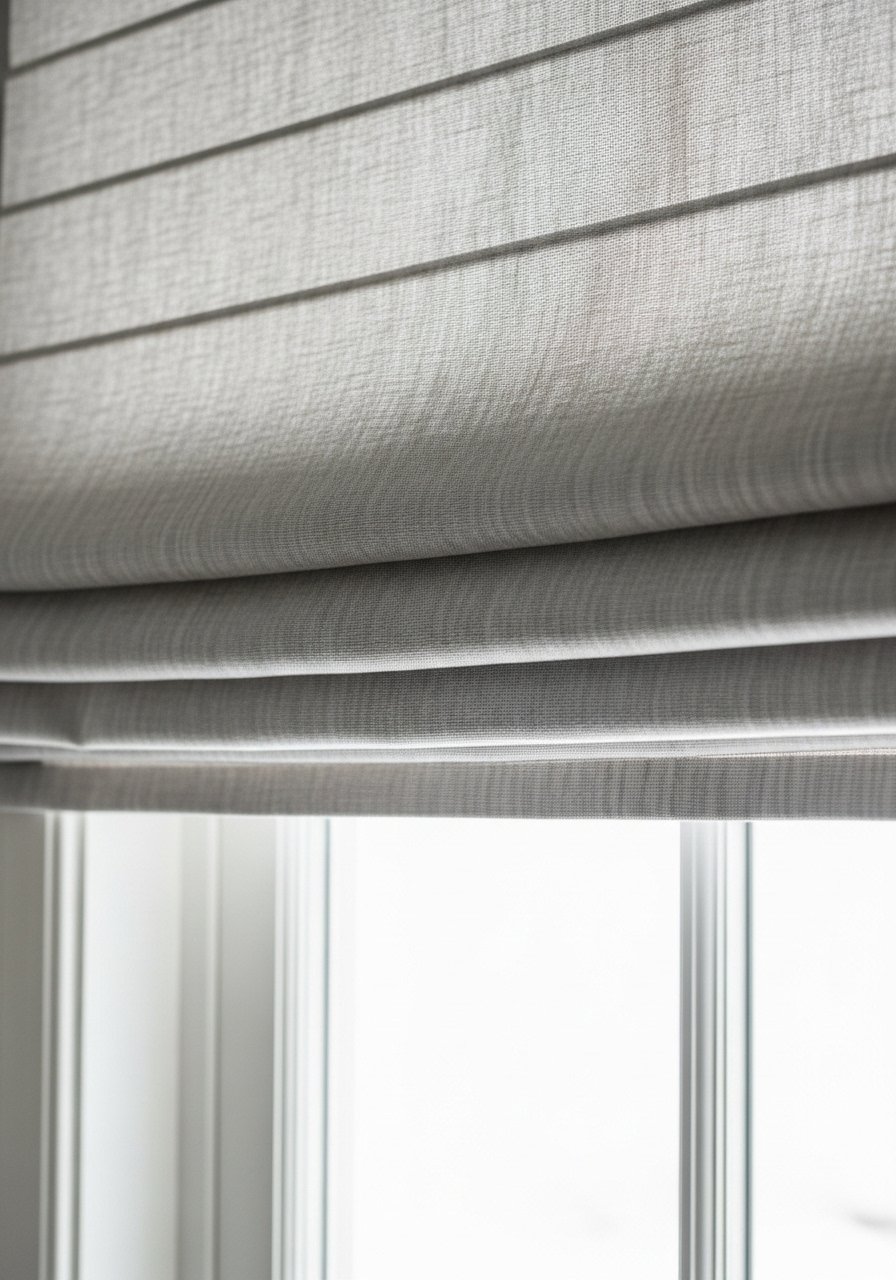
Roman shades look tailor-made and are a satisfying intermediate-beginner project. You'll learn to sew channels for dowels and install a cord system for raising and lowering.
Materials
- Main fabric, width = window width + 4", length = drop + 6"
- Lining fabric, same width and length
- Wooden dowels, cut to width minus 2", 3–4 pieces
- Roman shade tape or cotton webbing
- Cord cleat, cord (nylon)
- Sewing machine
- Staple gun or heavy-duty needle for mounting
- Measuring tape
Instructions
- Cut and join fabric if needed; press hems.
- Attach lining to back of main fabric, right sides facing, stitch around and turn.
- Mark channel positions approximately every 6–8" depending on shade height.
- Sew horizontal channels, leaving openings for dowels.
- Insert dowels into channels.
- Attach roman shade tape vertically on back and stitch cord through tape as per hardware instructions.
- Mount header to window with a bracket or staple to mounting board.
How to display or gift it
- Choose a neutral linen for a Japandi or cottagecore look.
- For gifting, include installation instructions and cord safety info.
- Store spare mounting hardware in a small hardware organizer tray.
- Fabric Drawer Liners
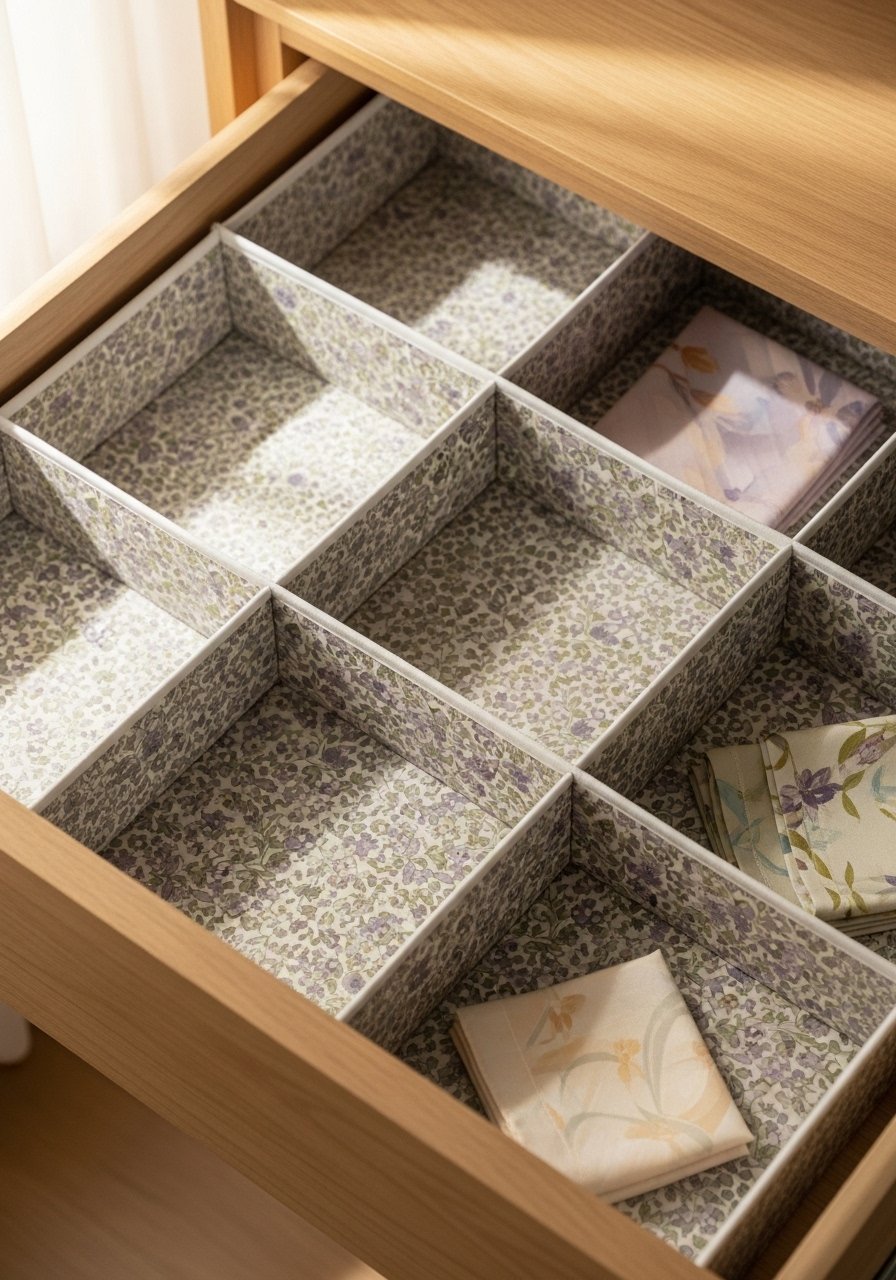
Drawer liners keep linens smelling fresh and add a polished drawer reveal. They’re small, fast, and teach measuring-to-fit.
Materials
- Fabric, thin cotton or muslin, 1/2 yard (adjust for number of drawers)
- Measuring tape
- Rotary cutter
- Matching thread
- Velcro dots or double-sided fabric tape (optional)
- Iron
Instructions
- Measure drawer interior (length, width).
- Add 1/2" to each dimension for hems.
- Cut fabric to size and hem all edges 1/4" then 1/4".
- Optional: add Velcro or fabric tape to keep liner in place.
- Press and insert.
How to display or gift it
- Use coordinating fabric for linen drawers.
- Store extra liners flat in a labeled file box.
- For gifting, pair with a set of napkins and tie with ribbon.
- Reversible Chair Cushion Pads
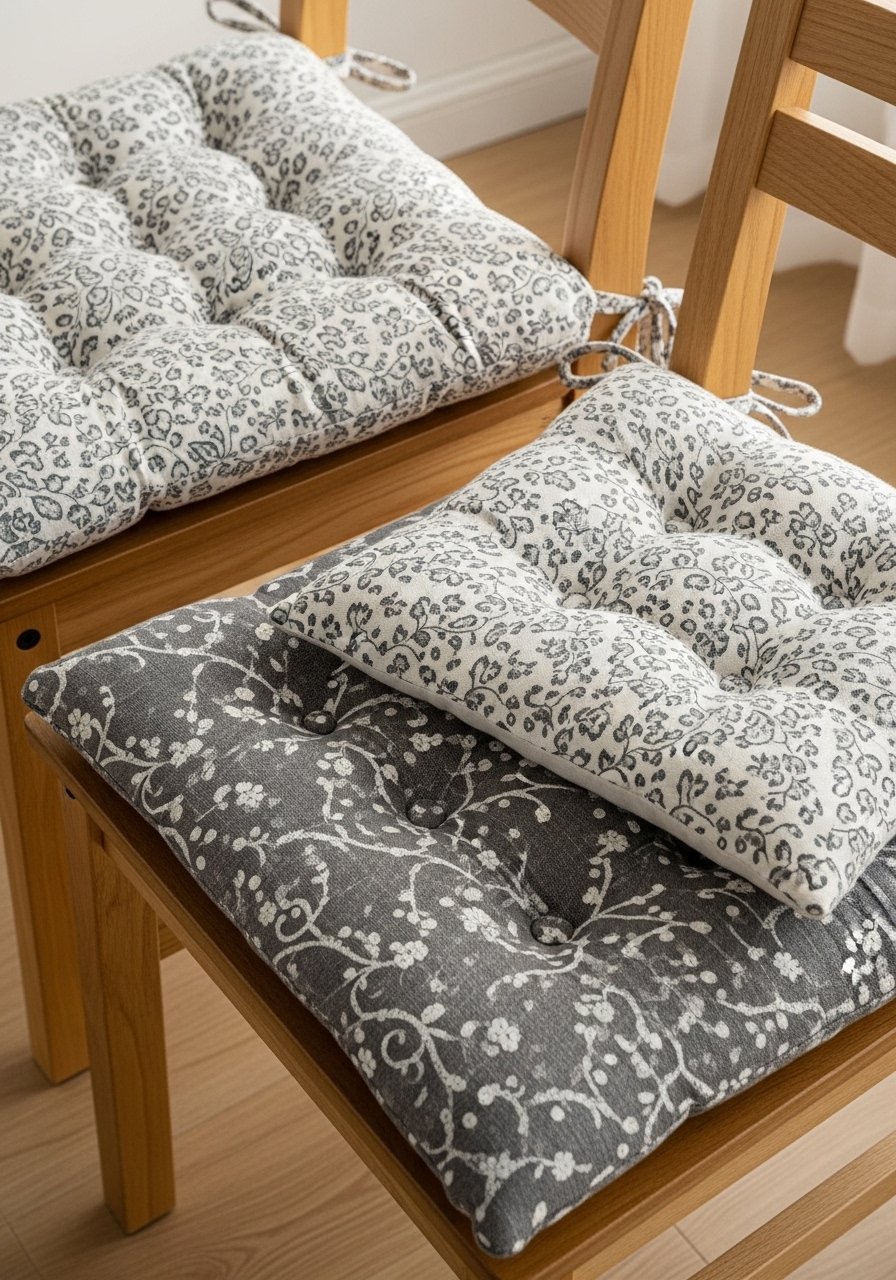
Cushion pads are comfy, portable, and let you play with prints. Reversible pads double styling and teach basic tufting or tie methods.
Materials
- Outer fabric: two pieces per cushion, 15" x 15"
- Batting or foam: 14" x 14"
- Sewing thread
- Buttons for tufting (optional)
- Sewing needle and floss for tufting
- Bias tape for ties, 2 ties per cushion, 18" each
Instructions
- Cut fabric and batting to size.
- Sandwich batting between fabric, pin.
- Sew three sides, insert foam, sew final side, leave space for tuft if doing buttons.
- For tufting: mark center, sew button through to secure and create tuft.
- Attach ties to corners and topstitch edges for durability.
How to display or gift it
- Tie cushions to chairs; store extras in a bench chest.
- Include care instructions for washing foam-safe covers.
- For presentable gifting, fold and place in a kraft gift box.
- Fabric Pocket Organizer for Wall
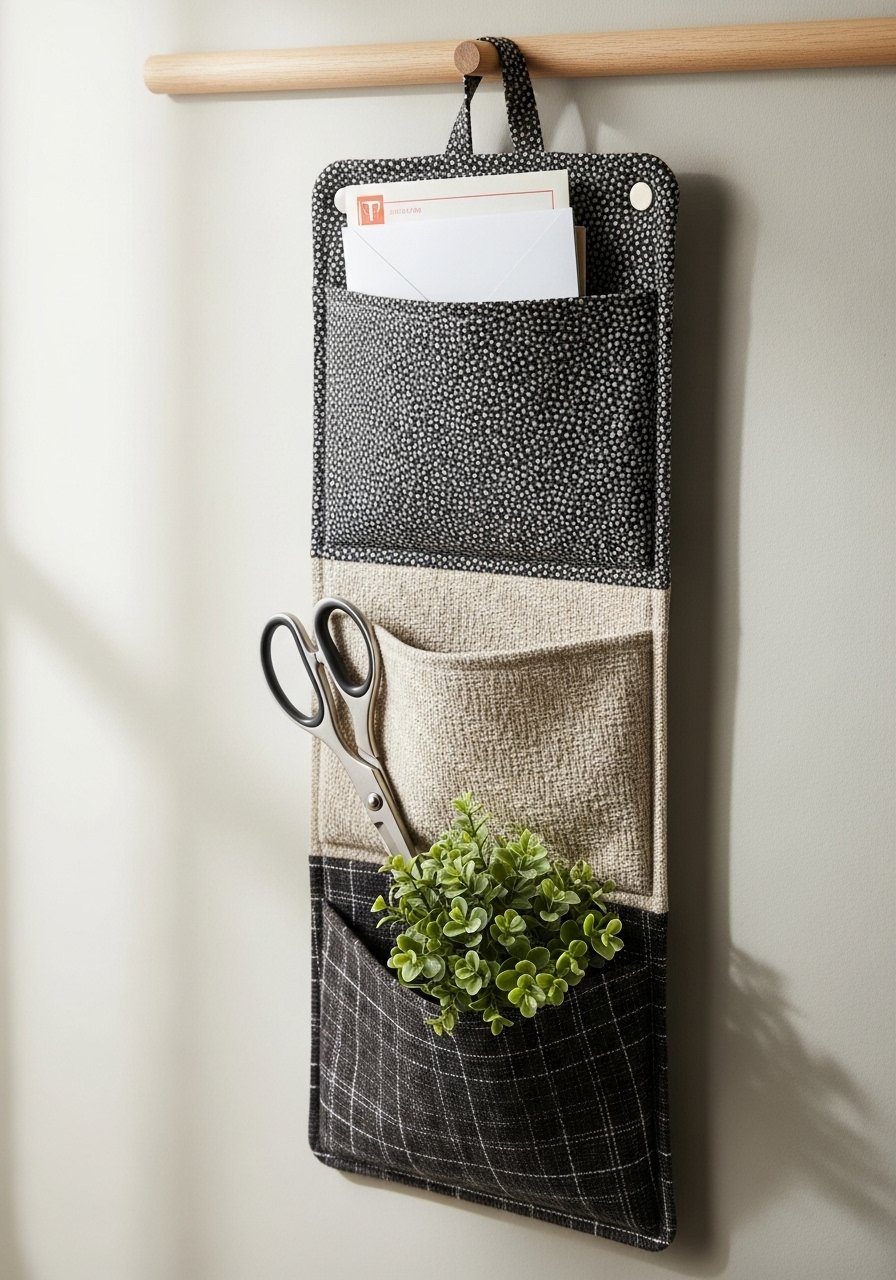
Wall organizers keep entryways tidy. This project teaches creating sturdy seams and attaching hanging loops or dowels.
Materials
- Main fabric, 12" x 36"
- Lining fabric, same size
- Interfacing, 12" x 36"
- Dowel, 36"
- Cotton webbing for hanger, 18"
- Thread
- Sewing machine
Instructions
- Fuse interfacing to main fabric.
- Fold to form three pockets (e.g., 12", 12", 12").
- Stitch pocket seams vertically to define sections.
- Create a top casing for the dowel; insert dowel and secure with end caps or knots.
- Attach webbing hanger and reinforce stitching.
How to display or gift it
- Hang in entryway or office for mail and keys.
- Fold flat for gifting in a tube or box.
- Use a small wooden dowel set for a clean look.
- Burlap and Linen Bread Basket
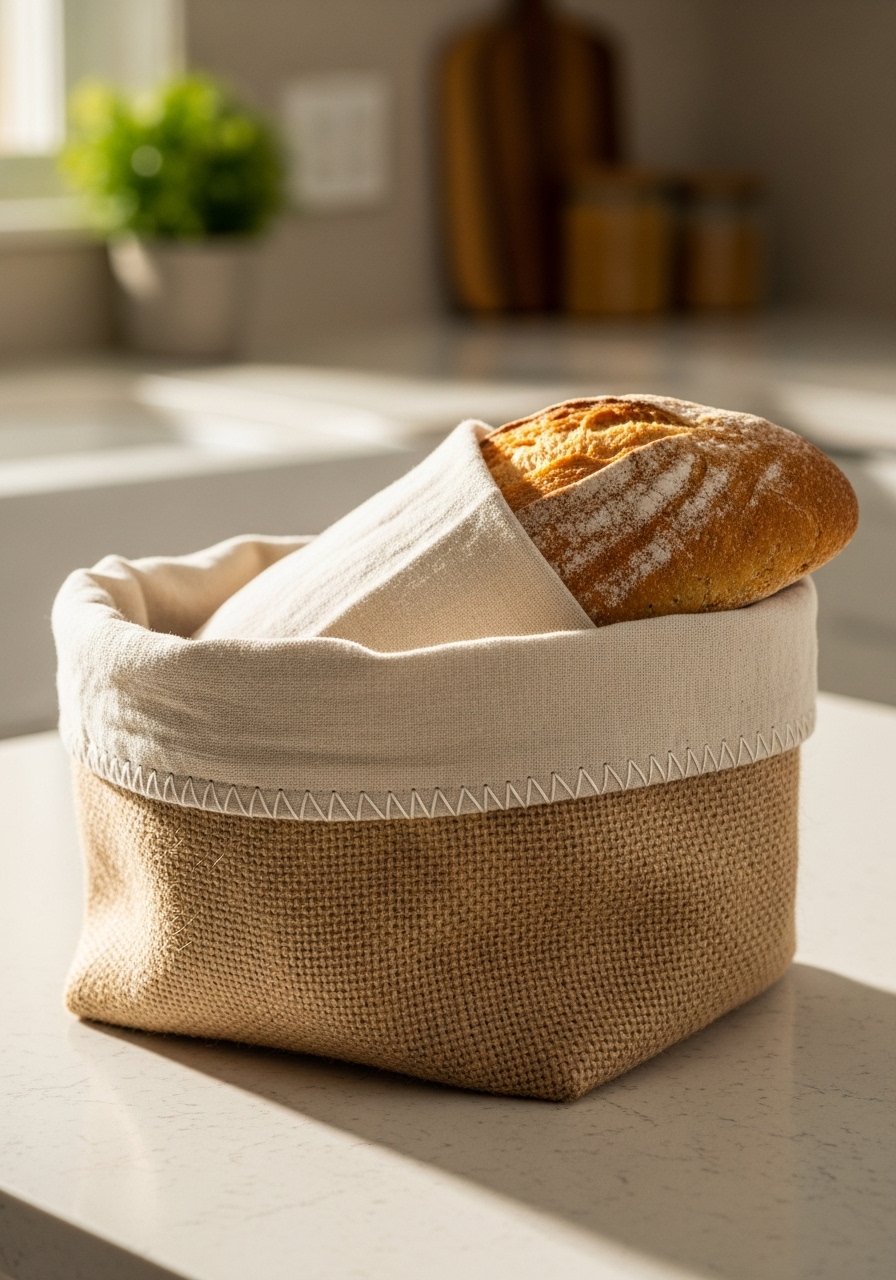
This basket combines rustic burlap and soft linen for a charming bread service. It’s quick, sturdy, and washable (remove liner).
Materials
- Outer burlap fabric, 12" x 24"
- Linen lining, 12" x 24"
- Matching thread
- Rotary cutter
- Sewing machine
- Clamps or binder clips
Instructions
- Cut outer and lining pieces; sew side seams to form tubes.
- Create boxed corners by sewing across the bottom at 3" depth.
- Insert lining into outer, fold top edge over to form a neat rim.
- Topstitch around rim to secure.
- Handwash liner as needed; wipe burlap gently.
How to display or gift it
- Present with artisan bread or pastries in a kraft box.
- Store flat until needed; keep liner in a small laundry mesh bag.
- For gifting, tuck in a small jar of jam.
- Patchwork Mini Wall Quilt
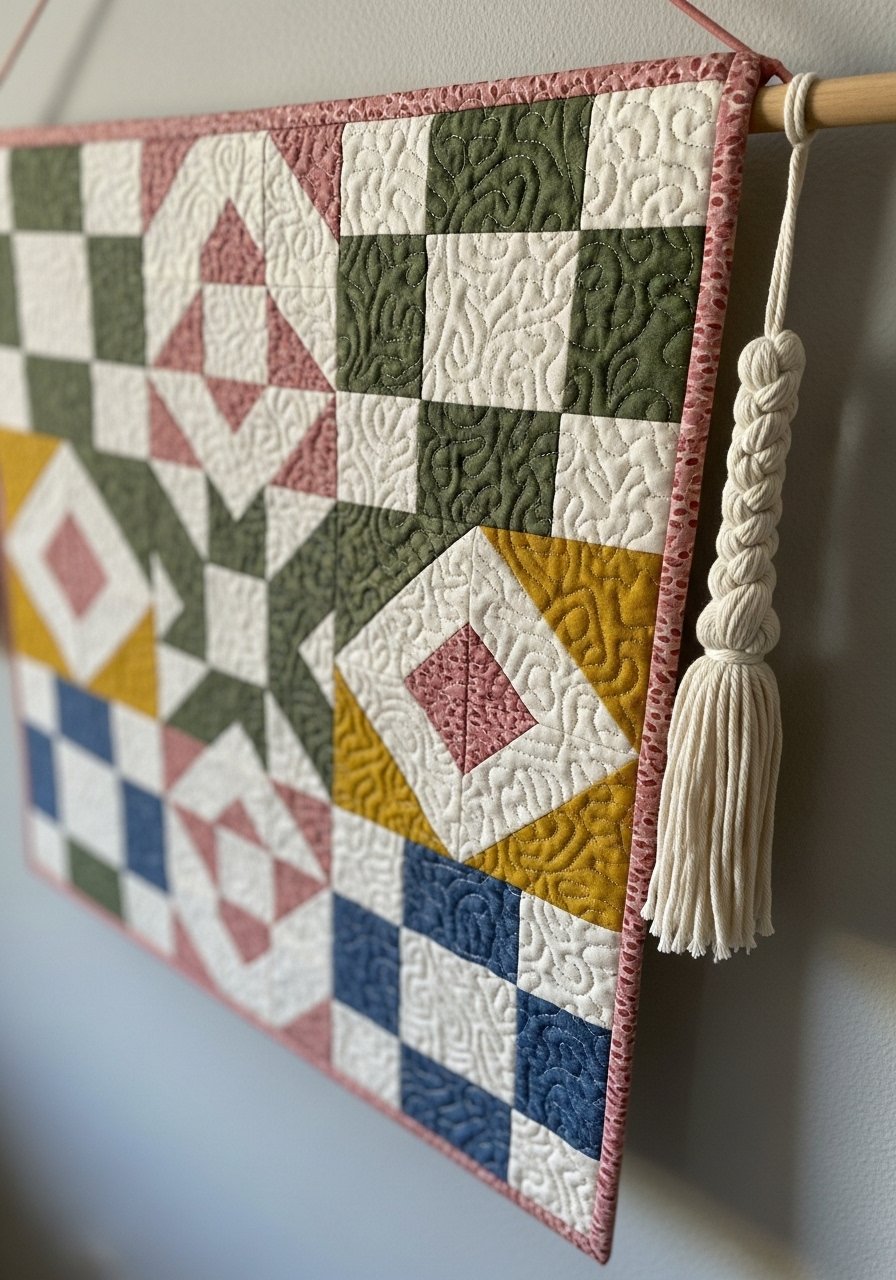
A mini quilt is a great way to practice patchwork and quilting on a small scale. It’s a gorgeous handmade accent for hallways or nurseries.
Materials
- Assorted cotton scraps, total approx 1/2 yard
- Batting, 12" x 12"
- Backing fabric, 12" x 12"
- Quilting thread
- Rotary cutter and ruler
- Quilting clips
- Wooden dowel for hanging
Instructions
- Cut patchwork pieces (e.g., four 6" x 6" squares) and sew into block.
- Press seams and layer with batting and backing.
- Quilt lines with walking foot or by hand.
- Trim to final size; bind edges with bias binding.
- Attach a dowel and hanger for display.
How to display or gift it
- Hang as part of a small gallery wall.
- Gift to new homeowners or for a housewarming.
- Store rolled with acid-free tissue to prevent creases.
- Shower Curtain Trim Edge
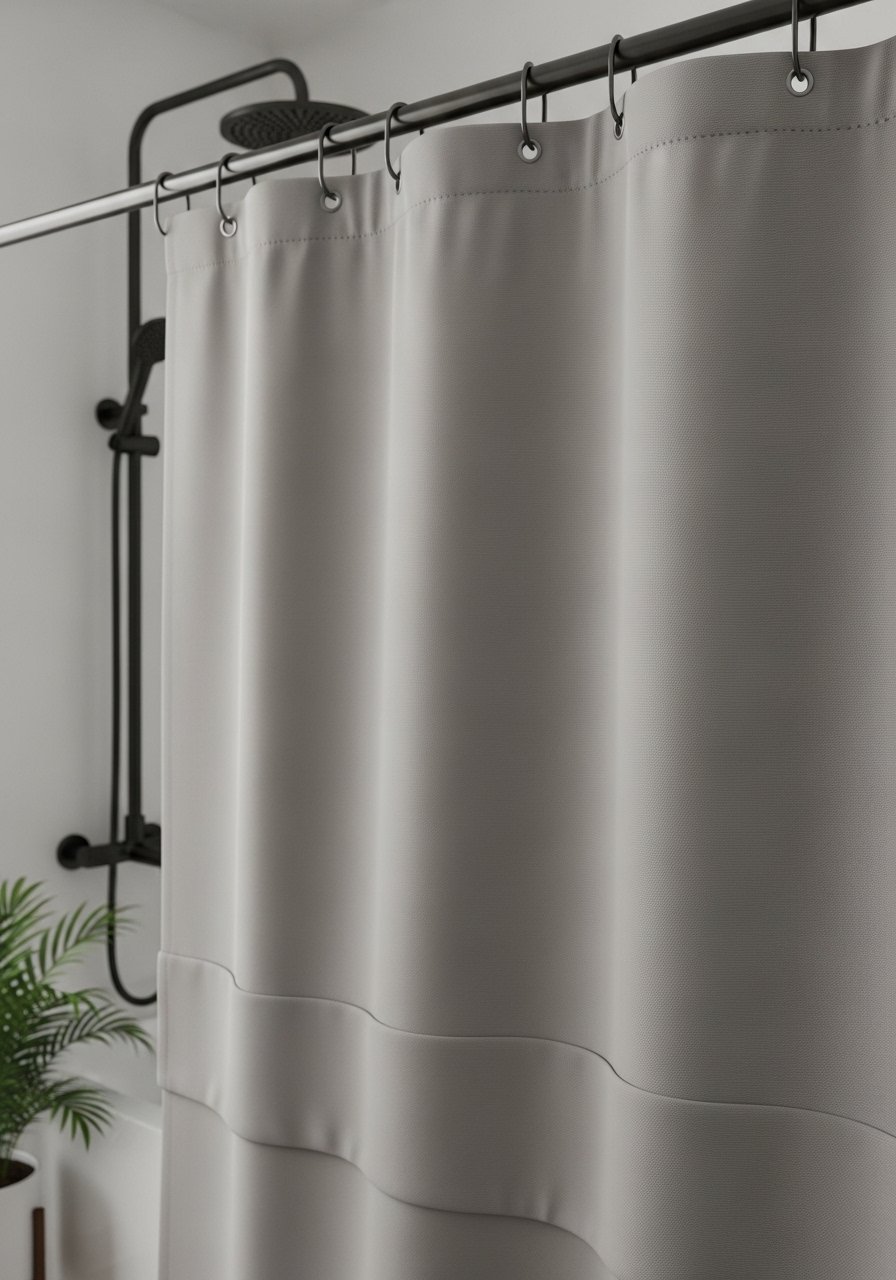
Add personality to a store-bought shower curtain by sewing on a border. It’s an easy way to customize and learn working with large pieces.
Materials
- Plain shower curtain, standard 72" x 72"
- Contrast fabric, width 72" x 12"
- Fabric clips
- Sewing machine with heavy-duty needle
- Seam ripper (to remove curtain hem if needed)
- Thread
Instructions
- Remove shower curtain hem if present.
- Measure and cut contrast fabric to 72" x 12", hem raw edges.
- Pin contrast fabric to bottom edge, right sides together.
- Sew with 1/2" seam, press seam up toward curtain and topstitch.
- Re-hem if needed and replace rings.
How to display or gift it
- Coordinate with towels and bath mat.
- Store extra curtain fabric folded in a bathroom cabinet.
- For gifting, pair with a shower-safe plant and wrap in cellophane.
- Fabric Plant Hangers (Sewn)
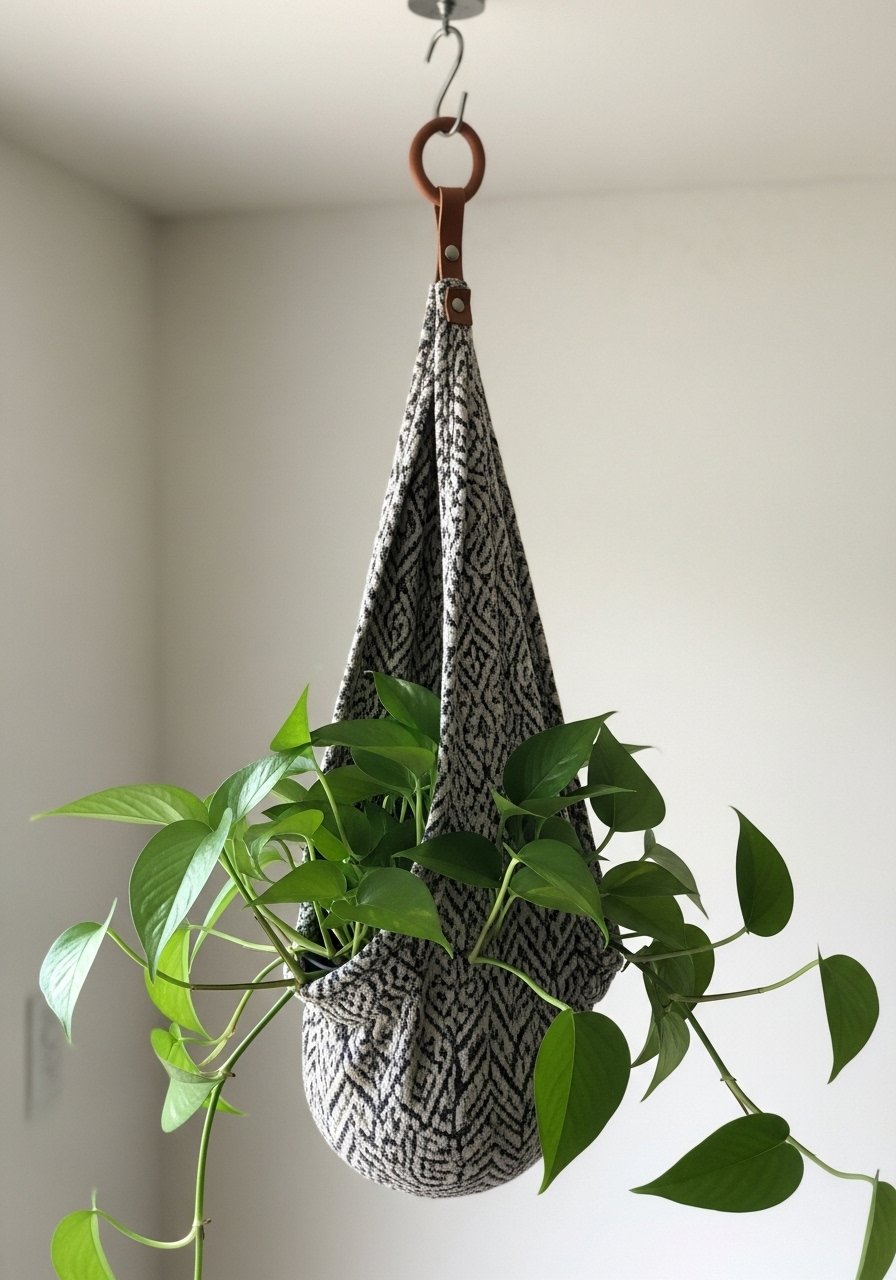
A sewn plant hanger is sturdier than macramé for heavier pots and looks modern with fabric slings and leather loops.
Materials
- Canvas or heavy cotton, 1/2 yard
- Leather or faux-leather for loop, 6"
- Thread heavy-duty
- Sewing machine with heavy needle
- Grommet kit (optional)
- Scissors
Instructions
- Cut fabric to 16" x 36", fold lengthwise and stitch to form a tube.
- Turn right-side out and press.
- Create a pocket by folding and stitching bottom to form cradle.
- Reinforce top with a stitched channel and add leather loop or grommet for hanging.
- Test with a light pot before hanging permanently.
How to display or gift it
- Pair with small indoor plants and place near a window.
- For gifting, include care instructions and a ceramic pot.
- Store flat or rolled to save space.
- Baby Crib Mobile Felt Pieces
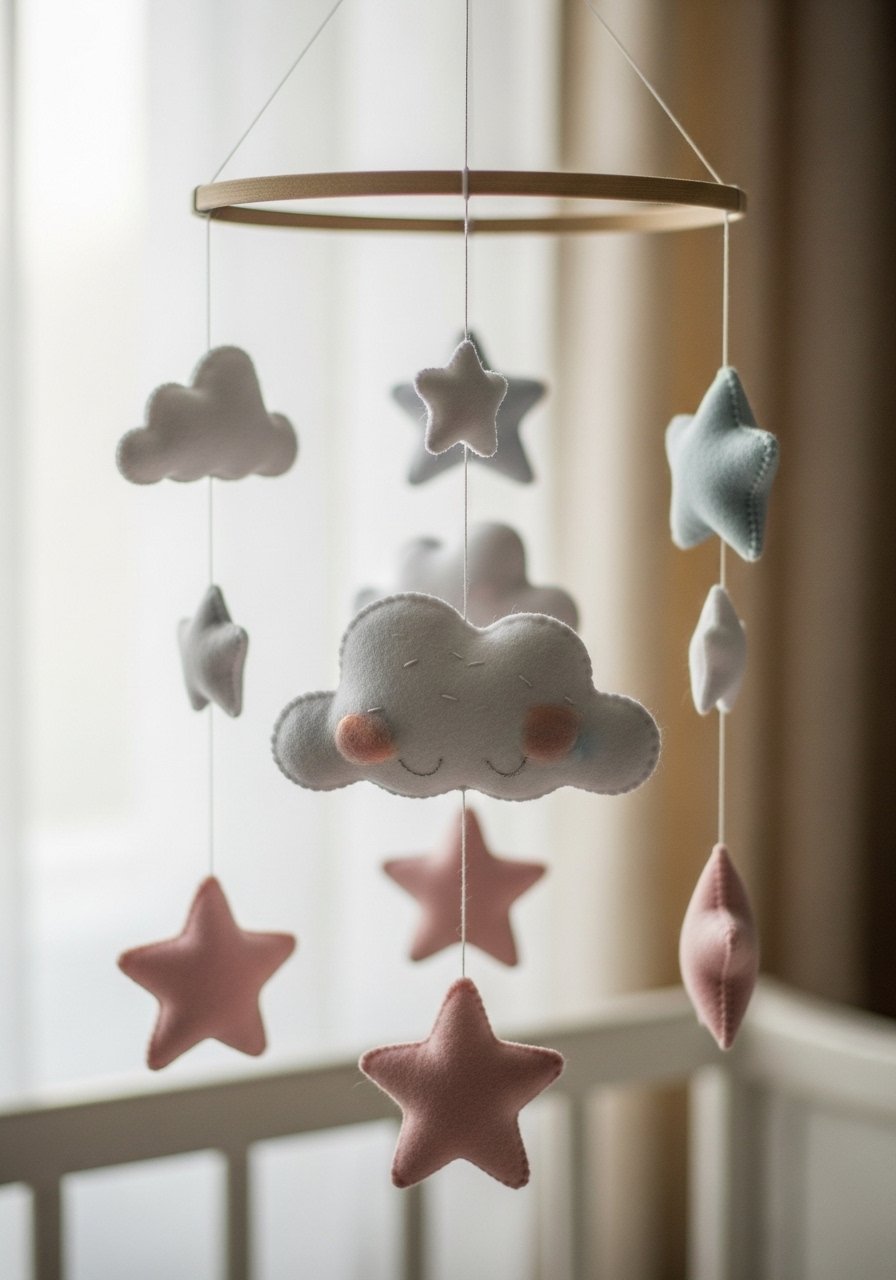
Felt mobiles are sewn by hand and perfect for practicing tiny stitches and assembly. They’re lightweight and enjoyable to personalize.
Materials
- Felt sheets, assorted colors, 6 x 9" each
- Embroidery floss
- Needle
- Small wooden hoop, 8"
- Stuffing (polyfil), small amount
- Scissors
- Glue gun (optional for attaching small bits)
Instructions
- Cut shapes (clouds, stars) from felt—pairs for each piece.
- Embroider details on one side of each pair.
- Stitch edges with a blanket stitch, leaving a small opening.
- Stuff lightly and finish stitching closed.
- Attach pieces to hoop using thin thread at varied lengths.
- Secure hoop with wrapped thread for hanging.
How to display or gift it
- Hang above crib or changing table away from reach.
- For gifting, present in a box with care tag.
- Keep spare felt in a small craft felt pack.
- Embroidered Tea Towels
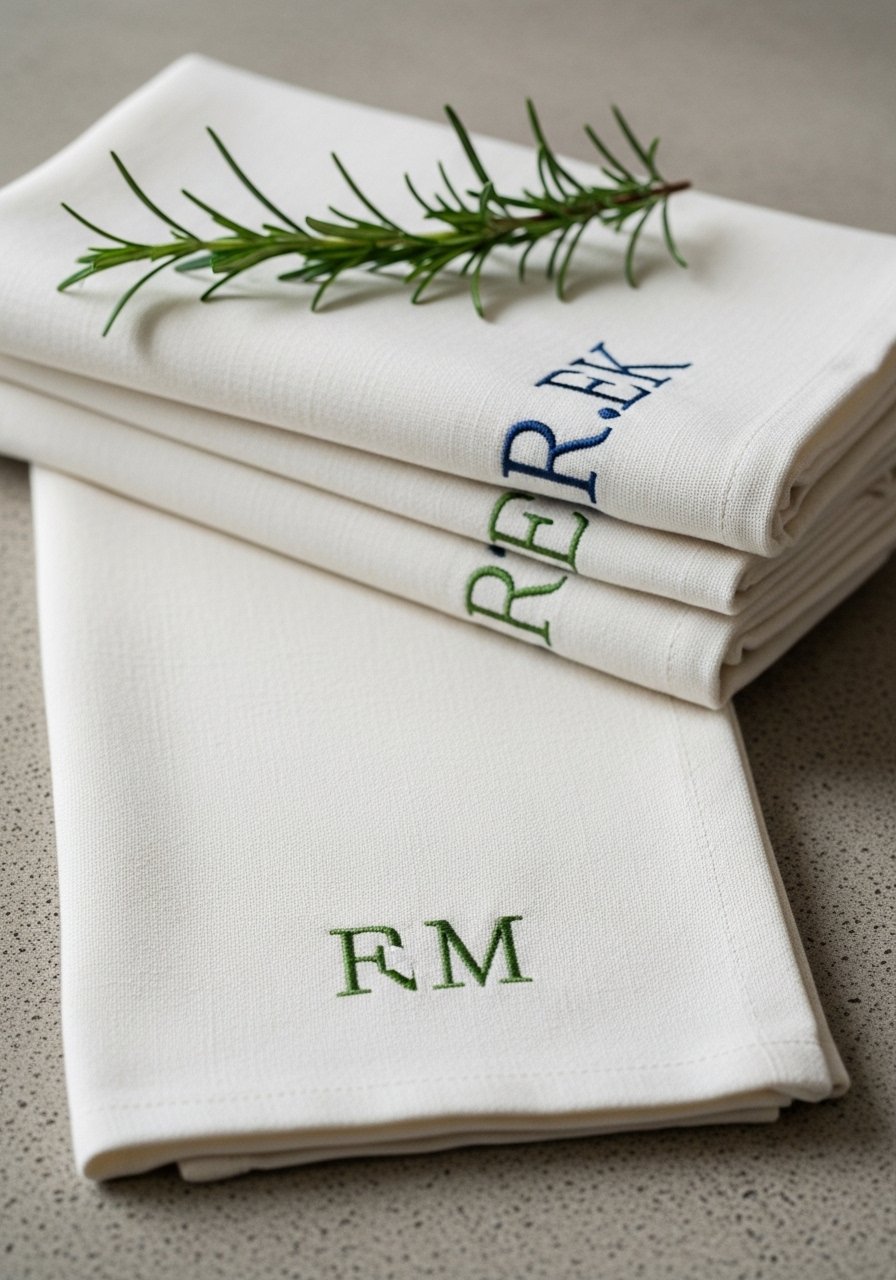
Embroidered towels add charm and show off basic hand-stitching. They’re quick to make and wash beautifully.
Materials
- Cotton tea towels, plain, 16" x 28", pack of 2–4
- Embroidery floss
- Embroidery needle
- Embroidery hoop
- Water-soluble fabric marker
- Scissors
Instructions
- Mark design lightly on towel with marker.
- Hoop fabric to keep tension.
- Stitch using backstitch, satin stitch, or French knots.
- Remove hoop and press lightly.
- Wait 24 hours before washing to ensure floss is secure.
How to display or gift it
- Roll towels and tie with twine for kitchen gifts.
- Store in a towel drawer or hang on oven handle.
- Use a small embroidery kit for patterns.
- Zip Pouch for Remote Controls
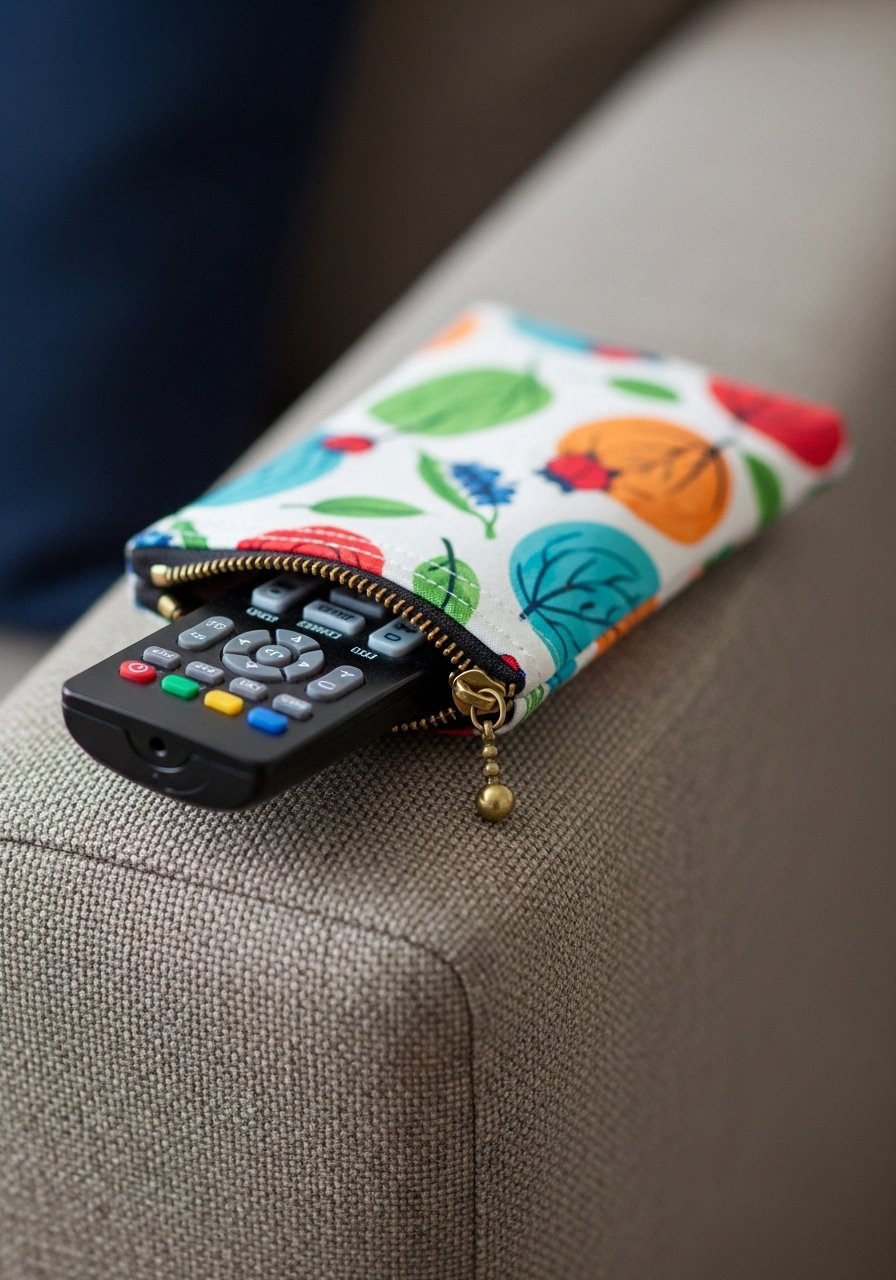
Zip pouches are practical and portable. This one keeps remotes in one place and is a great starter zipper project.
Materials
- Outer fabric, 8" x 8"
- Lining fabric, 8" x 8"
- Interfacing, 8" x 8"
- 1 zipper, 8"
- Thread
- Sewing machine with zipper foot
Instructions
- Fuse interfacing to outer fabric.
- Place zipper right side to fabric edge and sew with zipper foot.
- Attach lining similarly on the other side.
- Sew side seams with 1/4" seam allowance.
- Turn out through zipper and press.
- Topstitch edges for durability.
How to display or gift it
- Keep in couch pockets or TV trays.
- For gifting, pair with a TV guide or subscription card.
- Store in a small zipper pouch organizer.
- Simple Slipcover for Lampshade
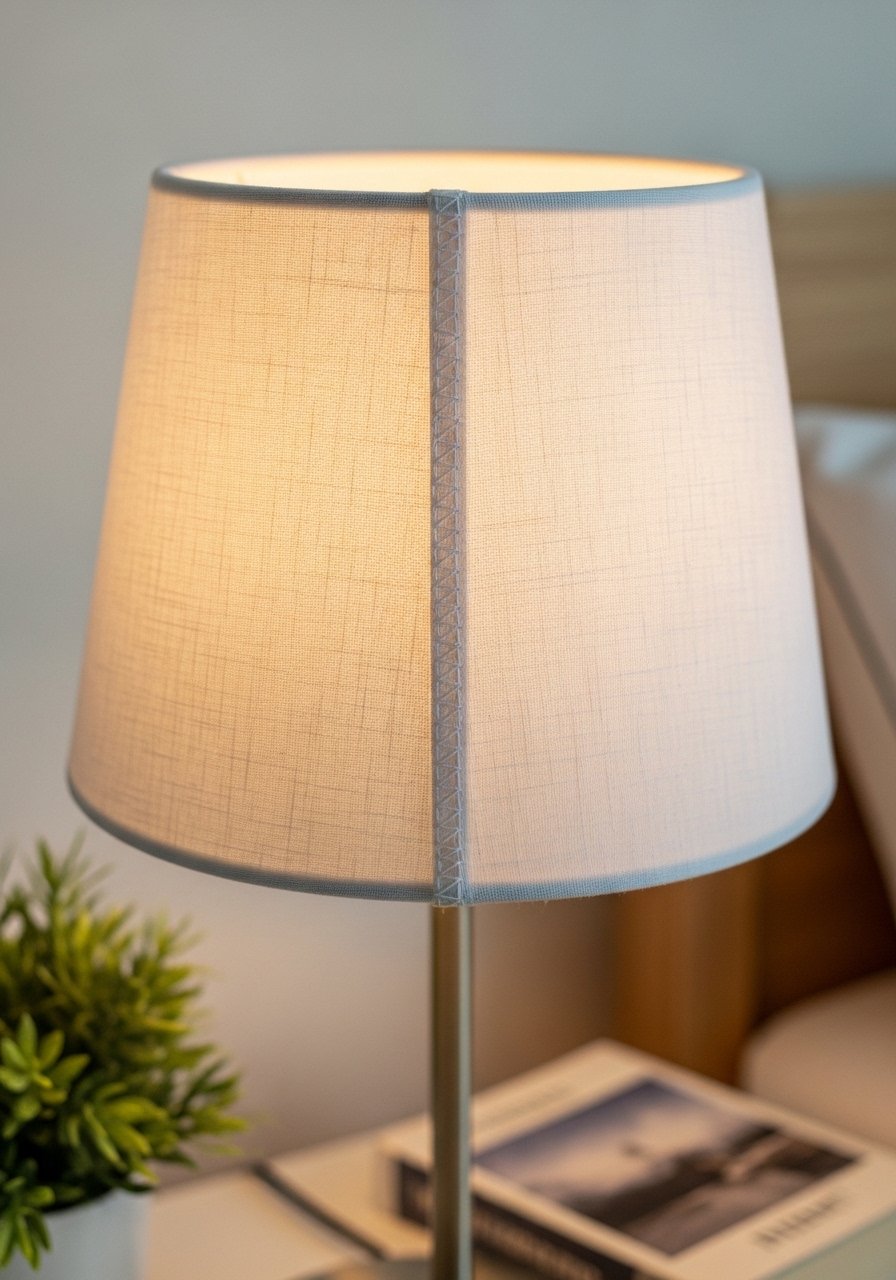
A slipcover refreshes a lamp without replacing hardware. It’s a fast, forgiving sew that teaches measuring for custom fit.
Materials
- Fabric, 1/2 yard (depending on shade size)
- Measuring tape
- Fabric scissors
- Matching thread
- Velcro or snap tape for easy removal, length of shade circumference
- Sewing machine
Instructions
- Measure shade height and circumference.
- Cut fabric to circumference + 1/2" and height + 1".
- Hem top and bottom edges 1/4".
- Sew side seam to form a tube.
- Attach Velcro to ends for removable closure.
- Slip onto shade and trim if needed for exact fit.
How to display or gift it
- Swap slipcovers seasonally for a fresh look.
- Store extra covers in a slim fabric storage box.
- For gifting, include a small bulb cleaner and tie with ribbon.
You made it to the end — and now your home has 23 fresh, achievable ways to add handmade charm. These beginner sewing projects for the home span quick one-hour wins to weekend builds, so you can pick a pace that fits your life. Try one in a room you want to refresh, save this pin for later, and share your favorite finished piece with a friend who likes hands-on gifts.
Trust me, a good sewing machine eases every project; I’ve been grateful for a sturdy machine like a Brother sewing machine for beginner and mid-level sewing. Which project will you try first — pillows, napkins, or a Roman shade? I’d love to hear which room you’re updating.





