
You love the idea of pretty painted rocks but worry your designs will look messy or amateur. If you've tried once and ended up with streaks, fuzzy lines, or paint that chips, this guide is for you. Learn how to paint rocks for beginners step by step for clean vibrant and totally professional looking results — even if you only have an afternoon.
The secret is simple prep, the right paint tools, and a little patience. I suggest an acrylic craft paint set for bright, opaque color and a set of paint pens for crisp outlines and tiny details that look store-bought.
In the sections below you'll find quick setup tips, step-by-step painting instructions, exact drying times, and sealing advice. Read straight through or jump to the step you need. Pin this guide so you can return to the step-by-step photos and product picks.
Gather and Prep Your Materials (easy, one-afternoon setup)

Prep is the step that makes painted rocks look professional. Start by washing rocks with warm, soapy water and let them dry fully — overnight if possible. If rocks are rough, sand them smooth with a fine sandpaper set until the surface feels even.
Organize paints and tiny bits with stackable craft organizer trays. That keeps your palette clean and helps you work faster. Working on one rock at a time keeps mistakes rare and gives you focused practice.
Apply a Clean Base Coat (the foundation for vibrant color)
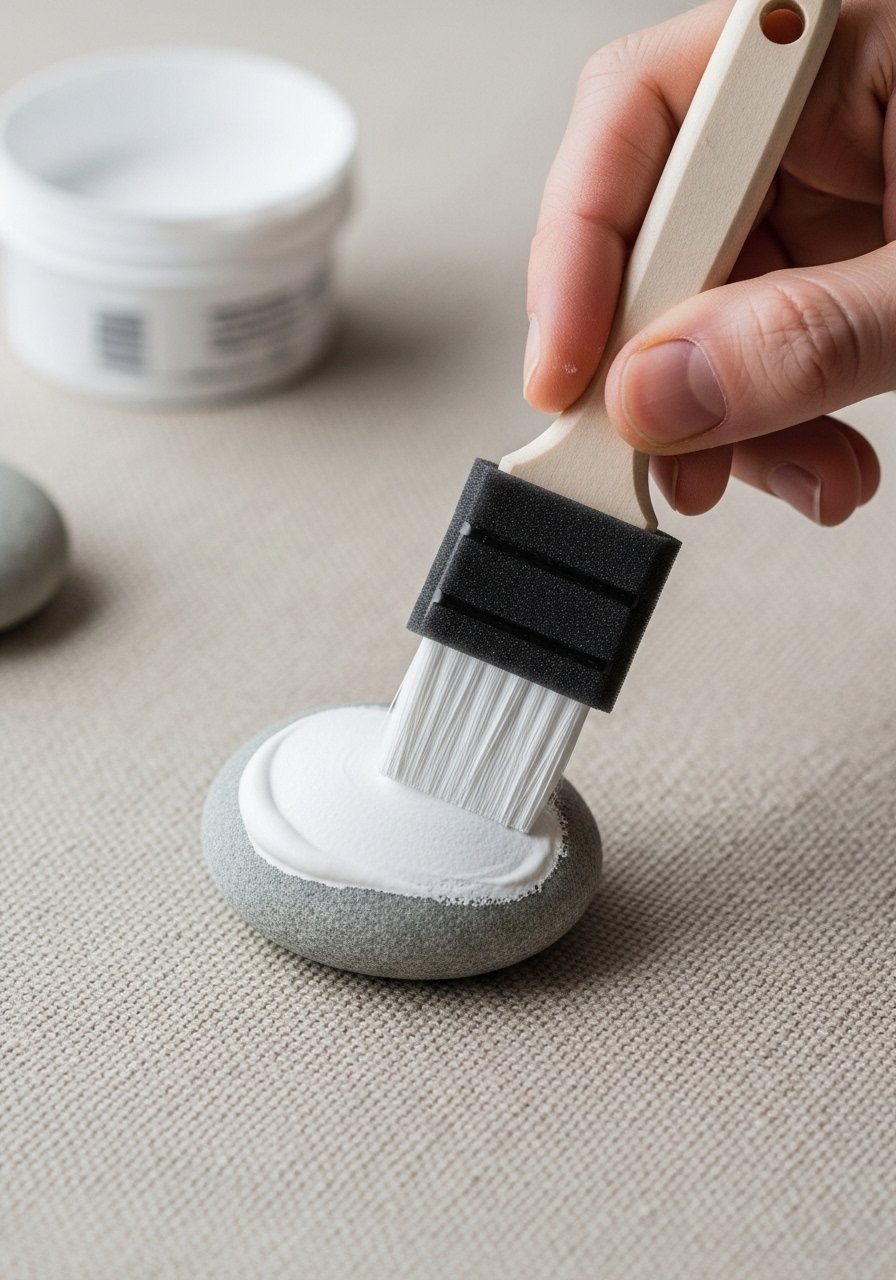
A smooth, opaque base coat makes colors pop and prevents feathering. Use a white undercoat for bright shades and allow 15–20 minutes drying between thin coats. You want two thin coats rather than one thick coat to avoid drips.
Use a foam brush set for even coverage and a cleaner finish. If you need sharp geometric edges, mask with low-tack painter's tape for small sections — it stops paint from bleeding. Let base coats cure for at least 1 hour before adding layers.
Add Details, Clean Lines, and Tricks for Control (beginner-friendly)
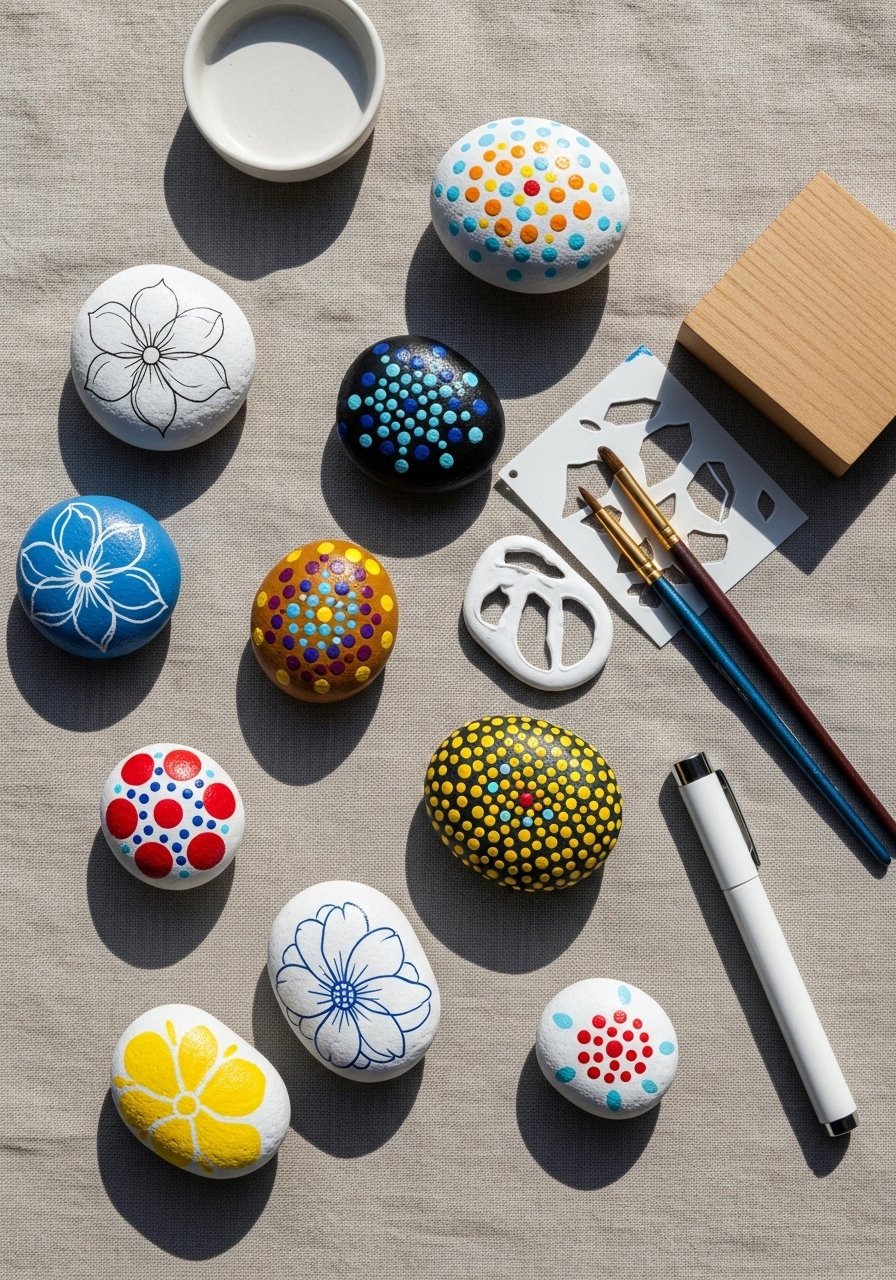
This is where the rocks go from good to polished. Use a combination of tools:
- For dots and simple shapes, use the tip of a round brush or the back of a paintbrush.
- For crisp outlines and lettering, use paint pens. They give consistent ink flow and tiny control.
- For tiny strokes and detail work, switch to a fine detail brush set.
Numbered micro-steps:
- Sketch your design lightly on the base with a pencil if needed.
- Block in main colors, let dry 10–15 minutes.
- Add layered details with pens or fine brushes; let each layer dry 5–10 minutes to avoid smudges.
Pro tips:
- Thicken paint slightly with a little water for smooth flow, not runny.
- Test pens on a spare rock to check opacity.
Seal, Dry, and Display (long-lasting finish and presentation)
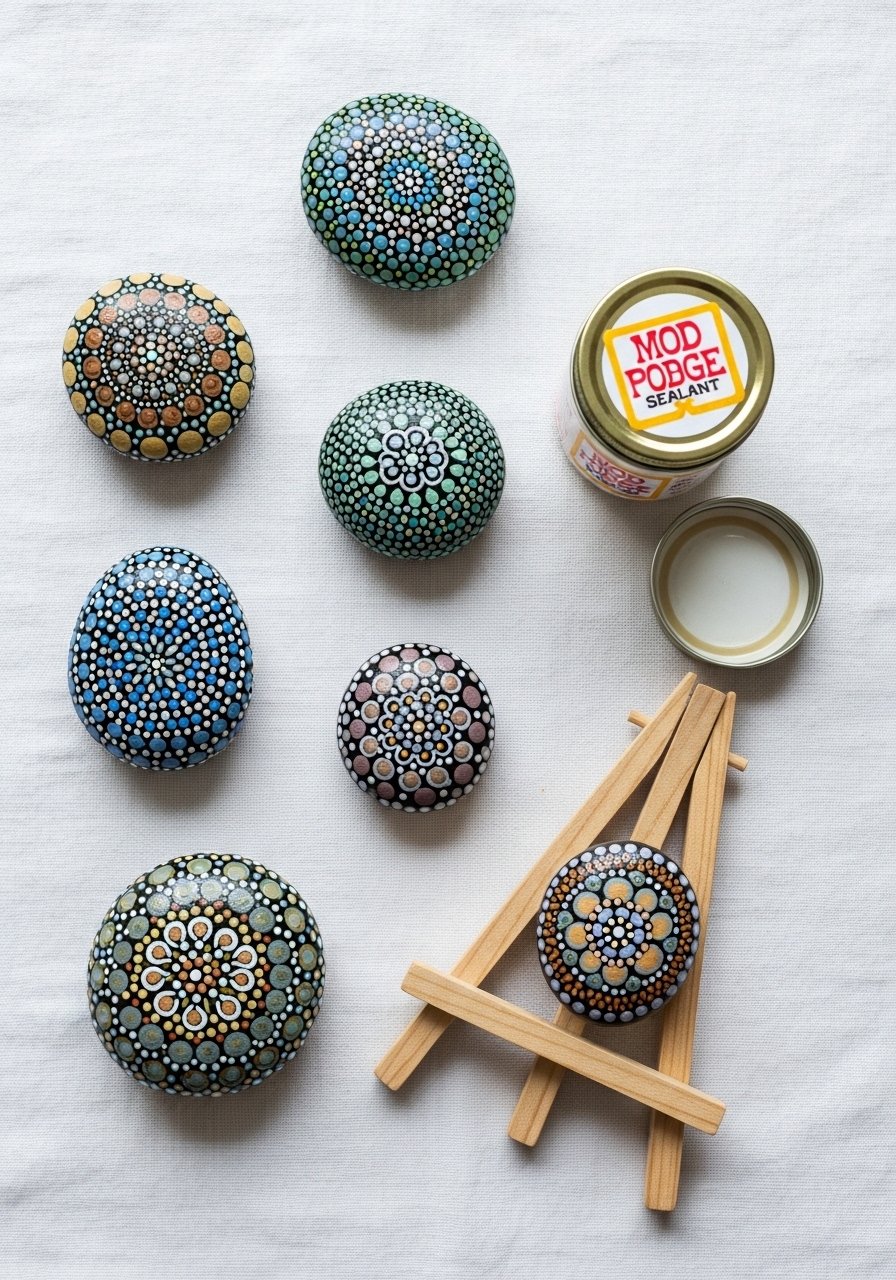
Sealing protects your hard work and gives a professional sheen. For indoor keepsakes, brush two thin coats of a Mod Podge gloss sealer, letting 15–20 minutes dry between coats. For outdoor rocks, use an outdoor-grade sealer and allow 24 hours cure before exposure.
Store and present them with small display items:
- Pop a feature rock on a small wooden easel for a gift.
- Keep extras in clear zip pouches for gifting or swapping.
Troubleshooting:
- If paint chips, sand lightly and reapply sealer.
- If edges look fuzzy, touch up with a paint pen after sealer cures.
Try Variations and Save Time (batch-making and pin-worthy ideas)
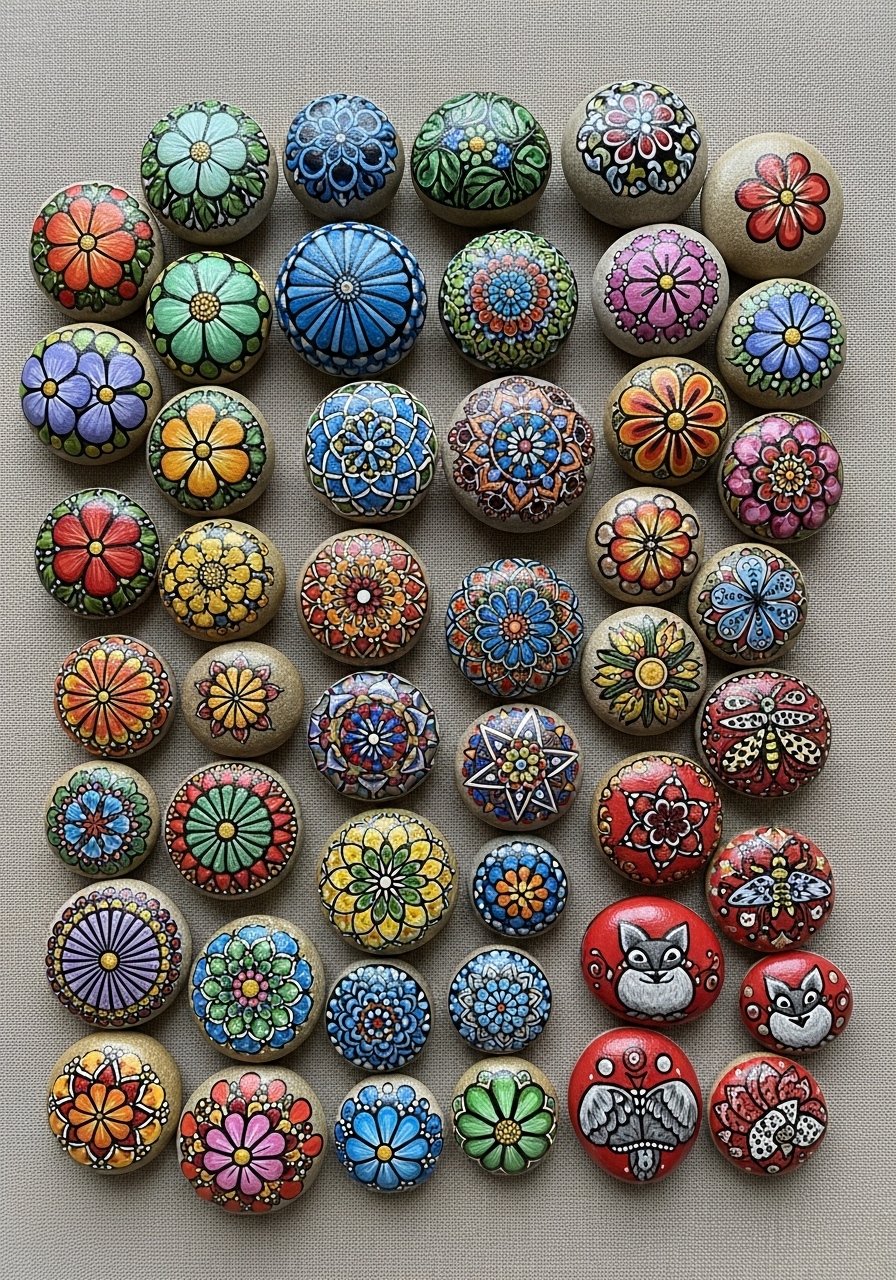
Want to make a stack for gifts? Batch your work:
- Clean all rocks first.
- Base coat a dozen at once.
- Add details in rounds: backgrounds, mid-tones, then fine lines.
Use a stencil set for repeated patterns and consistent motifs. Store finished pieces flat to avoid sealant pooling.
You're now set to paint rocks for beginners step by step for clean vibrant and totally professional looking results. Which style will you try first — florals, dots, or tiny landscapes? Pin this guide for your next craft afternoon and share it with a friend who loves quick, pin-worthy projects!


