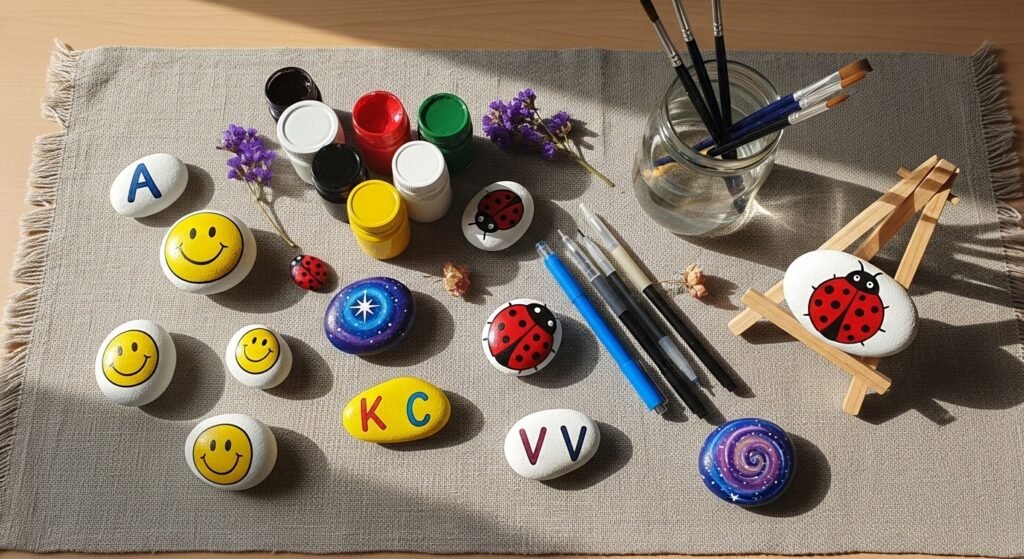
Painting rocks with kids is one of those simple, joyful crafts that turns an ordinary walk into a treasure hunt. With just a handful of smooth river rocks, some acrylic paint, and paint pens, you can make hours of focused, creative fun. These stone painting ideas for kids are colorful, easy to hold for little hands, and designed so kids feel proud of their finished pieces.
In this list you’ll find 23 kid-friendly projects—from simple smiley faces and alphabet learning stones to boho mandala rocks and sparkly galaxy pebbles. Each project includes a clear materials list (with exact quantities), step-by-step instructions with drying times, and display or gifting tips. I also drop in handy product picks like a reliable acrylic paint set and an easy-to-use sealer so your creations last.
Grab a set of washable acrylic craft paints and a few fine-tip paint pens and let’s make some colorful memories. You’ll find projects for toddlers, school-age kids, and crafty grown-ups who want to help.
1. Sunny Smiley Rocks
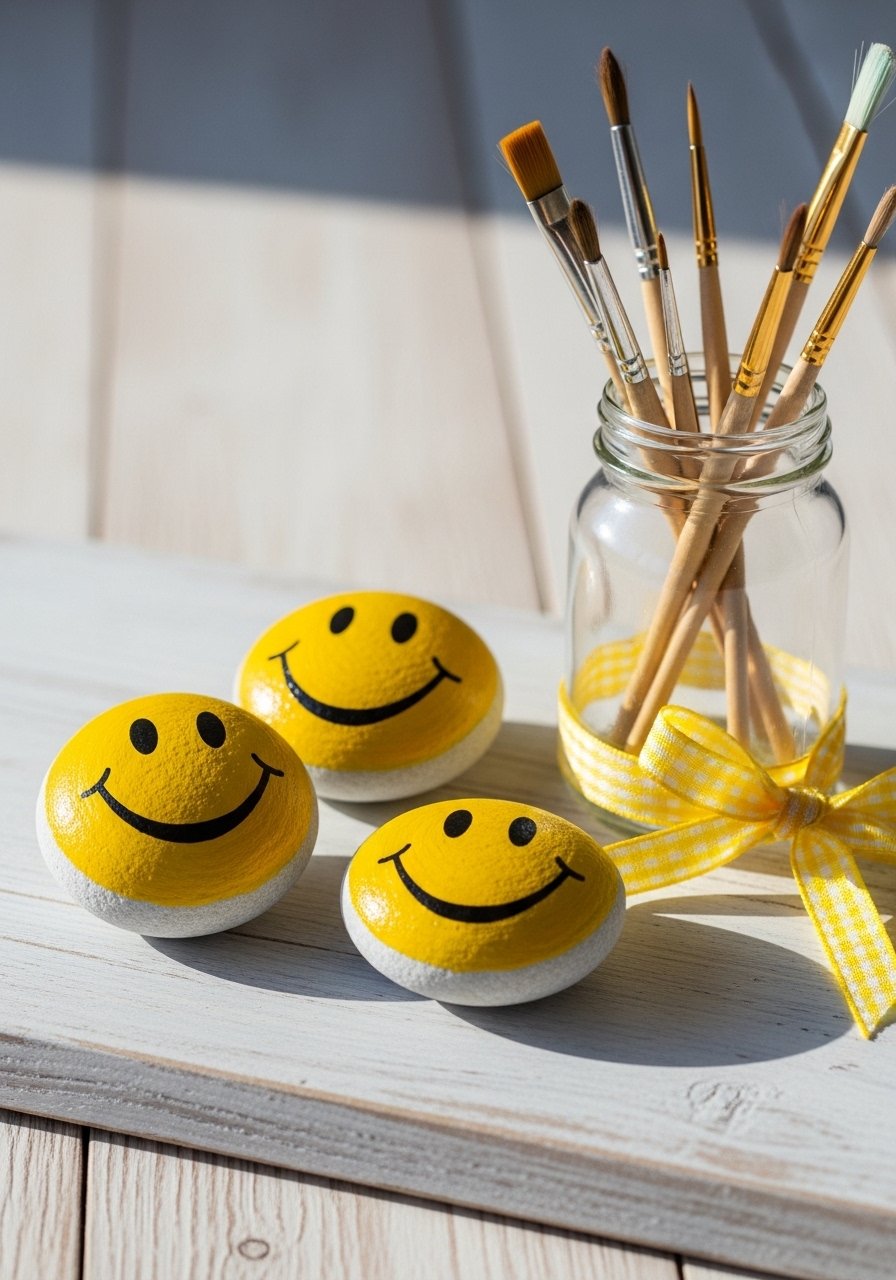
These classic smiley stones are perfect for beginners. They dry quickly and feel cheerful in little hands. The smooth glossy finish looks like a toy and makes the colors pop. Younger kids love dotting on eyes with a pencil eraser or the back of a paintbrush. I like using a set of fine detail round brushes for the face details.
Materials
- 5 smooth river rocks, about 2–3 inches each, washed and dried
- Acrylic craft paint in yellow, black, white (approx 5–10 mL per color)
- Fine-tip round paintbrush, size 0–2
- Pencil for sketching
- Paper towel
- Small palette or disposable plate
- Matte acrylic sealer spray, 1 can (for 20–30 stones)
Instructions
- Wash rocks with mild soap. Let dry fully—at least 1 hour.
- Apply a base coat of yellow acrylic paint. Use 2 thin coats, letting each dry 15–20 minutes until fully opaque.
- Lightly sketch a smiley face with pencil.
- Paint eyes with white dot using the tip of the brush. Let dry 5–10 minutes.
- Add black pupils and mouth with a fine brush. If shaky, use a black paint pen for steadier lines.
- Let dry 30 minutes, then spray a thin coat of matte sealer from 8–10 inches away. Let cure 1 hour.
How to display or gift it
- Group a set on a small wooden tray or display each on a mini wooden easel for a cheerful shelf vignette.
- Tie three stones with baker’s twine and tuck into a kraft gift bag for classroom gifts.
- Store finished stones flat in a craft organizer with felt dividers until distributing.
2. Ladybug Garden Stones
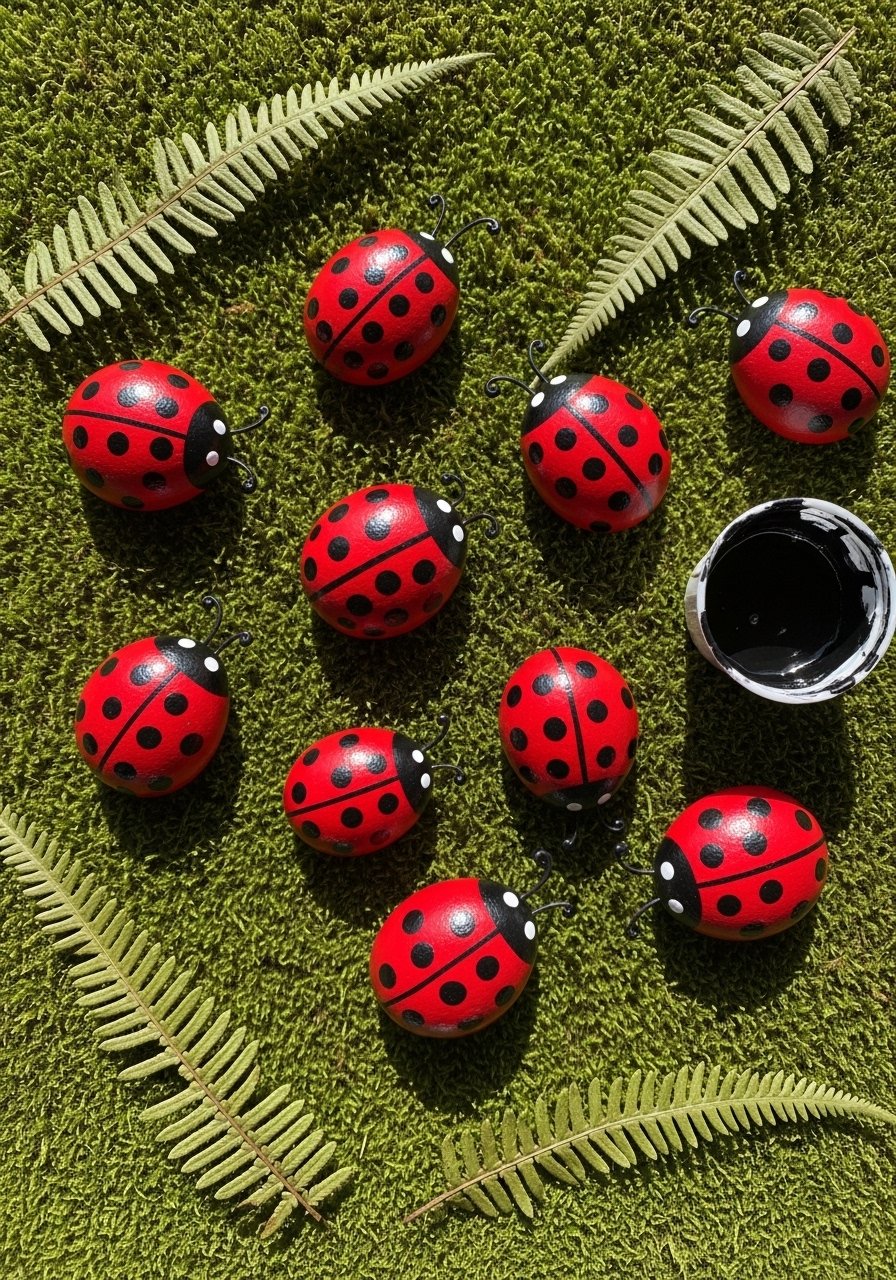
Ladybug stones combine bold color and simple dots—excellent for practicing controlled dabbing. The contrast of red and black really stands out in a backyard fairy garden. A dotting tool or the end of a paintbrush makes clean circles every time. For tiny hands, use a set of washable craft paints that rinse easily.
Materials
- 8 smooth round stones, 1.5–2.5 inches
- Red, black, and white acrylic paint, small tubes
- Dotting tool or the rounded end of a paintbrush
- Flat foam brush for base coat
- Paper plate palette
- Cup of water
- Gloss sealer, 1 small bottle or spray
Instructions
- Clean rocks and dry 1 hour.
- Paint base coat red with foam brush. Two thin coats, 15 minutes drying between coats.
- Paint a vertical black line down the middle for the shell split.
- Use the dotting tool dipped in black paint to add dots. Start with larger dots at the center, smaller toward edges.
- Add two small white dots on black eyes for shine. Let dry 20–30 minutes.
- Apply a thin gloss sealer coat. Let dry 1–2 hours before handling.
How to display or gift it
- Nestle ladybug stones among potted plants or tuck into a fairy garden.
- Attach a small stick to the bottom with hot glue and create garden stakes.
- Wrap a set in tissue and place in a small wooden box for teacher gifts.
3. stone painting ideas for kids: Rainbow Rock Garden
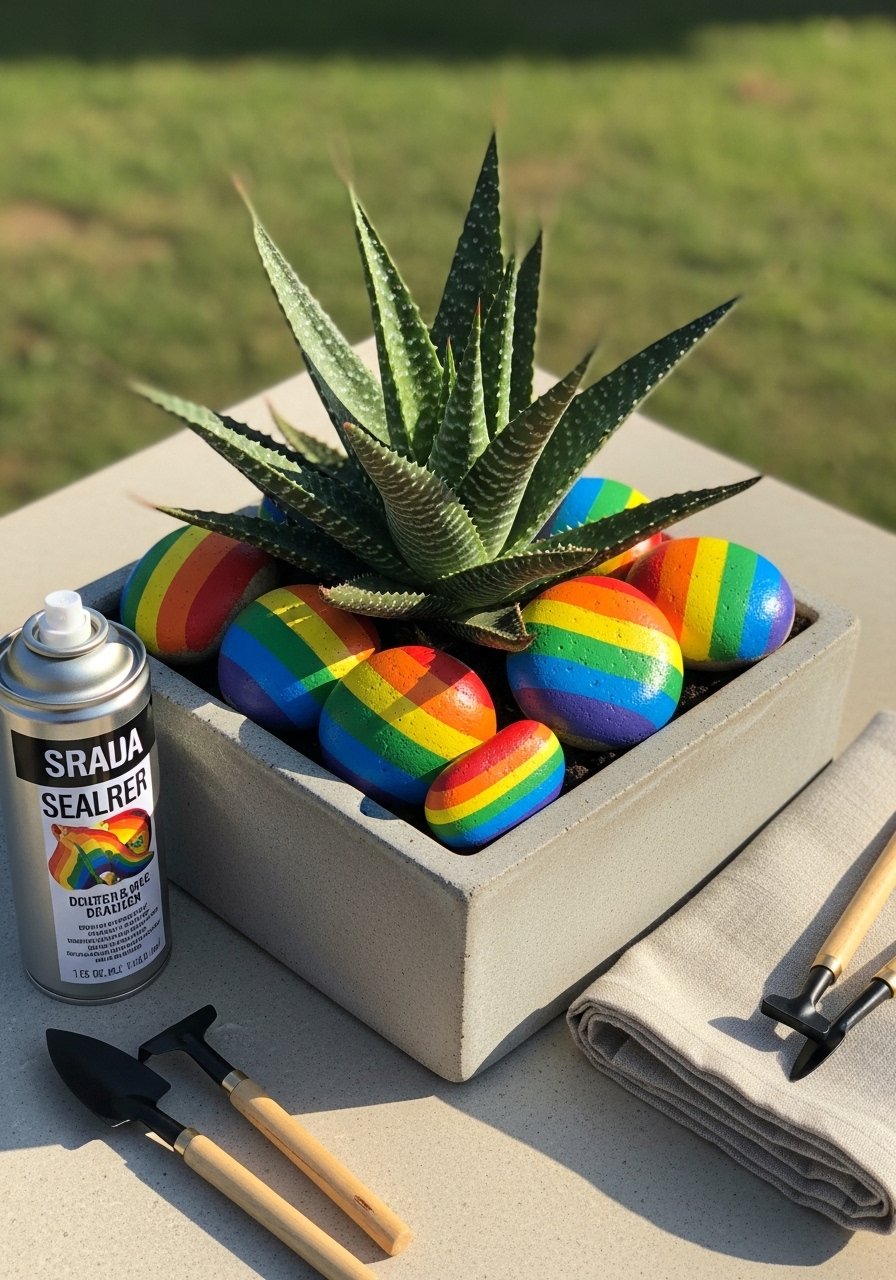
A rainbow rock garden brightens a windowsill or porch. Each child can paint one color band per stone, which teaches color blending in a simple way. Use a foam brush for smooth coverage and a set of acrylic craft paints with a wide palette.
Materials
- 12–20 small stones, 1–2 inches
- Acrylic paints in rainbow colors (6–10 colors)
- Foam brushes, pack of 3
- Small sponge for blending
- Palette or tray
- Gloves (optional)
- Outdoor sealer spray
Instructions
- Clean stones and let dry 1 hour.
- Paint each stone a base color with foam brush. Let dry 15–20 minutes.
- For gradients, dab a small damp sponge with second color and press lightly into wet paint to blend. Work fast.
- Let stones dry 30 minutes between blended layers.
- Add small details like stars or dots if desired with a fine brush.
- Spray two light coats of outdoor sealer, 30 minutes apart. Fully cure 24 hours.
How to display or gift it
- Arrange stones in a shallow planter or along a windowsill for a rainbow display.
- Bundle a mini set in clear cellophane and tie with twine for party favors.
- Store in a labeled craft container to keep colors from rubbing.
4. Animal Friend Pet Rocks
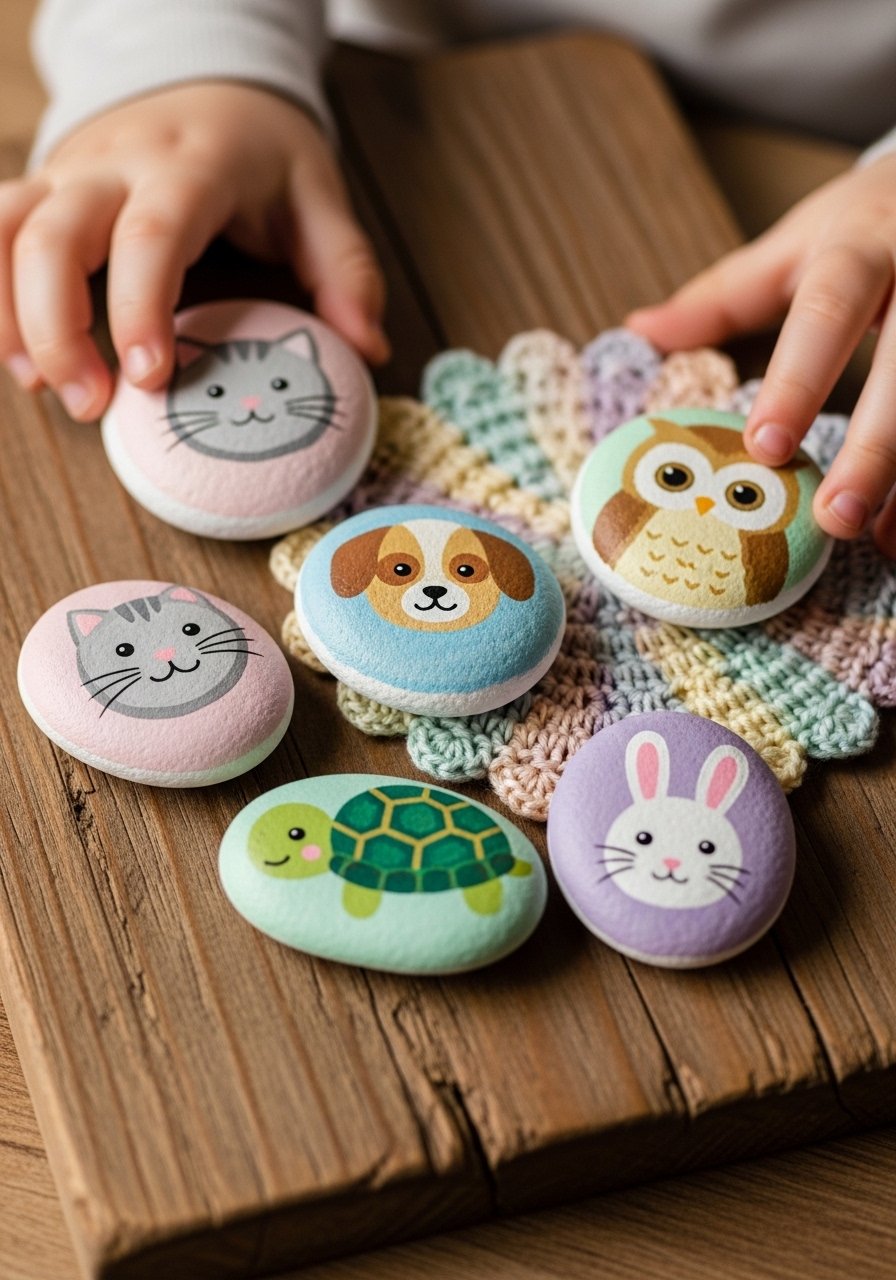
Turn rocks into beloved pet rocks: teach expression with tiny brushstrokes for eyes and whiskers. It’s a great project for storytelling—each rock can have a name. I recommend keeping a set of fine acrylic brushes handy for facial features.
Materials
- 5 medium flat stones, 2–3 inches
- Acrylic paints in pastel palette
- Fine detail brush set
- Black paint pen for tiny lines
- Pencil
- Paper towel
- Matte sealer
Instructions
- Wash and dry stones 1 hour.
- Paint a soft pastel base color. Two thin coats; dry 15 minutes each.
- Sketch face shapes lightly.
- Use fine brushes for eyes, noses, and whiskers. Use white dots for eye shine.
- Outline tiny details with a black paint pen if needed.
- Let dry 30 minutes, then apply matte sealer. Cure 1 hour.
How to display or gift it
- Create a “pet rock box” with a small cushion and gift tags.
- Display on a bookshelf in a row, each rock with a tiny name card held by a wooden peg.
- Store extras in a craft organizer drawer with dividers.
5. Alphabet Story Stones (Learning Rocks)
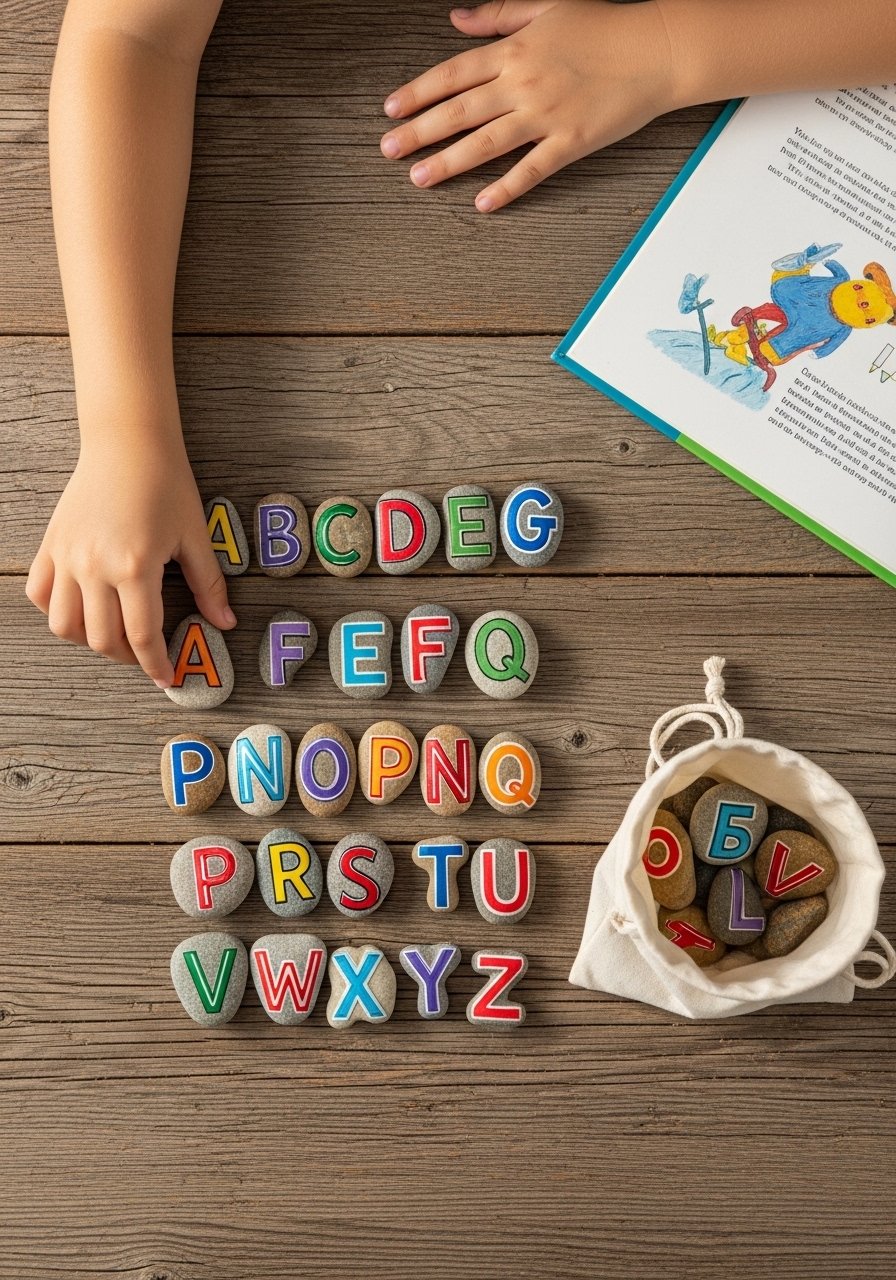
Alphabet story stones are both playful and educational. Kids can spell simple words, build sentences, or create stories with picture-and-letter pairs. Use bold block letters for readability and a set of paint pens for crisp lettering.
Materials
- 26 small flat stones, 1–1.5 inches
- White or light base paint, approx 30 mL
- Black fine-tip paint pen or marker
- Optional: small icon paints (apple, dog)
- Cloth drawstring bag
- Matte sealer spray
Instructions
- Clean and dry stones 1 hour.
- Apply a light base coat; two thin coats for opacity. Dry 15 minutes between.
- Use a pencil to lightly mark letter placement.
- Write letters in a bold uppercase with a black paint pen. Let dry 10 minutes.
- Add small icons on matching stones for early readers.
- Spray sealer; cure 24 hours for heavy handling.
How to display or gift it
- Store alphabet stones in a numbered cloth bag for preschool practice.
- Use a wooden tray for morning word-play sessions.
- Package as a learning set in a small kraft box for classroom gifts.
6. Space Galaxy Stones

Galaxy stones are dramatic and great for older kids who enjoy blending. They teach layering and splattering techniques. A toothbrush or stiff brush is perfect for star splatters. For vivid pigments, try a bright acrylic paint set.
Materials
- 6–10 smooth stones, 1.5–3 inches
- Acrylic paints: black, navy, purple, magenta, white
- Small sponge for color blending
- Old toothbrush for splatter stars
- Glitter (optional) in fine grade
- Gloss sealer
Instructions
- Clean stones; dry 1 hour.
- Paint a black base coat. Dry 15–20 minutes.
- Dab navy, purple, and magenta with a sponge to create nebula shapes. Blend edges while paint is wet.
- Flick white paint with toothbrush to make stars. Let dry 20 minutes.
- Add a few larger white dots for closer stars with a fine brush.
- Seal with a gloss coat. Cure 24 hours for best shine.
How to display or gift it
- Place in a small velvet pouch for night-themed party favors.
- Arrange in a shallow dish on a bedside table as little nightlights (non-luminous).
- Store flat in a craft organizer with soft liners.
7. Dot Mandala Rocks (Boho Style)
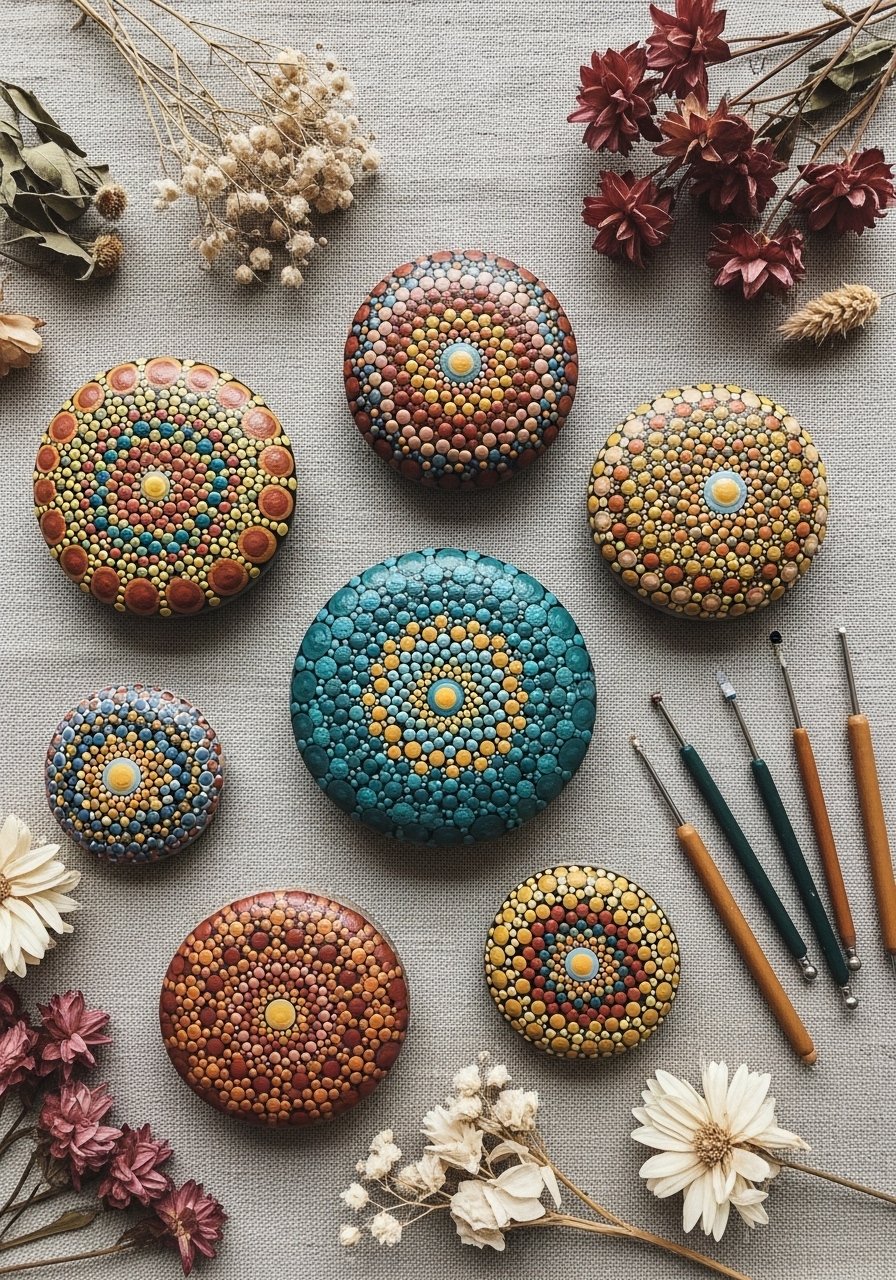
Dot mandalas are soothing and teach pattern repetition. They also look beautiful grouped on a mantel. Use a set of dotting tools for consistent circle sizes and a selection of earth-tone acrylics for a boho look.
Materials
- 10 round stones, 1–2.5 inches
- Acrylic paints in terracotta, teal, mustard, cream
- Dotting tool set with varied sizes
- Palette
- Small damp cloth
- Matte sealer spray
Instructions
- Wash and dry stones 1 hour.
- Paint base color if desired. Dry 15 minutes.
- Start dotting from center using progressively larger dotting tools for outer rings.
- Let each color dry 5–10 minutes before adding adjacent rings.
- Fill negative space with tiny cream dots for contrast.
- Spray with matte sealer; cure 1 hour.
How to display or gift it
- Arrange in a wooden bowl as a boho table accent.
- Glue to small magnets for a colorful fridge display.
- Wrap in tissue and tuck into a kraft box for a minimalist gift.
8. Nature Print Stones (Leaf & Flower Imprints)
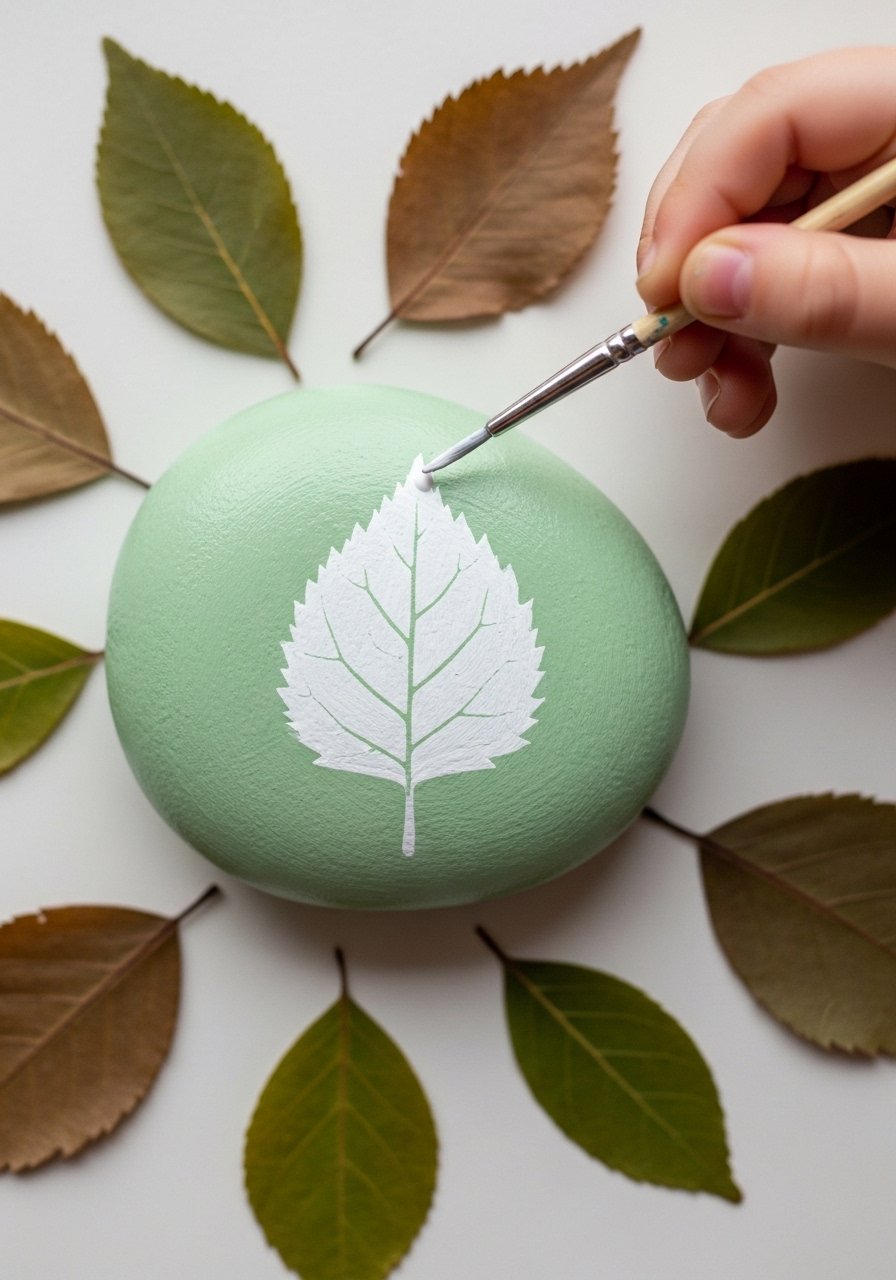
Nature print stones bring the outdoors inside. Use real leaves to block out paint and create negative-space prints. A small brayer roller can help press leaves flat for an even print.
Materials
- 8 medium flat stones
- Base paint (light green or beige)
- Contrasting paint for prints (white or dark green)
- Small pressed leaves or paper cutouts
- Brayer or small roller
- Fine brush for touch-ups
- Matte sealer
Instructions
- Paint base coat; two thin layers, dry 15 minutes each.
- Place leaf on stone, shiny side down for texture.
- Dab contrasting paint over leaf edge with a sponge or use a brayer for even coverage.
- Carefully lift leaf; touch up edges with a fine brush.
- Add tiny speckles for texture if desired. Dry 30 minutes.
- Seal with matte spray; cure 24 hours.
How to display or gift it
- Use as plant pot toppers in terracotta pots.
- Tie stones into bundles with dried lavender sprigs for a scented gift.
- Store in a shallow craft box with silica gel packs if gifting.
9. stone painting ideas for kids: Story Stones (Characters & Scenes)
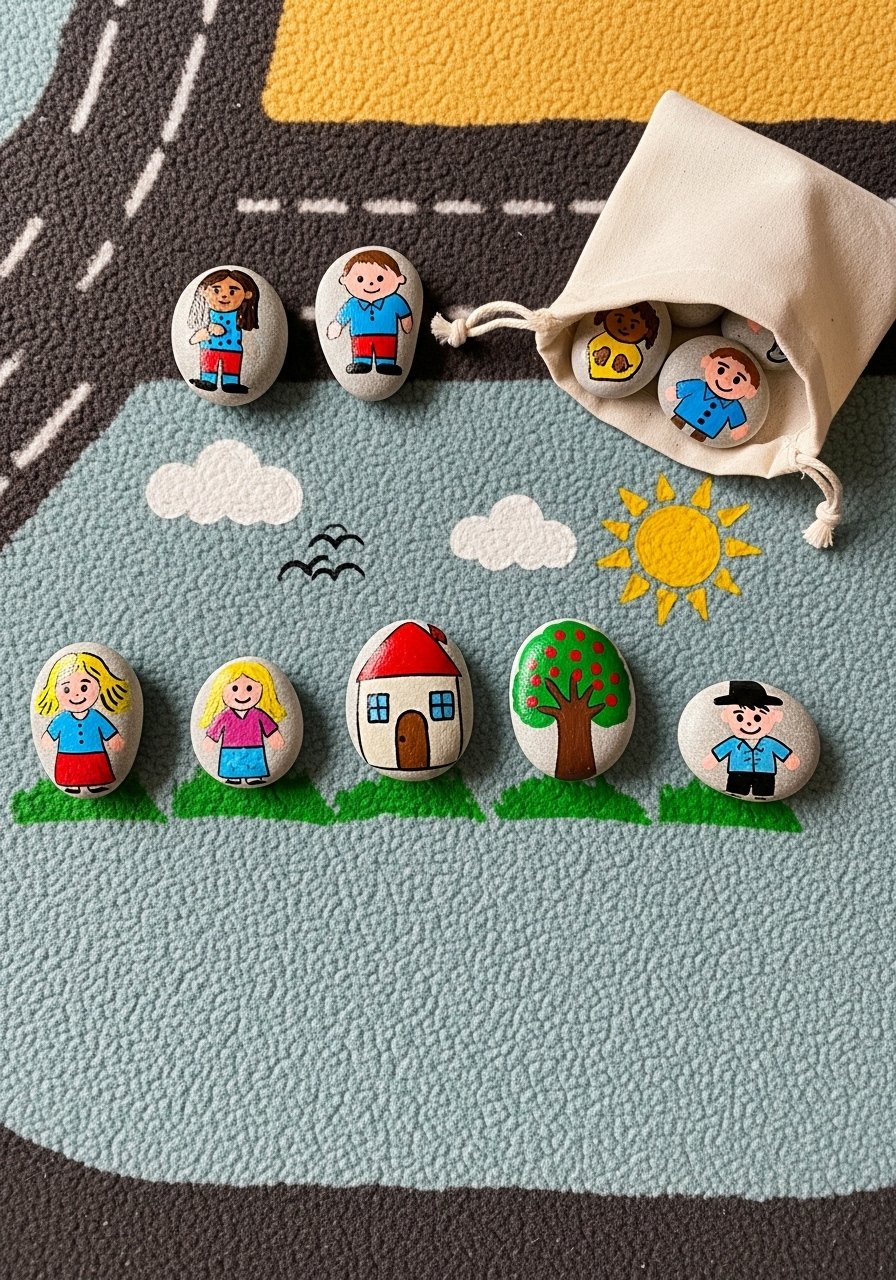
Story stones are a portable storytelling set. Each stone represents a character, object, or place. These encourage language development and imaginative play. I keep mine in a small drawstring bag for easy clean-up.
Materials
- 20 stones, mixed sizes
- Acrylic paints (various colors)
- Black fine-tip paint pen
- Pencil
- Small cloth bag
- Matte sealer spray
Instructions
- Clean and dry stones 1 hour.
- Paint simple bases for background elements. Dry 15 minutes.
- Sketch characters lightly.
- Paint characters with block colors; add outlines and facial features with paint pen.
- Let dry 20 minutes, then coat with matte sealer. Cure 24 hours.
- Encourage kids to arrange stones to tell short stories.
How to display or gift it
- Store in a drawstring bag with a mini booklet of story prompts.
- Use as a quiet-time activity in the car or at restaurants.
- Package as a birthday party activity set.
10. Animal Tracks Stones (Counting & Matching)
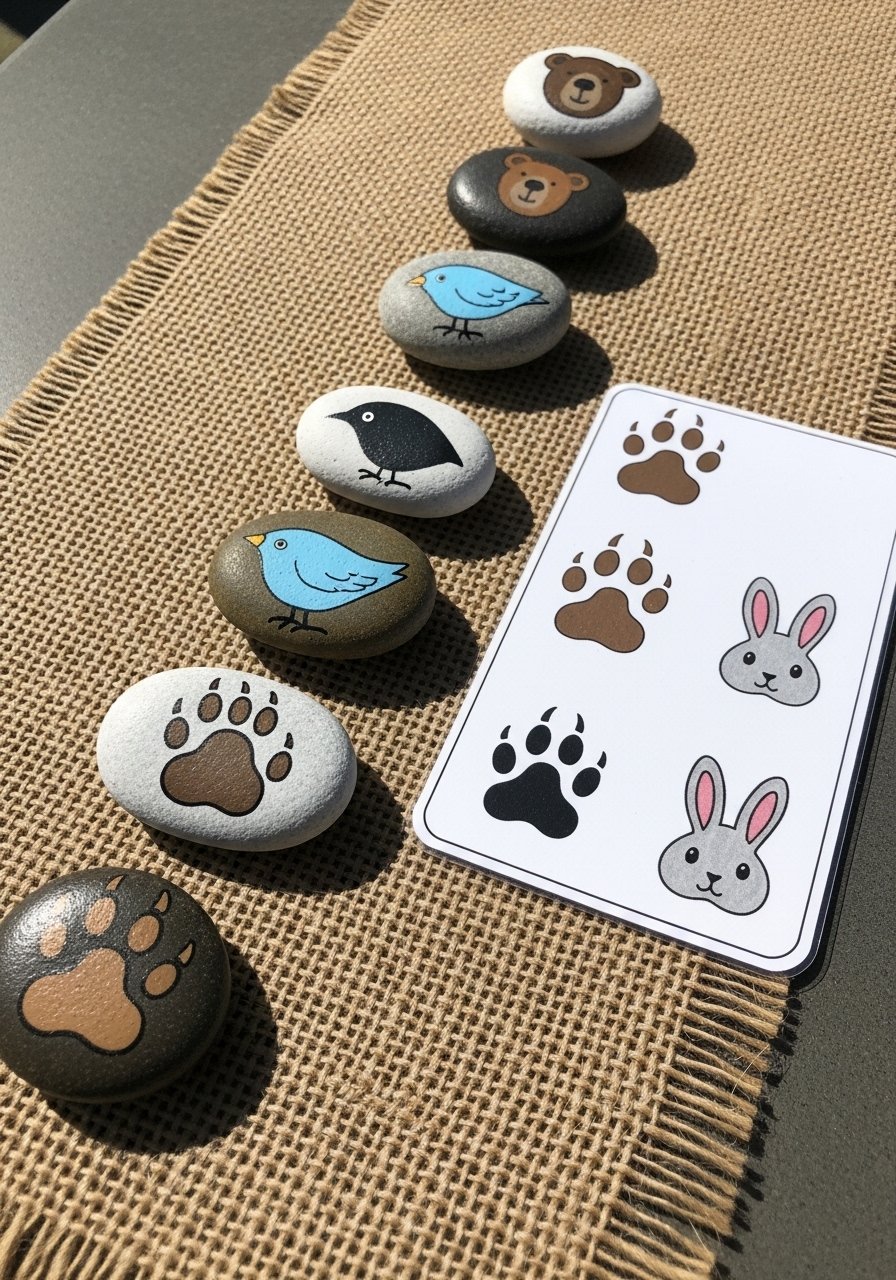
Animal track stones combine painting and early math skills. Kids practice counting by matching the number of prints to numeral stones. Use a set of small stencils to help younger crafters.
Materials
- 12 small stones
- Acrylic paints: tan, brown, black
- Mini animal track stencils or pencil for sketching
- Fine brush
- Number stickers (optional)
- Matte sealer
Instructions
- Paint light base for contrast; dry 15 minutes.
- Place stencil and fill with darker paint using a sponge dab.
- Remove stencil carefully. Touch up edges if needed.
- Create number stones (1–6) by painting numerals on separate stones.
- Let all paint dry 30 minutes, spray sealer; cure 24 hours.
- Use stones to set up matching/counting games.
How to display or gift it
- Store in a small divided box with cards for activities.
- Use as a counting center in preschool classrooms.
- Tie into a nature-walk lesson where kids search for real tracks.
11. Friendly Monster Pebbles
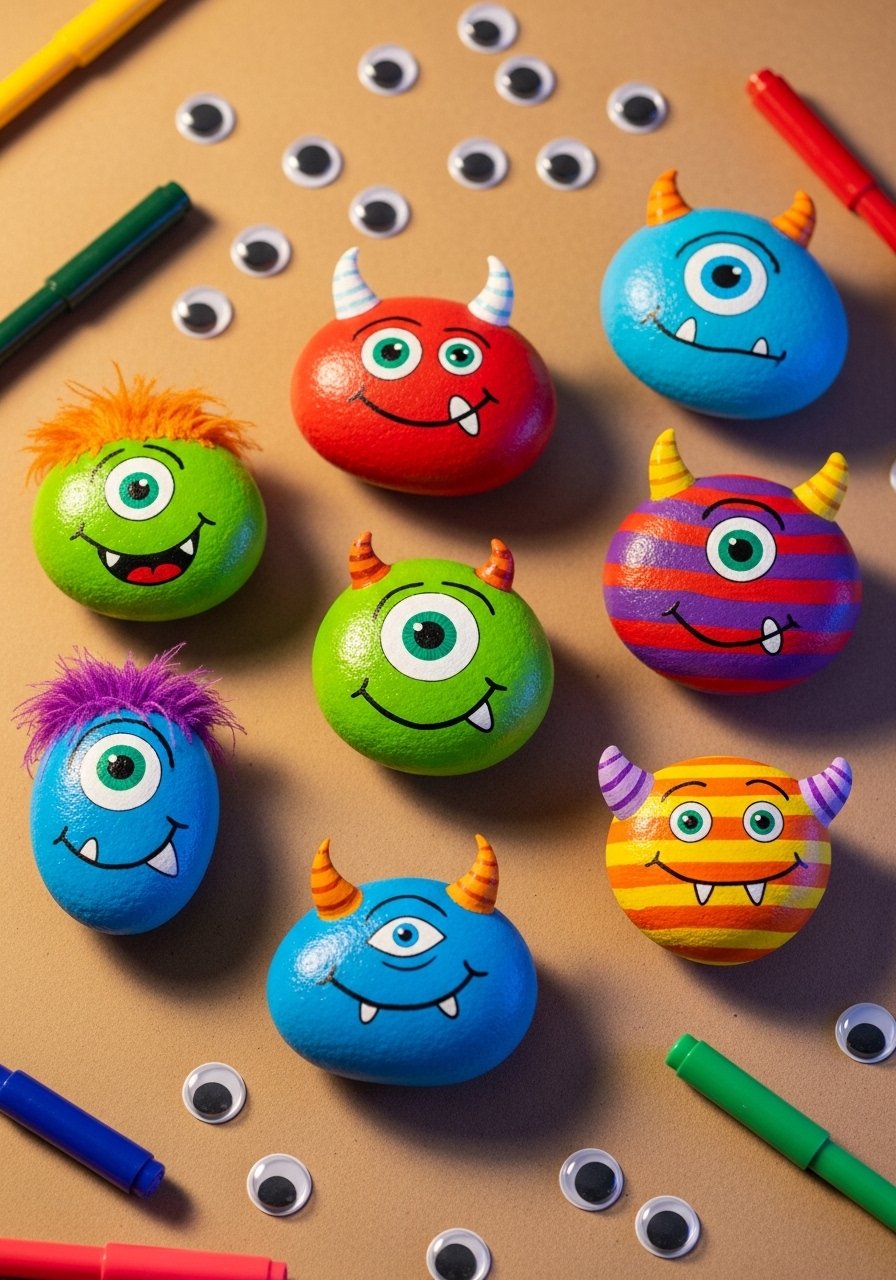
Monster pebbles are silly and perfect for letting kids be loose with color and shapes. Let them glue on small craft googly eyes for 3D fun. I keep an assorted googly eye pack in my supply drawer.
Materials
- 10 small pebbles
- Acrylic paints assorted
- Googly eyes, pack of 50
- Craft glue or hot glue for adult use
- Paint pens for details
- Matte sealer
Instructions
- Wash and dry stones 1 hour.
- Paint base colors; dry 15 minutes.
- Add mouths, horns, stripes with paint pens and brushes.
- Glue googly eyes after paint dries using craft glue. If using hot glue, adult only.
- Let glue set 30 minutes. Seal with matte spray, avoiding eyes.
- Let cure 24 hours before heavy handling.
How to display or gift it
- Create a “monster family” in a little cardboard house.
- Use as desk buddies or shelf pets.
- Package with a small story card describing each monster’s personality.
12. Mermaid Shell Rocks (Shimmery)
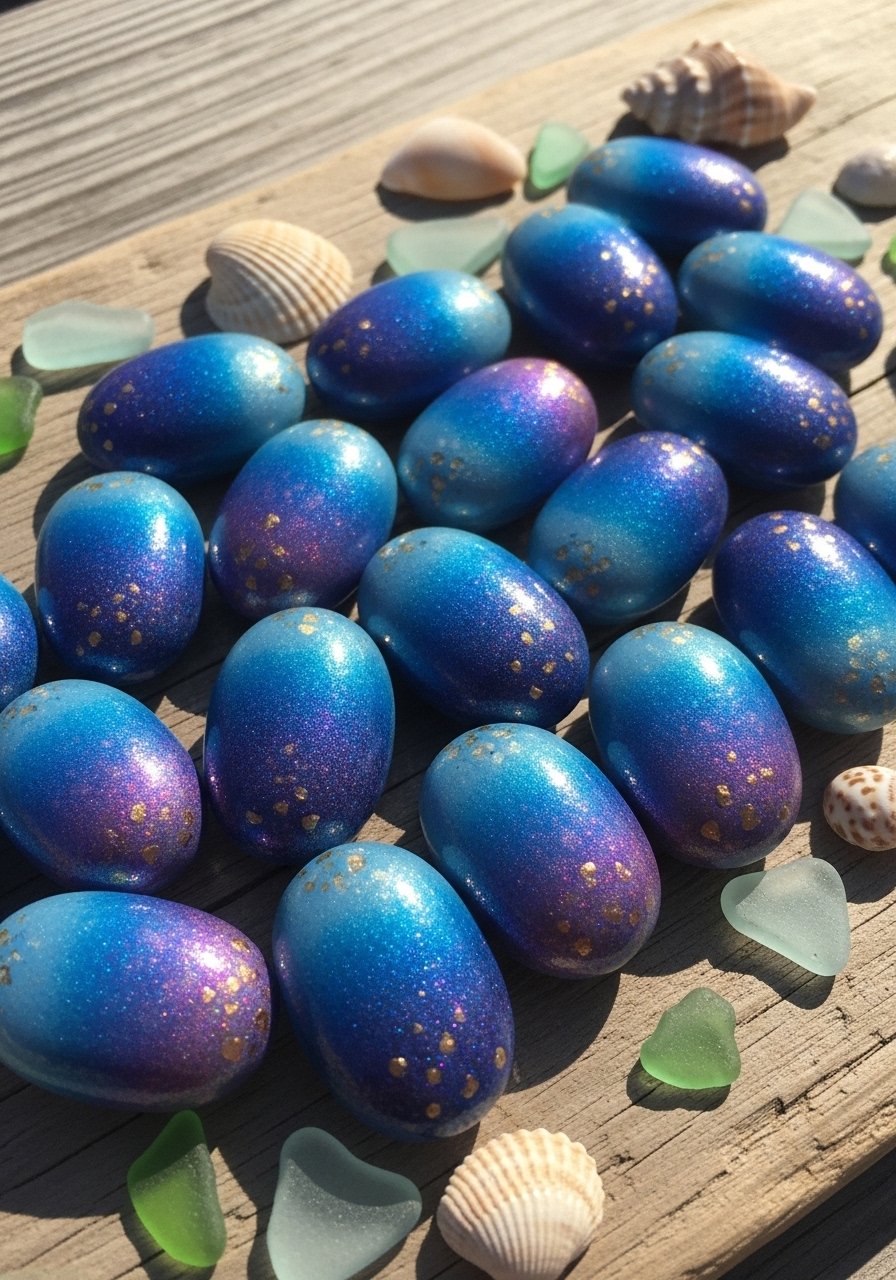
Add shimmer for underwater charm—use metallic or pearlescent paints for mermaid vibes. A tiny gold marker makes luxe accents. For shimmer, I reach for a small bottle of pearl acrylic medium.
Materials
- 8 oblong stones
- Acrylic paints in aqua, teal, purple
- Pearlescent medium or metallic paint
- Fine gold paint pen
- Small sponge
- Gloss sealer
Instructions
- Clean and dry stones 1 hour.
- Create ombré washes with sponge, two coats as needed. Dry 15 minutes between.
- Mix pearlescent medium with paint and dab for shimmer highlights.
- Add tiny gold lines or scales with gold pen.
- Seal with gloss for wet-look finish. Cure 24 hours.
How to display or gift it
- Tuck into a glass jar with sand for an ocean display.
- Package in a sea-themed favor box for birthday parties.
- Keep in a drawer with silica packs if gifting.
13. Seasonal Holiday Rocks (Pumpkins & Snowmen)
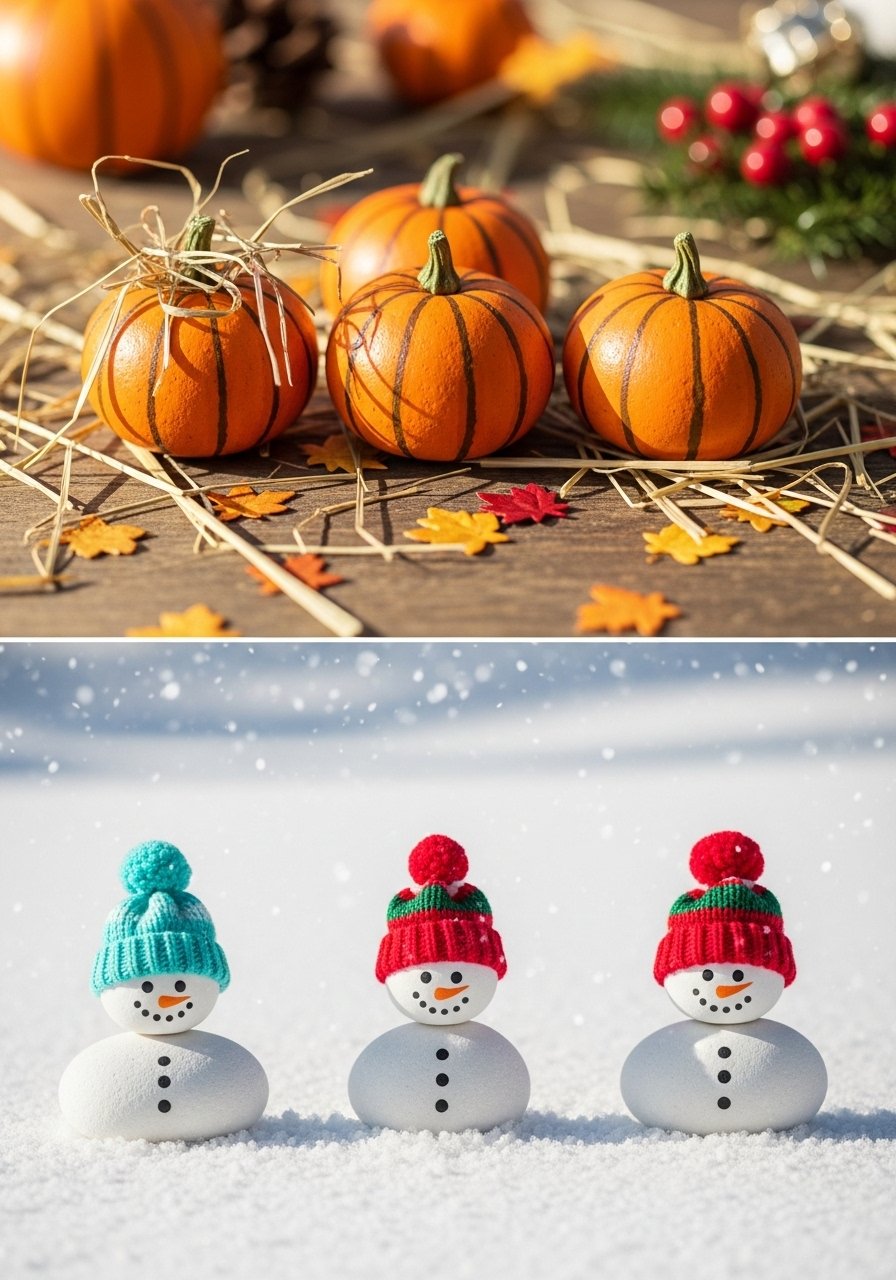
Seasonal stones are quick swaps for holiday décor. Paint pumpkins for fall and snowmen for winter—both require only a few colors and dry quickly. Keep a small pack of painter’s tape to mask crisp shapes.
Materials
- 10 mixed stones
- Acrylic paints: orange, black, white, green
- Painter’s tape for straight edges
- Small brush set
- Miniature props (tiny scarves or felt hats)
- Matte or gloss sealer depending on finish
Instructions
- Clean stones; dry 1 hour.
- For pumpkins, paint an orange base; add vertical dark lines and green stem.
- For snowmen, paint white base and stack dots for two or three-circle look.
- Add faces and accessories with fine brushes.
- Let dry 20–30 minutes. Seal appropriately—gloss for snowmen, matte for pumpkins.
- Affix tiny props with tacky glue if desired.
How to display or gift it
- Create a holiday mantelline with seasonal stones.
- Use as place-card holders for holiday dinners (write names on stones).
- Store seasonal sets in labeled boxes until needed.
14. Flower Garden Pebbles (Cottagecore)
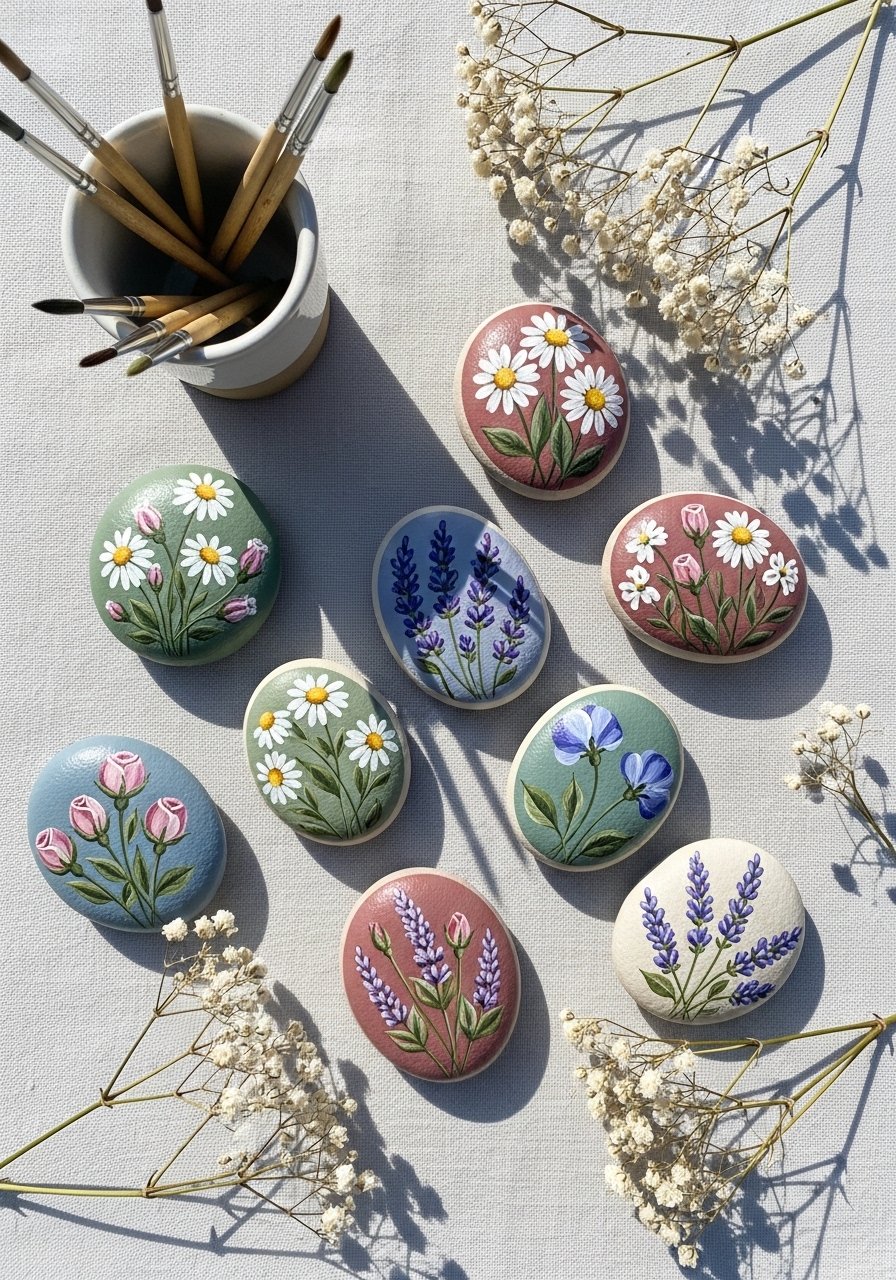
Cottagecore floral stones bring a gentle, handmade look to shelves and planters. Teach kids to paint simple petal shapes in layers. A [watercolor brush set] can help with delicate strokes when thinned acrylics are used.
Materials
- 12 oval stones
- Acrylic paints in soft pastels
- Small round brush, sizes 1–2
- Palette
- Tiny floral stencil (optional)
- Matte sealer
Instructions
- Clean and dry stones 1 hour.
- Paint light base color; dry 15 minutes.
- Sketch basic flower shapes.
- Paint petals with thin layers, starting light and adding darker centers.
- Add tiny leaf accents. Let dry 20 minutes.
- Spray matte sealer; cure 1 hour.
How to display or gift it
- Tuck into potted plants for a cottagecore touch.
- Wrap in kraft paper with a dried sprig as a sweet gift.
- Store in a shallow box separated with tissue.
15. Color-Blocked Rocks (Modern Japandi)
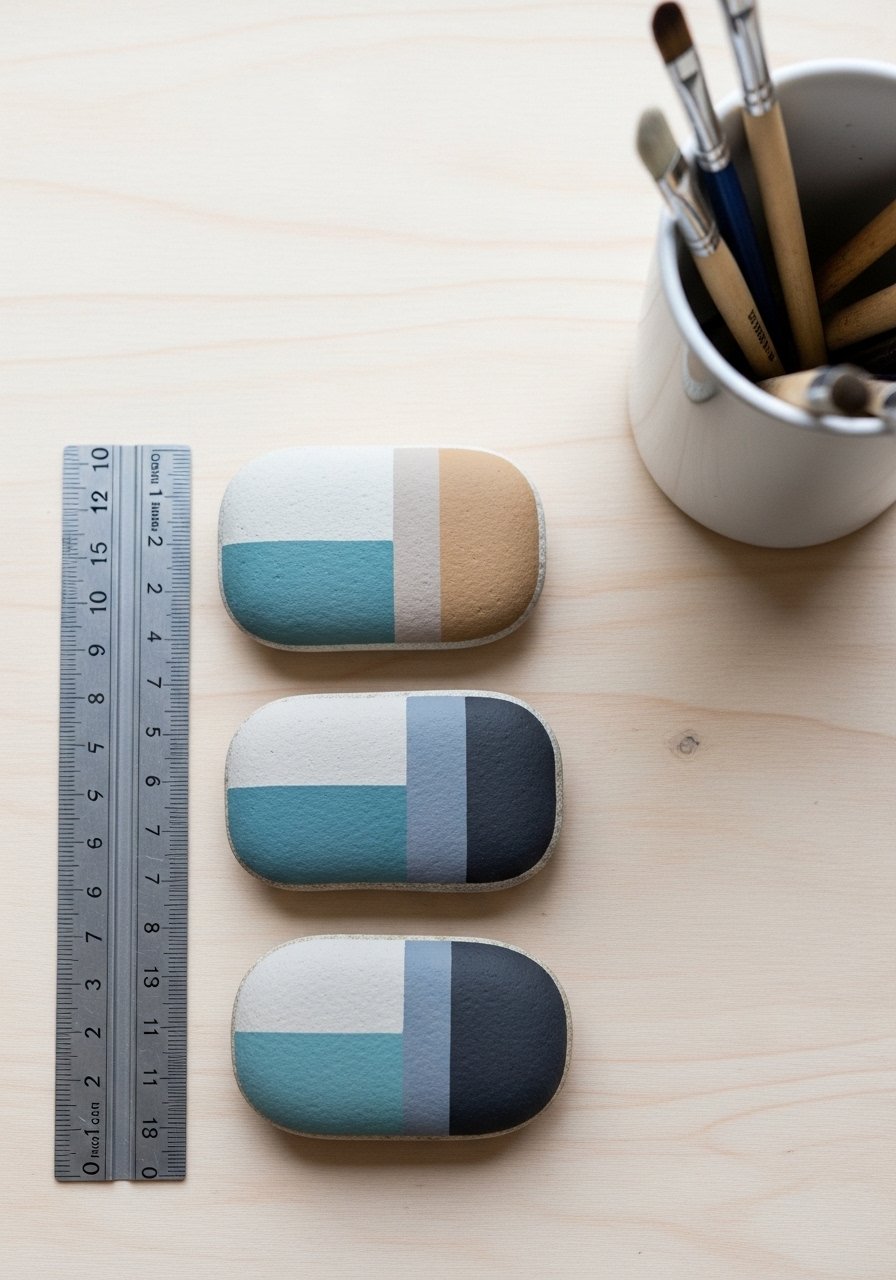
Simple color blocking looks very polished and fits Japandi or modern styles. Painter’s tape gives crisp edges. Measure and tape with a small metal ruler for clean lines.
Materials
- 6 flat rectangular stones
- Acrylic paints in muted palette
- Painter’s tape
- Metal ruler
- Foam brush
- Matte sealer
Instructions
- Clean rocks; dry 1 hour.
- Use painter’s tape to block off sections. Press tape firmly.
- Paint each block with foam brush. Two thin coats; dry 15 minutes between.
- Remove tape slowly after last coat is tacky to avoid lifting.
- Touch up crisp lines with a small brush if needed.
- Seal with matte spray; cure 1 hour.
How to display or gift it
- Arrange in a tray on a coffee table for modern décor.
- Use as paperweights or bookends in pairs.
- Store in a protective craft drawer.
16. Alphabet Action Rocks (Phonics Play)
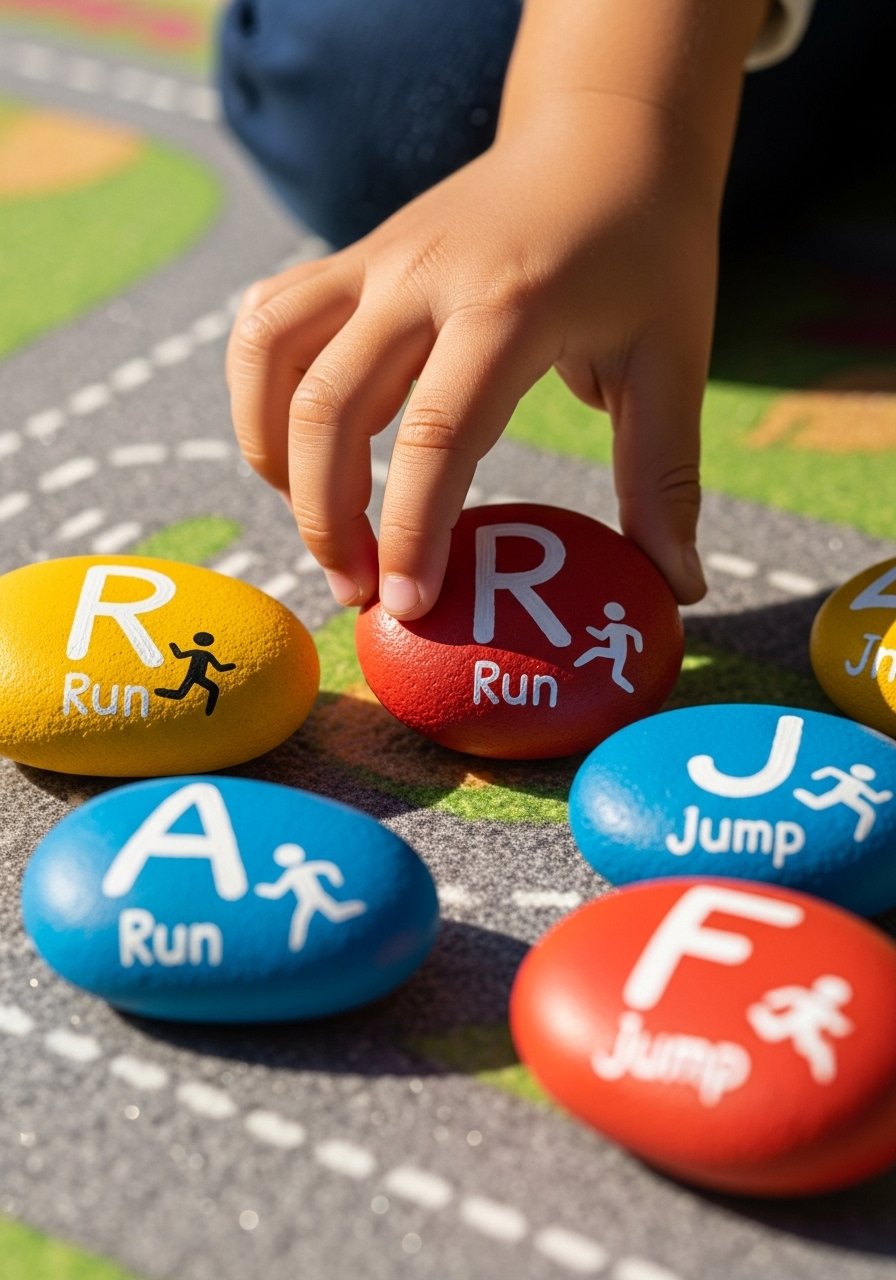
Alphabet action rocks pair letters with simple verbs—great for movement games. Paint an action icon beneath each letter for kinesthetic learning. Use a pack of washable paint pens for durable lines.
Materials
- 26 small stones
- Acrylic paints for base colors
- Paint pens for icons and letters
- Pencil
- Cloth bag for storage
- Matte sealer
Instructions
- Clean and dry stones 1 hour.
- Paint base colors; dry 15 minutes.
- Mark letters lightly with pencil.
- Draw icons under letters using paint pens.
- Let dry 20 minutes, then spray sealer. Cure 24 hours.
- Play movement games by drawing a card and acting out the verb.
How to display or gift it
- Store in a cloth bag for active recess games.
- Use in early-learning classrooms for group activities.
- Wrap as a learning gift with a printed activity guide.
17. stone painting ideas for kids: Glow-in-the-Dark Star Stones
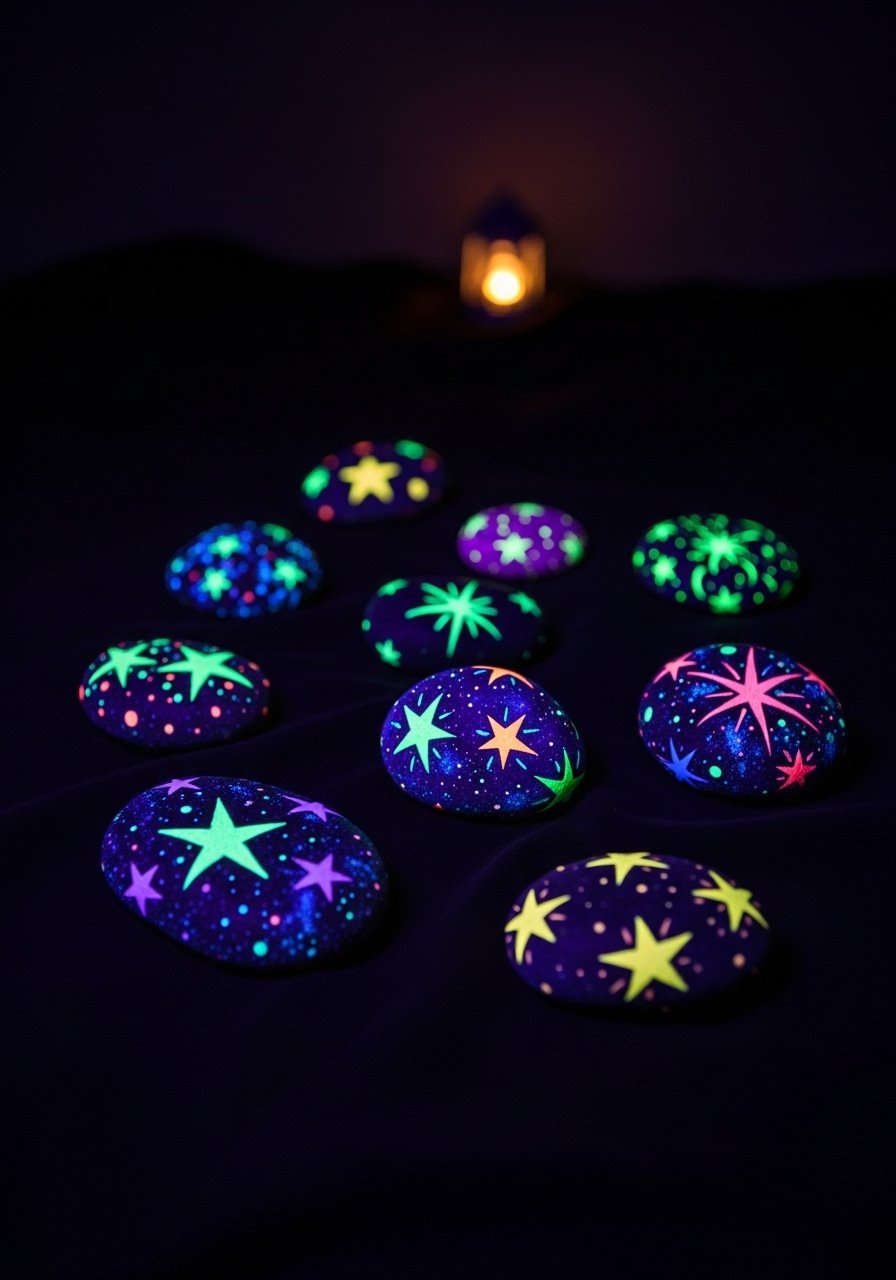
Glow-in-the-dark stones are magical for bedtime. Use a glow pigment mixed with clear medium for strong charge and glow. A small bottle of glow-in-the-dark paint works great.
Materials
- 8 stones
- Black or navy base paint
- Glow-in-the-dark paint or pigment
- Small brush
- Gloss sealer (non-yellowing)
- Bright light source to charge glow
Instructions
- Paint dark base; dry 15–20 minutes.
- Paint stars and comets with glow paint. Multiple thin coats for intensity; dry 10 minutes between coats.
- Charge under bright light for 5–10 minutes.
- Test glow in a dark room. Add extra coats if needed.
- Seal with gloss; cure 24 hours.
- Store in a dark box until gifting to preserve charge.
How to display or gift it
- Place in a child’s room on a bedside shelf for a soft glow.
- Use as night-time pathway markers during backyard camping.
- Gift with a small flashlight to “charge” the stones.
18. Map & Travel Stones (Learning Geography)
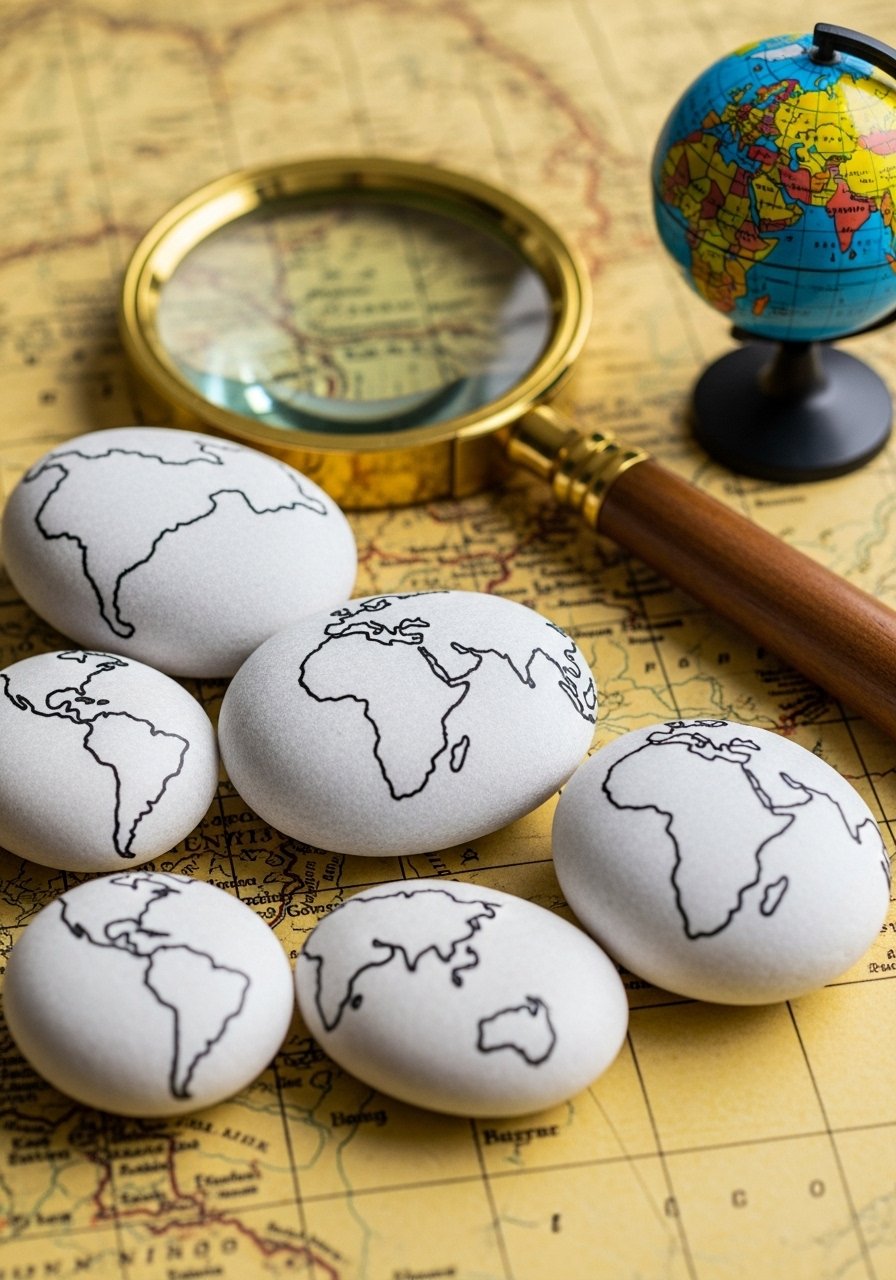
Map stones make geography tactile and fun. Paint simple continent shapes and use them for matching games or travel memory stones. A small fine-tip brush set helps with tiny coastlines.
Materials
- 10 medium stones
- Base paint neutral tones
- Acrylic paints for land/sea
- Fine detail brushes
- Pencil
- Matte sealer
Instructions
- Prime stones with a neutral base; dry 15 minutes.
- Sketch simplified map outlines with pencil.
- Paint land in a contrasting color; add tiny details like dots for capitals.
- Let dry 20 minutes, then outline with a fine brush.
- Seal with matte spray; cure 24 hours.
- Use stones in matching games or to tell travel stories.
How to display or gift it
- Present as a travel memory set in a small wooden box.
- Use in classroom geography centers.
- Store in a divided organizer labeled by continent.
19. Emoji Mood Rocks
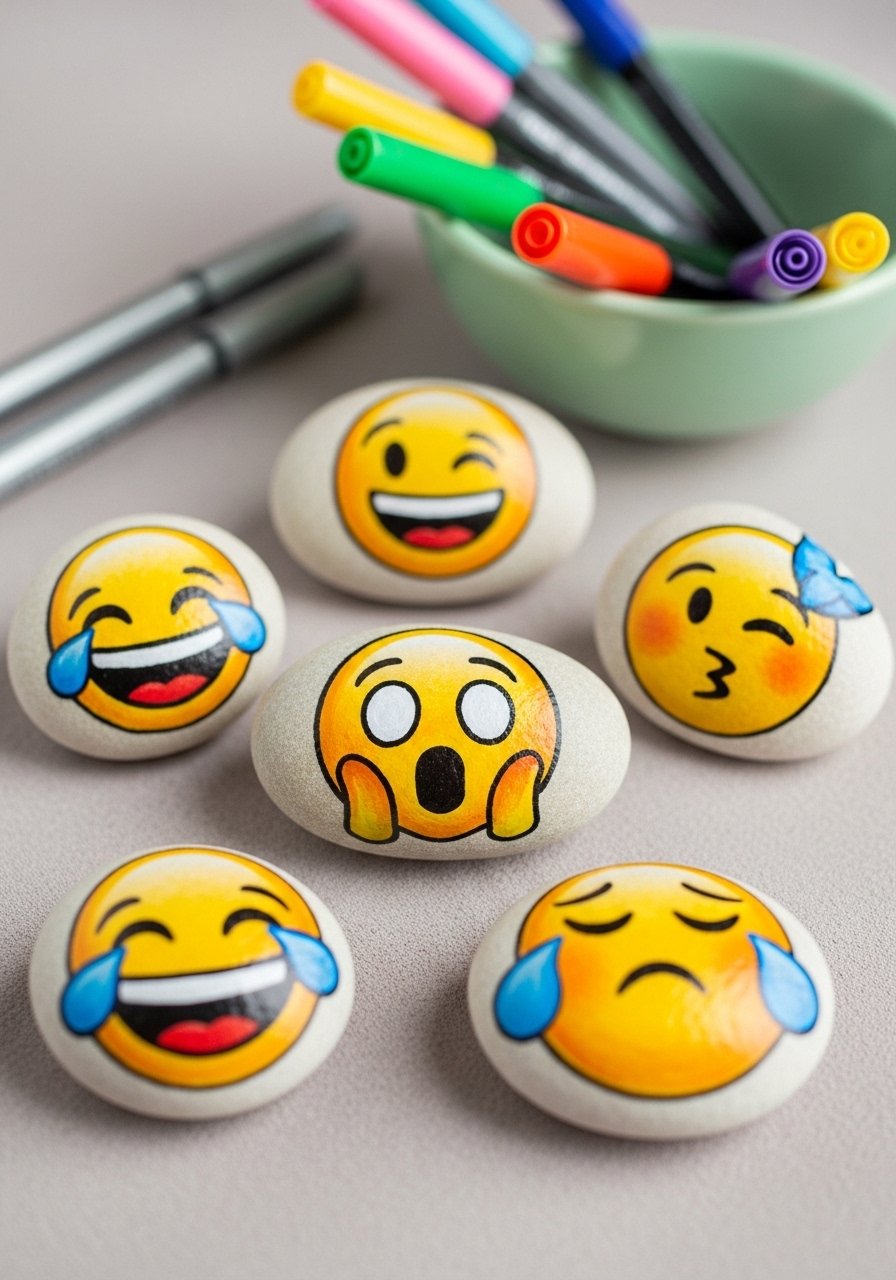
Emoji rocks help kids express feelings and can be used for check-in routines. They’re quick—one base color and a few bold details. Keep a pack of paint pens for crisp emoji lines.
Materials
- 8 small stones
- Yellow base paint
- Black and white paint pens
- Optional: blush pink paint
- Paper towel
- Matte sealer
Instructions
- Paint base with yellow; two coats as needed. Dry 15 minutes.
- Draw facial features with black paint pen. Add white highlights.
- Add blush or tiny hearts with pink.
- Let dry 10–15 minutes, then seal. Cure 1 hour.
- Use as a feelings chart or for playtime conversations.
How to display or gift it
- Keep an emotion jar where kids pick a rock to show how they feel.
- Package as a conversation-starter gift for a child starting school.
- Store in a small box with activity prompts.
20. Pebble Bugs (Washi Tape Wings)
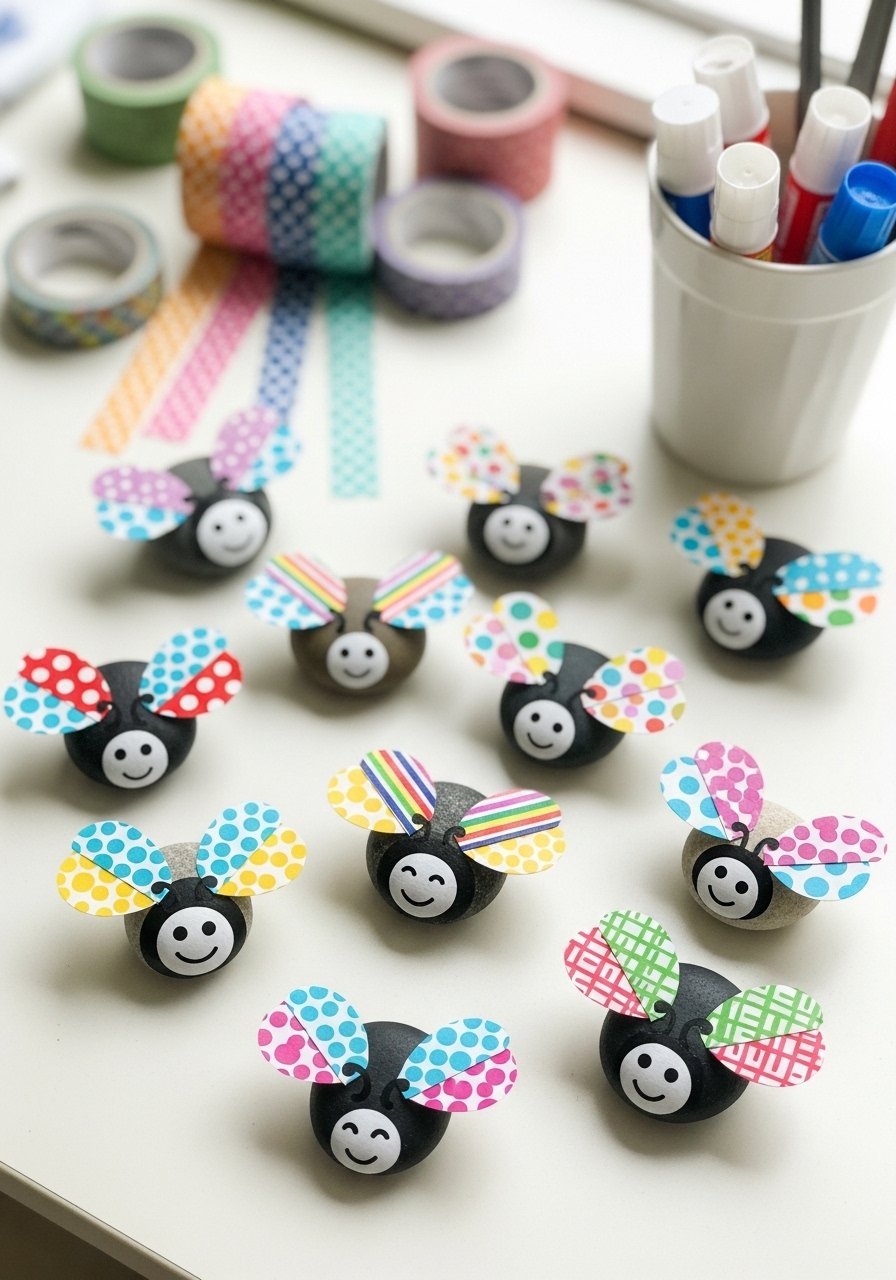
Washi tape adds instant pattern without intricate painting—easy for small hands to press on wings. Use a low-tack craft glue if wings need securing. I love a colorful washi tape assortment for patterns.
Materials
- 10 pebble stones
- Acrylic paints for faces
- Washi tape in assorted patterns
- Craft glue or glue stick
- Scissors
- Matte sealer
Instructions
- Paint faces on pebbles and dry 15 minutes.
- Cut washi tape into wing shapes and press onto stone sides.
- Secure with a dab of craft glue if needed; let set 10 minutes.
- Add antennae with a fine pen.
- Spray sealer carefully over painted areas, avoiding lifting tape edges.
- Cure 24 hours before play.
How to display or gift it
- Stick magnets to the back for fridge buddies.
- Arrange in a bug jar with faux leaves for playtime.
- Bundle in cellophane with a bug-spotting checklist.
21. Patterned Pebble Magnets
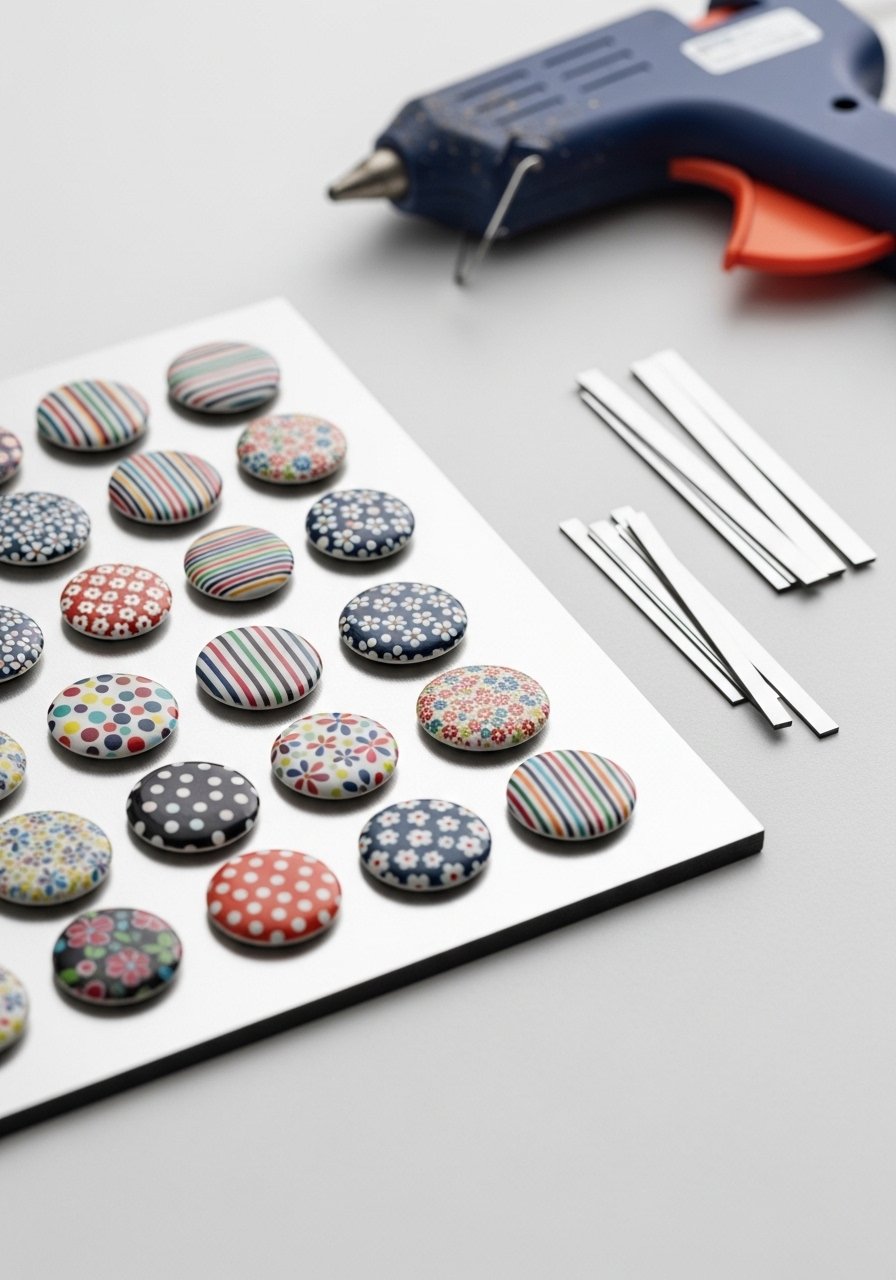
Turn painted pebbles into fridge magnets—use adhesive magnetic strips for easy assembly. These make useful small gifts and help kids practice repeating patterns. Use a magnetic tape roll.
Materials
- 8–12 small pebbles
- Acrylic paints for patterns
- Magnetic adhesive strips (1 inch pieces)
- Hot glue gun (adult use)
- Fine brushes
- Matte or gloss sealer
Instructions
- Paint pattern on pebble; dry 15 minutes.
- Seal paint with a light spray. Let dry 30 minutes.
- Cut magnetic strip to size and remove backing.
- Press magnet onto pebble; reinforce with a small dab of hot glue if needed (adult).
- Let glue cool 10 minutes before use.
- Test magnet strength on a fridge and adjust size if needed.
How to display or gift it
- Use as functional fridge art for notes and kids’ drawings.
- Package as a set in a small metal tin for gifting.
- Keep extras in a magnetic desk organizer.
22. Patterned Rock Tic-Tac-Toe Set
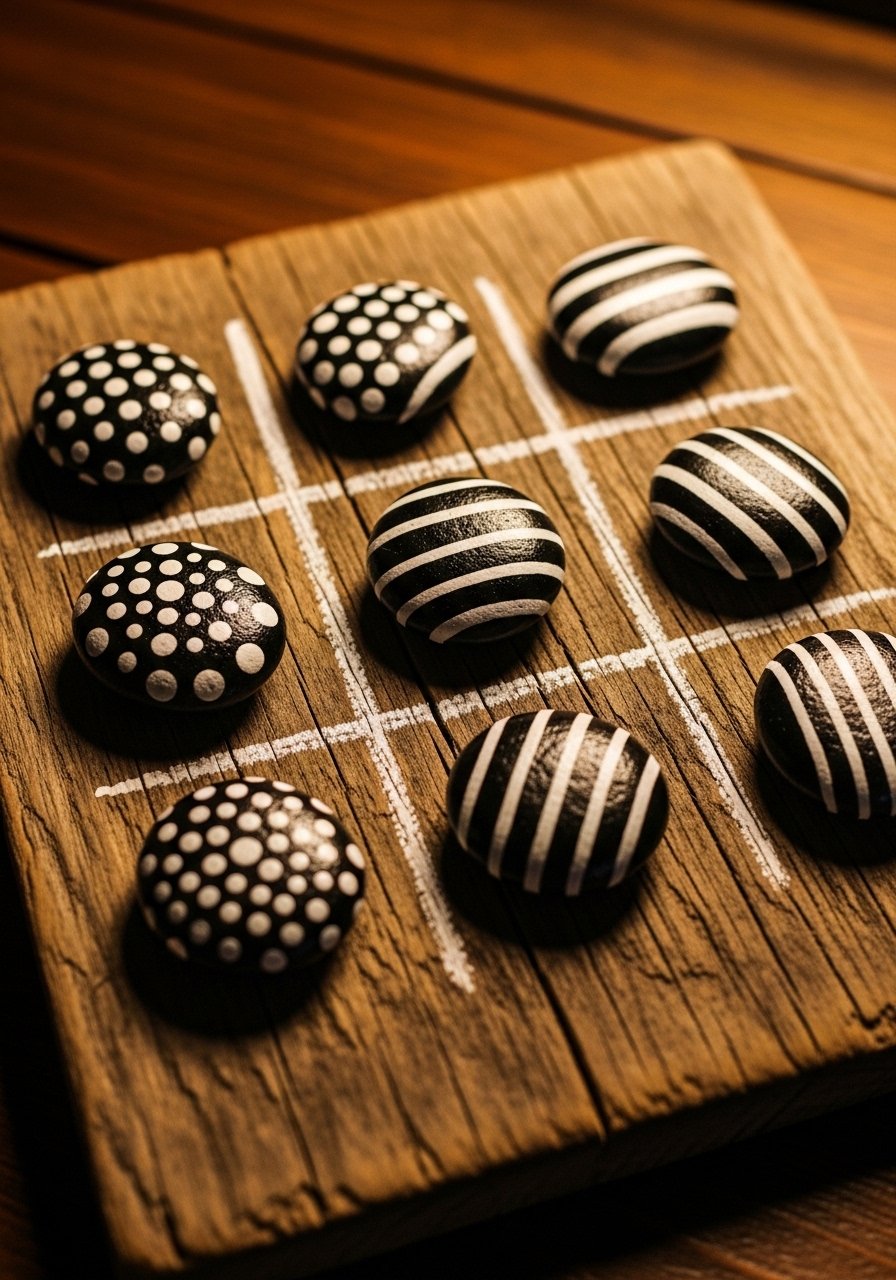
Create a reusable travel tic-tac-toe set with painted patterns instead of Xs and Os. Rocks are durable and portable—great for travel. A small chalkboard board makes a great playing surface.
Materials
- 10 flat stones (5 per player)
- Two contrasting paint schemes
- Small tray or board for grid
- Fine brush set
- Matte sealer
Instructions
- Paint five stones with one pattern and five with another. Dry 15 minutes.
- Seal both sets; dry 30 minutes.
- Draw grid on board with chalk or paint and let dry.
- Play games and store stones in a small pouch.
- If patterns rub, add a second sealer coat and let cure 24 hours.
- Wash board gently when needed.
How to display or gift it
- Tie set with ribbon and tuck into a travel kit.
- Keep in a living room basket for quick games.
- Store in a craft organizer pouch.
23. Pretty Pebble Place Cards
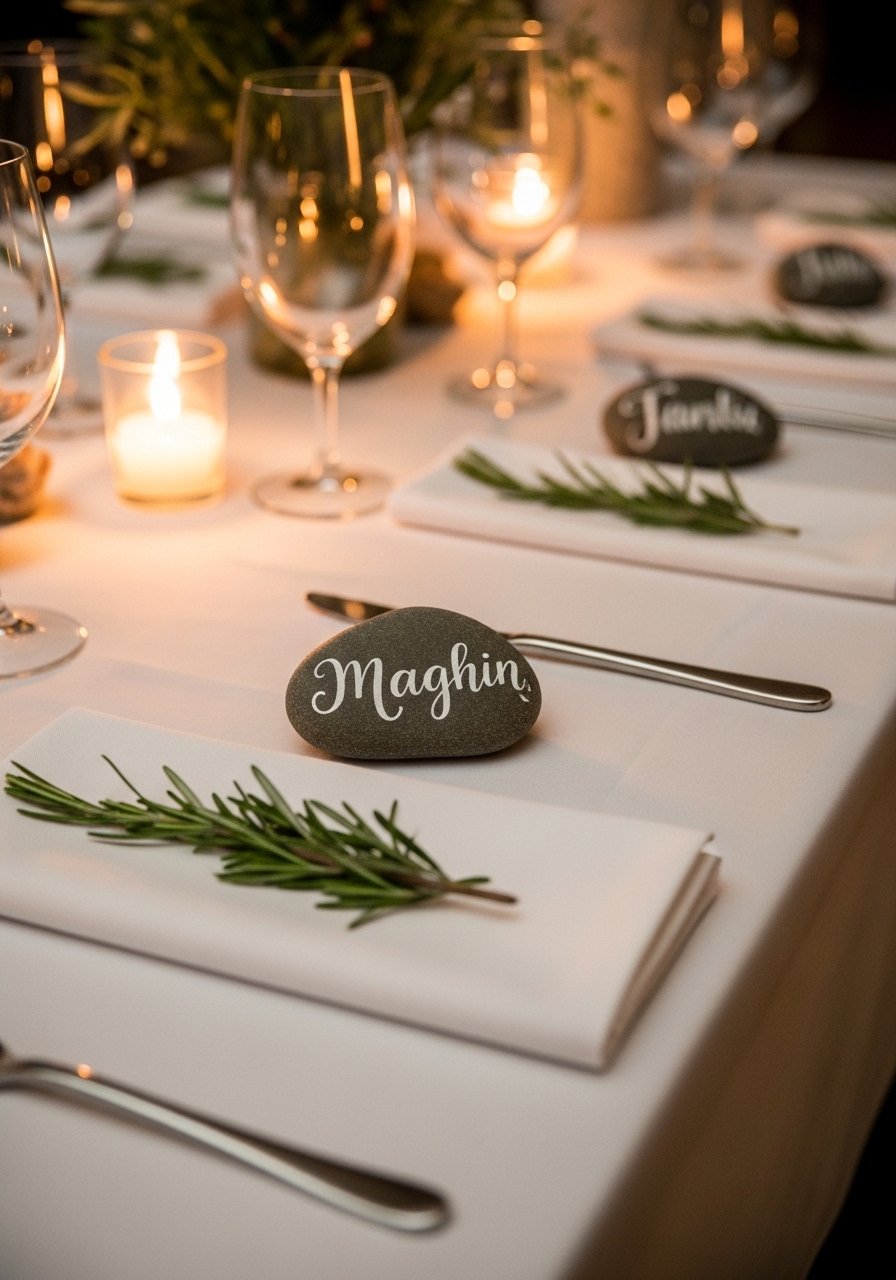
Painted stone place cards are a charming alternative to paper for dinner parties and weddings. Use a white gel pen or fine paint pen for neat lettering.
Materials
- 12 flat stones (one per guest)
- Neutral base paint
- White or metallic paint pen for names
- Pencil
- Small cloth for polishing
- Matte sealer
Instructions
- Paint stones with neutral base, two coats if needed. Dry 15 minutes.
- Lightly pencil names in script.
- Trace names with metallic or white paint pen. Let dry 10 minutes.
- Seal lightly to protect writing; cure 1 hour.
- Place on napkins or at each place setting.
- Keep extras stored flat in a small box.
How to display or gift it
- Use as keepsakes guests can take home.
- Pair with a small sprig of rosemary for scent and styling.
- Store unused place stones in a labeled craft container.
Painting stones with kids is a perfect mix of low-prep craft time and high-imagination play. From simple smiley faces to story stones and game sets, these stone painting ideas for kids offer options for every age and interest. Try one project today and pin your favorites for rainy afternoons.
If one tool could improve every project here, it’s a dependable set of fine paint pens — they make tiny details and lettering so much easier. I find a good multi-pack lasts through dozens of projects and saves a lot of fussy brush work. Happy painting—what project are you trying first?
Trust me, picking up a quality hot glue gun with temperature control changed how every single one of these projects turned out — no more stringy mess, no more burns.


