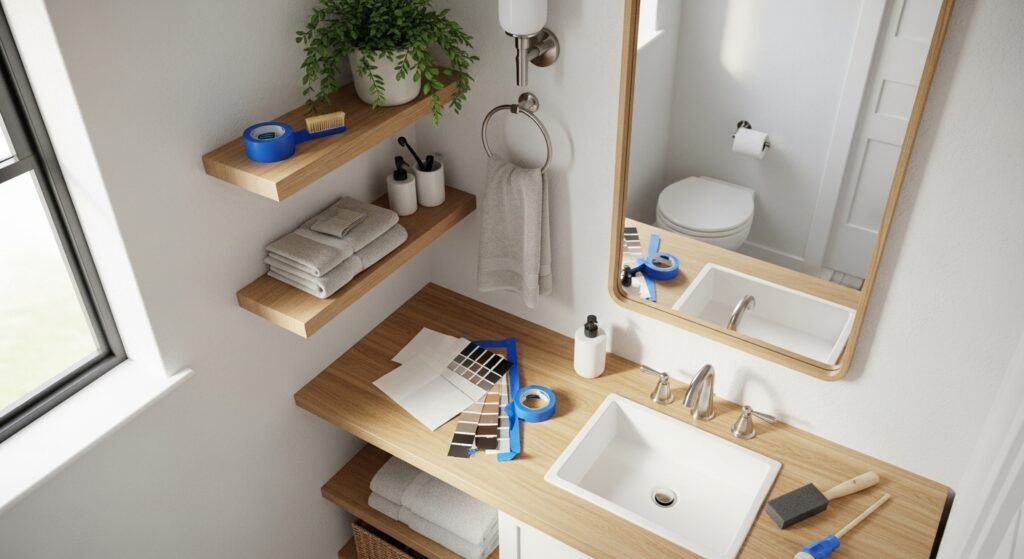
You love a bathroom that feels calm and roomy, even when square footage is small. These 27 easy small bathroom remodel ideas show how to squeeze more storage, light, and style from every inch. You’ll find paint tricks, smart shelving, mirror hacks, and simple installs that make the room read larger and breathe easier.
Each project is written so you can finish it in an afternoon or a weekend. I mention handy tools as you go—like running a strip of LED behind a mirror or using painter’s tape for crisp lines—and include links to items I use, such as a reliable foam brush set for paint touch-ups and a fast hot glue gun for quick organizer builds. Read on for small bathroom remodel ideas that actually fit real life: realistic materials, drying times, and troubleshooting tips so you don’t waste time or money.
- Slim Floating Corner Shelves
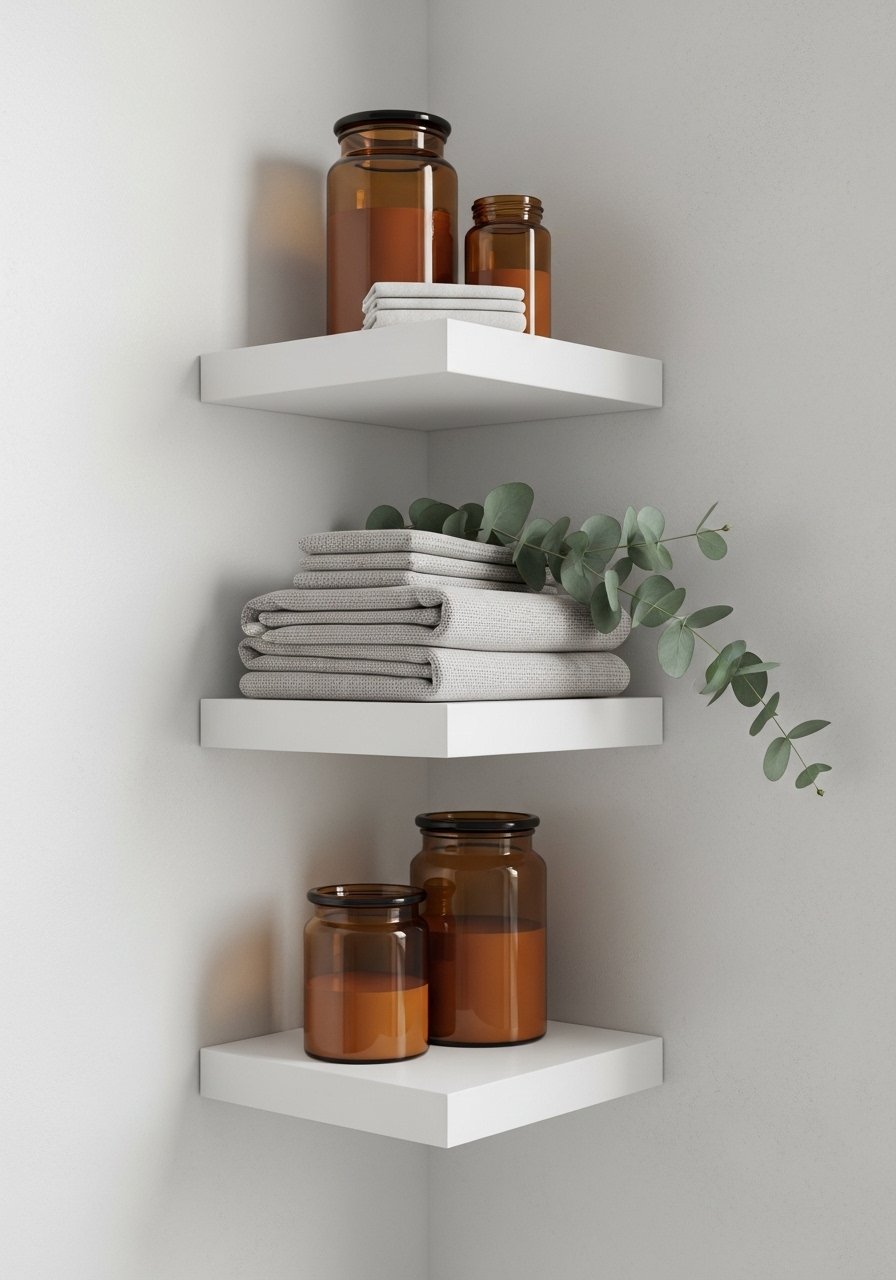
These corner shelves reclaim dead space and keep countertops clear. The look is airy and tailored, perfect for small bathrooms that need vertical storage. Beginners love this because the cuts are simple and the mounting is forgiving.
Materials
- 3 pieces of pine board 6" x 10" x 3/4", cut on a 45° for corner fit
- 3 wall-mount floating shelf brackets (6" depth)
- 16 wood screws (1¼")
- Spackle for screw holes, 4 oz
- Sandpaper 120 & 220 grit
- Satin white paint, 8 oz
- Painter’s tape, 1 roll
- Clear matte sealer, 4 oz
Instructions
- Measure the corner height and mark three shelf locations spaced 12–14" apart.
- Cut boards to a right-angle triangle with a 6" front edge; sand edges smooth with 120 then 220 grit.
- Paint two light coats of satin white. Dry time: 30 minutes between coats; fully cured 24 hours.
- Install brackets on the wall using wall anchors if not into studs. Use a level for perfect alignment.
- Screw shelves onto brackets from underneath. Fill screw heads with spackle and sand when dry (30 minutes).
- Apply one coat of clear matte sealer. Dry 2 hours to touch, 24 hours to cure.
How to Display or Gift It
- Style with rolled towels, small glass jars, and a sprig of greenery.
- Use a small wooden easel to display a tiny framed print on the top shelf.
- These shelves make a lovely housewarming gift—wrap them in kraft paper and tie with twine.
- Store unused brackets and spare screws in a stackable craft organizer until installation.
- Over-the-Toilet Slim Storage Unit

This narrow, wall-hugging unit adds vertical storage without crowding the floor. It’s a great beginner woodworking project if you can handle straight cuts. Use a brad nailer for quick assembly.
Materials
- 2 side panels 60" x 8" x 3/4"
- 3 fixed shelves 25" x 8" x 3/4"
- 1 back rail 25" x 1"
- Wood glue, 4 oz
- 24 brad nails (1")
- Sanding sponge
- Chalk paint (French gray), 8 oz
- Felt pads for feet
Instructions
- Cut and sand all panels. Wipe dust with a damp cloth.
- Assemble sides and shelves with wood glue and brad nails. Clamp and allow glue to set 30 minutes.
- Attach back rail for wall anchoring; locate studs for secure mount.
- Paint two coats of chalk paint. Dry 45 minutes between coats; cure 24 hours.
- Attach felt pads to bottom to protect floor.
- Mount against wall and secure to studs with long screws.
How to Display or Gift It
- Store toilet paper in woven baskets on the bottom shelf.
- Place tall items like lotions on the top to draw the eye upward.
- For gifting, disassemble shelves and wrap with kraft paper and instructions in a gift box.
- Ladder Towel Rack That Doubles as Shelf

A lean-to ladder uses vertical visual weight and keeps towels accessible. You can add a small shelf to one rung for toiletries. A jigsaw and orbital sander make the build smooth.
Materials
- 2 dowel rails 60" x 1¼"
- 4 rungs 18" x 1" dowels
- Wood glue, 2 oz
- Jigsaw or handsaw
- Orbital sander, sandpaper 120/220
- Stain or paint, 6 oz
- Clear wax finish, 2 oz
Instructions
- Cut rails and rungs to size. Sand edges.
- Mark rung spacing: 12"–14" apart. Drill pocket holes for each rung.
- Apply wood glue to rungs and insert into pocket holes. Clamp and let set 1 hour.
- Sand smooth and apply stain or paint. Dry times: 30–45 minutes between coats.
- Seal with clear wax; buff when dry (20 minutes).
- Lean ladder against wall; secure with anti-tip strap if you have kids.
How to Display or Gift It
- Hang lightweight towels and a macramé plant holder.
- Add a small fold-out shelf to a middle rung for perfume bottles.
- Store flat in a craft storage rack when not in use.
- Tie with ribbon for gifting to a friend who loves cottage or farmhouse aesthetics.
- Refinish Vanity with Chalk Paint for an Instant Expand

Painting the vanity a light, neutral shade makes the room feel larger instantly. Chalk paint sticks to most finishes—no sanding required—so it’s fast and forgiving. A foam roller helps avoid brush marks.
Materials
- Chalk paint, 16 oz (soft sage or cream)
- Flat foam roller (4")
- Detail brush for corners
- Painter’s tape
- New drawer pulls (brass or matte black), 2–4 pieces
- Degreaser wipes, pack of 10
- Clear wax or matte sealer, 4 oz
Instructions
- Remove hardware; clean surfaces with degreaser wipes and let dry 10 minutes.
- Tape off countertop and sink edges with painter’s tape.
- Apply first thin coat with foam roller and detail brush for edges. Dry 45 minutes.
- Apply a second coat for full coverage. Dry 45 minutes.
- Lightly sand edges for a worn look if desired. Apply clear wax and buff 20 minutes after drying.
- Reattach new hardware and reinstall.
How to Display or Gift It
- Pair with woven storage baskets under the sink for a unified look.
- Add a small tray for daily items to keep counters tidy.
- For gifting, include a small can of paint and a foam brush inside a gift box.
- Reframe the Medicine Cabinet with a DIY Trim

A simple trim makes an old recessed cabinet read like custom millwork. Use a miter saw for clean corners and wood glue plus brad nails for a neat finish.
Materials
- 4 trim pieces 1" x 2" (cut to size)
- Wood glue, 2 oz
- 12 brad nails (1")
- Painter’s caulk, 3 oz
- Stain or paint, 4 oz
- Sandpaper 220 grit
Instructions
- Measure the mirror perimeter and cut trim at 45° miters.
- Dry-fit pieces around the mirror; adjust for tight seams.
- Apply wood glue and secure with brad nails. Wipe excess glue.
- Fill nail holes and seams with painter’s caulk. Sand smooth when dry (20 minutes).
- Paint or stain. Dry 30–45 minutes between coats.
- Reinstall doors and touch up edges.
How to Display or Gift It
- Add a small command hook on the inside for jewelry.
- Use a labeled small jar to store cotton swabs on the shelf.
- For gifting, include a small stain sample and instructions in a kraft bag.
- Large Frameless Mirror to Create Depth
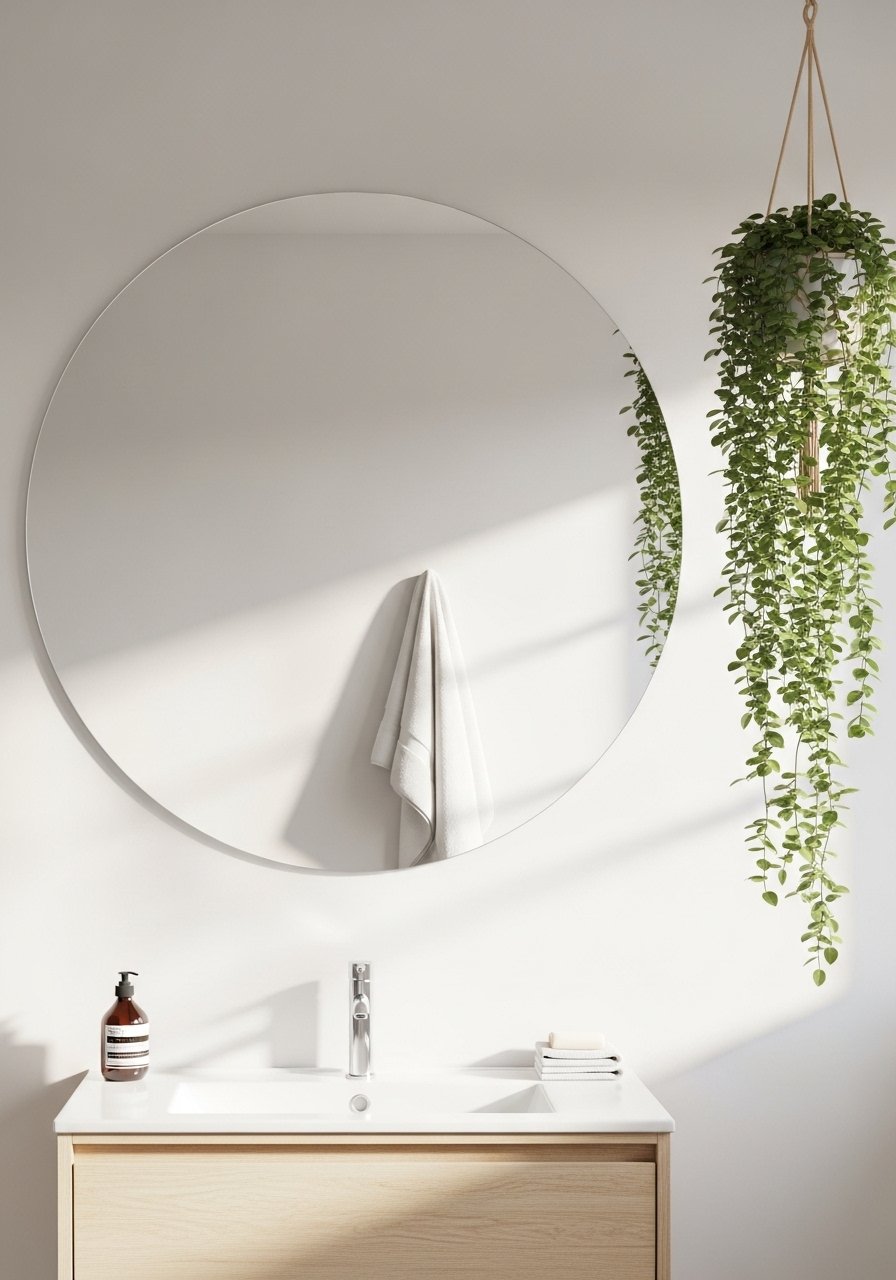
Replacing a small mirror with a larger frameless one doubles perceived space by reflecting light and sight lines. A pair of heavy-duty adhesive mirror clips makes hang easy without visible frames.
Materials
- Frameless round or rectangular mirror (measure wall, leaving 2" clearance from edges)
- 4 mirror clips or heavy-duty mirror adhesive
- Rubbing alcohol wipes
- Masking tape for spacing
- Silicone sealant, 3 oz (optional for extra hold)
Instructions
- Clean wall and mirror edge with rubbing alcohol wipes.
- Mark clip positions on wall and align with the mirror using masking tape for a template.
- Install clips per package instructions or apply mirror adhesive to back and press firmly.
- Hold mirror in place for 10 minutes; allow adhesive to cure 24 hours before removing support.
- Apply a thin bead of silicone around the edge if desired; cure 24 hours.
- Clean mirror with a glass cleaner and lint-free cloth.
How to Display or Gift It
- Pair with a narrow shelf underneath for daily essentials.
- Style with a hanging plant to soften lines.
- For storage during a move, pack mirror between cardboard sheets.
- LED Backlit Mirror Strip for Soft Glow
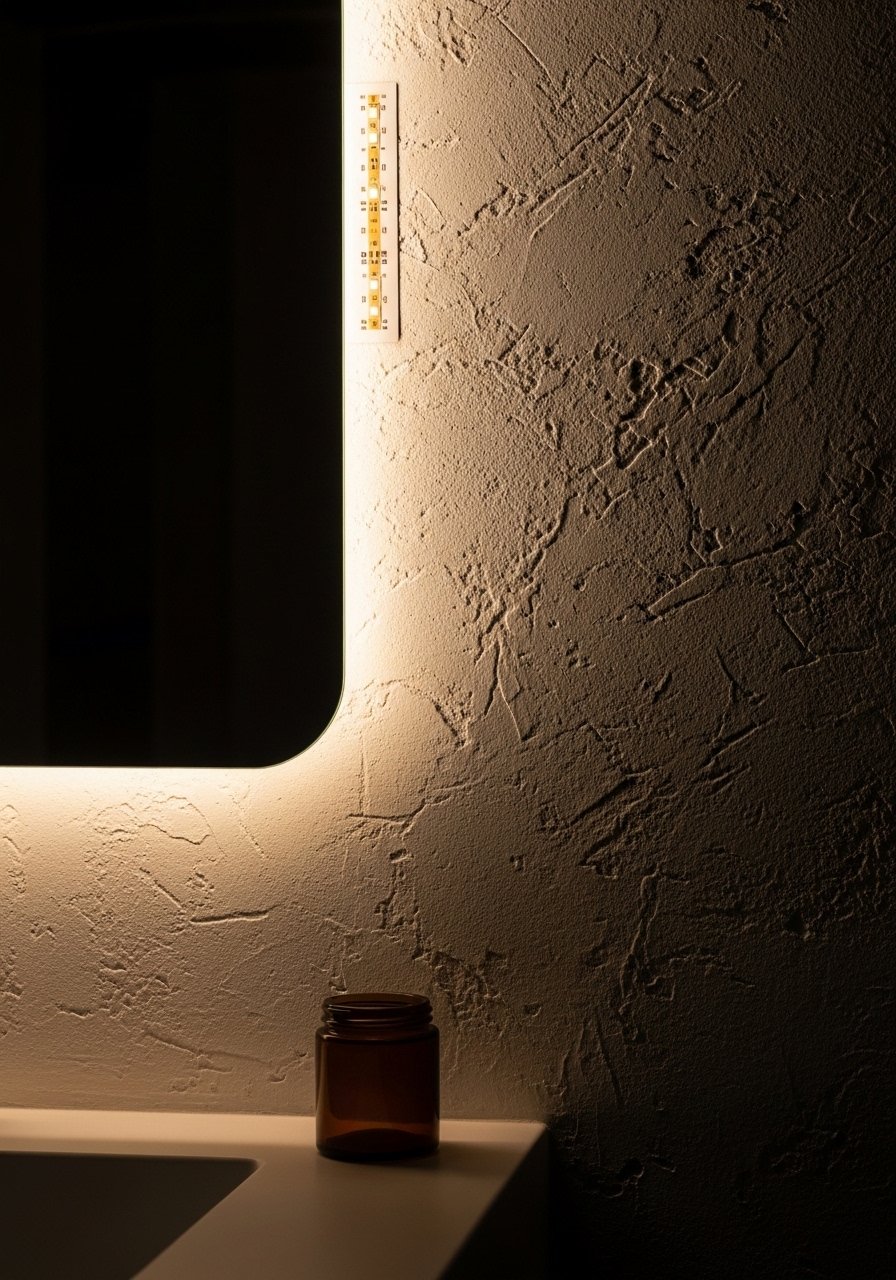
Adding a soft LED backlight makes the room feel bigger by creating depth between mirror and wall. Peel-and-stick LED strips are easy to install and dimmable options create spa-like light.
Materials
- Dimmable LED strip light (5m) with adhesive backing
- 12V DC power supply
- Inline dimmer switch
- Measuring tape
- Double-sided mounting tape
- Wire clips
Instructions
- Measure mirror perimeter and plan LED route. Cut strip at marked cut points only.
- Clean mirror back with rubbing alcohol. Peel adhesive and apply strip along edge.
- Connect strip to power supply and inline dimmer per instructions.
- Tuck wires behind mirror and secure with wire clips.
- Test for even light. If any gaps, add a small mirror tape shim.
- Let adhesive set 24 hours before adjusting dimmer.
How to Display or Gift It
- Use warm white LEDs for a cozy effect, cool white for a crisp look.
- Hide transformer in a drawer or behind vanity.
- Package spare LED strip and dimmer in a small gift box for friends who love lighting hacks.
- Peel-and-Stick Subway Tile Accent Wall

Peel-and-stick tiles give the subway tile look without the mess. They instantly brighten a wall and add texture without shrinking the space. Use a good scraper to remove air bubbles.
Materials
- Peel-and-stick subway tile sheets (enough for accent area)
- Utility knife
- Straight edge/ruler
- Level
- Grout pen in light gray (optional)
- Caulk for edges, 3 oz
Instructions
- Clean wall; ensure surface is dry and smooth.
- Plan layout from the center outward to keep tiles balanced.
- Peel backing and press tiles firmly, using a squeegee to remove bubbles.
- Trim edges with utility knife and straight edge for a clean finish.
- Use grout pen to define lines if desired. Dry 10 minutes.
- Caulk edges where tile meets other surfaces. Cure 24 hours.
How to Display or Gift It
- Pair with a small shelf for daily essentials above the backsplash.
- Use glass jars with labeled contents to create a tidy look.
- Keep leftover sheets in a flat craft organizer for repair.
- Refresh Tile Grout for a Cleaner Look

Refreshing grout instantly makes small tiles read cleaner and brighter, which makes the room feel larger. A grout pen can recolor lines quickly; allow full cure before splashing.
Materials
- Grout cleaner or oxygen bleach, 16 oz
- Stiff nylon brush or old toothbrush
- Grout pen in matching color
- Masking tape
- Microfiber cloths
Instructions
- Apply grout cleaner and let sit per label (10–15 minutes).
- Scrub grout lines with nylon brush until clean.
- Rinse thoroughly and let dry 24 hours.
- Use grout pen to recolor lines. Apply in short strokes; wipe away excess quickly.
- Allow pen to dry 2 hours to touch, 24 hours to fully cure.
- Seal grout with clear grout sealer if desired; cure 24 hours.
How to Display or Gift It
- Pair with a small tray to corral toothbrushes and keep counters clean.
- Store cleaners in a labeled spray bottle inside the cabinet.
- As a gift, include a grout pen and scrub brush in a small caddy.
- Vertical Stripe Paint Trick to Add Height

Vertical stripes draw the eye up and create the illusion of taller ceilings. Use painter’s tape for crisp edges and a brayer roller for smooth coverage.
Materials
- Two paint colors (base + slightly darker stripe), 8 oz each
- Painter’s tape (1" and 2")
- Foam roller and trim brush
- Measuring tape and pencil
- Drop cloth
Instructions
- Measure wall width and mark centers for an even stripe pattern.
- Apply painter’s tape for desired stripe width; press edges firmly.
- Paint base color first. Dry 45 minutes.
- Remove tape, let base cure 24 hours.
- Re-tape along stripe edges; apply darker stripe color using foam roller. Dry 45 minutes.
- Remove tape slowly at a 45° angle for crisp lines.
How to Display or Gift It
- Hang a tall mirror to reinforce the vertical effect.
- Use narrow floating shelves to add function without breaking the visual height.
- For gifting, include a small can of paint and a foam brush in a tote.
- Narrow Glass Floating Shelf for Toiletries

A glass shelf keeps sight lines clear and holds small necessities without feeling heavy. Tempered glass and hidden brackets are safe and sleek.
Materials
- Tempered glass shelf 24" x 6"
- Hidden floating shelf bracket set
- Wall anchors (if no studs)
- Silicone pads for glass
- Level and drill
Instructions
- Determine shelf height and mark studs or use anchors.
- Install bracket per manufacturer directions—ensure level.
- Place silicone pads on bracket and rest tempered glass.
- Check stability; tighten if needed.
- Leave weight-free for 1 hour to settle.
- Style with small jars and lightweight items only.
How to Display or Gift It
- Use identical amber jars for cotton pads and Q-tips for a cohesive look.
- Add a small framed print leaning against the wall for charm.
- Wrap small glass shelves carefully for gifting in bubble wrap inside a craft box.
- Slim Rolling Caddy from a Cookie Sheet Cart

A slider caddy on wheels fits narrow gaps and keeps extra supplies handy. Convert a kitchen roller cart by changing casters and adding waterproof trays.
Materials
- Slim metal rolling cart (12" wide)
- Waterproof plastic trays (cut to fit)
- Replacement rubber casters (2 locking, 2 fixed)
- Rust-proof spray paint (optional)
- Measuring tape
Instructions
- Measure gap width to pick a cart that fits by 1/4" clearance.
- Replace casters with rubber, non-marking wheels; install locking casters at front.
- Spray paint cart with rust-proof paint if desired; dry 1 hour between coats.
- Insert waterproof trays into cart shelves.
- Load with toiletries and roll into place.
- Lock casters to keep it stable when in use.
How to Display or Gift It
- Store hair tools on the middle shelf and towels on the bottom.
- Use small labeled jars to keep items tidy.
- For gifting, include a set of rubber caster covers in a small bag.
- Magnetic Organizer Inside Cabinet Door

Magnetic strips keep small metal tools easy to find and free up drawer space. Peel-and-stick magnetic strips make installation tool-free.
Materials
- Peel-and-stick magnetic strip (12")
- Small metal tins with adhesive backing
- Velcro strips
- Ruler and pencil
- Cleaning wipe
Instructions
- Clean inside cabinet door with cleaning wipe and let dry.
- Measure and mark placement for magnetic strip and tins.
- Peel backing and press magnetic strip firmly to door for 30 seconds.
- Attach tins with adhesive on door for extra storage for cotton swabs.
- Mount Velcro to hold a hair dryer strap if desired.
- Allow adhesive to set 24 hours before loading.
How to Display or Gift It
- Keep metal grooming tools easily visible and organized.
- Pack as a small gift with sample tins and a magnetic strip in a kraft box.
- Clear Shower Curtain with Patterned Border
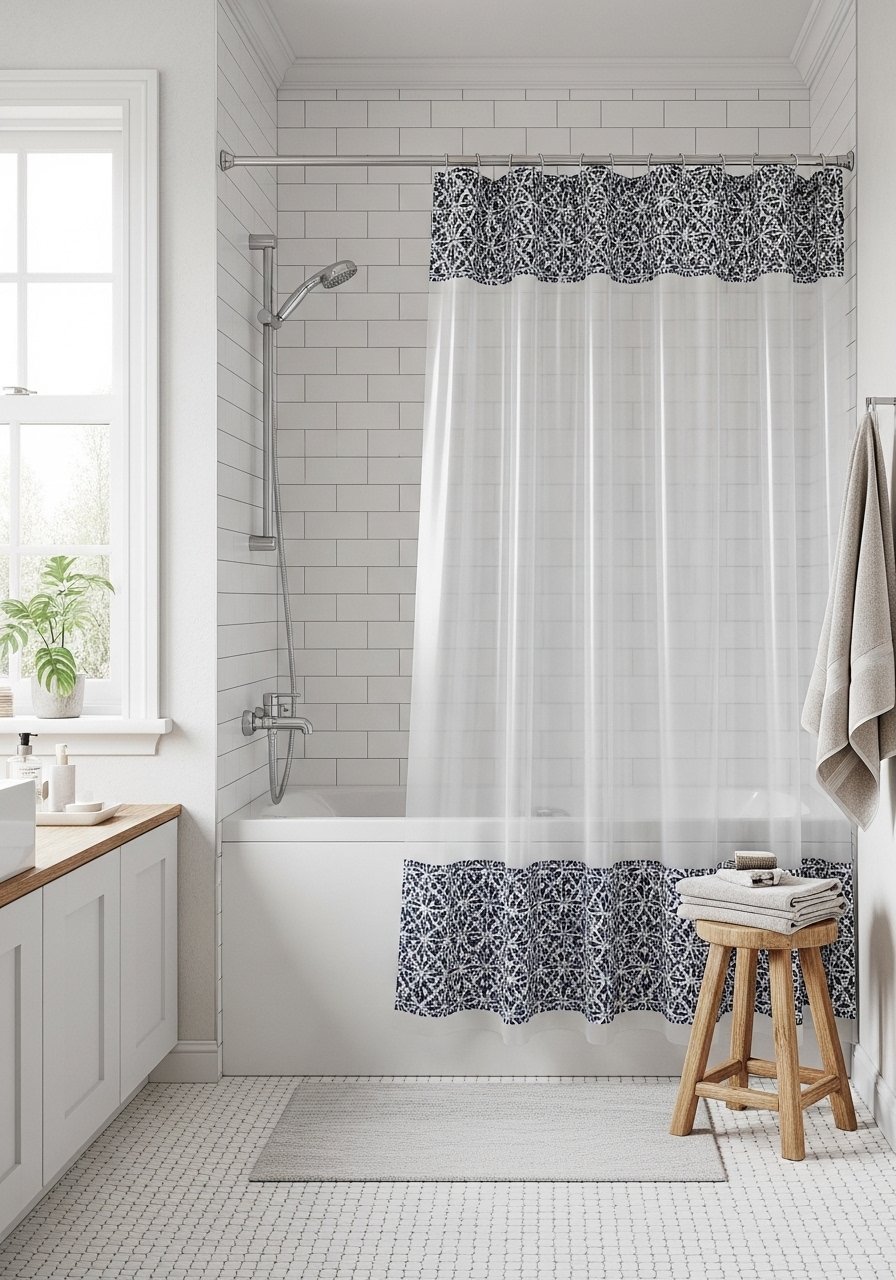
A mostly clear curtain keeps the visual field open while a patterned border adds personality. Use rust-proof rings and weighted hem to reduce billowing.
Materials
- Clear vinyl shower curtain with fabric border or plain + fabric border to sew
- Rust-proof shower curtain rings
- Sewing machine or fabric glue (if adding border)
- Thread and pins
- Iron
Instructions
- If adding border, cut fabric strip 4" wide to desired length.
- Pin and sew or use fabric glue to attach border to vinyl. Use a heavy-duty needle.
- Hem edge and add weights if desired.
- Hang with rust-proof rings and ensure curtain hangs inside tub by 1–2" to prevent splashes.
- Wash fabric border per instructions to keep fresh.
- Replace curtain every 12–18 months for hygiene.
How to Display or Gift It
- Pair with a themed bath mat and soap dispenser.
- Fold and present as a set in a gift box for someone moving into a new apartment.
- Store spare hooks in a small craft organizer.
- Corner Shower Niche Using Tension Baskets

A tension pole with corner baskets creates a built-in niche without tile work. Perfect for renters or weekend projects.
Materials
- Tension shower pole (adjustable to ceiling)
- 2–3 corner shower baskets that clamp to the pole
- Non-slip pads
- Measuring tape
Instructions
- Measure from tub edge to ceiling; adjust tension pole to fit snugly.
- Slide corner baskets onto the pole at desired heights.
- Add non-slip pads between basket and pole if needed for grip.
- Load bottles and soaps; distribute weight evenly.
- Recheck tension after a few uses.
- Clean baskets monthly to prevent soap scum buildup.
How to Display or Gift It
- Use matching refillable travel bottles for a polished look.
- Gift as a practical starter kit for students or renters.
- Swap Out Bulky Vanity Light for Slim LED Sconce
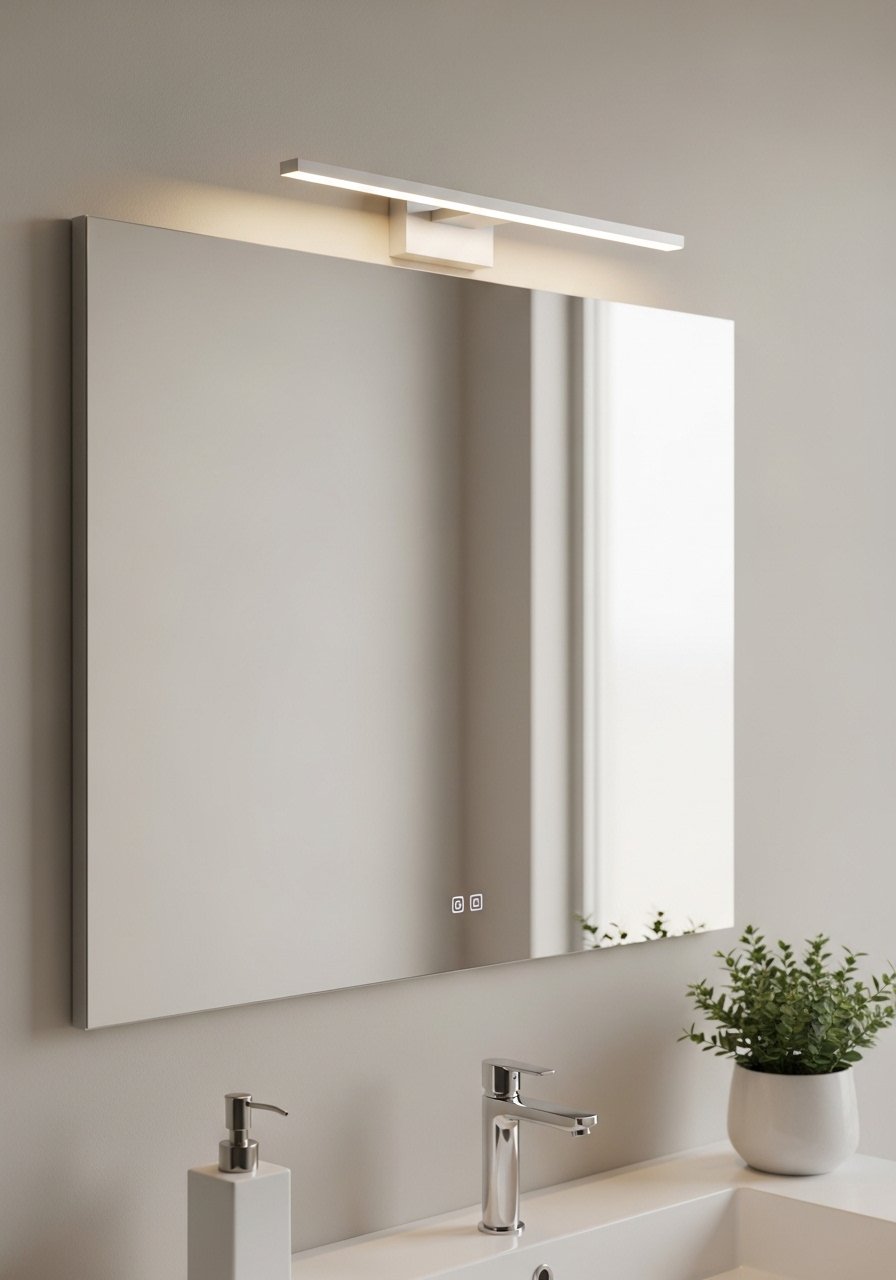
A slim LED sconce gives even, glare-free light and reduces visual clutter overhead. Choose a fixture with a warm color temperature for flattering light.
Materials
- Slim LED vanity sconce (measure width of mirror)
- Screwdriver and wire connectors
- Voltage tester
- Mounting hardware
- Wire caps
Instructions
- Turn off power at breaker and verify with voltage tester.
- Remove old fixture and disconnect wires.
- Mount the new bracket and connect wires using wire connectors.
- Secure sconce and test power.
- Adjust color temperature if fixture permits.
- Restore cover and enjoy even, flattering light.
How to Display or Gift It
- Pair with a wall-mounted dimmer for mood control.
- Include a small LED bulb pack as a gift for newly remodeled bathrooms.
- Sliding Barn Door to Save Swing Space

Replacing a swinging door with a sliding barn door frees up floor space inside the bathroom. Use a top-hung track to avoid bottom rails that trap rugs.
Materials
- Barn door slab (measure opening + 2")
- Top-hung sliding door hardware kit
- Anti-jump clips
- Door stops and floor guide
- Drill and screws
- Paint or stain
Instructions
- Measure opening width and add 2" for overlap.
- Install track at recommended height, anchored to studs.
- Hang door and install anti-jump clips and stops.
- Install floor guide to prevent swinging.
- Adjust rollers for smooth glide.
- Paint or stain door and allow 24 hours to cure before heavy use.
How to Display or Gift It
- Use a pocket door alternative for renters where allowed.
- Pair with a small coat hook outside for robes.
- Store spare hardware in a labeled bag for future adjustments.
- Under-Sink Pull-Out Drawers
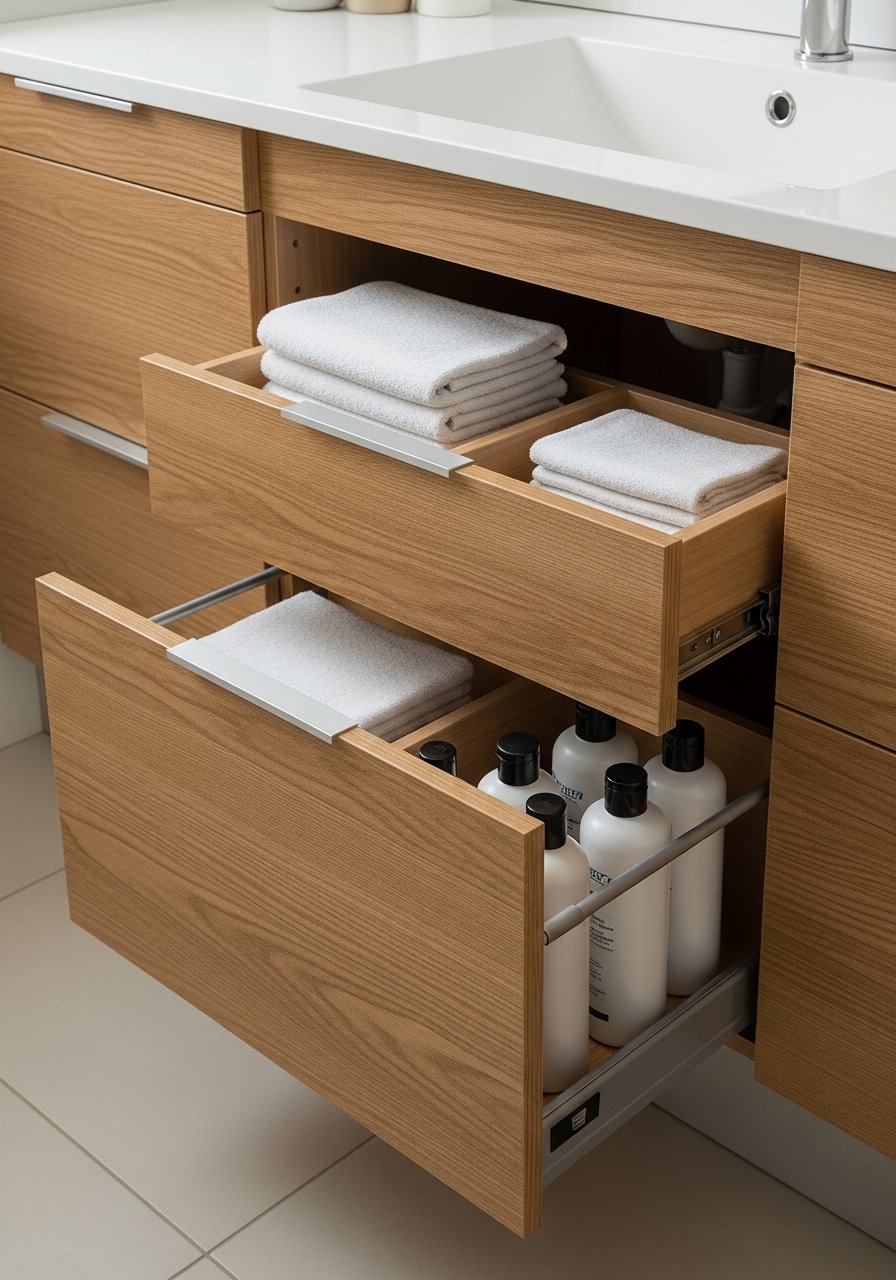
Pull-out drawers make under-sink storage accessible and neat. Soft-close slides keep movement smooth. Measure carefully around plumbing.
Materials
- 2 shallow pull-out drawer boxes (measure cabinet width)
- 4 soft-close drawer slides
- Screws and brackets
- Measuring tape
- Drill and level
Instructions
- Measure cabinet interior and mark slide positions, avoiding plumbing.
- Attach slides to drawer boxes then to cabinet interior per instructions.
- Insert drawers and test glide; adjust screws to level.
- Load drawers with towels and small items.
- Check clearance with sink pipes and trim drawer fronts if necessary.
- Add non-slip liners to each drawer shelf.
How to Display or Gift It
- Use small labeled bins to group items inside drawers.
- Perfect as a practical gift—include drawer liners and a label set.
- Towel Bar That Becomes a Thin Shelf

A towel bar with a narrow shelf above provides a place for essentials while keeping towels below. Use a single board cut to fit and secure with brackets.
Materials
- Slim wood board 24" x 4" x 3/4"
- Small L-brackets (2)
- Screws and anchors
- Sandpaper and finish
- Painter’s tape
Instructions
- Measure the towel bar width and cut the wood board to match.
- Sand and finish board with clear sealer; dry 2 hours.
- Install L-brackets on the wall above towel bar and secure board.
- Place a thin non-slip mat on board to prevent items sliding.
- Arrange essentials—bar soap dish, small jar, rolled washcloths.
- Check stability periodically and tighten screws if needed.
How to Display or Gift It
- Use small jars to corral cotton swabs and toothpicks.
- Wrap the shelf in kraft paper with brackets as a simple, useful housewarming gift.
- Resin Countertop Organizer Tray
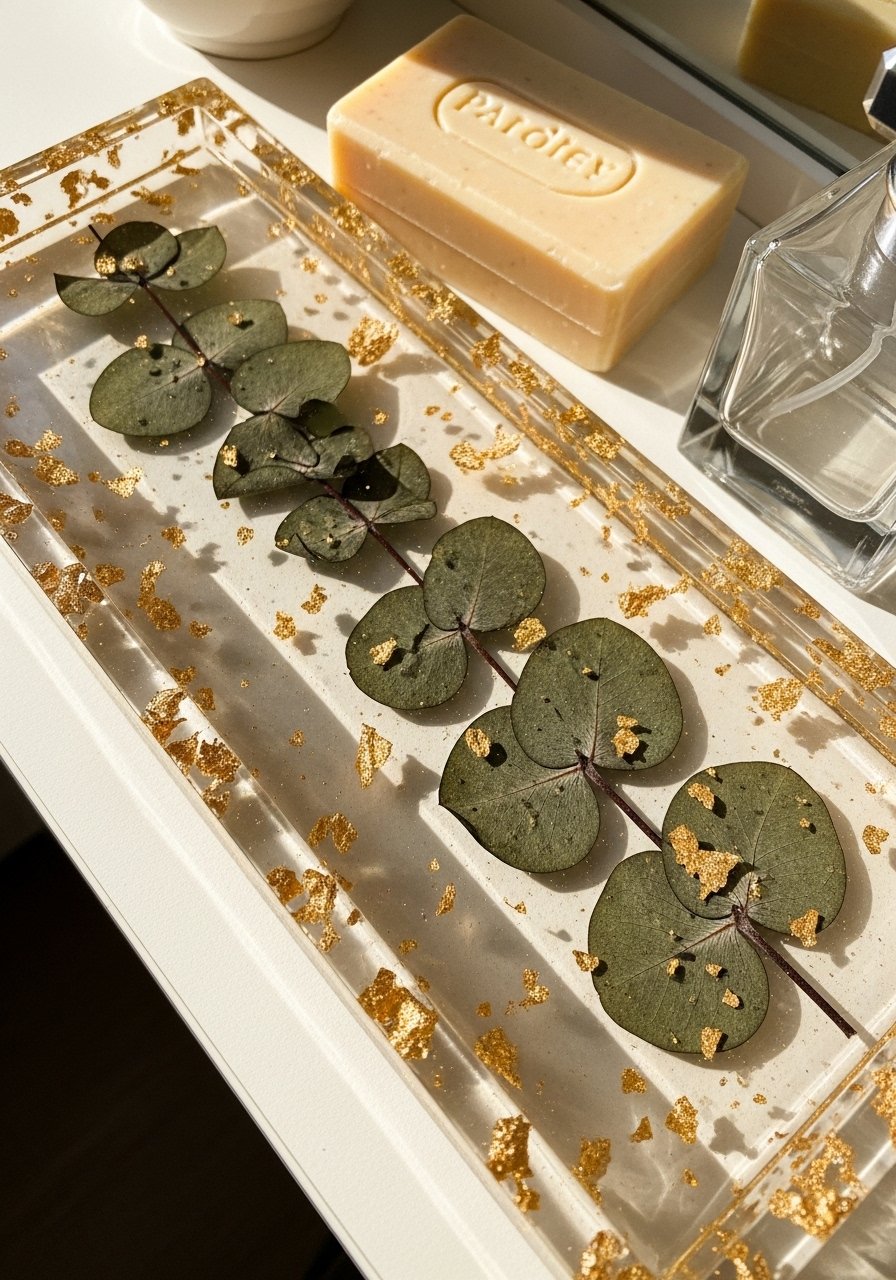
A custom resin tray adds polish and keeps counters tidy. Epoxy resin can be tinted and cured in 24–72 hours depending on brand.
Materials
- Silicone tray mold (8" x 6")
- Two-part epoxy resin kit (enough for mold volume)
- Pigment powders or mica
- Dried botanicals or gold leaf
- Disposable mixing cups and stir sticks
- Nitrile gloves and respirator mask
Instructions
- Prepare mold and dried elements; ensure they are completely dry.
- Mix epoxy resin per manufacturer ratios; stir 3–5 minutes to avoid bubbles.
- Pour a thin base layer and place botanicals; allow tacky 6–8 minutes.
- Pour remaining resin to desired thickness. Use torch or heat gun quickly to pop bubbles.
- Let cure 24 hours to handle, 72 hours full cure.
- Demold and sand edges lightly if needed.
How to Display or Gift It
- Use as a catch-all for jewelry and daily items.
- Wrap in tissue inside a small box for a personal gift.
- Store resin leftovers per manufacturer guidance.
- Floating Soap Shelf from Reclaimed Wood
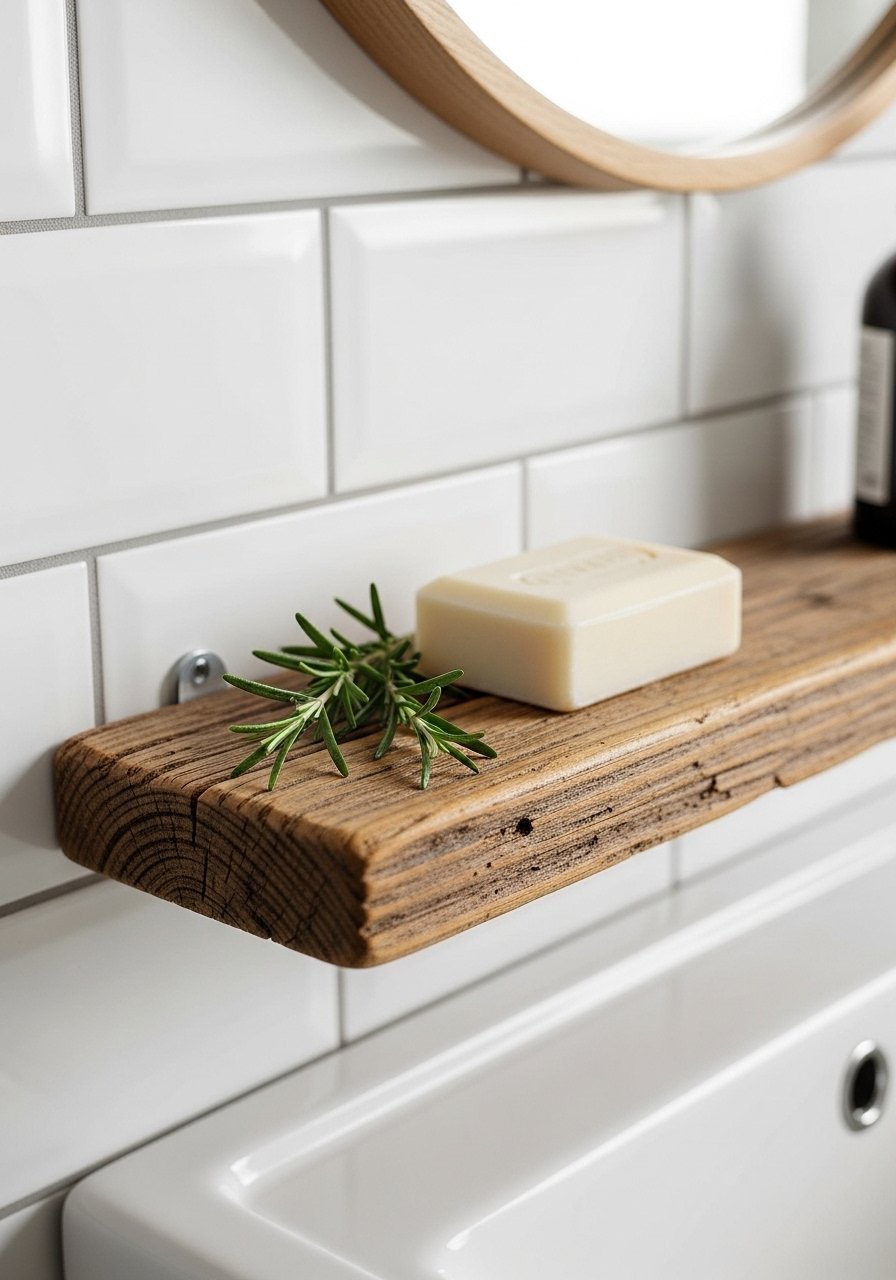
A slim reclaimed-wood shelf adds texture and a place for soap. A clear coat protects wood from moisture. Use a single bracket for a minimalist look.
Materials
- Reclaimed wood strip 8" x 2" x 3/4"
- Single small shelf bracket
- Waterproof clear sealer, 2 oz
- Sandpaper 220 grit
- Screws and anchors
Instructions
- Sand wood smooth and wipe dust.
- Apply two thin coats of waterproof clear sealer. Dry 30 minutes between coats.
- Mount bracket at desired height, secure to wall studs or anchors.
- Rest shelf on bracket and secure with a small screw from below.
- Allow sealer to cure 24 hours before placing wet soap.
- Replace sealer annually for longevity.
How to Display or Gift It
- Add a bar of handmade soap and wrap in wax paper for a gift.
- Use small saucer underneath to catch drips or rotate soaps to dry.
- Macramé Hanging Plant Shelf for Vertical Greenery
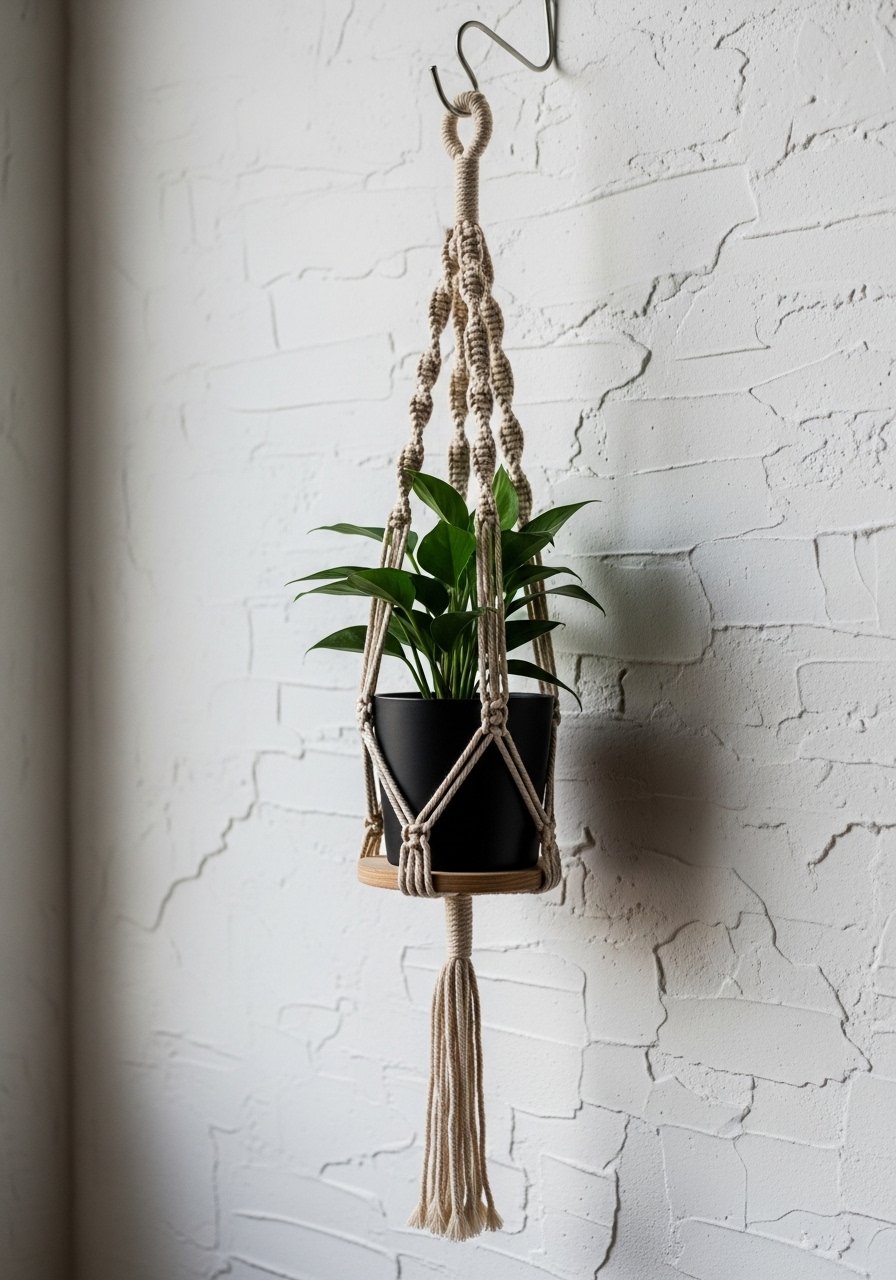
A hanging macramé shelf brings green life upwards, drawing the eye and softening corners. 3mm cord gives a delicate look. Learn a few basic knots to complete this quick project.
Materials
- Macramé cord 3mm single-strand, 10 yards
- Wooden ring (2")
- Small wood platform 6" diameter
- Scissors and tape measure
- Potted plant (small)
Instructions
- Cut cords: eight lengths of 2.5 yards each.
- Attach cords to wooden ring using lark’s head knots.
- Form square knots to create a basket pattern; space knots 1.5" apart.
- Tie off and attach wooden platform to the gathered cords.
- Trim ends evenly and use a lighter briefly on synthetic cord ends if needed.
- Hang from a ceiling hook; water plant carefully to avoid drips.
How to Display or Gift It
- Display near a window or mirror to reflect greenery and light.
- Include a small potted plant wrapped in kraft paper for gifting.
- Store spare cord in a craft organizer for future projects.
- Upcycled Drawer Organizer Inserts

Custom inserts make small drawers work harder. Use foam board and fabric for a polished look. Measure carefully for snug compartments.
Materials
- Foam board sheets (3mm), 2 sheets
- Fabric remnants (cotton or canvas), 1/2 yard
- Hot glue sticks and hot glue gun
- Utility knife and metal ruler
- Double-sided tape
Instructions
- Measure drawer interior and sketch compartment layout.
- Cut foam board strips for walls and cover in fabric with hot glue.
- Assemble inserts with hot glue, pressing seams for neatness.
- Place inserts in drawer and adjust for fit.
- Label compartments with washi tape if desired.
- Replace periodically if glue loosens.
How to Display or Gift It
- Pair with a set of small glass jars for brushes and tools.
- Wrap as a small organizing kit for a friend who loves tidy spaces.
- Mirror Tile Mosaic to Expand a Small Wall
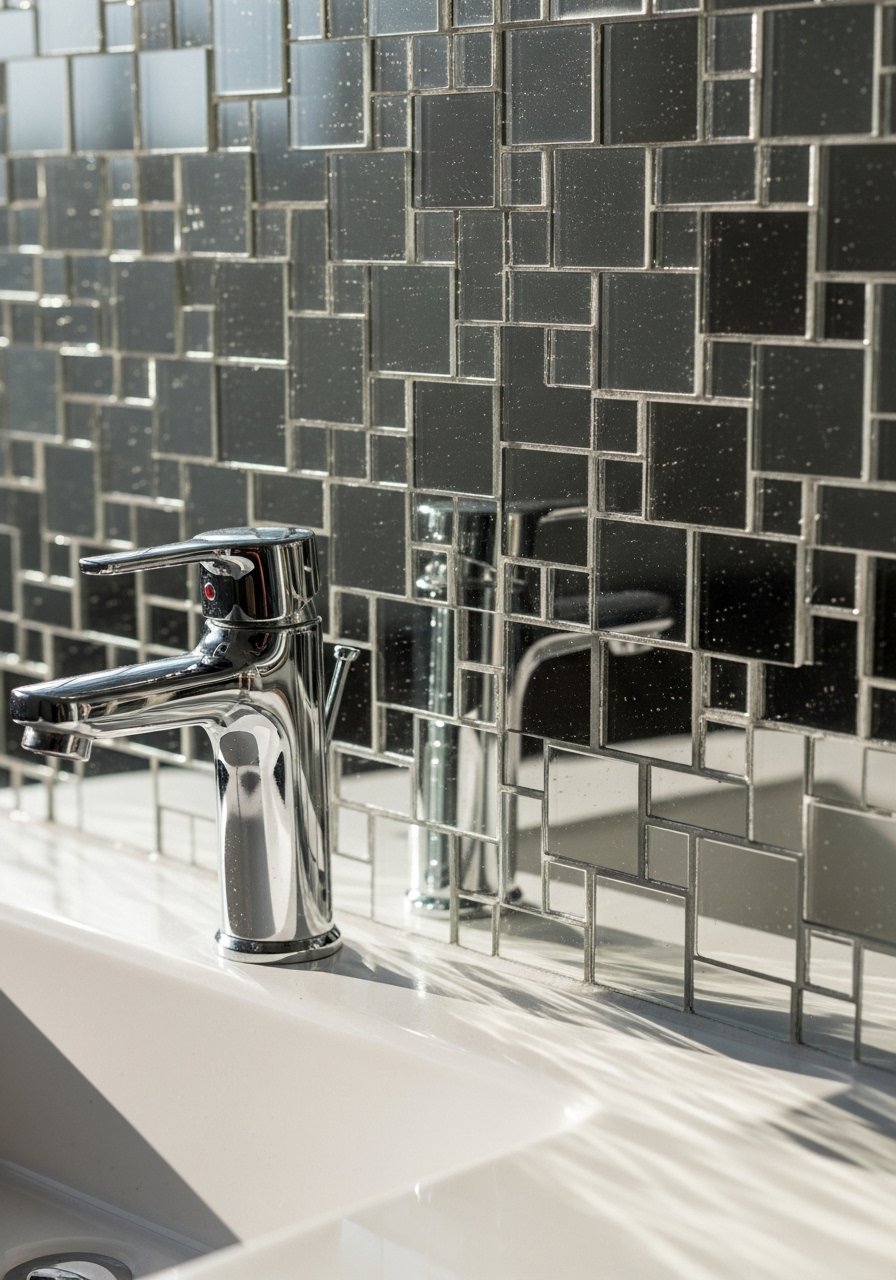
A mirror mosaic catches light and creates visual interest, making the room feel bigger. Use adhesive mirror tiles and grout pen for a DIY-friendly approach.
Materials
- Peel-and-stick mirror tiles (1"–2" square)
- Grout pen light gray
- Measuring tape and level
- Utility knife
- Microfiber cloth
Instructions
- Plan tile layout on paper, measure wall area.
- Start from center and press peel-and-stick tiles onto wall.
- Trim edge tiles with utility knife for a clean fit.
- Use grout pen to mimic grout lines, if desired. Dry 2 hours.
- Clean tile faces with microfiber cloth.
- Replace or repair any lifted tiles using extra adhesive.
How to Display or Gift It
- Use as a backsplash behind the sink to reflect more light.
- Box up extra tiles and grout pen as a small DIY gift set.
- Paint Ceiling a Lighter Tone to Open Up Space

Painting the ceiling a lighter or slightly tinted tone makes it feel higher. A satin finish reflects light without glare. Use an extension pole for rollers to make the job quick.
Materials
- Ceiling paint (light tint), 1 quart
- 9" foam roller and extension pole
- Trim brush
- Painter’s tape
- Drop cloth
Instructions
- Tape ceiling edges and lay drop cloth.
- Cut in around trim with a brush.
- Use roller with extension pole to apply first coat. Dry 2 hours.
- Apply second coat for uniform coverage. Dry 2 hours, full cure 24 hours.
- Remove tape slowly at a 45° angle.
- Touch up edges after curing if needed.
How to Display or Gift It
- Pair with warm LED recessed lights for a cohesive look.
- Include a spare can of paint with a small foam brush as a gift.
- Faux Encaustic Tile Stickers for a Patterned Floor
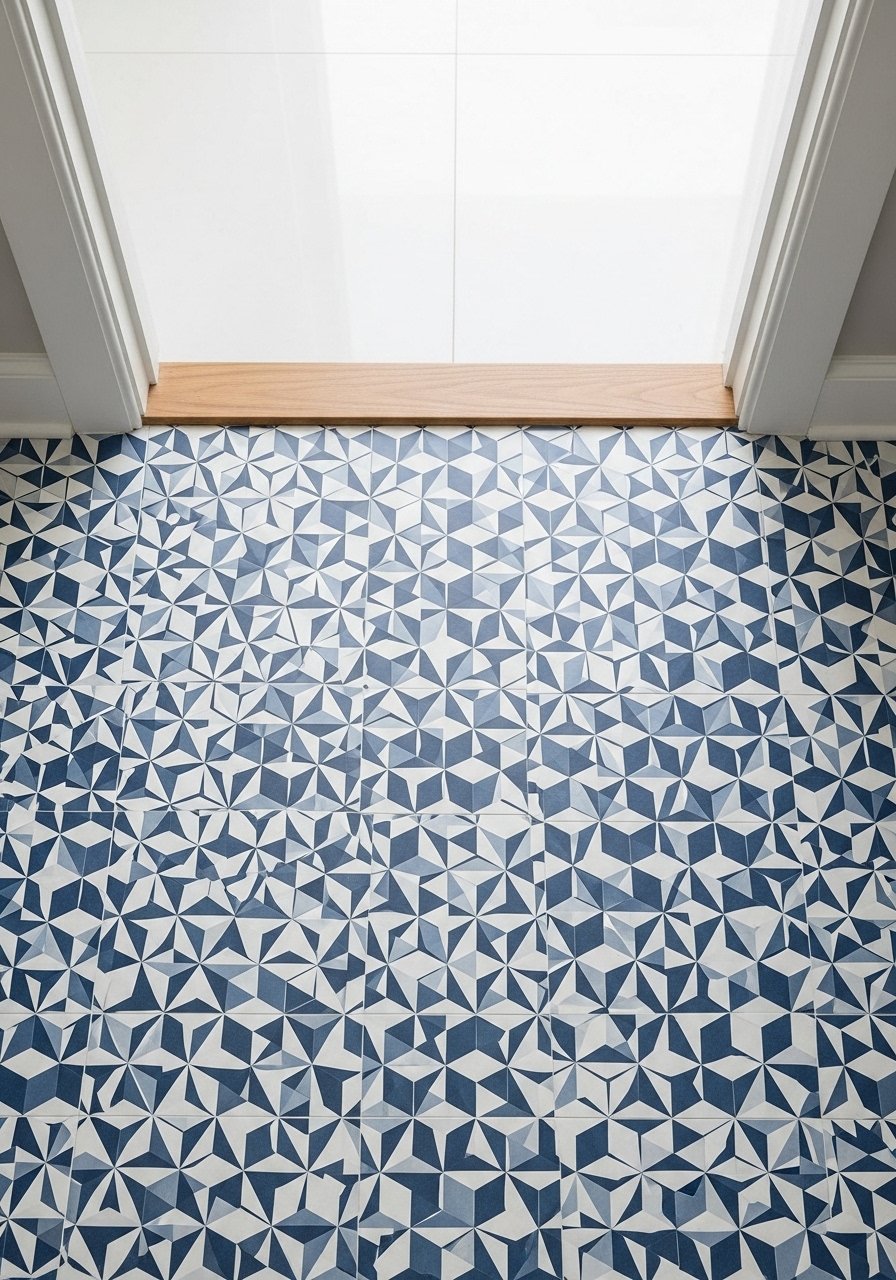
Floor tile stickers give the look of encaustic tile without heavy work. Use a roller to press edges and allow adhesive to set before heavy foot traffic.
Materials
- Peel-and-stick vinyl floor tiles (enough for floor area)
- Floor roller
- Utility knife
- Ruler and chalk line
- Cleaning solution
Instructions
- Clean floor thoroughly and let dry 24 hours if recently mopped.
- Snap chalk line to plan layout from center.
- Peel and apply tiles, pressing firmly and using floor roller to remove bubbles.
- Trim edges with a sharp utility knife.
- Wait 24 hours before placing rugs or heavy items.
- Clean with a damp mop; avoid harsh chemicals.
How to Display or Gift It
- Add a neutral bath mat to anchor the patterned floor.
- Include an accent towel set for a coordinated gift bundle.
- Slim Vanity Mirror with Built-In Shelf

A narrow mirror with an integrated shelf gives reflection and tiny storage without a bulky vanity. This is a great weekend build using plywood and a mirror strip.
Materials
- Slim mirror strip (custom cut)
- Plywood backing 24" x 6" x 1/2"
- Small shallow shelf (attach to plywood)
- Mirror adhesive or clips
- Sandpaper and paint
Instructions
- Cut plywood to size and sand edges smooth.
- Attach small shelf to bottom of plywood with wood glue and screws.
- Paint or finish plywood and let dry 24 hours.
- Affix mirror strip to plywood with mirror adhesive; press firmly.
- Mount assembly to wall with brackets.
- Allow adhesive 24 hours to cure before loading shelf.
How to Display or Gift It
- Use to keep your daily lotion and toothbrush within reach.
- Send as a practical, beautiful gift with a small bottle of hand soap.
You made it through 27 small bathroom remodel ideas designed to maximize storage, light, and perceived space without a gut renovation. From clever shelving and paint tricks to lighting and organizers, there are options for renters, weekend DIYers, and anyone who wants a bigger-feeling bathroom with minimal fuss. Pin your favorite projects, try one this weekend, and don’t forget to share which hack made the biggest difference for your small space.
Trust me, picking up a quality hot glue gun with temperature control changed how every single one of these projects turned out—no more stringy mess, no more burns. Which of these small bathroom remodel ideas will you try first?





