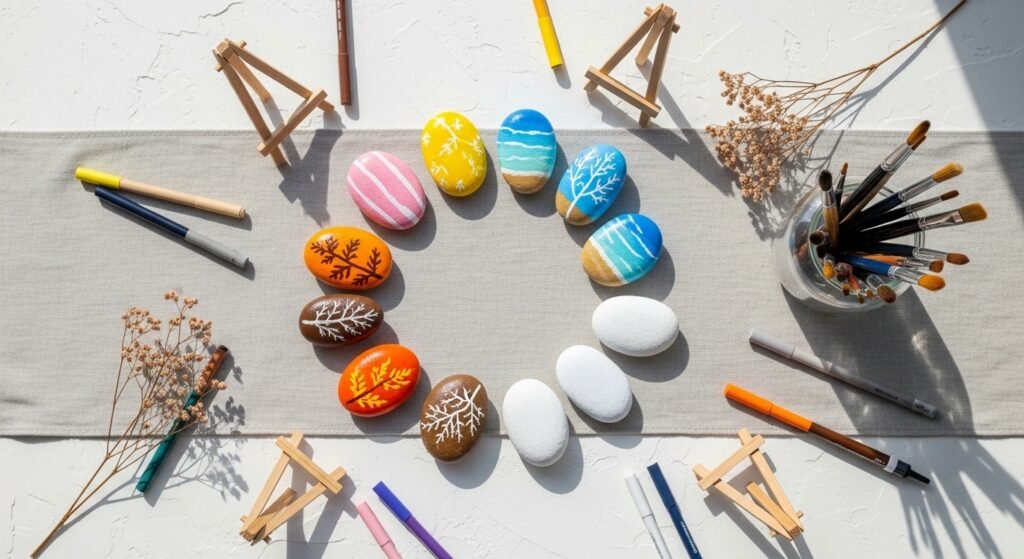
Spring into painting season—or keep your shelves fresh all year—with 30 creative, do-able seasonal stone painting ideas that bring charm to every corner of your home. Whether you collect smooth river rocks on walks or buy a bag to stash in your craft closet, these projects are designed to be approachable, low-cost, and joyful. You’ll find quick kid-friendly designs, elegant gifts, holiday-specific motifs, and a few resin-topped showstoppers for when you want something glossy and keepsake-worthy.
Each idea includes an exact materials list, step-by-step instructions with drying times, troubleshooting tips, and styling suggestions so your painted stones look polished on display or wrapped for gifting. I reach for my round river rocks and a set of acrylic paint pens for nearly every project—they speed things up and make details pop. Ready? Grab a foam brush and your favorite paint and let’s make a year’s worth of cute, seasonal decor.
1. Spring Floral Posies (seasonal stone painting ideas: spring florals)
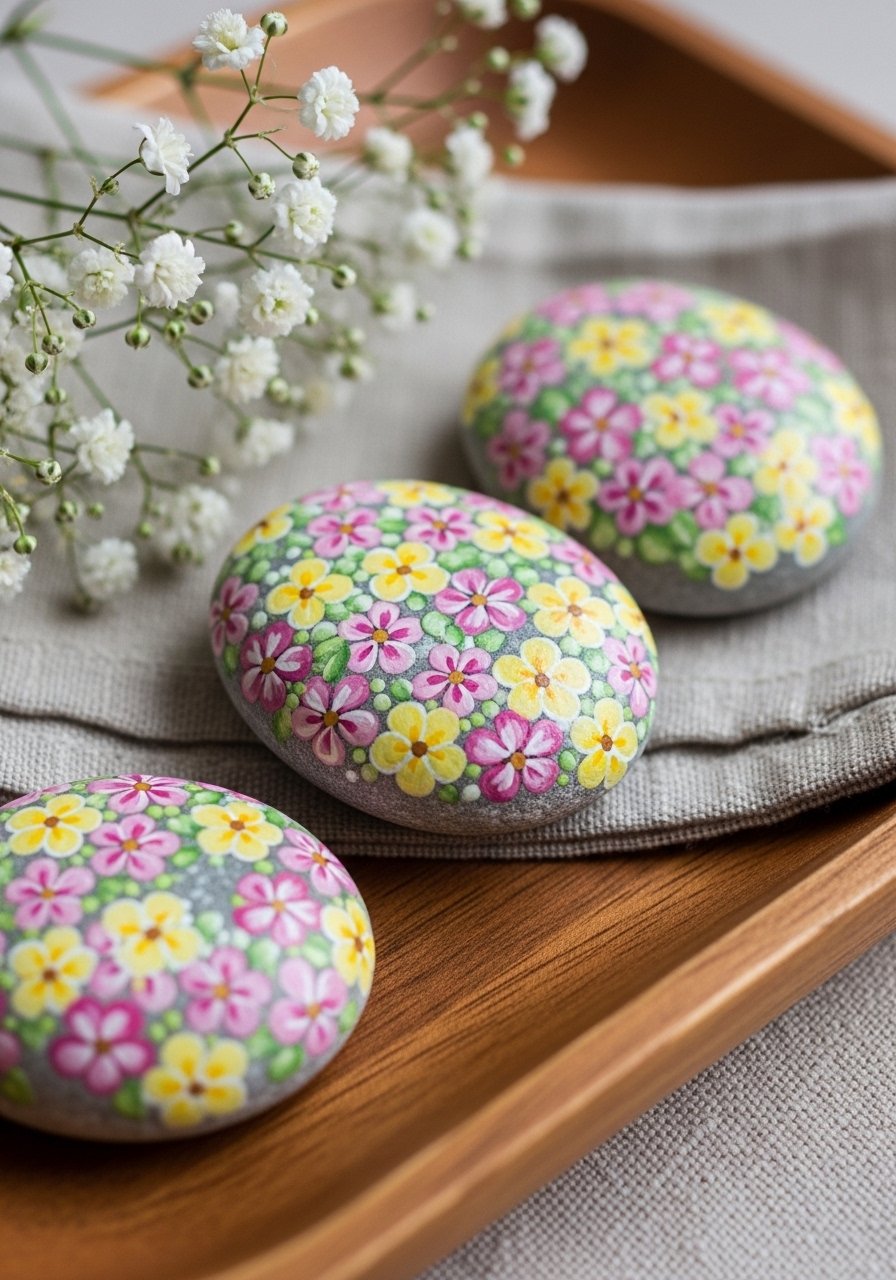
These sweet floral stones mimic cottagecore seed packet charm. Tiny daisies, ranunculus, and sprigs look delicate but paint up quickly. Beginners and kids love the simple dot-and-petal method. The texture is soft matte, perfect for a windowsill cluster.
Materials
- 6–8 smooth river rocks, 2–3 in (pick similar sizes)
- Acrylic craft paint, pastel set (12-color)
- White acrylic paint pen, 0.7 mm
- Detail round brushes, sizes 0 and 2
- Flat foam brush, 1 inch
- Matte Mod Podge, 2 coats
- Paper towel and small palette
- Fine-grit sandpaper, 220 grit
Instructions
- Wash and dry rocks; sand any rough spots with 220 grit until smooth.
- Prime each rock with one thin coat of white acrylic using the foam brush; let dry 20–30 minutes.
- Block in base colors in pastel shades; two thin coats give opaque coverage—allow 30 minutes between coats.
- Use a size 0 round brush to paint small petals (three to five strokes per petal).
- Add centers with the white paint pen or a dotting tool; let dry 10 minutes.
- When fully dry and cool to the touch (about 1–2 hours), apply two thin coats of Matte Mod Podge, 15 minutes drying between coats.
- Inspect for tackiness; fully dry after 24 hours before handling heavily.
How to Display or Gift It
- Arrange a trio on a small wooden easel for a mantel vignette.
- Tuck one in a flower pot as a living-garden tag.
- Wrap in clear cello with dried lavender for gifting; use a kraft box for multiples.
- Store extras flat in a stackable craft organizer to avoid chipping—my go-to is a clear, multi-drawer craft cabinet.
2. Pastel Easter Egg Rocks
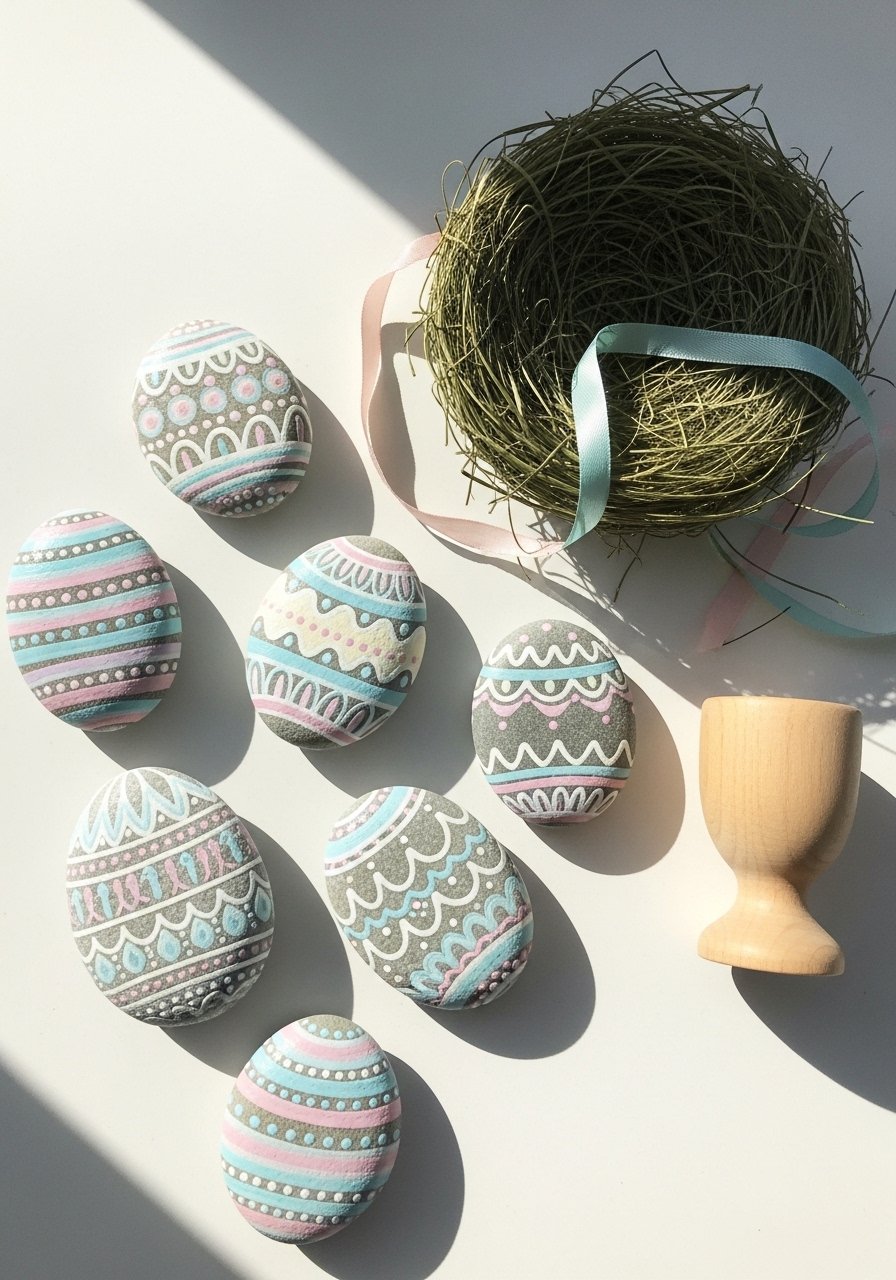
These egg-shaped stones are a delightful, reusable table scatter for Easter brunch. The glossy finish gives them an enamel-egg look that's satisfying to hold. Great for adults and kids painting together.
Materials
- 8–12 oval river rocks, 2–3 in
- Pastel acrylic paint set
- Painter’s tape, 0.25 in
- Fine-tip paint pens, assorted colors
- Gloss Mod Podge, 2 coats
- Small sponge dauber
- Paper plate palette
Instructions
- Clean rocks and dry. Tape an even center line with painter’s tape for a crisp stripe if desired.
- Base coat each rock in pastel color; apply two thin coats, drying 20 minutes each.
- Remove tape carefully. Use fine-tip paint pens for dots, scallops, and tiny accents.
- Sponge on texture with a sponge dauber for speckled effects; let dry 30 minutes.
- Seal with two coats of Gloss Mod Podge, 20 minutes between coats; cure 24 hours.
How to Display or Gift It
- Scatter across the Easter table as place-holders with names written in pen.
- Pop in glass bowls with faux moss for a centerpiece.
- Keep extras in a mason jar wrapped with ribbon for gifting.
3. Garden Marker Pebbles (spring garden)
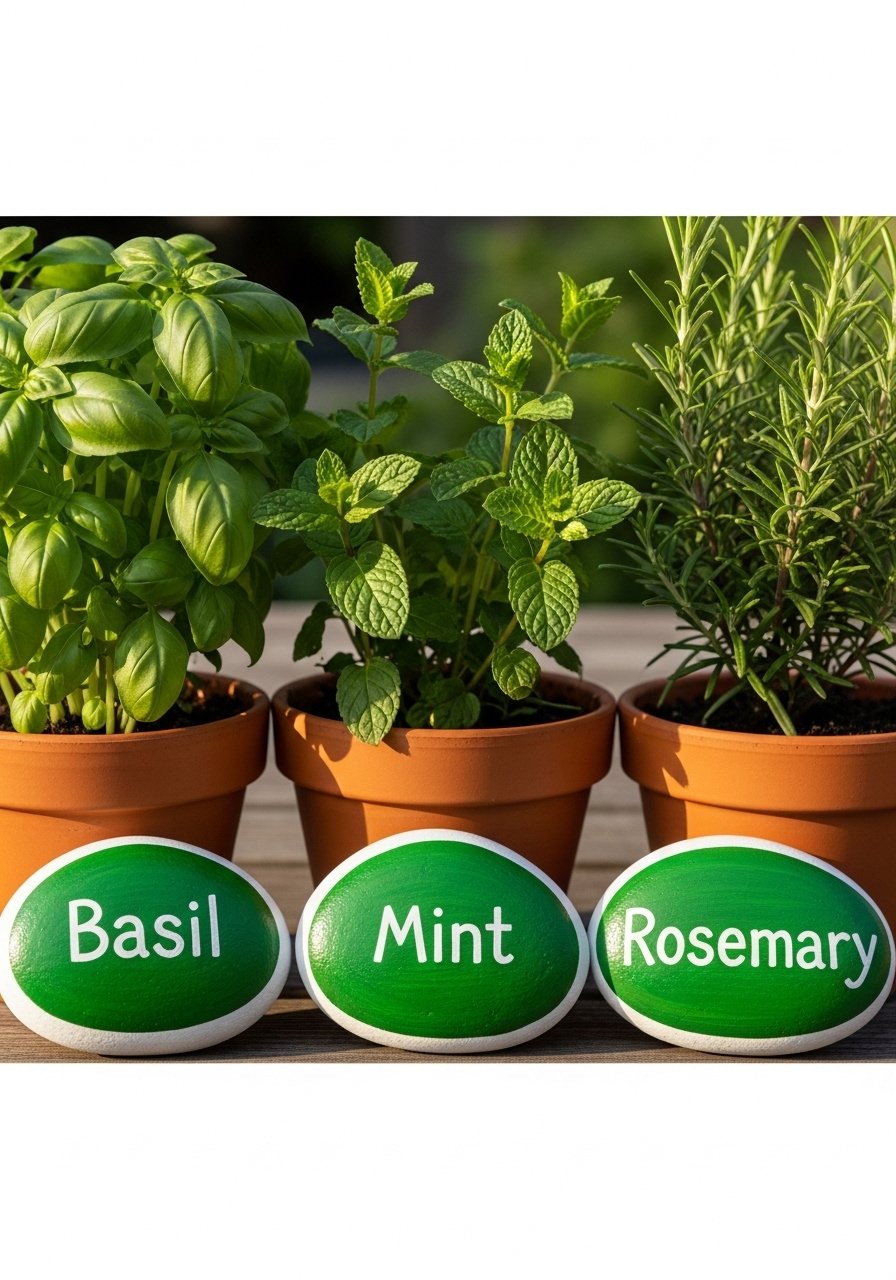
Turn rocks into durable garden markers that survive watering and sun. Use outdoor-grade paint and a weatherproof sealer. These look great in herb windowsills or potted patios.
Materials
- 12 flat river rocks, 2–3 in
- Outdoor acrylic paint, greens set
- Outdoor clear acrylic sealer spray
- 0.5 mm permanent paint marker
- Ruler and pencil
- Gloves and mask for spraying
Instructions
- Clean and dry rocks; sketch names faintly in pencil.
- Paint base color—two coats for solid coverage, drying 30 minutes between coats.
- Write herbs with a 0.5 mm permanent paint marker; let ink dry 10–15 minutes.
- Apply two light coats of outdoor acrylic sealer spray, 15 minutes between coats; cure 24 hours.
- Test by sprinkling water—no bleeding means sealed.
How to Display or Gift It
- Insert into soil near plants or line them across a window box.
- Bundle sets in a kraft gift box with seed packets.
- Store unused markers in a waterproof container between seasons.
4. Bee-Friendly Pollinator Stones (spring accent)
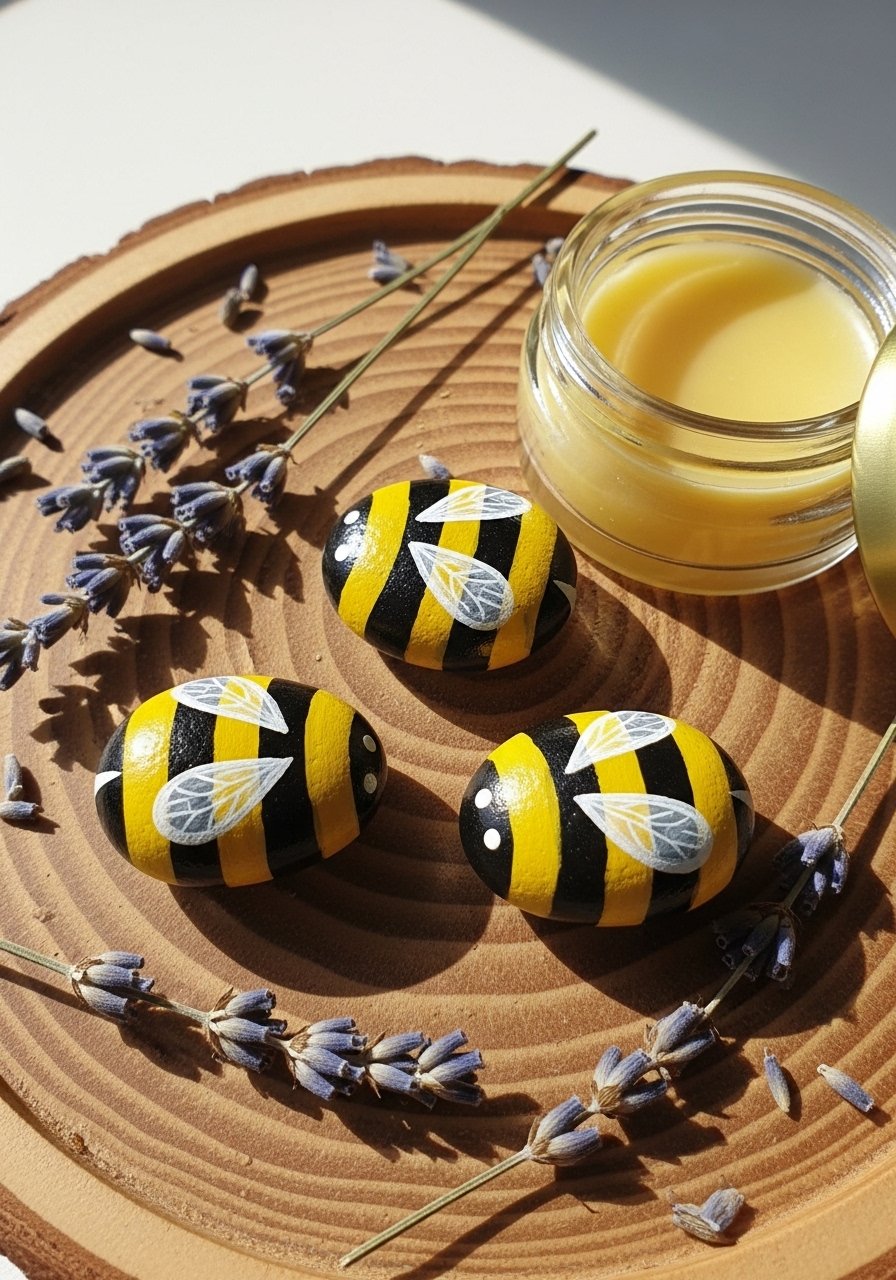
Tiny bumblebees painted on stones add a playful spring pop. Use a gloss sealer for a slight sheen that mimics a bee's glossy body.
Materials
- 6 small round stones
- Acrylic paint: yellow, black, white
- Fine liner brush
- Gloss spray sealer
- Toothpicks for dots
- Palette and water cup
Instructions
- Prime stones with a thin white coat; dry 20 minutes.
- Paint yellow base; two coats may be needed—dry 20–30 minutes.
- Use the fine liner brush to add black stripes and head.
- Add wing highlights with white; small dots with a toothpick.
- Spray with gloss sealer outdoors in light strokes. Cure 24 hours.
How to Display or Gift It
- Glue to a thin wooden magnet backing for fridge art.
- Cluster with tiny succulents in a tray.
- Gift in a tin with a handwritten pollinator facts card.
5. Floral Mandala Thumbstones (spring meditation stones)
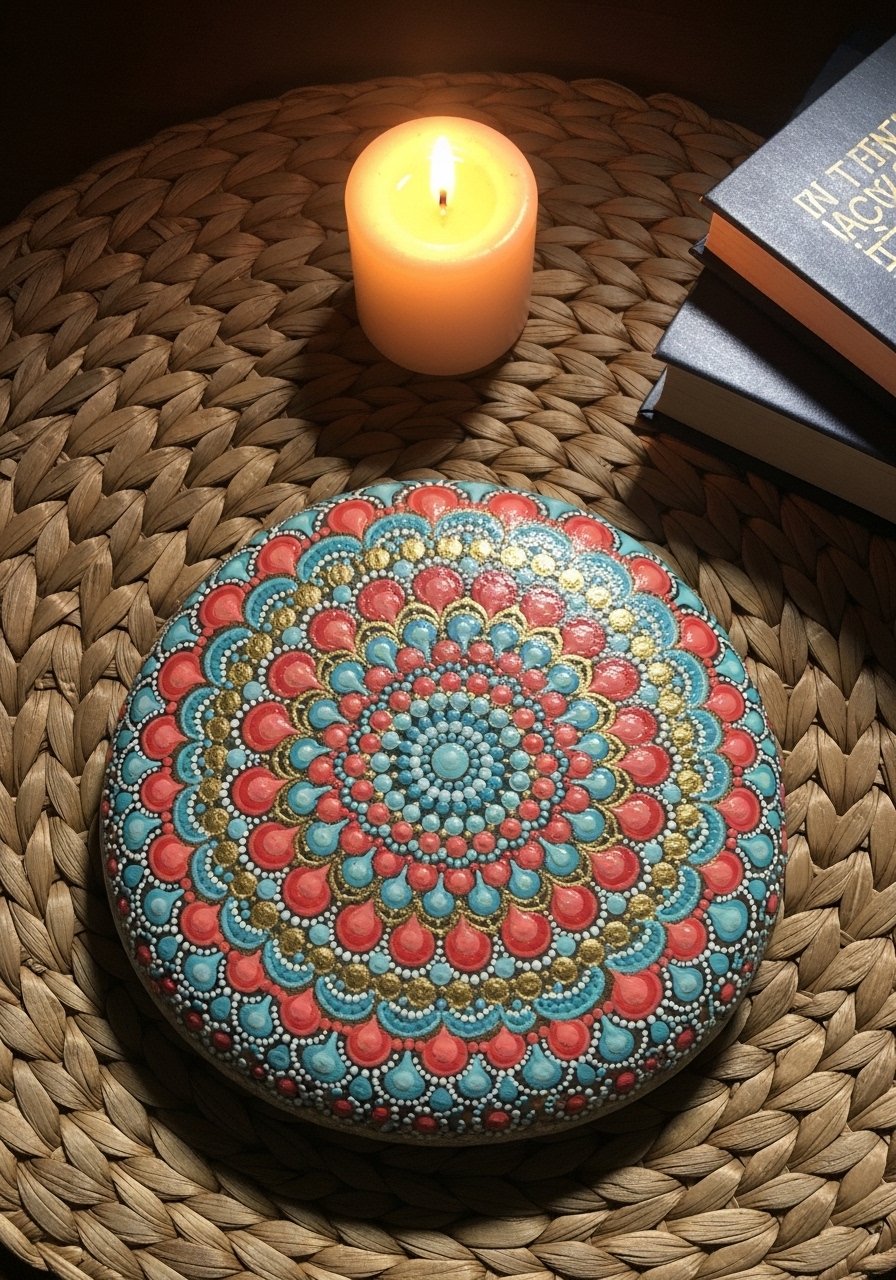
These mandala thumbstones feel meditative—great for gifting as worry stones. Use metallic paint sparingly for a subtle sheen.
Materials
- 1–2 large flat stones, 3–4 in
- Fine dotting tools set
- Acrylic paints: coral, teal, white, gold
- Sealant: matte or satin spray
- Small foam brush
Instructions
- Clean stone and paint base color; let dry 30 minutes.
- Mark center and use dotting tools to form concentric patterns.
- Build outward with varying dot sizes; allow 10–15 minutes between areas.
- When fully dry, mist with satin spray; cure 24 hours.
How to Display or Gift It
- Place near a reading chair for calming rituals.
- Wrap in a small velvet pouch for a thoughtful gift.
- Keep spares in a divided craft box to prevent rubbing.
6. Beach Memory Stones (summer)
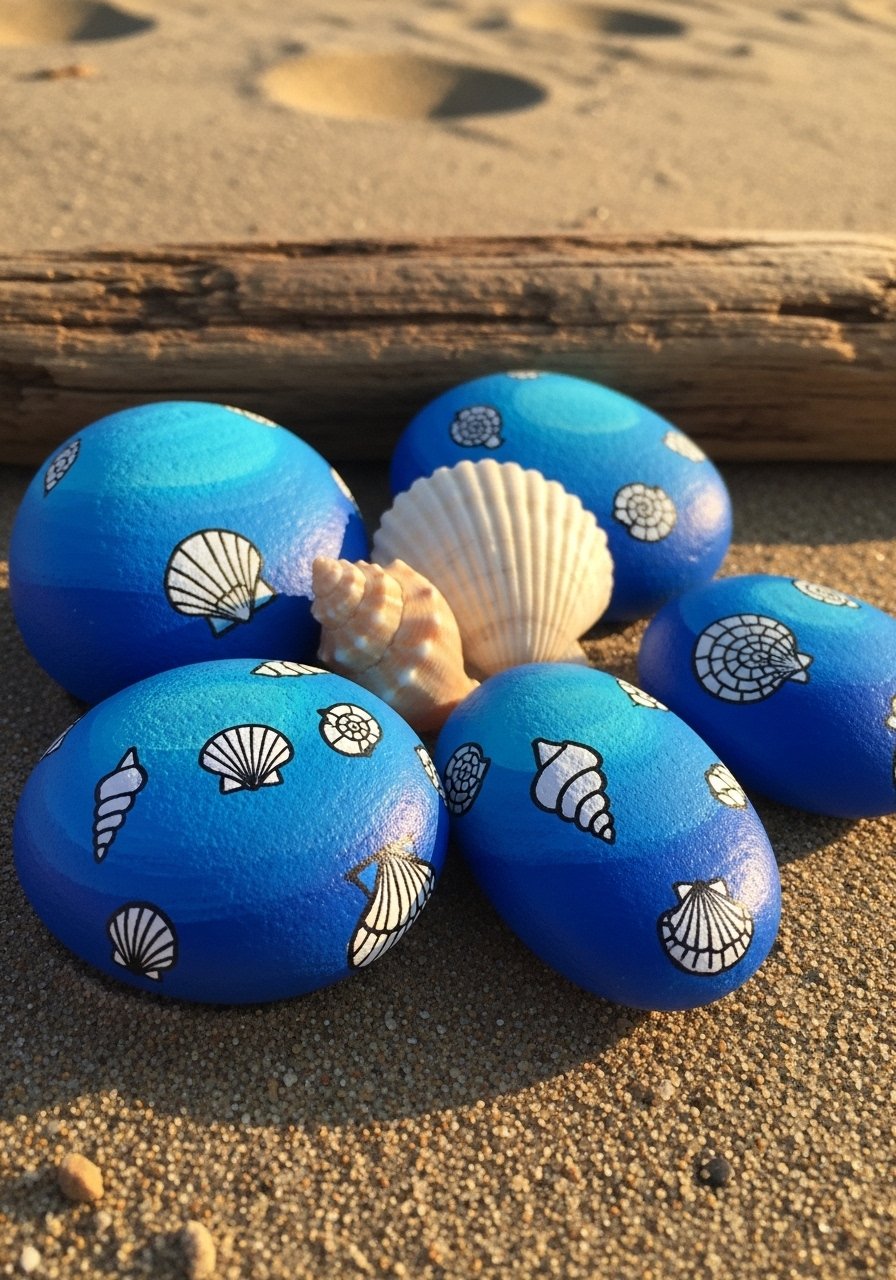
Capture seaside memories with beach-hued stones—perfect for summer mantel displays or as travel mementos. Add sand-texture varnish for tactile effect.
Materials
- 8–10 smooth beach stones
- Acrylic paint set: ocean tones
- Sand texture gel medium
- Small flat brush
- Gloss varnish
- Fine liner paintbrush
Instructions
- Paint base ocean gradients with blended blues; allow 30 minutes to dry.
- Mix sand gel medium for a textured edge and apply with flat brush, dry 1 hour.
- Use fine liner brush for shell/white highlight details.
- Seal with gloss varnish—two coats, 20 minutes apart; cure 24 hours.
How to Display or Gift It
- Float in a shallow glass bowl filled with sand as a centerpiece.
- Add a label with location and year for keepsakes.
- Pack in tissue paper and a kraft box for gifting.
7. Nautical Anchor Stones (summer coastal)

Nautical anchors are crisp and graphic. Use a stencil or a Cricut-cut template for uniform shapes.
Materials
- 6 oval stones
- Navy blue acrylic paint
- White acrylic paint pen
- Small anchor stencil or cut template (Cricut)
- Clear matte sealer
Instructions
- Base coat stones in navy—two coats, drying 20–30 minutes between.
- Position stencil and secure with painter’s tape.
- Fill anchor with white paint using a small foam brush; remove stencil carefully.
- Touch up edges with a white paint pen if needed.
- Seal with matte sealer; cure 24 hours.
How to Display or Gift It
- Arrange on entryway tray with coastal keys.
- Tie three together with twine and hang on a hook as rustic decor.
- Store flat in a shallow drawer between seasons.
8. Seashell Mosaic Stones (summer craft)
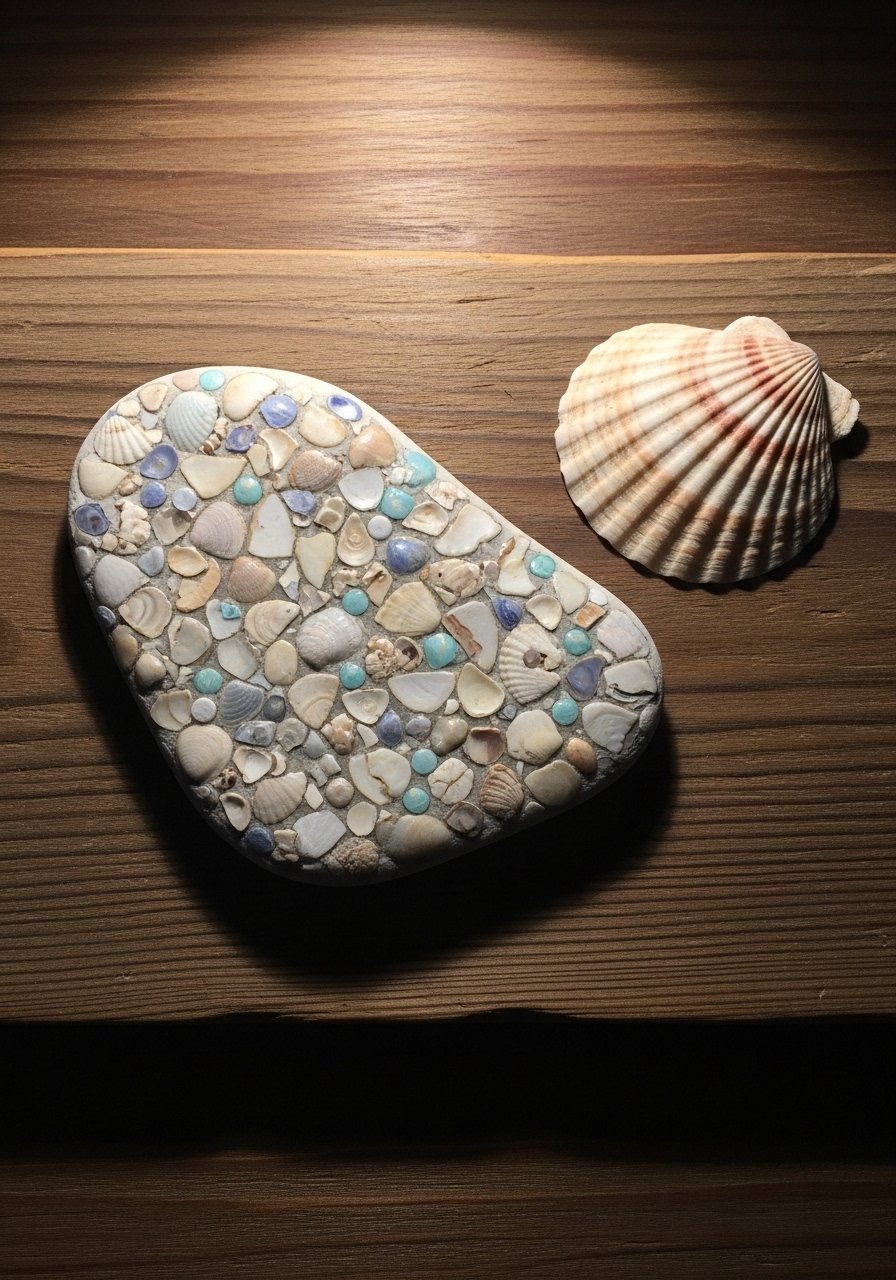
Mix tiny real shells with painted pieces for a mini mosaic. Epoxy secures shells and adds a river-rock shine.
Materials
- 1 large flat stone (4–5 in)
- Small shells and shell fragments, 1–2 oz
- Acrylic paints in sea tones
- Clear epoxy resin kit
- Disposable mixing cups and stir sticks
- Gloves and respirator mask
Instructions
- Arrange shell pieces on a painted base to plan design.
- Glue down larger shells with craft glue; let set 1 hour.
- Mix small batch of epoxy per instructions; pour thin layer over stone to encase shells—work quickly.
- Degas with a heat gun for 5–10 seconds to remove bubbles.
- Cure per resin kit instructions (usually 24–72 hours), then add a second coat if needed.
How to Display or Gift It
- Display on a small wooden easel in bathrooms.
- Gift in a padded box with a seaside note.
- Keep away from direct sunlight to maintain resin clarity.
(Resin product link example: epoxy resin kit)
9. Sunburst Citrus Stones (summer citrus)
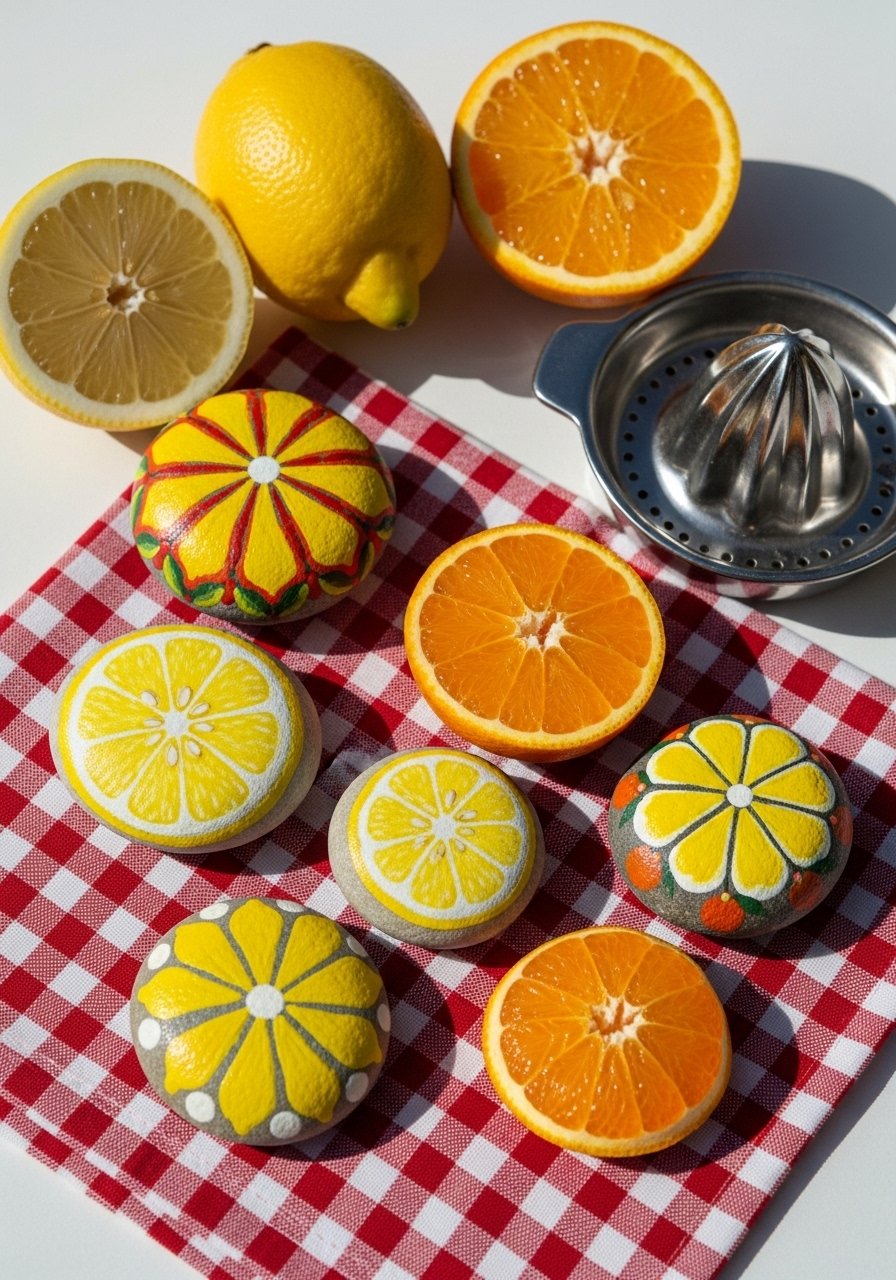
These bright citrus stones add sunny energy to kitchen shelves or picnic tables. Use a brayer to get smooth base coats.
Materials
- 6 small round stones
- Acrylic paints: lemon yellow, tangerine, white
- Mini brayer roller
- Fine liner brush
- Gloss varnish
Instructions
- Prime rocks white and dry 20 minutes.
- Roll on base citrus color with brayer for even coverage; two coats may be needed.
- Paint thin white segments for rind details with a fine liner.
- Add highlight dots and seal with gloss varnish, two coats, cured 24 hours.
How to Display or Gift It
- Place in a fruit bowl for a playful kitchen accent.
- Tie a set with gingham ribbon as hostess gifts.
- Store flat in a shallow drawer to preserve gloss.
10. Patriotic Flag Rocks (summer holidays)
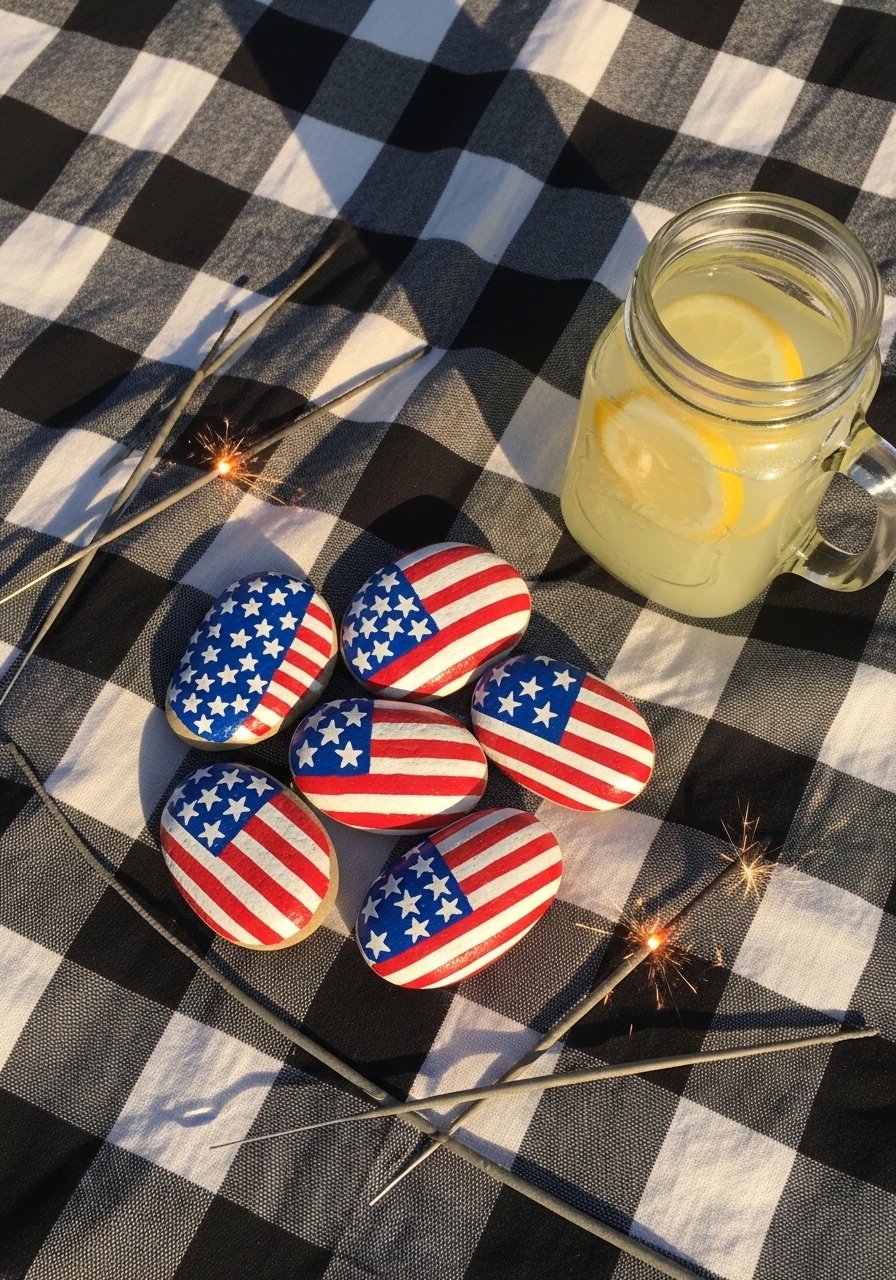
Perfect for Fourth of July tablescapes—lightweight and reusable decorations that withstand outdoor use when sealed.
Materials
- 12 medium rocks
- Red, white, blue acrylics
- Star stencil
- Outdoor acrylic sealer spray
- Small sponge brush
Instructions
- Paint base colors; let dry 20–30 minutes.
- Use star stencil for the blue section and paint small stripes with a thin brush.
- After ink dries, apply two light coats of outdoor sealer; cure 24 hours.
- Check for tackiness and add another light coat if needed.
How to Display or Gift It
- Scatter on picnic tables as placeholders.
- Glue magnets to the back for patriotic fridge decor.
- Gift as a set in burlap with ribbon.
11. Golden Leaf Acorn Stones (fall)
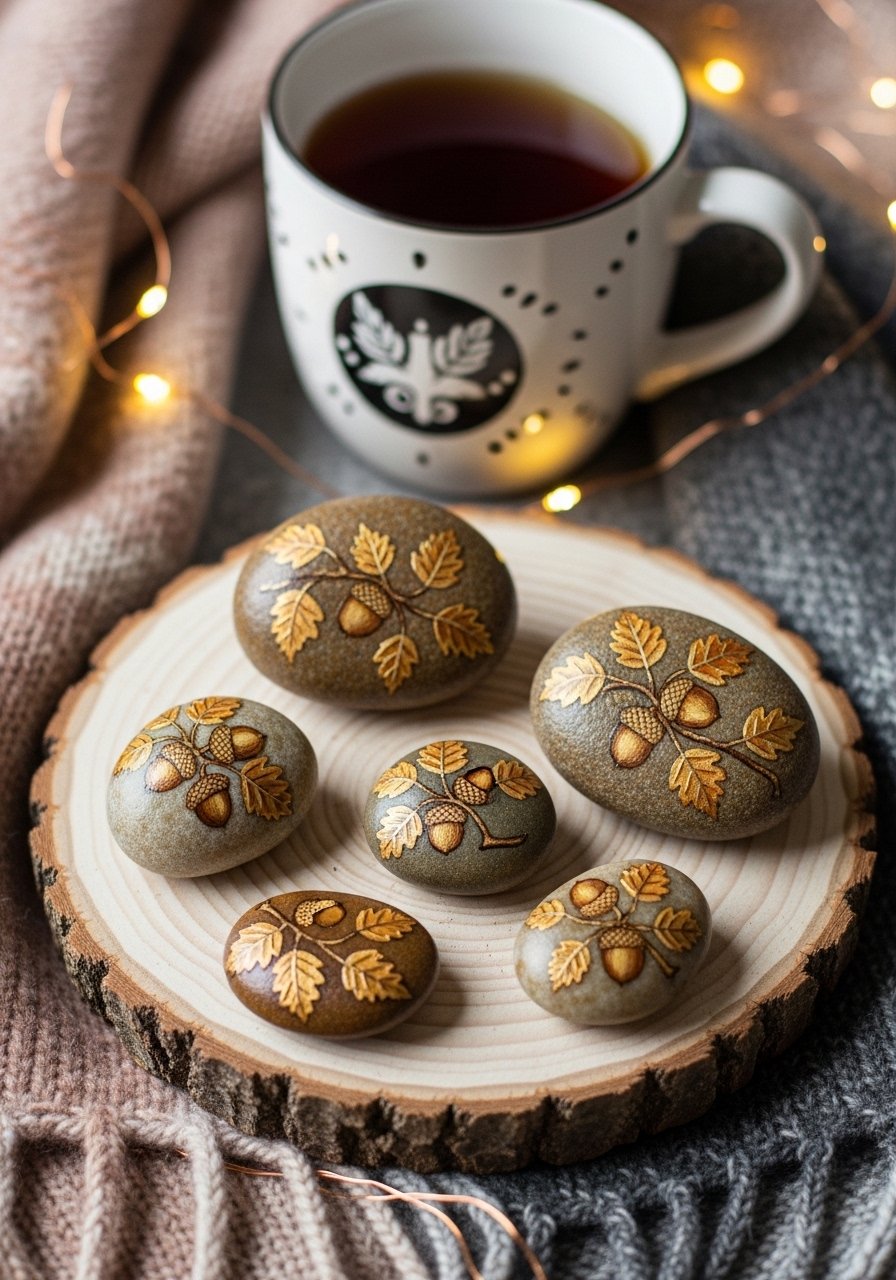
These capture cozy fall textures in miniature. Metallic gold leafing paint adds a luxe feel.
Materials
- 8 small stones
- Acrylic paints: burnt sienna, ochre, white
- Metallic gold acrylic paint
- Fine leafing brush
- Matte sealer
Instructions
- Prime stones with a tan base; dry 20–30 minutes.
- Paint leaves and acorns with small brush in layers; allow 10–15 minutes between layers.
- Add gold highlights with a fine brush for veins and acorn caps.
- Seal with matte sealer; cure 24 hours.
How to Display or Gift It
- Thread several on twine as rustic ornaments.
- Tuck into place settings with name tags.
- Keep in a linen-lined box for seasonal rotation.
12. Pumpkin Patch Rocks (fall)
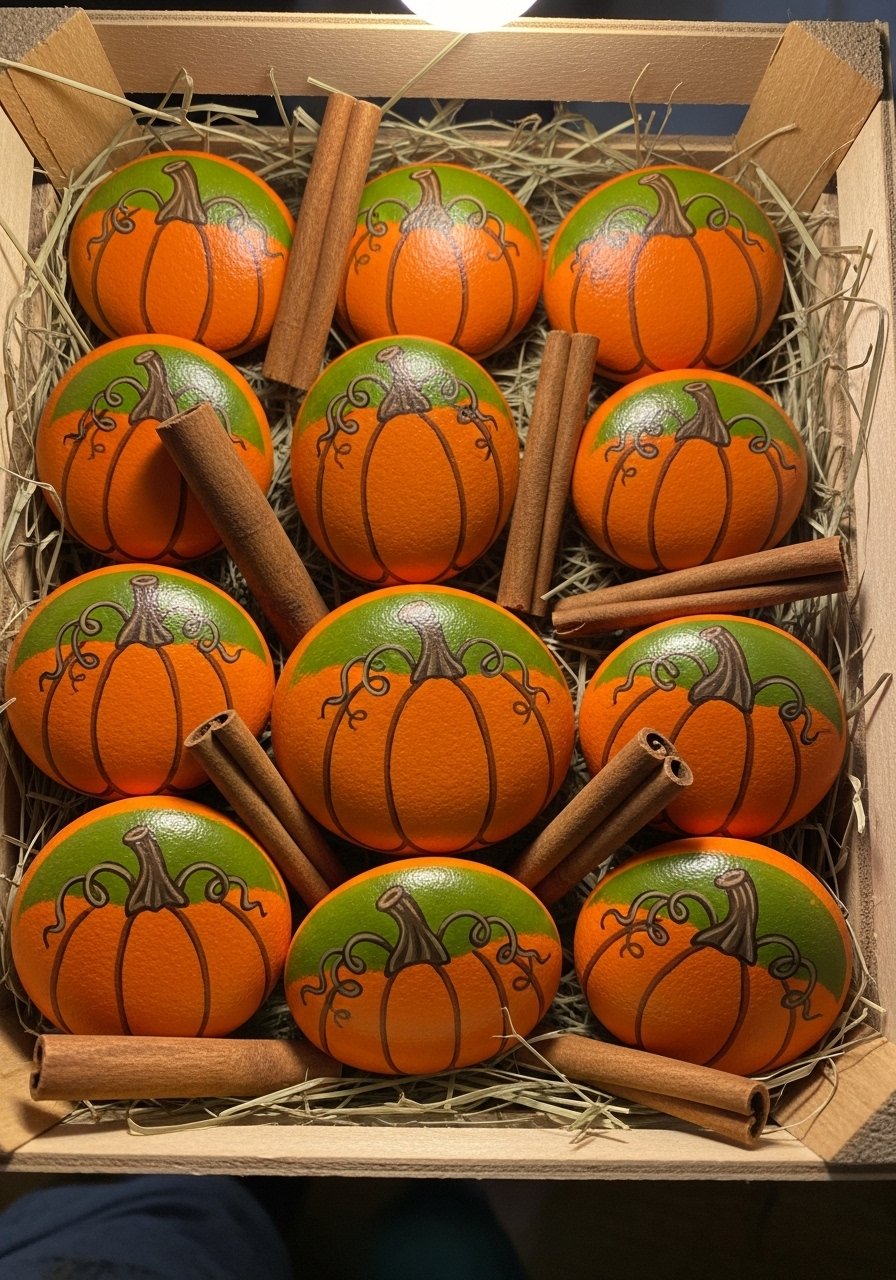
Cute as table scatter or as a kid-friendly craft for harvest parties. Use a toothpick for stem texture.
Materials
- 10 oval stones
- Orange and green acrylic paints
- Toothpicks or dotting tools
- Gloss sealant spray
- Small craft knife for stem texture (optional)
Instructions
- Paint base orange—two coats, drying 20 minutes between.
- Use a toothpick to etch vertical pumpkin ridges through the paint for texture.
- Paint stems in green; add shadow lines.
- Seal with gloss spray and allow 24 hours to cure.
How to Display or Gift It
- Fill a small wooden crate as a centerpiece.
- Add to baskets for teacher gifts.
- Store in a ventilated container between fall seasons.
13. Leaf Imprint Rocks (fall textured)
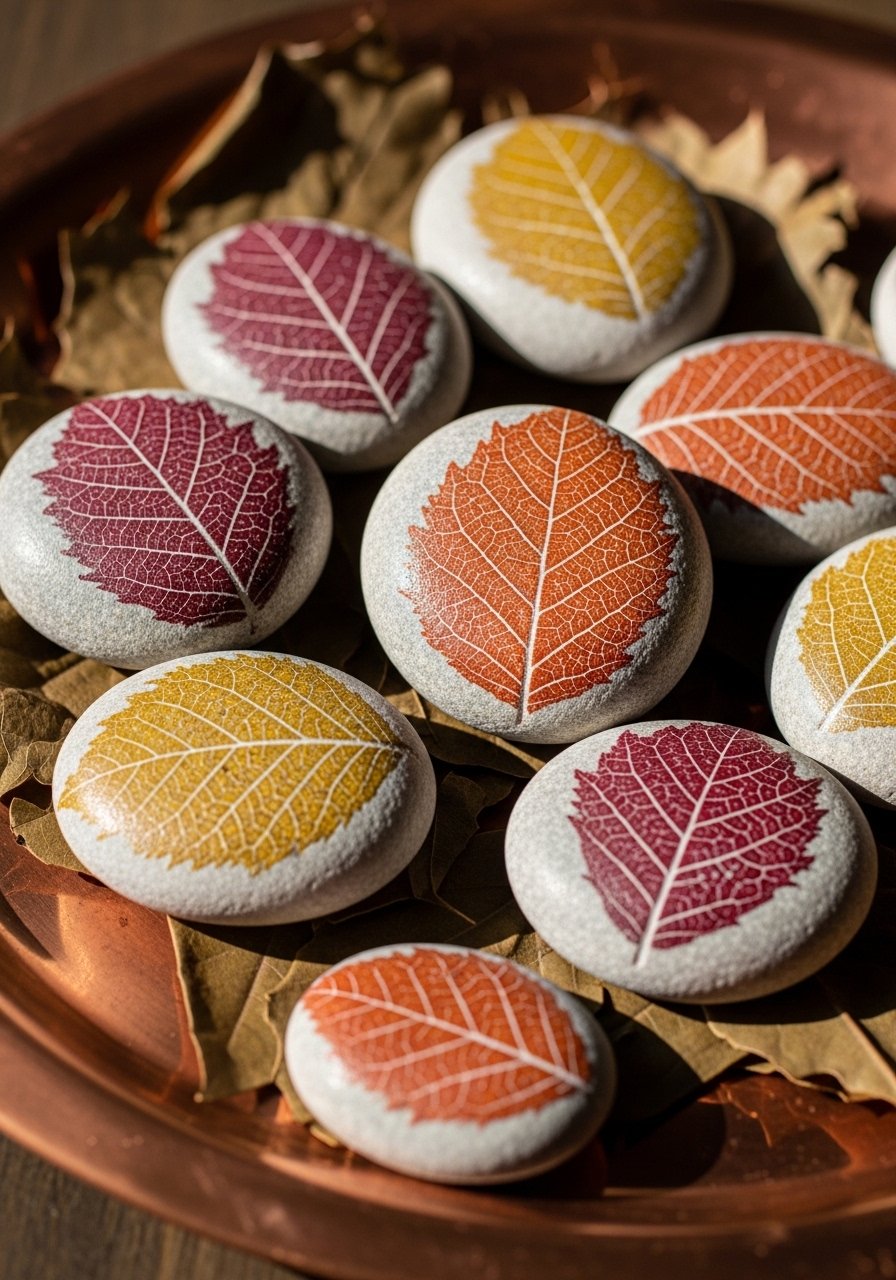
Instead of painting leaves freehand, press real leaves into wet paint for organic vein textures that look authentic.
Materials
- Flat stones (6)
- Acrylic paint in fall tones
- Real pressed leaves
- Brayer roller
- Matte sealer
Instructions
- Paint a thin base coat and while tacky, press leaf onto stone.
- Roll gently with a brayer to transfer veins.
- Remove leaf carefully; touch up edges.
- Seal with matte sealer; cure 24 hours.
How to Display or Gift It
- Arrange in a shallow bowl for a fall coffee table.
- Pair with a candle and a sprig of cinnamon for gifting.
- Store in a flat craft drawer to avoid scratching.
14. Cozy Sweater Pattern Stones (fall hygge)

Bring knitwear vibes to your shelf without the bulk. Repeating motifs look intricate but are easy if you use a thin liner brush.
Materials
- 8 medium stones
- Acrylic paints: cream, rust, brown
- Liner brush
- Pencil for stenciling
- Satin sealer
Instructions
- Paint a neutral base; let dry 30 minutes.
- Sketch simple geometric patterns lightly in pencil.
- Fill with paint using a liner brush; allow 10 minutes drying between motifs.
- Seal with satin sealer; cure 24 hours.
How to Display or Gift It
- Pair with a handmade knit swatch for a bundled gift.
- Use on side tables near cozy throws.
- Store in a fabric-lined box to avoid scratches.
15. Halloween Jack-O’-Lantern Steppers
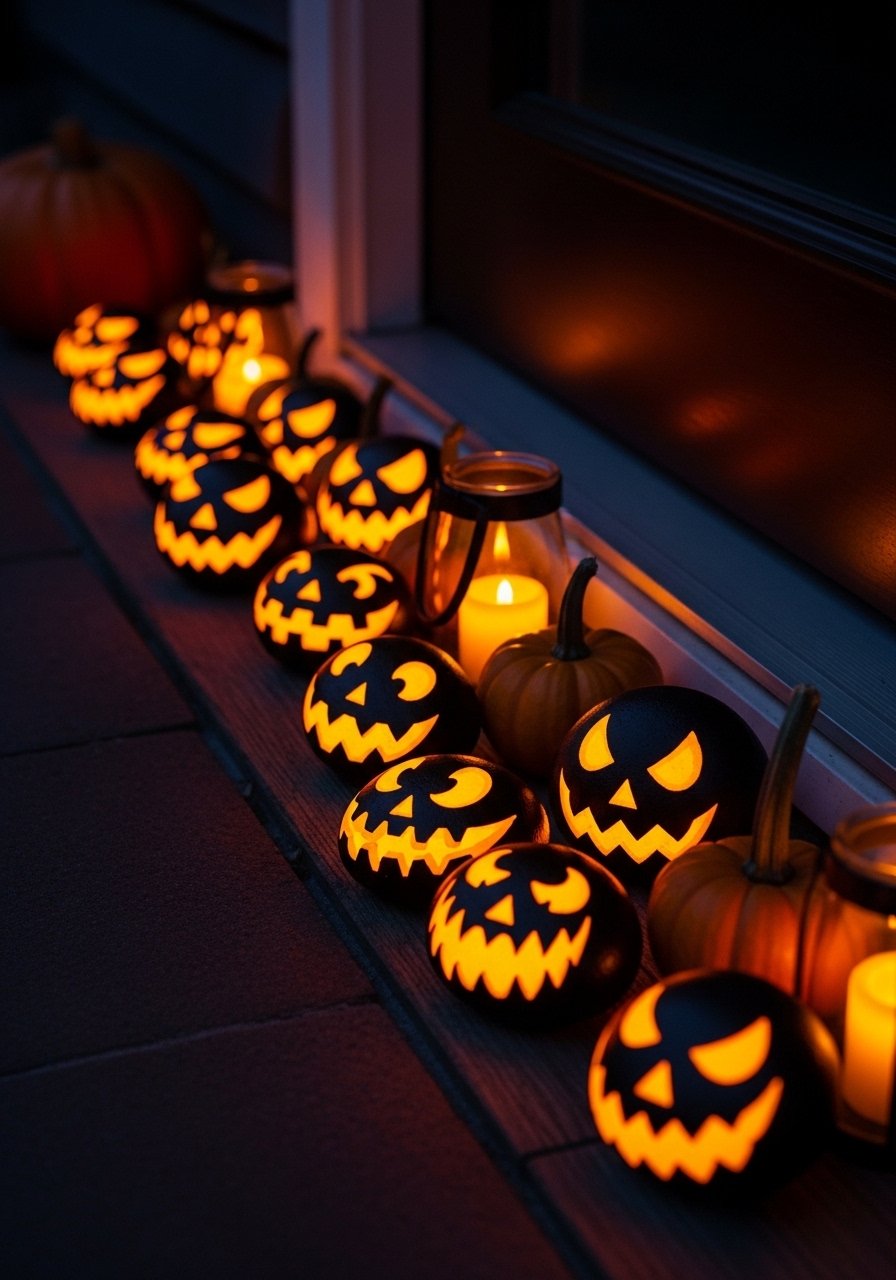
These spooky faces are great for front-porch steps or a kid-friendly Halloween scavenger hunt.
Materials
- 10 round stones
- Bright orange and black acrylic
- Detail brush
- Glow-in-the-dark paint (optional)
- Outdoor sealer
Instructions
- Paint base orange—two coats, drying 20 minutes each.
- Sketch faces in pencil; fill in black with a detail brush.
- Add glow paint inside eyes/mouth if using; dry 30 minutes.
- Spray with outdoor sealer; cure 24 hours.
How to Display or Gift It
- Line walkway steps for a safe, reusable decoration.
- Hide them in a Halloween scavenger hunt for kids.
- Wrap a trio in tissue and ribbon for teacher gifts.
16. Spooky Cat Silhouettes (Halloween)
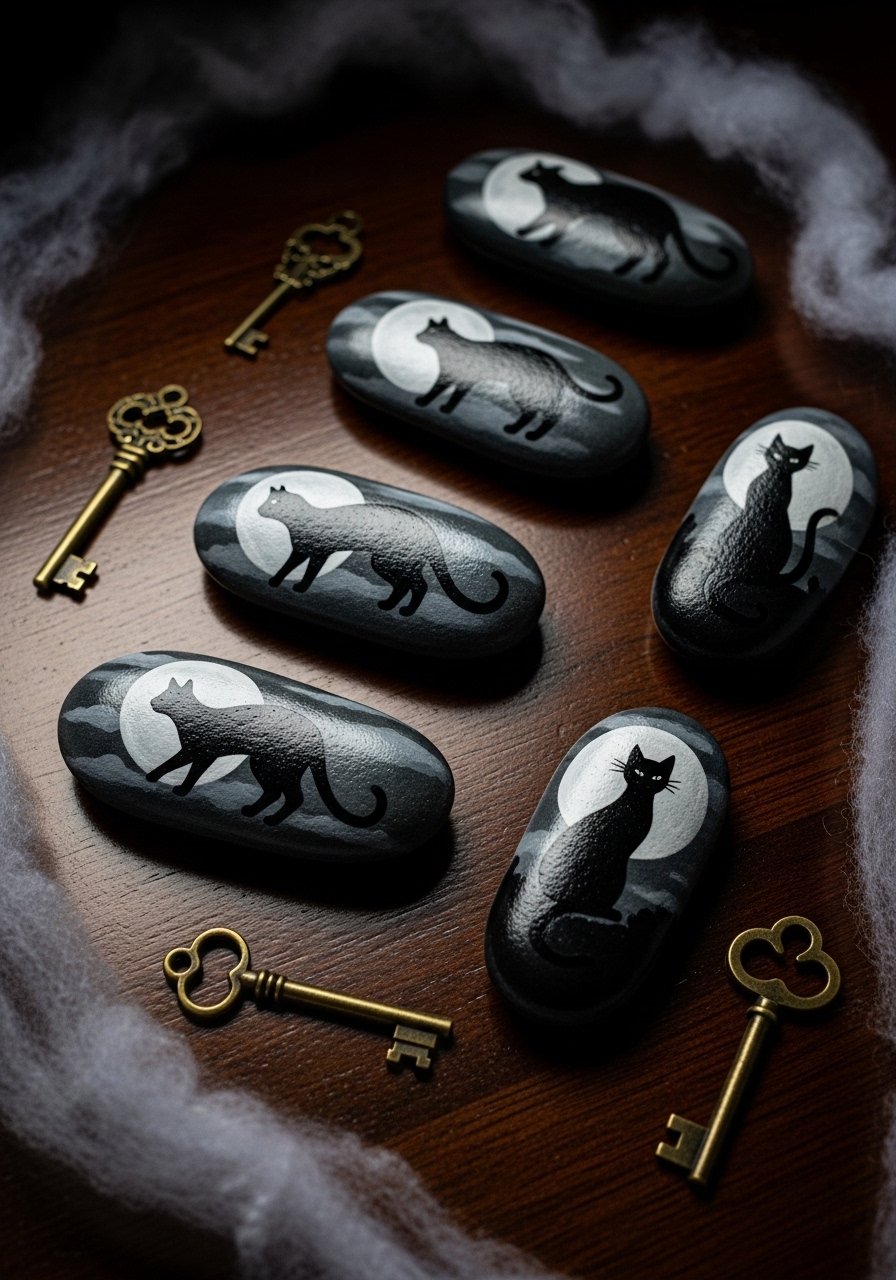
Sleek and minimal, these silhouette stones read well at a distance. Use a stencil for perfect shapes.
Materials
- 6 long oval stones
- Black acrylic paint
- Gray base paint
- Small cat silhouette stencil
- Matte sealer
Instructions
- Base coat in soft gray; let dry 20–30 minutes.
- Secure stencil and fill with black paint; remove carefully.
- Touch up with a detail brush as needed.
- Seal with matte sealer and cure 24 hours.
How to Display or Gift It
- Line on a mantel with orange candles for drama.
- Package in small kraft boxes with ribbon for seasonal gifts.
- Keep in craft drawer until next Halloween.
17. Thanksgiving Thankful Stones
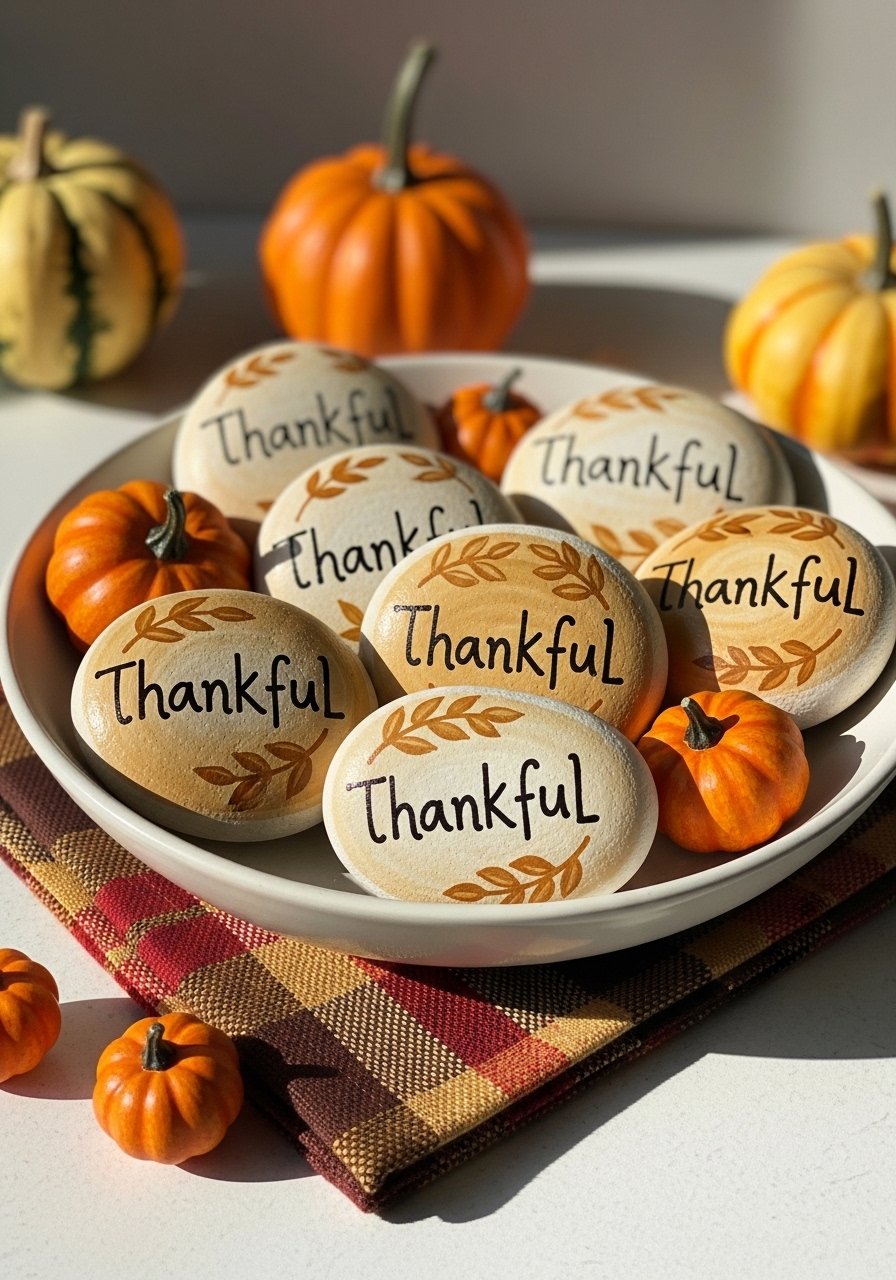
Use these as place-setting tokens or as a gratitude jar where guests add painted stones with notes.
Materials
- 12 stones
- Acrylic paints: cream, brown
- 0.5 mm permanent paint marker
- Small bowl or jar for collection
- Matte sealer
Instructions
- Paint base cream; dry 20–30 minutes.
- Write "thankful" or short words with a 0.5 mm paint marker.
- Add tiny leaf accents and let ink dry 10 minutes.
- Seal with matte sealer and cure 24 hours.
How to Display or Gift It
- Scatter on the Thanksgiving table for each guest.
- Use a jar labeled "Gratitude" for family sharing.
- Store extras in a small wooden box between gatherings.
18. Winter Snowflake Stones (winter)
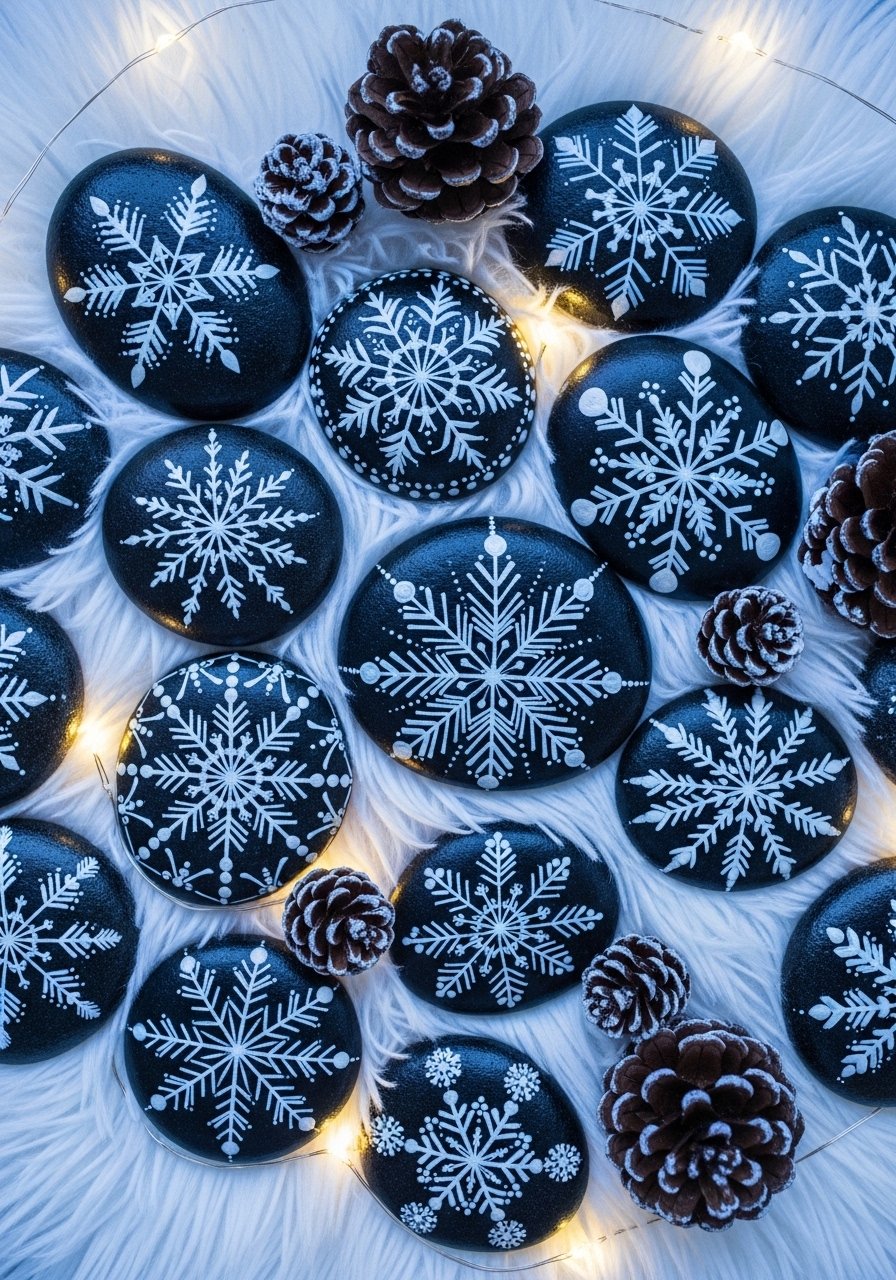
Snowflakes are timeless winter decor. A fine white paint pen makes crisp arms and dots.
Materials
- 8 flat dark stones
- White acrylic paint pen
- Silver metallic paint
- Fine-tipped brush
- Matte or satin sealer
Instructions
- Prime stones with dark base for contrast; dry 30 minutes.
- Use the white paint pen to draw snowflake arms—start at center and work outward.
- Add tiny silver dots for sparkle.
- Seal with satin sealer; cure 24 hours.
How to Display or Gift It
- Float in a glass cloche with faux snow for tables.
- Tie into a ribbon as a hostess gift.
- Store in a padded craft drawer after the season.
19. Holly Berry Mini Rocks (holiday)
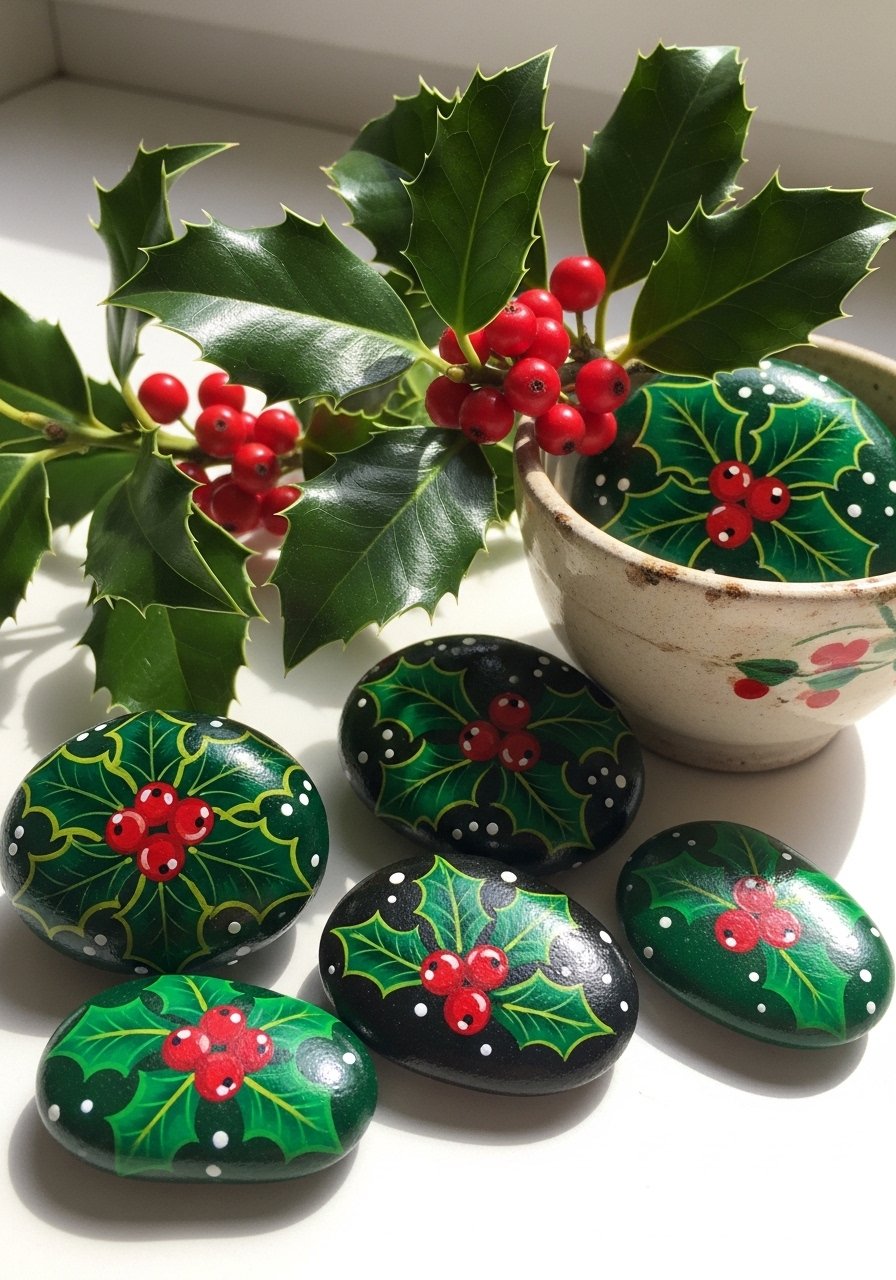
These classic holiday stones are understated and elegant. Use a glossy finish for berry shine.
Materials
- 12 small stones
- Green and red acrylic paint
- Gloss varnish
- Fine liner brush
- Gold paint (optional)
Instructions
- Paint base green and dry 20–30 minutes.
- Add red berry dots with a small round brush.
- Highlight berries with a tiny white dot for shine.
- Seal with gloss varnish; cure 24 hours.
How to Display or Gift It
- Tuck into wreaths or garlands as accents.
- Gift a set in a little tin with holiday tissue.
- Keep in a labeled holiday container for repeat use.
20. Santa Sleigh Rocks (Christmas)
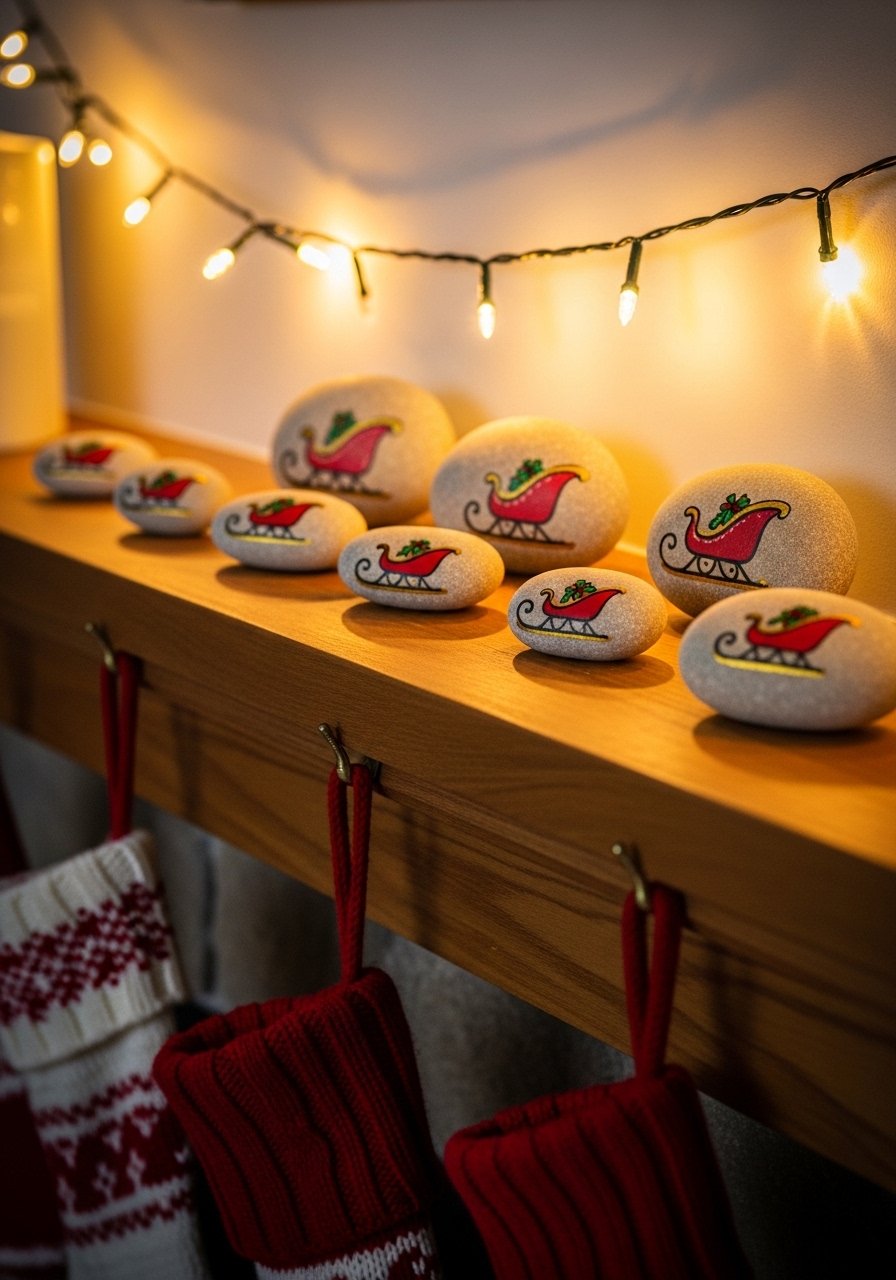
Whimsical and quick, these sleigh rocks make sweet additions to mantel scenes.
Materials
- 8 medium stones
- Red and gold acrylic paint
- Small angled brush
- Matte sealer
Instructions
- Base coat stones white or pale blue; dry 20 minutes.
- Paint sleigh shapes freehand or with a small stencil.
- Add gold runner lines with a fine brush.
- Seal with matte sealer; cure 24 hours.
How to Display or Gift It
- Place across the mantel between stockings.
- Add to a Christmas village display.
- Bundle as a neighbor gift in a kraft box.
21. Menorah Memory Stones (winter/holiday)
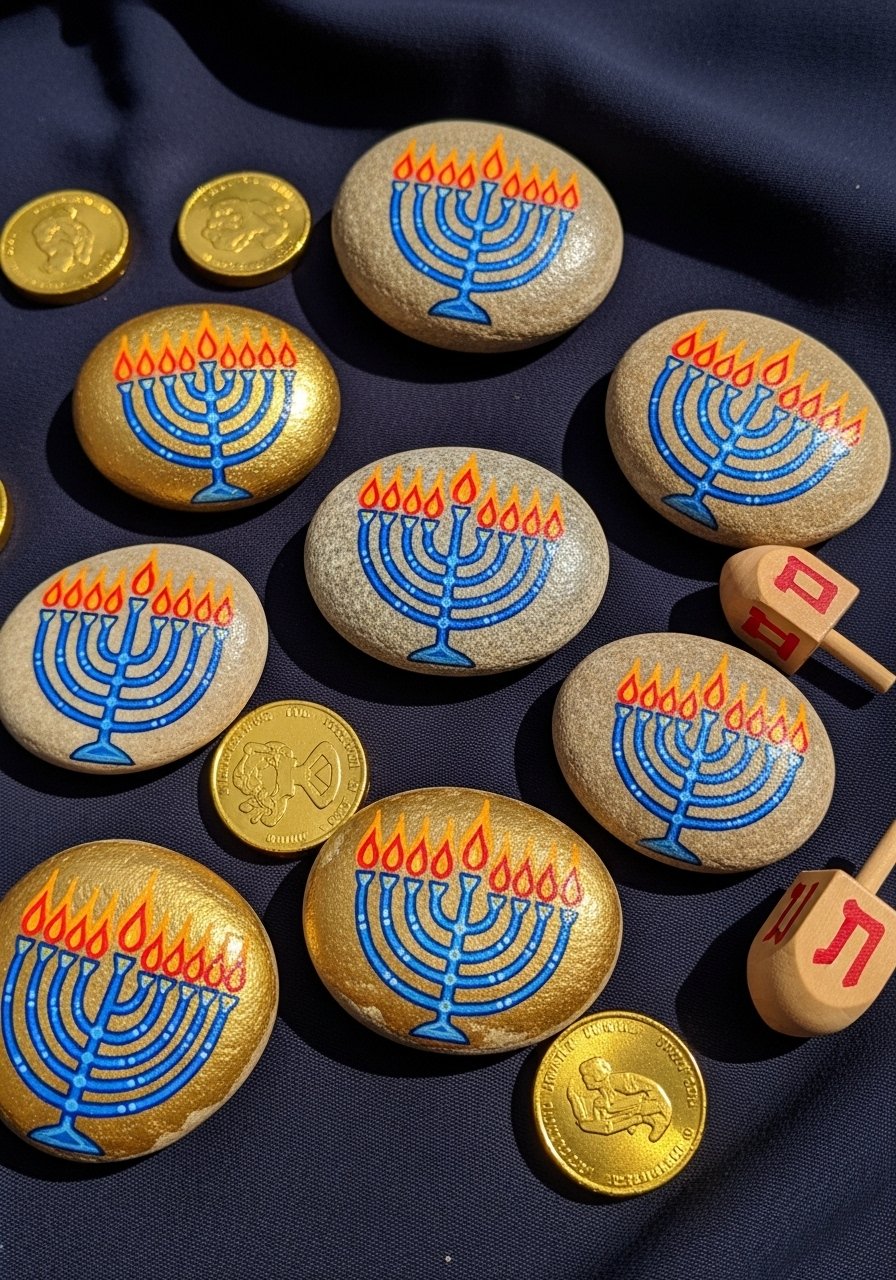
These stones honor Hanukkah traditions—painted menorahs make thoughtful gifts that last for years.
Materials
- 9 small stones
- Blue and gold acrylic paints
- Fine liner brush
- Gloss varnish
Instructions
- Paint bases in blue tones; dry 20–30 minutes.
- Paint small menorah silhouettes with gold; add flame dots.
- Seal with gloss varnish; cure 24–48 hours.
How to Display or Gift It
- Line along a menorah display or tabletop.
- Gift as a set with a small booklet of holiday blessings.
- Store in a holiday keepsake box.
22. New Year Confetti Stones (New Year)

Cheerful and celebratory, confetti stones are easy and festive for ringing in the New Year.
Materials
- 10 small stones
- Black base paint
- Metallic gold and bright acrylics for dots
- Dotting tools
- Satin sealer
Instructions
- Base coat stones black; dry 30 minutes.
- Use dotting tools to add colorful confetti dots.
- Add metallic numerals or tiny stars with gold paint.
- Seal with satin sealer; cure 24 hours.
How to Display or Gift It
- Scatter on a party table as playful confetti that lasts.
- Pack sets in small pouches for party favors.
- Store with party supplies for next year.
23. Valentine Heart Keepsakes (Valentine’s Day)

Perfect for sweet notes and symbolic gifts. Use a fine-tip marker for initials.
Materials
- 6 oval stones
- Blush and burgundy acrylics
- Fine-tip permanent paint marker
- Matte sealer
- Ribbon for tying sets
Instructions
- Paint base colors and dry 20–30 minutes.
- Draw hearts and initials with the fine-tip marker.
- Seal with matte sealer and cure 24 hours.
How to Display or Gift It
- Tie a pair with ribbon as a couples’ gift.
- Tuck a stone into a bouquet for a lasting memento.
- Keep extras in a small jewelry tin for safekeeping.
24. Leprechaun Gold Rocks (St. Patrick’s Day)
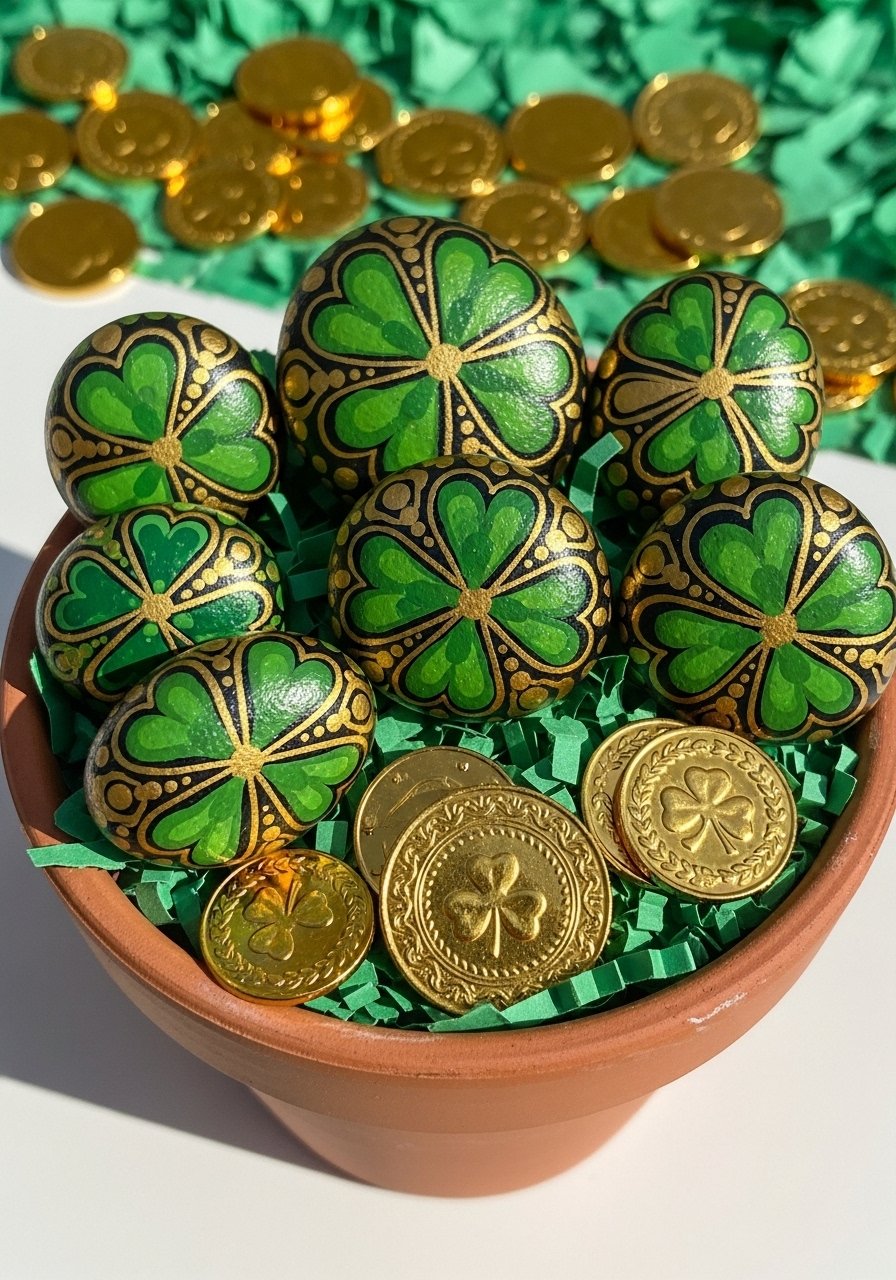
Add a bit of luck to tabletops with gold-accented shamrock stones. Metallic paints make the gold pop.
Materials
- 8 stones
- Green acrylic paints
- Metallic gold paint
- Small shamrock stencil (optional)
- Gloss varnish
Instructions
- Base coat in green hues; dry 20–30 minutes.
- Add shamrock shapes freehand or with a stencil.
- Dot with metallic gold accents and seal with gloss; cure 24 hours.
How to Display or Gift It
- Drop into a bowl of faux gold coins for a party centerpiece.
- Gift as pocket-sized tokens of luck.
- Store with seasonal decorations.
25. Spring Bunny Trail Stones (Easter/kids)
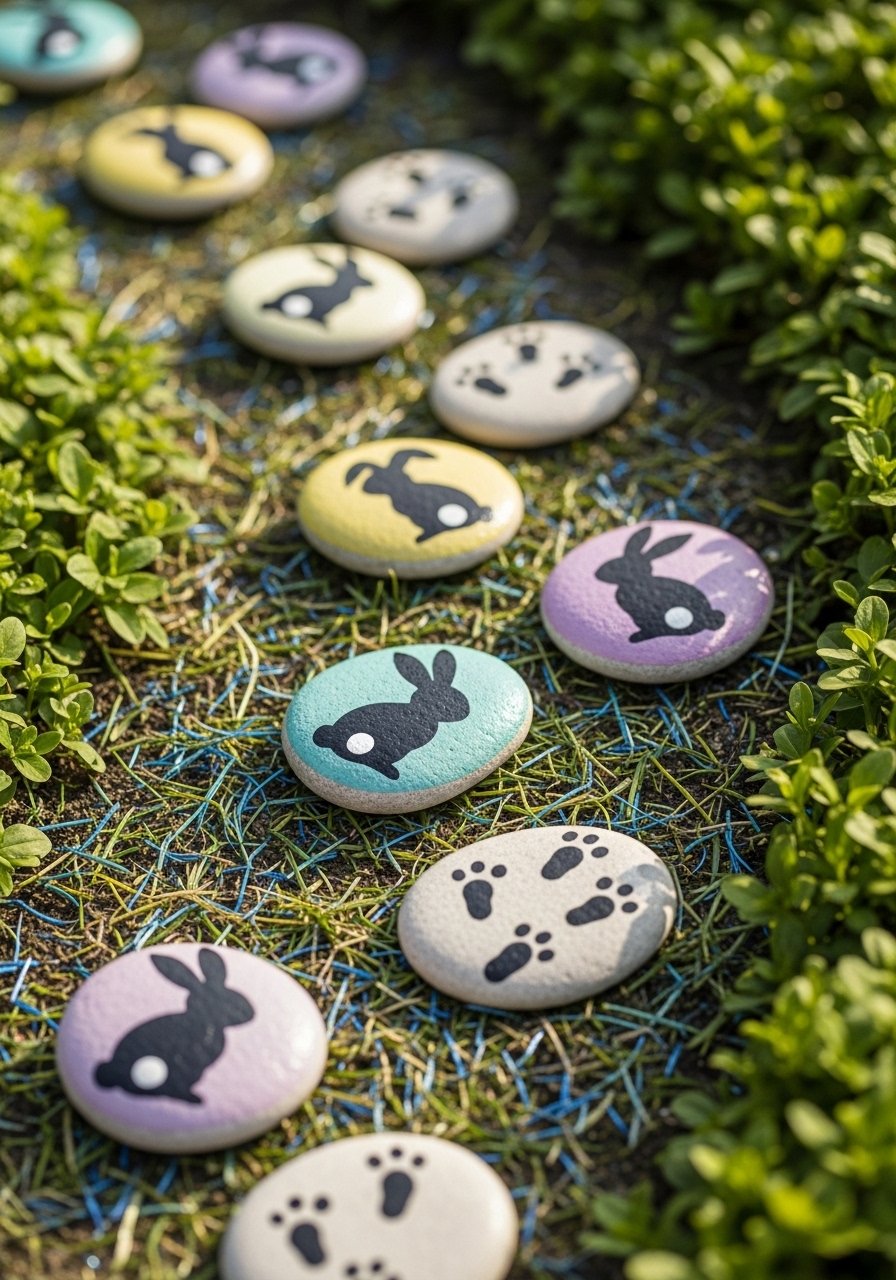
Painted bunnies with footprint trails are perfect for a front-yard egg hunt or backyard scavenger game for kids.
Materials
- 12 small stones
- Pastel acrylics
- Small foam brush
- Tiny stencil or freehand
- Outdoor sealer
Instructions
- Paint bunny silhouettes and footprints; let dry 20–30 minutes.
- Seal with outdoor sealer for weather resistance; cure 24 hours.
- Place along paths to guide kids to hidden eggs.
How to Display or Gift It
- Use as hunt markers or trail starters.
- Gift a set to neighbors with a note.
- Store in a weatherproof box between uses.
26. Zodiac Story Stones (year-round)
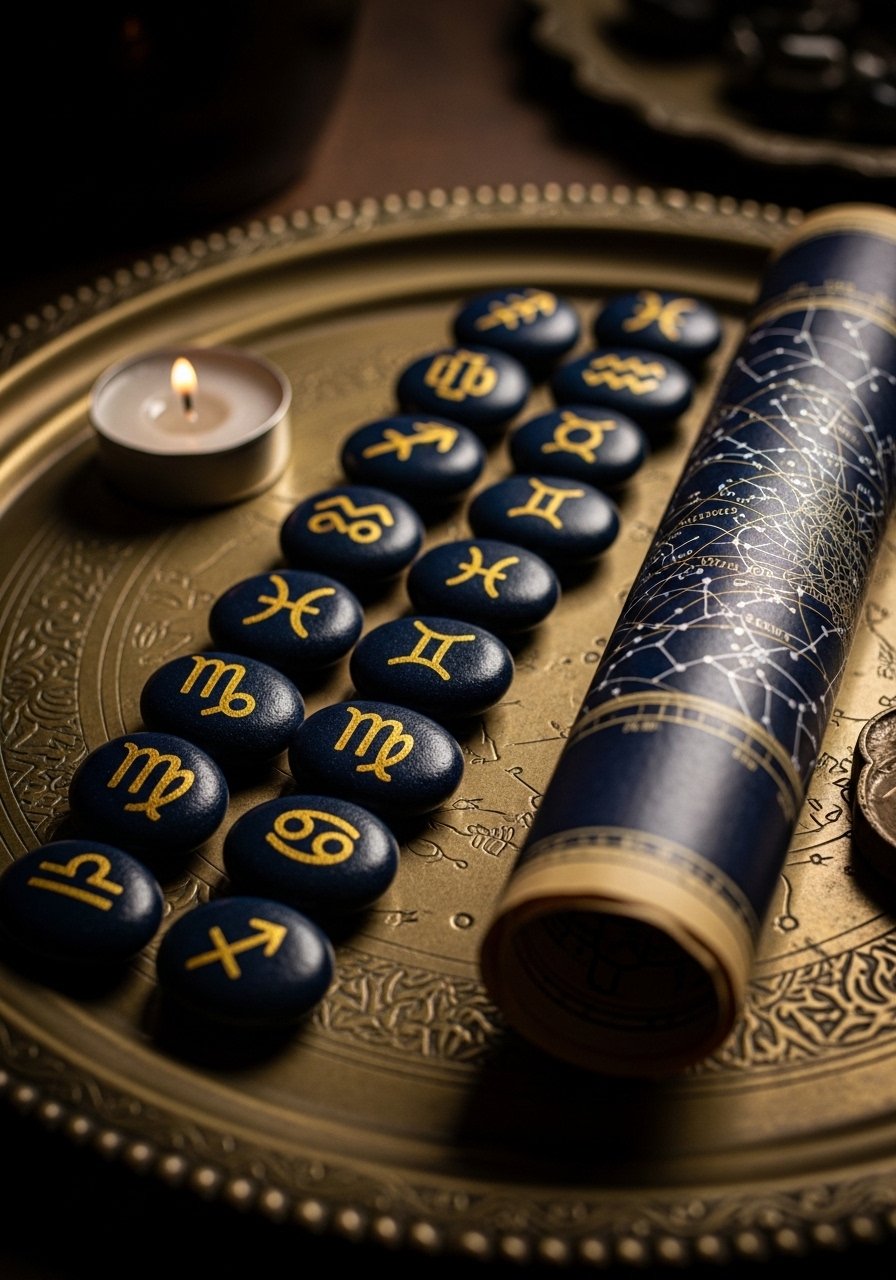
Paint zodiac symbols and give them as personalized keepsakes. Gold details on navy look luxe and mature.
Materials
- 12 medium stones
- Navy acrylic paint
- Gold metallic paint
- Fine liner brush
- Matte sealer
Instructions
- Base coat stones navy; dry 30 minutes.
- Paint each zodiac glyph in gold using a fine liner.
- Seal with matte sealer and cure 24 hours.
How to Display or Gift It
- Arrange on a small brass tray in the bedroom.
- Gift a birth-sign stone with a handwritten note.
- Store in a velvet pouch for safekeeping.
27. Story Stones for Kids (year-round activity)
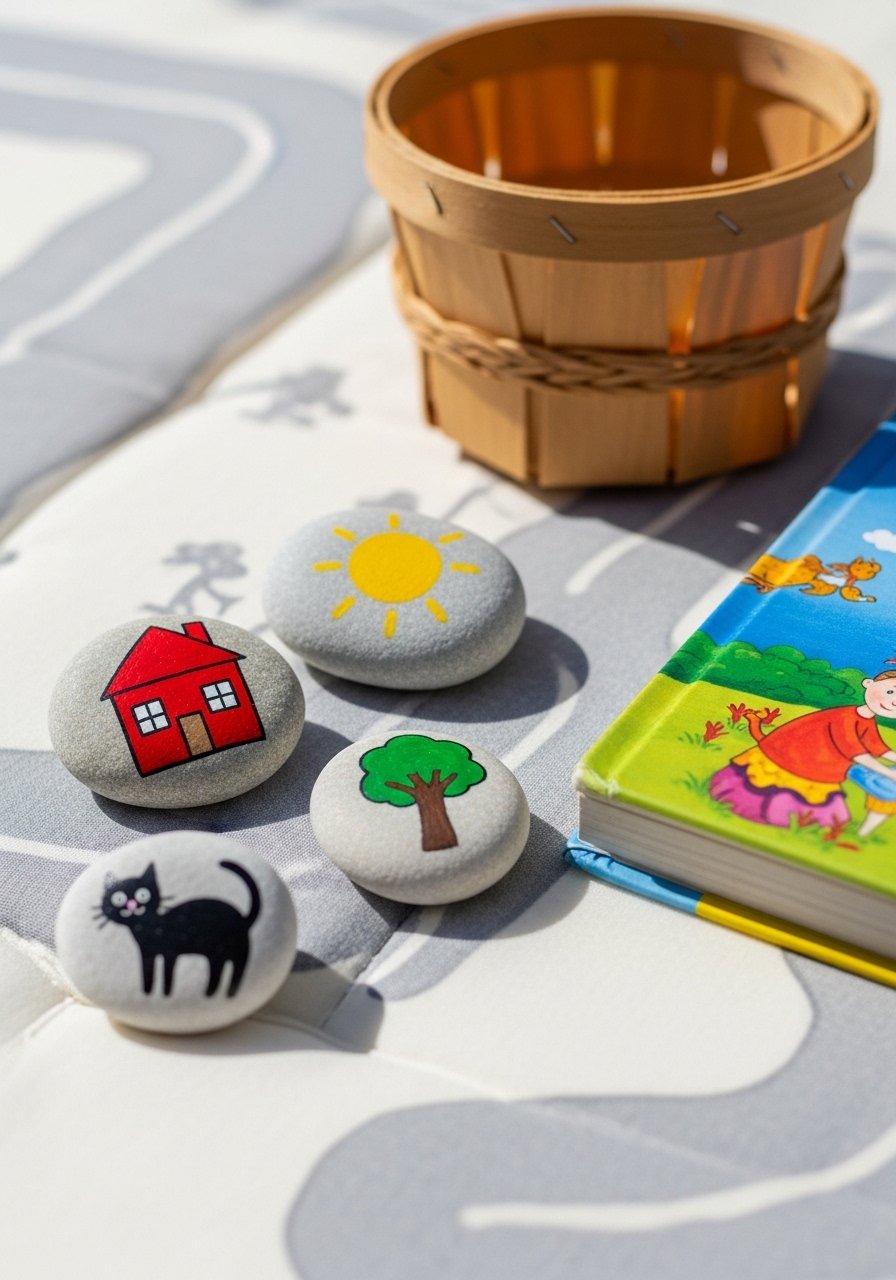
Create a storytelling set—each stone represents an object or character. These encourage creative play and can be swapped seasonally.
Materials
- 20 small stones
- Acrylic paints: primary colors
- Flat brush and round brushes
- Small basket for storage
- Matte sealer
Instructions
- Paint simple icons on stones; allow 10–15 minutes between strokes for detail.
- Apply one coat of matte sealer to preserve playability; cure 24 hours.
- Rotate icon themes each season (animals, holidays, weather).
How to Display or Gift It
- Store in a small woven basket.
- Gift as a learning set with a story prompt card.
- Keep in a kid-safe container for easy cleanup.
28. Fairy Garden Doorstones (spring/summer)
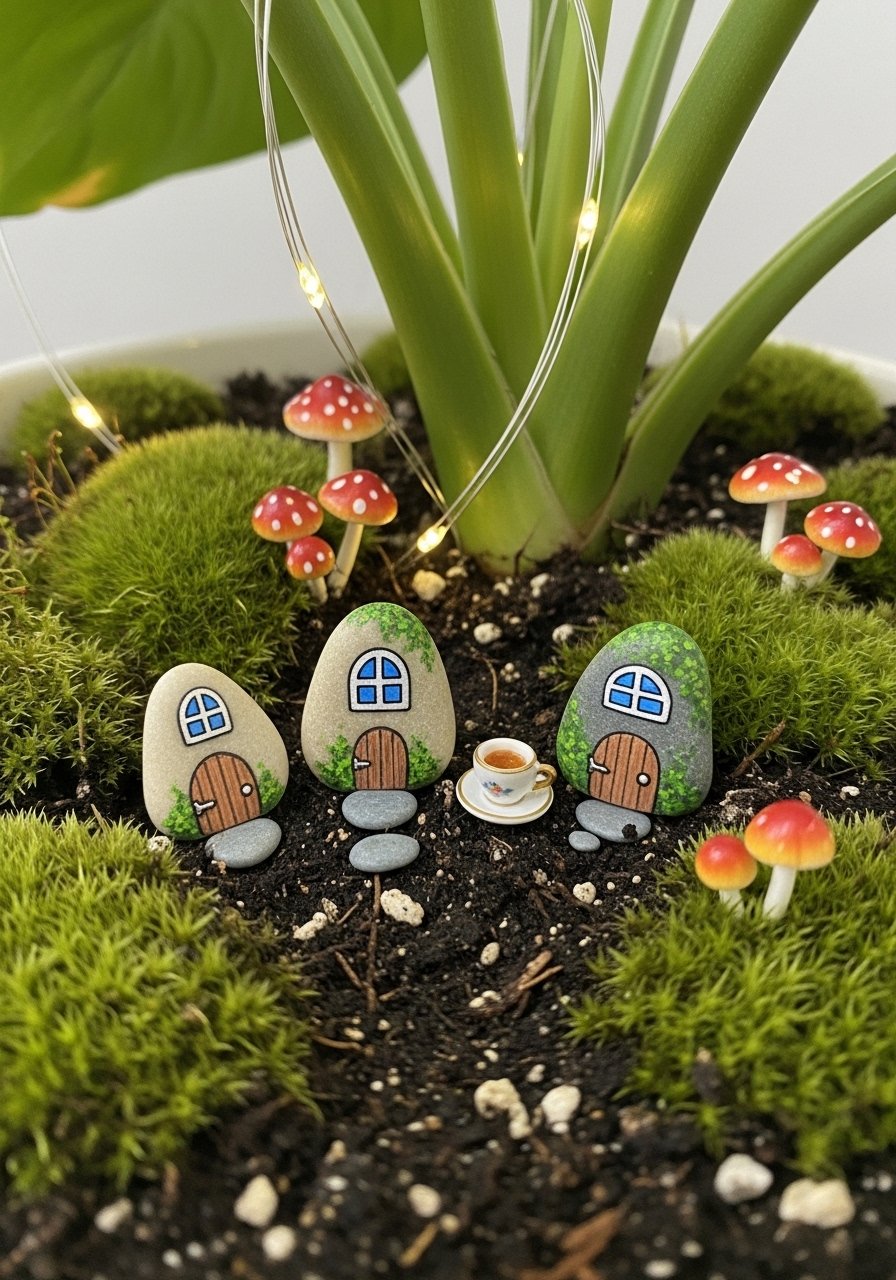
Use them to dress up potted plants. Add moss and tiny accents for a magical touch.
Materials
- Small flat stones
- Acrylic paints
- Miniature embellishments: fake moss, tiny ceramic mushrooms
- Craft glue
- Gloss varnish
Instructions
- Paint door shapes and details; dry 20–30 minutes.
- Glue miniature moss and mushrooms around base.
- Seal exposed paint surfaces with gloss varnish; cure 24 hours.
How to Display or Gift It
- Tuck into potted plants as a surprise.
- Gift a fairy garden kit with stones and miniatures.
- Store extras in a small box to prevent damage.
29. Gratitude Pebble Jar (year-round gifting)

Create a jar filled with painted pebbles that each say a small gratitude. A year-round ritual that's thoughtful and tactile.
Materials
- 30 small stones
- Acrylic paints: neutrals and metallics
- 0.5 mm paint marker
- Mason jar with lid
- Matte sealer
Instructions
- Paint bases and write short gratitude words with paint marker; dry 10–15 minutes.
- Seal stones with matte sealer; cure 24 hours.
- Fill a jar and add a label; encourage family members to add stones over time.
How to Display or Gift It
- Keep on a dinner table to share reflections.
- Gift as a "start of gratitude" kit with a journal.
- Store in a kitchen shelf or mantel for daily reminders.
30. Year-Round Seasonal Swap Stones (all-season kit)
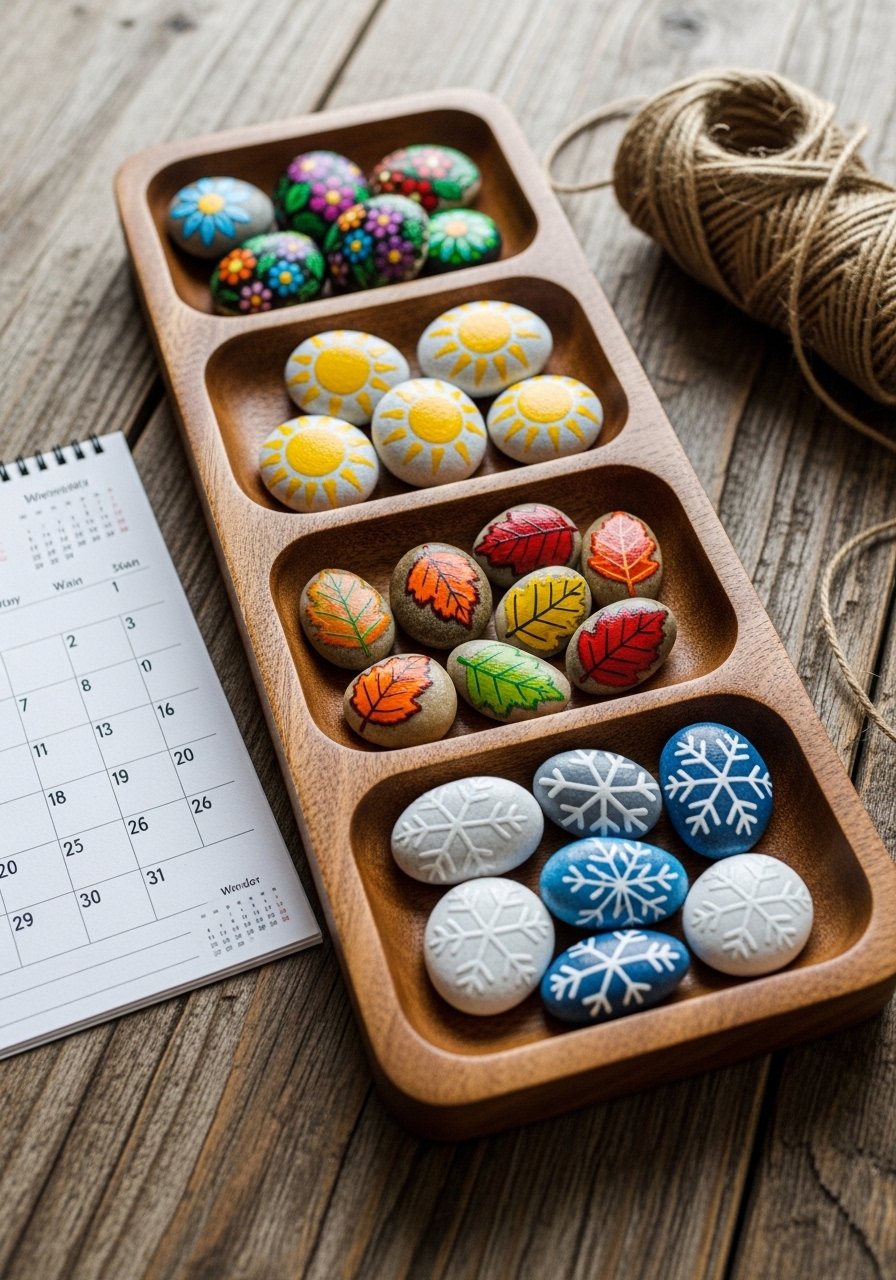
Create a tray you can swap out by season—four groups of stones that rotate so your decor always feels timely. This project ties the whole article together.
Materials
- 24 stones (6 per season)
- Acrylic paint assortment
- Small wooden divided tray
- Fine liner brushes
- Labels or small chalkboard tag
- Matte and gloss sealers
Instructions
- Decide on four seasonal palettes and paint six stones for each season—follow earlier instructions for specific motifs (flowers, sun, leaves, snowflakes).
- Let each set cure fully—24 hours after sealing—before placing in the tray.
- Label each compartment if desired with chalk tags for easy swapping.
- Rotate the tray on the mantel or entry table at season changes.
How to Display or Gift It
- Keep the tray on your entry table for easy seasonal swaps.
- Gift the full kit in a reusable wooden crate.
- Store off-season sets flat in a craft organizer to protect finishes.
Before you go, remember that a little tool investment makes a big difference across these projects. I reach for my detail brush set and a trusty hot glue gun with temperature control for embellishments—both make finishing faster and cleaner. Try a few of these seasonal stone painting ideas and pick the ones that fit your rhythm: a quick winter snowflake, a batch of spring florals, or a full seasonal swap tray. Which theme are you painting first? Pin this list for later, share with a crafty friend, and don’t forget to leave a comment with your favorite color palette.
Trust me, picking up a quality foam brush pack will save paint and help you apply smooth, even coats for every single project.


