You’ve been eyeing those warm, textured scarves on Pinterest but feel unsure where to start. Learning how to knit a scarf for beginners is one of the fastest ways to get comfortable with needles, tension, and simple stitches—without complicated patterns. You’ll finish with a cozy, stylish scarf and a handful of skills you’ll reuse for years.
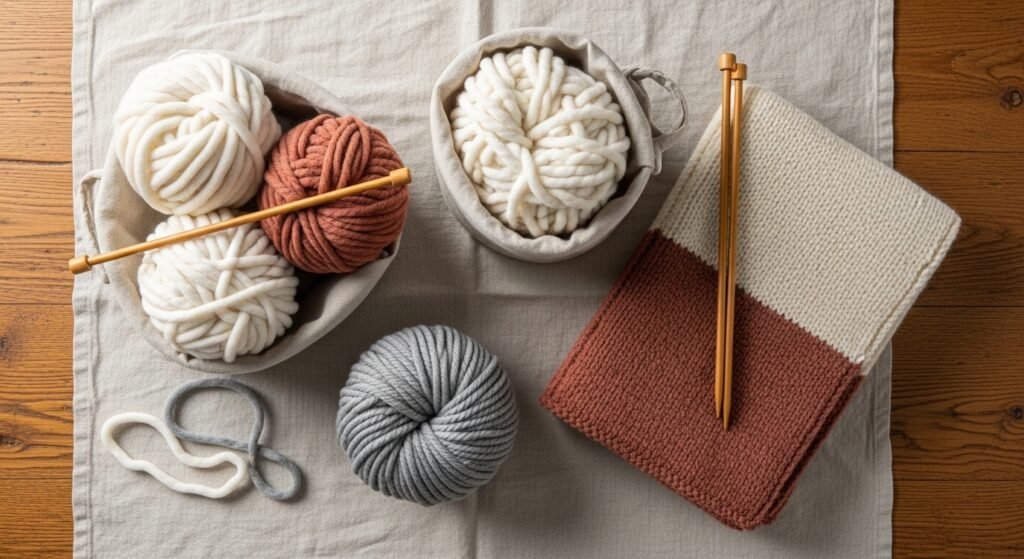
The secret is choosing the right yarn and needles. For a fast, beginner-friendly scarf try chunky yarn and a comfortable knitting needle set. Those two swaps cut frustration and make your stitches look neat from the first row.
Below you’ll learn how to cast on, knit the core stitch, finish clean edges, and block for a polished result—plus time estimates, stitch counts, and easy troubleshooting so you can make your first scarf in an afternoon or two.
Gather and Prep Your Materials (beginner-friendly, one-afternoon ready)
Start by choosing yarn and needles that match. For a soft, quick scarf use bulky or super-bulky yarn—about 200–300 yards (roughly 2–3 bulky skeins) makes a standard 60–70 inch scarf. Cast on for width:
- Cast on 20–30 stitches with US 10–11 (6–8mm) needles for a 6–8 inch wide scarf.
- Use US 13 (9mm–10mm) needles with super-bulky yarn for a thicker, faster piece.
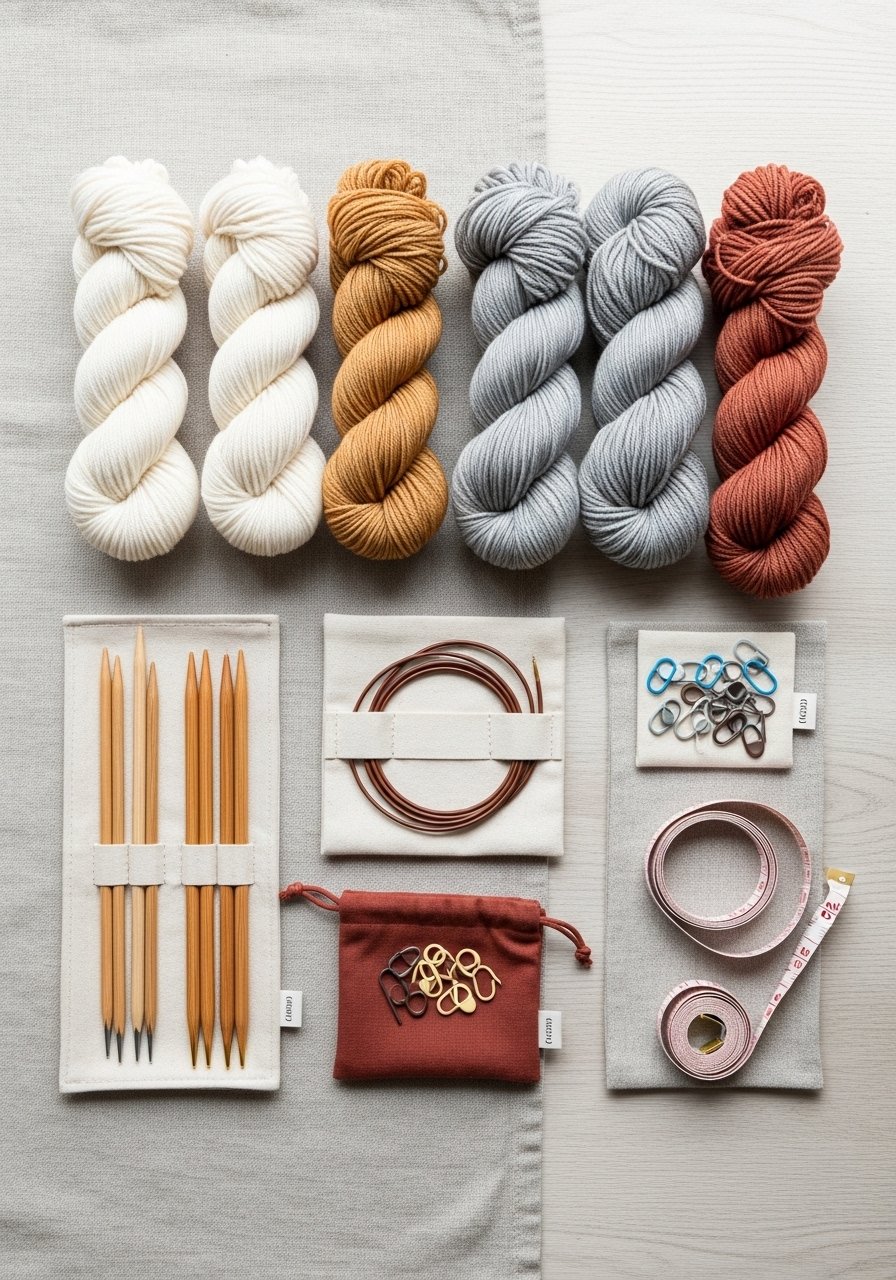
Helpful tools:
- Keep a tape measure nearby to check width and length.
- Use stitch markers to mark the beginning of rounds or pattern repeats.
Prep tip: Wind skeins into manageable balls and place them in a basket so yarn won’t roll away while you work.
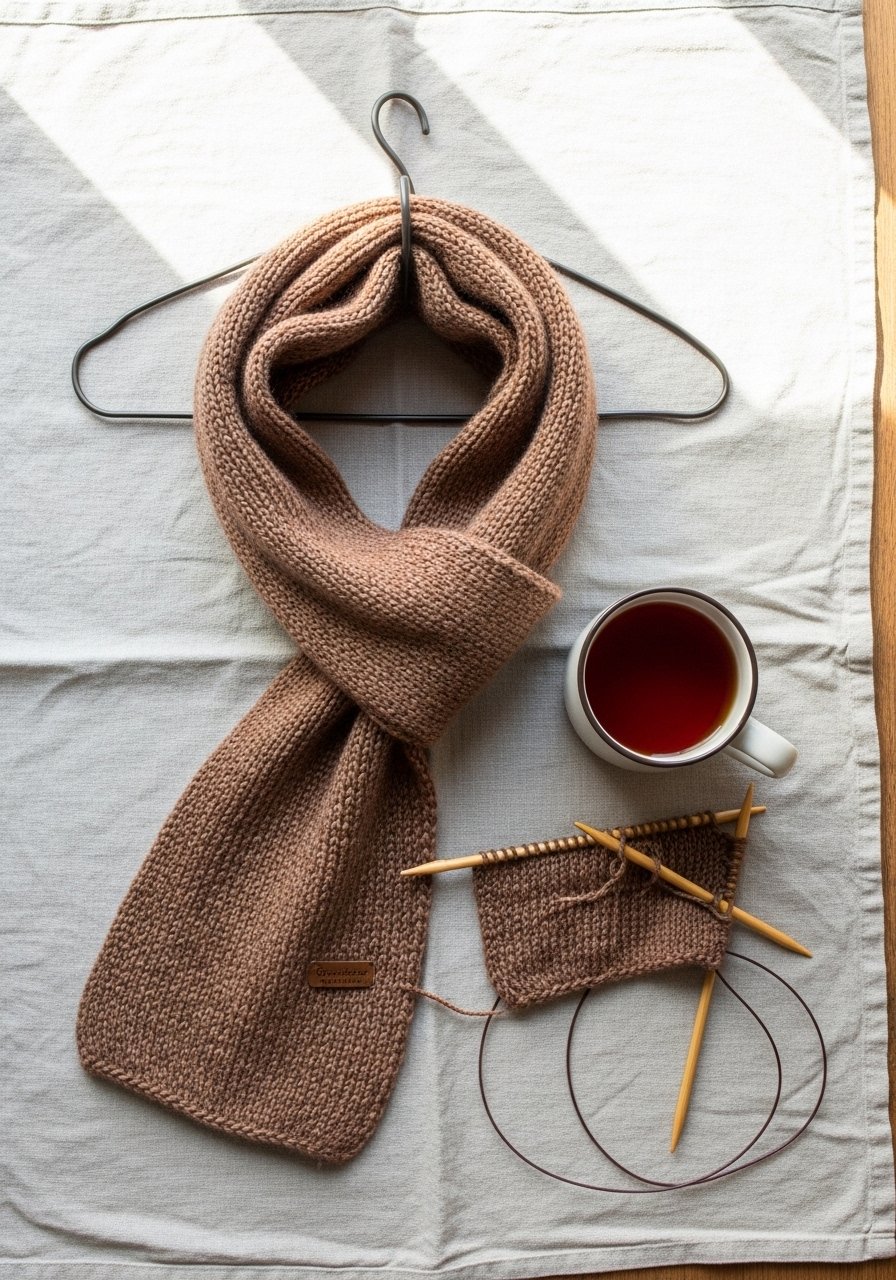
Master the Basic Knit Stitch (core technique, easy)
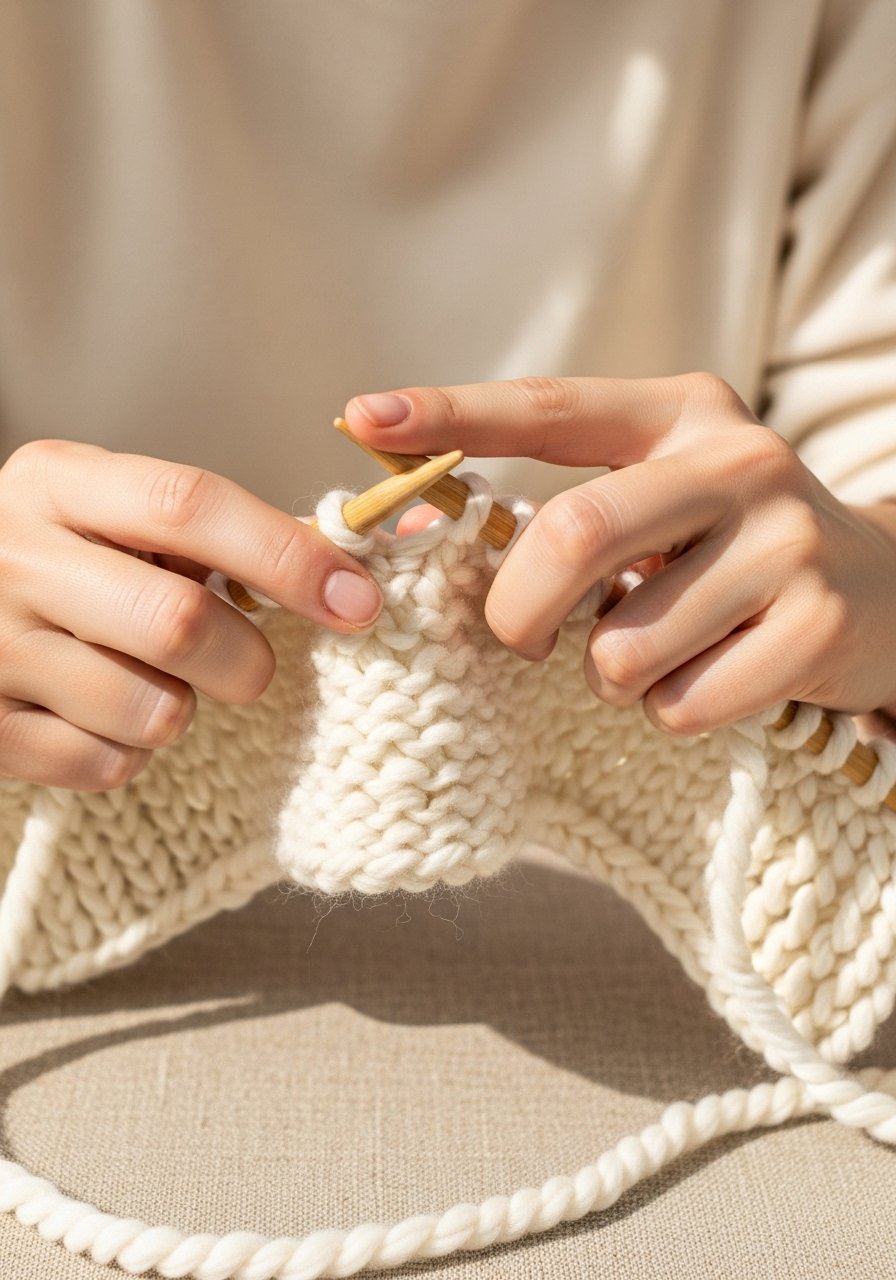
For beginners, the garter stitch (knit every row) is foolproof:
- Cast on 20–30 stitches.
- Knit every stitch across the row, turn, and repeat.
- Continue until the scarf measures 60–70 inches, or your desired length—this usually takes 4–6 hours for a full scarf with bulky yarn.
Pro tips:
- Keep tension relaxed; your stitches should glide on the needle.
- If stitches slip, a knitting needle set with ergonomic tips helps stabilize your hands.
- Use a row counter to track progress without breaking focus.
If you want texture, try alternating knit and purl rows for a rib or seed stitch pattern—just add a short practice swatch first.
Finish and Block for a Clean Edge (beginner-friendly finishing)
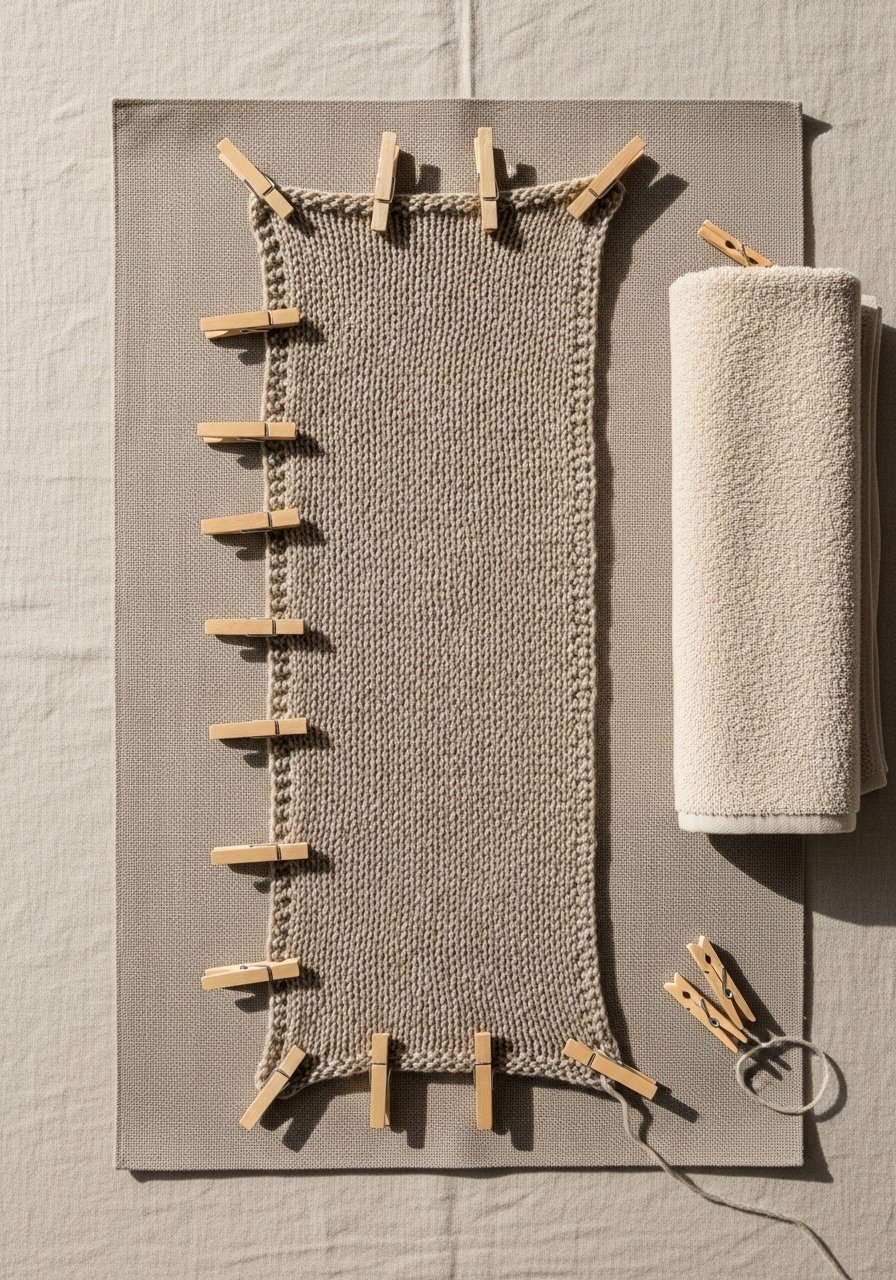
A tidy finish makes a homemade scarf look store-bought:
- Bind off loosely so the edge doesn’t pucker.
- Weave in ends using a tapestry needle set.
- Block the scarf: lay flat on a blocking mat, gently shape to measurements, and pin. Let dry 12–24 hours depending on yarn fiber.
Blocking tips:
- For wool blends, use a damp towel to press out excess water, then reshape.
- Synthetic yarns dry faster—often under 8–12 hours.
- A sweater stone or fabric brush removes fuzz after drying for a smooth finish.
Storing, Gifting, and Styling Your Scarf (pin-worthy presentation)
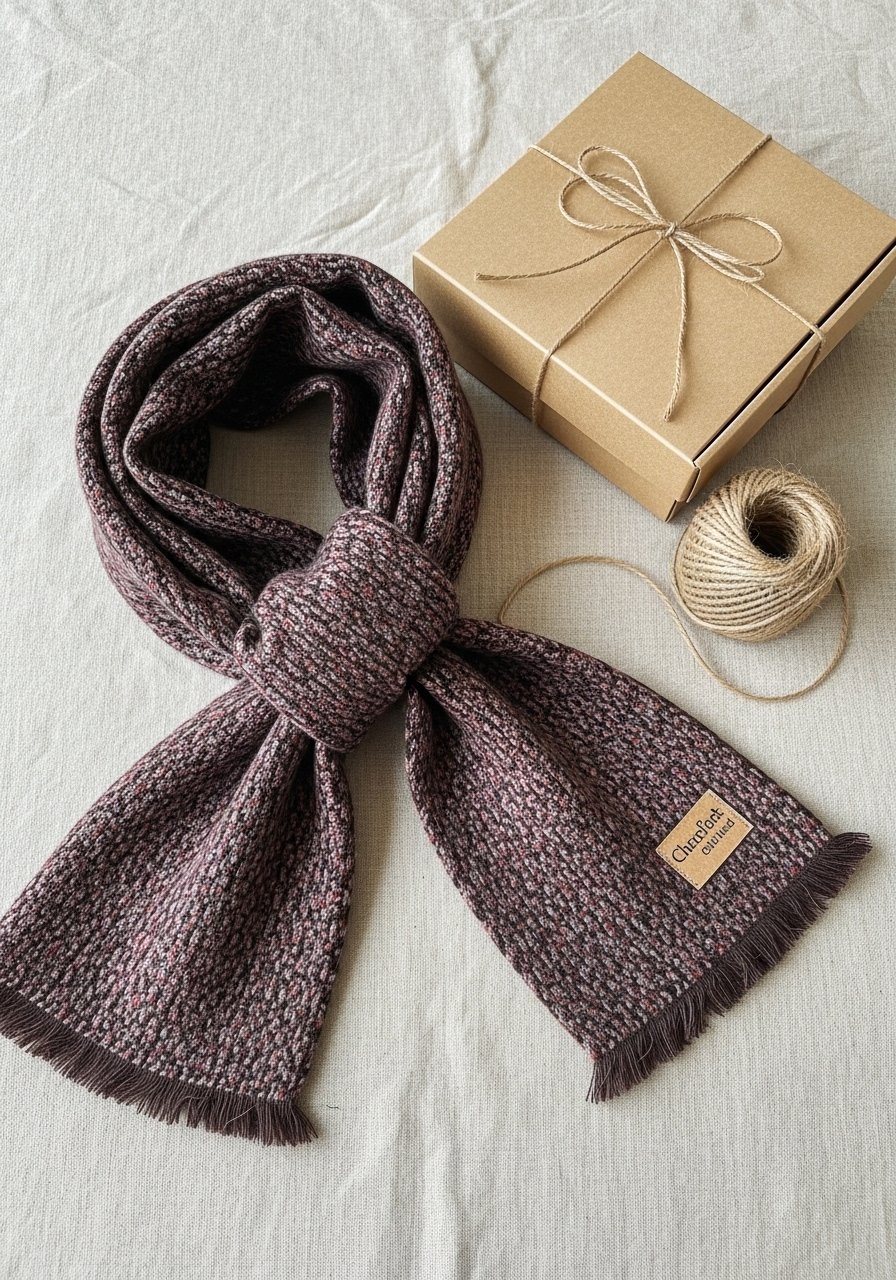
Once finished, store the scarf in a breathable bag or gift it in a simple kraft box:
- Fold flat and place in clear zip pouches for short-term storage.
- For gifting, add a small gift wrap set and tie with jute twine.
Style ideas:
- Drape loosely for a casual look or loop once for warmth.
- Try fringe by leaving extra yarn at bind-off and knotting every 1 inch.
You’ve learned how to knit a scarf for beginners with clear stitch counts, timing, and finishing steps. Save variations (widths, stitch patterns) for your next project and pin this guide for an easy reference.
You made a cozy scarf—and learned stitches, finishing, and blocking. Pin this guide for your next cozy craft afternoon and share with a friend who wants a beginner-friendly project. Which stitch will you try next—garter, rib, or seed? If you loved working with one yarn, grab a similar chunky yarn and keep knitting. Ready to make it? Let’s go!


