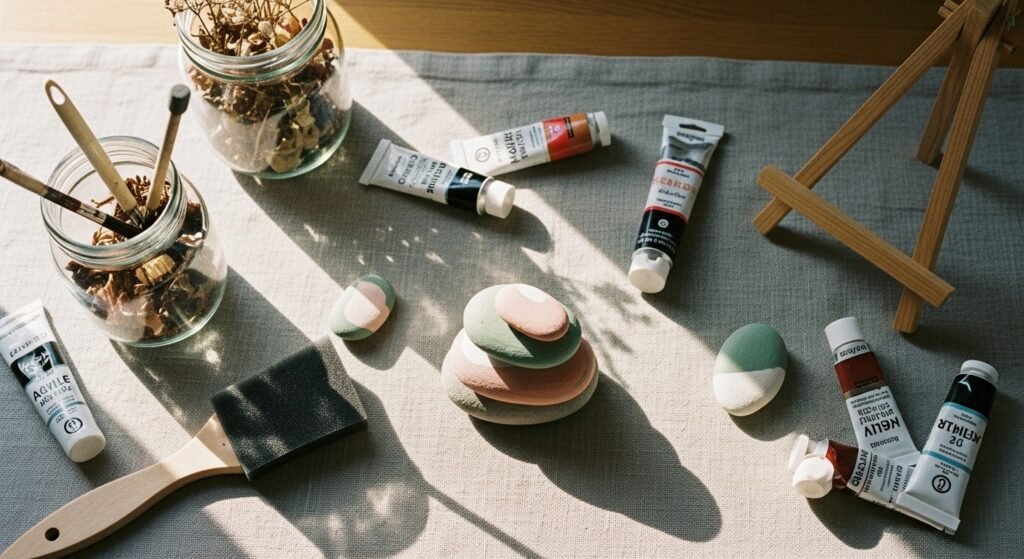
If you love tiny, pocket-sized crafts that brighten a shelf, garden, or mailbox, these budget stone painting ideas are for you. You don’t need a big budget or fancy gear — just a handful of smooth stones, a few paint colors, and simple tools you probably already own. I’ve gathered 24 projects that cost almost nothing and produce polished, gift-ready results.
You’ll find everything from cute story stones for kids to minimalist dots for a Japandi shelf, cozy cottagecore florals, and playful glow-in-the-dark garden markers. Each idea is built to be beginner-friendly, with exact material amounts, drying times, troubleshooting tips, and one helpful product recommendation to speed things up. I reach for an affordable acrylic craft paint set for color variety, and a pack of fine-point paint pens when I want crisp details fast. Ready to make something small that packs a lot of charm? Let’s paint some stones.
- Painted Kindness Pebbles — Tiny Notes of Joy
These little pebbles are perfect for dropping into pockets, tucking into library books, or leaving on a neighbor’s doorstep. They’re smooth, matte, and readable from a few feet away — ideal for quick, low-cost gifts. I use a steady fine-point paint pen for lettering so the lines stay crisp.
Materials
- 8–12 smooth river pebbles, 1–2 in (25–50 mm) each
- Acrylic craft paint (choose 6 small colors) — about 10–12 mL each
- White or black paint pen, fine tip
- Sandpaper (220 grit) — 1 sheet
- Flat foam brush (1") for base coats
- Matte Mod Podge (2 oz) or similar sealer
- Paper towel and small paint palette or plate
Instructions
- Wash stones with warm water and dish soap. Let dry fully (30–60 minutes).
- Lightly sand the flattest surface with 220 grit to help paint adhere.
- Apply a thin base coat with the foam brush. Let dry 20–30 minutes. Apply a second coat if coverage is uneven.
- Once opaque and dry to the touch (about 30 minutes after the second coat), use the fine-point paint pen to write short words. Practice on scrap paper first.
- Let ink dry 10 minutes, then inspect for gaps. Fill in with the pen or tiny brush as needed.
- Seal with a thin coat of Matte Mod Podge. Let dry 1 hour to touch; fully cure 24 hours.
Troubleshooting: If paint peels, make sure stones were fully dry and sanded. If pen skips, shake the pen and test on paper before writing on stone.
How to Display or Gift It
- Place in a small kraft gift box with shredded paper and a dried lavender sprig.
- Scatter on a coffee table tray or tuck into a purse as a daily reminder.
- Store extras flat in a stackable craft organizer until sealed, like a compact craft organizer tray.
- Minimalist Dot Stones — budget stone painting ideas for beginners
Simple dot patterns look designer but take minutes. This minimalist look fits Japandi and modern farmhouse shelves. I use a set of round wooden styluses, but a cotton swab works just as well for perfect dots.
Materials
- 6 smooth, flat stones, 1.5–2.5 in (40–60 mm)
- Acrylic craft paint in 3 coordinating colors (small tubes)
- Round dotting tools or wooden cocktail sticks, set of 3 sizes
- Pencil for centering guides
- Palette or disposable plate
- Matte spray sealer, 1 can
- Paper towels
Instructions
- Clean stones and dry thoroughly (30–60 minutes).
- Apply a thin white or cream base coat if you want contrast. Dry 20–30 minutes, add second coat if necessary.
- Mark centers with a pencil dot.
- Dip the largest dotting tool into paint and press firmly to create the central dot. Work outward using smaller tools and alternate colors.
- Let painted dots dry 20 minutes between color layers to avoid smudging.
- Once fully dry (about 1 hour), spray with a light coat of matte sealer in short bursts. Let cure 24 hours.
Troubleshooting: If dots flatten, use thicker paint (add less water) or apply two thin layers once dry.
How to Display or Gift It
- Arrange stones in a shallow dish or on a mantel.
- Glue one to a wooden magnet strip for a charming fridge accent.
- Keep spares in a small jewelry organizer tray for later gifting.
- Cottagecore Daisy Stones — budget stone painting ideas for floral accents
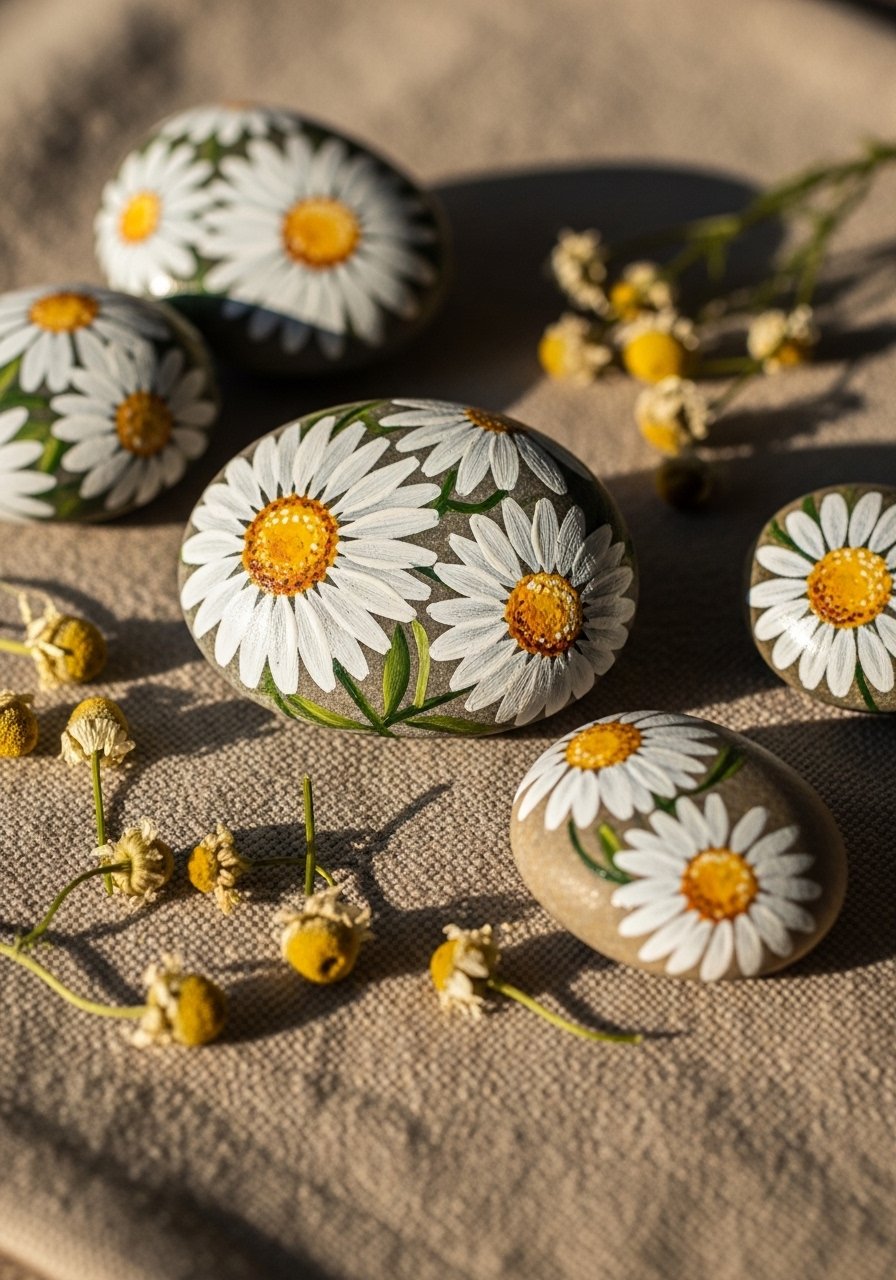
Tiny flowers add a wistful cottagecore touch to shelves and windowsills. This is a forgiving project; brushstrokes can be loose and charming. I keep a small round detail brush for petal shapes.
Materials
- 8 medium river stones, 1.5–2 in (40–50 mm)
- Acrylic paints: background color (1 oz), white (small tube), mustard yellow (small tube), sap green (small tube)
- Round size 0 detail brush
- Flat 1" foam brush
- Palette
- Matte acrylic spray sealer (1 can)
- Paper towel and water cup
Instructions
- Clean and dry stones (30–60 minutes). Sand any rough patches.
- Paint bases a soft pastel using foam brush. Two thin coats, 20–30 minutes drying between coats.
- Load the size 0 brush with white and drag small petal strokes outwards from the center. Keep strokes light for a delicate look.
- Dot centers with mustard yellow using the brush tip. Add tiny green leaves.
- Let dry 30–45 minutes, then add a second pass on petals for opacity if needed.
- Spray with matte sealer (two light coats, 15 minutes between coats). Cure 24 hours.
Troubleshooting: If petals look clumped, wipe the brush on a towel to reduce paint load and try again.
How to Display or Gift It
- Glue onto a small wooden card and hand as place settings.
- Tuck into potted plants for whimsy.
- Ship in kraft boxes cushioned by tissue and a sprig of dried chamomile.
- Chalkboard Message Stones — budget stone painting ideas for erasable notes
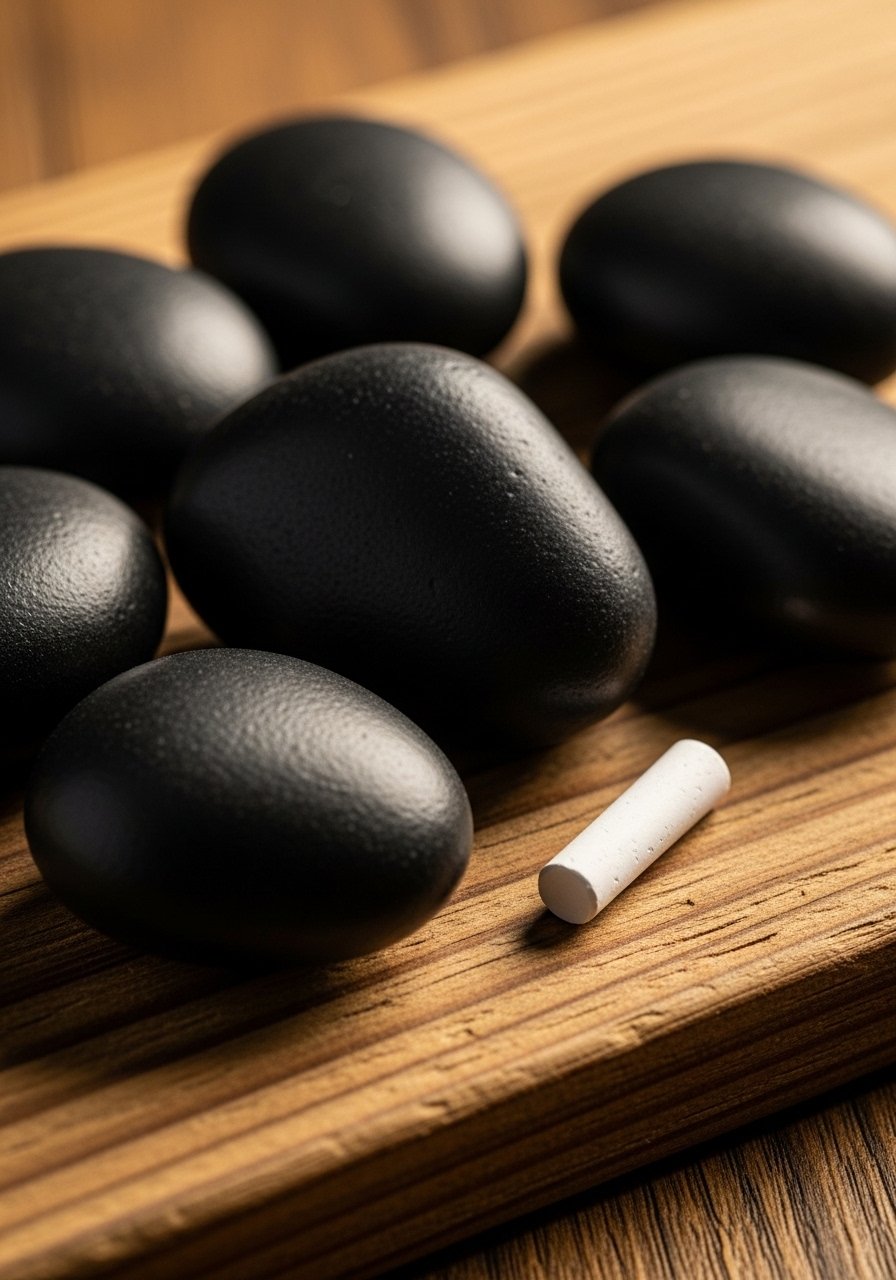
Make reusable message stones — write notes with chalk then wipe off. Great for menus, reminders, and kids’ play. A small pack of chalk completes the set.
Materials
- 6 flat stones, 1.5–2 in (40–50 mm)
- Black chalkboard paint (2 oz)
- Chalk or chalk markers for writing
- 1" foam brush
- Sandpaper 220 grit
- Clear matte sealer (optional for extra durability)
Instructions
- Clean stones and sand lightly on painting surface.
- Apply 2 thin coats of chalkboard paint, letting dry 30 minutes between coats.
- Cure overnight if possible for surface hardness.
- Season the surface by rubbing a piece of chalk over the stone and wiping off.
- Write with chalk. Wipe clean with a damp cloth when needed.
- Optionally, spray one light coat of matte sealer to reduce dusting (test first, some sealer can interfere with chalk).
Troubleshooting: If chalk smudges heavily, add another thin coat of chalkboard paint and re-season.
How to Display or Gift It
- Wrap a set with a piece of chalk tied in twine.
- Use them as place cards at gatherings.
- Store extras in a mason jar with chalk — try a mason jar craft set.
- Marbled Stone Trick (no resin) — cheap technique for faux marble
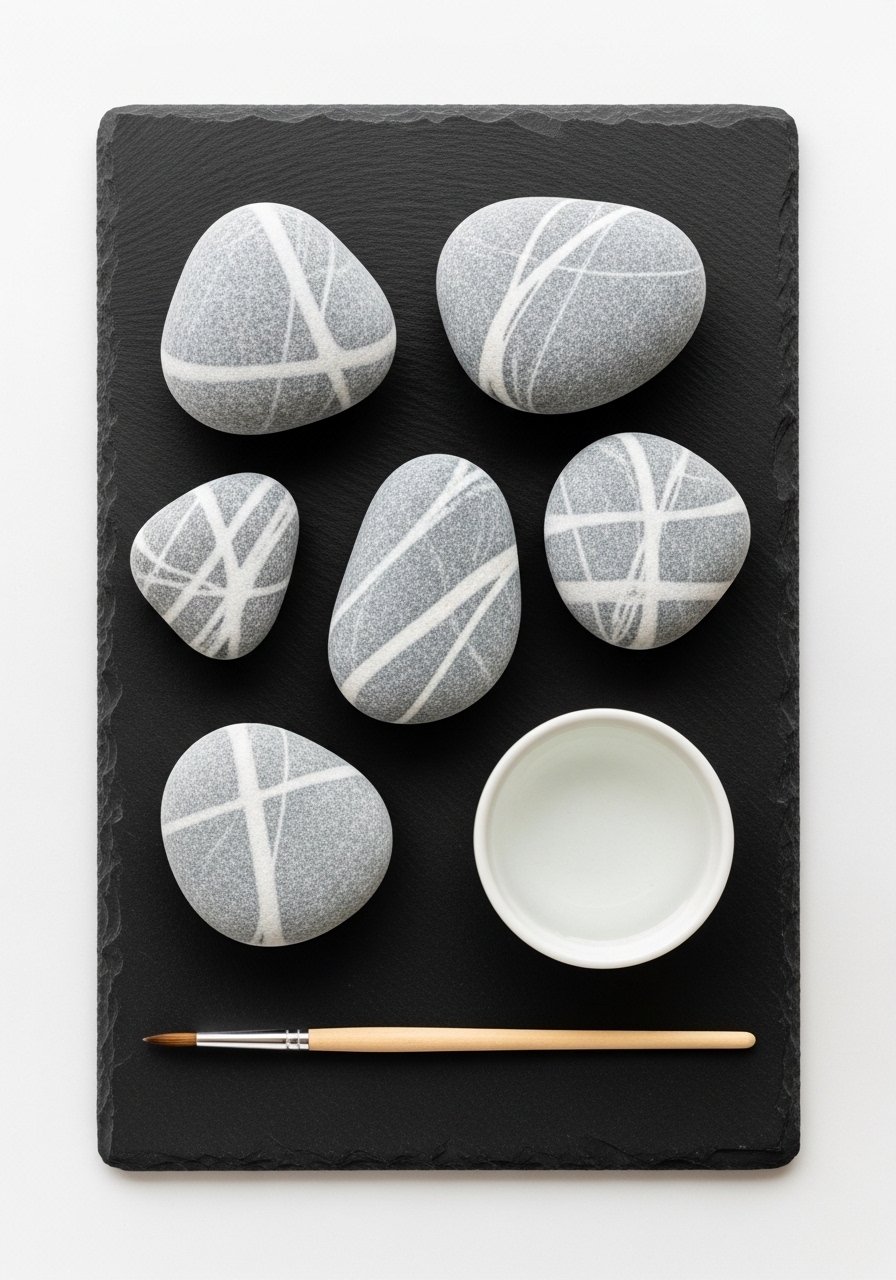
You can get marble looks without resin. This watered-down, swirled acrylic method gives soft veining and feels high-end — perfect for farmhouse and modern settings. Use a plastic cup and stir stick rather than expensive tools.
Materials
- 6 medium smooth stones, 2–3 in (50–75 mm)
- Acrylic paints: white, two grays (small tubes)
- Small disposable cups for mixing
- Toothpicks or wooden stir sticks
- Flat foam brush for base
- Paper towels
- Matte or satin spray sealer, 1 can
Instructions
- Clean stones; apply a base coat of off-white. Let dry 20–30 minutes.
- In a cup, mix a tiny amount of gray paint with water to a runny but pigmented consistency.
- Drip thin lines of gray across the stone and use a toothpick to drag the paint into veiny shapes.
- Add darker gray sparingly for depth. Work fast; water helps the veins blend.
- Let dry 45–60 minutes. If veins fade, add a second pass with slightly thicker paint.
- Seal with satin spray in two light coats, 15 minutes apart. Cure 24 hours.
Troubleshooting: Too much water makes paint bead. Keep paint slightly watery but not puddling.
How to Display or Gift It
- Group on a marble tray or wooden trivet.
- Attach felt pads to the back for stone coasters.
- Pack in a small jewelry box as a paperweight gift.
- Glow-in-the-Dark Night Stones — garden markers that sparkle after dark
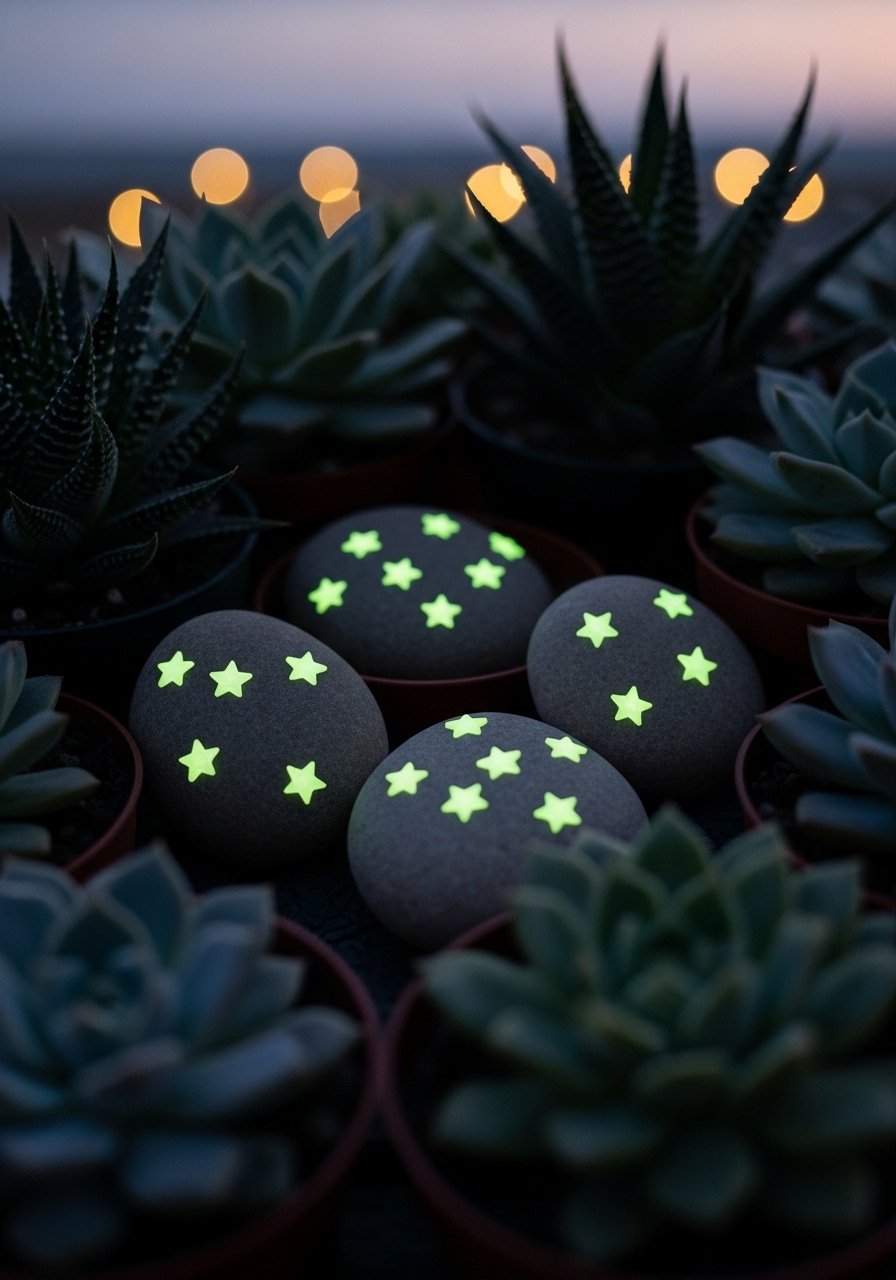
Charge these in daylight and they glow while the house sleeps — fun for garden paths and kids’ rooms. Use a reliable glow paint for strong effect.
Materials
- 8 small stones, 1–1.5 in (25–40 mm)
- Glow-in-the-dark acrylic paint (small bottle)
- White acrylic base paint (small tube)
- Detail paint brush, size 0–2
- Flat foam brush
- Matte sealer spray
Instructions
- Clean stones. Paint a white base for stronger glow, let dry 20–30 minutes.
- Apply two thin coats of glow paint, waiting 30 minutes between coats.
- For brighter glow, apply a third thin coat after 1 hour if needed.
- Charge in full daylight for 30–60 minutes or under a strong lamp for 10–15 minutes before use.
- Seal with a matte sealer; avoid glossy finishes which can dull glow effect slightly. Cure 24 hours.
Troubleshooting: If glow is weak, ensure thicker application of glow paint over white base.
How to Display or Gift It
- Line them along a potted plant saucer or garden edging.
- Gift wrapped with a note: "Charge in sunlight for magic nights."
- Store in a small airtight container when not in use to avoid dust.
- Tiny Pet Portrait Stones — budget stone painting ideas for memorials or gifts
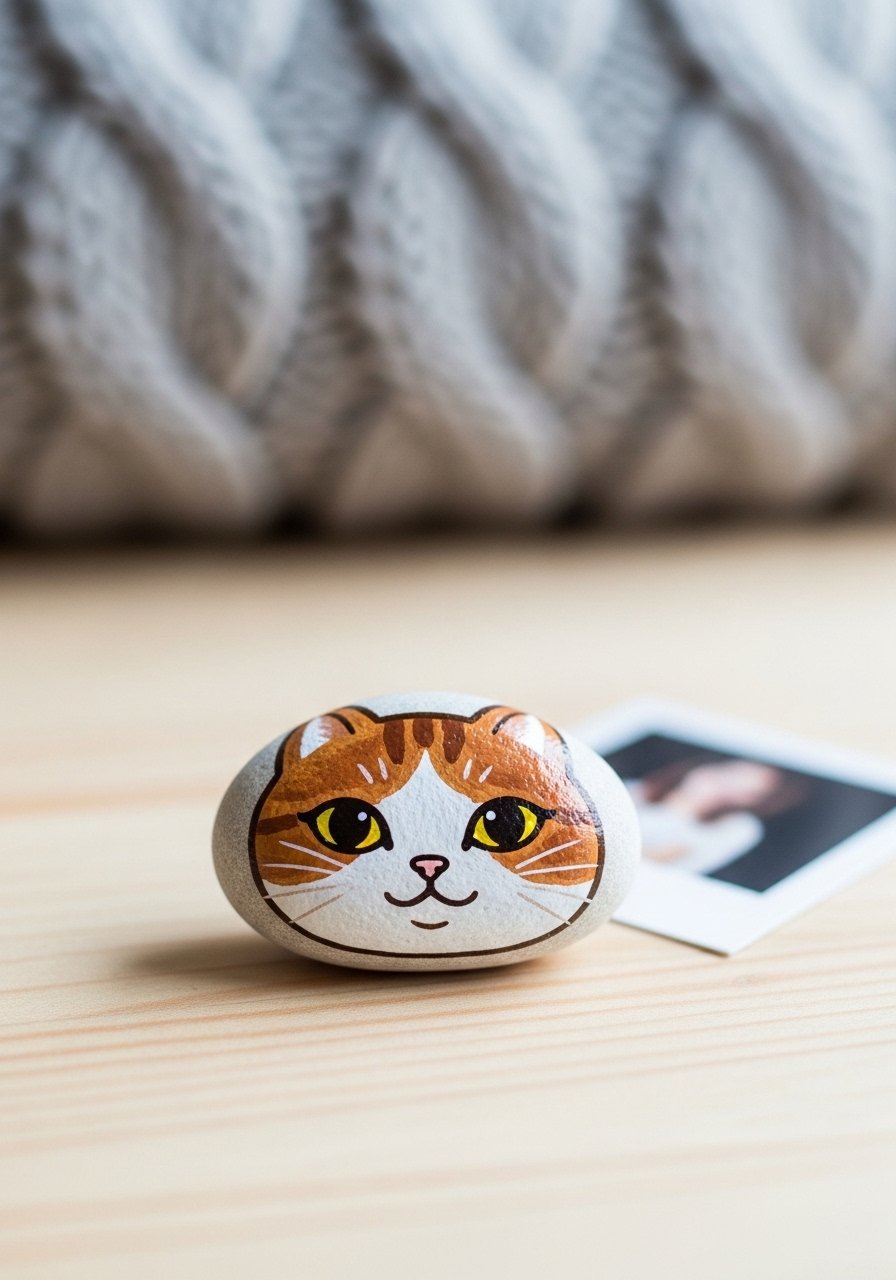
Capture a pet’s likeness in a few brushstrokes. This is a sentimental, low-cost memento. A fine liner brush and a photo reference are helpful.
Materials
- 1–3 oval stones, 1.5–2 in (40–50 mm) per portrait
- Acrylic paints (small tubes of primary colors plus white/black)
- Fine liner brush (size 00–0)
- Round brush size 2
- Practice paper and pencil
- Matte sealer
Instructions
- Choose a photo with clear facial markings. Sketch lightly on paper to plan.
- Clean stone and paint a neutral base coat; dry 20–30 minutes.
- Block in major color areas with size 2 brush. Let dry 15–20 minutes.
- Use fine liner brush for eyes, whiskers, and small marks. Work in thin layers.
- Build up contrast with tiny highlights in the eyes (white dot) to bring the portrait to life.
- Seal with matte spray and let cure 24 hours.
Troubleshooting: If scale looks off, take photos during painting to check proportions.
How to Display or Gift It
- Attach to a small wooden easel and place on a bedside table.
- Tuck into a memory box with a printed photo.
- Ship in a cushioned jewelry box for safe delivery.
- Painted Succulent Stones — low-cost faux plants
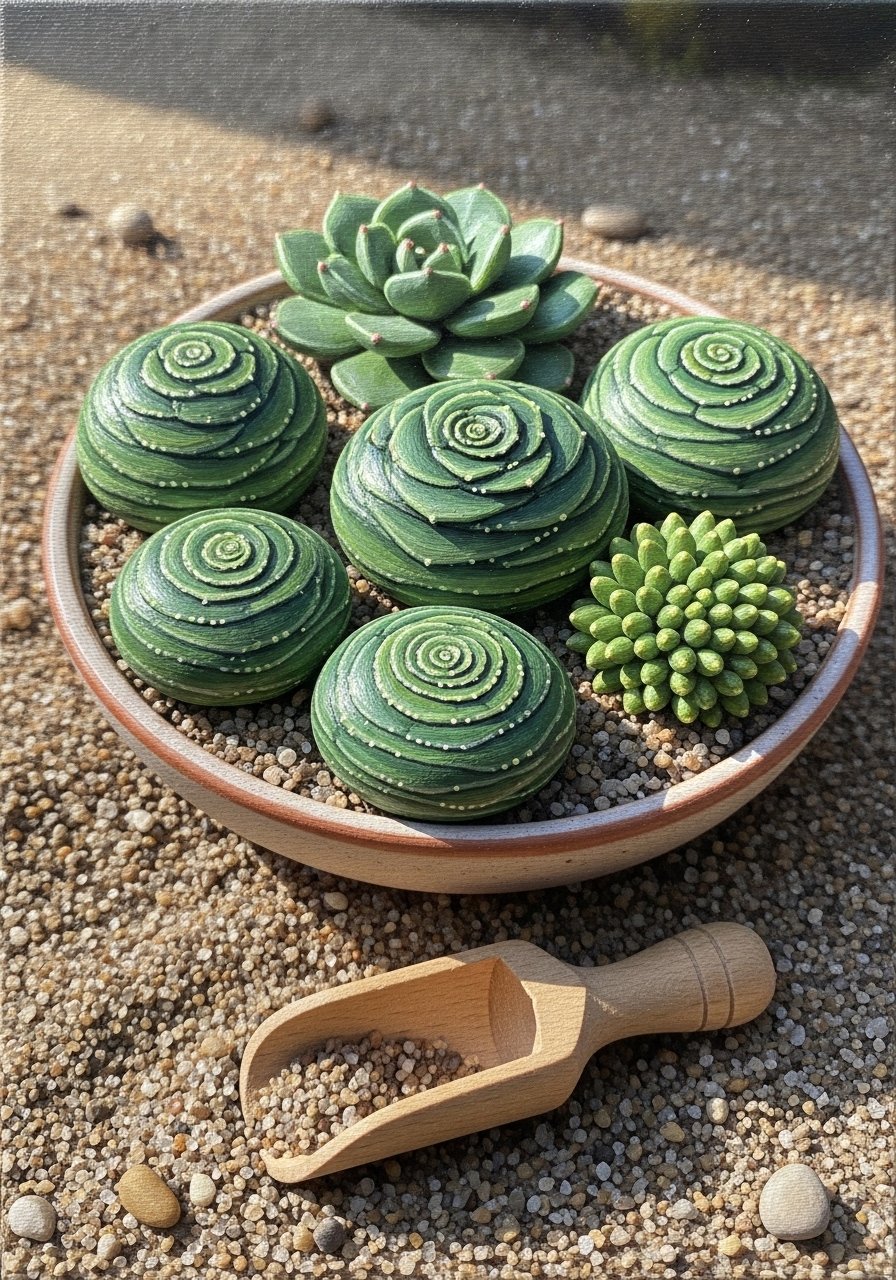
Succulent stones add greenery without watering. Perfect for apartments and low-light spaces. A fan brush or small round brush helps achieve leaf textures.
Materials
- 6–10 rounded stones, 1–2 in (25–50 mm)
- Acrylic paints in 4 greens (light, medium, dark, olive)
- Round brush size 0–2
- Fan or small dry brush for texture (optional)
- Palette
- Matte sealer
Instructions
- Clean stones; paint a mid-green base. Dry 20–30 minutes.
- Use a small round brush to paint layered teardrop shapes radiating outwards for rosette succulents.
- Add shadow with a darker green at the leaf bases and tiny white highlights on tips.
- Let dry 30 minutes, add a second layer for depth if needed.
- Seal with matte sealer in two light coats; cure 24 hours.
Troubleshooting: Keep leaf shapes simple; tiny details can be implied with shadow lines rather than precise strokes.
How to Display or Gift It
- Arrange in a shallow planter with sand and pebbles.
- Gift in a small kraft box labeled “No watering required.”
- Store extras flat in a shallow craft organizer drawer.
- Painted Story Stones — make playtime more imaginative
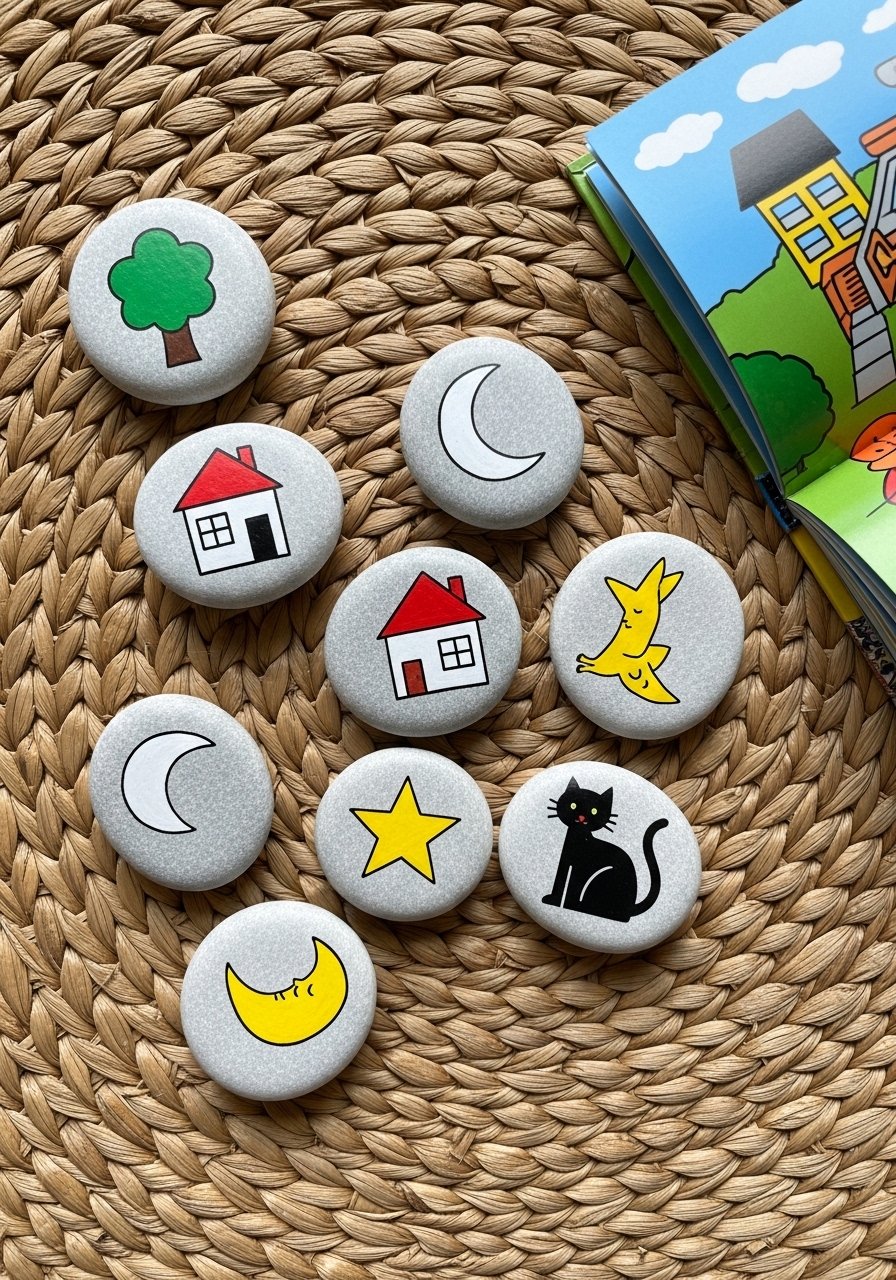
Story stones spark imagination for kids and are super cheap to make. Keep icons bold and simple for little hands to recognize.
Materials
- 12 small stones, 1–1.5 in (25–40 mm)
- Acrylic paint set (basic colors)
- Black paint pen for outlines
- Round brush size 1
- Small drawstring cotton bag for storage
- Matte sealer
Instructions
- Wash stones and let dry.
- Paint each stone with a pale background color (mixes work). Dry 20–30 minutes.
- Sketch simple icons with pencil, then paint with bright colors.
- Outline icons with a black paint pen for readability. Dry 10 minutes.
- Seal lightly and let cure 24 hours.
Troubleshooting: If outlines bleed, use less paint and allow base to fully cure before penning.
How to Display or Gift It
- Store in the drawstring bag for travel play.
- Use as bedtime story prompts or group activity prompts.
- Pair with a small fabric pouch like a drawstring cotton bag set.
- Geometric Tape Stones — crisp lines without freehand
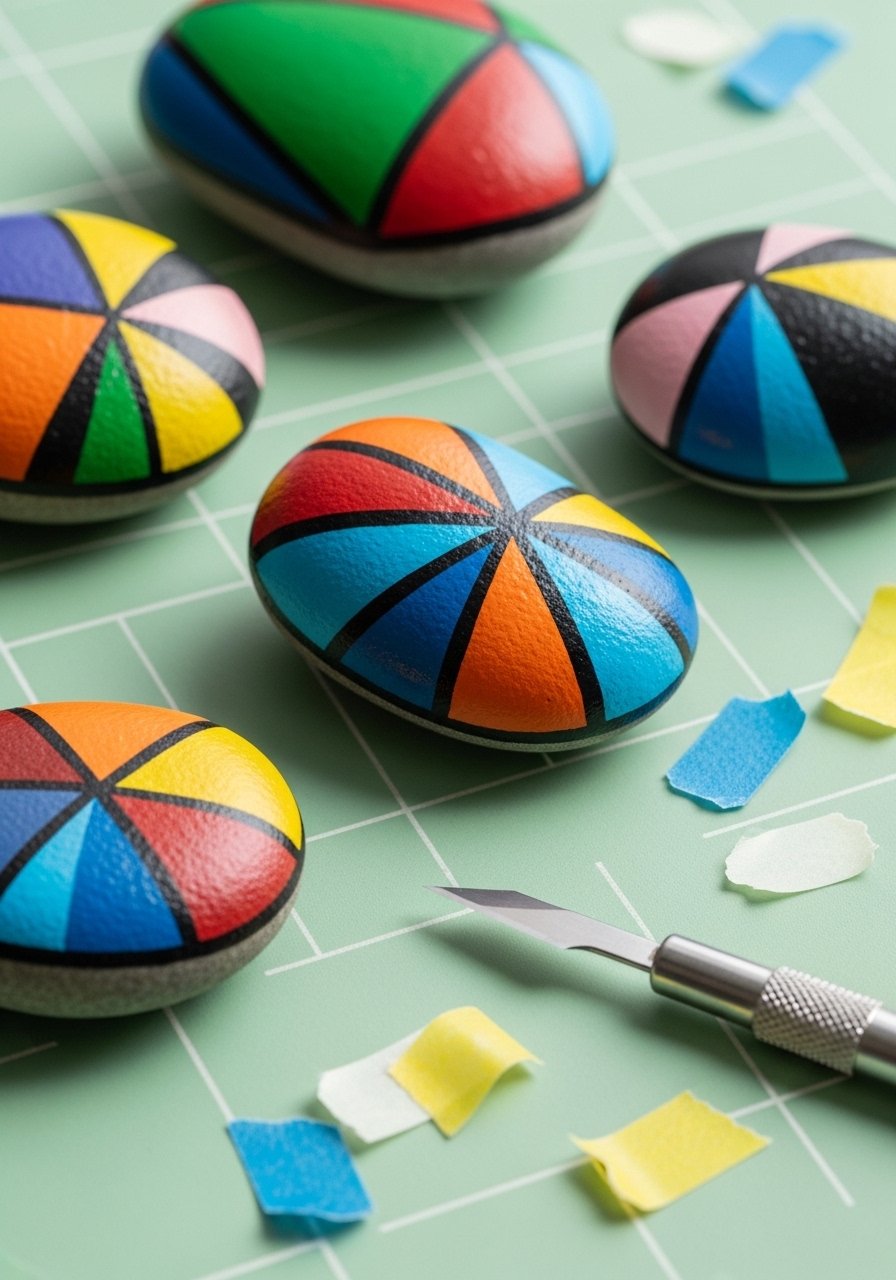
Painter’s tape is your friend for perfect geometric shapes on stones. Use low-tack tape to avoid peeling paint.
Materials
- 8 medium stones, 1.5–3 in (40–75 mm)
- Painter’s tape (1/4" or 1/8" narrow)
- Acrylic paints (2–3 colors)
- Craft knife or scissors for trimming tape
- Small flat brush for filling
- Matte sealer
Instructions
- Clean stones and paint a base color. Dry 20–30 minutes.
- Apply painter’s tape to create shapes; press down edges firmly.
- Paint over exposed areas. Allow first coat to dry 15–20 minutes, add second if needed.
- Carefully remove tape while paint is still slightly tacky to avoid lift.
- Touch up edges with a fine brush if needed. Seal with matte spray and let cure 24 hours.
Troubleshooting: If tape lifts paint, use low-tack painter’s tape and make sure base color is fully cured.
How to Display or Gift It
- Arrange in a tray for a modern accent.
- Glue to a wooden block to create a mini sculpture.
- Store in a craft supply box between projects.
- Pebble Pebble Magnets — tiny art for the fridge
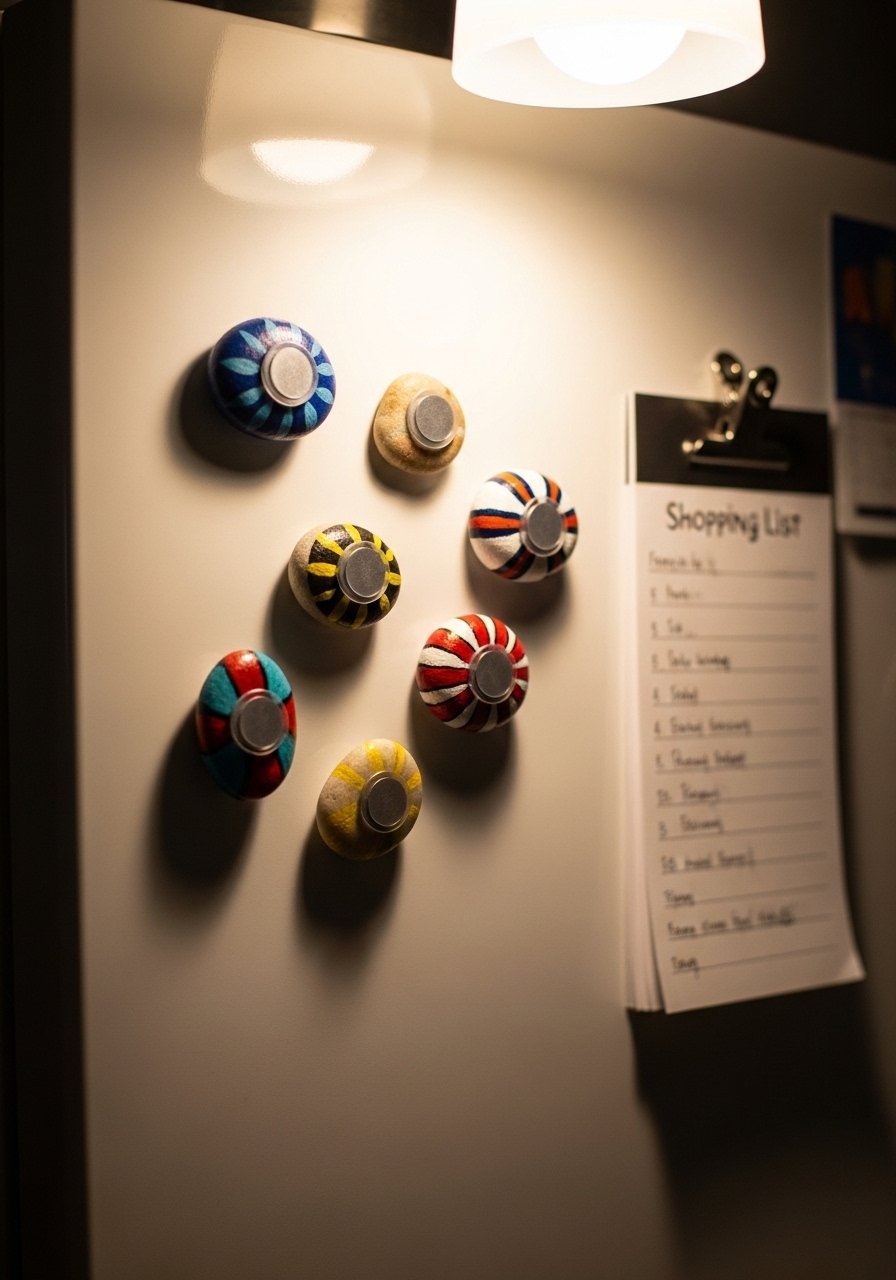
Turn tiny stones into cheerful fridge magnets. Use strong round magnets and E6000 or hot glue for hold.
Materials
- 6 small flat stones, 1–1.5 in (25–40 mm)
- Acrylic paints for design
- Strong adhesive magnets (6–12, small round)
- Hot glue gun or E6000 adhesive
- Fine detail brush
- Matte sealer
Instructions
- Paint stones as desired and let dry fully.
- Attach magnet to back with a dab of hot glue or E6000. Press for 30 seconds if hot glue, hold 5 minutes if E6000.
- Allow glue to cure fully per product instructions (E6000: 24 hours).
- Test magnet strength on fridge edge.
- Add felt pads if you want to protect surfaces.
Troubleshooting: If magnets fall off, re-glue with a stronger adhesive and allow full cure time.
How to Display or Gift It
- Pack three in a small kraft box as a hostess gift.
- Attach a tiny printed recipe to a magnet and gift as a fridge helper.
- Keep extras in a small parts organizer.
- Terrazzo Dots on Stone — farmhouse chic on a budget
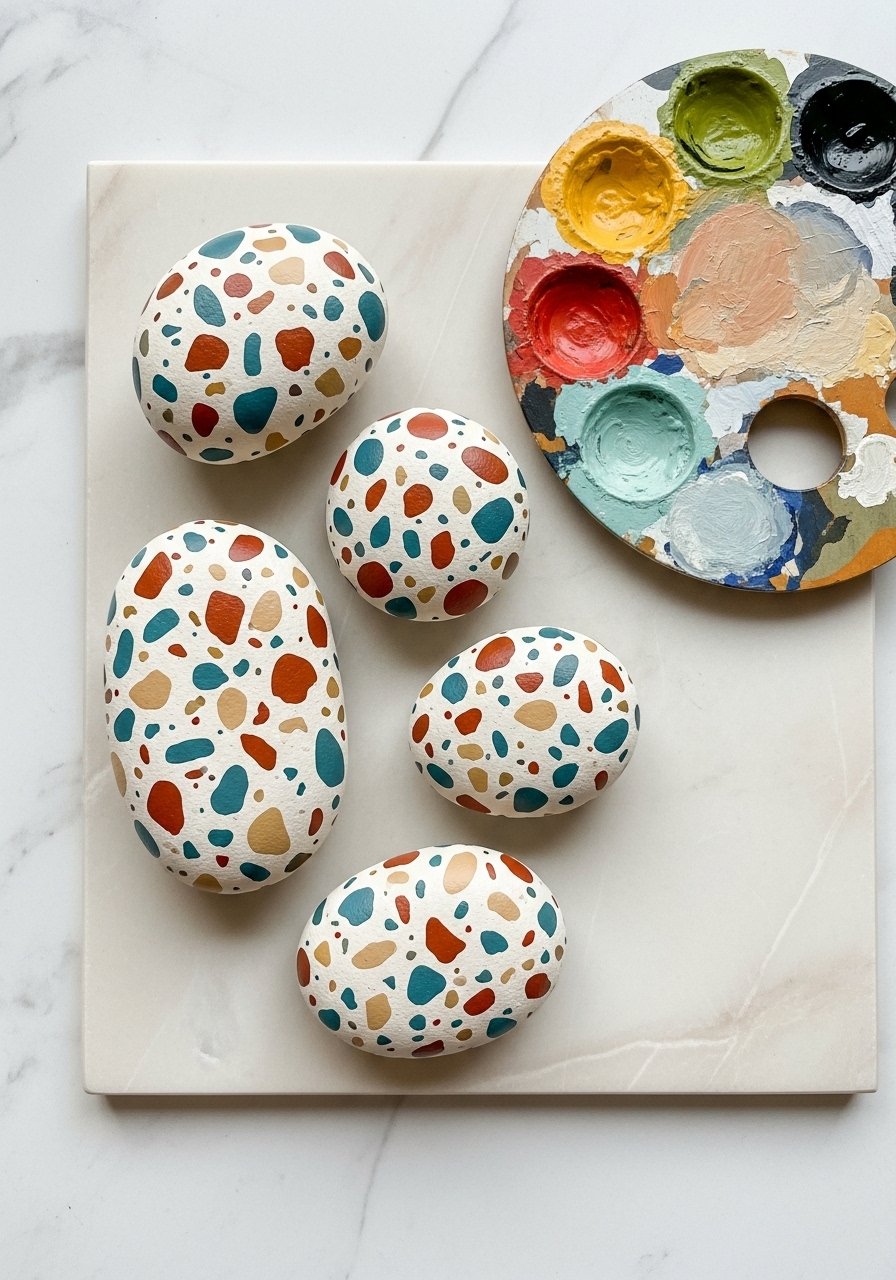
Terrazzo looks expensive but is simple: little chips of color over a neutral base. Use a toothpick or tiny brush for the chips.
Materials
- 6 medium flat stones, 1.5–2.5 in (40–60 mm)
- Acrylic paints in 6 tiny shades (a set works well)
- Toothpicks or small stipple brush
- Cream or warm white base paint
- Matte sealer
Instructions
- Paint a cream base and let dry 20–30 minutes. Add second coat if needed.
- Use a toothpick to drop small imperfect chips of color across the stone.
- Build layers, spacing chips so they look natural. Dry between layers 15–20 minutes.
- Once covered to satisfaction, seal with matte spray (two light coats). Cure 24 hours.
Troubleshooting: Keep chips irregular — perfect shapes can look too planned.
How to Display or Gift It
- Use as decorative shelf accents.
- Glue onto a small wooden coaster for a unique drink coaster.
- Store in a shallow tray organizer.
- Metallic Dipped Stones — luxe accents for little money
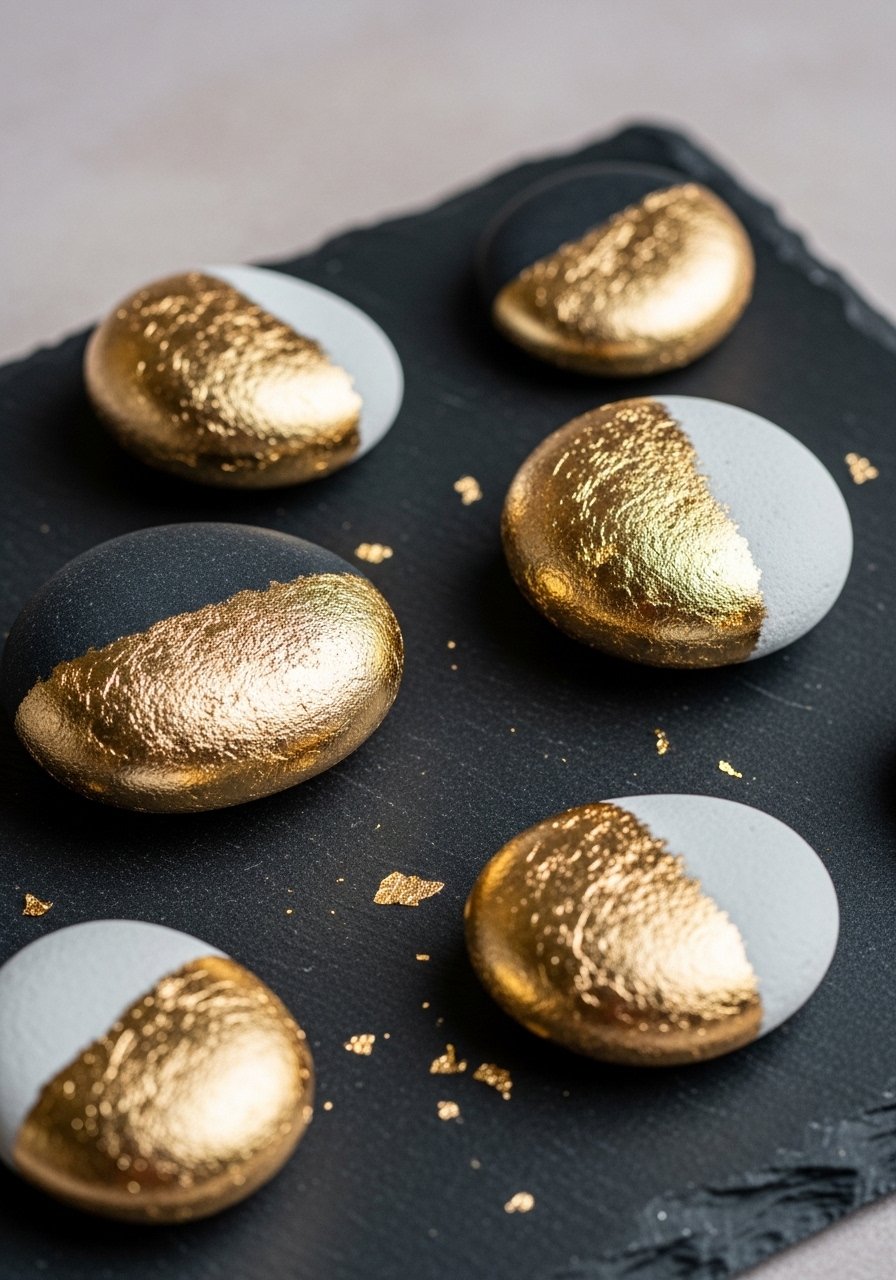
A metallic dip gives a chic highlight. Try metallic acrylic or leafing paint for a glint without gold leaf mess.
Materials
- 8 stones, mixed sizes
- Acrylic paints for base (2 coats)
- Metallic gold acrylic paint or gold leaf paint
- Flat foam brush
- Fine detail brush for edges
- Satin sealer (to reduce metal dulling)
Instructions
- Paint the base color and let dry 20–30 minutes. Add second coat if needed.
- Mask the dipping line with a pencil guide or painter’s tape if you want a crisp edge.
- Apply metallic paint to top or half; smooth with a fine brush.
- Let metallic layer dry 30–45 minutes. Add a second thin coat if needed.
- Seal with satin sealer in two light coats; cure 24 hours.
Troubleshooting: Metallics often show brush strokes; use thin coats and smooth quickly.
How to Display or Gift It
- Place on a coffee table stack with candles.
- Glue to a small slate tile to make a jewelry tray.
- Wrap individually in tissue for a thoughtful hostess gift.
- Abstract Brushstroke Stones — expressive and fast
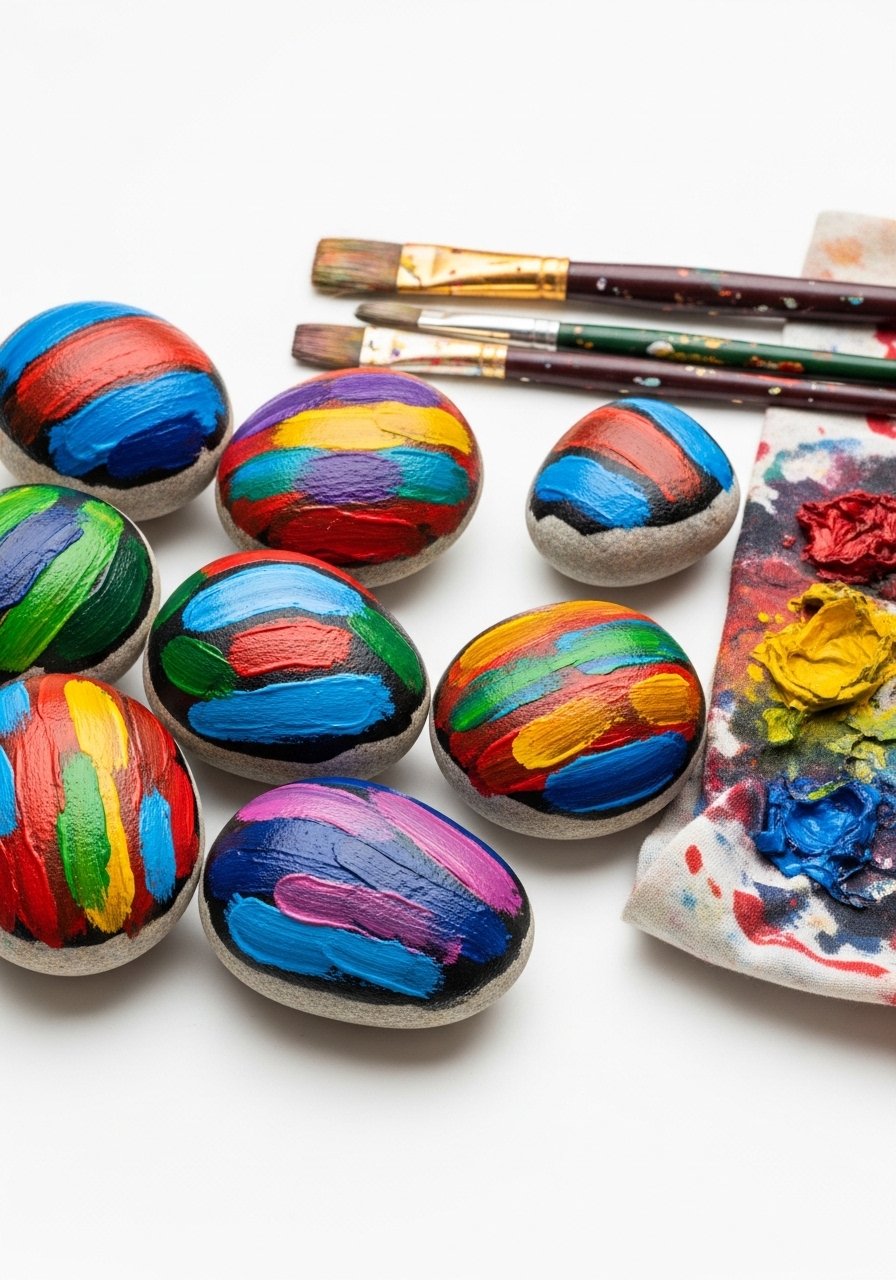
Expressive strokes look artistic without precision. This method is great for using leftover paints.
Materials
- 10 small stones, assorted
- Acrylic paints, assorted leftover colors
- Flat and round brushes (sizes 1–6)
- Palette or plate
- Matte sealer
Instructions
- Base coat stones with a neutral color to unify the set. Dry 20–30 minutes.
- Load your brush with paint and make single confident strokes across the stone.
- Layer contrasting colors after 10–15 minutes when the first layer is slightly tacky.
- Let dry 30–45 minutes, then assess if more strokes are desired.
- Seal in a single light coat of matte sealer. Cure 24 hours.
Troubleshooting: Avoid overworking — bold looks benefit from restraint.
How to Display or Gift It
- Group several on a mantel for a mini gallery.
- Mount onto magnetic sheets for portable art.
- Store flat in a shallow box organizer.
- Holiday Theme Stones — cheap seasonal swaps
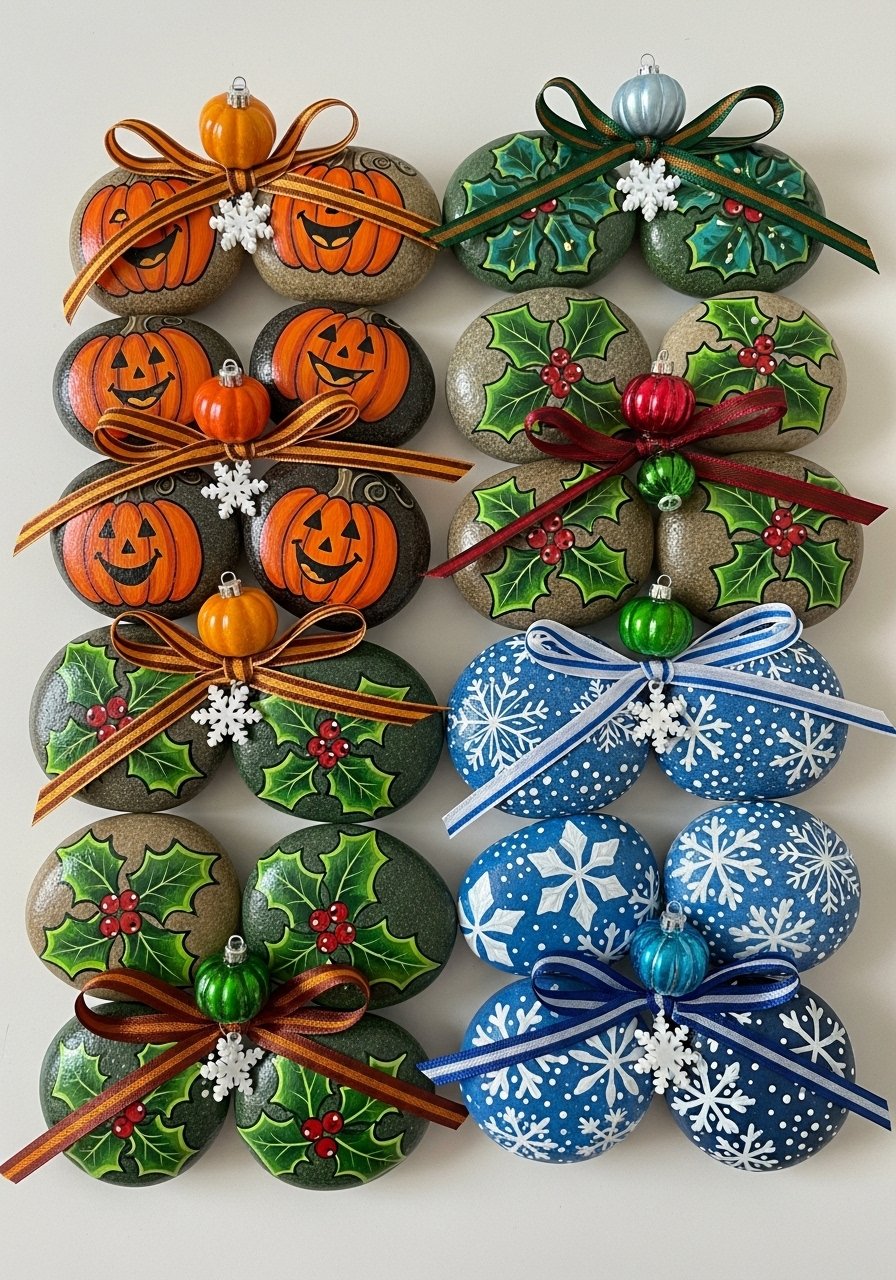
Make themed stones for quick seasonal decor. Swap designs through the year and store them together.
Materials
- 12 stones (mix sizes)
- Acrylic paints in seasonal palettes (small tubes)
- Fine detail paint pens for small details
- Foam brush
- Glitter glue (optional festive touch)
- Matte or gloss sealer based on finish
Instructions
- Paint base colours appropriate to the holiday. Dry 20–30 minutes.
- Add main motifs with a round brush or paint pens. Dry 10–20 minutes between details.
- For sparkle, apply a tiny amount of glitter glue and let fully dry.
- Seal with appropriate finish — gloss for shiny ornaments, matte for rustic looks. Cure 24 hours.
Troubleshooting: For crisp tiny shapes, paint larger blocks first and outline with a paint pen afterward.
How to Display or Gift It
- Tuck into wreaths, centerpieces, or gift boxes.
- Keep sets labeled by season in labeled kraft gift boxes for easy access.
- Story Character Stones for Puppets — playtime props
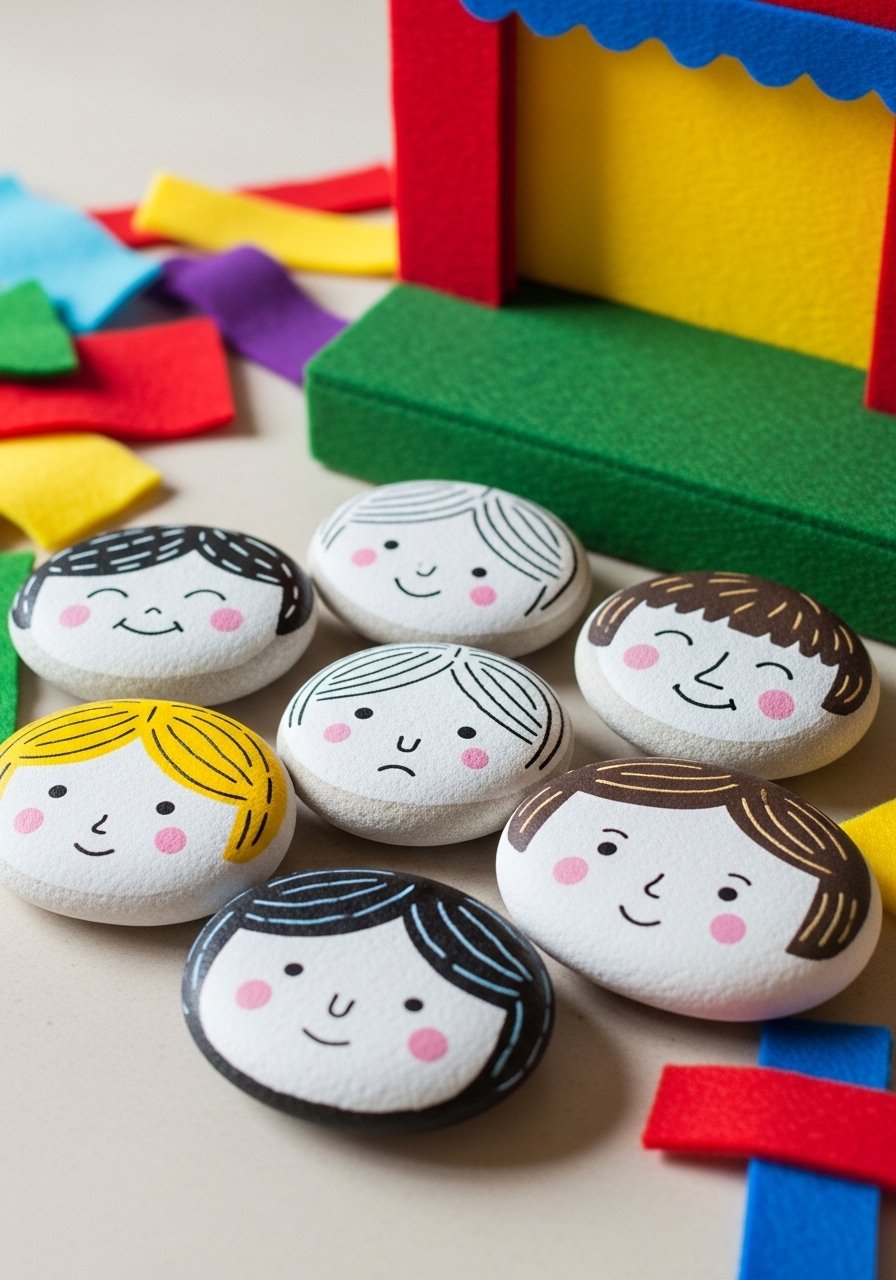
Perfect for preschool storytelling. Keep faces big and expressive for readability.
Materials
- 8 flat stones
- Acrylic paints for skin tones and features
- Round brushes, sizes 0–2
- Black paint pen
- Small cotton bag for storage
- Matte sealer
Instructions
- Paint skin-tone base and let dry 20–30 minutes.
- Add eyes, mouths, and hair shapes with a small round brush.
- Outline features with a black paint pen for clarity.
- Let dry 20 minutes, then seal with matte spray. Cure 24 hours.
Troubleshooting: Use simple expressions — kids respond to bold shapes.
How to Display or Gift It
- Pack in a small drawstring bag for travel.
- Use as story prompts in group circle time.
- Store in a child-safe craft bin.
- Leaf-Print Stones — nature-inspired monochrome
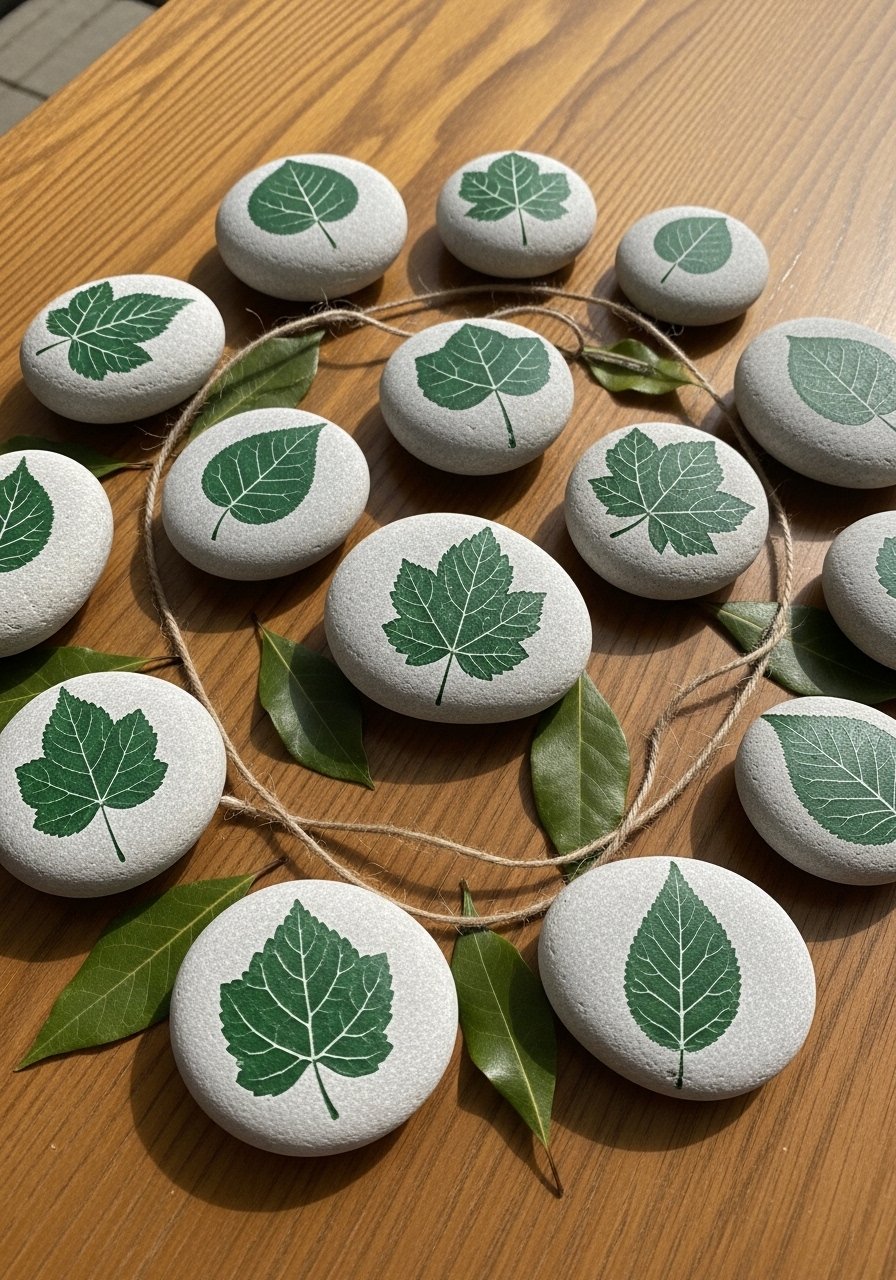
Press a leaf into paint then onto a stone for a charming imprint. Great for nature walks and memory-making.
Materials
- 6–10 stones
- Real leaves collected from outside
- Acrylic paint in a deep green
- Foam brush
- Paper plate for pressing
- Matte sealer
Instructions
- Clean stones and let dry.
- Paint one side of leaf lightly with foam brush.
- Press paint-side down onto stone, hold for 10–20 seconds, then peel gently.
- Let paint dry 20–30 minutes, add details with a fine brush if desired.
- Seal with matte spray; cure 24 hours.
Troubleshooting: Thick paint blurs edges — use a light, even coat on the leaf.
How to Display or Gift It
- Tie a small bundle with twine and a dried leaf as a gift.
- Place in a windowsill with dried botanicals.
- Store flat in a document box.
- Nautical Anchor Stones — beachy décor from found pebbles
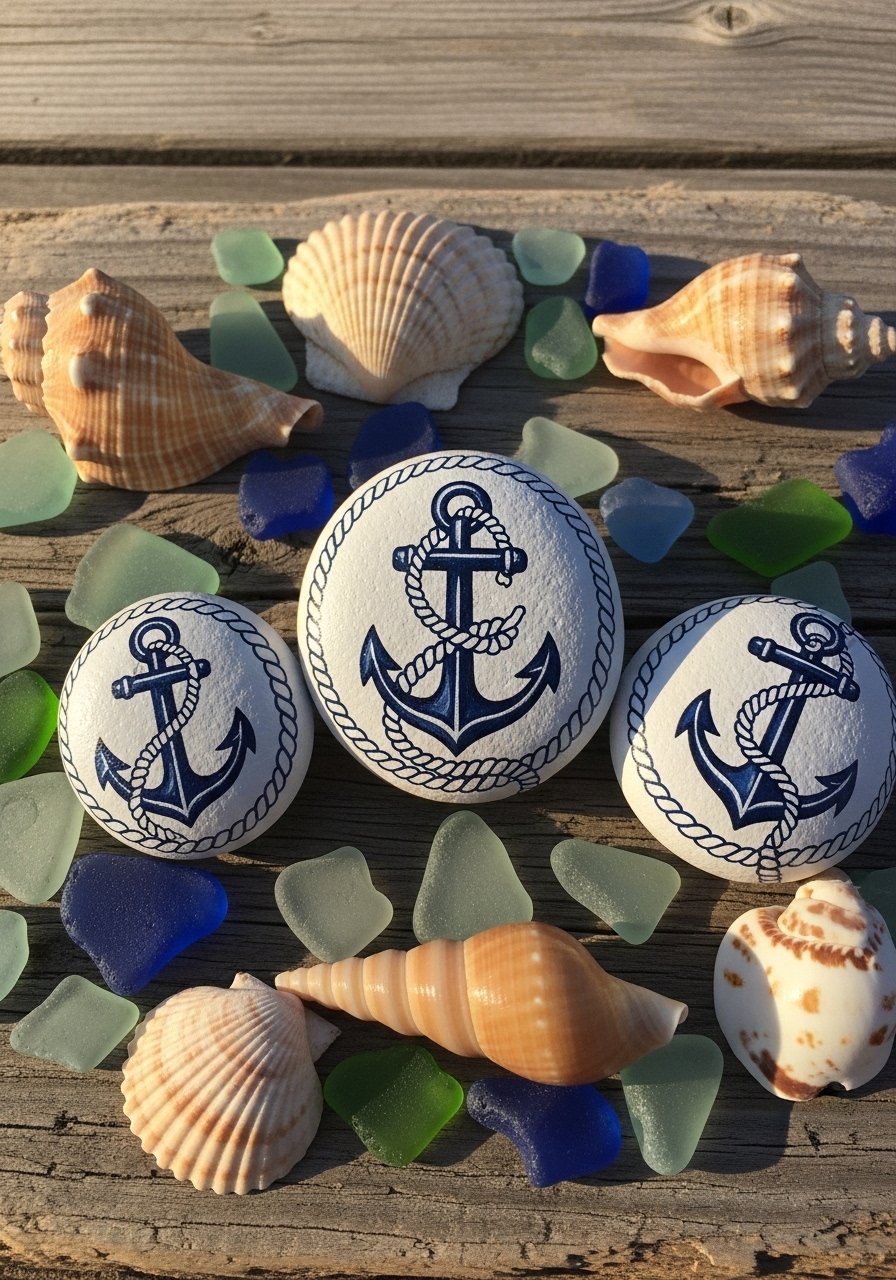
Use coastal motifs to bring beach vibes home. Navy and white keep it classic.
Materials
- 8 beach pebbles
- Acrylic paints: Navy, white, and sandy beige
- Fine liner brush and round brush
- Fine sandpaper
- Matte sealer
Instructions
- Clean and sand lightly.
- Paint a sandy base (two coats if needed). Dry 20–30 minutes.
- Use a fine liner to paint anchors and rope accents.
- Let dry 20 minutes. Add small white dots for highlights.
- Seal with matte spray and allow 24 hours to cure.
Troubleshooting: For steadier lines, rest your hand on the table and use a thin brush.
How to Display or Gift It
- Glue to driftwood for a coastal mobile.
- Pack with shells in a clear jar for a beach-scented gift.
- Keep in a small glass jar set.
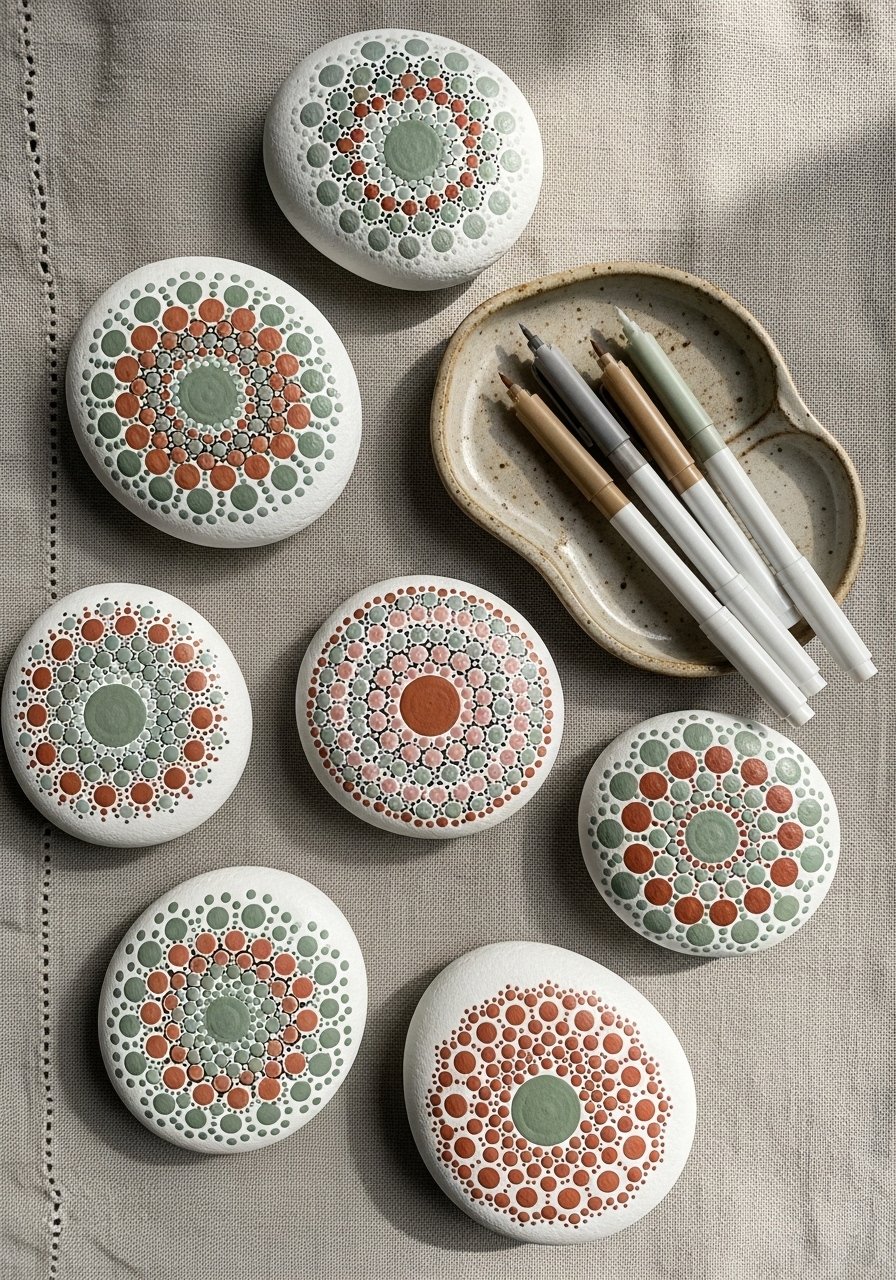
- Pebble Mandalas — meditative dot art in miniature
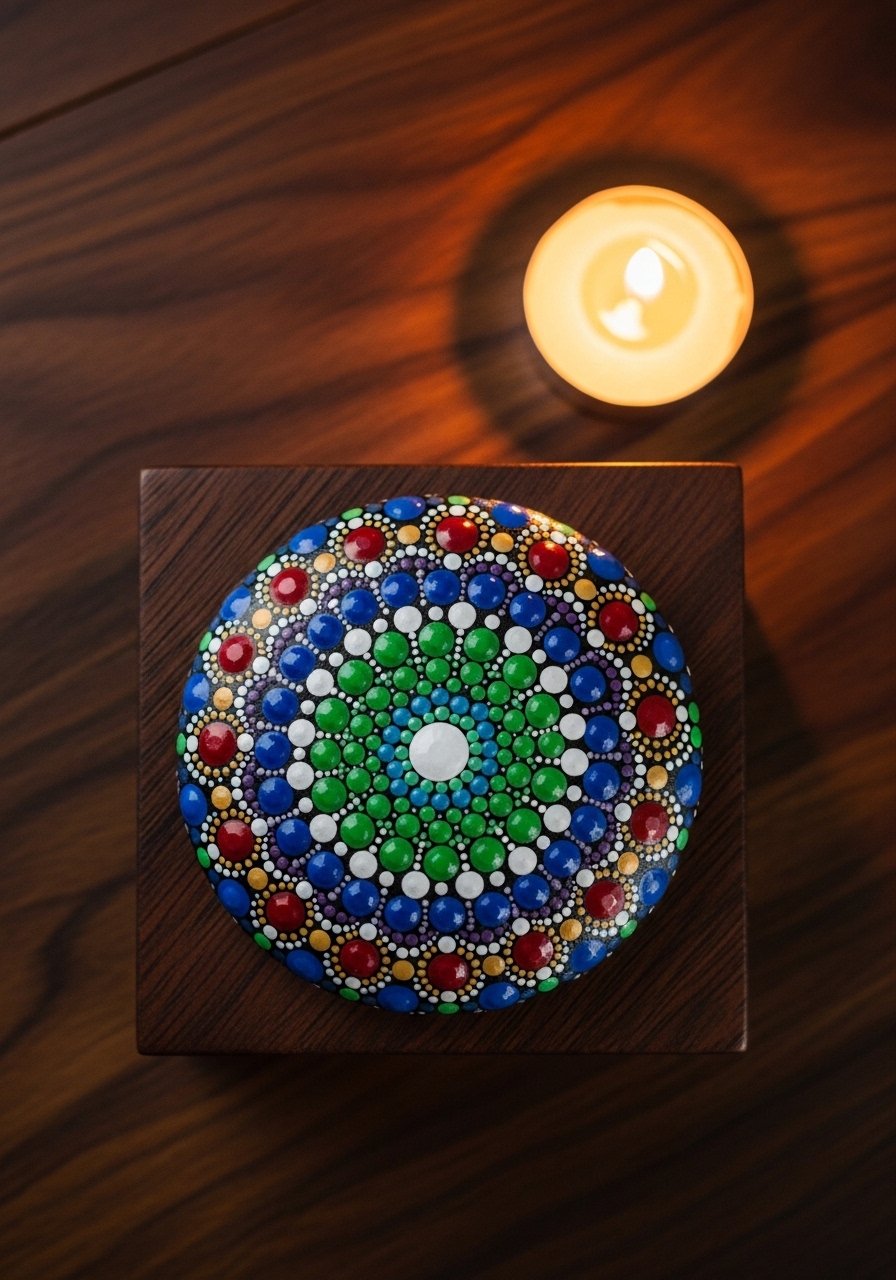
Mandalas are calming to paint and look intricate even with simple repetition. Great for mindful crafting sessions.
Materials
- 1 large flat stone, 3–4 in (75–100 mm)
- Acrylic paints in 4–6 coordinating shades
- Dotting tool set (3 sizes)
- Pencil and ruler for center lines
- Matte sealer
Instructions
- Draw faint center lines to guide pattern.
- Paint a neutral base and let dry 30 minutes.
- Use the dotting tools to build concentric rings of dots, drying 10–15 minutes between color changes.
- Vary dot sizes for interest.
- Seal with matte spray (two light coats). Cure 24 hours.
Troubleshooting: If dots smear, wait until fully tack-free before the next ring.
How to Display or Gift It
- Place on a tiny wooden easel as a mini meditation focal point.
- Give as a calming gift with a small candle.
- Store on a shelf in a small display easel.
- Faux Agate Slice Stones — painted mineral slices on pebbles
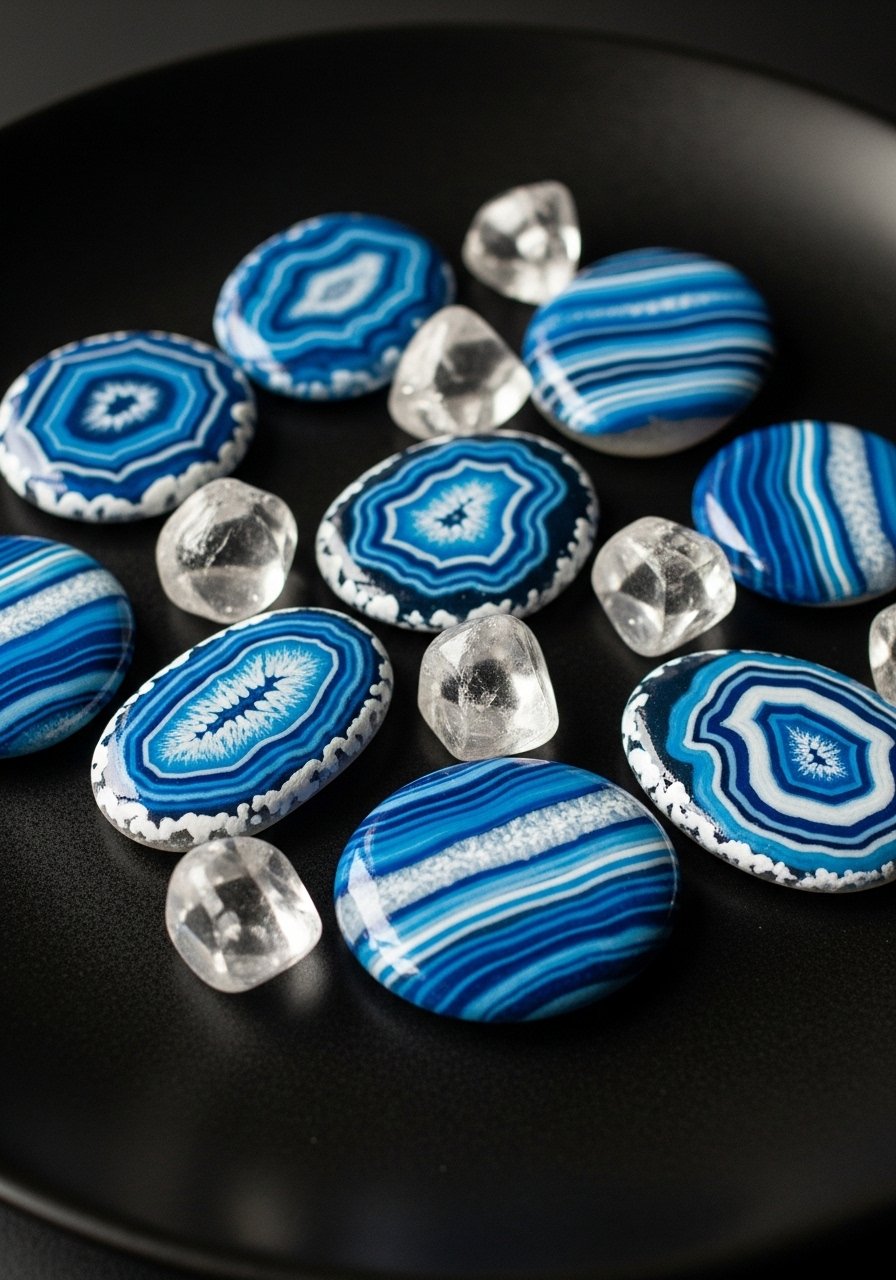
Mimic the look of agate with layered translucent washes. Thin paint layers are key.
Materials
- 6 smooth stones, 2–3 in (50–75 mm)
- Acrylic paints thinned with water (blue, white)
- Small round brushes
- Gloss sealer (to imitate stone sheen)
- Palette
Instructions
- Paint a translucent base wash (thin paint with water). Dry 20–30 minutes.
- Layer slightly darker washes to create bands. Let each layer dry 15–20 minutes.
- Add tiny white veins with a fine brush.
- Seal with gloss sealer in two light coats; cure 24–48 hours for a glass-like finish.
Troubleshooting: Too-thin paint will bead; adjust water ratio to be watery but pigmented.
How to Display or Gift It
- Arrange on a tray with tealight candles.
- Package with a small card describing the inspiration.
- Store in a padded gift box set.
- Painted Garden Markers — cheap, weather-friendly labels
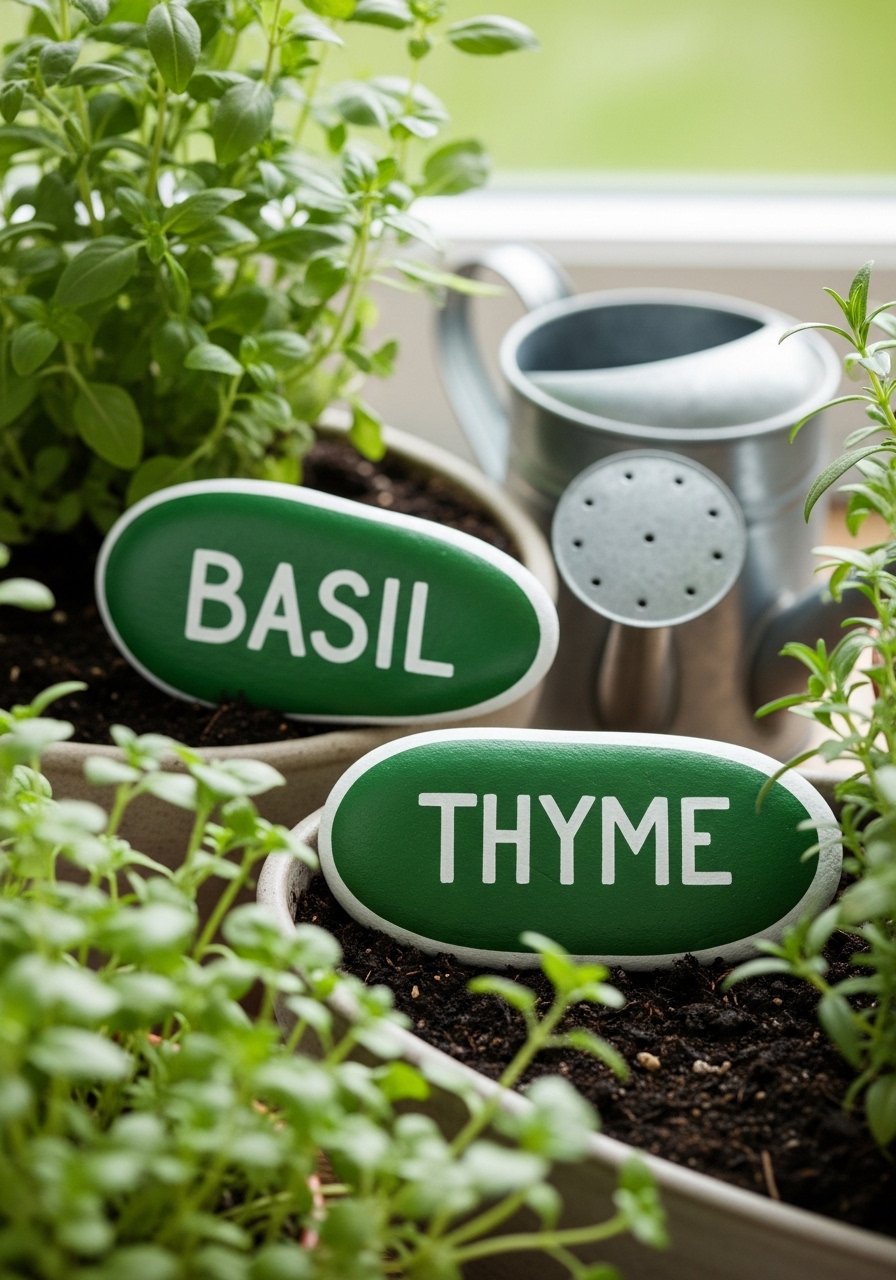
Label herbs and veggies with waterproof paint or outdoor sealer. These are functional and decorative.
Materials
- 6 elongated flat stones, 2–3 in (50–75 mm)
- Outdoor acrylic paint or regular acrylic with outdoor sealer
- White paint pen for lettering
- Flat brush and small detail brush
- Outdoor clear sealer spray
Instructions
- Clean stones and paint a solid green background. Dry 30 minutes and add second coat.
- Write names in white paint pen once background is fully dry.
- Once ink is dry 15 minutes, spray with outdoor sealer. Apply two coats, 15 minutes apart.
- Allow full cure 48 hours before placing outside.
Troubleshooting: If outdoors, elevate stones slightly to avoid soil contact that can wear paint.
How to Display or Gift It
- Set in front of plant pots or beds.
- Pair three markers in a small potted herb garden for gifting.
- Store extra markers in a garden tote; try a garden tote bag.
- Tiny Mosaic Painted Stones — faux tile effect
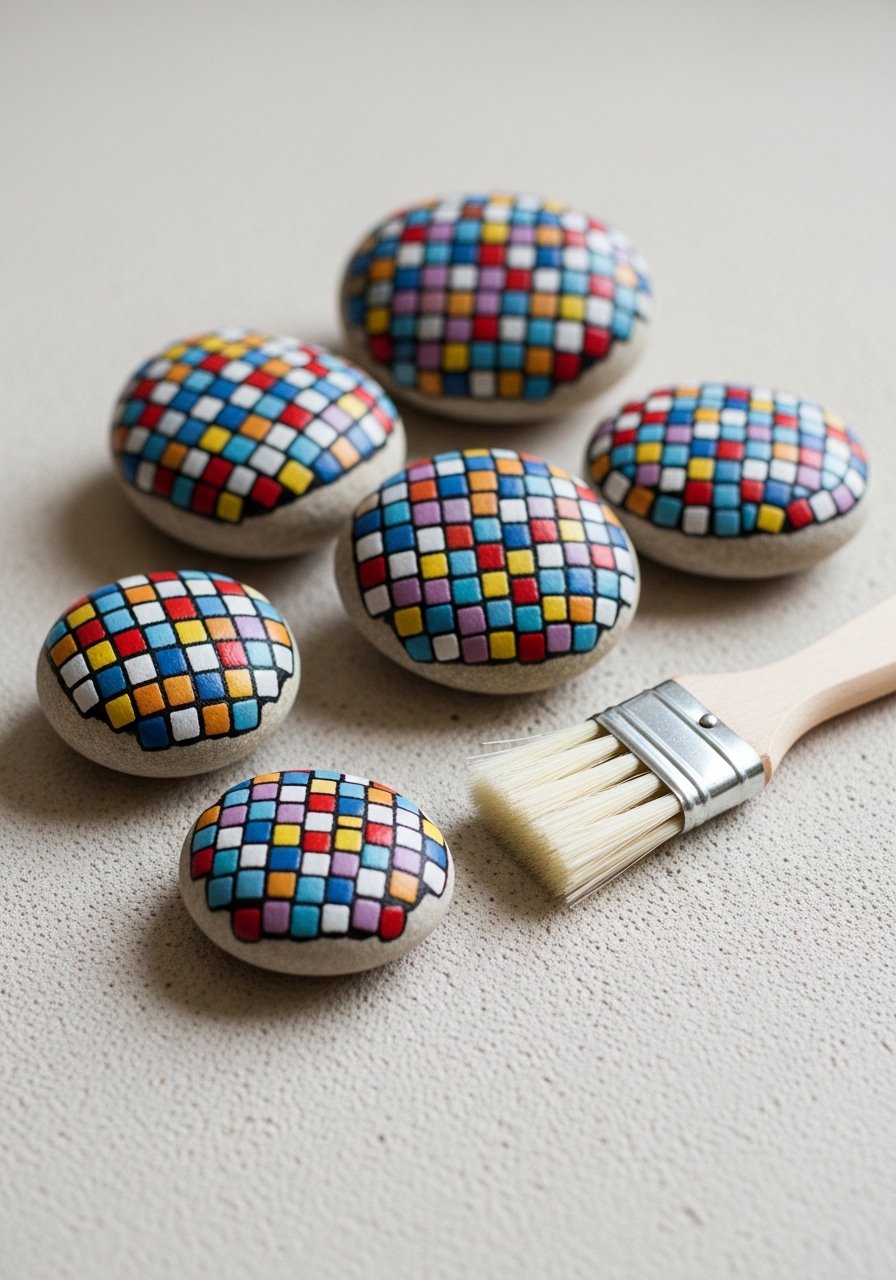
Create a mosaic effect with tiny painted blocks and dark grout lines. It’s modern and tactile.
Materials
- 6 stones
- Acrylic paints in 6 bright colors
- Fine liner brush
- Black paint for grout lines
- Matte sealer
Instructions
- Paint a light base and let dry 20–30 minutes.
- Using a fine brush, paint small squares across the stone.
- Once colors are dry, draw thin black lines between squares to act as grout.
- Touch up colors as needed. Seal with matte spray. Cure 24 hours.
Troubleshooting: Keep squares imperfect for a handcrafted look.
How to Display or Gift It
- Glue to the faces of small wooden blocks for mini display tiles.
- Bundle with a small tile coaster set for a mixed-media gift.
- Store in a shallow drawer organizer.
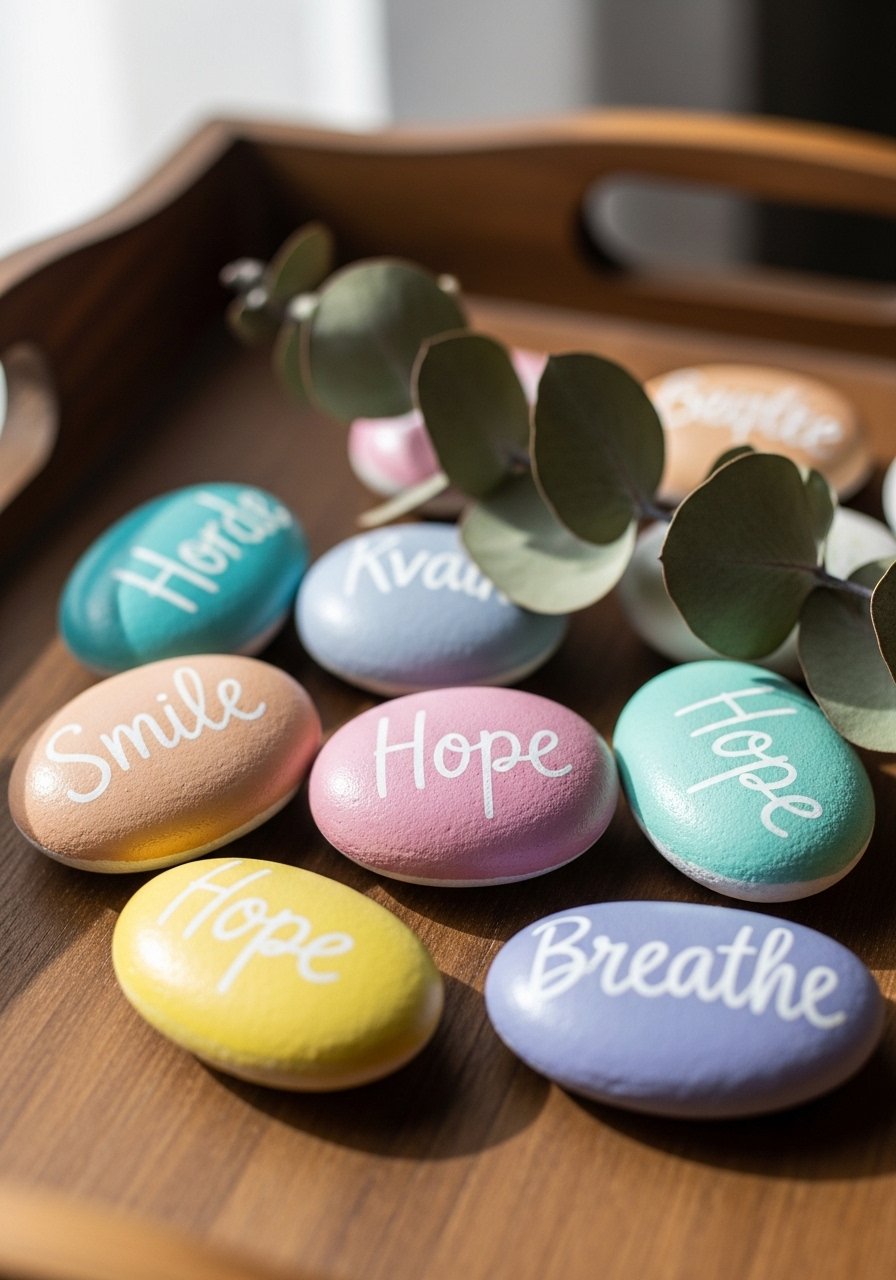
- Painted Word Rocks for Gratitude — daily reminder stones

Short, single-word stones are great for a gratitude jar or a daily pick-me-up. Keep type legible with a paint pen.
Materials
- 10 small stones
- Neutral base paint
- Black or white paint pen (bold tip)
- Flat foam brush
- Small kraft jar for storage
Instructions
- Paint neutral bases and dry 20–30 minutes.
- Write one word per stone with a bold paint pen. Allow ink to dry 10 minutes.
- Seal lightly (optional) and place in a jar for daily picks.
Troubleshooting: If pen smudges, wait longer before sealing or use a different pen brand.
How to Display or Gift It
- Keep in a jar labeled “Daily Words” on a bedside table.
- Gift as a set of morning mantras in a small kraft jar.
- Store extras in a mason jar with ribbon.
- Painted Rock Paperweights — functional art for desks
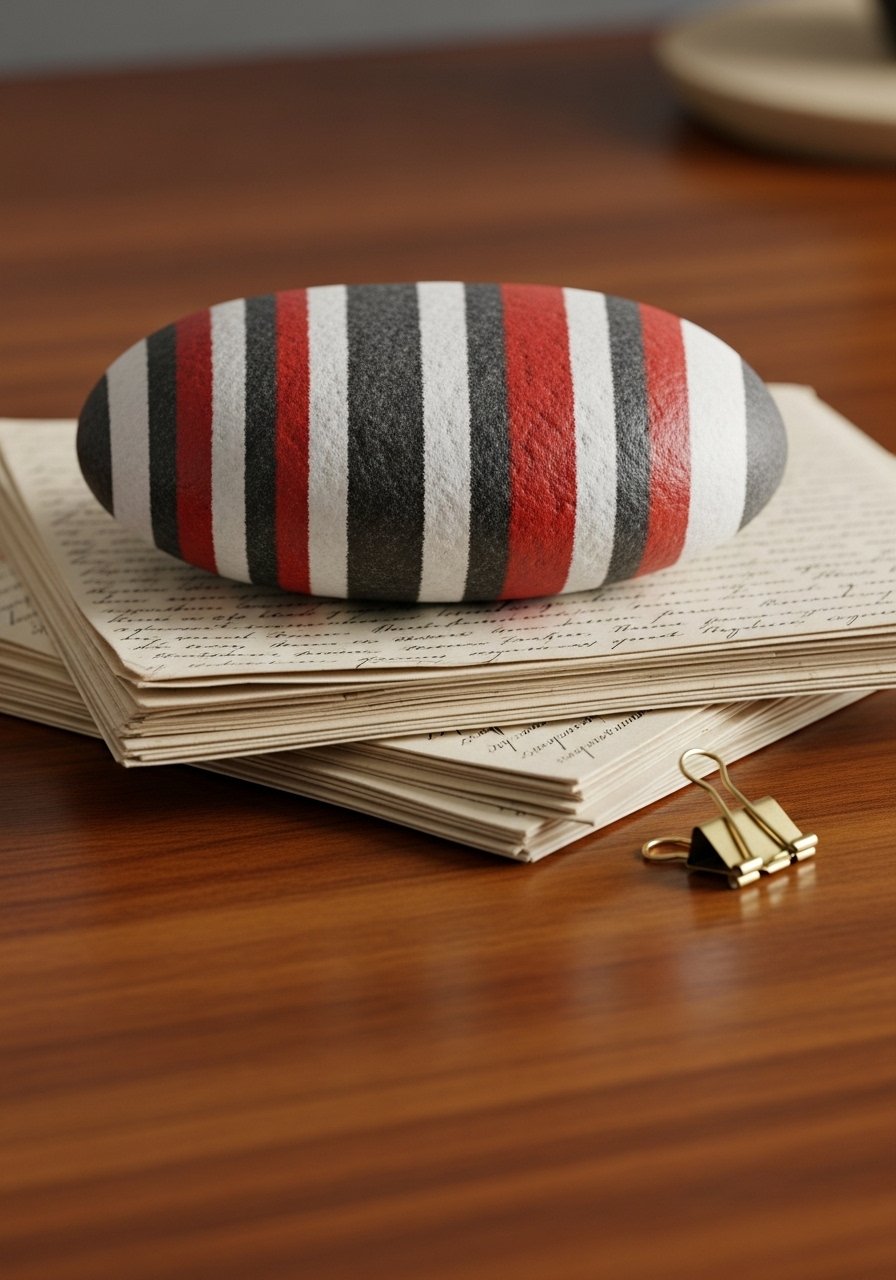
Make a few weighted stones for tidy desks. Bold graphics or initials make them personal.
Materials
- 2–4 heavy stones, 3–4 in (75–100 mm)
- Acrylic paints (bold colors)
- Large flat brush and small detail brush
- Satin sealer
- Felt pads to protect desk surfaces
Instructions
- Clean and paint bold patterns or initials. Dry 30 minutes between coats.
- Apply two coats for opacity where needed.
- Attach felt pads to the bottom to prevent scratching.
- Seal with satin sealer for a slight sheen. Cure 24–48 hours.
Troubleshooting: If paint chips, sand lightly and add a thin primer-like base coat (gesso) before painting.
How to Display or Gift It
- Tie to a set of stationery as a desk gift.
- Use as a bookend for thin paper stacks.
- Store in a desktop organizer or gift box.
You made it to the end — bravo! There’s a huge range here: quiet minimalist dots, playful story stones, garden-ready markers, and small keepsake portraits. Each of these budget stone painting ideas is designed to use minimal supplies, short dry times, and easy techniques so you can make batches without breaking the bank.
Pin a few favorites to try later, and pick one project to start today — I promise it’ll be quick and satisfying. Which stone idea are you most likely to make first? Share with a friend and tag along on a little painting afternoon; it’s a sweet, low-cost way to spend time together. And if you want one tool that speeds up many of these projects, consider grabbing a good-value acrylic craft paint set — it keeps color options open and reduces stops at the store. Happy painting!


