You want a quick, practical project that teaches the basics without a big time commitment. Learning how to knit a dishcloth for beginners is the perfect one-afternoon project — it’s forgiving, useful, and gives you practice with knit and purl. You’ll finish with a scrubbable cloth that looks great on the sink and builds confidence for larger projects.
The secret? Use a smooth, absorbent cotton yarn and a comfortable pair of needles so stitches glide without slipping. I like working with cotton dishcloth yarn and a pair of bamboo knitting needles in US 8 for grip and speed. These two changes cut frustration and make practice feel productive.
Read on to learn how to knit a dishcloth for beginners step-by-step, with simple stitch patterns, timing tips, and finishing tricks you can use right away.
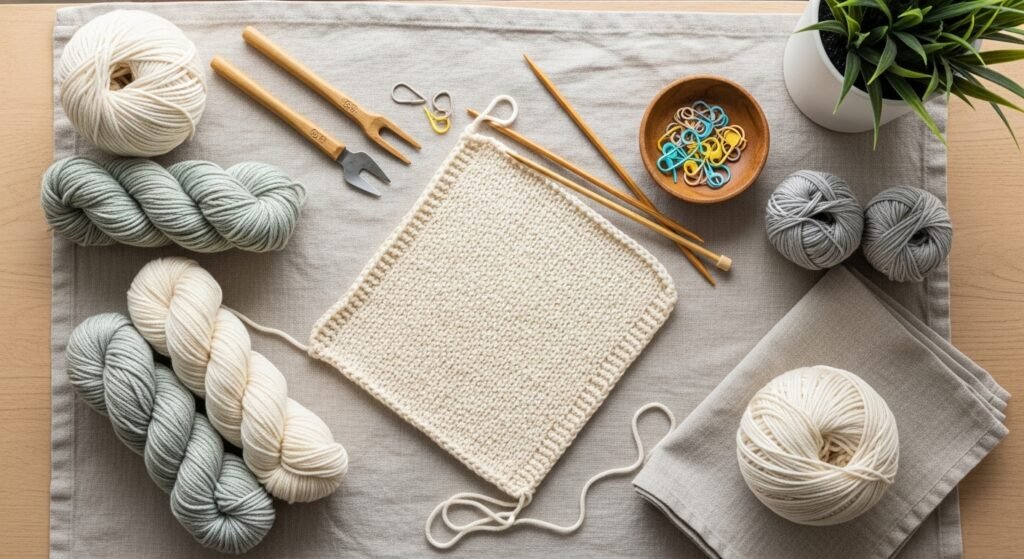
Gather and prep your materials (easy, one-afternoon project)

Before you cast on, prep saves time. For a standard dishcloth, plan for one skein (approx. 100–120 g) of cotton worsted-weight yarn — that’s enough for a approximately 8"–9" square dishcloth. Measure as you go.
Helpful picks:
- Use stitch markers to mark pattern repeats.
- Keep a flexible measuring tape nearby to check size.
- A pair of craft scissors and a tapestry needle make trimming and weaving ends tidy.
Prep tip: Wind your yarn into a center-pull ball so it doesn’t roll while you work. Use a wooden yarn bowl if you like an extra-smooth feed.
Cast on and knit the core stitches (beginner-friendly seed and garter)
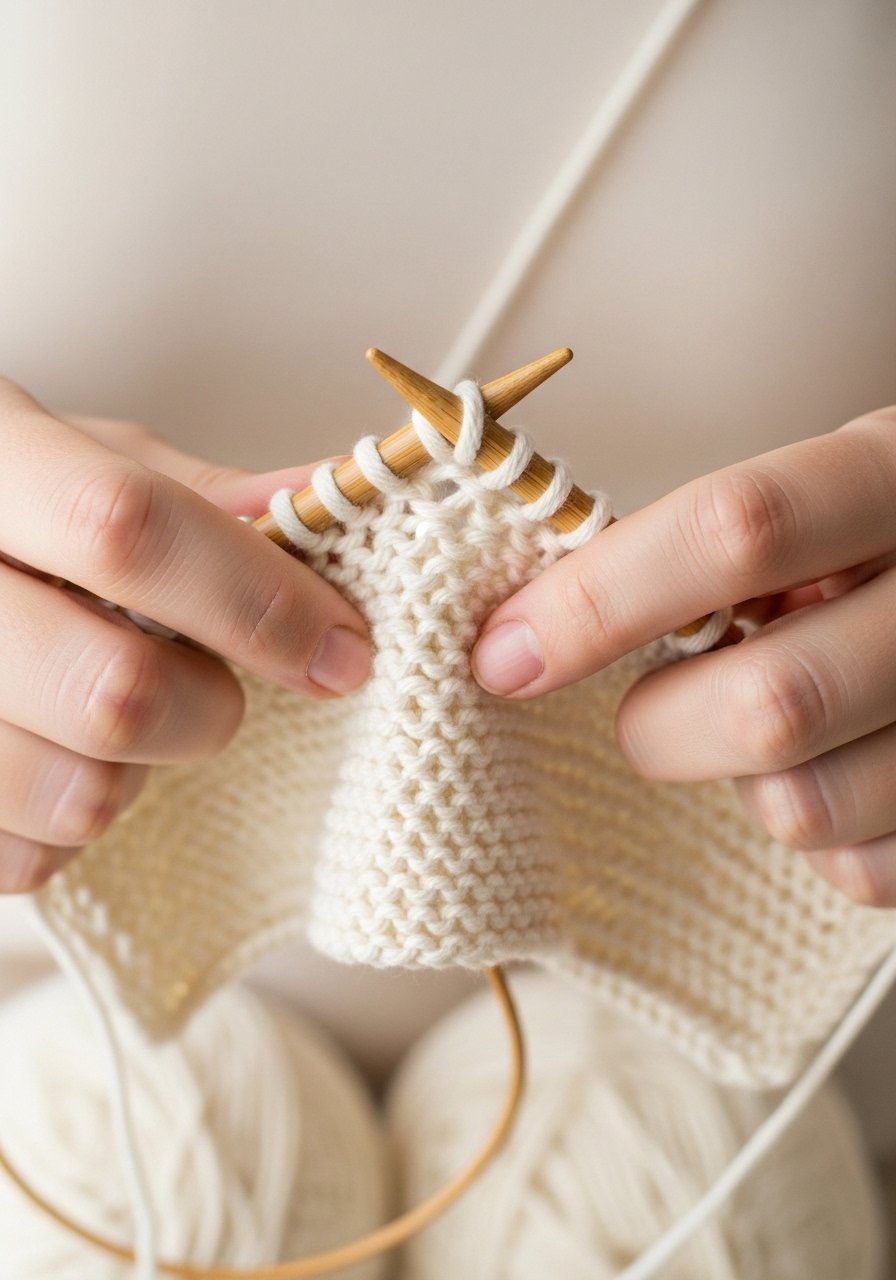
You’ll practice the fundamental knit and purl while making textures that scrub well.
Try this simple pattern (approx. 8" square):
- Cast on 36 stitches with your US 8 needles.
- Row 1–6: Knit every stitch (garter ridge base).
- Row 7: K1, p1 across (seed stitch start).
- Continue seed stitch for about 6 inches or until the piece measures 8–9 inches.
- Finish with 6 rows garter (knit every stitch) and bind off loosely.
Numbered tips:
- Keep tension even — not too tight, or the cloth won’t lie flat.
- Use a knitting row counter when you want to track repeats without guessing.
- If stitches feel tight, switch briefly to needles one size larger.
Common mistake to avoid: binding off too tightly. Leave the final edge slightly loose so the cloth sits flat.
Finish and block for a professional look (no-sew finishing)
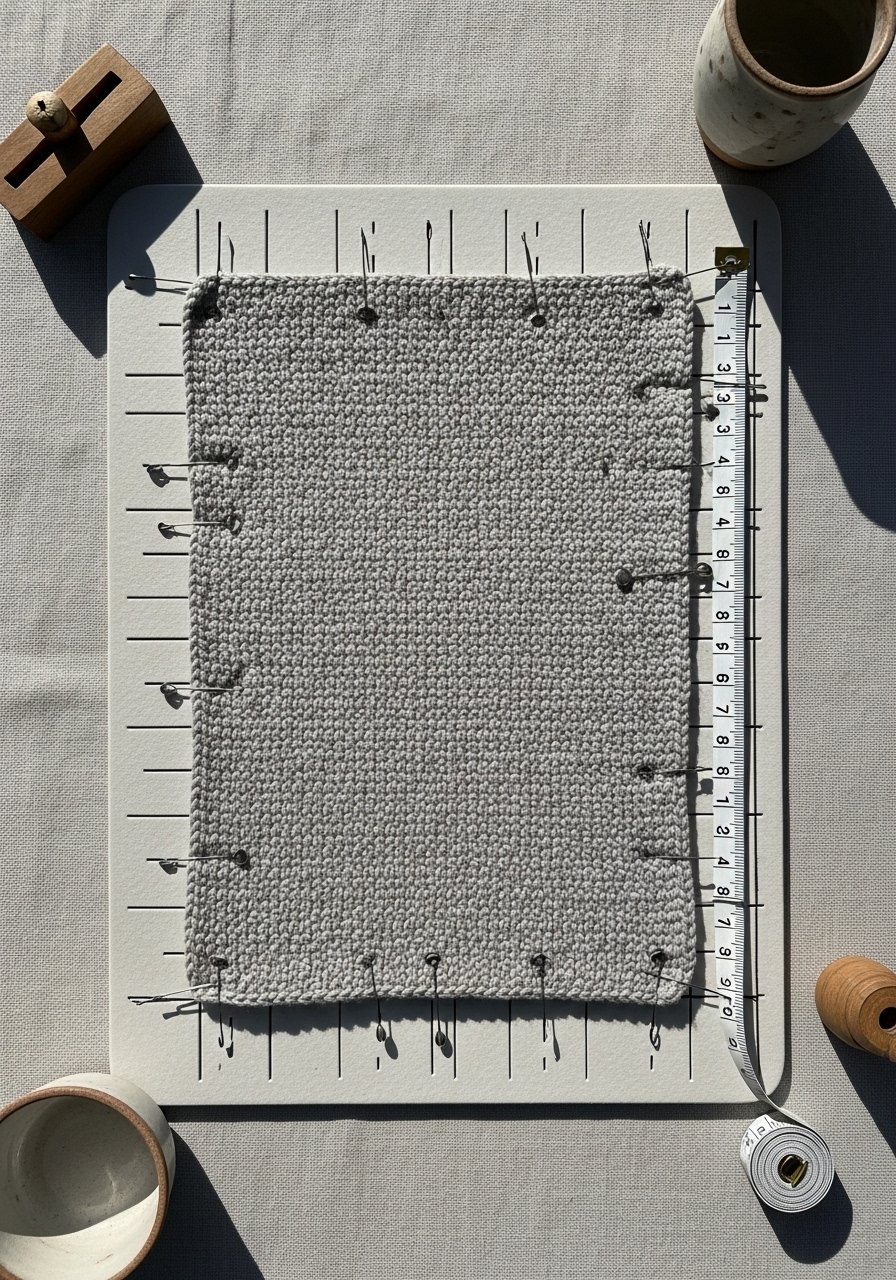
Finishing makes the cloth both prettier and more functional. Weave in tails with a tapestry needle and block the cloth flat.
Steps:
- Soak the cloth in lukewarm water for 5–10 minutes, gently squeeze (no wringing).
- Lay flat on a blocking mat and pin edges square with rust-proof blocking pins.
- Let dry completely — 12–24 hours depending on humidity.
Pro tip: Add a small hanging loop before the final bind-off by leaving a longer tail and threading it through the top edge.
Store, gift, and variations (budget and upcycled ideas)
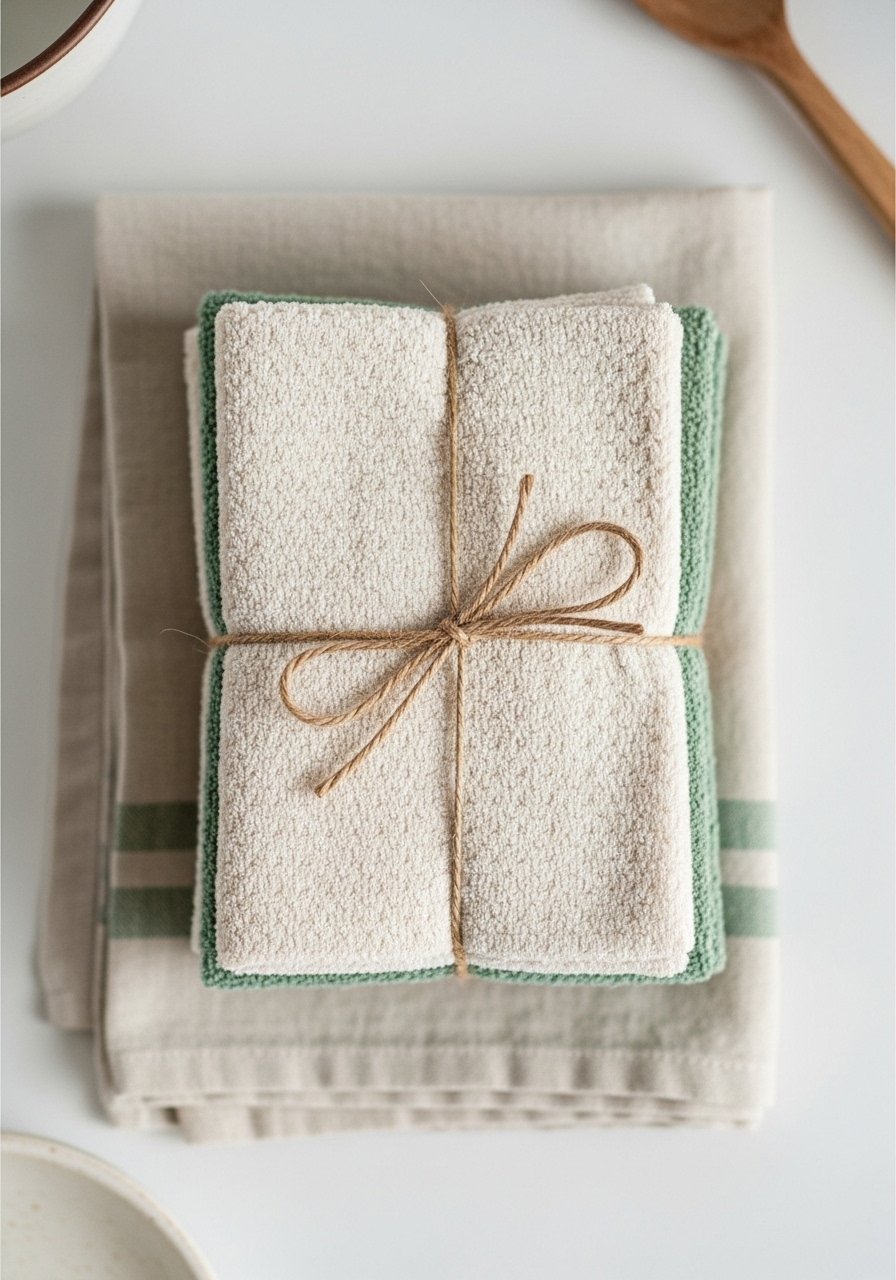
Once you can knit a dishcloth for beginners, variations are quick:
- Try alternating garter and seed stripes for texture.
- Use leftover cotton scraps for colorful, upcycled cloths.
- Batch-make three cloths in an afternoon — keep finished stacks in clear zip pouches for gifting.
Storage tip: Store flat in a drawer or wrap in tissue for gifting. A knitting gauge ruler helps you reproduce sizes reliably.
You’ll also appreciate having extra stitch markers and a tidy yarn bowl if you make several at once.
You just learned how to knit a dishcloth for beginners and turned practice into something practical and pretty. Pin this guide for your next craft afternoon and try the seed stitch or garter option first — which texture will you try: classic garter or bouncy seed stitch? Ready to make it? Let's go!


