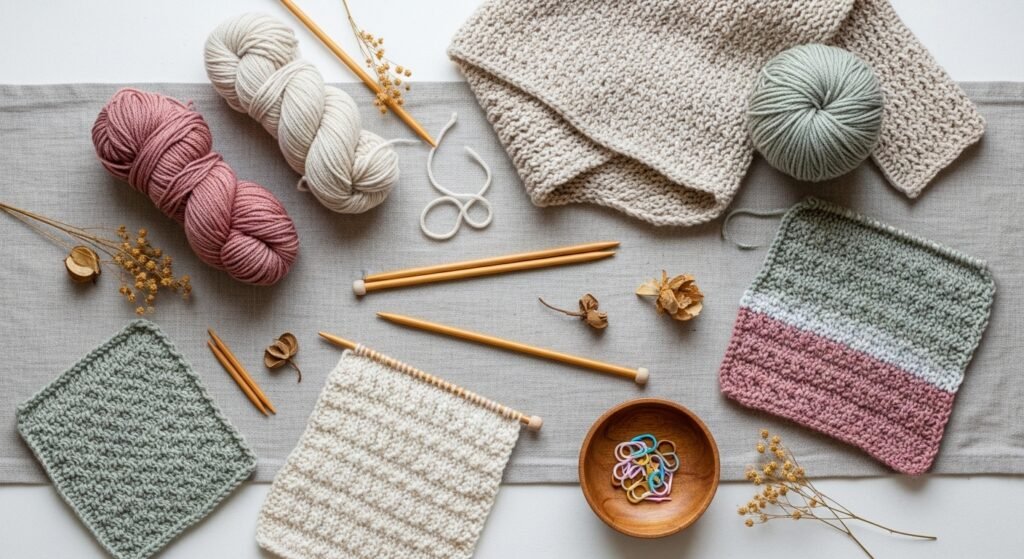
Start with a warm mug, your favorite yarn, and a couple of simple stitches. If you've typed "knitting stitches for beginners" into the search bar, you're in the right place. This list brings together 22 gorgeous, beginner-friendly stitches and pairs each one with a small, satisfying project you can finish in an afternoon or a weekend. You'll find clear materials lists, step-by-step instructions, blocking and finish times, and styling ideas for every piece.
You don't need a huge tool kit to get started. I reach for a basic knitting needle set for gauge experiments and keep a ceramic yarn bowl on my table so skeins don't roll away. These projects focus on texture, simple repeats, and stitches that build confident hands — perfect when learning knitting stitches for beginners and making something beautiful.
- Garter Stitch Scarf — Classic Cozy for Any Wardrobe
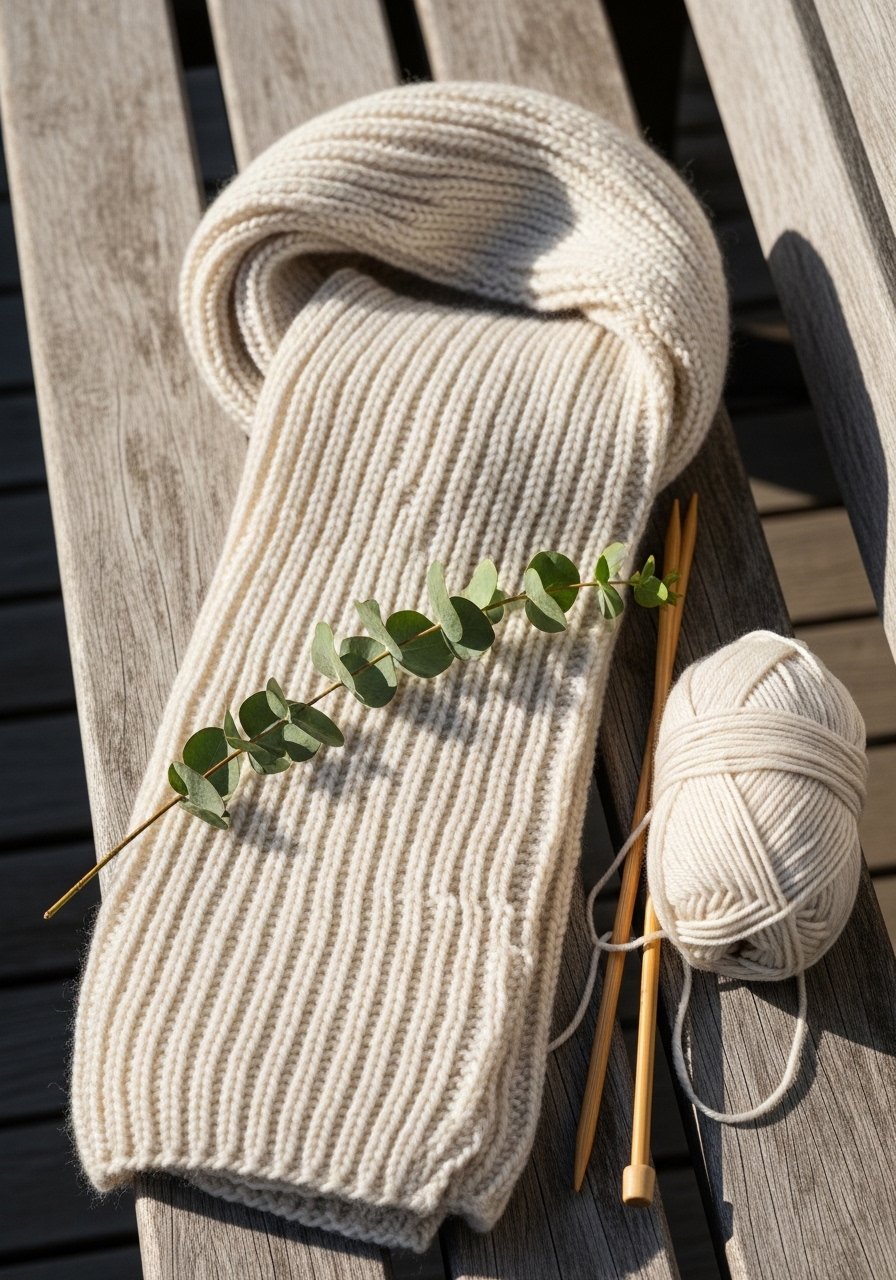
This is the purest way to learn the rhythm of knitting. The garter stitch creates a squishy, reversible fabric with visible ridges. It’s perfect for complete beginners and makes a scarf that feels warm and homespun. Knitting it is meditative — you’ll hear the little clicks of the needles as the fabric grows.
Materials
- 200 g worsted-weight acrylic or wool blend (approx 400 yards)
- Pair of US 8 (5 mm) straight needles, 14" long
- Tapestry needle for weaving ends
- Scissors
- Stitch marker (optional)
- Blocking board or towel for shaping
Instructions
- Cast on 30 stitches loosely using long-tail cast-on.
- Row 1: Knit all stitches (this is your garter stitch).
- Repeat Row 1 until scarf reaches 60 inches (about 150 cm).
- Bind off loosely in pattern (knit each stitch, slip next needle knitwise and pass previous stitch over).
- Weave in ends with a tapestry needle.
- Lay flat to block for 1–2 hours if desired to even out edges. No heavy pressing; the garter ridges look lovely natural.
How to Display or Gift It
- Drape over the back of a chair for a cozy vignette.
- Roll and tie with twine and a sprig of dried lavender for gifting.
- Store flat in a breathable craft box or folded in a knit project bag.
- Stockinette Dishcloth — Smooth, Soft Everyday Cloth
Stockinette is the first "fancy" fabric most knitters meet. One side is smooth, the other shows purls. This dishcloth project teaches you to switch between knit and purl rows. It’s practical, quick, and the cotton yarn gets better with use.
Materials
- 50 g 100% cotton worsted-weight yarn (approx 100 yards)
- Pair of US 7 (4.5 mm) needles, 10–14" length
- Tapestry needle
- Scissors
- Stitch holder or scrap yarn
- Small spray bottle for blocking
Instructions
- Cast on 36 stitches.
- Row 1 (RS): Knit.
- Row 2 (WS): Purl.
- Repeat Rows 1–2 for stockinette for 8 inches (20 cm).
- To avoid curling, work a garter border: knit 4 rows at start and finish (or pick up a garter edge after).
- Bind off in pattern, weave in ends.
- Wet-block on a towel and pin to 8 x 8 inches, let dry 12–24 hours to relax stitches.
How to Display or Gift It
- Stack with a matching sponge and tie with baker's twine.
- Keep damp laundry aside for next use in a kitchen storage basket.
- Seed Stitch Mini Mat — Bouncy, Nubby Texture
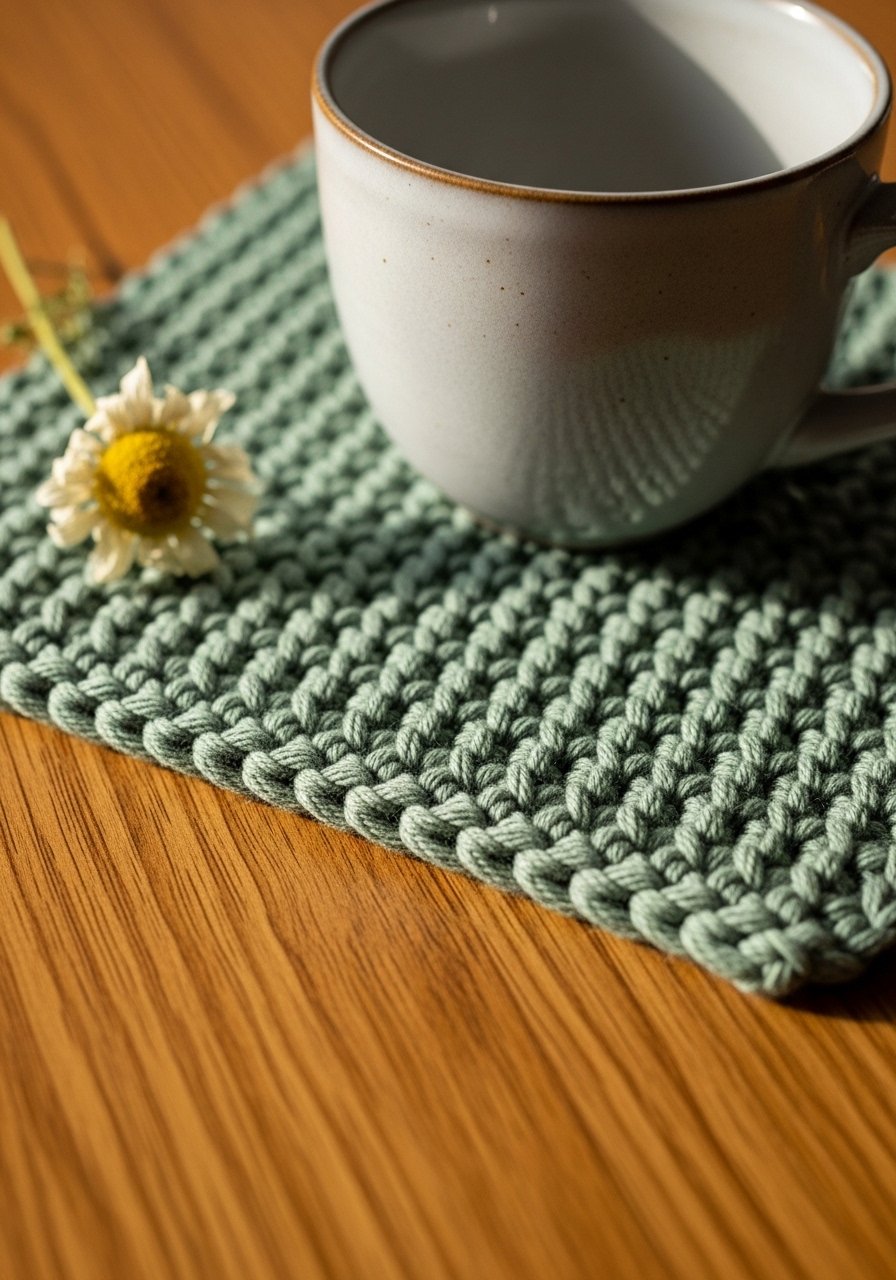
Seed stitch alternates knits and purls to make a pebbled fabric that lies flat. It’s great for coasters, mats, or small accessories. You’ll get comfortable switching stitches every stitch, which sharpens your tension control.
Materials
- 50 g DK or sport cotton yarn (approx 110 yards)
- Pair of US 6 (4.0 mm) needles
- Tapestry needle
- Scissors
- Blocking mat and pins (optional)
- Small wooden coaster or cardboard template
Instructions
- Cast on 36 stitches.
- Row 1: K1, P1 to end.
- Row 2: P1, K1 to end.
- Repeat Rows 1–2 until piece measures 5.5 inches (14 cm).
- Bind off in pattern, weave in ends.
- Lightly block to square shape; allow to dry 6–12 hours.
How to Display or Gift It
- Pair two mats and tie with ribbon for hostess gifts.
- Store flat in a small stackable drawer organizer.
- 1×1 Rib Headband — Stretchy Fit, Seamless Look
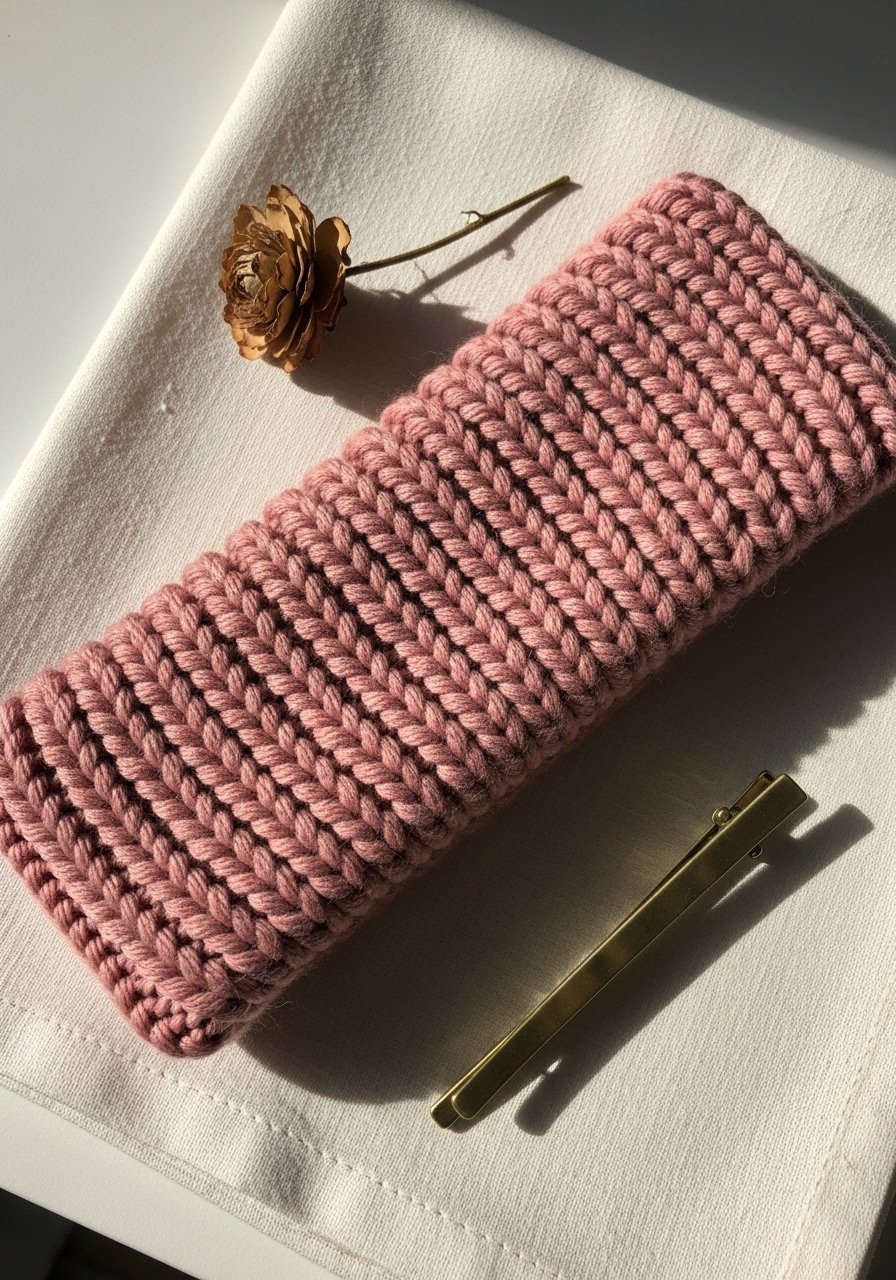
Ribbing gives stretch and structure. The 1×1 rib is reversible and works for snug headbands or cuffs. It’s a fast knit that makes you confident in switching between knit and purl every stitch.
Materials
- 50 g worsted-weight yarn (approx 100 yards)
- Circular needles US 8 (5 mm), 16" length, or double-pointed needles for small circumference
- Stitch marker
- Tapestry needle
- Scissors
- Optional: small elastic band for stability
Instructions
- Cast on 80 stitches loosely and join in the round, place marker.
- Round 1: K1, P1 to marker.
- Repeat Round 1 for 18 inches (46 cm) total if knitted flat; for headband in round, work 6–8 inches (15–20 cm).
- Bind off loosely in rib (knit the k sts and slip p stitches as needed).
- Fold and seam with mattress stitch if knitted flat. Weave in ends.
- Block on a head-shaped form or flat towel for 1–2 hours if needed.
How to Display or Gift It
- Slip onto a small card and tuck into kraft tissue for gifting.
- Store rolled inside a craft organizer box.
- 2×2 Rib Beanie — Classic Fit With Stretch
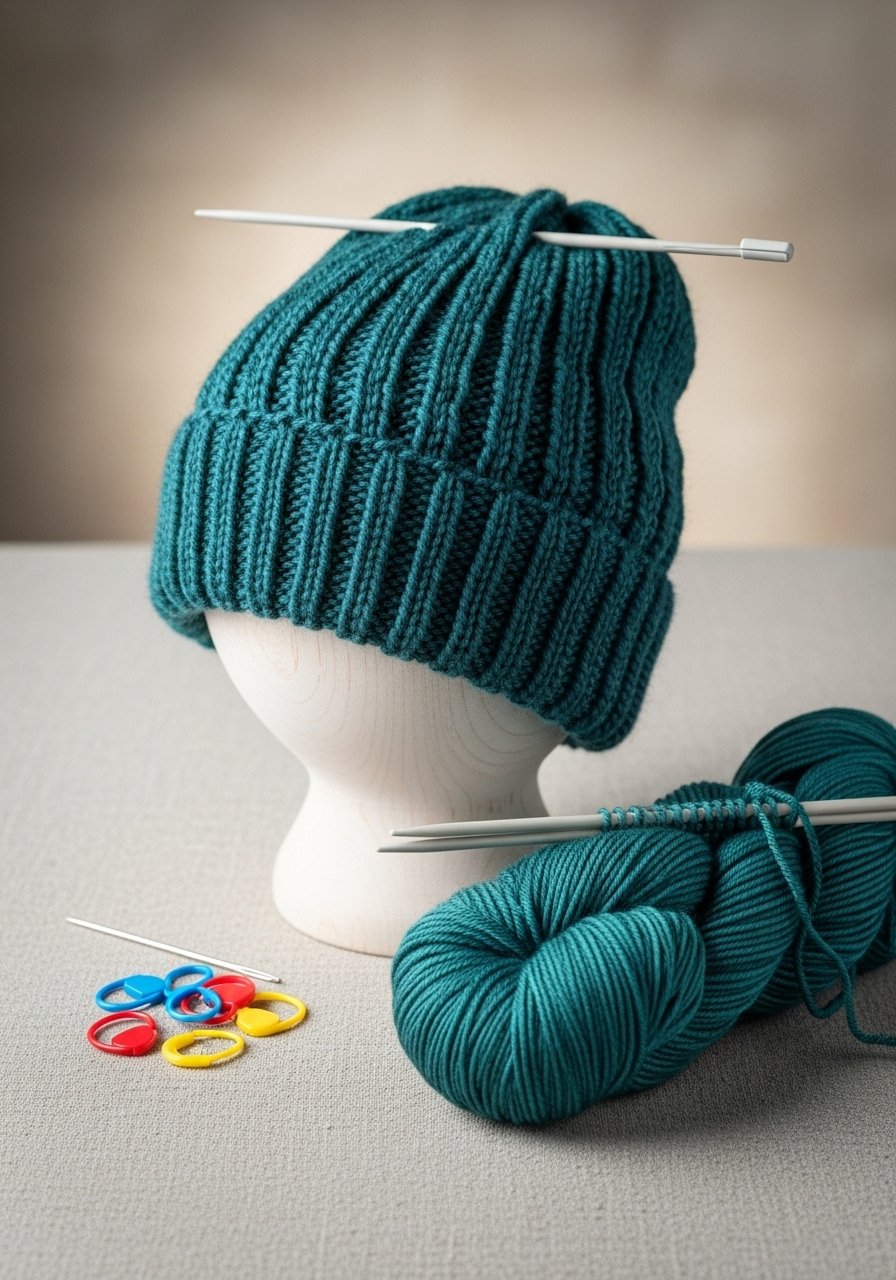
2×2 rib is the go-to for beanies. It gives clean vertical columns and excellent stretch. This project teaches ribbing in the round and basic decreases for shaping a crown.
Materials
- 100 g worsted-weight yarn (approx 200 yards)
- Circular needles US 8 (5 mm), 16" and 32" for magic loop or set of DPNs
- Stitch markers
- Darning needle
- Scissors
- Optional: Pom-pom maker
Instructions
- Cast on 96 stitches and join in the round.
- Work K2, P2 rib for 6 inches (15 cm) for brim.
- Continue in rib for another 4–6 inches depending on slouch (total length 10–12 inches).
- Begin crown decreases: K2tog, K2, P2tog, P2 in pattern; place markers each 8 stitches and continue decreasing every other round until 8–12 stitches remain.
- Cut yarn, thread through remaining sts, pull tight, and weave in.
- Steam-block gently for shape if needed.
How to Display or Gift It
- Add a faux leather tag and pair with matching mitts.
- Store in a hat organizer shelf or wrap as a cozy winter present.
- Broken Rib Mug Cozy — Subtle Texture, Quick Knit
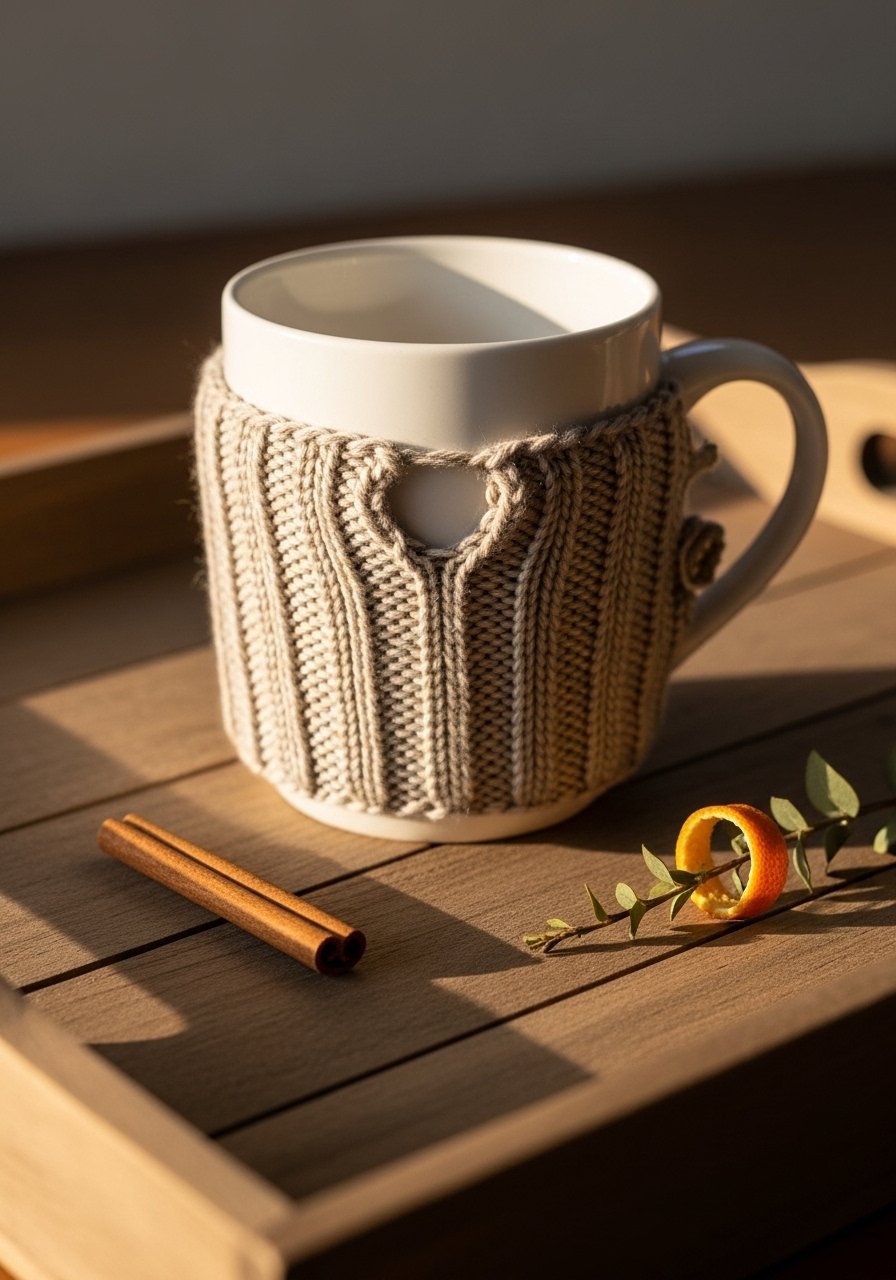
Broken rib alternates columns to make a stretchy fabric with more texture than plain rib. This tiny project builds confidence in stitch repeats and is ideal for gifting or craft markets.
Materials
- 20 g DK yarn (approx 40–50 yards)
- Straight needles US 6 (4 mm) or circular short length
- Button (1 small, 3/4" diameter)
- Darning needle
- Scissors
- Measuring tape
Instructions
- Cast on 36 stitches.
- Row 1: K2, P2 to end.
- Row 2: P2, K2 to end.
- Repeat Rows 1–2 for 3.5 inches (9 cm).
- Bind off, fold lengthwise and seam short edge. Sew on button and make a loop with yarn or elastic.
- Block lightly if necessary, let dry 1–2 hours.
How to Display or Gift It
- Slide onto a mug and tie with twine for a kitchen-ready gift.
- Store with other small finished goods in a mason jar display.
- Basketweave Pillow Cover — Chunky Geometric Texture
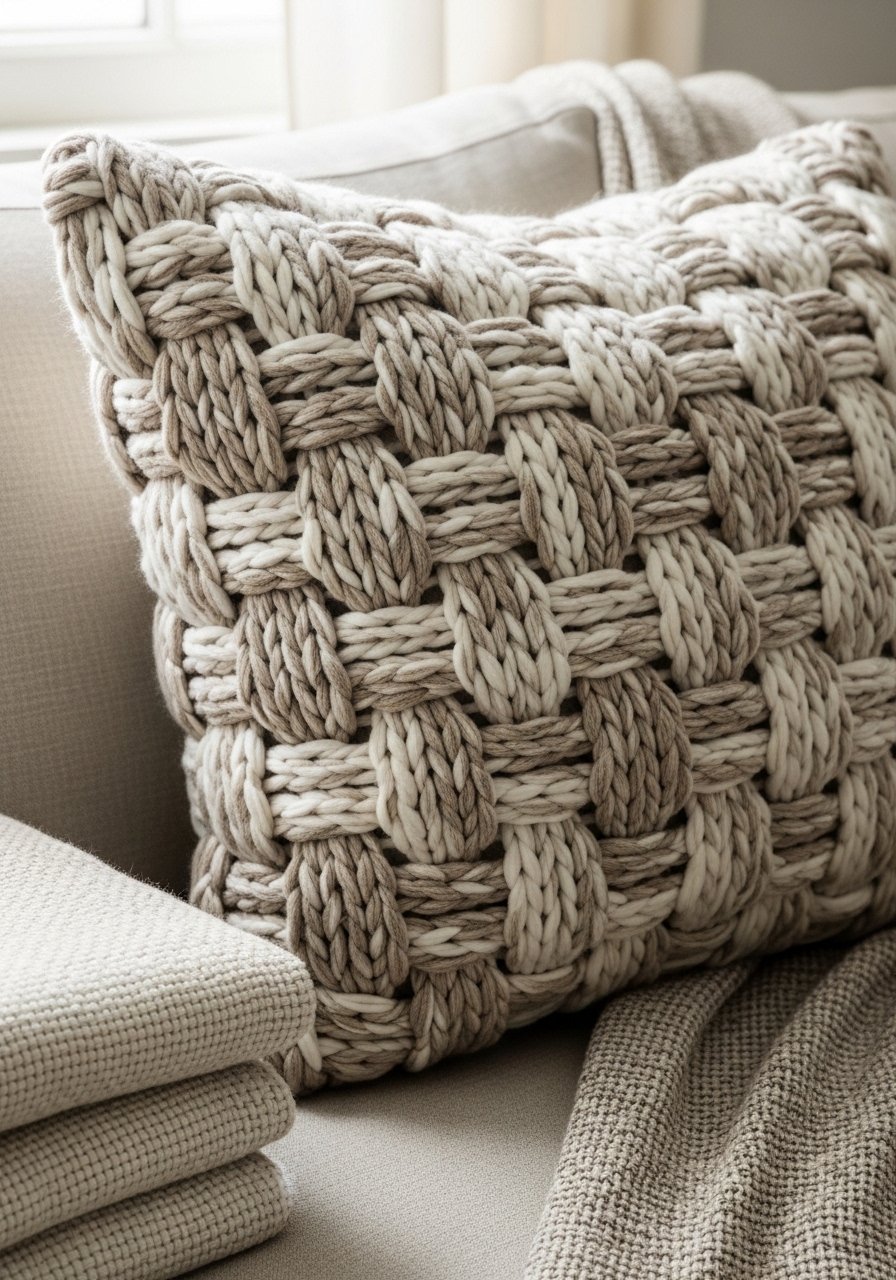
Basketweave alternates blocks of knits and purls to create a woven look. It’s a great next step once you know basic stitches, and the pillow makes a dramatic textured accent.
Materials
- 300–350 g bulky yarn (approx 450–550 yards)
- Straight needles US 10 (6 mm) or circular 24"
- Pillow insert 18 x 18 inches
- Tapestry needle
- Scissors
- Stitch markers
Instructions
- Cast on 72 stitches.
- Row 1–4: K8, P8 repeat to end.
- Row 5–8: P8, K8 repeat to end.
- Repeat Rows 1–8 until piece measures 18 inches.
- Bind off in pattern. Make a second panel or knit one long piece and seam sides.
- Seam three sides with mattress stitch, insert pillow, seam last side, weave ends.
- Steam-block to even block for 2–3 hours.
How to Display or Gift It
- Pair with a complementary throw and display on a small wooden bench.
- Include care instructions and package in a kraft gift box.
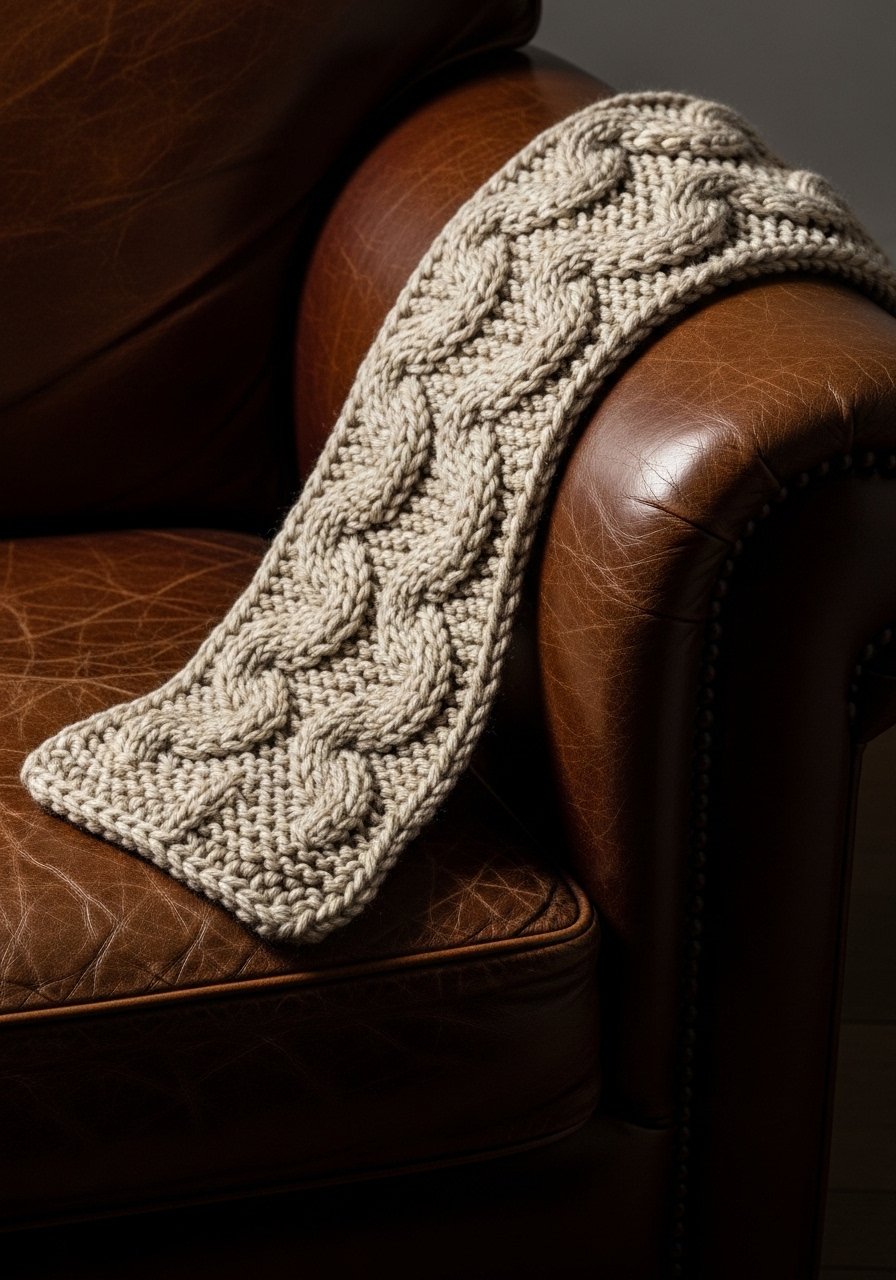
- Simple Cable Earwarmer — Intro to Twisted Stitches
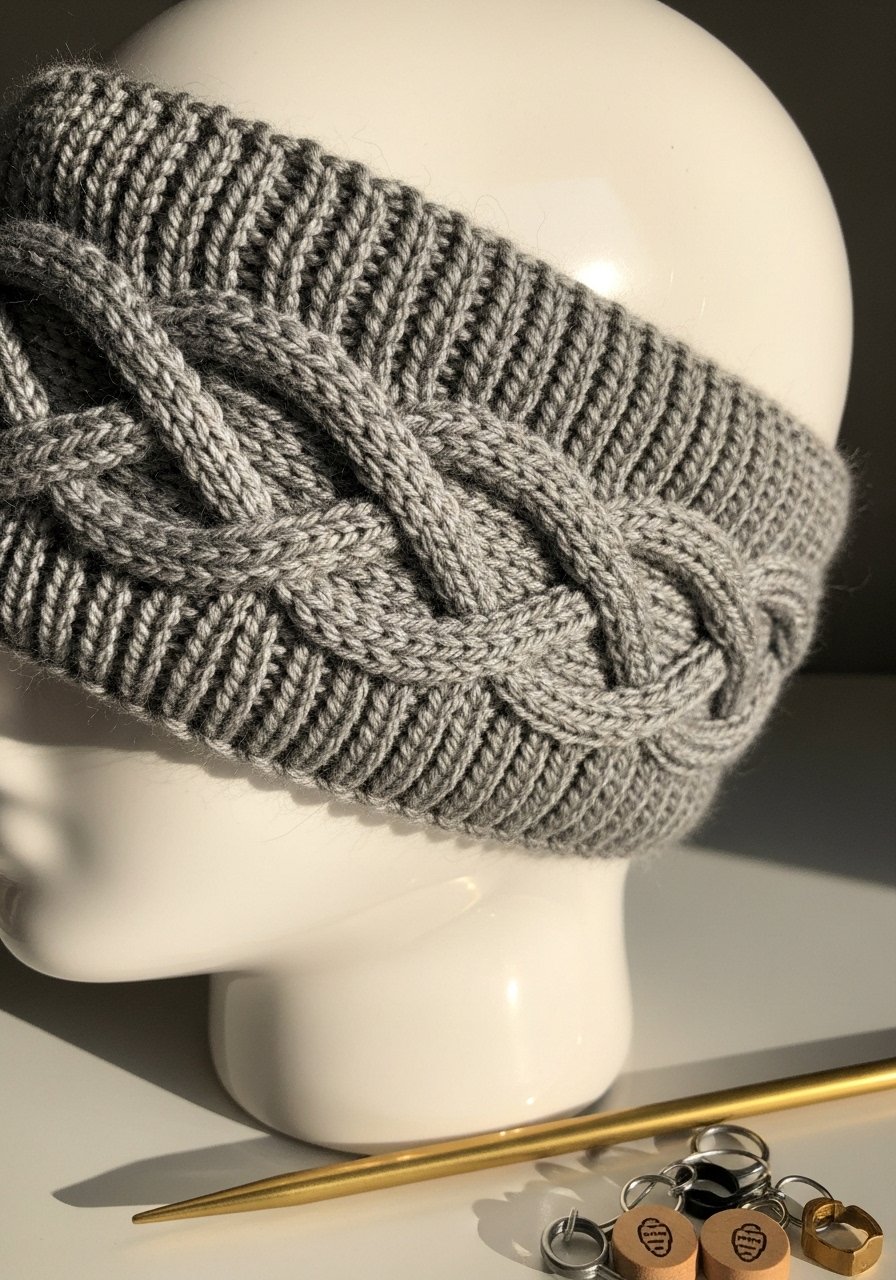
Cables look complex but are just crossed stitches. This earwarmer uses an easy 4-stitch cable and teaches how to use a cable needle. It’s polished and cozy.
Materials
- 50 g worsted yarn (approx 100 yards)
- Circular needles US 8 (5 mm), 16"
- Cable needle (or small DPN)
- Stitch markers
- Tapestry needle
- Scissors
Instructions
- Cast on 44 stitches and join in the round.
- Work 2 inches of 2×2 rib.
- Cable pattern: K4, P4; C4F (slip 2 to cable needle in front, knit next 2, then knit 2 from cable needle), P4 across.
- Repeat cable pattern until piece reaches 18 inches (for a headband, work 5–6 inches).
- Finish with 2 inches of rib and bind off loosely.
- Weave in ends; block on a flat towel for 1–2 hours.
How to Display or Gift It
- Add a small leather tag and tuck into a custom gift box set.
- Wear as a functional accessory on crisp mornings.
- Bobble Baby Booties — Cute Raised Dots for Texture
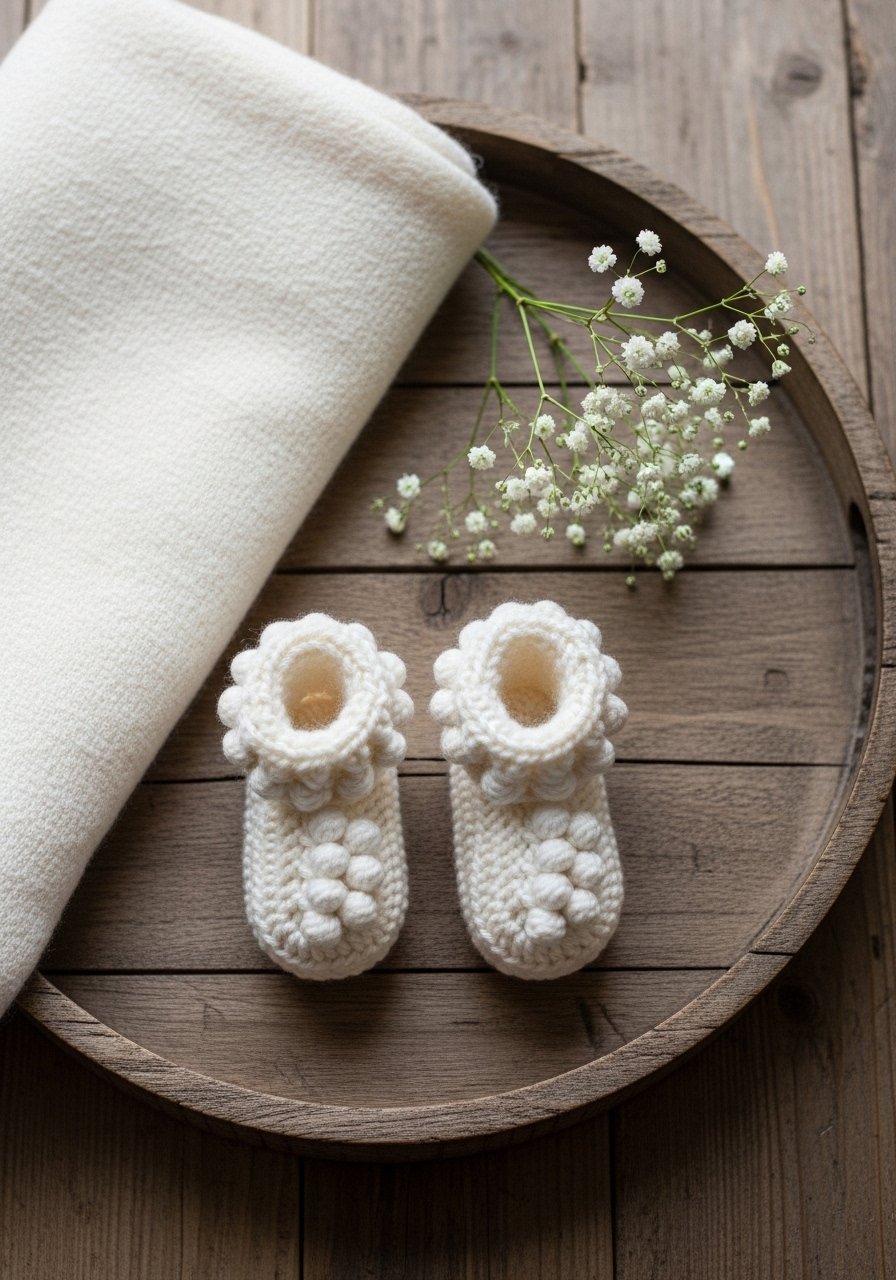
Bobble stitches add playful bumps to knitting. These baby booties teach how to make small bobbles and shape tiny soles. They're great for practicing increases and decreases.
Materials
- 50 g soft DK baby yarn (approx 120 yards)
- Double-pointed needles US 5 (3.75 mm)
- Stitch markers
- Tapestry needle
- Scissors
- Small button for ankle strap (optional)
Instructions
- Cast on 36 stitches for sole and divide onto 3 DPNs.
- Work in garter or stockinette for 3 inches for sole shaping.
- Begin upper: knit across, create bobble by: K1, (Kfb, K1) 3 times in same stitch or follow simple 5-stitch bobble (knit into front and back, leave on left needle, repeat then turn and purl back, finally pass extra stitches back).
- Place markers for shaping and decrease for toe using K2tog evenly every other round until 8–10 sts remain.
- Graft toe using Kitchener stitch or draw yarn through and sew closed.
- Attach ankle strap and button; weave in ends.
- Block flat for 2–3 hours.
How to Display or Gift It
- Nest booties in a small kraft box with a handwritten note.
- Store in a breathable baby keepsake box.
- Simple Eyelet Shawlette — Delicate Holes, Beginner Lace
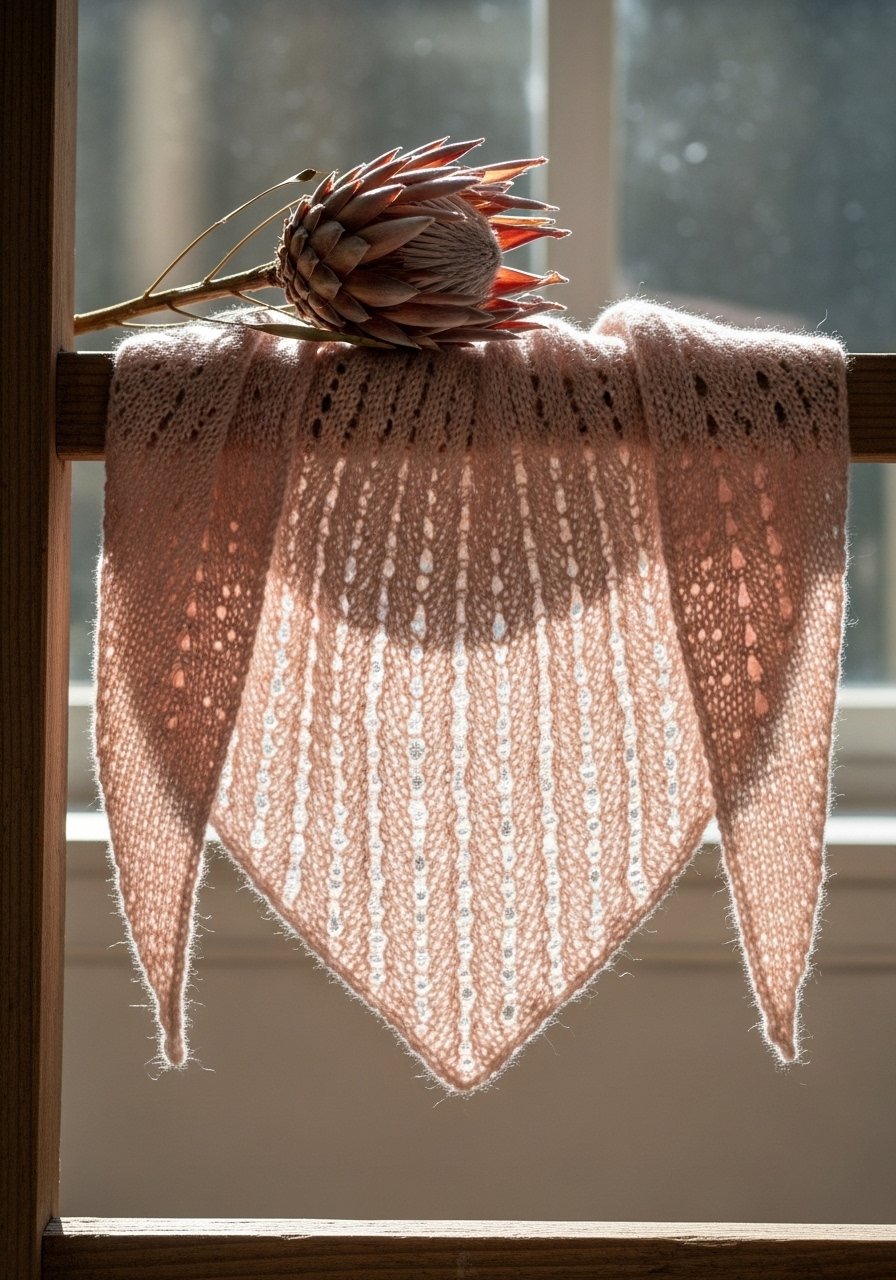
Eyelet lace uses yarn-overs and decreases to make small holes. This shawlette is a gentle introduction to lace repeats and blocking, which really shows off the pattern.
Materials
- 150 g fingering or sport weight yarn (approx 400 yards)
- Circular needles US 6 (4 mm), 24"
- Stitch markers
- Tapestry needle
- Blocking wires and pins
- Small spray bottle
Instructions
- Cast on 3 stitches.
- Row 1 (RS): K1, YO, K to end.
- Row 2: Purl.
- Continue increasing with YO at beginning and end every RS row to form triangle.
- Incorporate eyelet row every 4th row: K2, (YO, K2tog) repeat across.
- Continue until shawl wingspan is 48 inches or desired size.
- Bind off loosely, wash gently and block with wires to open eyelets. Dry 24–48 hours.
How to Display or Gift It
- Hang on a small ladder or pin on a shawl stand for display.
- Wrap with tissue in a luxury scarf box.
- Slip-Stitch Color Coasters — Pop of Color With Simple Technique
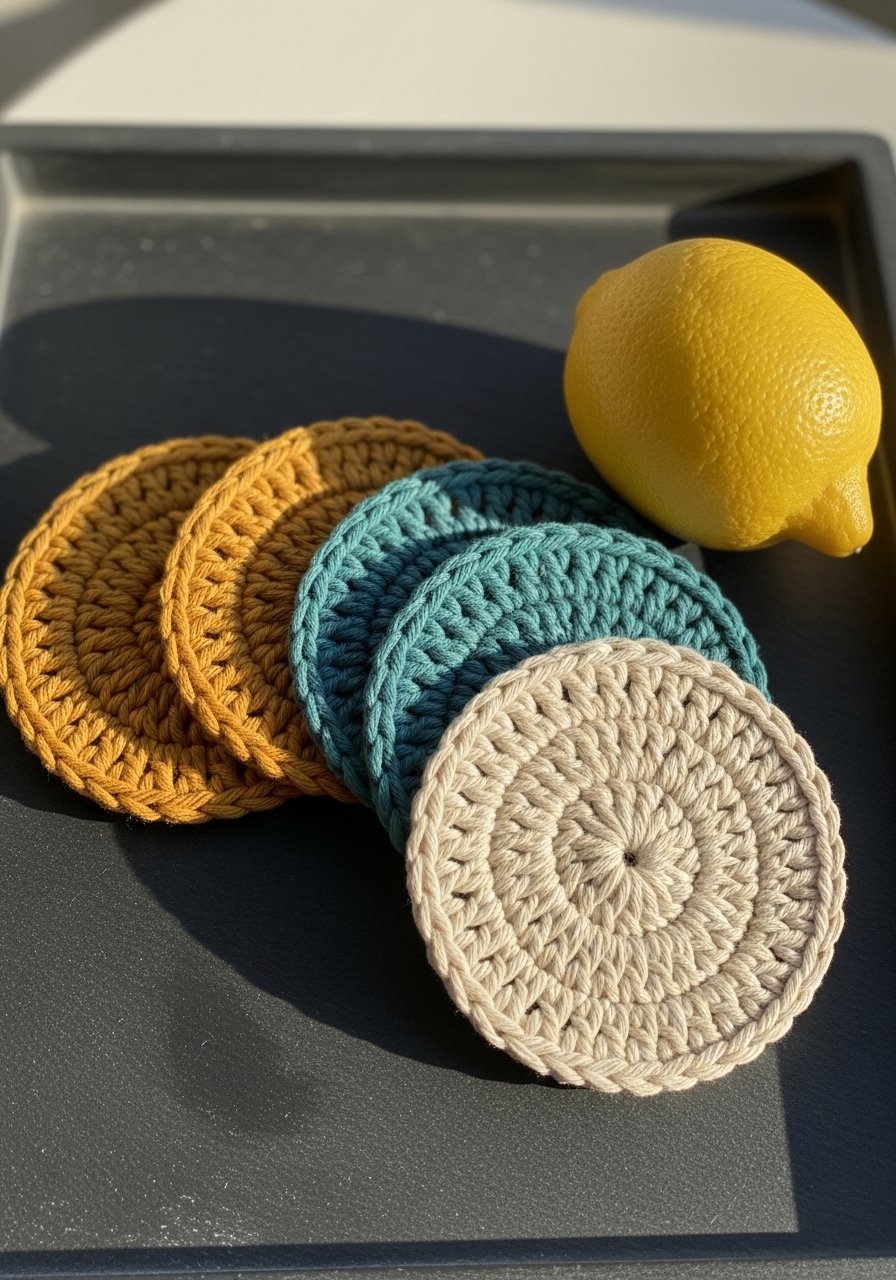
Slip stitches let you create color patterns without working floats. These coasters teach color contrast, carrying yarn along edges, and neat finishes.
Materials
- 25 g each of two cotton colors (approx 50 yards per color)
- Pair of US 6 (4 mm) needles
- Tapestry needle
- Scissors
- Cardboard coaster template (optional)
- Small sewing needle for joining colors
Instructions
- Cast on 32 stitches with Color A.
- Row 1: K1, slip 1 wyif across (slip stitch pattern).
- Row 2: Purl all.
- After 6 rows, switch to Color B and continue slip pattern.
- Make 4 color blocks, ending with Color A.
- Bind off, weave in ends; wet-block lightly for 2–4 hours.
How to Display or Gift It
- Stack and tie with ribbon; add a set of matching napkins.
- Store in a small coaster storage box.
- Chevron Throw Cushion Cover — Pointed Texture, Modern Look
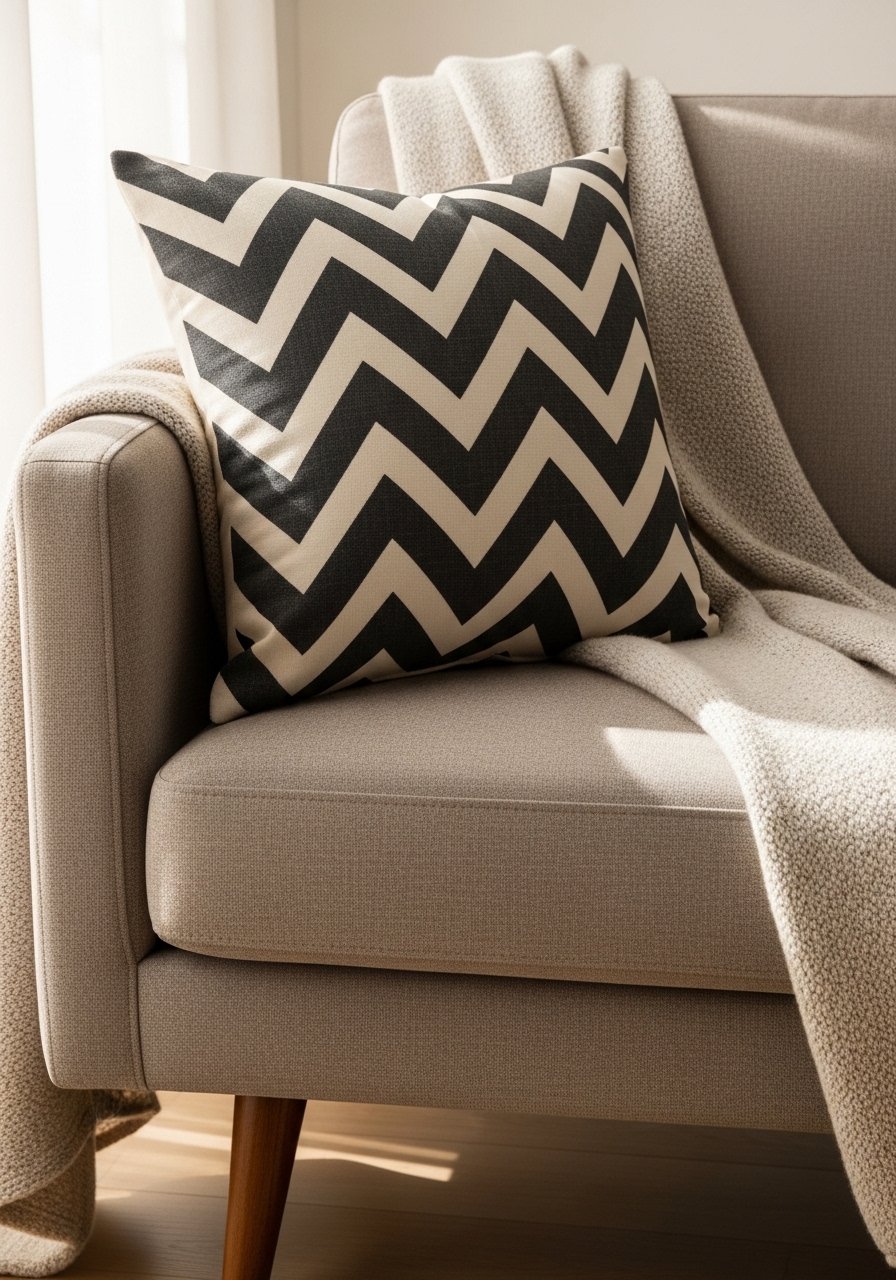
The chevron uses simple increases and decreases to shape V motifs. It’s graphic, modern, and teaches even tension with shaping rows.
Materials
- 300 g worsted yarn (approx 540 yards total, split across two colors)
- Circular needles US 8 (5 mm), 24–32"
- Stitch markers
- Tapestry needle
- Pillow insert 20 x 20 inches
- Scissors
Instructions
- Cast on 120 stitches.
- Work chevron repeat: K2tog, K4, YO then on next row adjust to maintain pattern, or follow simple pattern: Row 1: K2tog, K6, YO, K1, YO, K6, SSK across.
- Repeat pattern until panel measures 20 inches.
- Bind off, make a second panel or fold and seam sides.
- Seam with mattress stitch, insert pillow, finish seam.
- Block flat for 2–4 hours to sharpen chevrons.
How to Display or Gift It
- Mix with natural linen pillows for a Japandi vibe.
- Package in a gift pillow box.
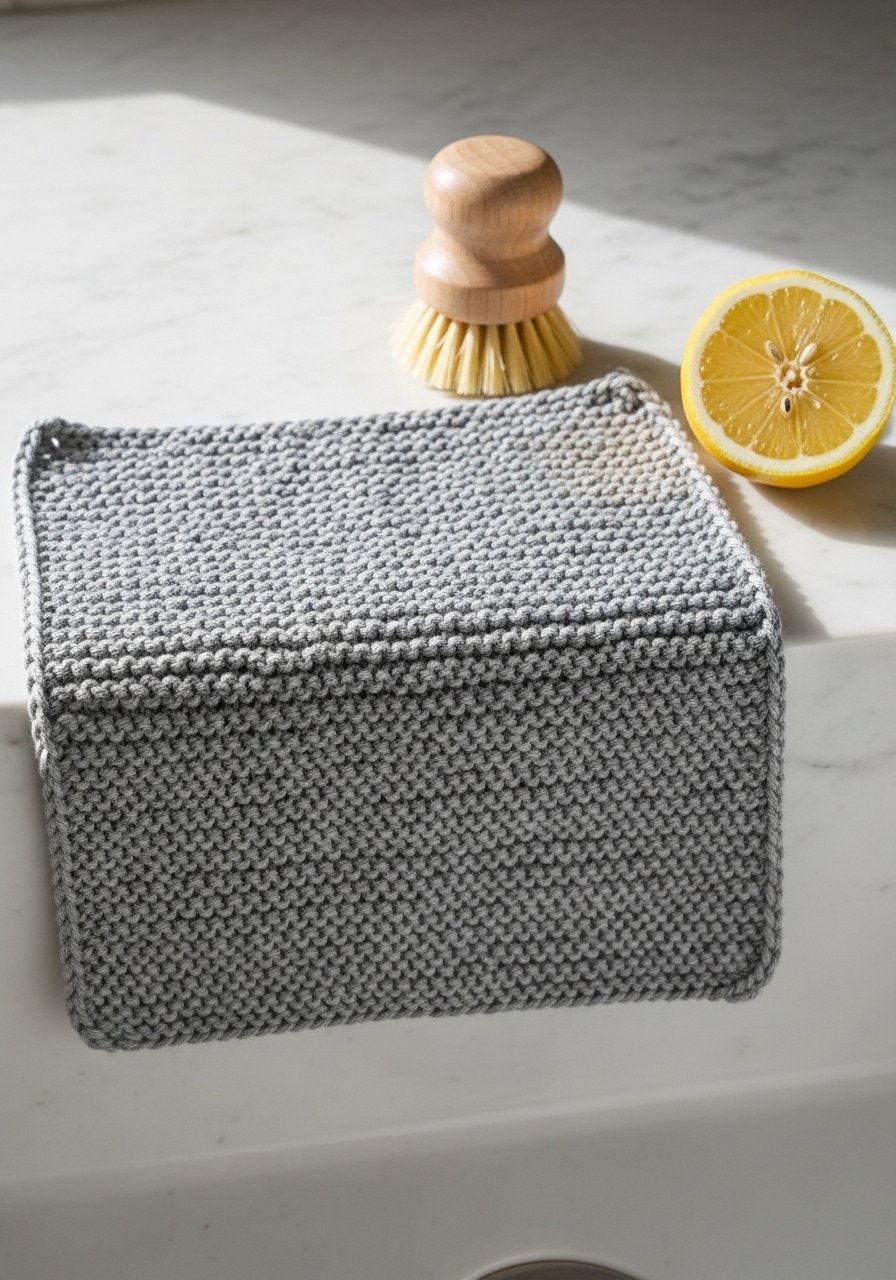
- Waffle Stitch Washcloth — Plush Grid Texture
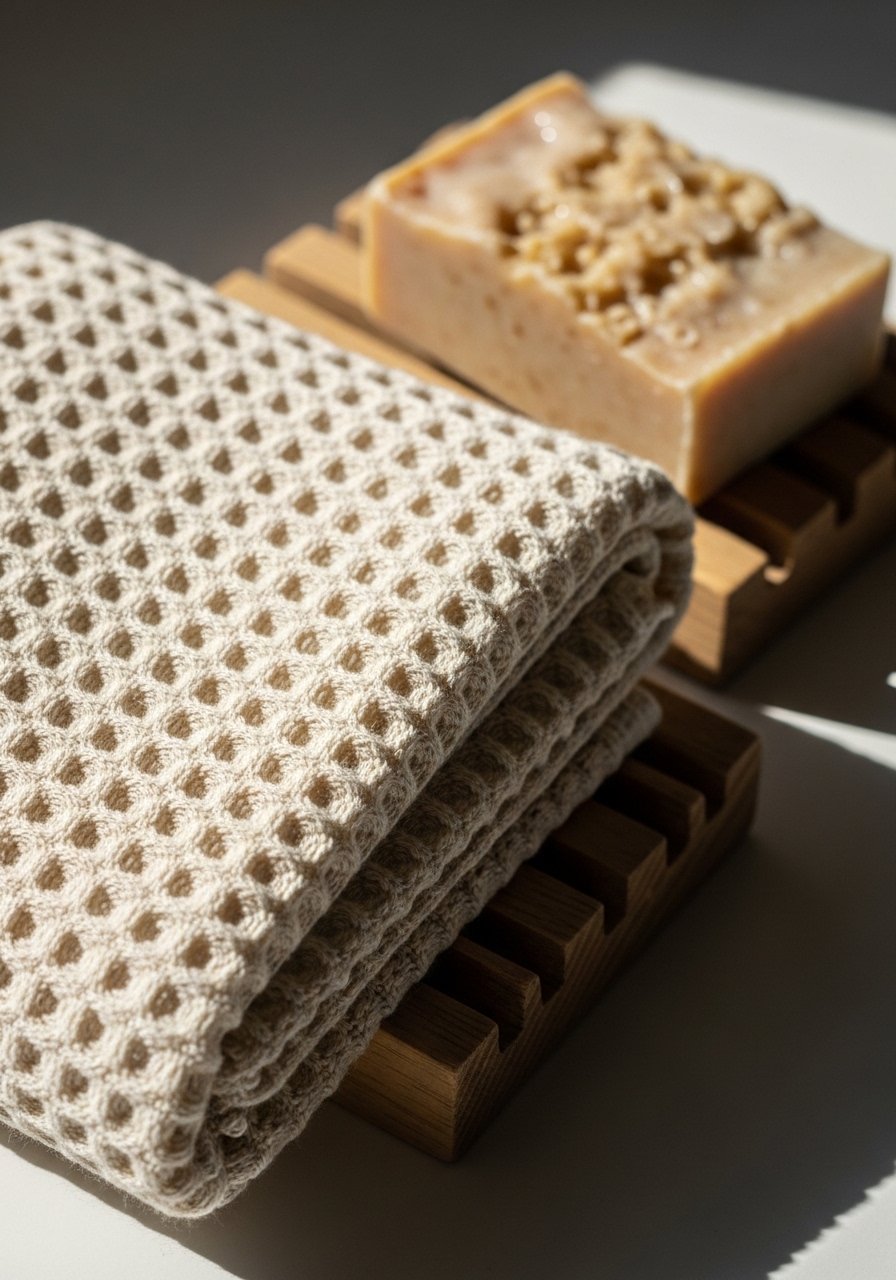
Waffle stitch combines knits and purls with slipped stitches to create a squishy, insulating grid. It's fantastic for washcloths, producing great scrubbing texture.
Materials
- 50 g cotton worsted yarn (approx 100 yards)
- Pair of US 7 (4.5 mm) needles
- Tapestry needle
- Scissors
- Small clothesline for drying
Instructions
- Cast on 38 stitches.
- Row 1: K1, P1 across.
- Row 2: K3, slip 1 purlwise repeat.
- Follow a 4-row waffle repeat until piece measures 8 x 8 inches.
- Bind off in pattern, weave ends.
- Wash and dry naturally; allow 12–24 hours to fully dry.
How to Display or Gift It
- Pair with a small soap bar and wrap in muslin cloth.
- Store in a bath caddy basket.
- Linen Stitch Market Bag — Durable, Subtle Basket Texture
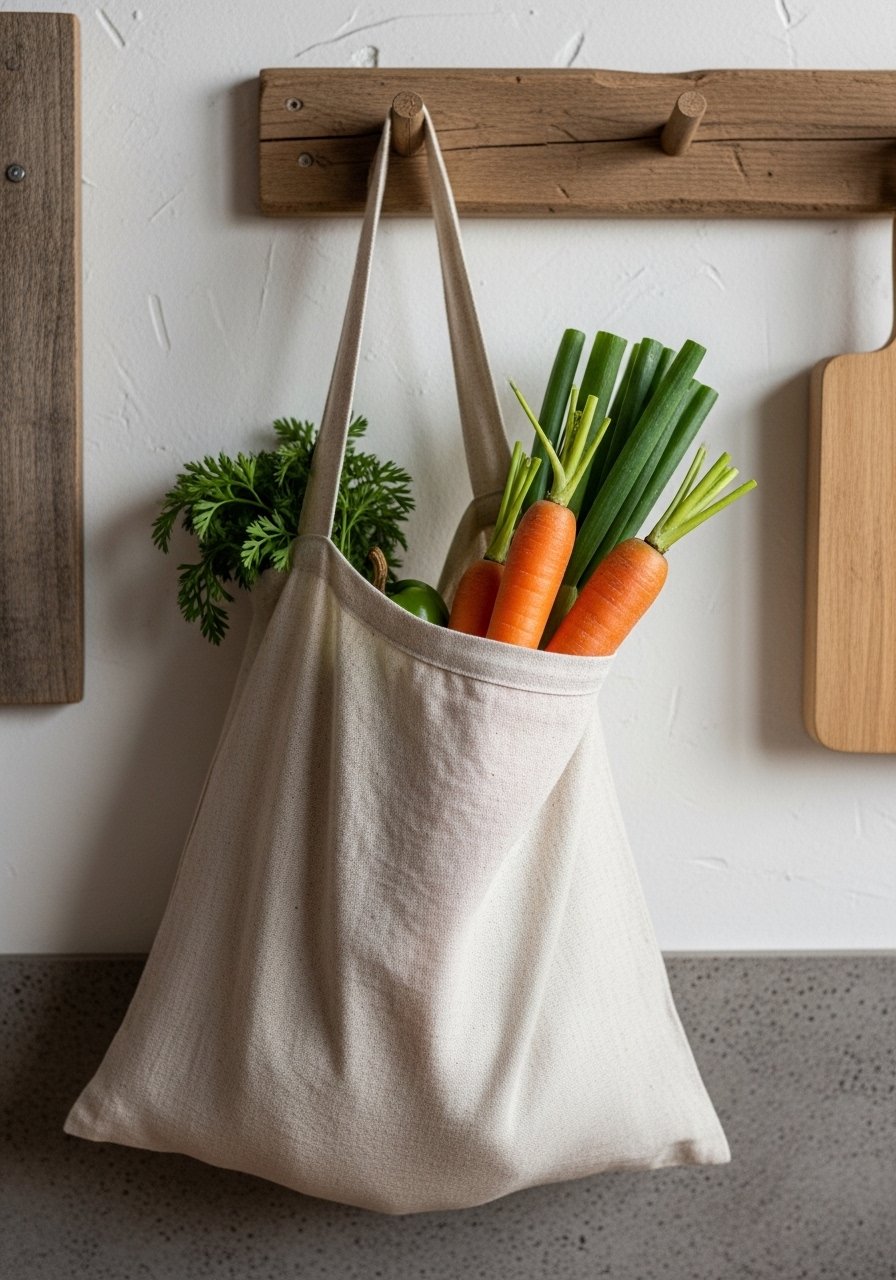
Linen stitch creates a dense, fabric-like texture that's strong and stretchy—perfect for reusable market bags. It’s made by alternating knit and slipped stitches to build a woven look.
Materials
- 300 g cotton yarn (approx 600 yards)
- Circular needles US 8 (5 mm), 24" or longer for bag width
- Stitch markers
- Tapestry needle
- Cotton canvas lining (optional): 1/2 yard
- Scissors
Instructions
- Cast on 100 stitches.
- Row 1: K1, slip 1 wyif to end.
- Row 2: Purl all stitches.
- Repeat Rows 1–2 for linen stitch until bag measures 16 inches.
- Bind off loosely; fold and seam the sides, pick up stitches for handles and knit straps 16 inches long.
- Optionally sew a canvas lining to prevent stretching. Let lining adhesive set 24 hours if gluing.
- Block lightly for shape 2–3 hours.
How to Display or Gift It
- Use as a farmer’s market tote or gift filled with seasonal produce.
- When not in use, fold and store in a cotton storage bag.
- Seed-and-Rib Fingerless Gloves — Warm, Flexible Wristbands
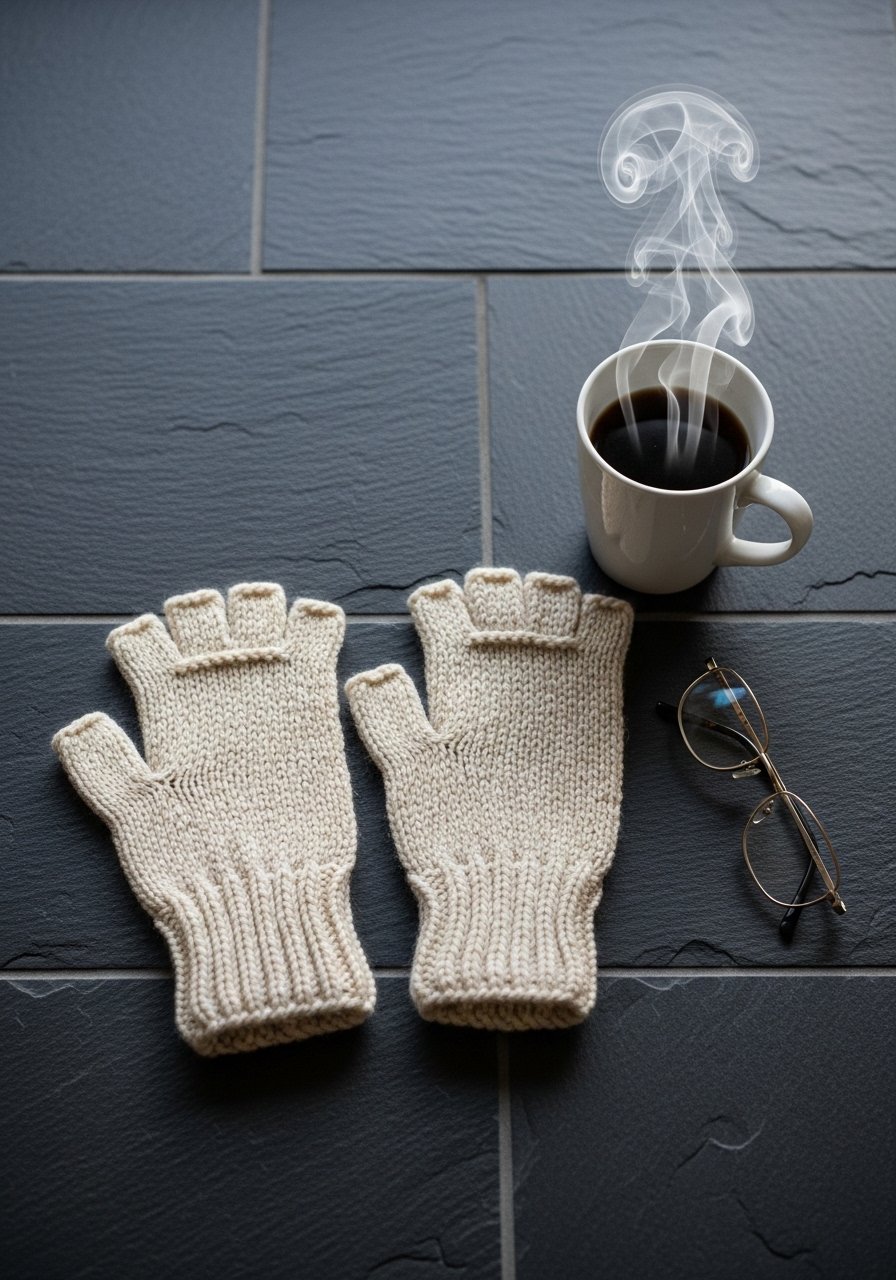
Combine seed stitch with ribs for a glove that’s both textured and stretchy. These are great for practicing small-circumference knitting and finishing techniques.
Materials
- 100 g fingering or sport yarn (approx 250 yards)
- Set of DPNs or circulars for magic loop US 4 (3.5 mm)
- Stitch markers
- Tapestry needle
- Scissors
Instructions
- Cast on 44 stitches, join in round and work 1×1 rib for 1 inch.
- Switch to seed stitch for 3 inches or desired hand length.
- Place a marker where thumb will be: bind off 6 stitches and continue cuff in pattern.
- Later, pick up 6 stitches across thumb gap and knit in pattern for 1.5 inches, then bind off.
- Weave in ends. Block flat for 1–2 hours.
How to Display or Gift It
- Pair with a matching beanie and wrap in a gift tissue set.
- Store in a small drawer organizer for easy access.
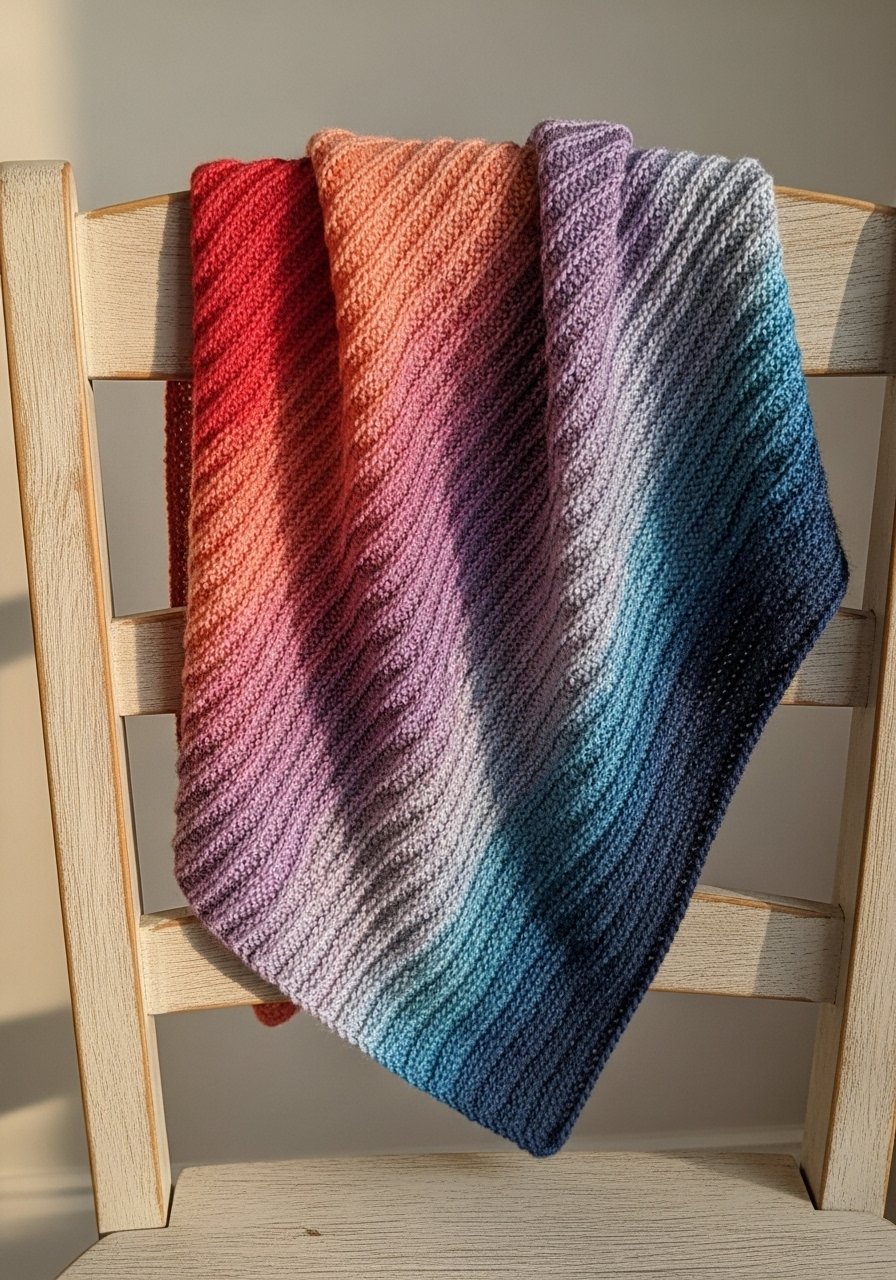
- Garter Ridge Baby Blanket — Soft Ridges, Cozy Stripes
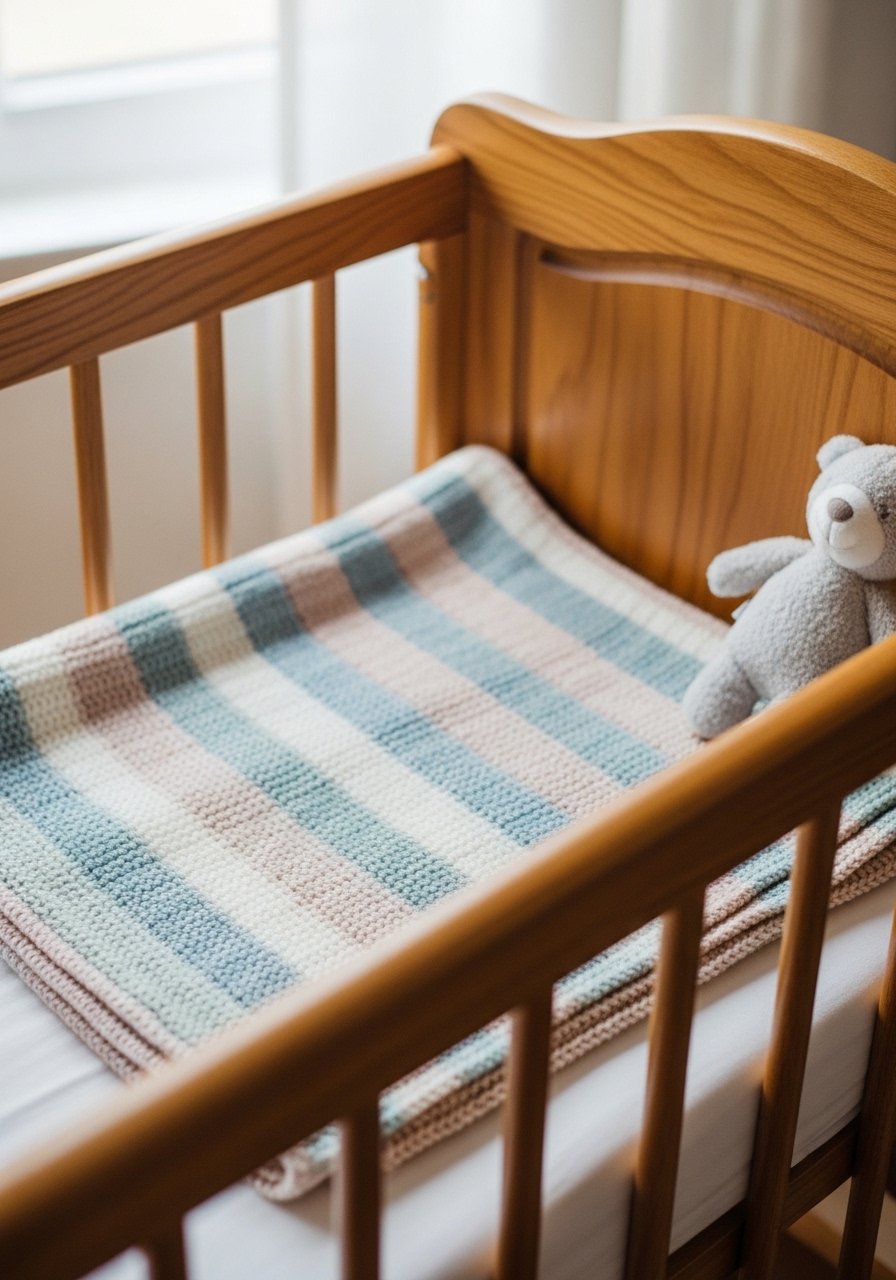
Garter ridges are rows of garter stitch separated by stockinette or slip-stitch bands. They add subtle rhythm and make a baby blanket that’s tactile and drapey.
Materials
- 400 g soft acrylic or baby yarn (approx 800 yards)
- Straight or circular needles US 8 (5 mm), 32" for blanket knitting
- Stitch markers
- Tapestry needle
- Scissors
- Blocking mats and pins
Instructions
- Cast on 120 stitches.
- Row 1–4: Knit (garter ridges).
- Row 5–8: Work stockinette for 4 rows (RS: K, WS: P).
- Repeat garter ridges and stockinette bands until blanket measures 36 x 36 inches.
- Bind off in pattern, weave ends.
- Wash gently and block flat for 24–48 hours.
How to Display or Gift It
- Fold in a gift box with a small stuffed toy.
- Keep in a breathable baby storage box or basket.
- Mosaic Tile Dishcloth — Graphic Slip-Stitch Motifs
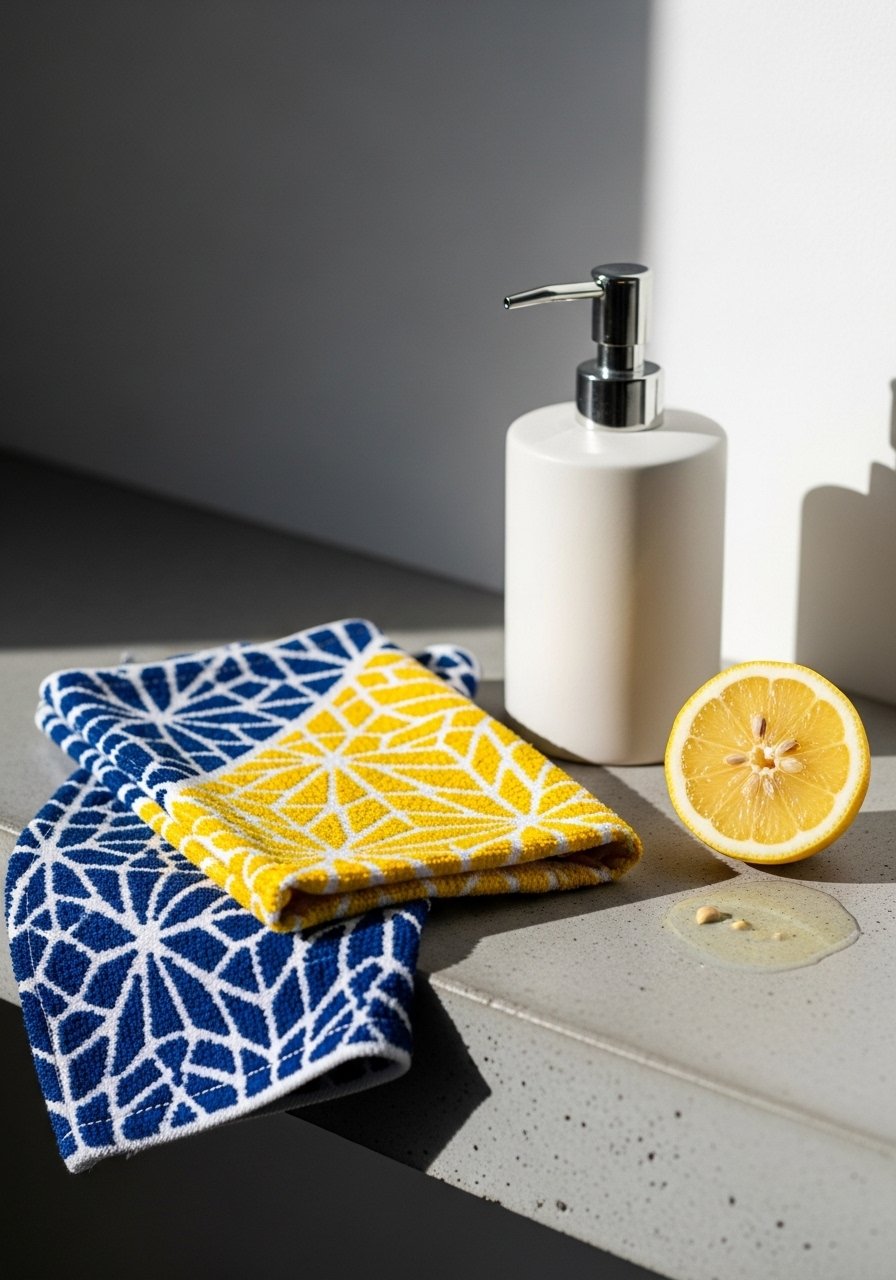
Mosaic knitting uses slipped stitches to make bold geometric patterns using only one color per row. It’s an easy way to get colorwork without stranding floats.
Materials
- 25 g each of two cotton colors (approx 50 yards each)
- Pair of US 7 (4.5 mm) needles
- Tapestry needle
- Scissors
- Printed chart (graph paper)
Instructions
- Cast on 36 stitches.
- Follow a simple 8-stitch mosaic chart, working Color A rows while slipping Color B st, then switch colors per chart.
- Continue until cloth measures 8 x 8 inches.
- Bind off, weave ends, and wash to set stitches; dry 12–24 hours.
How to Display or Gift It
- Stack with other cloths and tie with ribbon for a kitchen starter kit.
- Store in a labeled kitchen drawer organizer.
- Picot Edged Headband — Pretty Edge With Simple Body
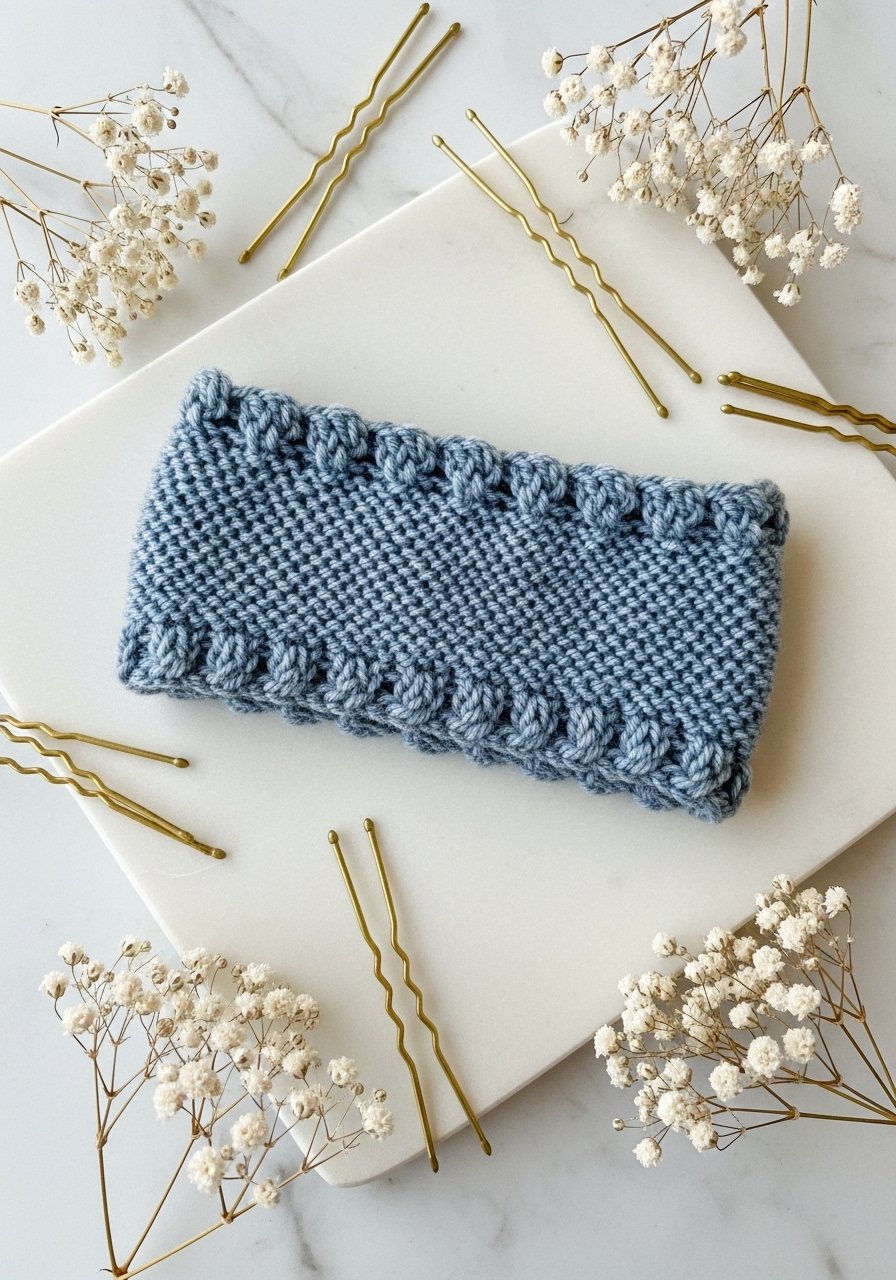
Picot edging gives a delicate scallop to an otherwise simple fabric. You’ll practice pick-up stitches and a decorative bind-off.
Materials
- 50 g worsted yarn (approx 100 yards)
- Circular needles US 7 (4.5 mm), 16"
- Stitch markers
- Tapestry needle
- Scissors
Instructions
- Cast on 80 stitches.
- Work stockinette in the round for 5 inches.
- To work picot bind-off: K2tog, yarn over, pass loop over to form points or use crochet picot method: bind off leaving small loops.
- Weave in ends and block for 1–2 hours to set edge.
How to Display or Gift It
- Pair with coordinating barrettes and place in a small jewelry box.
- Gift as a set with matching mitts.
- Twisted Stitch Scarf — Subtle Rope Texture
Twisted stitches are simple knits worked through the back loop to tighten the stitch and create a rope-like texture. This scarf teaches control for firmer stitches.
Materials
- 150 g worsted yarn (approx 300 yards)
- Straight needles US 8 (5 mm) or circular for flat work
- Stitch markers
- Tapestry needle
- Scissors
Instructions
- Cast on 28 stitches.
- Row 1: K2tbl (twist), P2 repeat to end.
- Row 2: Purl all.
- Repeat for 60 inches or desired length.
- Bind off and weave in ends.
- Light blocking for 1–2 hours to relax minor tension.
How to Display or Gift It
- Tuck into a leather gift sleeve or present in a fabric gift bag.
- Pair with a matching hat.
- Diagonal Rib Shawl — Bias Knitting for Pretty Draping
Bias or diagonal knitting uses increases and decreases to slant the fabric. This pattern creates soft diagonal rubs that lay beautifully across shoulders.
Materials
- 200 g DK yarn (approx 600 yards)
- Circular needles US 6 (4 mm), 32" or longer
- Stitch markers
- Tapestry needle
- Blocking wires and pins
Instructions
- Cast on 4 stitches.
- Row 1: K2, YO, K2tog to establish bias and diagonal rib.
- Continue increase at start and decrease at end every other row to shape.
- Work until shawl wingspan is 50–60 inches.
- Bind off, wash gently, and block pinned on bias for 24–48 hours.
How to Display or Gift It
- Style with a belt over a dress or drape on a chair.
- Wrap as a thoughtful handmade gift and include a care card.
- Moss-Panel Table Runner — Repeating Pebbled Panels
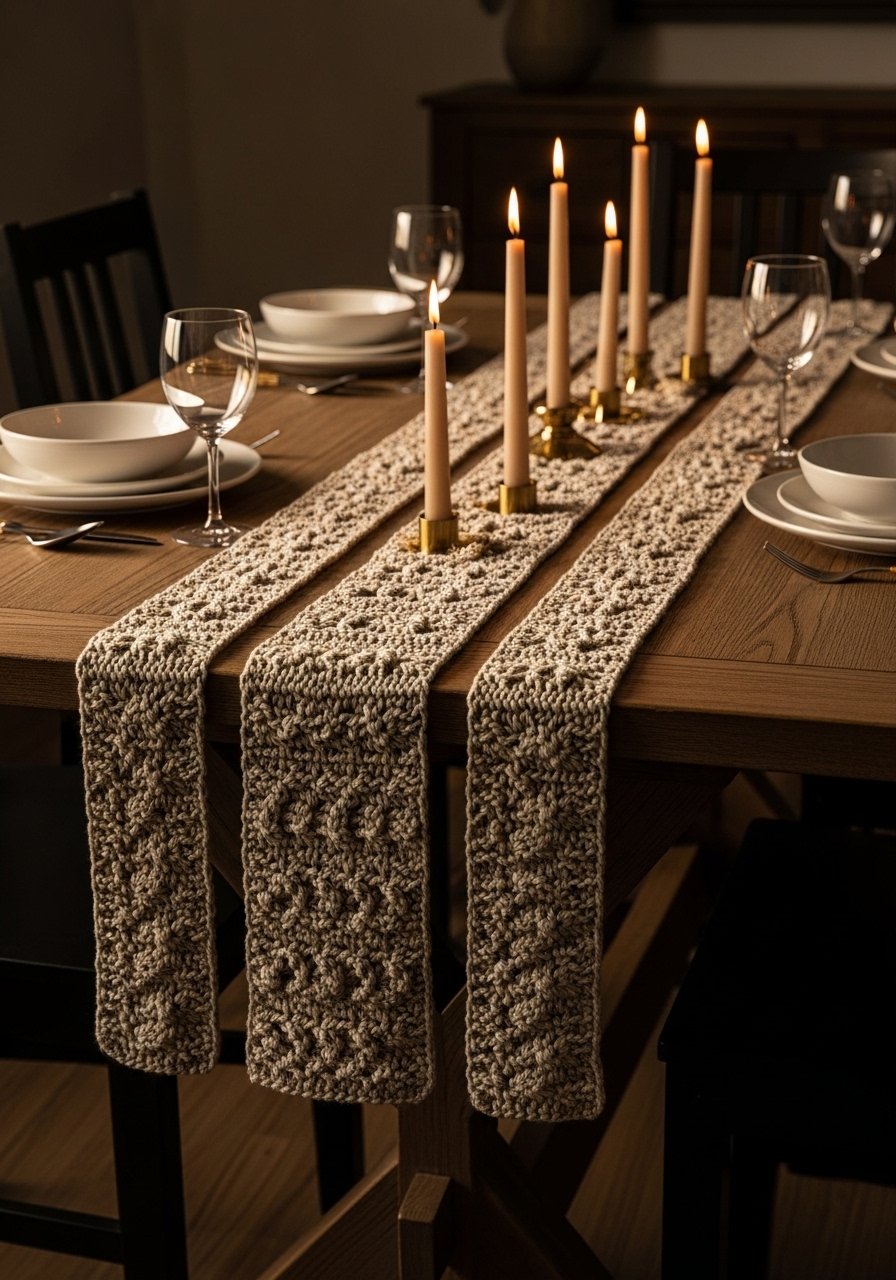
Moss stitch panels in alternating stripes create a rustic table runner perfect for cottagecore or farmhouse tables. It’s repetitive and soothing to make.
Materials
- 250 g worsted yarn (approx 500 yards)
- Circular needles US 8 (5 mm), 32"
- Stitch markers
- Tapestry needle
- Scissors
- Blocking mats and pins
Instructions
- Cast on 60 stitches.
- Work moss stitch: Row 1: K1, P1; Row 2: P1, K1 across four-row repeat to build panel height.
- Alternate moss panels with garter ridges every 8 rows until runner is 72 inches.
- Bind off, block flat for 24 hours to shape.
How to Display or Gift It
- Pair with a set of linen napkins for a seasonal table.
- Store flat in a drawer or roll on a fabric tube storage core.
- Beginner Lace Bookmark — Tiny, Delicate Practice Piece
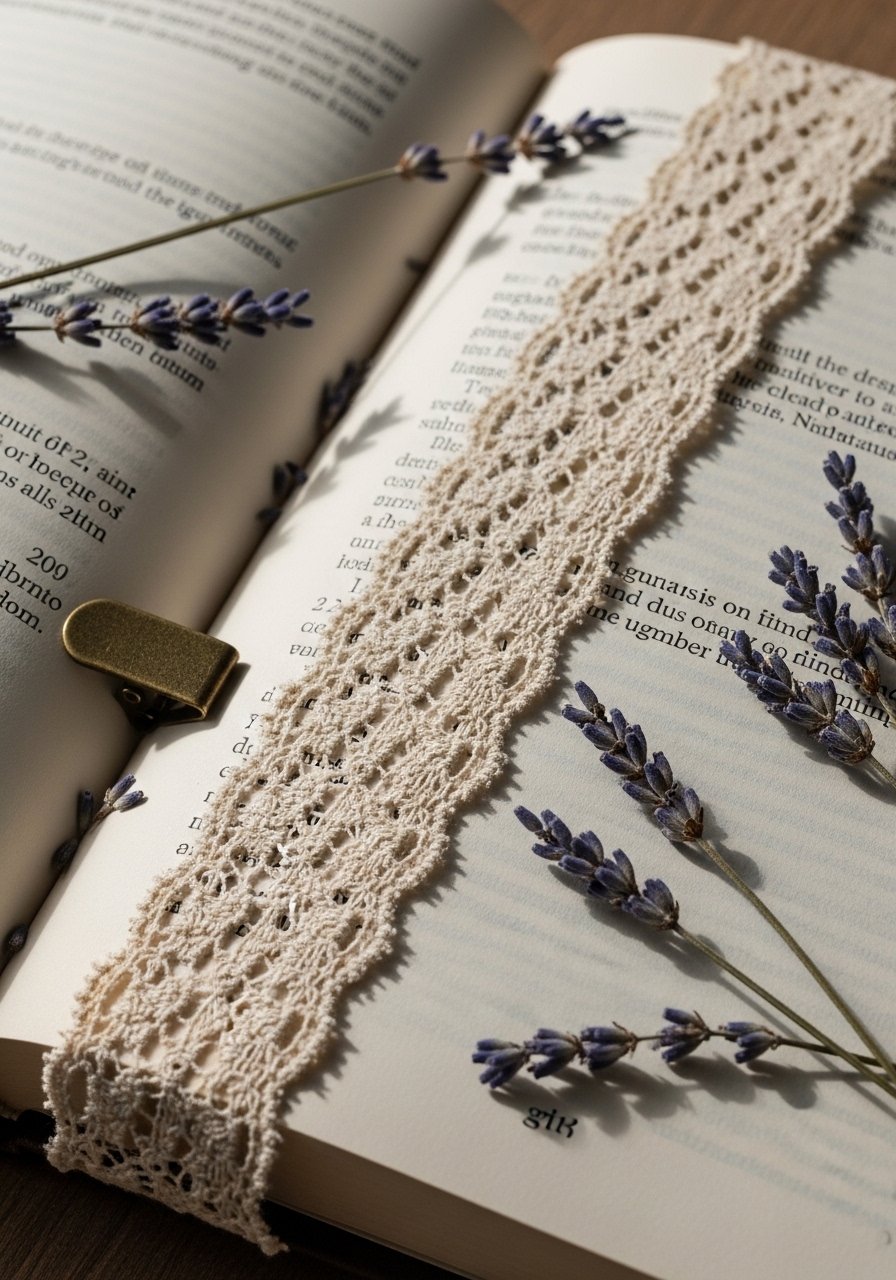
A bookmark is the perfect tiny lace project. You’ll practice yarn-overs, decreases, and picot edges without committing to a large blocking session.
Materials
- 10 g fingering cotton (approx 50 yards)
- Straight needles US 3 (3.25 mm)
- Tapestry needle
- Blocking board and pins
- Small ribbon for tassel (optional)
Instructions
- Cast on 20 stitches.
- Work a 6-row lace repeat: Row 1: K1, YO, K2tog, K3 repeat to end.
- Continue repeats until bookmark is 7 inches long.
- Work picot edge or simple bind-off.
- Wet-block on a board for 6–8 hours to open lace.
- Add ribbon tassel and weave in ends.
How to Display or Gift It
- Pair with a used hardcover and tie in twine.
- Keep flat in a bookmark organizer box.
Knitting tips, troubleshooting, and finishing notes
- If your edges curl in stockinette, add a garter border or pick up and knit a simple knitted border. A flexible blocking mat set makes a huge difference when finishing pieces.
- Tight spot when knitting twisted stitches? Try needles one size larger for the pattern rows, and switch back for ribbed edges.
- For even tension when changing colors, carry yarn loosely across the wrong side and catch floats every 3–5 stitches.
- Use a set of high-quality stitch markers to keep repeats tidy; I like a mixed pack from brands like Clover or Susan Bates, available via a general stitch marker set.
Thanks for getting this far — you now have 22 approachable projects that teach a wide range of knitting stitches for beginners while making lovely, usable items. Pick one that matches how much time you have: coasters and headbands are quick wins; blankets and cushions are weekend or week-long projects. Save or pin this article for later reference, and tag a friend who'd love to try a new stitch. Which one will you try first?
And if you want my single-most-handy tool recommendation for finishing and blocking across many of these makes, grab a good blocking mat set — it keeps edges crisp and patterns readable without fuss.


