You know that moment when a blank page turns into something totally sparkly and proud? These 22 viral drawing ideas for kids with colored pencils are crafted to do exactly that. They’re bright, detailed, and designed so kids get fast wins while practicing real techniques—layering, burnishing, blending, and texture.
You’ll find projects for beginners and more patient artists, from quick cartoon prompts to careful pet portraits. Each idea includes a short materials list with exact quantities, simple step-by-step instructions, drying or set times when needed, and smart tips to avoid common mistakes like muddy color mixes or broken pencil tips.
Grab a kid-safe sharpener and a smooth sketchbook to start. I reach for my Prismacolor Premier Colored Pencils for creamy color laydown and a soft kneaded eraser for lightening highlights. Ready? Let’s turn those pencil strokes into proud fridge art.
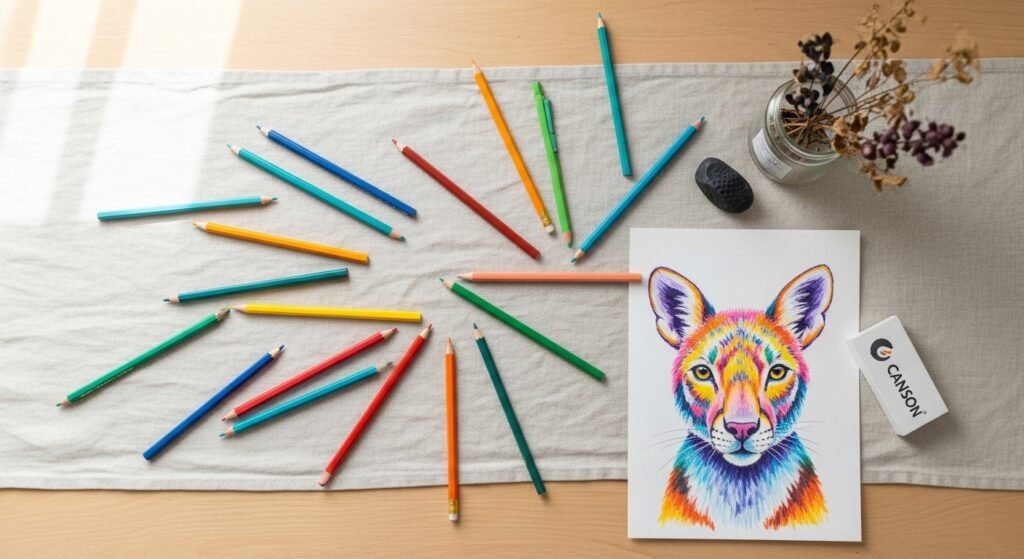
1. Rainbow Animal Portraits — drawing ideas for kids with colored pencils
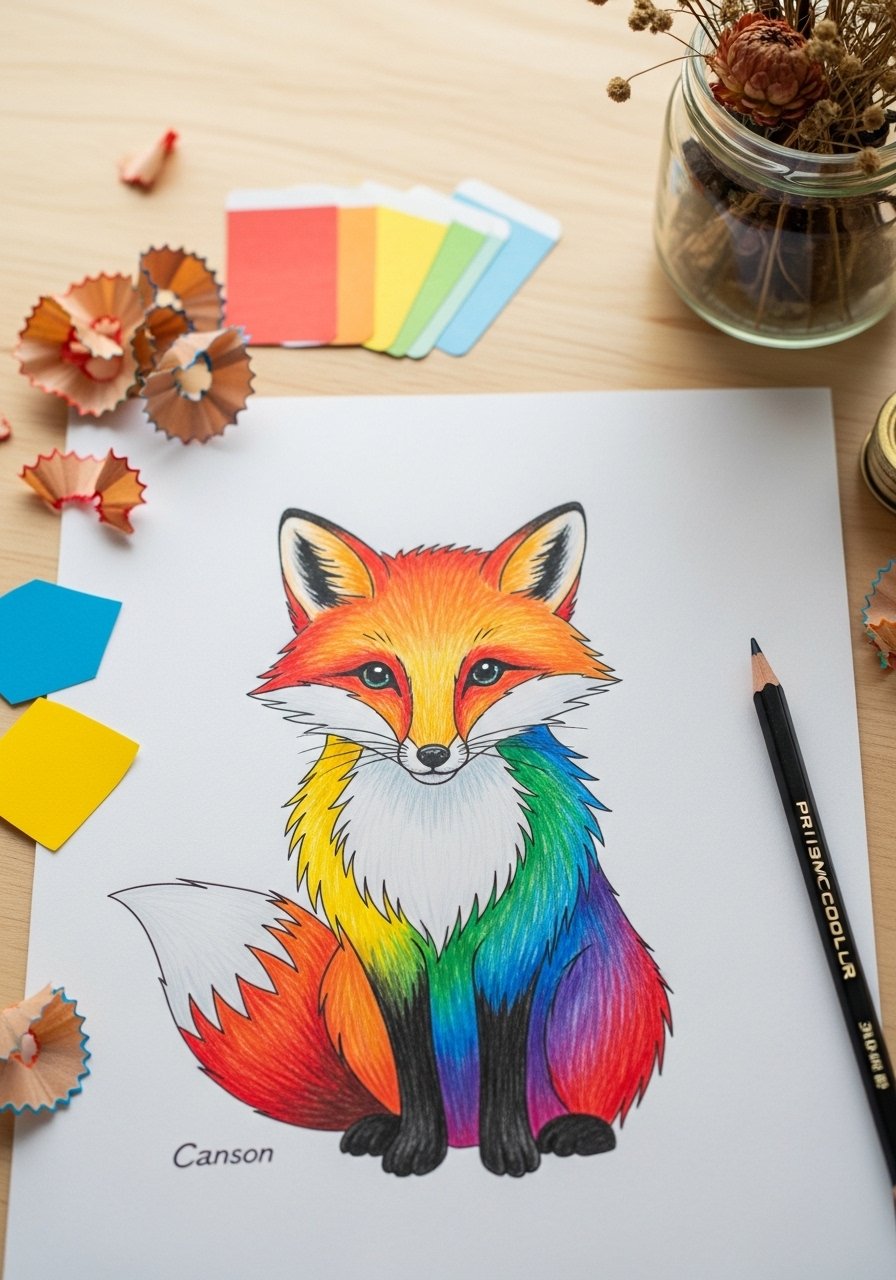
This project teaches color layering and playful palettes. Kids pick an animal outline, then fill regions with layered rainbow hues for a vibrant, graphic look. It’s great for beginners who love bold color and for older kids practicing pressure control.
Materials
- 1 sheet 9"x12" Canson Mixed Media paper
- 12–24 colored pencils (a beginner set or Crayola Colored Pencils, 12-count)
- 1 HB pencil for sketching
- 1 kneaded eraser
- 1 pencil sharpener
- 1 blending stump (optional)
Instructions
- Lightly sketch an animal outline with an HB pencil.
- Decide rainbow segment order; faintly draw divider lines.
- Fill each segment with light layers of color. Start soft.
- Add a second layer using heavier pressure to deepen hues.
- Use a blending stump to soften transitions if desired.
- Lift small highlights with the kneaded eraser.
- Sign at the corner and spray a light coat of workable fixative from 12" away (if using).
How to Display or Gift It
Frame in a small wooden frame and hang in a kid’s room or gallery wall. Wrap several portraits in kraft paper for a colorful gift set. Store unframed artwork flat in a stackable craft organizer.
2. Starry Galaxy Doodles
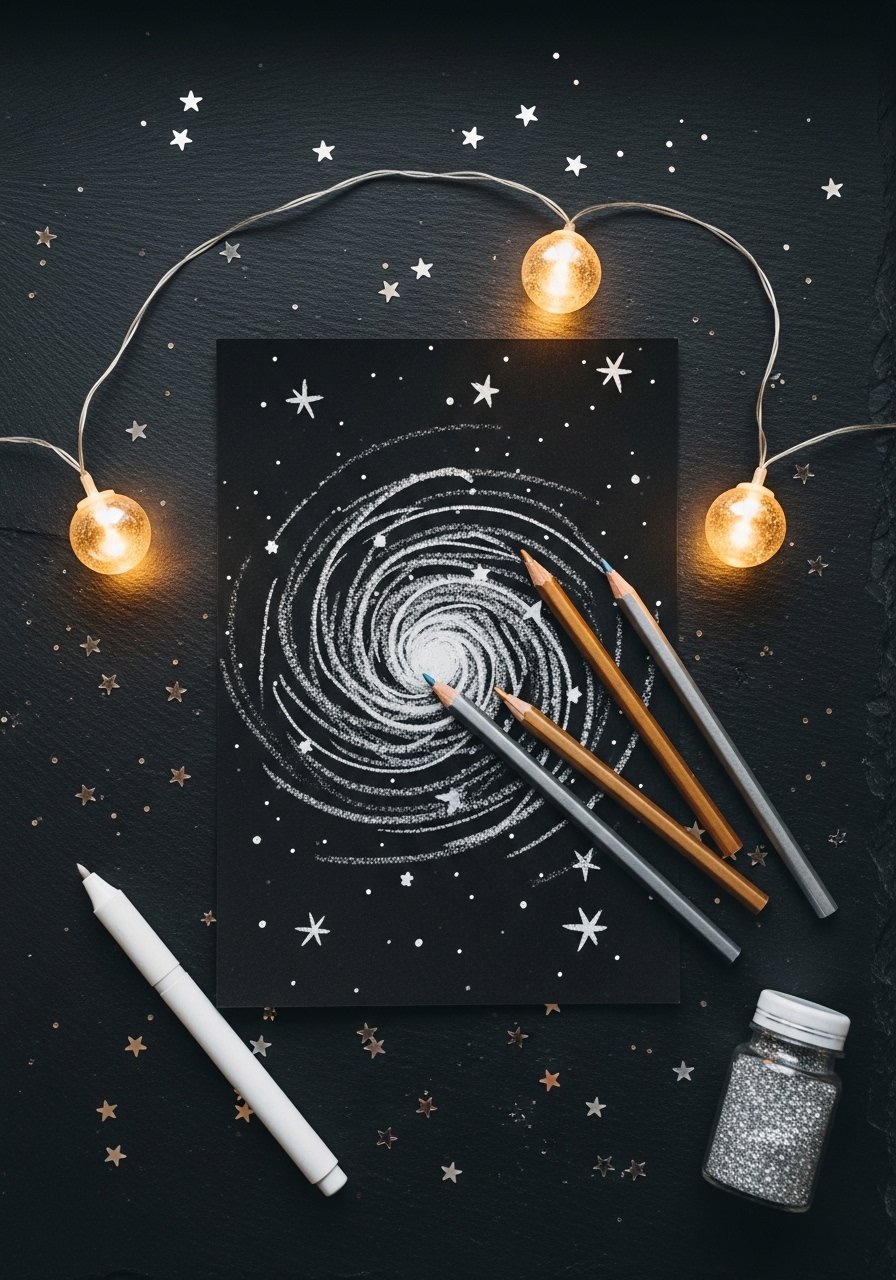
Galaxies are perfect for practicing gradients and glitter effects. Using colored pencils on dark paper teaches kids how pigment shows up against negatives and how to layer light tones.
Materials
- 1 sheet 9"x12" black construction paper
- 6–10 metallic or light-colored pencils (try Faber-Castell Polychromos for bright pigments)
- 1 white gel pen
- 1 foam brush for gentle blending
- 1 small container of craft glitter (optional)
Instructions
- Sketch a faint spiral galaxy with a white gel pen.
- Layer pale blues, purples, and pinks around the spiral.
- Use short circular strokes to build star clusters.
- Lightly smudge with a foam brush to soften halos.
- Dot bright stars with the white gel pen.
- Add tiny glitter accents with a glue dot and sprinkle; let dry 10–15 minutes.
How to Display or Gift It
Mount the page onto a white mat to show contrast. Slip into a frame with museum glass for protection. Bundle several as a space-themed gift with a small craft glitter set.
3. Detailed Botanical Study
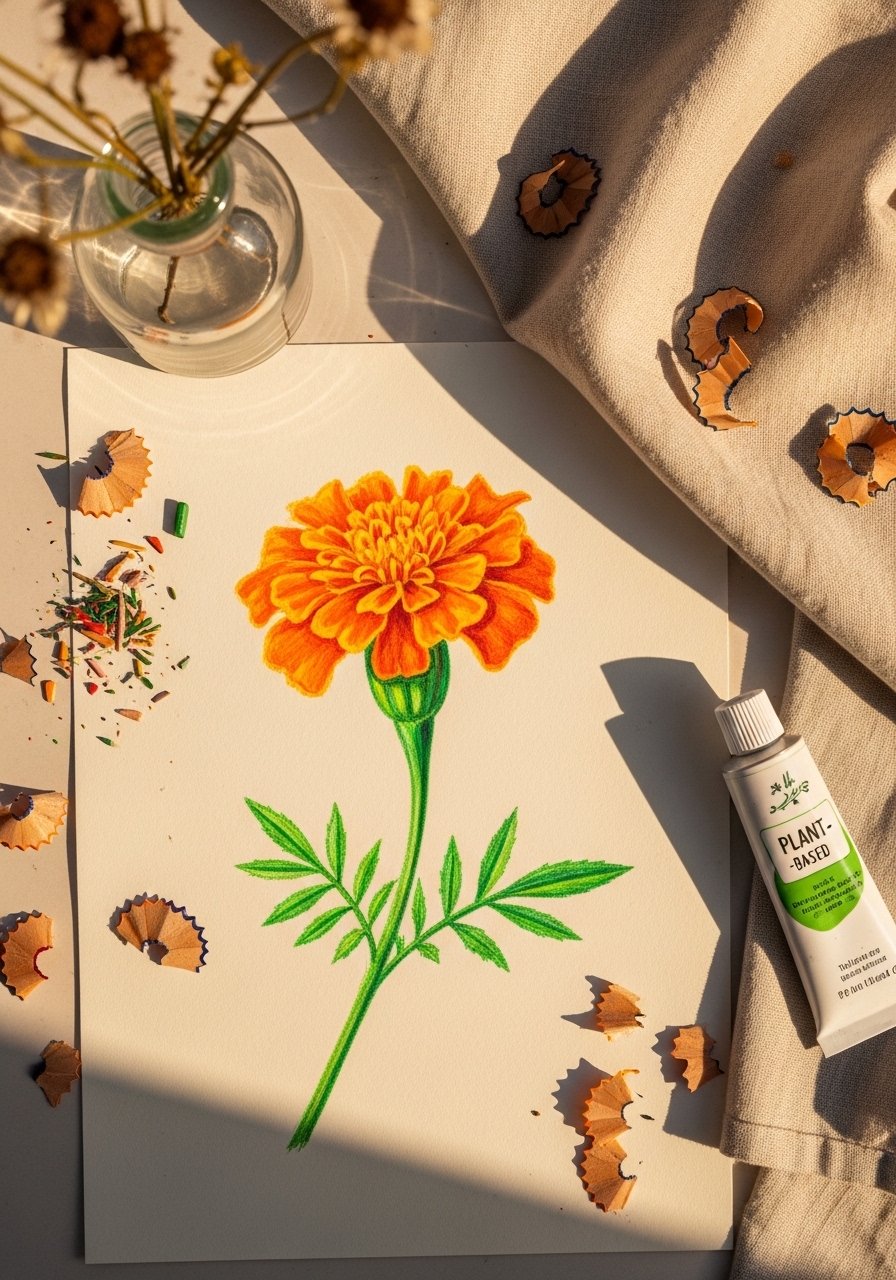
Botanical studies build observation skills and fine detail. Kids learn to render veins, petals, and subtle shading while practicing layered color to simulate depth and softness.
Materials
- 1 sheet 9"x12" Canson Bristol smooth paper
- 12–24 colored pencils (include green and yellow tones)
- 1 mechanical pencil for vein details
- 1 kneaded eraser
- 1 small round detail brush (for graphite dust removal)
- 1 hand lens (optional)
Instructions
- Choose a real flower or photo reference.
- Lightly sketch the outline and main veins.
- Lay base colors with light pressure.
- Add midtones, following petal curvature.
- Deepen shadows with cross-hatching in darker pencils.
- Lift tiny highlights with kneaded eraser.
- Brush away crumbs with the detail brush.
How to Display or Gift It
Press the drawing under books for 24 hours to flatten. Frame with a white mat for a botanical shelf. Package in a clear art sleeve inside a kraft gift box.
4. Cubist Fruit Still Life
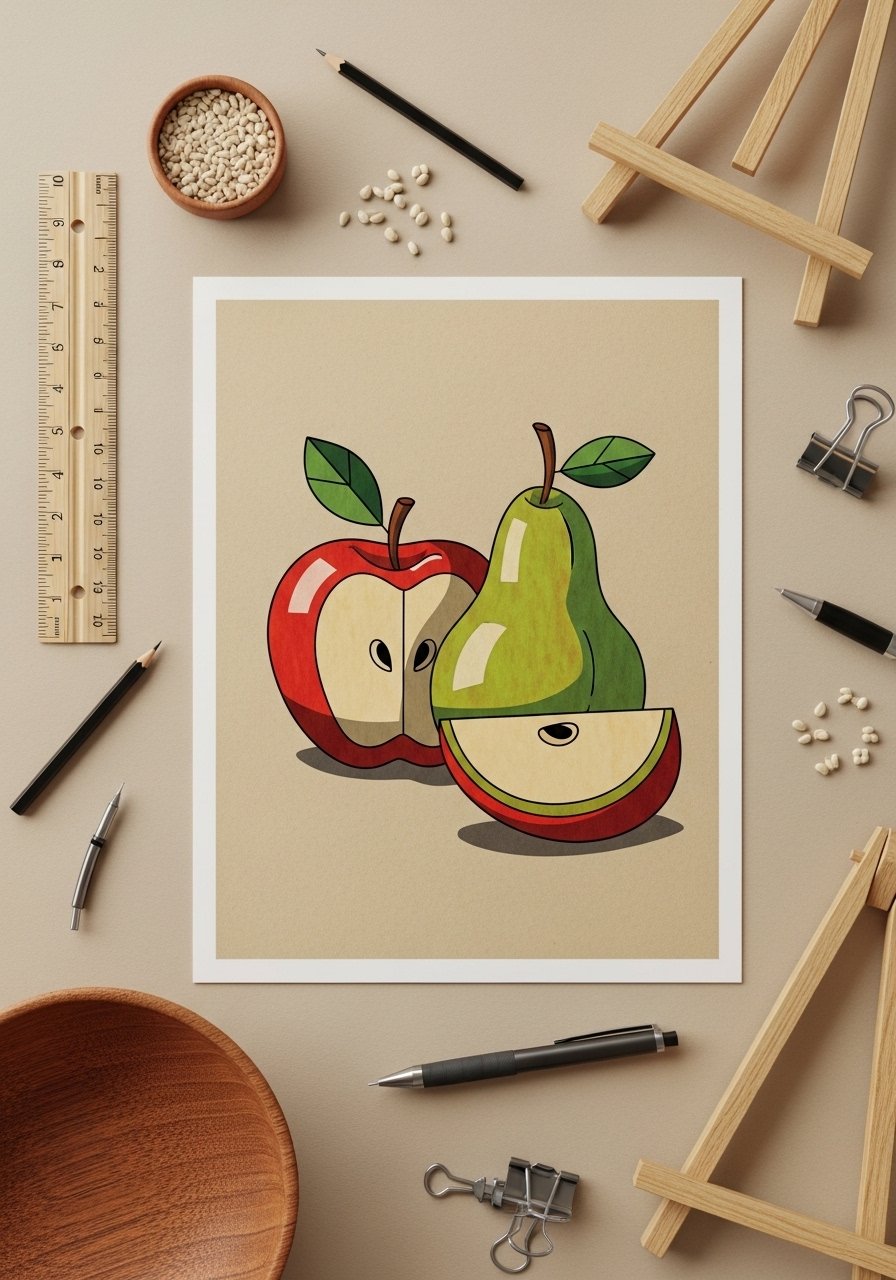
Cubist still lifes are great for teaching shapes and color blocking. Kids learn to simplify objects and play with contrasting hues and hard edges.
Materials
- 1 sheet 9"x12" tan drawing paper
- 12 colored pencils with warm and cool tones
- 1 ruler (12")
- 1 HB pencil
- 1 eraser
- 1 blending stump (optional)
Instructions
- Arrange two fruits and sketch simplified block shapes.
- Divide objects into geometric planes with the ruler.
- Assign a different color family to each plane.
- Fill each plane with flat layers; avoid blending.
- Add thin outlines with a darker pencil for definition.
- Remove construction lines with eraser.
How to Display or Gift It
Lean on a small wooden easel on a kitchen shelf. Pair with a mini fruit bowl and a note card for a thoughtful kitchen gift. Store flat in a portfolio folder.
5. Cartoon Robot Friends
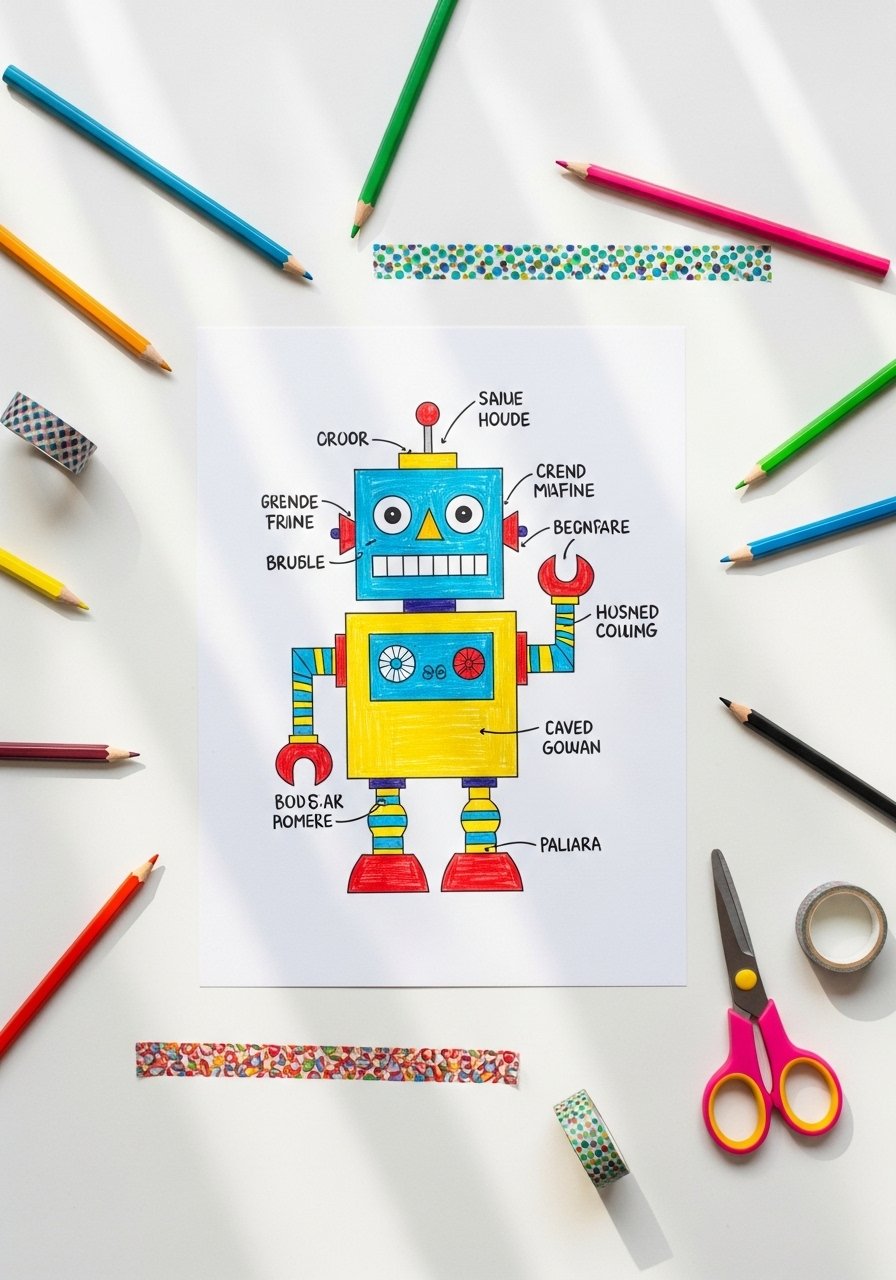
Robots are excellent for designing shapes and metallic textures. Kids learn to imply metal with cool grays and small reflective highlights.
Materials
- 1 8.5"x11" white sketchbook paper
- 8–16 colored pencils (include metallic or cool grays)
- 1 metallic silver pencil (optional)
- 1 ruler
- 1 black fineliner (0.3mm)
Instructions
- Sketch a basic robot body using rectangles and circles.
- Add panels, bolts, and screens.
- Shade each panel with gradient from dark to light.
- Use the metallic pencil for highlights.
- Outline details with the black fineliner.
- Add a small background pattern (gears or stars).
How to Display or Gift It
Punch two holes and string as a mini booklet for kids to flip through robot designs. Attach to a magnet sheet for fridge display. Gift with a kid’s sketchbook.
6. Patterned Mandalas for Calm Focus
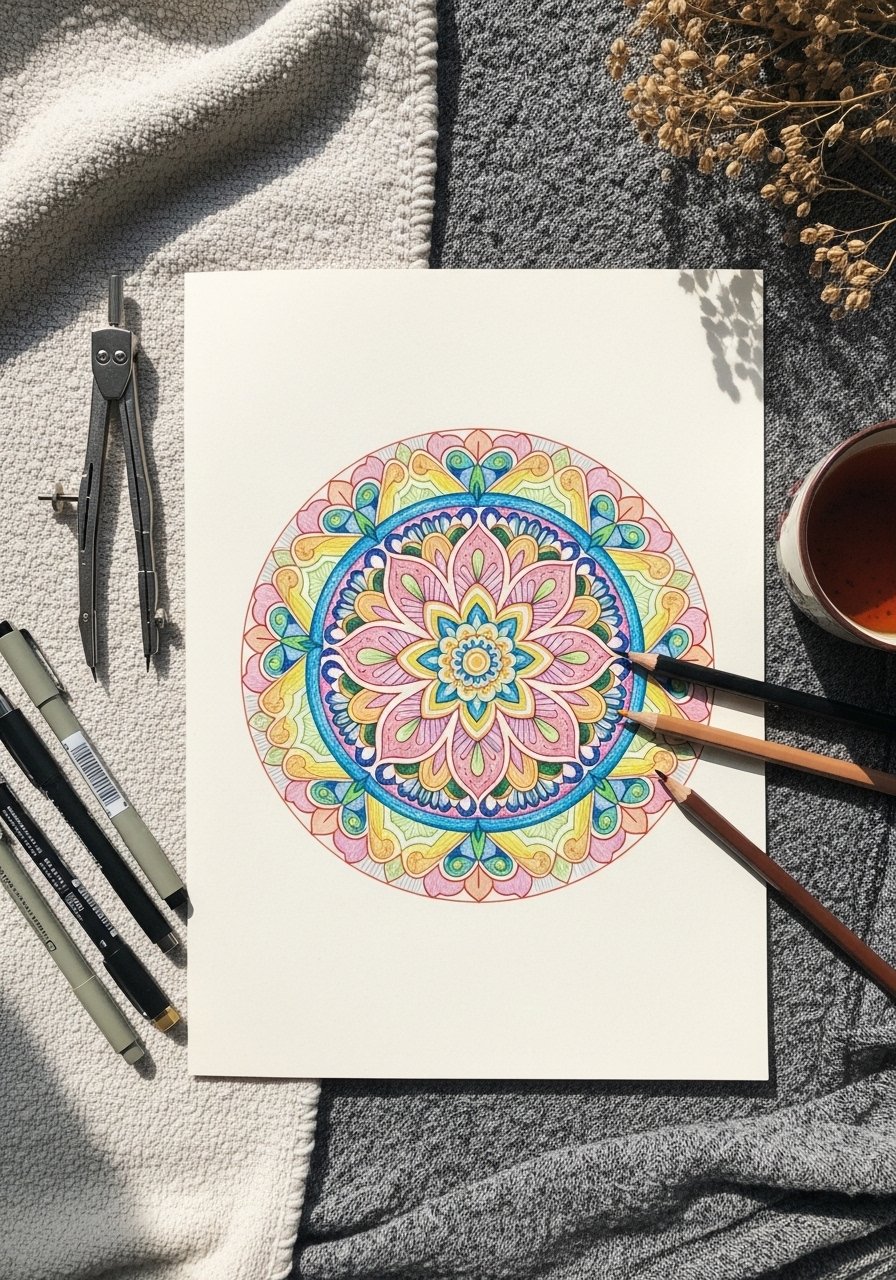
Mandalas teach repetition, symmetry, and careful coloring. This calming activity helps with fine-motor control and patience.
Materials
- 1 8.5"x11" drawing paper
- 1 compass and ruler
- 6–12 colored pencils in harmonious palette
- 1 fineliner pen
- 1 protractor (optional)
Instructions
- Draw concentric circles with the compass.
- Divide into even segments with faint pencil lines.
- Sketch repeating motifs in pencil.
- Carefully color each ring, keeping tones consistent.
- Add dot highlights with a white gel pen.
- Erase construction lines gently.
How to Display or Gift It
Frame several mandalas as a calming wall trio. Press and store flat in labeled sleeves for later gifting. Pair with a small wooden easel.
7. Textured Fur Practice: Bunny Study
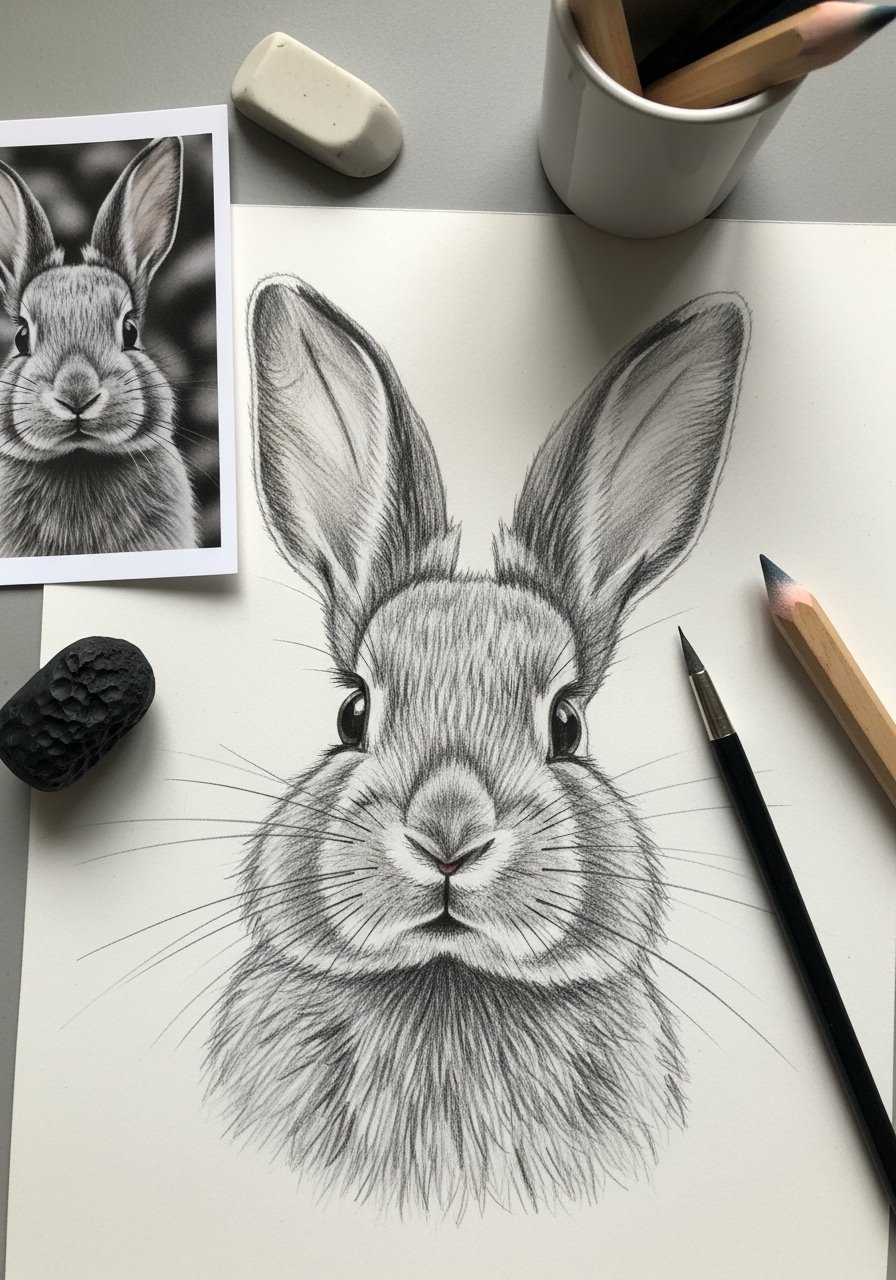
Fur textures teach short directional strokes and layering. This short study focuses on pressure control to get soft-to-crisp fur.
Materials
- 1 9"x12" smooth Bristol paper
- 6–10 colored pencils (include warm browns and cool grays)
- 1 kneaded eraser
- 2 blending stumps (small and medium)
- 1 reference photo
Instructions
- Lightly sketch the bunny silhouette.
- Map fur direction with faint lines.
- Lay a base tone for each fur area.
- Use short, overlapping strokes for fur; vary pressure.
- Add darker strokes near shadows for depth.
- Pull out highlights by lifting with the kneaded eraser.
How to Display or Gift It
Mount on a small canvas panel for a tactile look. Tuck into a homemade card for a newborn gift. Pack finished studies in a flat art storage box.
8. Underwater Scene with Layered Blues

Layering blues and translucent textures creates believable water. Kids practice gradients and overlapping shapes for depth.
Materials
- 1 9"x12" mixed-media paper
- 8–12 colored pencils heavy on blue and green tones
- 1 white colored pencil for highlights
- 1 soft pastel (optional for wash)
- 1 fixative spray (workable)
Instructions
- Lightly sketch horizon and main seaforms.
- Block in base blues in horizontal bands.
- Layer darker blues under objects to suggest depth.
- Color fish brightly and add scale texture with tiny strokes.
- Use white pencil for bubble highlights.
- Apply a light fixative coat; dry 10–15 minutes.
How to Display or Gift It
Clip to a string with tiny clothespins for a nautical garland. Frame with a navy mat. Store flat in a portfolio sleeve.
9. Foodie Illustrations: Cute Cupcakes
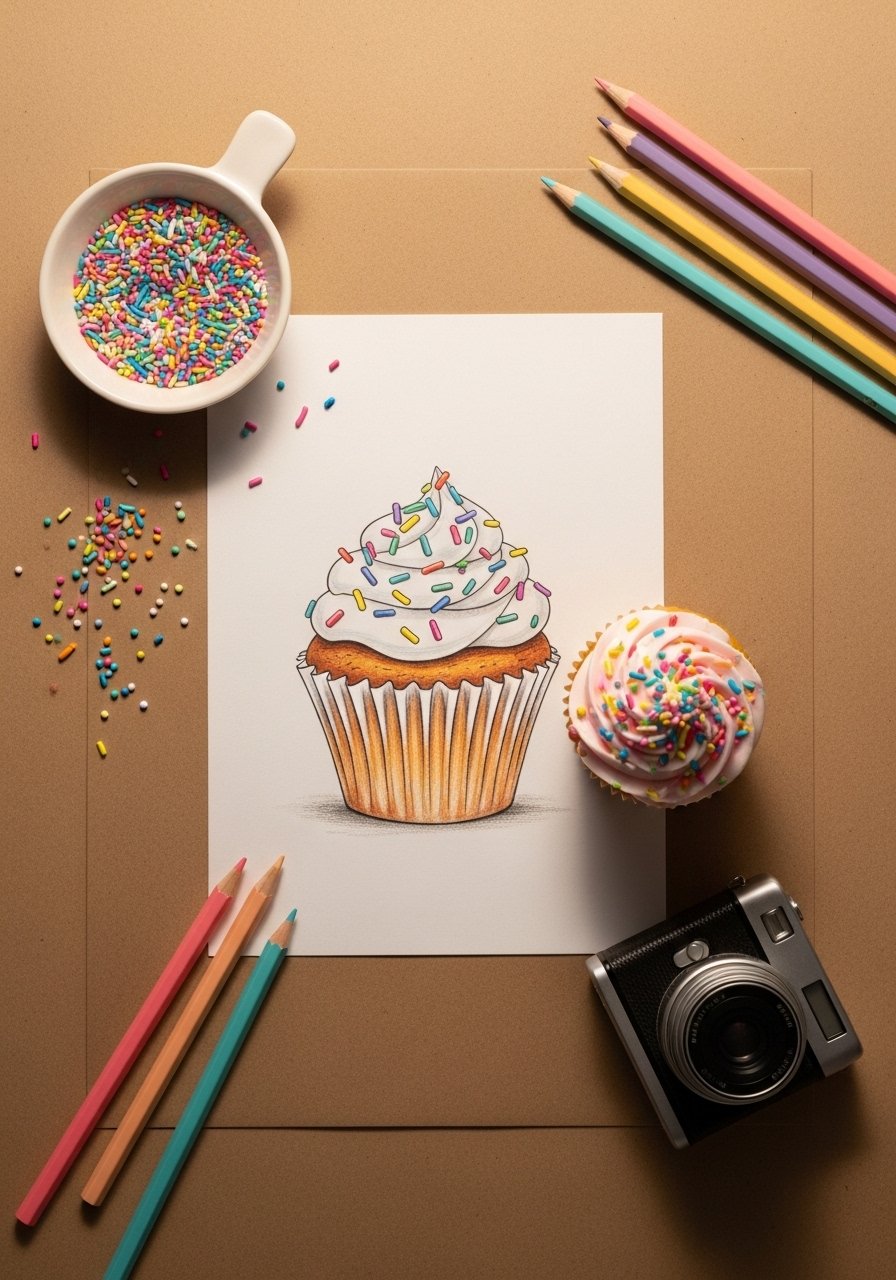
Food drawings let kids practice small details—sprinkles, frosting folds, and reflections—while being super fun.
Materials
- 1 8.5"x11" sketchbook page
- 10–12 colored pencils (pastels and bright tones)
- 1 white gel pen for highlights
- 1 reference cupcake (optional)
Instructions
- Sketch the cupcake base and frosting swirl.
- Lay base colors for paper cup and frosting.
- Add midtones and shadow under the frosting.
- Dot sprinkles with various colors, leaving tiny white highlights.
- Finish edges with a darker pencil for definition.
- Sign it and date the back.
How to Display or Gift It
Make a mini recipe card set with foodie drawings on the cover. Slide into a clear sleeve for protection.
10. Cute Monster Mash
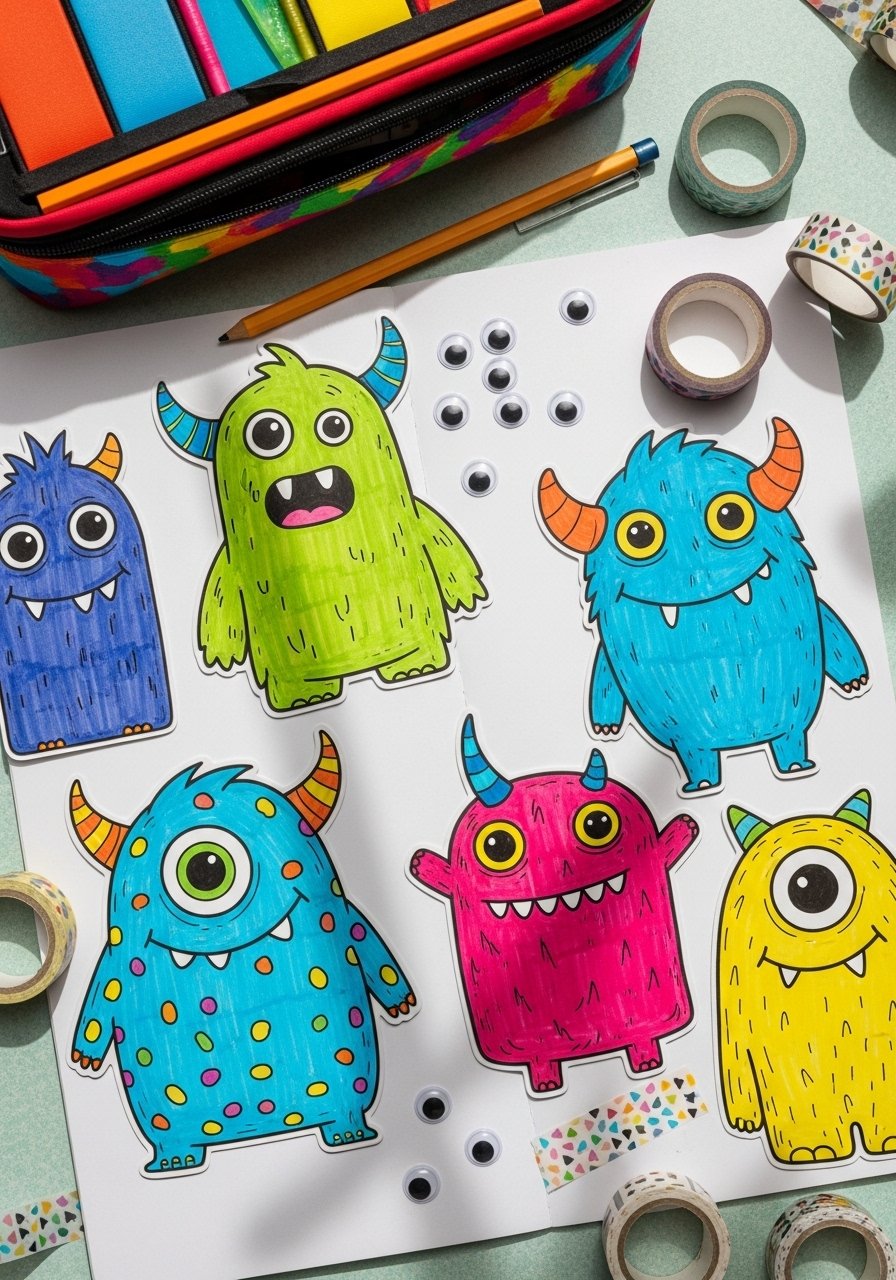
Monsters are perfect for imagination and practicing expressive lines and texture. Let kids invent color rules and patterns.
Materials
- 1 9"x12" sketchbook page
- 8–16 colored pencils across bold and neon shades
- 1 black fineliner for outlines
- 1 set of googly eyes (for mixed-media fun)
Instructions
- Warm up with quick 1–2 minute monster sketches.
- Choose three favorites to color fully.
- Use bold patterns—stripes, polka dots, spikes.
- Add shadows beneath to ground each creature.
- Outline with the fineliner for a cartoon look.
- Glue a single googly eye for a mixed-media accent (let dry 10 minutes).
How to Display or Gift It
Bind several doodles into a zine. Stick a magnet on the back to make fridge art. Store extras in a zine-making kit.
11. Jungle Animals: drawing ideas for kids with colored pencils
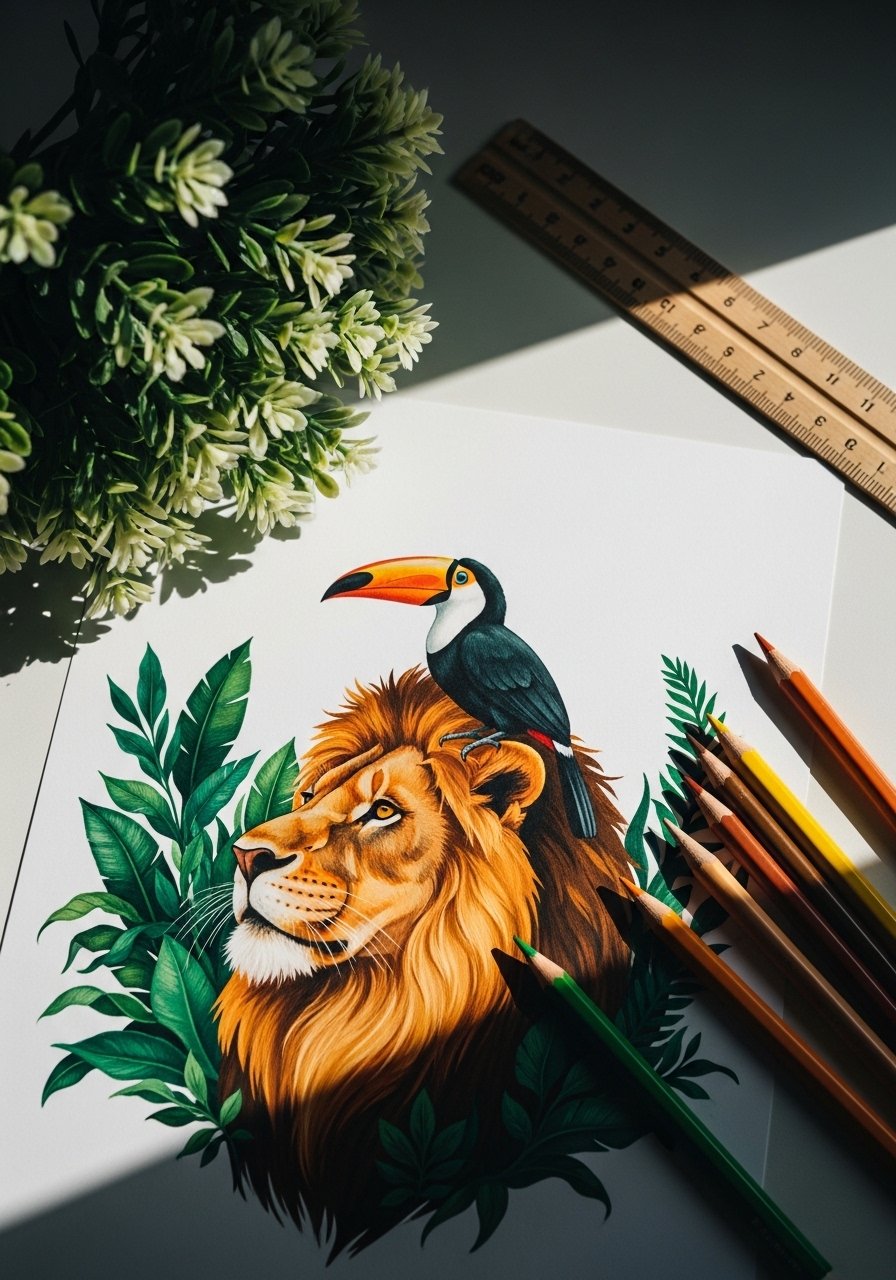
This set focuses on varied textures—mane, feathers, and leaves. Kids learn to contrast warm animal tones with cool jungle foliage.
Materials
- 1 9"x12" mixed-media pad sheet
- 12–24 colored pencils including greens and earth tones
- 1 white pencil for feather highlights
- 1 tapered kneaded eraser
- 1 paper towel for gentle blending
Instructions
- Sketch the animal shapes with light lines.
- Block in major color areas: fur, beak, foliage.
- Build feather texture with short layered strokes.
- Create mane volume with directional strokes from root to tip.
- Darken shadows beneath animals for depth.
- Blend gently and lift highlights with the kneaded eraser.
How to Display or Gift It
Create a matching set for a nursery wall. Roll and secure in kraft paper for gifting. Keep extras safe in a tube mailing box.
12. Seasonal Holiday Cards — Quick Festive Drawings
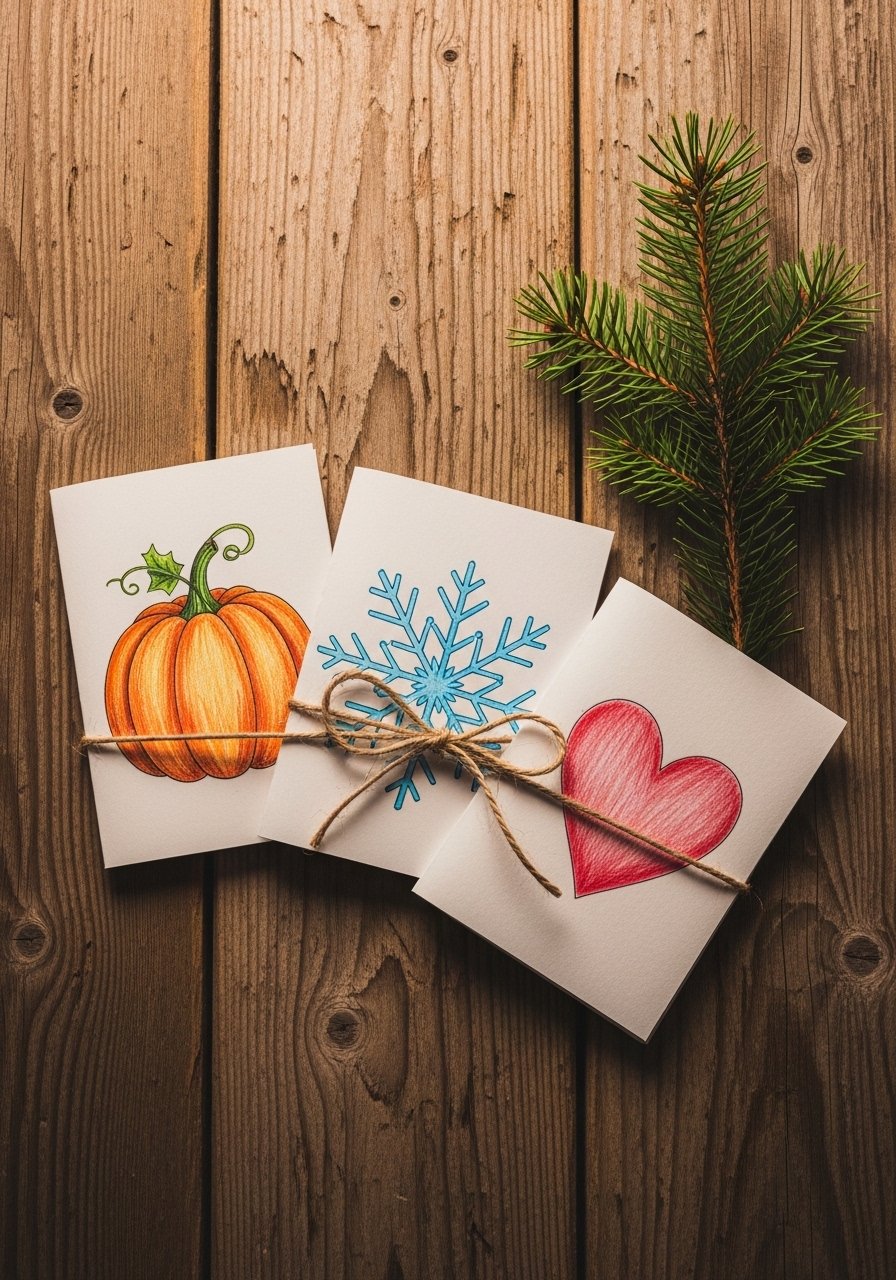
Seasonal cards are fast wins. Kids can reproduce simple icons repeatedly to make batches for family and friends.
Materials
- 10 4"x6" blank card stock cards
- 6–12 colored pencils in seasonal palette
- 1 black pen for lettering
- 1 roll of twine for bundling
- 1 set of envelope stickers
Instructions
- Fold card stock or use pre-folded cards.
- Sketch simple icons (pumpkin, snowflake, heart).
- Color with layered pencil strokes.
- Add small metallic highlights with a silver pencil.
- Write a short message inside with the black pen.
- Bundle in groups of three tied with twine.
How to Display or Gift It
Tuck into a kraft envelope and add a sticker seal. Store flat in a card organizer box.
13. Name Letter Portraits
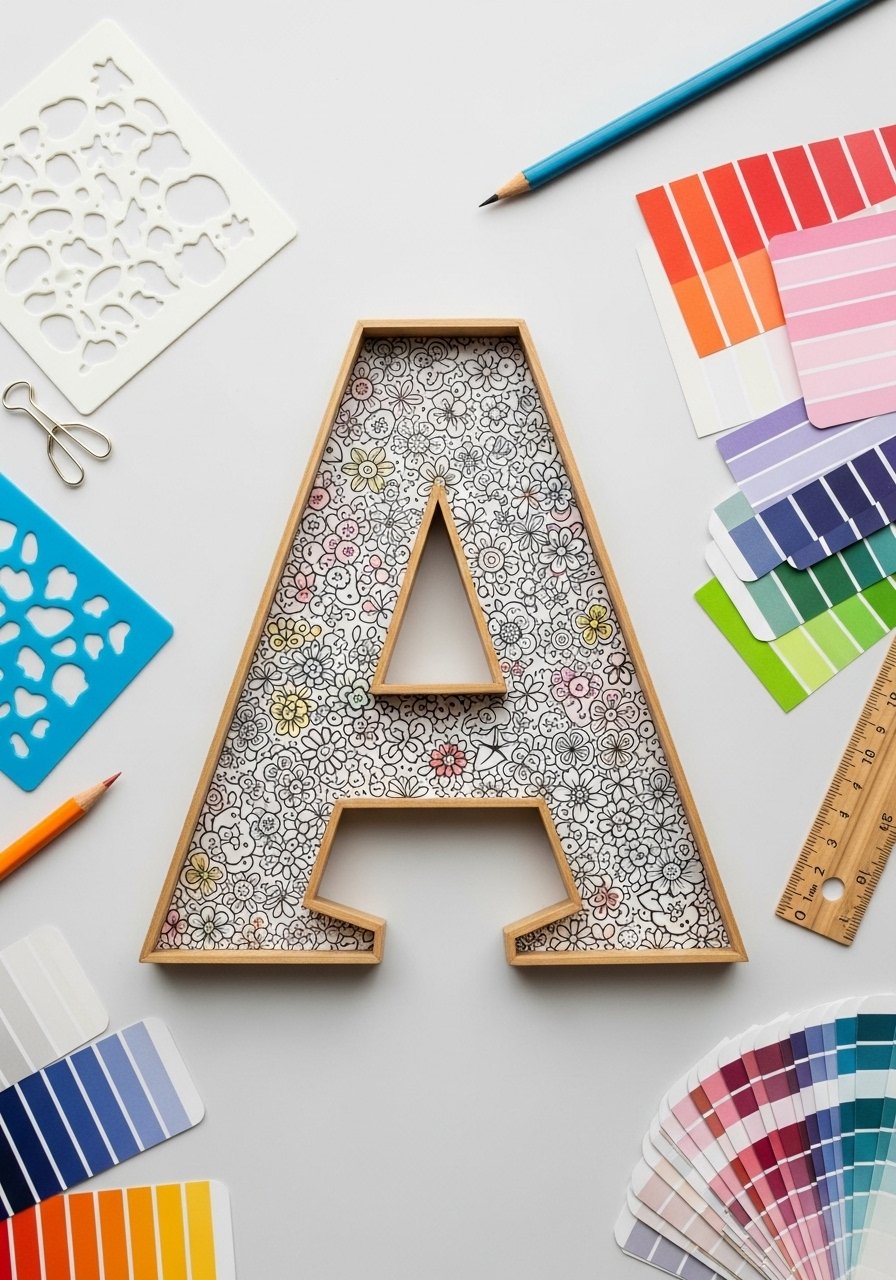
Turn a name into art. Kids fill large block letters with themed doodles—perfect for bedroom doors or personalized gifts.
Materials
- 1 sheet 9"x12" Bristol paper
- 1 alphabet stencil (8" letters)
- 8–16 colored pencils
- 1 fineliner for doodle outlines
- 1 eraser
Instructions
- Trace a large letter with the stencil.
- Divide letter into small zones with pencil.
- Fill each zone with different tiny doodles or patterns.
- Color carefully within each doodle.
- Outline shapes with a fineliner for contrast.
- Cut out and mount on colored cardstock if desired.
How to Display or Gift It
Glue to a wooden plaque for a door sign. Slip into a frame as a birthday gift. Keep unused letters in a stencil storage folder.
14. Optical Illusion Shapes
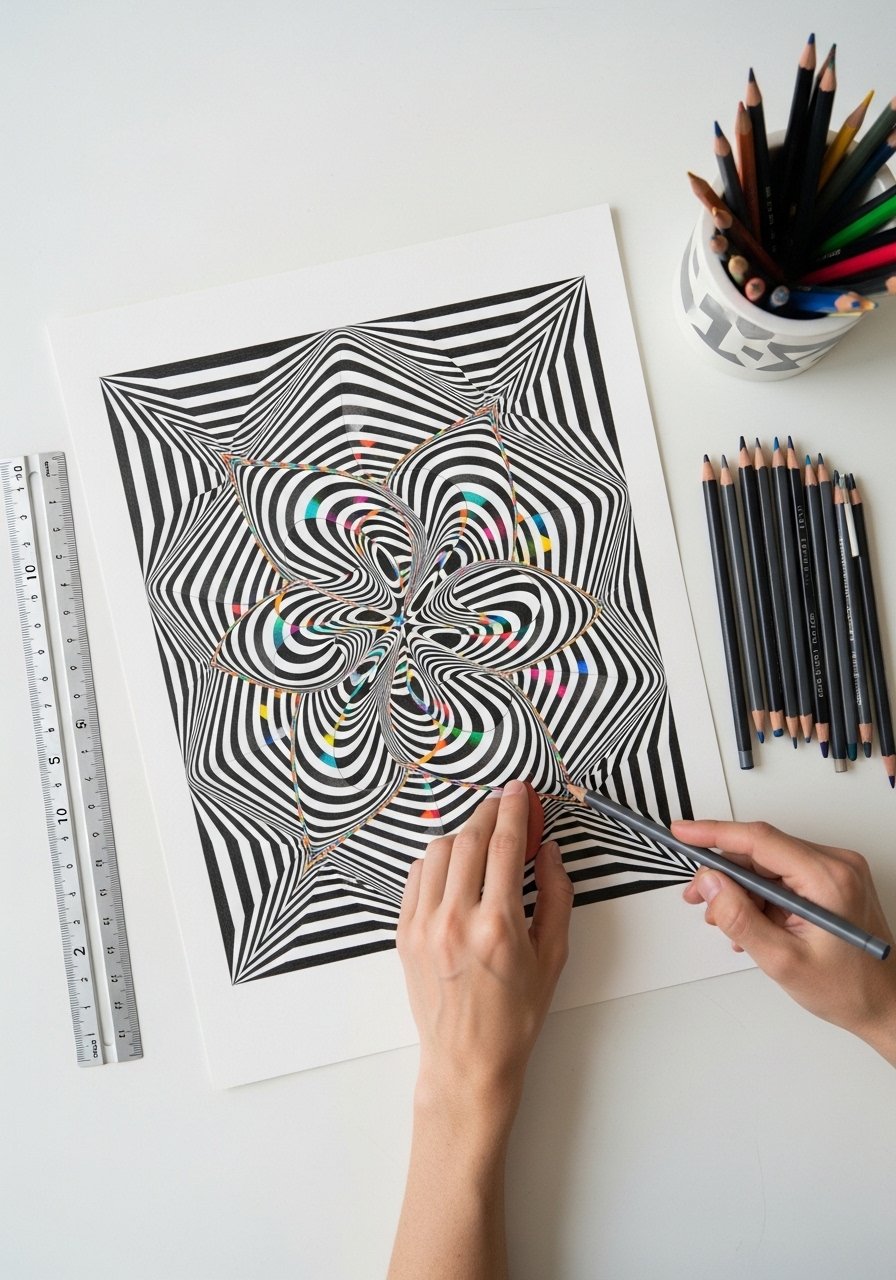
Optical illusions teach contrast and careful edge work. Kids learn to plan negative space and create depth with simple shapes.
Materials
- 1 9"x12" Bristol paper
- 6–8 colored pencils (plus black and white)
- 1 ruler
- 1 compass
- 1 eraser
Instructions
- Draw repeating concentric shapes with the compass and ruler.
- Plan a light/dark pattern across sections.
- Fill alternating areas with black/white or color.
- Smooth edges carefully for crisp lines.
- Step back to check optical effect; tweak contrast.
- Frame with a slim black mat.
How to Display or Gift It
Mount under glass to preserve contrast. Create a set of three illusions for a modern shelf. Store in a flat art portfolio.
15. Layered Landscape Scenes — drawing ideas for kids with colored pencils
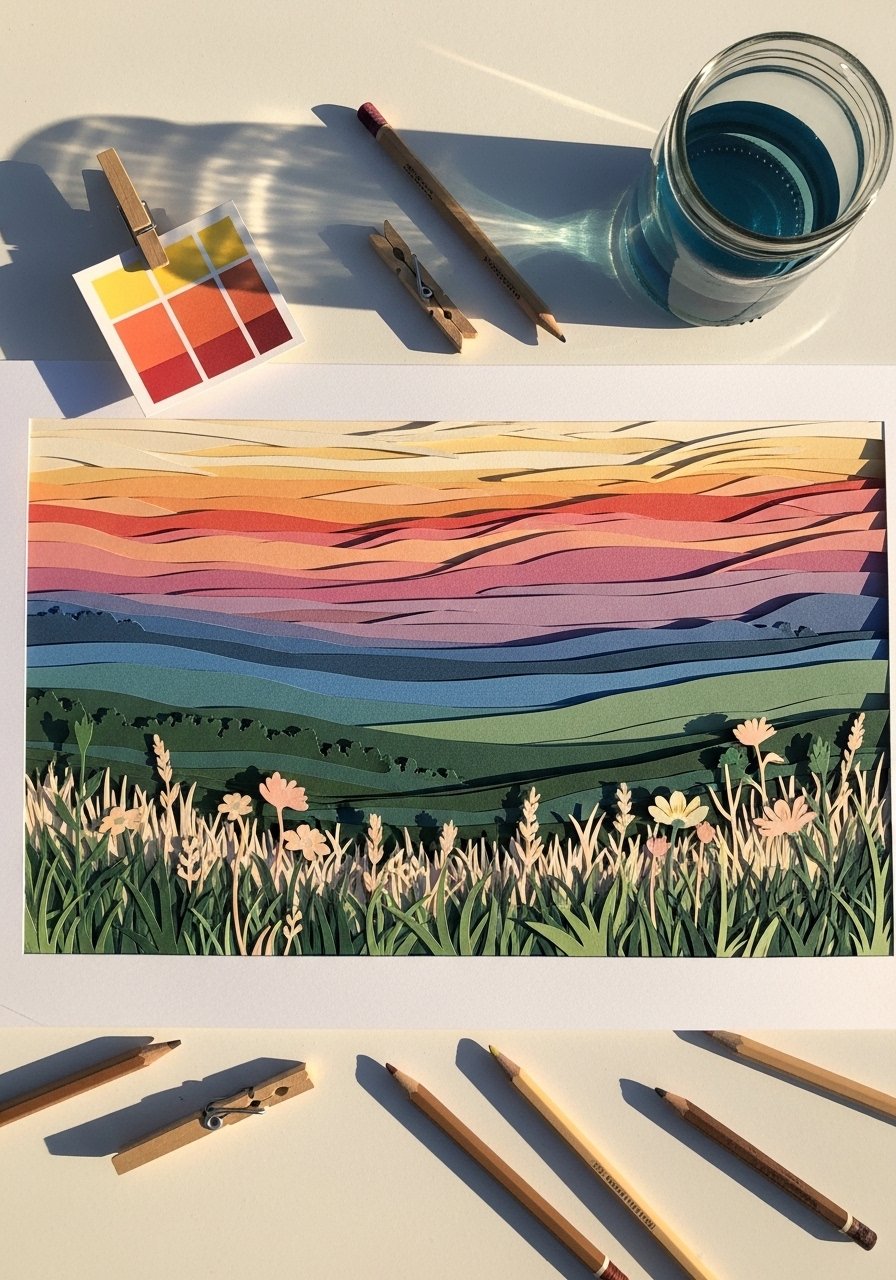
Layered landscapes teach atmospheric perspective—making far objects lighter and cooler. Kids practice simple horizon composition and soft gradation.
Materials
- 1 9"x12" cold-press mixed media paper
- 12–18 colored pencils (include warm sunset tones)
- 1 blending stump
- 1 white pencil for distant highlights
- 1 sponge for gentle smudging (optional)
Instructions
- Lightly sketch horizon and main shapes.
- Block in sky gradient from dark to light.
- Add midground hills in cooler tones.
- Place darker foreground elements to frame.
- Use the blending stump for soft transitions.
- Finish with sharp foreground details.
How to Display or Gift It
Frame with a wide mat to enhance depth. Make matching note cards using a cropped section. Slide originals into a portfolio case for safekeeping.
16. Stained Glass Window Drawing

This project teaches strong outlines and color saturation. Kids learn to mimic glass by keeping colors vibrant and distinct.
Materials
- 1 8.5"x11" heavyweight paper
- 10–16 colored pencils in jewel tones
- 1 black marker for leading lines
- 1 white gel pen for glints
Instructions
- Sketch a window design with defined panes.
- Trace leading lines with the black marker.
- Fill panes with saturated colors using heavy pressure.
- Add subtle gradients to suggest light.
- Dot small highlights with the white gel pen.
- Let marker ink dry fully (15 minutes).
How to Display or Gift It
Place against a sunny window or lightbox for faux stained-glass effect. Gift in a clear sleeve with a ribbon. Use a small glassine sleeve to protect colors.
17. Fashion Sketches: Outfit Ideas
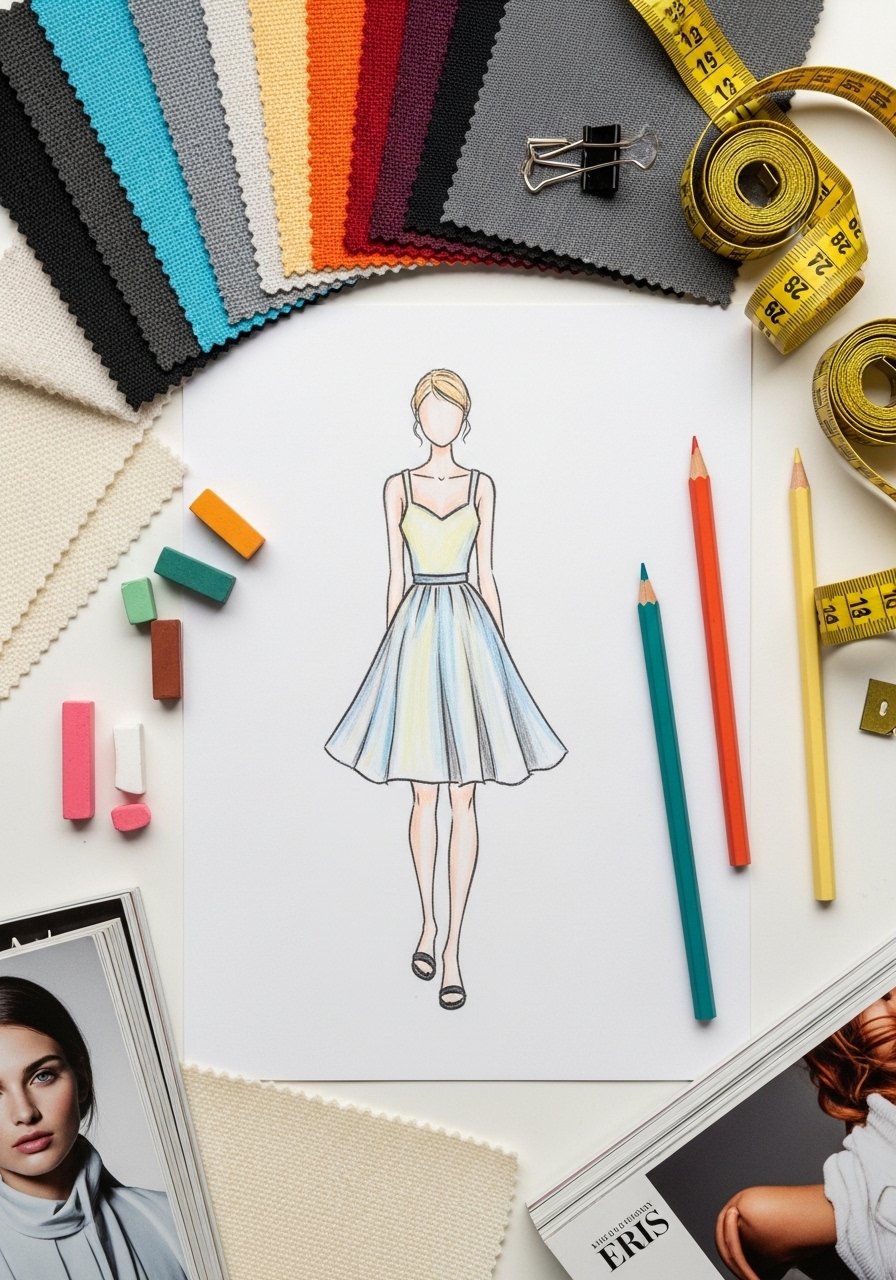
Fashion sketches encourage stylized line work and pattern thinking. Kids explore texture and drape with confident strokes.
Materials
- 1 pad of croquis sketch paper (9"x12")
- 10–12 colored pencils (include skin tones and fabric colors)
- 1 fine fineliner for seams
- 1 scrap of patterned fabric for reference
Instructions
- Lightly draw a croquis figure.
- Block in the garment silhouette.
- Indicate seams and folds with a fine fineliner.
- Use patterned pencils and cross-hatching for fabrics.
- Add accessories and small details last.
- Annotate fabrics or colors on the side.
How to Display or Gift It
Bind sketches into a mini portfolio as a pretend lookbook. Present with a ribbon and a fabric swatch pack.
18. City Skyline Silhouettes
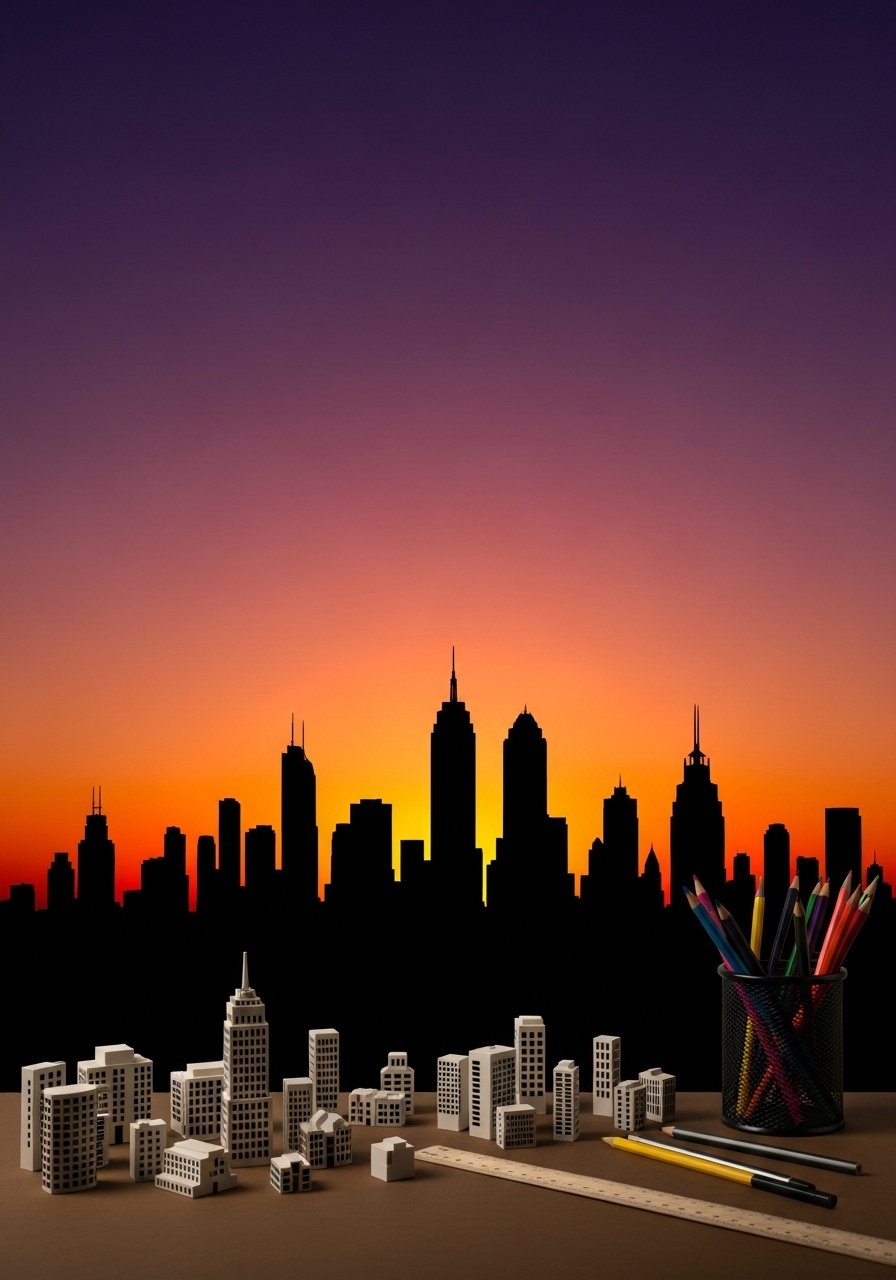
Silhouettes teach contrast and composition. Kids create moods with simple shapes and dramatic skies.
Materials
- 1 11"x14" mixed-media paper
- 8–12 colored pencils focusing on sunset palette
- 1 black colored pencil or charcoal stick
- 1 ruler
- 1 craft knife (for optional skyline cutouts)
Instructions
- Draw horizon line and skyline silhouettes.
- Fill sky with gradated sunset hues.
- Darken skyline silhouette uniformly.
- Add small window dots with a yellow pencil.
- For cutout effect, carefully cut skyline and mount on contrasting paper.
- Let mounted pieces rest overnight to flatten.
How to Display or Gift It
Create a set of cities for a travel-themed wall. Bundle as a city card pack for gifts and store in a document tube.
19. Fantasy Creatures with Armor and Scales
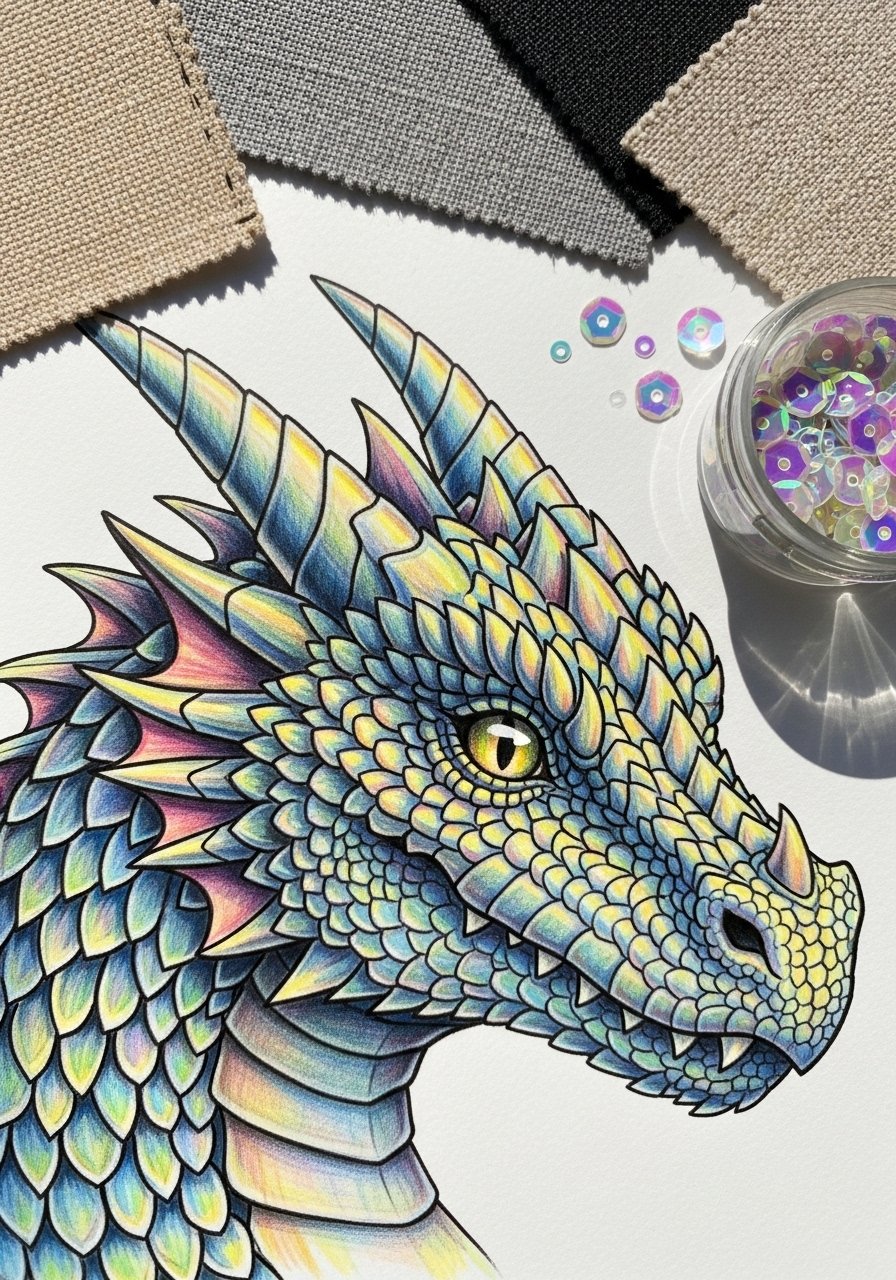
Fantasy creatures let kids mix texture types—scales, armor, fur. Scale rendering teaches repetitive mark-making and highlight placement.
Materials
- 1 9"x12" Bristol paper
- 12–18 colored pencils including metallic tones
- 1 white pencil for reflective scales
- 1 tiny detail brush (for graphite dust removal)
- 1 sealer (optional)
Instructions
- Sketch creature outline and key scale rows.
- Color base tones in each scale row.
- Add darker crescent shadows at scale bases.
- Put tiny white highlights on scale tips.
- Use metallic pencils for armor plates.
- Spray a light fixative if adding glitter or sequins.
How to Display or Gift It
Make a themed sketchbook for fantasy fans. Add a sequined border and present in a decorative gift box.
20. Feather & Scale Studies: Texture Practice
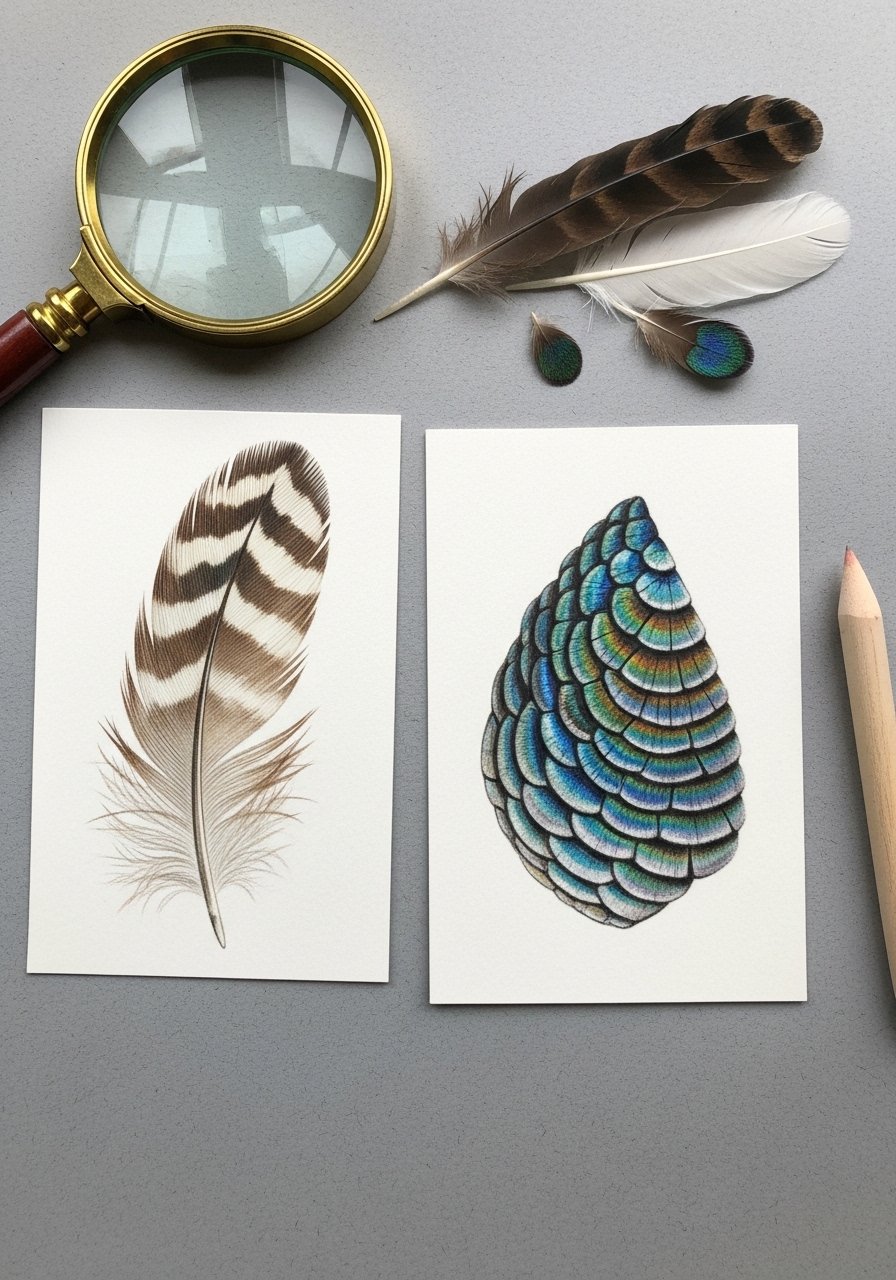
Focused texture studies strengthen observation and mark variation. Short focused sessions improve control.
Materials
- 1 6"x6" sketch card
- 6–8 colored pencils (include cool blues and neutrals)
- 1 magnifier (optional)
- 1 blending stump
- 1 kneaded eraser
Instructions
- Choose one feather and one scale reference.
- Block the basic shapes lightly.
- For feathers, use long directional strokes.
- For scales, layer small crescent marks with shadow bases.
- Add highlights last for pop.
- Date and label each study.
How to Display or Gift It
Make a texture study flipbook. Store in a small index card box for reference.
21. Comic Strip Panels: Tell a Short Story

Comics teach sequencing, expressions, and economy of line. Kids work on facial expressions and simple backgrounds.
Materials
- 1 9"x12" drawing paper
- 4 fineliner pens (various nibs)
- 8–12 colored pencils
- 1 ruler
- 1 eraser
Instructions
- Divide the sheet into four even panels.
- Sketch thumbnails to plan the gag.
- Draw characters with clear expressions.
- Ink with fineliner, waiting 5 minutes for ink to dry before erasing pencil.
- Color using simple flat fills and a few shadows.
- Add dialogue with neat lettering.
How to Display or Gift It
Compile strips into a homemade comic book zine. Bind with staples and gift in a zine sleeve.
22. Pet Portrait Medallions
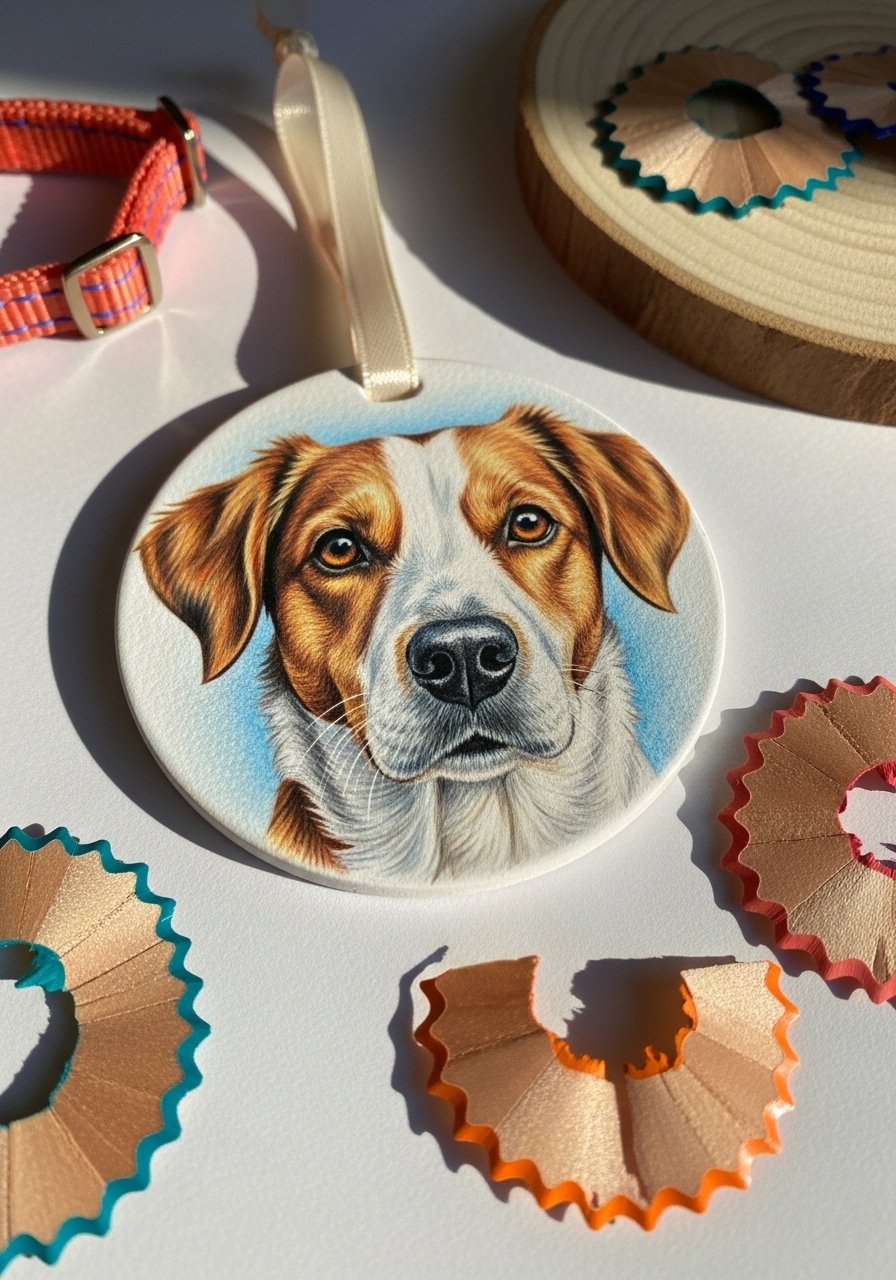
Pet medallions are small, focused, and sentimental. Kids practice proportion and layered fur in a compact area.
Materials
- 1 4" round mixed-media panel or heavy paper
- 6–12 colored pencils matching pet fur
- 1 photo reference of the pet
- 1 thin ribbon for hanging
- 1 spray fixative (optional)
Instructions
- Lightly sketch the pet face to fit the circle.
- Block in base colors for fur and eyes.
- Layer midtones and then darker strokes for depth.
- Carefully render the eyes with bright highlights.
- Trim and mount on a round wooden plaque if using paper.
- Attach ribbon loop; spray fixative lightly and dry 10–15 minutes.
How to Display or Gift It
Hang as an ornament or keychain on a pet-lover’s tree. Gift in a small padded box with a note. Protect and store extras in a small jewelry gift box.
These 22 projects span quick doodles and patient studies so kids can practice technique and enjoy impressive results. Try a few different pencil brands—I use Prismacolor Premier Colored Pencils for creamy layers and a stiffer set like Faber-Castell Polychromos when I want crisp texture.
Which idea are you pinning first? Save this post for rainy afternoons, share with a friend who loves crafts, and come back when you want a fresh project. For overall cleanup and storage, I keep supplies sorted in a stackable craft organizer — it keeps pencils safe and ready for the next burst of creativity.


