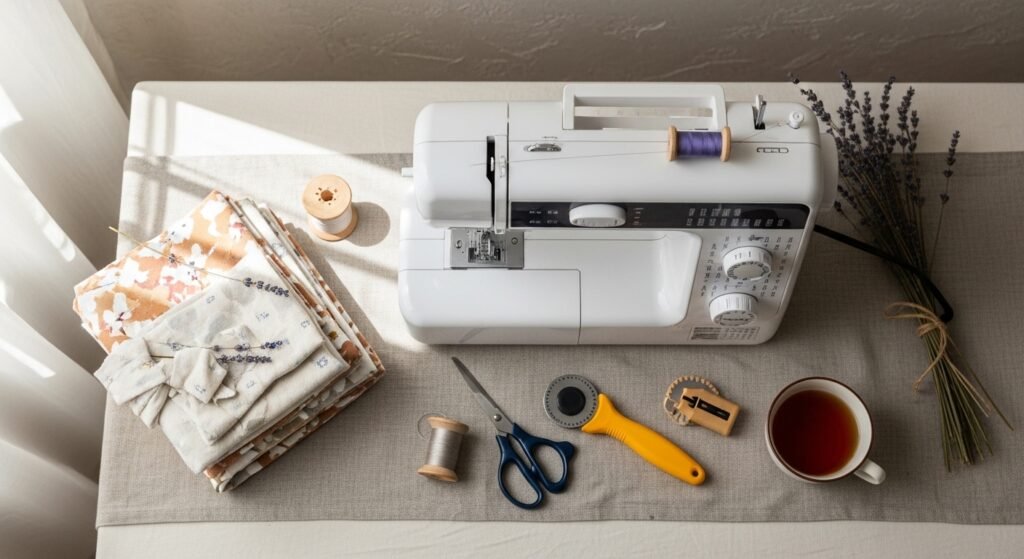
You know that buzz when you finish a neat seam and the project looks like it came from a boutique? That's the feeling these sewing projects deliver. This collection of sewing projects for beginners with a machine focuses on quick wins: each one is fast, forgiving, and finishes with a polished look that reads professional.
You'll find 22 clear, step-by-step projects that teach basic techniques—zippers, linings, topstitching, piping—and practical finishing tips. I mention the best tools when they actually help. I start most days with my Brother CS6000i sewing machine for smooth, even stitches, and I rely on a self-healing cutting mat and a rotary cutter for fast, accurate cutting.
These projects work for small batches and gift-making. Each one includes a materials list with exact amounts, step-by-step instructions, and display or gifting ideas. So grab your machine, some fabric scraps, and let's make something lovely.
- Classic Zipper Pouch — a sewing project for beginners with a machine

This small zip pouch looks boutique but sews in under an hour. It’s great for leftover quilting cotton. The straight seams and topstitch give that crisp, professional edge. Beginners, gift-givers, and pouch collectors will love how tidy the finished seams feel in your hands.
Materials
- Outer fabric: 10 in x 9 in cotton (one piece)
- Lining fabric: 10 in x 9 in cotton (one piece)
- Interfacing: 10 in x 9 in fusible lightweight interfacing (Pellon SF101)
- Zipper: 9-inch nylon or metal zipper
- Thread: cotton/polyester, 50 yd
- Optional: small keyring or zipper pull
Instructions
- Fuse interfacing to the wrong side of the outer fabric following manufacturer’s 5–8 second press instructions.
- Place outer fabric right sides together and stitch across one short edge at 1/4 in seam to make a tube. Repeat with lining, leaving a 2.5 in gap along one long seam for turning.
- Press seams open with an iron and turn outer tube right side out.
- Insert the outer tube into the lining tube so right sides face each other. Align raw edges and pin.
- With the zipper face down on the top edge, stitch across the top with a 1/4 in seam. Repeat for the opposite top edge.
- Trim corners diagonally and turn through the gap in the lining. Push corners out with a blunt tool.
- Hand-stitch or machine-topstitch the lining gap closed. Press edge and topstitch along both zipper edges for a polished look. A zipper foot helps here—try a sewing machine zipper foot.
How to Display or Gift It
- Nest several pouches in a kraft gift box with tissue for a boutique set.
- Attach a tiny handwritten tag with the fabric name.
- Store pouches flat in a small drawer organizer to keep zippers from snagging. A stackable craft organizer works well.
- Make a batch in coordinating prints for an instant gift stash.
- No-Fray Fringed Edge Canvas Tote

This tote is a fast sew and has a relaxed, rustic vibe. The raw-fringe edge gives a soft boho look while canvas holds shape. It’s perfect for market runs or gifting. If you like textures, the fringe feels tactile and rustic in your hands.
Materials
- Canvas outer: 18 in x 16 in (one piece)
- Cotton lining: 18 in x 16 in (one piece)
- Straps: two 1.5 in x 22 in cotton webbing straps
- Thread: heavy-duty polyester
- Fray check (optional): 10 ml
Instructions
- Cut canvas and lining to size. Fold canvas top edge 1/2 in twice and stitch to create a clean top hem.
- Mark a 2 in strip along the bottom edge of the canvas and make vertical snips 1/8 in apart through the hem to create fringe. Wash to encourage fraying if desired (wash on cold, air dry).
- With right sides together, stitch side seams of outer and lining at 3/8 in. Leave a 3 in gap in lining bottom for turning.
- Box corners by folding each corner to form a 2 in square and stitch across at 1 in from point for a flat base.
- Insert lining into outer, right sides facing. Topstitch around the bag opening at 1/8 in from edge to attach lining and outer together.
- Fold strap ends under by 1/2 in and topstitch to inside of bag securely in a rectangle with an X.
How to Display or Gift It
- Pair with a set of fabric napkins and tie with twine in a kraft bag.
- Hang the tote on a peg rack for a casual kitchen display.
- Store stacked in a closet using a canvas storage box.
- Make matching small zip pouches to tuck inside the tote for market essentials.
- Patchwork Throw Pillow Cover — sewing project for beginners with a machine

Patchwork gives a high-end handmade look without fancy skills. You’ll learn basic piecing, seam allowances, and a neat zipper or envelope closure. The texture feels cozy and the small quilted blocks add a cottagecore or farmhouse vibe.
Materials
- Assorted cotton scraps: nine 6 in x 6 in squares (or 3 prints x 3 blocks)
- Backing fabric: 17 in x 17 in cotton or linen
- Batting (optional quilted look): one piece 16 in x 16 in
- Invisible zipper: 16 in
- Thread: 100 yd
- Quilting safety pins: 8
Instructions
- Arrange nine 6 in squares in a 3×3 grid. Sew rows together with 1/4 in seam, pressing seams open.
- Sew rows together to make a 16 in square top (finished size 16 in after seams).
- Layer top, batting, and backing right sides out (if quilting). Baste with pins and quilt straight lines 1/2 in apart using a walking foot.
- Attach the 16 in invisible zipper along one edge using an invisible zipper foot, or make an envelope back with two overlapping 9 in pieces.
- Trim and turn, insert 16 in pillow form, and finished seams should be smooth. Use a quilting walking foot for even feeds.
How to Display or Gift It
- Mix and match patchwork pillows on a neutral sofa for a layered look.
- Wrap in kraft tissue and tie with linen ribbon for a cozy gift.
- Store seasonal cushions flat in a breathable cotton storage bag.
- Make a matching set of two for a quick living-room update.
- Elastic-Waist Drawstring Bag (Gym or Shoe Bag)

This bag is simple but practical. The elastic top keeps contents secure, and the drawstring allows quick closure. It’s great for gym gear, shoes, or kid’s toys. The fabric has a smooth, slightly crisp feel.
Materials
- Outer fabric: 18 in x 14 in medium-weight cotton or nylon
- Lining: same size cotton
- Elastic: 1/2 in wide, 10 in
- Cord drawstring: 40 in
- Thread: polyester
- Cord stopper (optional): 1
Instructions
- Fold outer fabric right sides together and stitch side seams at 1/2 in. Repeat for lining, leaving a 3 in gap in lining.
- Fold top edge down 1 in and again 1 in to create a channel for elastic and cord. Stitch around leaving 1.5 in gap for elastic insertion.
- Thread elastic through the channel with a safety pin and sew ends securely overlapping 1/2 in.
- For the drawstring channel, fold another 1 in over and topstitch, making sure there’s a path for the cord on the outside edge.
- Turn bag right side out through the lining gap. Hand-stitch or machine-stitch the gap closed.
- Insert cord and cord stopper. Tie ends or add a decorative bead.
How to Display or Gift It
- Fill with small gifts and tie with baker’s twine.
- Keep a set in your car as shoe bags. Use a mesh laundry bag for travel storage.
- Make matching kids’ sets for daycare.
- Reversible Cotton Apron

A reversible apron looks tailor-made but is easy to sew. Pockets, neat topstitching, and a clean hem make it look professional. It’s perfect for gardeners, bakers, or craftroom duty.
Materials
- Two fabrics: each 28 in x 40 in cotton or linen
- Bias tape or 1.25 in webbing for ties, two at 30 in each
- Thread: polyester
- Optional: interfacing for pocket, 8 in x 10 in
Instructions
- Lay the two fabric pieces right sides together. Stitch the front curve (neck) and side seams at 1/2 in, leaving the bottom and neck ties open.
- Turn right side out through a corner and press flat.
- Topstitch neck and side edges 1/8 in from seam for firm edges.
- Cut two pockets 8 in x 8 in, fuse interfacing, fold edges 1/4 in and topstitch onto apron front.
- Insert ties in the side openings and topstitch to secure. Reinforce with a small box stitch.
- Give the whole apron a final press; corners should be crisp.
How to Display or Gift It
- Roll the apron and tie with ribbon for gift-giving.
- Hang on a peg in the kitchen for a cottagecore look.
- Store folded flat in a drawer with a fabric storage bin.
- Quick Fabric Coasters (Set of 4)

Coasters are fast, use scraps, and teach quilt-as-you-go basics. Quilting them adds weight and absorbs condensation. These make stylish housewarming gifts.
Materials
- Outer fabric: four 5 in x 5 in squares
- Backing fabric: four 5 in x 5 in squares
- Batting: four 5 in x 5 in pieces (cotton batting)
- Thread: coordinating
- Optional: fabric glue stick for basting
Instructions
- Layer outer, batting, and backing for each coaster. Baste with a few pins or a fabric glue stick.
- Quilt desired pattern: straight lines at 1/2 in spacing or diagonal cross-hatch.
- Trim to 4.5 in square for neat edges.
- Finish edges with a zigzag stitch or binding strips 4.75 in long folded and topstitched.
- Press and repeat for all coasters.
- Let quilts rest for 1 hour after heavy pressing to relax fibers.
How to Display or Gift It
- Stack four coasters with twine and a small tag.
- Place a coaster set by the entryway as a small welcome gift.
- Store sets flat in a shallow drawer or coaster holder when not used.
- Simple Elastic Waist Skirt (Beginner-Friendly)

A gathered elastic waist skirt sews quickly and gives a polished look with minimal pattern work. The elastic waistband makes sizing forgiving. The skirt fabric feels soft and flows nicely.
Materials (Size S-M)
- Main fabric: 1.5 yards lightweight cotton (45 in wide)
- Elastic: 1 in wide waistband elastic, 28–30 in (cut to waist measurement minus 2 in)
- Thread: 200 yd
- Safety pin for elastic threading
Instructions
- Measure waist and cut a rectangle (waist x 2) by 22 in for a midi or 16 in for knee length.
- Hem the bottom by folding 1/2 in then 1/2 in and stitch.
- Sew side seam with 5/8 in seam allowance to form a tube.
- Fold top edge down 1 in then again to create a 1 in casing. Leave a 2 in gap for elastic.
- Thread elastic with safety pin, overlap ends 1 in, and zigzag to secure. Close casing hole with stitching.
- Evenly distribute gathers and press lightly.
How to Display or Gift It
- Pair with a simple tee or knit top for styling.
- Wrap in tissue and tuck a care card for gifting.
- Fold neatly in a drawer or hang on a skirt hanger with clips.
- Oven Mitt with Insul-Bright Batting
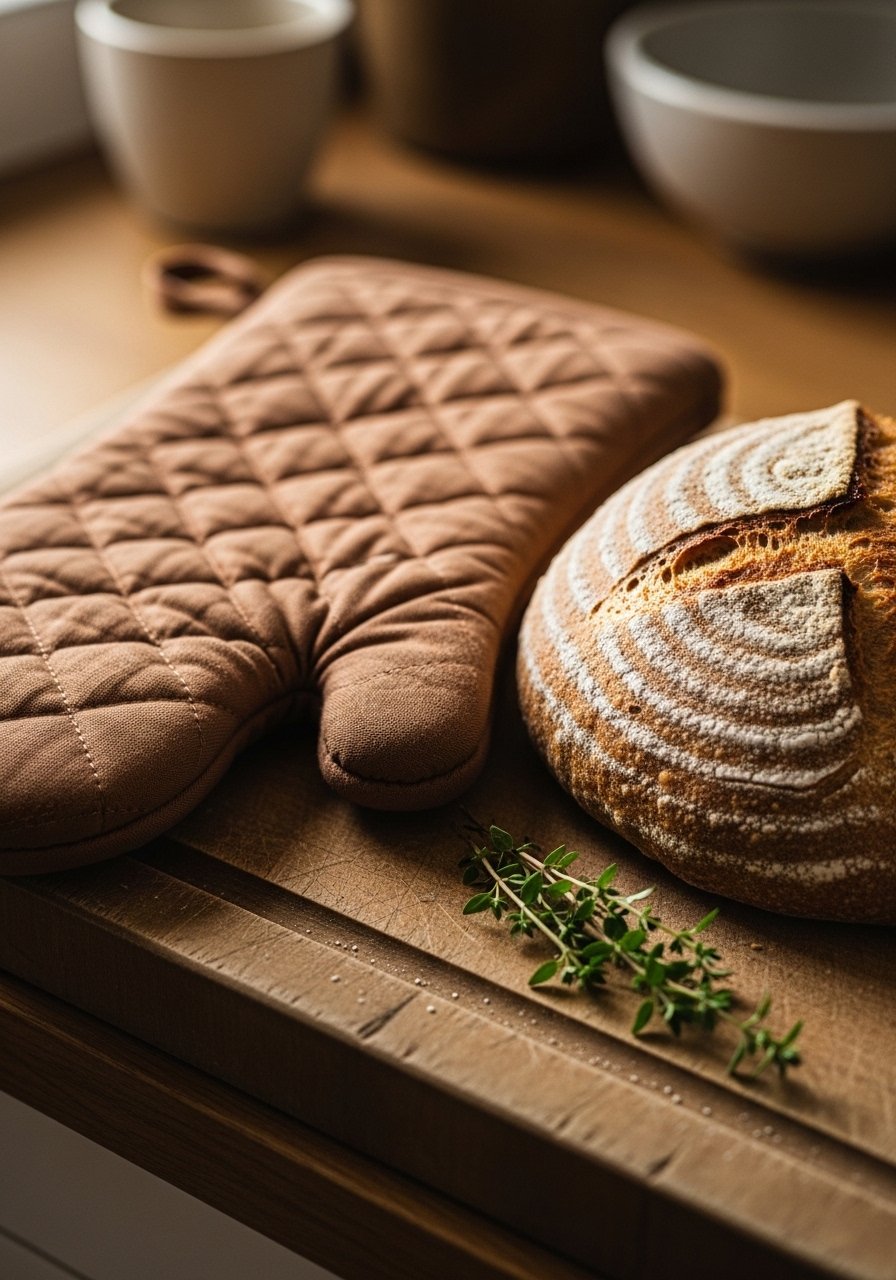
This oven mitt uses Insul-Bright to provide heat resistance. The quilting gives it a custom look. The mitt feels thick and cushiony in your hand when finished.
Materials
- Outer fabric: two mirror-image pieces (pattern) cotton quilter’s weight
- Insulating batting: Insul-Bright or similar, cut to match pattern
- Lining fabric: two pieces cotton
- Thread: heavy-duty polyester
- Bias binding: 1 in wide, 20 in for edge
Instructions
- Cut outer, lining, and Insul-Bright to pattern. Layer outer, Insul-Bright, and lining (lining towards the inside).
- Baste layers and quilt as desired, spacing quilting lines 1 in apart.
- With right sides together, stitch the outer and lining along seam allowance, leaving the wrist opening unsewn.
- Turn through the opening, pushing edges smooth. Press carefully.
- Bind the wrist opening with bias binding and topstitch.
- Add a hanging loop with a small fabric loop before final edge stitch.
How to Display or Gift It
- Pair with a set of linen kitchen towels and wrap in a bakery-style box.
- Hang on a magnetic hook near the oven for convenient access.
- Store flat in a drawer between uses.
- Reversible Fabric Headband with Button Detail
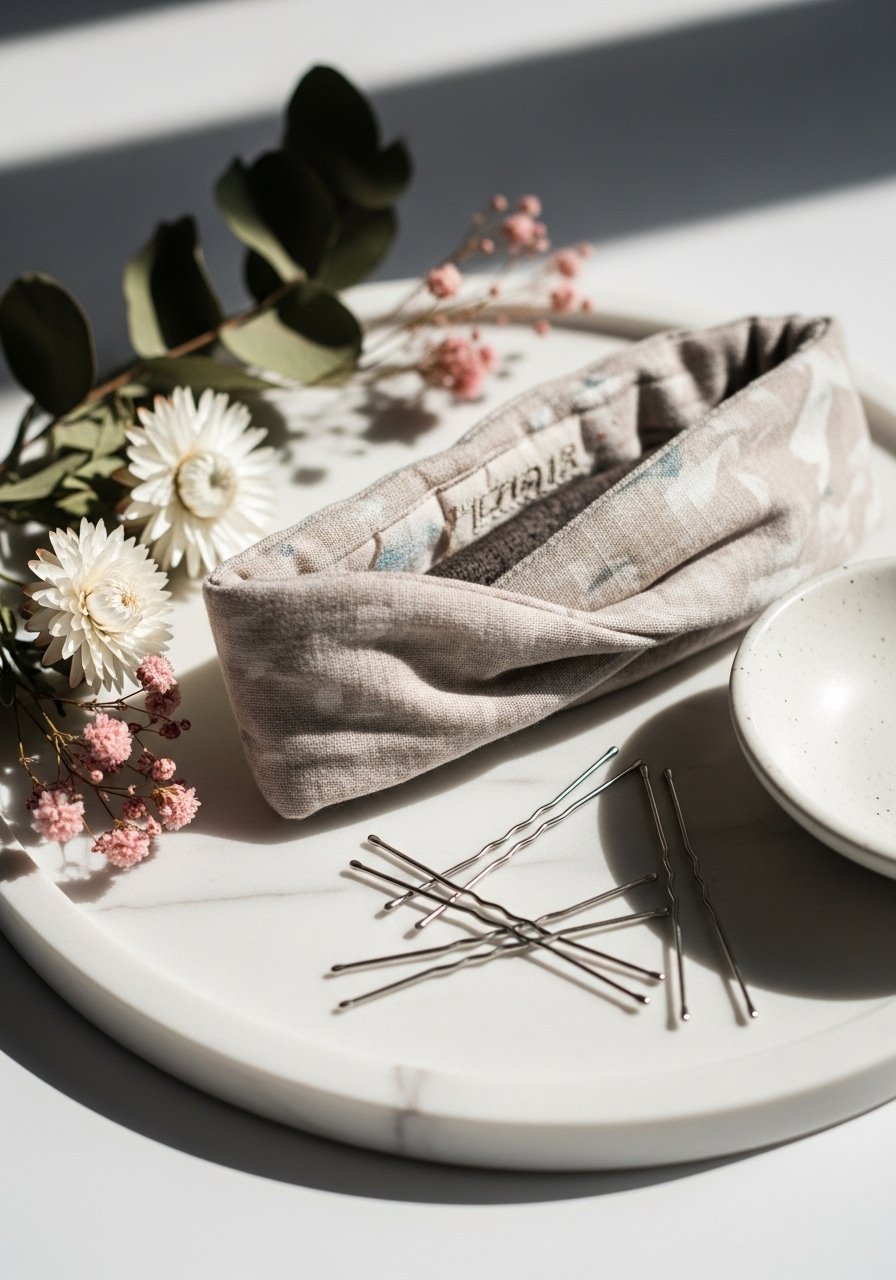
This headband sews quickly and has a polished finish. The button detail adds a boutique touch. It’s soft to the touch and holds shape without stiffness.
Materials
- Two fabric strips: 3.5 in x 18 in each
- Fusible interfacing: 3 in x 18 in lightweight
- Elastic: 1/2 in, 4 in
- Decorative button: 1 (optional)
- Thread: 50 yd
Instructions
- Fuse interfacing to one strip. Place strips right sides together and stitch long edges at 1/4 in, leaving short ends open.
- Turn right side out, press, and topstitch 1/8 in from edge.
- Insert elastic into short ends and stitch securely.
- Sew ends closed and topstitch around seam.
- Sew decorative button over the seam to hide stitching if desired.
- Press and shape with your fingers to smooth any puckers.
How to Display or Gift It
- Pair with a small pouch or barrettes for a styling set.
- Store headbands on a ribbon hook or small tray.
- Wrap in tissue and place in a kraft gift box.
- Fabric Gift Bags (Set of 3 Drawstring and Foldover)

Fabric gift bags are reusable and eco-friendly. Make a set in small, medium, and large sizes. They sew fast and require only straight seams.
Materials
- Small bag fabric: 8 in x 12 in
- Medium bag fabric: 12 in x 16 in
- Large bag fabric: 16 in x 20 in
- Drawstring cord: 30 in per bag
- Thread: polyester
- Optional: ribbon or twine
Instructions
- Fold each fabric piece in half right sides together and stitch side seams at 1/2 in, leaving top open.
- Hem top by folding 1/4 in then 1 in; stitch to create a channel for drawstring.
- Turn right side out and press.
- Thread drawstring using a safety pin and knot ends.
- For foldover style, hem top and fold down 2 in and topstitch for a neat edge.
- Fill and tie or fold over to finish.
How to Display or Gift It
- Use for holiday or wedding favors.
- Store flat in a drawer or hang on a peg with a small label.
- Make matching sets and tuck into a kraft paper gift bag.
- Eyeglass/Sunglass Soft Case

This padded case protects spectacles and sews fast. The soft quilting gives a cushioned feel. It’s a practical project that finishes with a boutique touch.
Materials
- Outer fabric: 8 in x 8 in
- Lining fabric: 8 in x 8 in
- Batting: 8 in x 8 in
- Velcro or snap: 1 small snap or 1 in velcro
- Thread: polyester
Instructions
- Layer outer, batting, and lining; quilt with straight lines spaced 1/2 in apart.
- Fold into a rounded eyeglass envelope shape and pin edges.
- Stitch around perimeter at 1/4 in, leaving opening for turning if necessary.
- Add snap or velcro to keep the flap closed.
- Trim and press the edges smoothly.
- Test with glasses to ensure snug fit.
How to Display or Gift It
- Pair with a microfibre cleaning cloth and place in a small box.
- Keep cases in a small dish by your entryway for easy grab-and-go storage.
- Store folded flat in a slim drawer organizer.
- Quilted Mug Rug — sewing project for beginners with a machine

A mug rug is a mini-quilt and a great intro to quilting techniques. It gives you control over stitch lines and finish. The small size makes finishing time quick and rewarding.
Materials
- Outer fabric: four 5 in x 5 in squares or one piece 6 in x 6 in
- Batting: 5 in x 5 in
- Backing: 6 in x 6 in cotton
- Binding: 1/2 in bias strips, 22 in
- Thread: polyester
Instructions
- Layer top, batting, and backing. Baste with pins.
- Quilt in straight lines or free-motion (practice on scrap first). Keep quilting lines 1/4–1/2 in apart for structure.
- Trim edges to 5 in x 5 in.
- Attach binding by folding strip in half lengthwise and sewing around. Miter corners and hand-stitch the back for a neat finish.
- Press thoroughly for crisp edges.
- Let rest 30 minutes after pressing.
How to Display or Gift It
- Stack with a matching coaster set and tie with twine.
- Use as small hostess gifts when visiting friends.
- Store in a shallow tray near the coffee station.
- Fabric Storage Basket (Boxy)

A fabric basket is sturdy and attractive with interfacing or heavyweight canvas. The structured sides create a boutique look and are great for organizing small items.
Materials
- Outer fabric: 12 in x 12 in with 12 in x 8 in side panels
- Lining fabric: same
- Heavy interfacing or canvas: matching panels
- Thread: heavy-duty
- Optional: small leather patch
Instructions
- Cut base and side panels for outer, lining, and interfacing.
- Fuse interfacing to outer pieces.
- Stitch side seams for both outer and lining at 1/2 in.
- Box corners by folding and stitching a 1.5 in square at each corner.
- Insert lining into outer, wrong sides facing, and topstitch the rim 1/8 in for a finished edge.
- Press firmly and shape basket with hands.
How to Display or Gift It
- Use baskets on shelves for a clean, japandi or farmhouse look.
- Fill with small gifts and wrap in cellophane for a curated gift.
- Store flattened baskets inside a fabric storage bin.
- Lined Makeup Brush Roll

A brush roll organizes brushes and protects bristles. Lining and pocket tabs give a refined finish. It feels smooth and snug when brushes are tucked in.
Materials
- Outer fabric: 12 in x 18 in
- Lining fabric: same
- Pocket strips: four 12 in x 4 in
- Interfacing: lightweight, 12 in x 18 in
- Closure: ribbon or leather strap 30 in
- Thread: polyester
Instructions
- Fuse interfacing to outer fabric.
- Sew pocket strips by folding 1/4 in edges and topstitching to form neat pockets. Space pockets evenly.
- With right sides together, stitch outer to lining around edges, leaving a gap for turning.
- Turn, press, and topstitch to close the gap.
- Attach ribbon or strap to one side for wrapping and securing.
- Insert brushes and roll up; wrap with strap and tie.
How to Display or Gift It
- Include a small cleansing cloth and tie as a set.
- Place in a makeup bag or vanity tray for display.
- Store rolled in a drawer or hang from a hook.
- Scrunchies (Set of 6)

Scrunchies are fast, use tiny fabric scraps, and sew in minutes. They feel soft and springy in your hair.
Materials
- Fabric strips: six 4 in x 18 in strips
- Elastic: six pieces 7 in (1/4 in elastic)
- Thread: polyester
- Safety pin: 1
Instructions
- Fold each fabric strip lengthwise with right sides together and stitch a 1/4 in seam.
- Turn tube right side out and press.
- Insert elastic with safety pin and sew ends securely with a zigzag stitch.
- Tuck raw edges into the seam and stitch closed or hand sew.
- Scrunch fabric over the elastic and even out the gathers.
- Repeat for all six scrunchies.
How to Display or Gift It
- Place in a small glass jar or gift box tied with baker’s twine.
- Store in a small drawer divider by color.
- Include with a headband for a styling set.
- Cordkeeper Cable Organizer

This little organizer keeps charging cables tidy and looks polished with simple topstitching. The snap closure feels secure and compact.
Materials
- Outer fabric: 6 in x 4 in
- Batting: 6 in x 4 in
- Lining: 6 in x 4 in
- Snap: 1 set
- Thread: polyester
Instructions
- Layer outer, batting, and lining; quilt with a single line to create structure.
- Fold into a rectangle with a flap; mark snap placement.
- Install snap following package instructions.
- Topstitch edges for reinforcement at 1/8 in.
- Roll cords and secure inside.
- Store in a cable drawer or tech pouch.
How to Display or Gift It
- Tuck into a tech gift box with a small power bank.
- Use a small drawer organizer for multiple cordkeepers.
- Wrap in kraft paper for a simple stocking stuffer.
- Kids’ Play Superhero Cape (Velcro Closure)
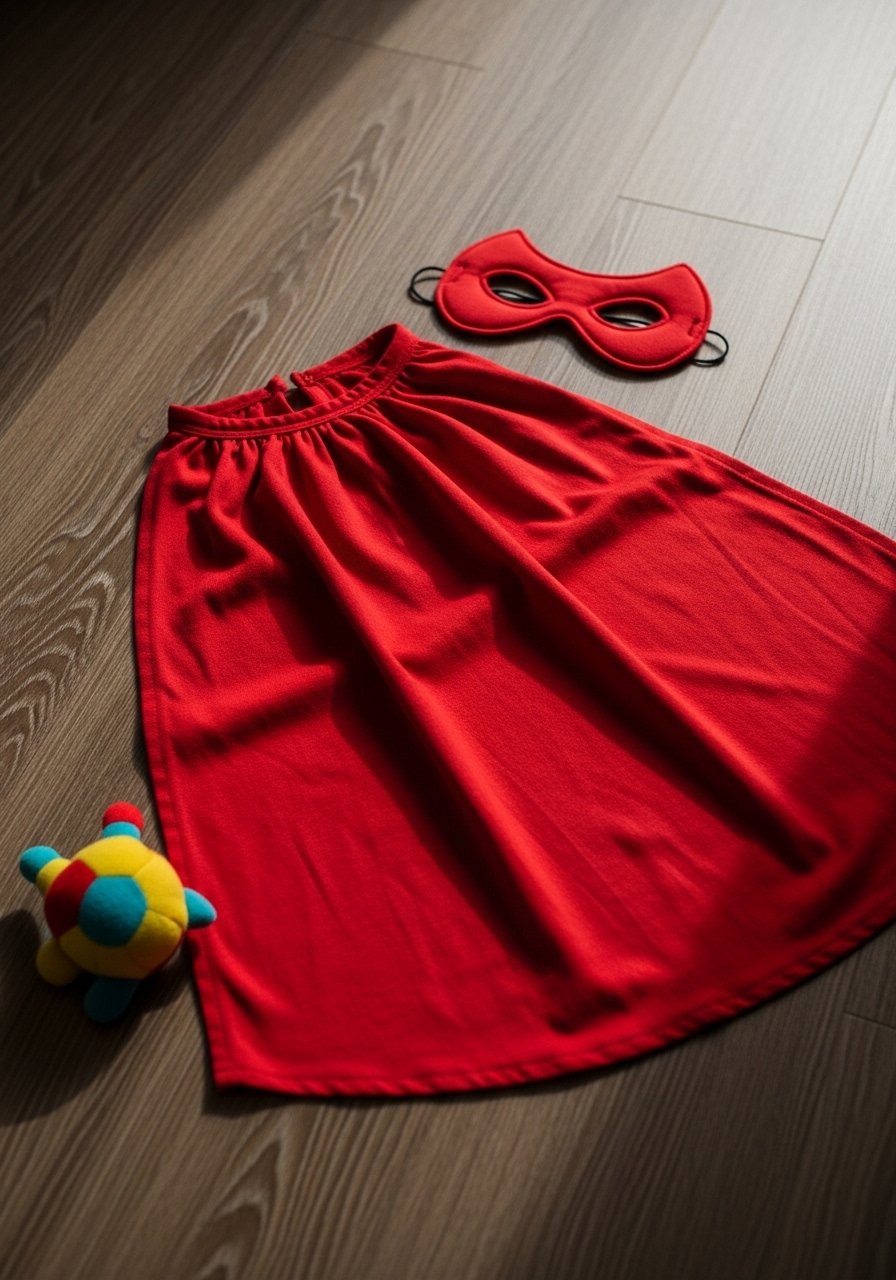
A cape is a playful, fast sew. The velcro closure makes it easy for kids to put on. The fabric feels light and flows nicely in motion.
Materials
- Main fabric: 36 in x 20 in cotton or satin
- Bias binding: 1 in wide, 40 in
- Hook-and-loop (velcro): 2 in
- Thread: polyester
Instructions
- Cut fabric to shape: a rounded rectangle 36 x 20 with a neck curve.
- Hem all edges by folding 1/4 in then 1/4 in and stitching.
- Attach bias binding around neck edge for a neat finish.
- Sew hook and loop pieces to the ends of the neck opening 1 in from edge.
- Press and test for comfortable fit.
- Personalize with fabric paint or appliqué if desired.
How to Display or Gift It
- Roll with a matching mask and tie with ribbon.
- Hang on a child’s peg or hook for easy access.
- Store folded in a toy bin or garment bag.
- Fold-over Clutch with Magnetic Snap
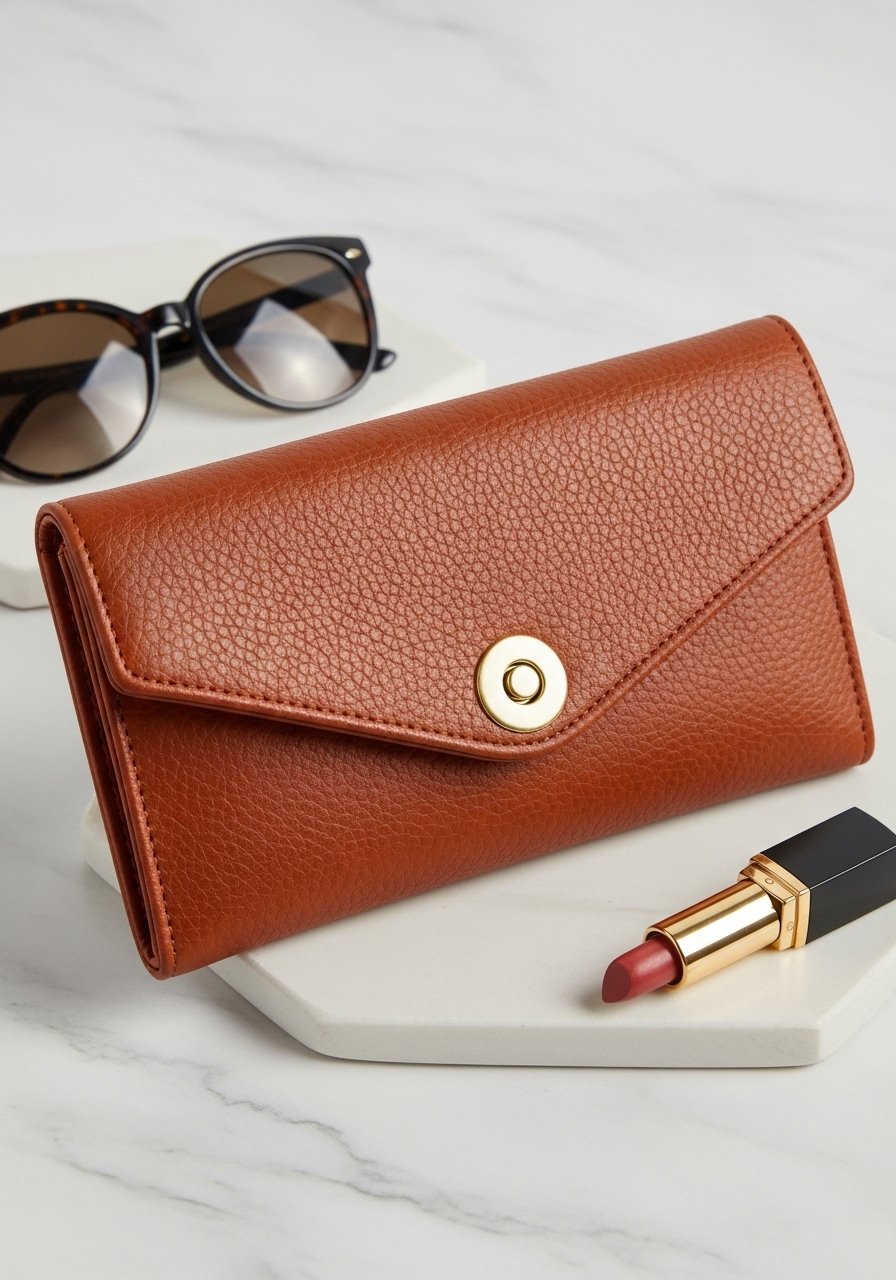
This clutch looks designer but is beginner-friendly. The magnetic snap provides an elegant closure and the folded shape reads clean and modern.
Materials
- Outer faux leather or canvas: 12 in x 10 in
- Lining fabric: 12 in x 10 in
- Lightweight interfacing: 12 in x 10 in
- Magnetic snap: 1 set
- Thread: heavy polyester
Instructions
- Fuse interfacing to lining.
- Place outer right sides together and stitch side seams at 1/4 in if needed. Turn right side out.
- Add magnetic snap following package instructions and reinforce with a small interfacing patch.
- Fold top over 4 in and press to form the clutch shape.
- Topstitch around the edge for a neat finish.
- Insert small card pocket inside if desired.
How to Display or Gift It
- Fill with a lipstick and card for a simple gift.
- Store on entry console or inside a larger tote.
- Wrap in tissue and place in a kraft gift box.
- Soft Baby Burp Cloths (Set of 4)

These burp cloths sew quickly and are super useful. Double layers and neat topstitching give them absorbency and a boutique finish.
Materials
- Muslin cotton: four pieces 18 in x 10 in
- Cotton terry backing (optional): four pieces 18 in x 10 in
- Thread: polyester
Instructions
- Place muslin and terry right sides together and stitch around at 1/4 in, leaving a 3 in gap.
- Turn right side out through the gap and press.
- Edge-stitch close to the edge to close the gap and add a second line of topstitch for durability.
- Repeat for all four cloths.
- Wash in warm water to soften muslin before first use (prewash recommended).
- Store flat to maintain shape.
How to Display or Gift It
- Stack in a small gift basket with a baby toy.
- Tie with a soft ribbon and include care instructions.
- Store folded in a nursery drawer or a mason jar set for a rustic presentation.
- Quick Hair Turban / Towel Wrap
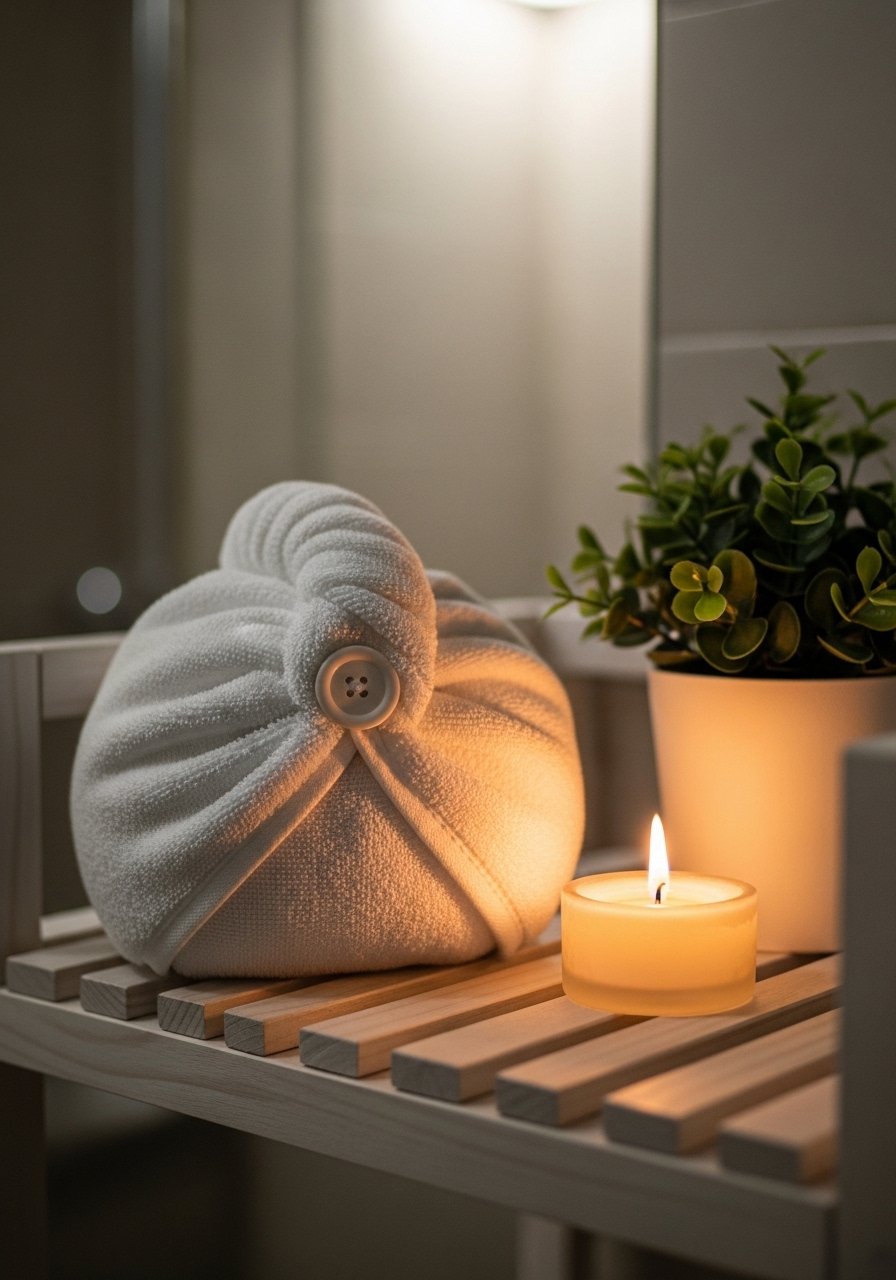
A turban wrap is an easy sew and perfect for hair care after showers. The button loop keeps it secure and it feels soft against the skin.
Materials
- Terry or soft terry-like cotton: 20 in x 30 in
- Button: 1 (large)
- Thread: polyester
- Elastic (optional): 1/4 in x 2 in
Instructions
- Fold towel in half lengthwise; round one end for a tapered shape.
- Hem edges by folding 1/4 in twice and stitching.
- Sew a loop of fabric or elastic to one end and sew button to the opposite end.
- To use, twist hair and secure with the loop and button.
- Press lightly to shape edges.
- Wash in warm water to pre-soften before gifting.
How to Display or Gift It
- Pair with a small bottle of hair oil and tie with twine.
- Store on a bathroom shelf rolled and secured with a ribbon.
- Include with a bath set in a kraft gift box.
- Key Fob Wristlet with Hardware

A key fob is a quick hero project with a polished finish thanks to hardware. It’s perfect for practicing short seams and topstitching.
Materials
- Fabric strip: 4 in x 9 in
- Interfacing: 4 in x 9 in
- Key fob hardware: swivel clip and D-ring set (1)
- Thread: heavy polyester
Instructions
- Fuse interfacing to fabric strip.
- Fold lengthwise right sides together and seam along long edge at 1/4 in. Turn right side out.
- Insert hardware, fold ends in 1/2 in, and topstitch across to secure the hardware and close the wristlet.
- Repeat topstitching for reinforcement.
- Clip to keys and test strength.
- Make a few in different fabrics for coordinated gifts.
How to Display or Gift It
- Add to a small key bowl or box for a practical gift.
- Keep spare fobs in a drawer near the door for quick swaps.
- Label and store in a small compartmented tray.
- Simple Soft Slippers with Non-Slip Sole
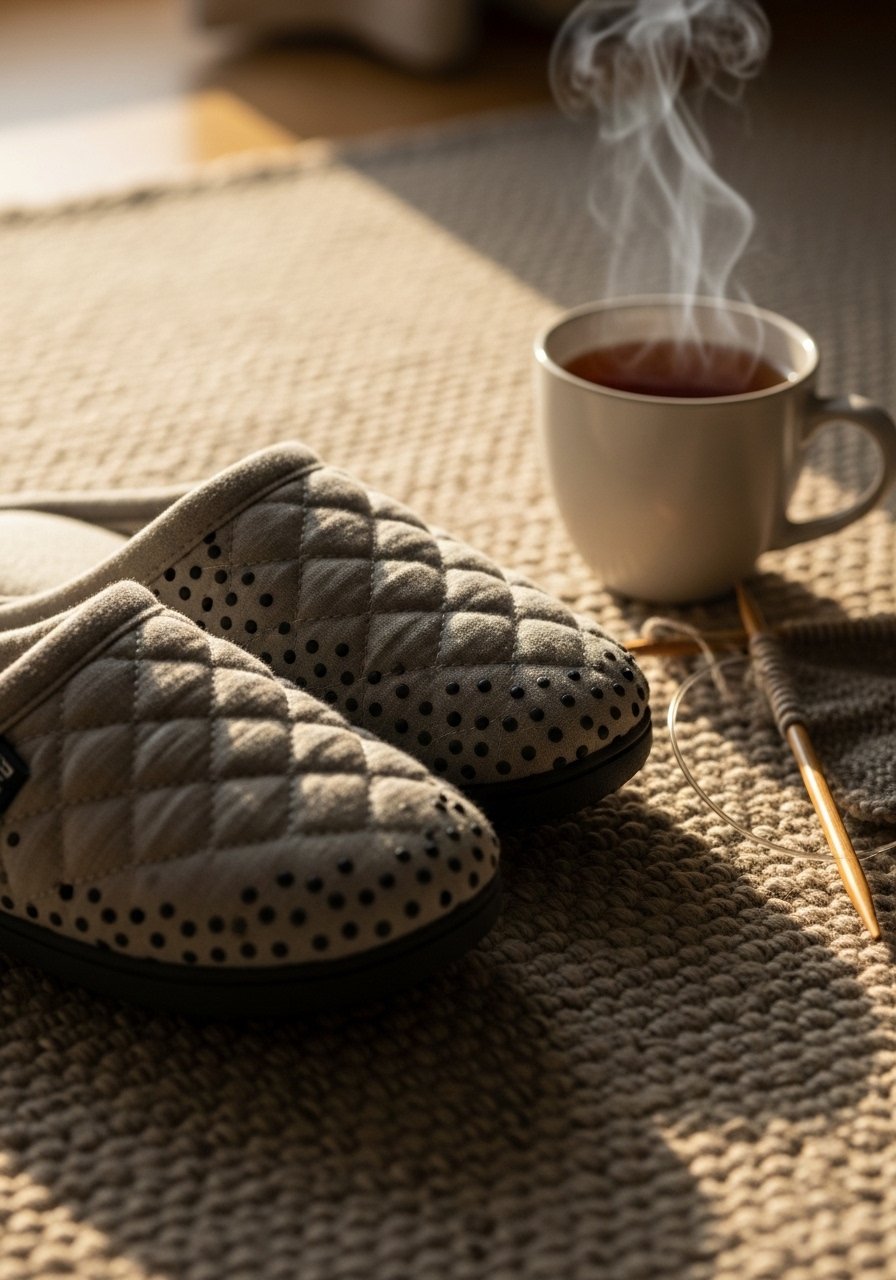
Slippers are a cozy sew that finishes with a boutique feel. Adding a non-slip sole patch makes them practical for home wear. The padding feels pillowy on the feet.
Materials (Adult M)
- Outer fabric: pair of pieces per slipper, 10 in x 6 in
- Lining: same size soft flannel
- Batting: 10 in x 6 in (thin)
- Non-slip sole fabric: 6 in x 3 in per slipper (dotted rubber)
- Thread: heavy polyester
Instructions
- Cut slipper pattern pieces (top, sole, lining). Use an existing slipper sole for tracing.
- Layer top, batting, and lining; baste and quilt if desired.
- Stitch top to sole, right sides together, at 1/4 in. Leave opening for turning if needed.
- Turn right side out, press, and topstitch edges to secure.
- Hand-stitch non-slip sole patches to bottom with whipstitch for extra durability.
- Make both slippers and try on to check fit.
How to Display or Gift It
- Present in a small cloth bag with a care card.
- Store in a laundry hamper or shoe tray near bed.
- Make matching felts or washcloth sachets for a cozy gift box.
You made it through 22 approachable projects that look like they took way more time than they did. From tiny zip pouches to structured baskets and cozy slippers, these sewing projects for beginners with a machine are designed to build confidence and produce polished results fast. Pin this page to save your favorites and try one each weekend.
Want a little equipment nudge? A good rotary cutter and self-healing cutting mat sped up every single project here and gave me cleaner seams from the very first cut. Which project are you starting with — a pouch, pillow, or something cozy for home? Share and tag a friend who’d like to sew along.





