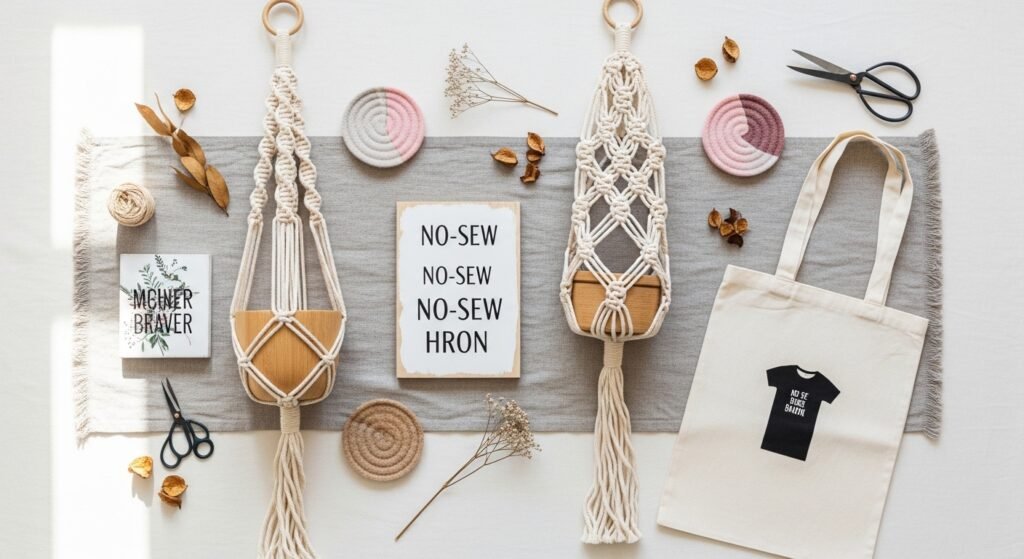
Start with something small and quick: a simple project you can finish in an evening with a glue gun and a cup of tea. These no sew projects for beginners are built for people who want pretty, practical results without the learning curve of a needle and thread. You’ll find everything from felt home accents to macramé-style knots made with cord (no stitching required), plus the exact quantities and drying times so nothing derails your session.
Each project is designed for real-life makers—complete materials, step-by-step instructions, and tips to avoid common mistakes like glue strings, frayed edges, or warped bases. I often grab a fast-heating hot glue gun for quick bonds and a self-healing cutting mat when trimming. Keep this list saved and pinned—these no sew projects for beginners are perfect for craft nights, gifts, and last-minute decor.
- Felt Flower Garland — quick party decor (no sew projects for beginners)
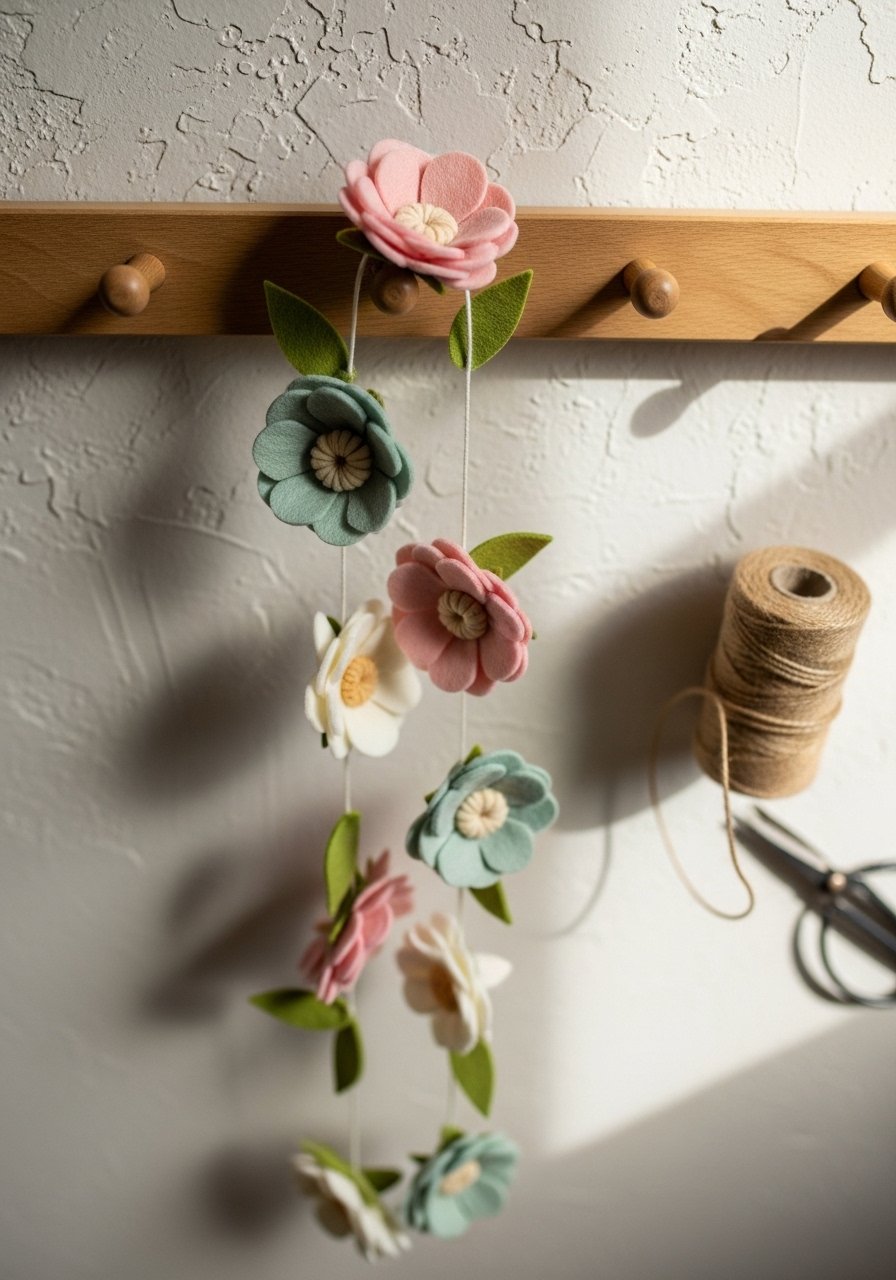
A sweet garland made from layered felt flowers that looks delicate but holds up well. The petals are soft and slightly textured, and the finished garland brings a cottagecore touch to mantels or party tables. Kids and beginners love cutting simple shapes; adults appreciate the layered color play.
Materials
- 10 felt sheets (4" x 6") in assorted colors
- 1 roll of natural twine, 10 yards
- 20 wooden craft beads, 12 mm
- 1 sheet of printable flower templates (or draw freehand)
- 1 bottle of tacky craft glue, 2 oz
- 1 pair of sharp detail scissors
- 1 self-healing cutting mat
- Optional: hot glue sticks (if using a glue gun)
Instructions
- Print or sketch a simple flower petal template (about 2.5" diameter total).
- Trace and cut 40 large petals and 40 small petals from felt (two per flower).
- Layer one small petal on top of two large petals to make a 3-layer flower.
- Glue layers together with tacky glue; press for 30 seconds until tacky.
- Thread a wooden bead through twine and tie a small knot to fix it in place; space beads every 6 inches.
- Glue each felt flower to the twine with a dab of glue behind the center; hold 10–15 seconds.
- Leave garland flat to cure for 1 hour; full set after 24 hours.
- Trim any loose felt fibers with detail scissors.
How to Display or Gift It
Hang across a fireplace, over a crib (out of reach), or use as party bunting. For gifting, loop the garland into a kraft box lined with tissue paper and tuck in a dried sprig. Store flat in a shallow craft organizer to avoid crushing. A small kraft gift box set works well for making batches.
- No-Sew T-Shirt Tote (Beginner-friendly upcycle)
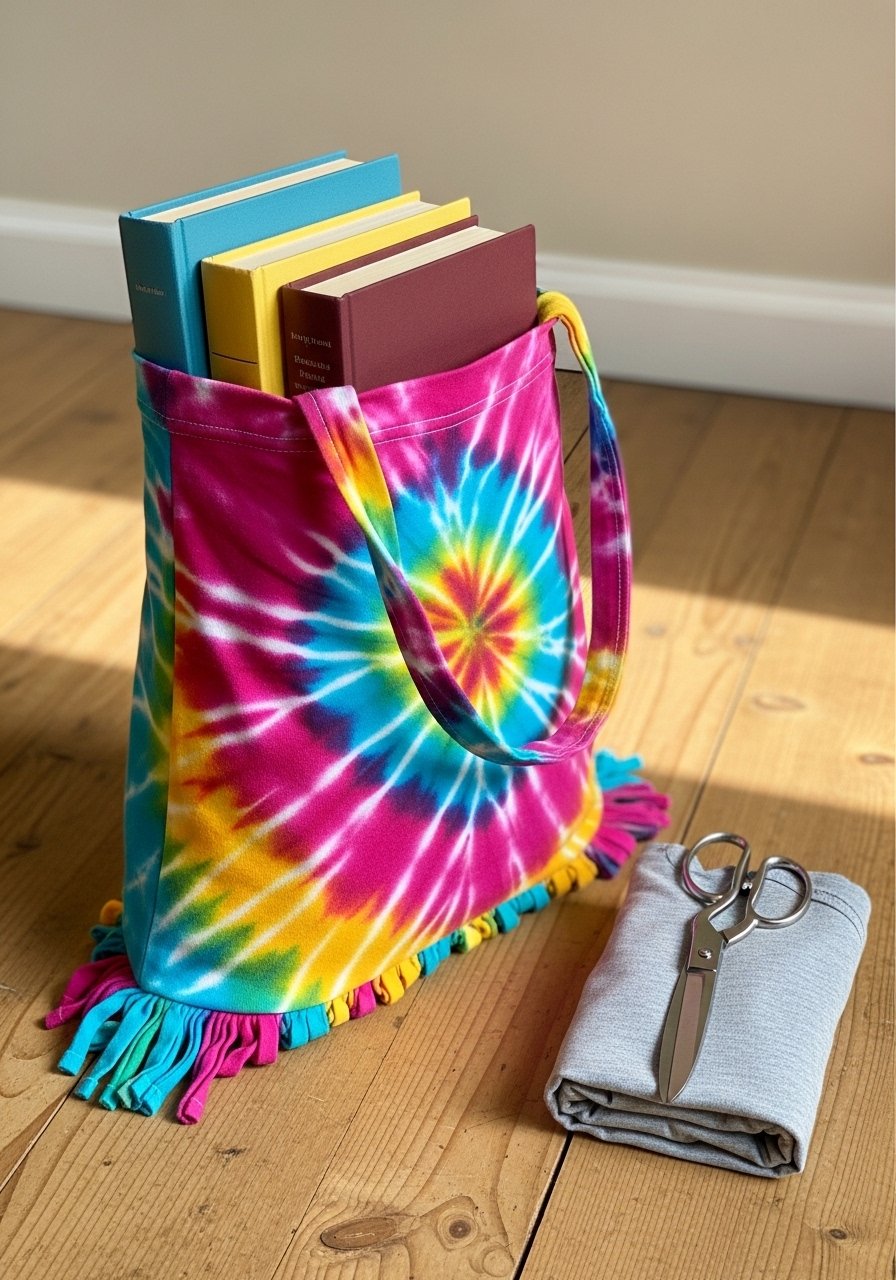
Turn an old tee into a reusable bag in under 20 minutes—zero stitching, just cutting and tying. The cotton has a lived-in, soft texture that feels good to hold. Great for last-minute grocery runs or improv gift bags.
Materials
- 1 adult cotton t-shirt (prewashed)
- 1 pair of sharp fabric scissors
- 1 ruler or measuring tape
- 1 fabric marker (washable)
- 1 piece of cardboard (for the base, optional, 8" x 10")
- Optional: fabric glue for reinforcing knots
Instructions
- Lay the t-shirt flat and cut off the sleeves along the seam.
- Cut a deep scoop across the neckline to create the bag opening.
- Trim the hemline across the bottom to remove the finished edge.
- Cut fringe slits about 1" wide and 4" long across the bottom.
- Pair opposite fringe strips and tie a double knot, repeat across the entire bottom.
- For a sturdier base, insert an 8" x 10" cardboard piece into the bag.
- Press knots down and let sit 15 minutes; optional dab of fabric glue on knots and dry for 1 hour.
How to Display or Gift It
Roll and tie with a ribbon for gifting. Store folded in a linen basket or hang by handles on a peg hook. Use a small fabric storage basket to keep several t-shirt totes tidy.
- Cork Trivet Mosaic — quick kitchen upgrade
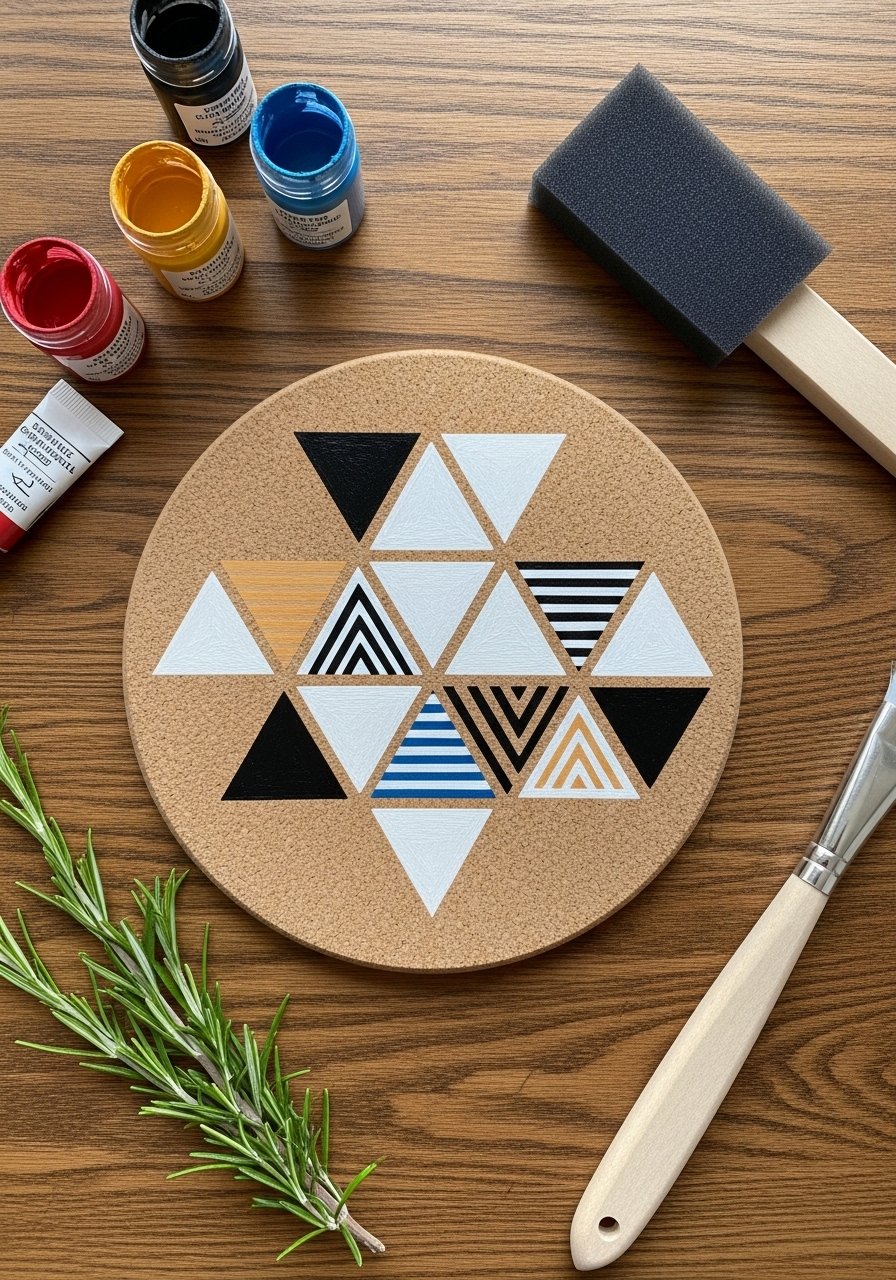
This trivet uses cork tiles and acrylic paint for a durable, heat-resistant piece. The texture is warm under hands and protects surfaces. It's ideal for beginners who want color without sewing.
Materials
- 1 round cork trivet, 8" diameter
- 5 small acrylic paint pots (assorted colors)
- 1 flat foam brush, 1"
- 1 roll of painter's tape, 0.94"
- 1 small sanding block, 120 grit
- 1 bottle of matte Mod Podge, 4 oz
- 1 damp cloth for cleanup
Instructions
- Lightly sand the cork surface and wipe clean.
- Use painter's tape to mark geometric sections on the trivet.
- Apply acrylic paint with a foam brush in thin coats.
- Let each coat dry 20 minutes; apply a second coat if needed.
- Remove tape carefully when paint is dry to the touch (about 25 minutes).
- Seal with one thin coat of matte Mod Podge; dry 1 hour and cure 24 hours.
- Test heat resistance with a warm mug; avoid direct hot pans over 200°F.
How to Display or Gift It
Stack several for a layered table display. Wrap in kraft paper for gifting and include a care note. Store flat in a drawer or use a small wooden easel to show it between uses.
- No-Sew Fringe Pillow Cover (Boho vibe)
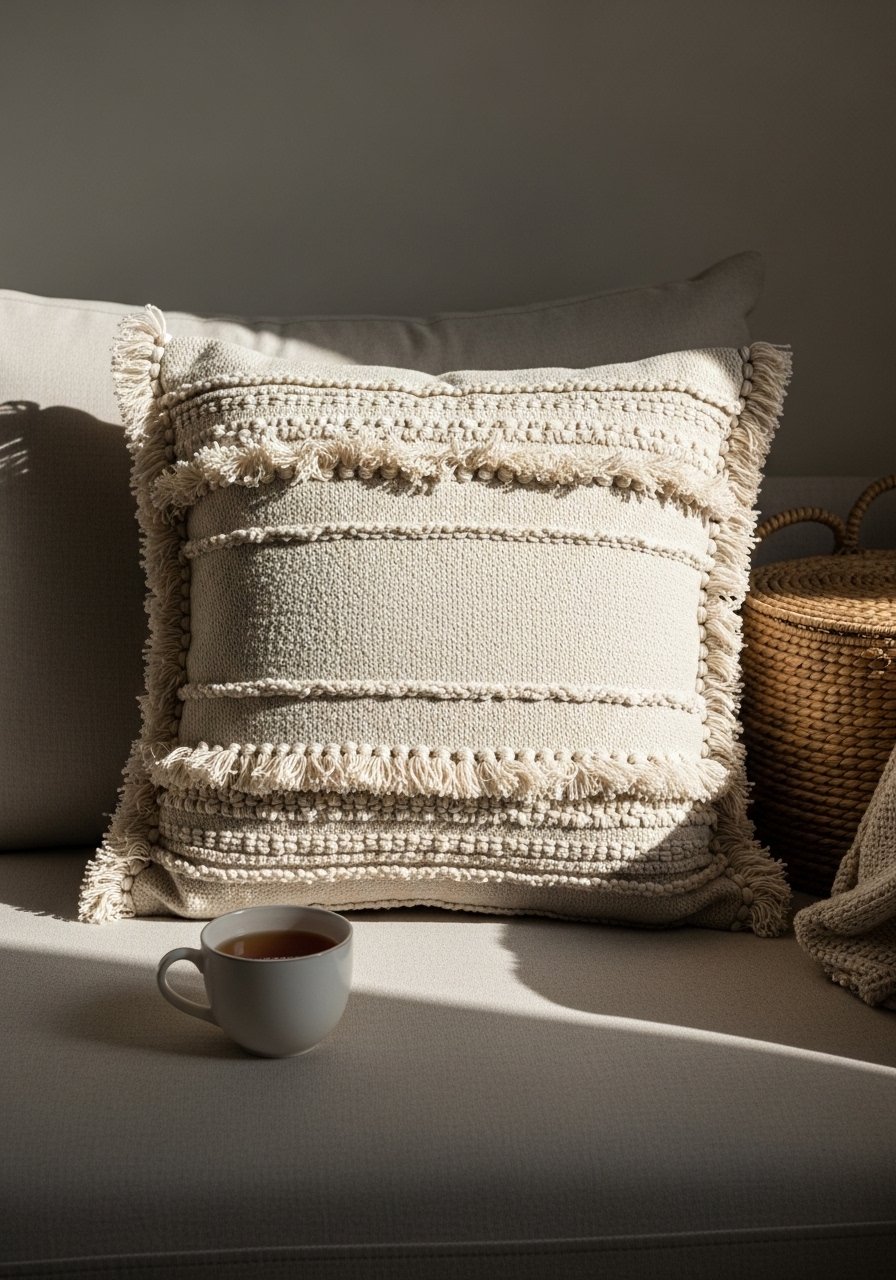
Get a textured pillow cover look without a sewing machine. This uses fringe strips glued to a basic pillow cover. The surface is plush and slightly rustic—perfect for a Japandi or boho living room.
Materials
- 1 plain pillow cover, 18" x 18"
- 1 cotton fabric yardage, 1/2 yard
- 1 bottle of fabric glue, 2 oz
- 1 ruler and fabric marker
- 1 pair of fabric scissors
- 1 foam brush
- 1 hot glue gun and glue sticks (optional for faster set)
Instructions
- Cut fabric into 1" wide strips, each 18" long.
- Fringe each strip by snipping along one edge every 1/4", stopping 3/4" from the other edge.
- Apply a bead of fabric glue along the top unfringed edge and press onto pillow cover; hold 30 seconds.
- Continue layering fringe strips, overlapping slightly, until cover is fully covered.
- Allow glue to cure 4 hours; full strength 24 hours.
- Trim any uneven fringe lengths.
How to Display or Gift It
Pair with a knitted throw and natural wood tray for cozy styling. Wrap in tissue and box for gifting. Keep spare covers stacked in a breathable fabric storage bin to avoid crushing; try a stackable craft organizer.
- Painted No-Sew Canvas Wall Art (no sew projects for beginners)
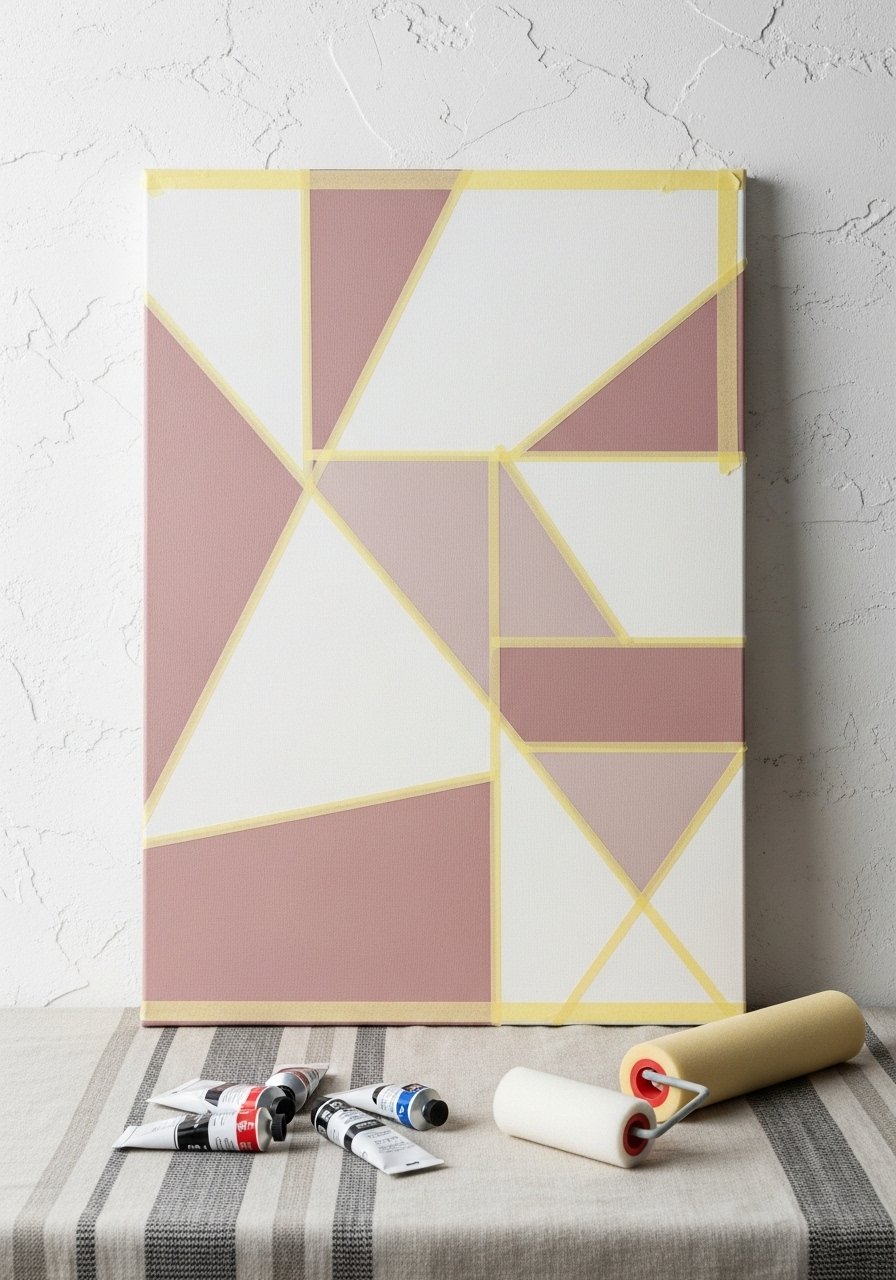
Create gallery-worthy art without a stitch in sight—just painter's tape and acrylics. This project is great if you like Japandi minimalism or bold farmhouse stripes.
Materials
- 1 pre-stretched canvas, 12" x 16"
- 3 tubes of acrylic paint
- 1 brayer roller or foam brush
- 1 roll of painter's tape, 0.94"
- 1 palette or paper plate
- 1 damp cloth
- 1 small jar of water
Instructions
- Lay canvas flat and press painter's tape to mask off design sections.
- Mix paint colors on palette and apply with a foam brush or brayer.
- Use thin coats: dry 15 minutes between coats.
- Remove tape slowly when paint is dry to the touch (about 20–25 minutes).
- Add a second layer for opacity if needed; dry 30 minutes.
- Seal with a thin coat of acrylic varnish; cure 24 hours.
How to Display or Gift It
Stand on a small easel or mount on the wall for a modern vignette. Wrap in butcher paper and tie with twine for gifting. Store unused canvases vertically in a protected rack or use a small wooden easel for display.
- Macramé-Style Plant Hanger (3mm cord, no knotting stress)
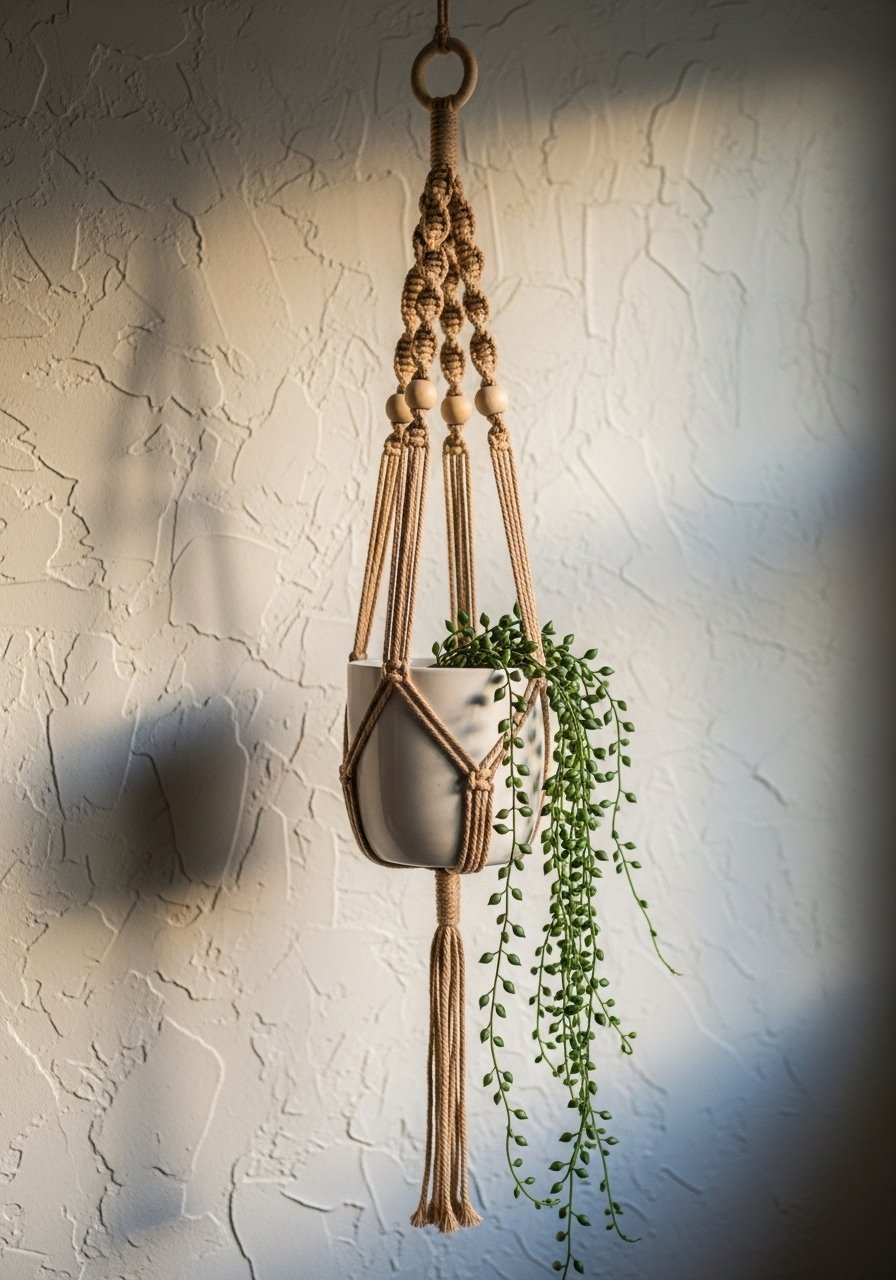
This hanger mimics macramé with simple wrap-and-loop techniques—no complex knots. The cotton cord has a soft matte texture that complements boho and farmhouse decor.
Materials
- 3mm single-strand cotton cord, 10 yards
- 1 ceramic pot, 4" diameter
- 8 wooden beads, 10 mm
- 1 ruler
- 1 pair of scissors
- 1 wooden dowel, 6"
- Optional: fabric glue for securing ends
Instructions
- Cut cord into 4 lengths of 2.5 yards each.
- Fold cords in half and loop over the dowel with a lark’s head.
- Pair strands and wrap tightly around each other to create decorative bands; secure with a dab of fabric glue.
- Add wooden beads on strands and slide into position.
- Create a simple gather at base by tying all strands together in a secure overhand knot.
- Trim ends evenly and lightly comb fringe.
How to Display or Gift It
Hang from a hook in a sunny window. Pair with a small plant and gift in a kraft box. Store cord rolled neatly in a clear mason jar between projects.
- No-Sew Fabric Basket (sturdy organizer)
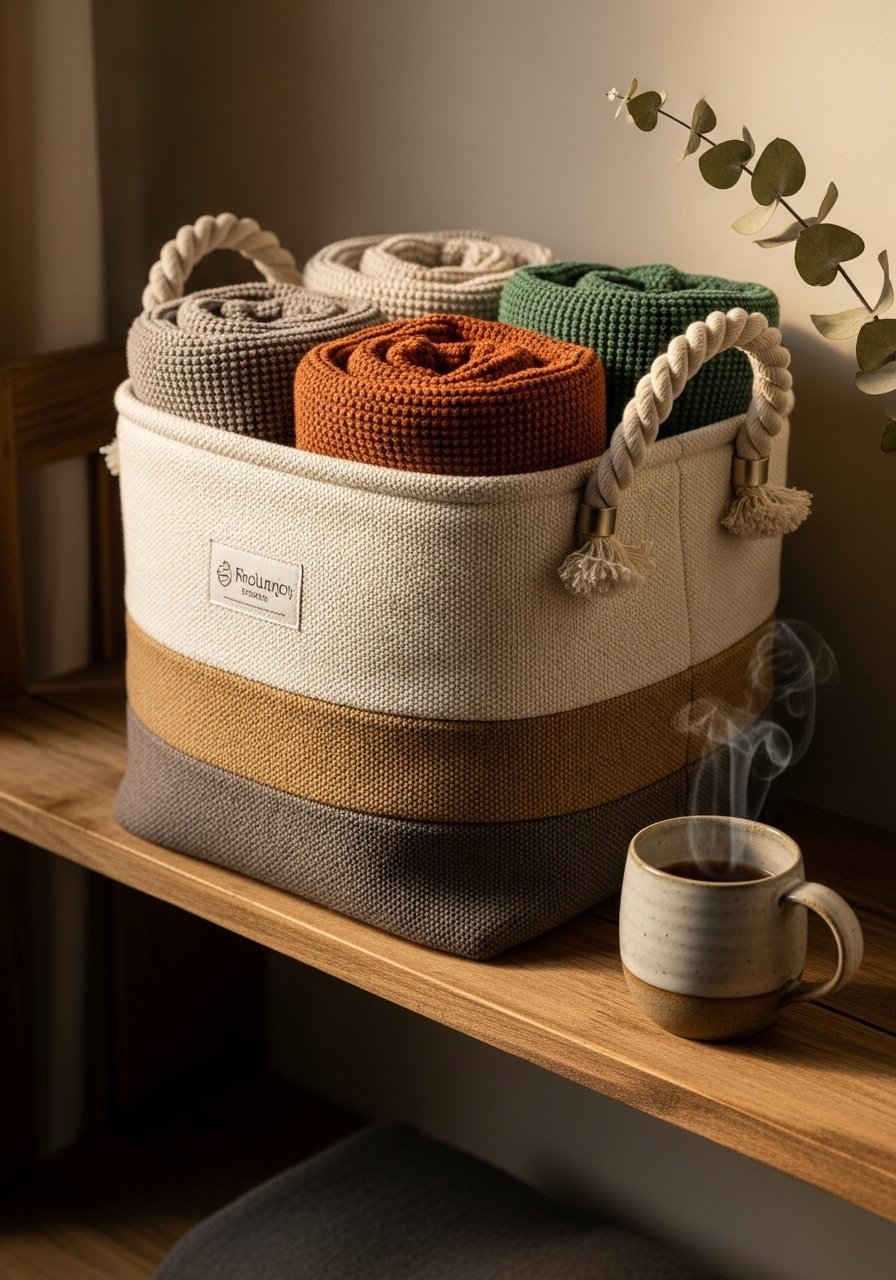
Make a structured basket with interfacing and glue. The finished basket holds yarn, toys, or supplies and has a crisp, natural feel.
Materials
- 1 yard cotton canvas, 18" wide
- 1 yard fusible interfacing, 18" wide
- 1 roll of fabric glue, 2 oz
- 1 pair of fabric scissors
- 1 ruler and fabric marker
- 2 short rope handles, 6" each
- 1 bone folder for crisp folds
Instructions
- Fuse interfacing to canvas following manufacturer heat instructions (press 10–12 seconds).
- Cut canvas + interfacing to 12" x 24" rectangle.
- Fold sides up to form a box shape; mark and cut corner squares 4" x 4" to form box corners.
- Apply fabric glue to inner seam edges and press firmly; clamp for 15 minutes.
- Attach rope handles with dabs of glue; allow 1 hour cure.
- Let basket rest overnight for full bond strength.
How to Display or Gift It
Use in entryways or on shelves; line with tissue for gifting. Store collapsed in a shallow bin when not in use. A fabric storage basket pairs well on open shelves.
- Beaded Keychain Tassels (quick gifts)
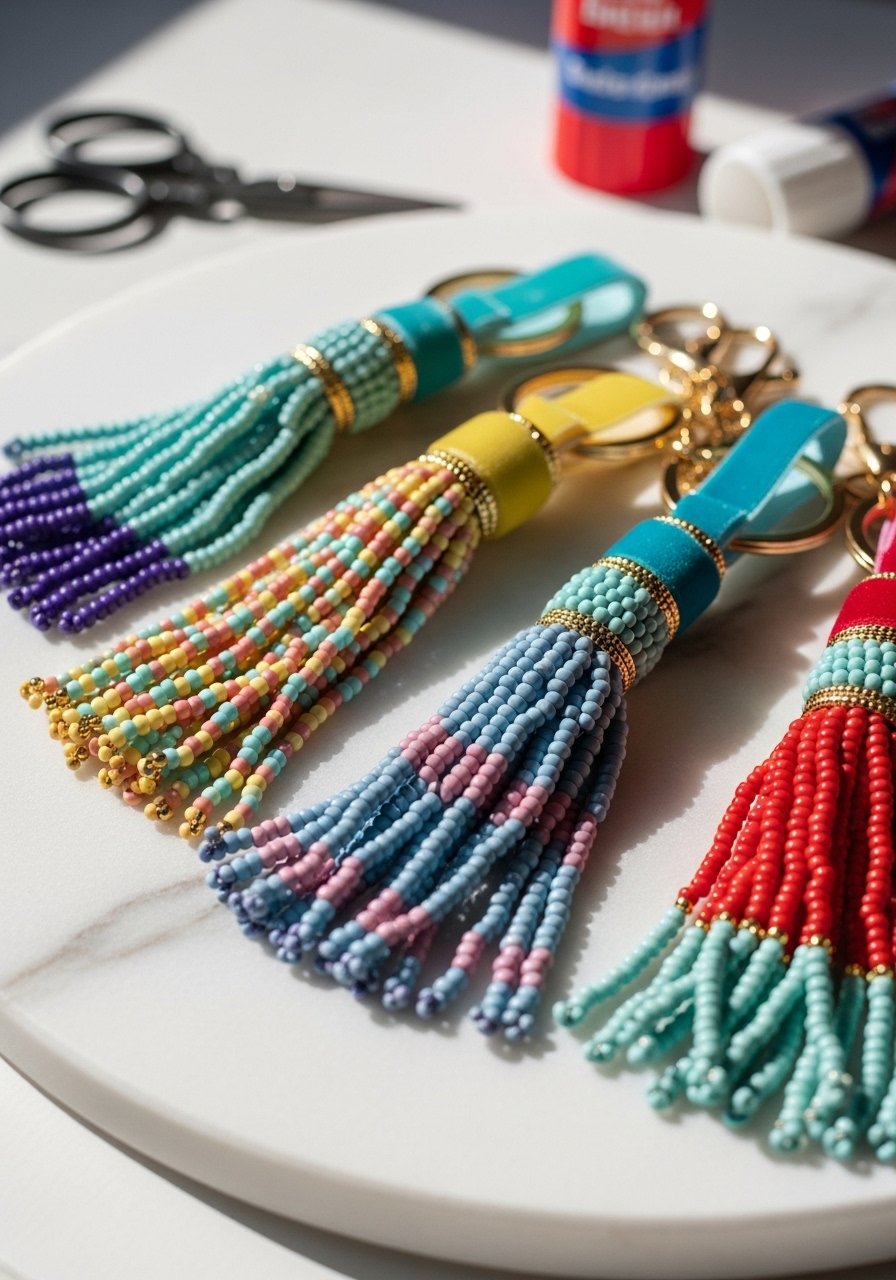
Tiny tassel keychains make perfect add-ons for gifts and are a great starter craft. The beads add weight and a polished finish.
Materials
- 10 yards rayon embroidery floss (varied colors)
- 6 large gold jump rings
- 6 key rings
- 12 wooden or metal beads
- 1 small craft glue, 1 oz
- 1 pair of embroidery scissors
- 1 split ring pliers (optional)
Instructions
- Wrap floss around a 3" cardboard piece 30 times.
- Slide one end through the loop and tie a short piece of floss to secure the top.
- Trim the bottom loops to create the tassel.
- Thread a bead onto the tassel’s top and secure with a dot of glue.
- Attach key ring via jump ring and press closed.
- Let glue cure 30 minutes.
How to Display or Gift It
Bundle multiple keychains on a small card and tie with ribbon. Store crafted tassels hanging from a pegboard to prevent tangles or in a small craft organizer.
- Washi Tape Picture Frames (instant gallery)
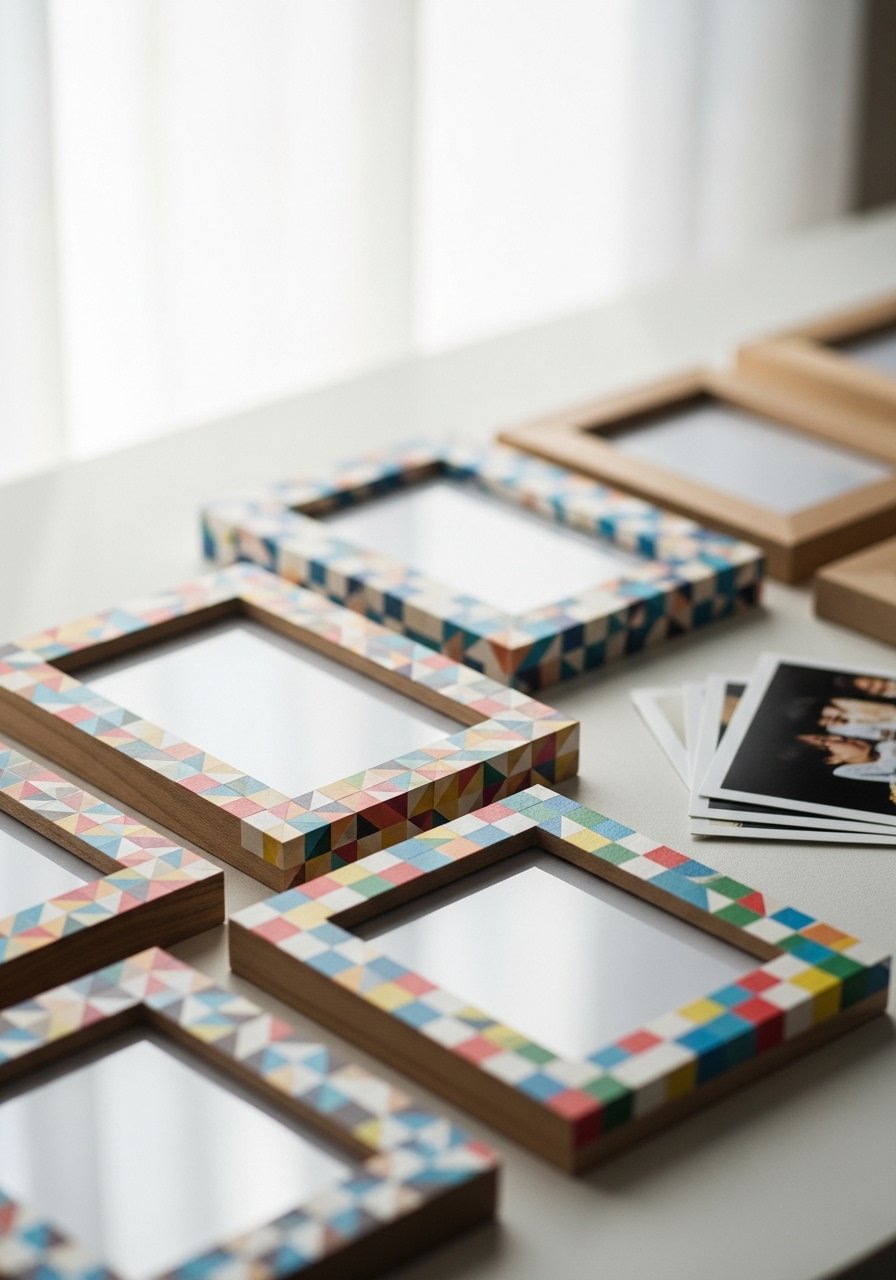
Washi tape transforms plain frames into colorful accents. It’s forgiving and perfect for swapping styles seasonally.
Materials
- 4 small wooden frames, 5" x 7"
- 6 rolls of washi tape (assorted widths)
- 1 craft knife
- 1 ruler and cutting mat
- 1 foam brush and Mod Podge (for sealing)
- 1 lint-free cloth
Instructions
- Clean frame surfaces and plan tape layout.
- Apply tape strips smoothly, overlapping slightly for pattern.
- Trim edges with a craft knife and ruler on the mat.
- Seal with one thin coat of Mod Podge; dry 1 hour.
- Reinsert photos after full cure (24 hours).
How to Display or Gift It
Group frames in a gallery cluster. Wrap in tissue and tie with twine for gifting. Store extra washi rolls in a labeled craft organizer tray.
- Felt Phone Sleeve (no sew projects for beginners)
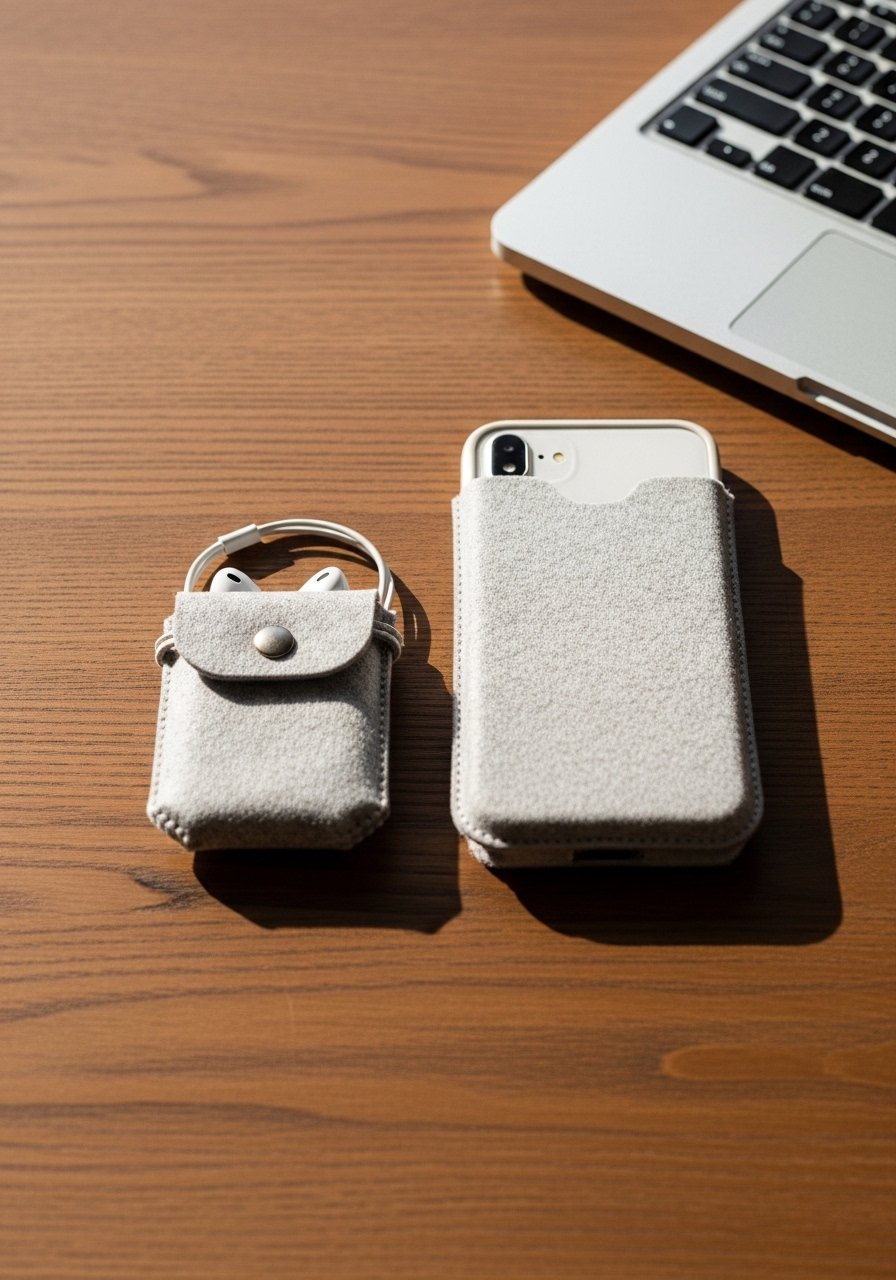
A slim, padded sleeve keeps your phone safe from scratches. Felt is soft and slightly firm—an ideal material for a beginner no-sew project.
Materials
- 1 felt sheet, 9" x 12", 3mm thickness
- 1 magnetic snap closure, 10 mm
- 1 fabric marker and ruler
- 1 hot glue gun with low-temp sticks
- 1 pair of fabric scissors
- 1 scrap of cotton batting, 9" x 5"
Instructions
- Fold felt in half; mark phone outline with 1/4" seam allowance.
- Cut out sleeve shape leaving top open.
- Glue batting to inner back for padding.
- Fold and glue side seams with 1/4" seam; press for 20 seconds.
- Attach magnetic snap to flap with glue; let set 30 minutes.
- Test fit and trim any excess.
How to Display or Gift It
Pair with a small earbud pouch and present in a kraft box. Store flat in a drawer to avoid puckering and use a small kraft gift box.
- Upcycled Denim Coasters
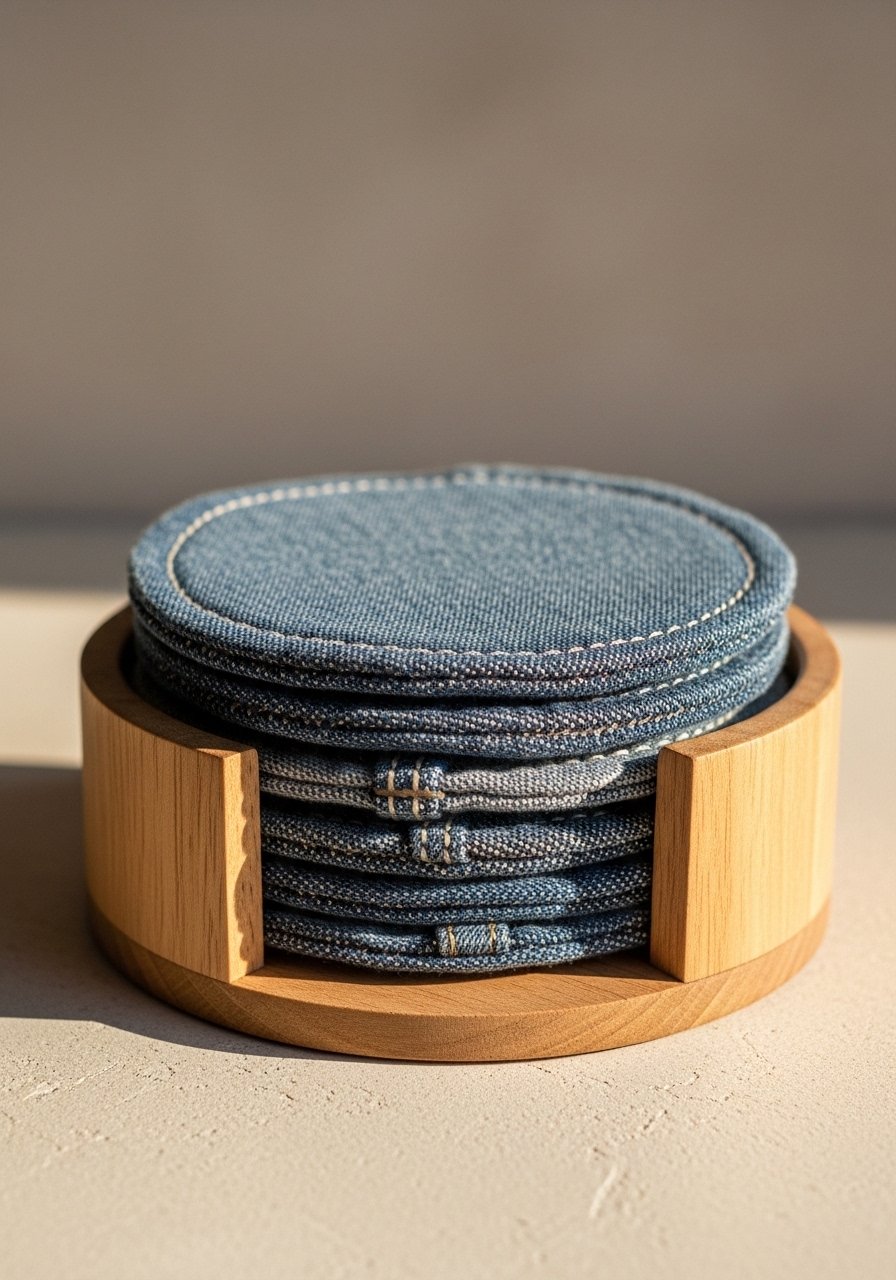
Use old jeans to create thick, absorbent coasters with texture and character. No stitching—just careful gluing and pressing.
Materials
- 4 denim jean seat pieces, 4" circles
- 1 cork backing circles, 4"
- 1 bottle of contact cement or fabric glue, 2 oz
- 1 circular hole punch or scissors
- 1 heavy book for pressing
- 1 sandpaper, fine grit
Instructions
- Cut denim into 4" circles, two layers each.
- Glue denim layers together; press under a heavy book for 30 minutes.
- Glue cork backing to denim circle and press for 1 hour.
- Sand edges lightly to remove loose threads.
- Cure fully 24 hours before use.
How to Display or Gift It
Tie a set with twine and a kraft tag for gifting. Stack and store in a drawer or on a coaster tray—an acacia wood coaster holder keeps them tidy.
- No-Sew Fleece Throw (super fast blanket)
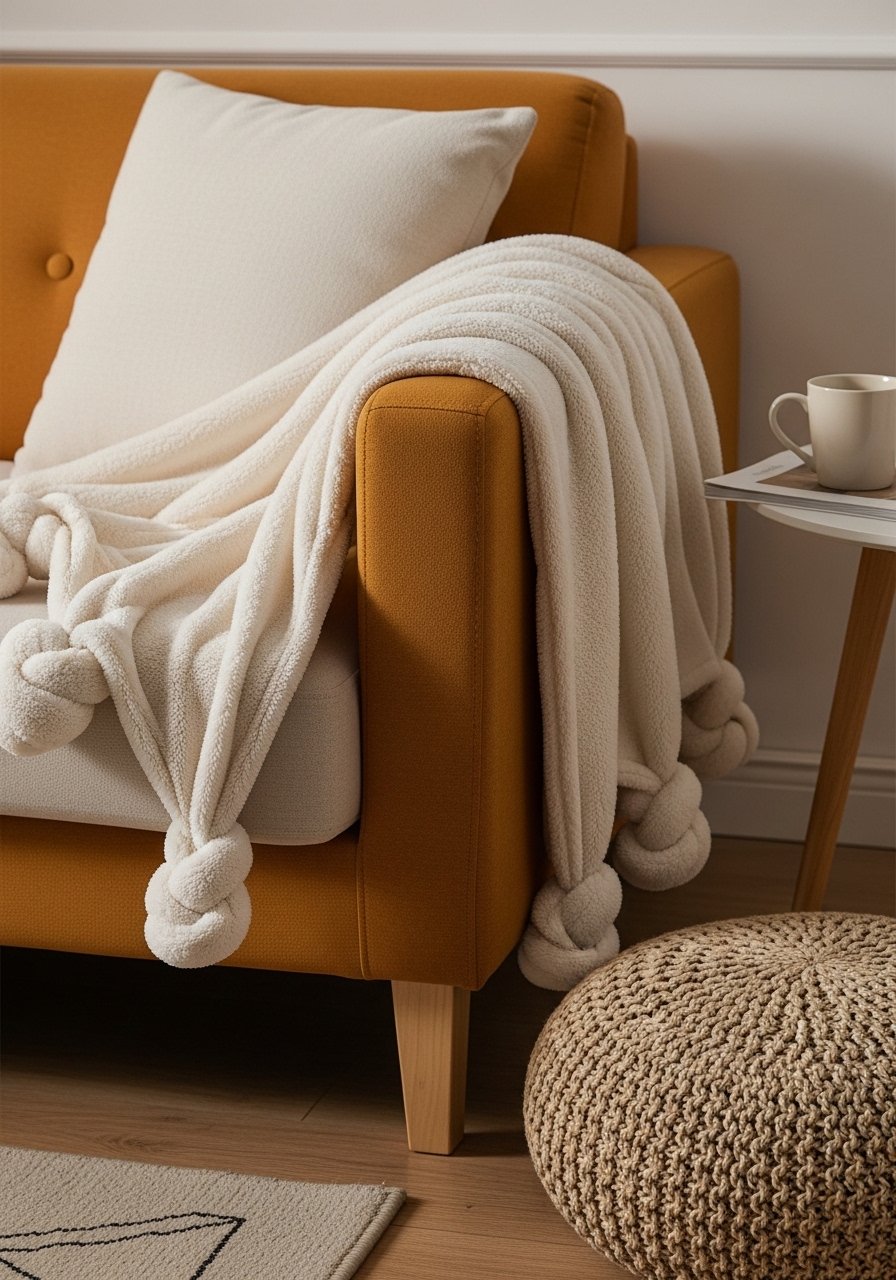
This classic no-sew blanket uses knotted fringe to finish edges. The fleece is plush and warm—perfect for movie nights.
Materials
- 2 yards polar fleece, 60" wide
- 1 ruler and fabric marker
- 1 pair of sharp fabric scissors
- 1 measuring tape
Instructions
- Cut fringe along all four edges: 1" wide, 4" long strips.
- Match corner strips and tie double knots to finish.
- Continue knotting along edges until complete.
- Trim any uneven fringe to uniform length.
How to Display or Gift It
Fold and tie with a ribbon for gifting; store rolled in a linen basket. A woven gift ribbon set makes presentation pretty.
- Wooden Bead Curtain Tiebacks
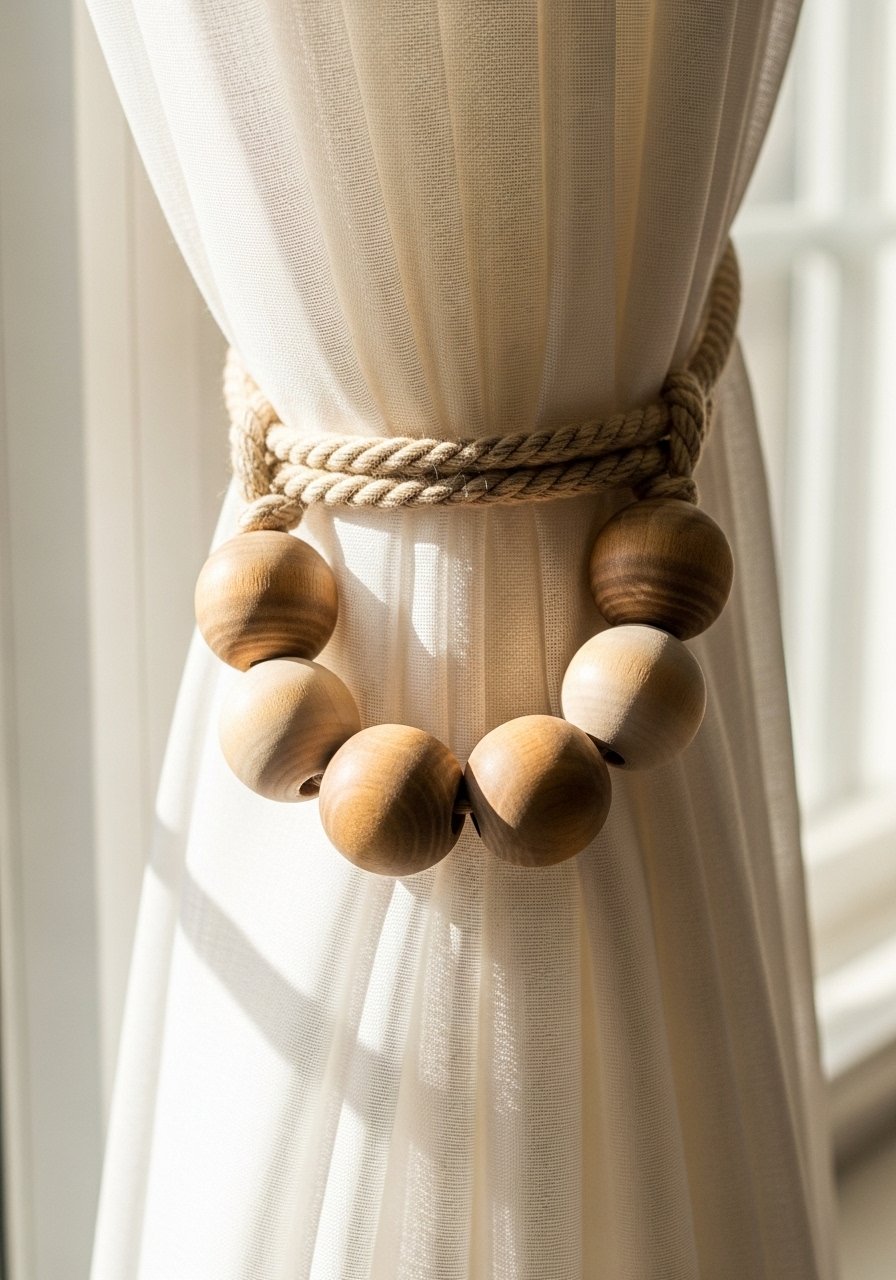
These tiebacks add texture and make closing curtains feel intentional. The beads have a tactile warmth and look handmade.
Materials
- 10 wooden beads, 20 mm
- 2 lengths cotton rope, 30" each
- 1 large gold ring (for slip knot)
- 1 bottle of wood stain (optional)
- 1 small paint brush
Instructions
- Thread beads onto rope and tie sliding knot around gold ring.
- Stain beads if desired; dry 1 hour.
- Slip around curtain and cinch.
How to Display or Gift It
Pair with matching tassels and give as a housewarming gift. Store spare beads in a labeled mason jar.
- No-Sew Ribbon Hair Bow Clips
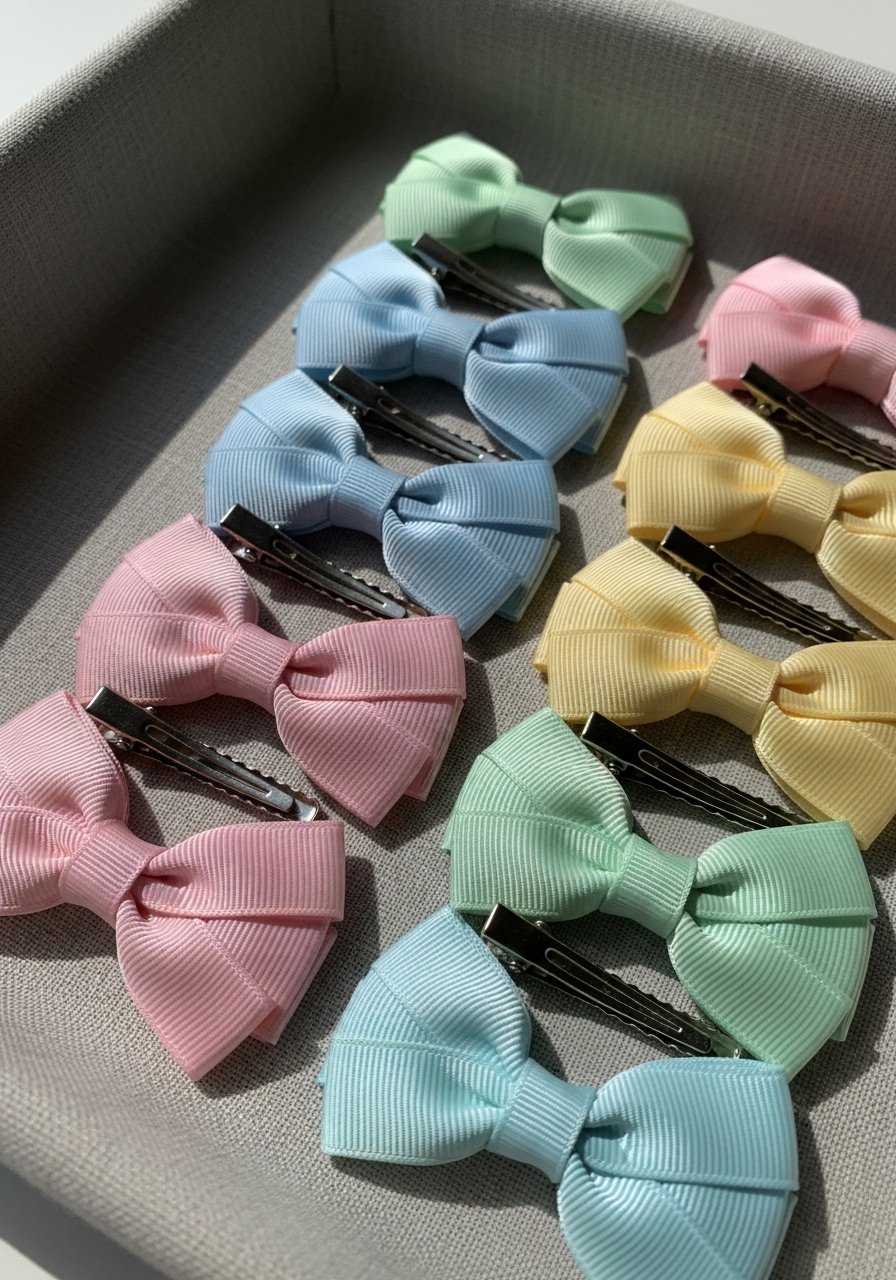
Quick to make and customizable—the ribbon has sheen and structure that holds shapes well. Great for kids’ gifts or craft fairs.
Materials
- 1 roll grosgrain ribbon, 1" wide, 3 yards
- 6 alligator hair clips
- 1 hot glue gun and sticks
- 1 pair of scissors
- 1 ruler
Instructions
- Cut ribbon into 6" and 3" pieces for loops and centers.
- Form loops and glue center with a small dot.
- Glue bow onto clip and secure with center wrap.
- Let glue set 10 minutes.
How to Display or Gift It
Attach to a backing card and place in a clear bag for gifting. Use a hair clip display card set for markets.
- Clay Air-Dry Photo Holders (no baking)
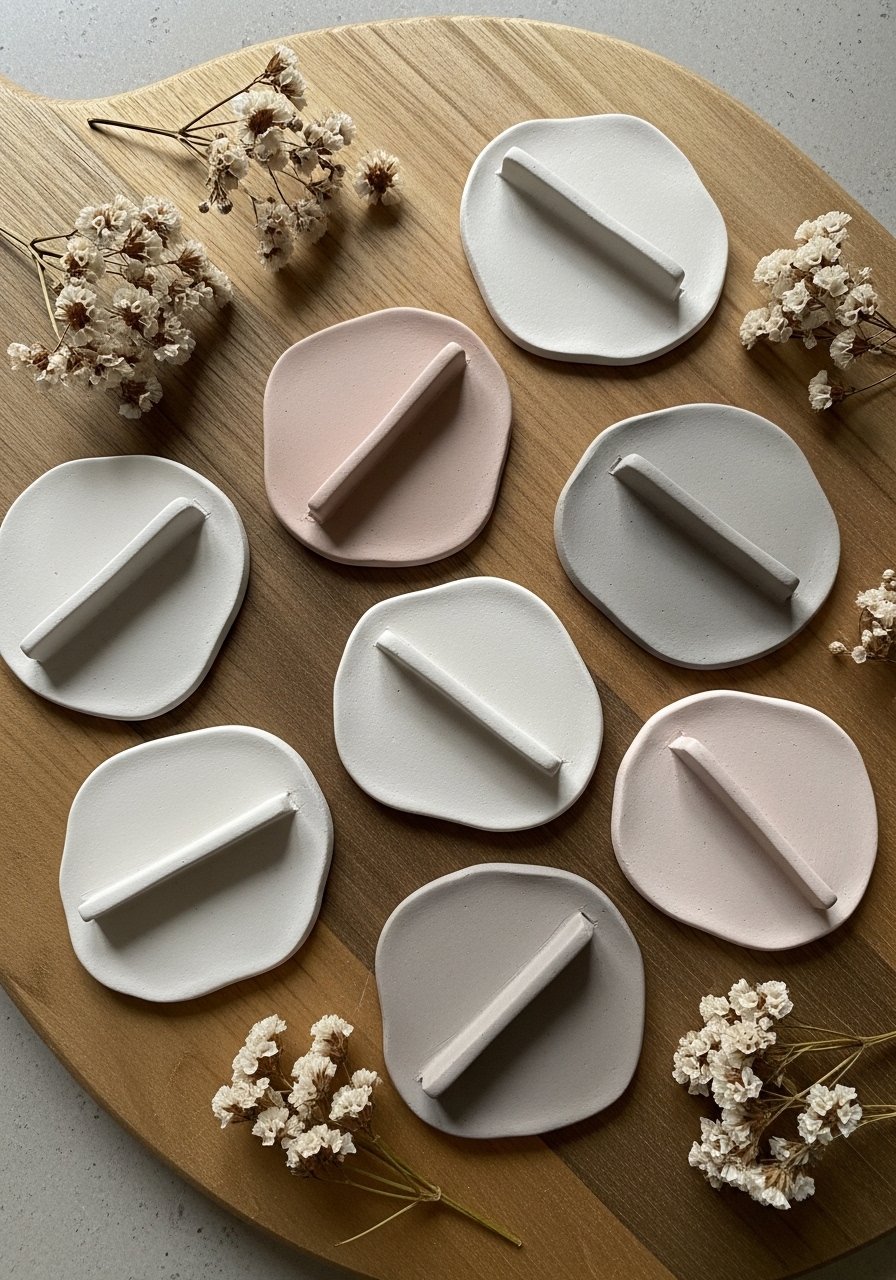
Air-dry clay shapes become charming desktop accessories—simple to press, shape, and let sit.
Materials
- 1 pack air-dry clay, 500 g
- 1 rolling pin (small)
- 1 small clay knife or craft knife
- 1 acrylic paint set and fine brush
- 1 sealant spray or Mod Podge, glossy
Instructions
- Roll clay to 1/4" thickness.
- Cut desired shapes and press a 1/4" groove for photo insertion.
- Smooth edges and leave to dry 24–48 hours (thicker pieces need more).
- Paint and seal; dry 1 hour then cure 24 hours.
How to Display or Gift It
Wrap with tissue and tuck a tiny printed photo inside. Store pieces on a flat shelf while curing; use a small craft drying rack for multiple pieces.
- Quick Fabric Bowl (no sewing)
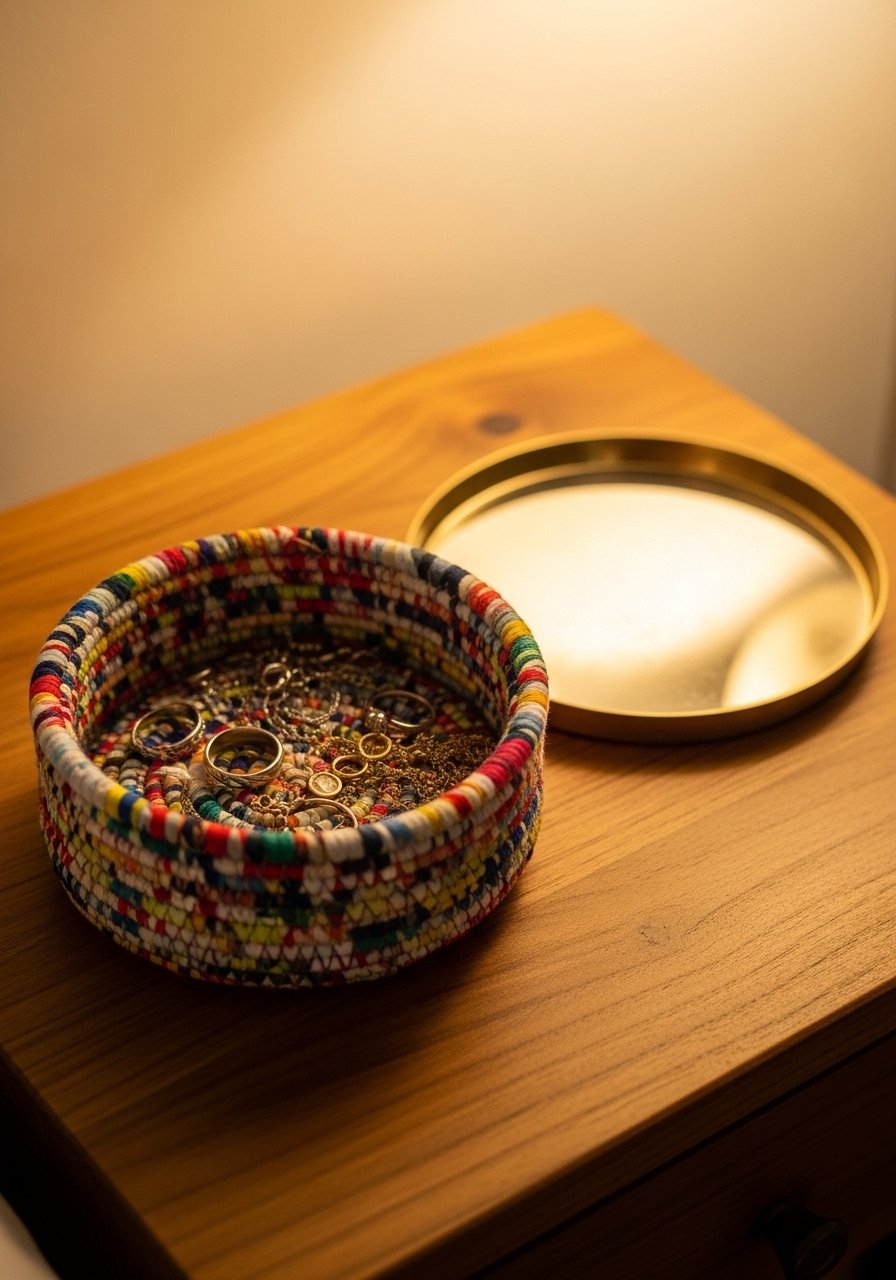
Coil fabric strips into a bowl shape and glue as you go. The finished piece is soft yet structured—ideal for jewelry or desk bits.
Materials
- 1 cotton yard, 1/2 yard
- 1 bottle of fabric glue
- 1 pair of scissors
- 1 filler cord (optional, 10 yards)
- 1 ruler
Instructions
- Cut fabric into 1" strips.
- Wrap strips around filler cord or itself, applying glue between layers.
- Coil tightly and continue until the diameter reaches 4–6".
- Let bowl rest overnight to set.
How to Display or Gift It
Fill with small soaps or jewelry and gift in a box. Keep bowls stacked in a drawer to preserve shape.
- No-Sew Ribbon Wreath
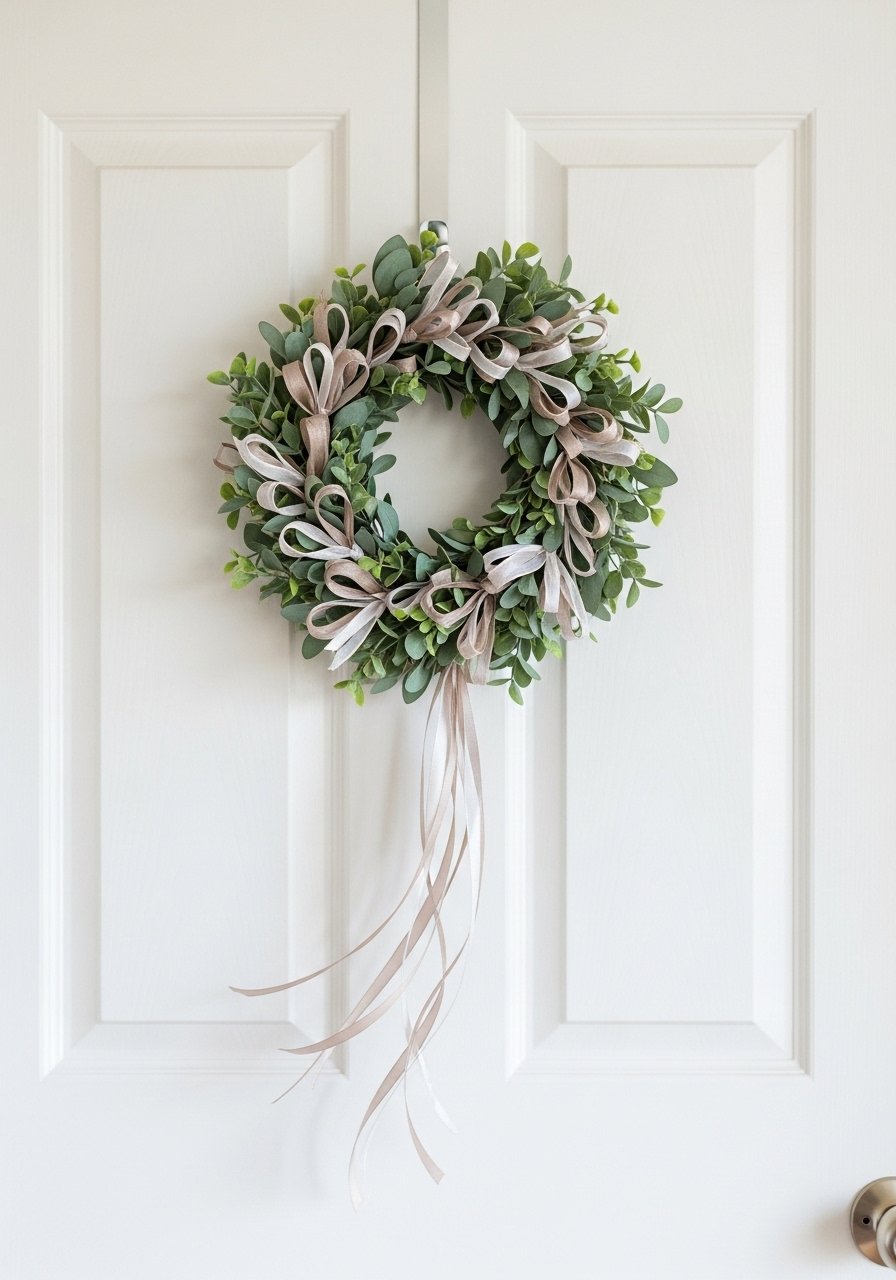
Brighten a door with ribbon bows—no base wiring required; just tie and trim for lush fullness.
Materials
- 12 ribbon strips, 1.5" x 20"
- 1 wire wreath base, 8" diameter (optional)
- 1 pair of scissors
- 1 floral wire (optional)
- 1 dried eucalyptus sprig for accent
Instructions
- Tie ribbon strips around wreath base or each other to form loops.
- Layer multiple loops for fullness.
- Tuck in eucalyptus and secure with floral wire.
- Hang and fluff ribbon tails.
How to Display or Gift It
Hang on a small interior door or gift wrapped in cellophane. Store flat in a wreath box or on a peg.
- Leather Cord Bracelet (no stitching)
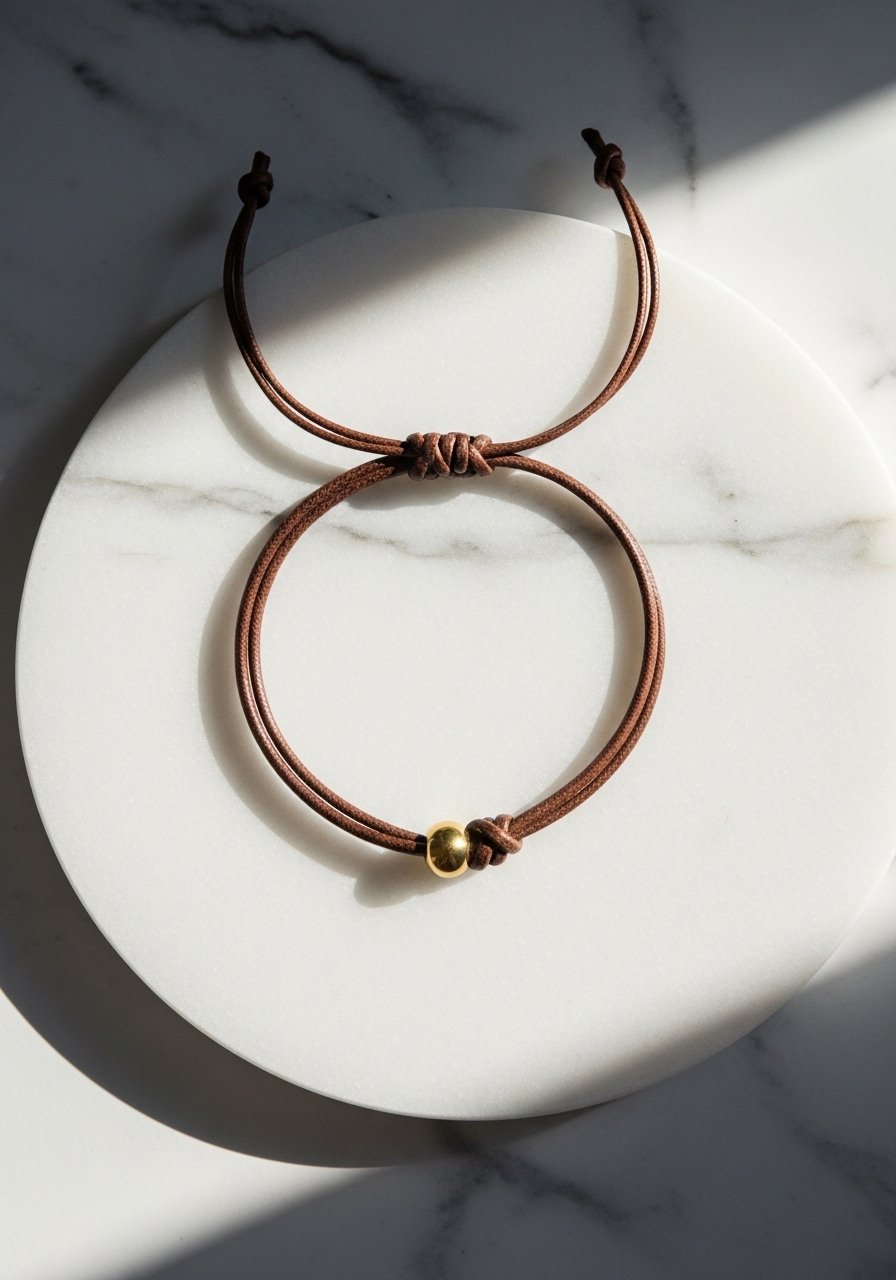
Minimalist leather bracelets are quick to make and feel luxe. Use knot closures for adjustable wear.
Materials
- 3mm leather cord, 24"
- 1 metal bead or charm
- 1 pair of scissors
- 1 lighter to seal ends (use carefully)
- 1 small ruler
Instructions
- Measure wrist and cut leather cord 12" longer than measurement.
- Slide metal bead onto center.
- Tie sliding knots for adjustable closure.
- Trim and lightly melt ends to prevent fray.
How to Display or Gift It
Package in a tiny jewelry box and tuck into a greeting card. Store multiple bracelets in a small craft organizer drawer.
- Paper Flower Wall Cluster
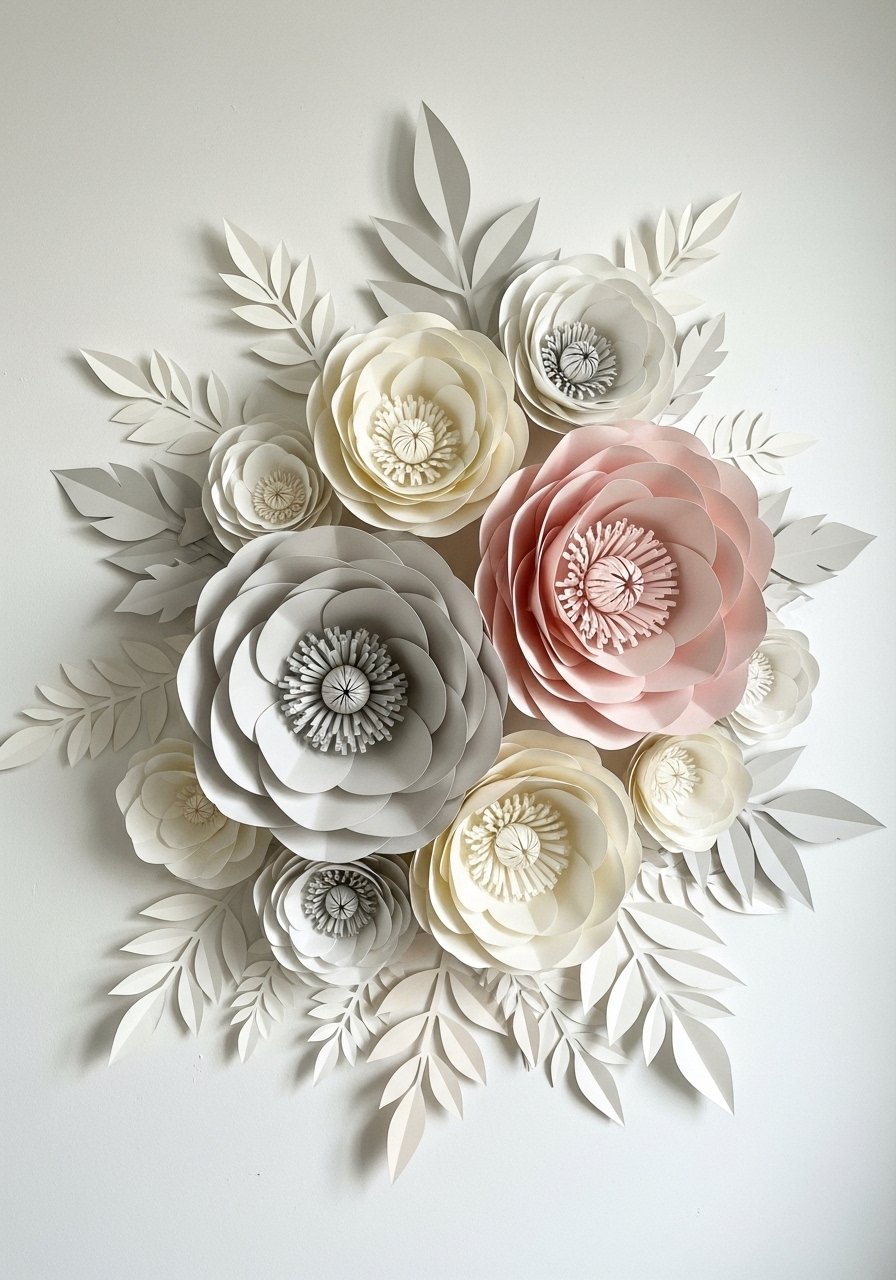
Paper flowers create dramatic wall art without sewing. Use heavy cardstock and glue for crisp petals and clean edges.
Materials
- 5 sheets heavy cardstock (assorted colors), 12" x 12"
- 1 pencil and templates
- 1 precision craft knife
- 1 hot glue gun and sticks
- 1 foam brush (for shaping)
- 1 mounting putty or removable strips
Instructions
- Trace petal templates and cut from cardstock.
- Shape petals by curling edges with a foam brush.
- Layer and glue petals to form blooms.
- Attach to wall with mounting putty or removable strips.
How to Display or Gift It
Create a focal wall or a seasonal backdrop. Store extra petals flat in a craft box between seasons. Use a removable mounting strip pack for damage-free hanging.
- Stenciled Terra Cotta Pots (no sew projects for beginners)
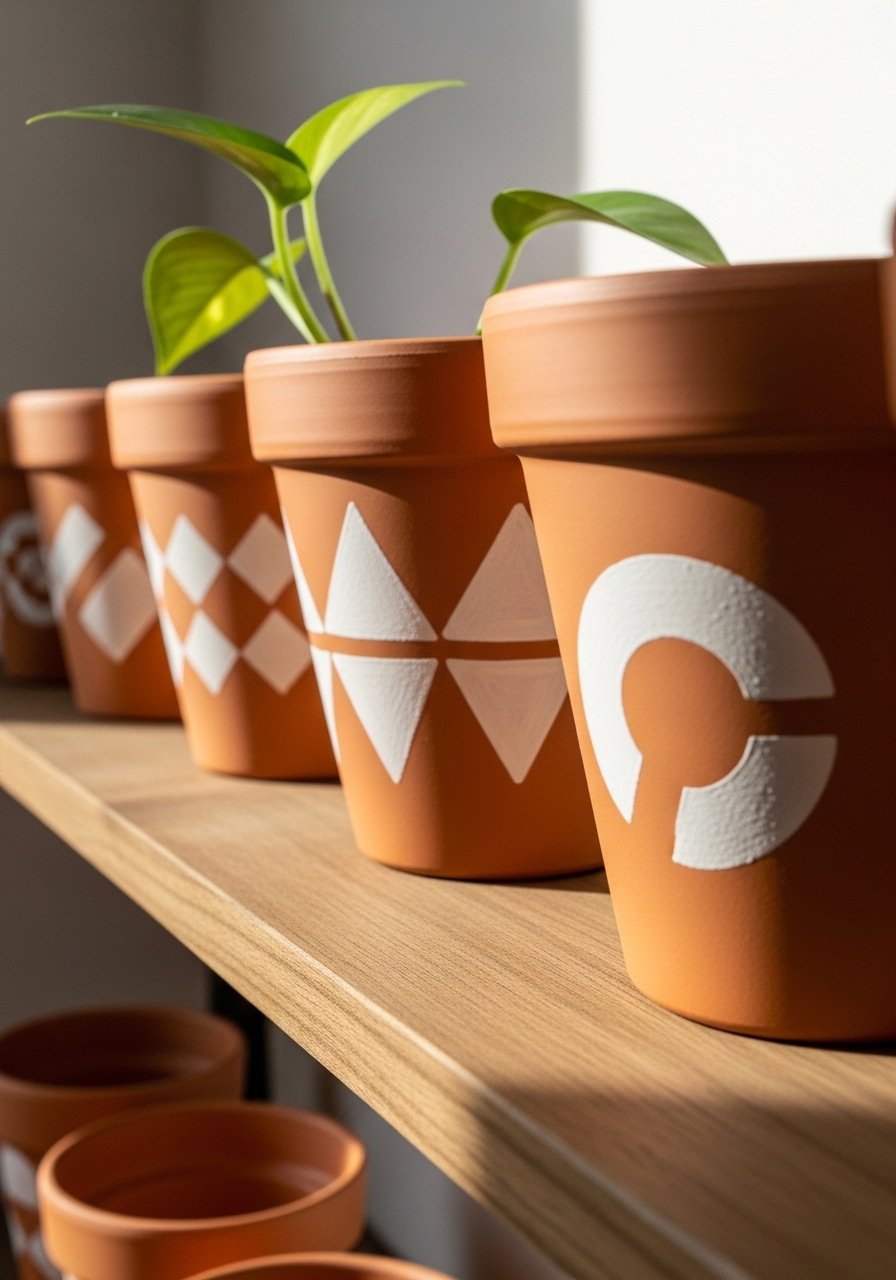
Painted pots add personality to shelves and make lovely gifts. Stencils give a crisp look without precise brushwork.
Materials
- 3 terra cotta pots, 4" diameter
- 1 acrylic paint set
- 1 stencil set (geometric shapes)
- 1 foam brush and small detail brush
- 1 matte sealer spray
- 1 damp cloth for prepping surface
Instructions
- Wipe pots with damp cloth and let dry 10 minutes.
- Tape stencil to pot; dab paint with a foam brush in thin layers.
- Remove stencil when paint is dry to the touch (10 minutes).
- Apply matte sealer after 30 minutes; cure 24 hours.
- Plant small succulents once fully cured.
How to Display or Gift It
Group pots on a windowsill or gift with a small succulent tucked inside. Wrap with kraft paper and include care instructions. Store unused pots stacked in a cool dry place.
A few final words: This list spans tiny gifts to practical homeware, all designed so you can make pretty things without pulling out a needle. Pick a project that matches your time and supplies—many are finishable in under an hour. Save this post, pin your favorites, and try one this weekend.
Trust me, picking up a quality hot glue gun with temperature control changed how many of these turned out — less stringing, faster set, neater results. Which no sew project for beginners will you try first? Share a photo with a friend and swap ideas for colors and finishes.





