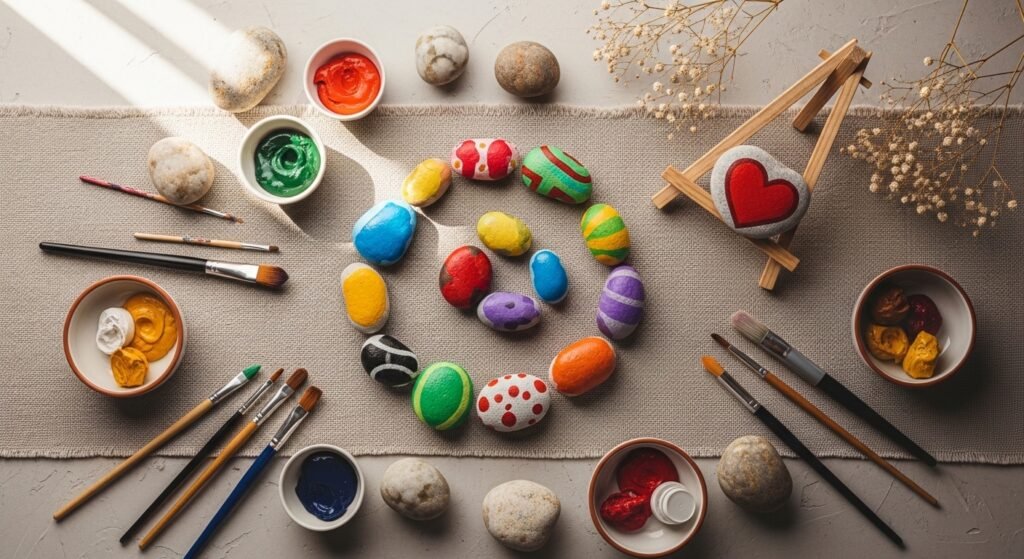
Rocking a quiet afternoon with a pile of smooth stones is one of the simplest joys. Whether you’re scribbling dots with a paint pen, crafting a nature-inspired scene, or creating a set of game stones for the kids, these stone painting ideas will give you fresh ways to play with color, texture, and finish. I’ve gathered 25 projects that range from effortless kid-friendly designs to refined pieces that fit cottagecore, boho, farmhouse, and modern Japandi corners.
You’ll find step-by-step instructions, exact material quantities, drying times, and tips to avoid common slip-ups—like paint flaking or cloudy sealers. Start each project with basics like a small acrylic set or a set of paint pens; I often reach for my artist-quality acrylic paint set for bright coverage and fine-tip paint pens when detail work matters. Keep a foam brush set handy for sealers and varnish — it saves cleanup time. Ready to pick up a stone and start? Let’s paint.
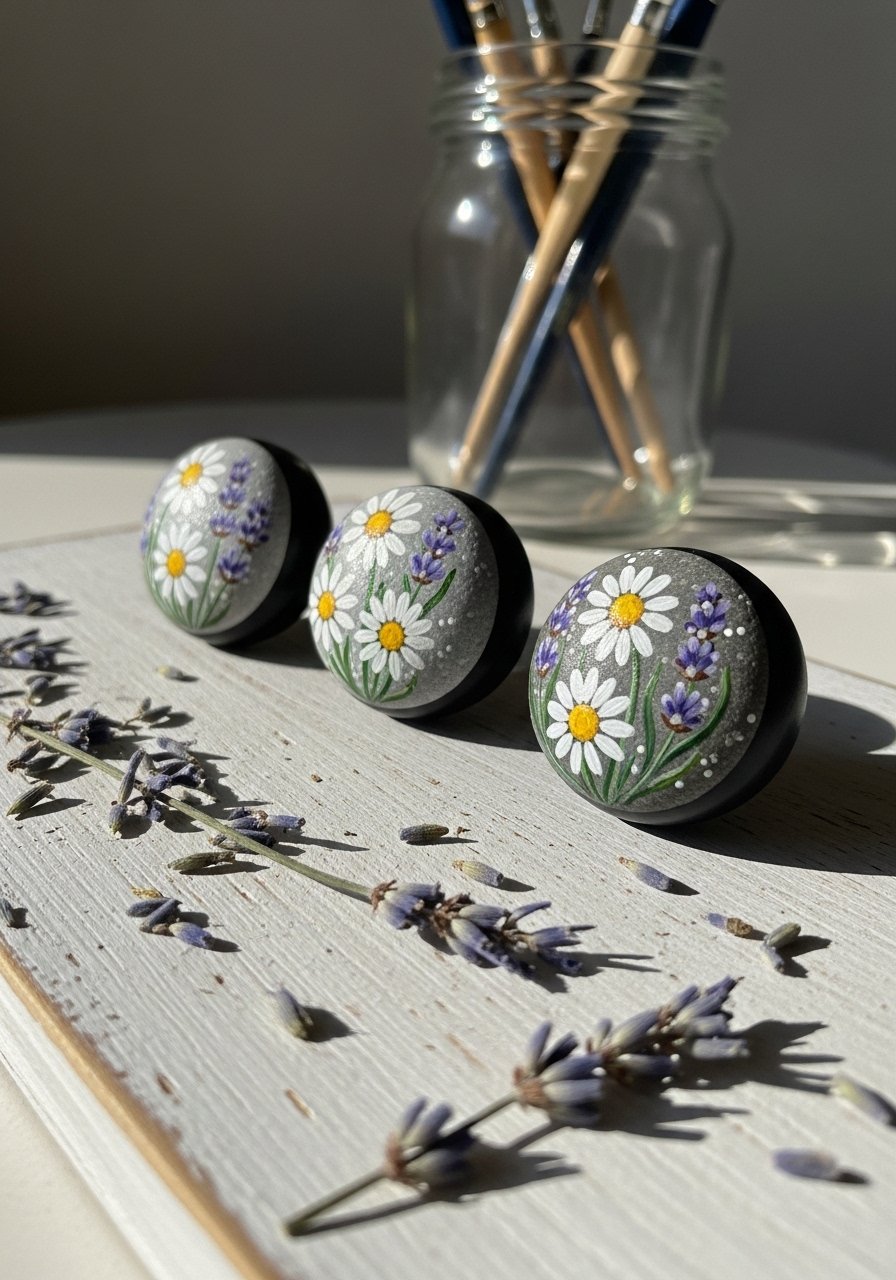
- Mini Floral Pebble Magnets
These cheerful mini floral pebble magnets are perfect for beginners and kids. They look sweet on a fridge or as party favors. The finish is slightly glossy, with fine brush flower centers that pop. Use a round-tipped detail brush for crisp petals; a set of fine detail brushes helps get those tiny dots just right.
Materials
- 6–12 smooth river stones, 2–3 cm diameter, cleaned
- Acrylic craft paints: white, yellow, pink, green (tubes, 12 ml each)
- Fine-tip paintbrush set (size 0–2)
- Black and white paint pens (0.7 mm)
- Round fridge magnets (12 mm) — 6 to 12
- E6000 or strong craft glue, 1 oz
- Gloss Mod Podge or clear acrylic sealer, 1 spray can
- Soft cloth for cleaning stones
Instructions
- Wash stones with warm soapy water; let dry fully (at least 2 hours).
- Prime stones with thin white acrylic base coat; let dry 30–45 minutes.
- Sketch flower centers with a pencil or go freehand with a yellow paint dot.
- Paint petals using a small round brush; work in 2 coats for opaque coverage. Dry 15–20 minutes between coats.
- Add leaf details with a thin brush and a green paint pen for crisp lines.
- When fully dry (no tack, about 2 hours), glue magnets to the back using E6000. Allow adhesive to cure 24 hours.
- Seal fronts with two thin coats of glossy sealer, 15 minutes drying between coats; cure 24 hours before use.
How to Display or Gift It
- Arrange a set in a small kraft box with shredded paper and a sprig of dried lavender for a pretty hostess gift.
- Stick them on a small metal memo board near your kitchen command area.
- Store extra magnets in a stackable craft organizer until the sealer fully cures.
- Make-ahead tip: You can paint a large batch of floral tops and glue magnets as orders come in.
- Polka Dot Garden Markers
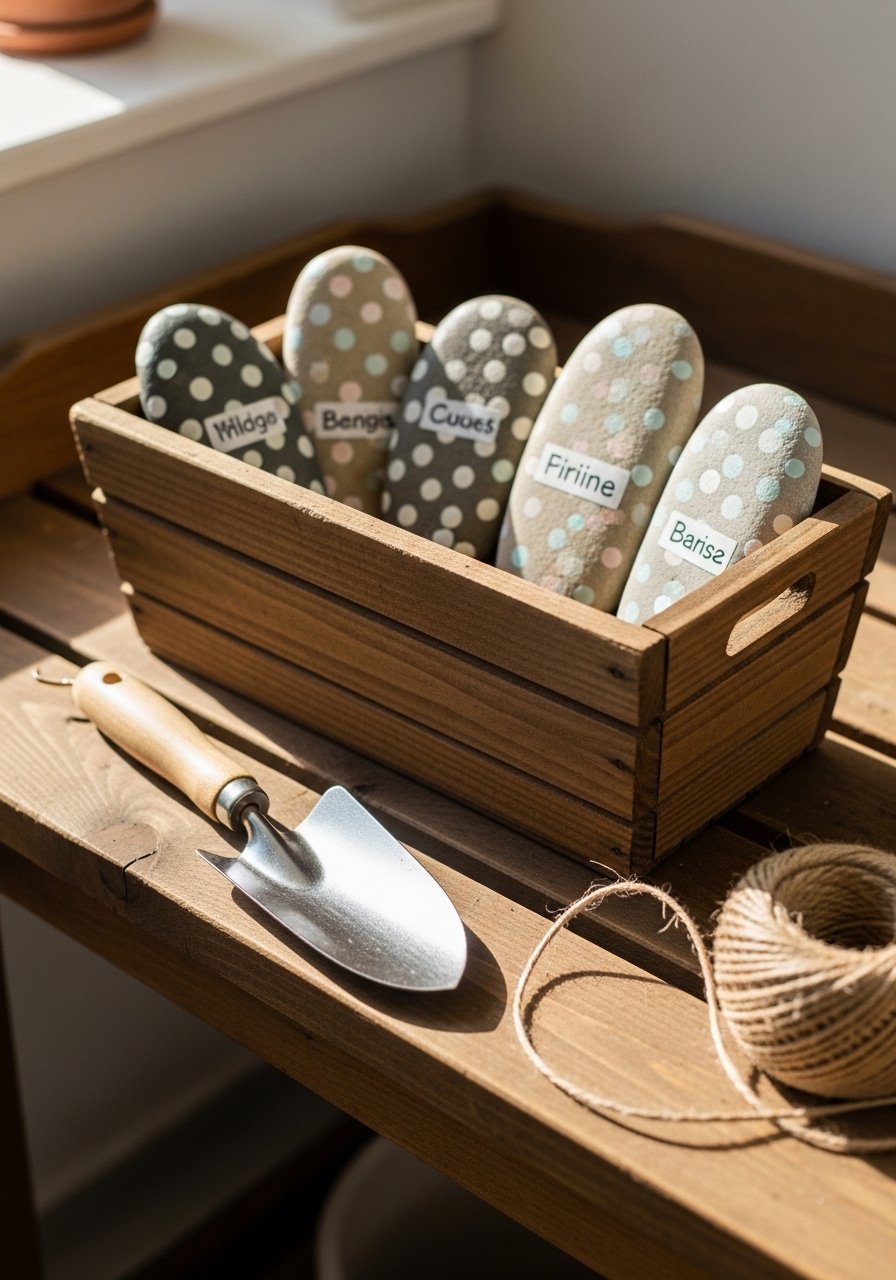
These playful polka dot garden markers add charm to potted herbs and small garden beds. The elongated flat stone shape gives enough space for plant names. Use outdoor-friendly sealer so your labels last through watering and sun. I like using a weatherproof clear spray sealer for durability.
Materials
- Flat river stones, 10–12 cm long (6 pieces)
- Acrylic outdoor paint (tubed), assorted pastels
- Medium round brush and fine liner brush
- Permanent paint pen (white or black, 1 mm)
- Outdoor clear spray sealer (UV-resistant)
- Paper towel and rubbing alcohol for prepping
- Painter’s tape (for clean edges if desired)
Instructions
- Clean stones; remove dirt with rubbing alcohol; dry 1 hour.
- Paint base color: one thin coat, dry 20–30 minutes, repeat for even coverage (2 coats).
- Use a small round brush or the end of a paintbrush handle to dot polka dots. Apply two coats for opacity, drying 10 minutes between coats.
- Once dots dry, write plant names with a permanent paint pen. Let ink set 15 minutes.
- Cure fully for 24 hours, then apply two light coats of UV outdoor spray sealer. Wait 15 minutes between coats. Allow 48 hours before placing in direct contact with soil.
- Troubleshooting: If paint chips, sand lightly with 220-grit sandpaper and repaint.
How to Display or Gift It
- Tie three markers together with twine and slip into a small kraft bag for a sweet gift.
- Push markers into potted herbs or use wire stands for larger beds.
- Keep unused markers in a plastic bin with a lid to protect the finish.
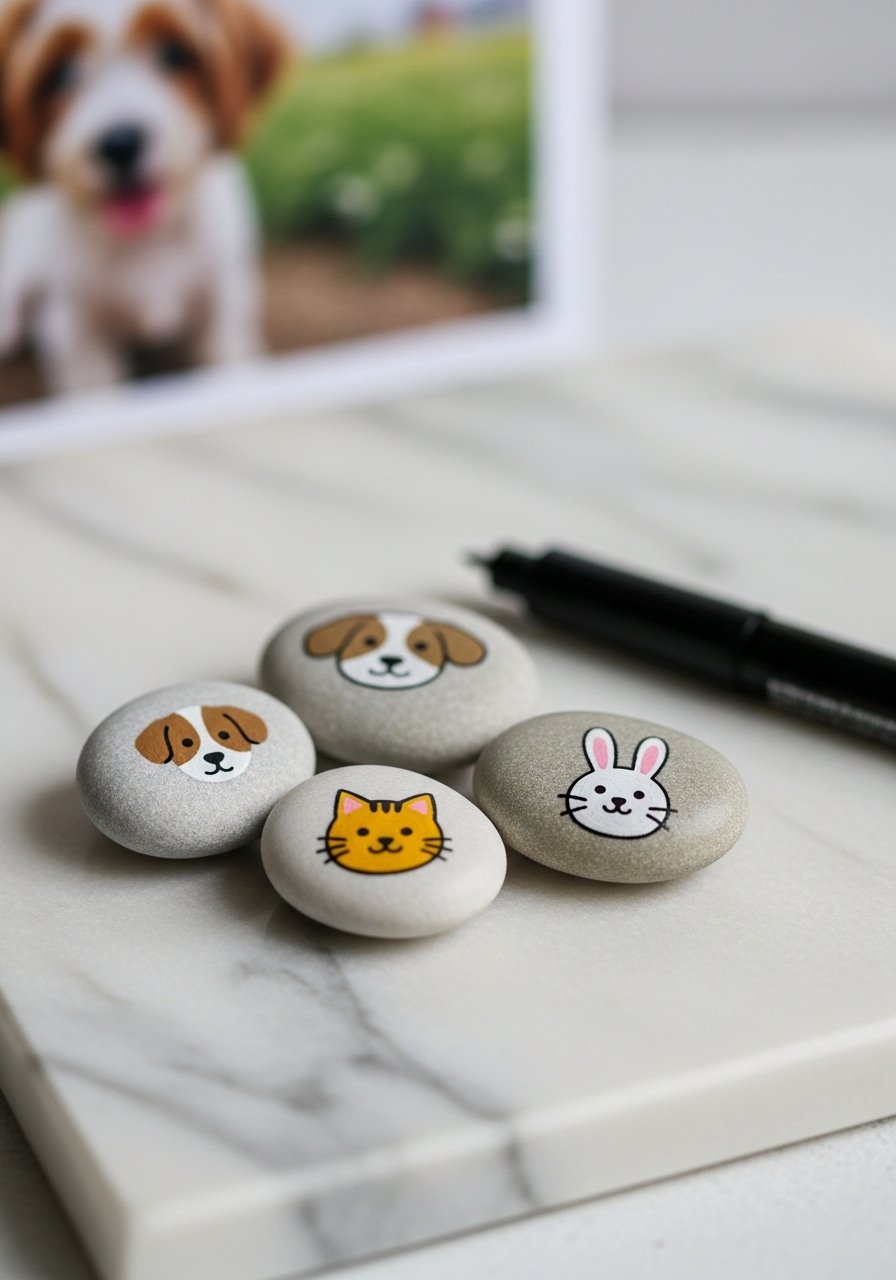
- Pet Portrait Pocket Stones
Turn a beloved pet into a pocket-sized portrait. These stones make thoughtful sympathy or birthday gifts. Work from a simple photo and simplify features into shapes—big eyes, little noses. A set of archival paint pens helps with precision and longevity.
Materials
- Smooth oval stones, 4–6 cm wide (3–6 stones)
- Acrylic paints: flesh tones, browns, black, white
- Fine-tip paint pens (0.5–1 mm)
- Ultrathin sable or synthetic detail brush
- Matte Mod Podge for sealing (brush-on)
- Small palette and water cup
- Soft tissue for blending
Instructions
- Clean stones; prime with one thin white acrylic coat. Dry 30–45 minutes.
- Lightly sketch pet’s face using pencil or very light paint.
- Block in base fur colors with thin layers; two coats usually suffice. Dry 20 minutes between coats.
- Add eyes and nose with a small detail brush; highlight with a dot of white for life.
- Use paint pens for whiskers and tiny fur strokes. Let ink cure 1 hour.
- Seal with a thin brushed coat of matte Mod Podge; dry 30 minutes between coats. Apply two coats total. Cure 24 hours.
How to Display or Gift It
- Tuck in a linen drawstring pouch with a small label featuring the pet’s name.
- Display on a tiny easel on a nightstand or shelf.
- For bulk orders, keep portraits in a padded craft organizer to prevent scuffs.
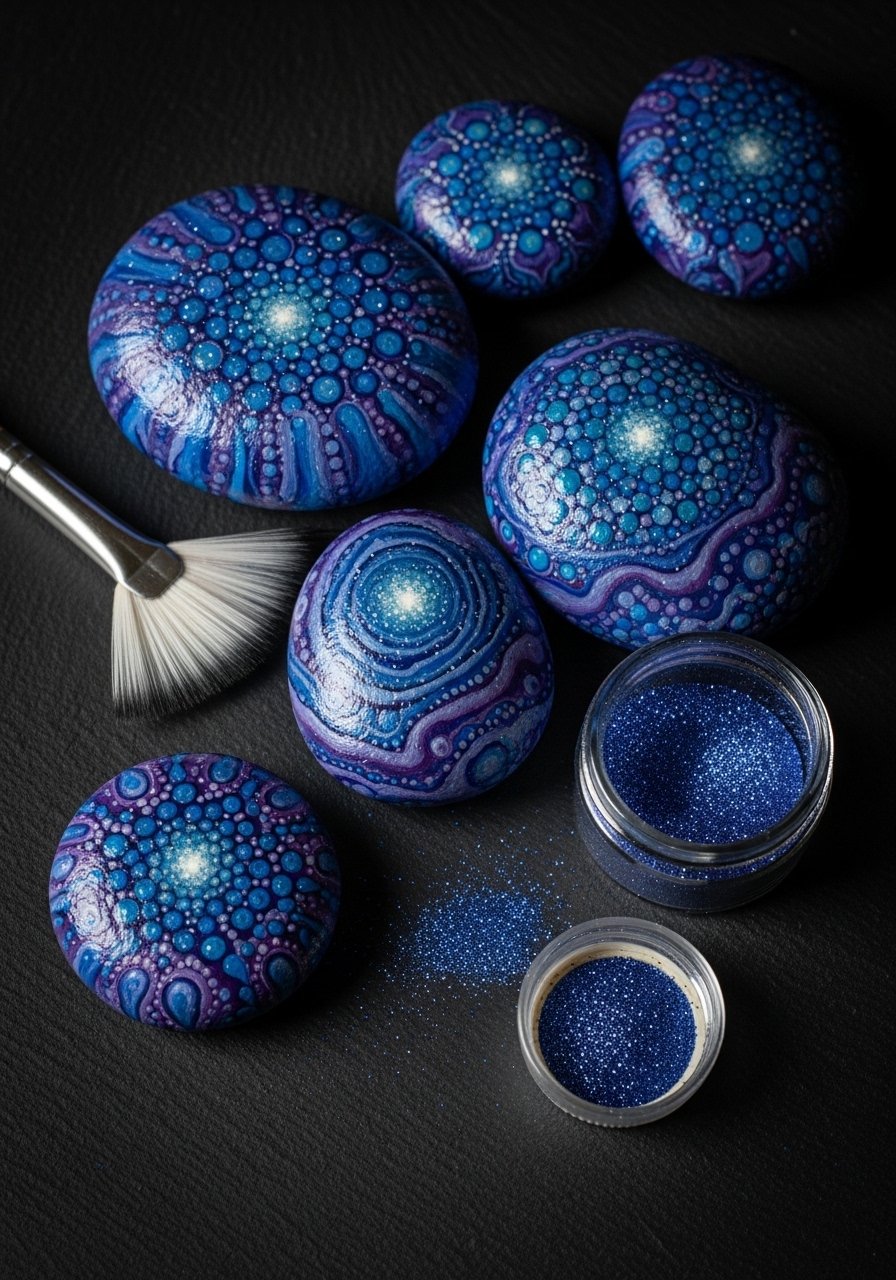
- Galaxy Galaxy — Night Sky Stones
Create cosmic swirls and starlit speckles with layered sponges and splatter techniques. This design yields depth and tiny shimmer. I reach for a cheap toothbrush or a mini fan brush when splattering star dots for a controlled spread.
Materials
- Smooth medium stones, 4–6 cm
- Acrylic paints: black, ultramarine blue, purple, white
- Cosmetic sponge pieces or foam pouncers
- Fan brush or old toothbrush for splatter
- Fine white paint pen for star details
- Optional: fine iridescent glaze or mica powder (small jar)
- Gloss varnish spray
Instructions
- Clean stones; paint a base coat of black. Dry 30 minutes.
- Dab layered blues and purples with a sponge to create nebula shapes. Work in thin layers; dry 10–15 minutes between layers.
- Mix a little white with water; flick onto stones with a toothbrush for star speckles. Practice on scrap first.
- Add a few larger stars and tiny constellations with a fine-tip paint pen.
- Optionally dust a tiny amount of mica powder into wet paint for shimmer. Let dry 1 hour.
- Seal with two coats of glossy varnish, 15 minutes drying between coats; cure 24 hours.
How to Display or Gift It
- Place in a shallow black tray as a tabletop vignette with a small battery tea light.
- Bundle three stones in a velvet bag for a "wish stone" gift.
- Store flat in a drawer with tissue between pieces.
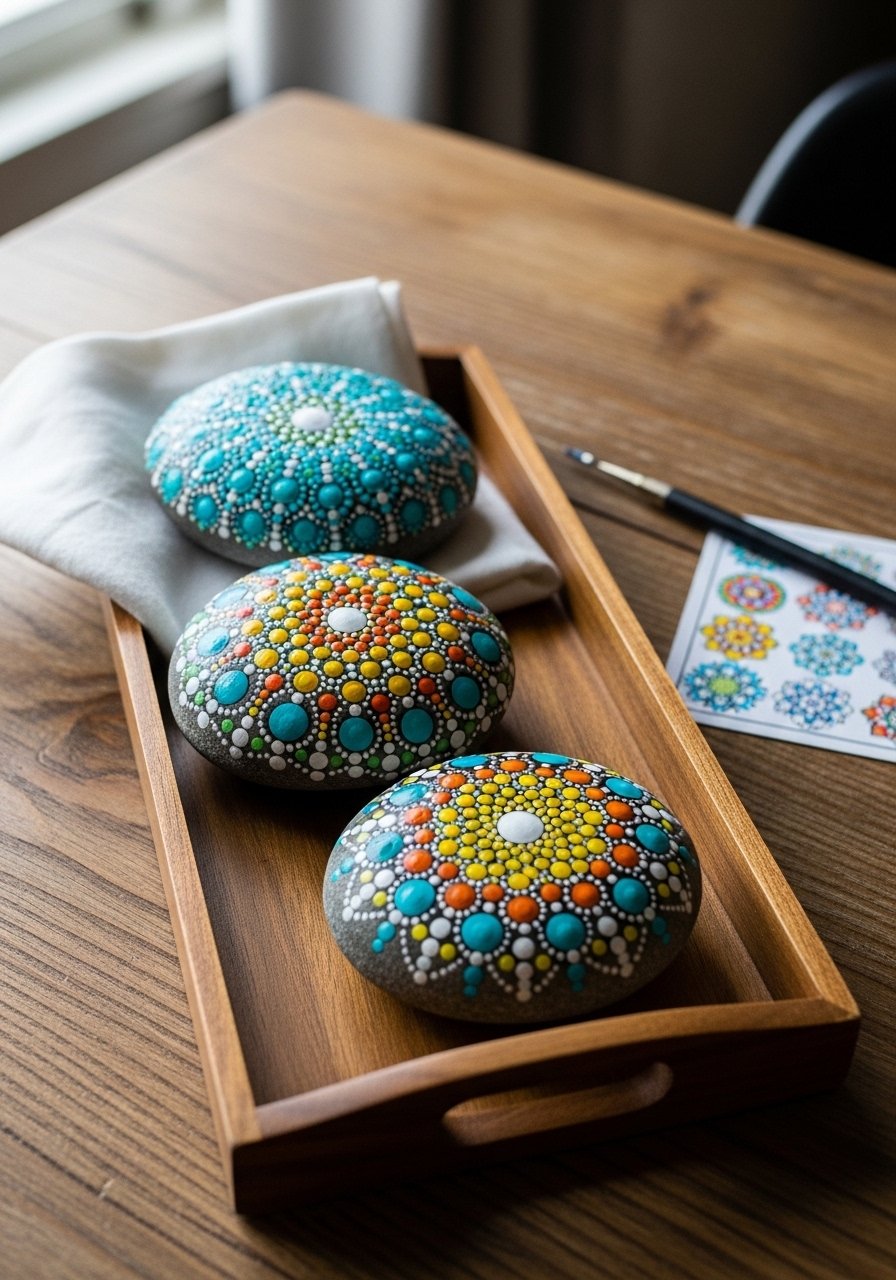
- Dot Mandala Centerpieces
Mandala dots are meditative and look elegant as tabletop accents. This technique uses dotting tools or the ends of paintbrushes for uniform circles. For precision, a dotting tool set is handy.
Materials
- Large river stones, 6–8 cm diameter (3–6)
- Acrylic paint set (varied colors)
- Dotting tool set (various sizes)
- Pencil and circular template (bottle cap)
- Matte sealer (brush or spray)
- Soft towel for staging
Instructions
- Clean stones; paint a solid base color; allow 1 hour drying.
- Mark center with pencil using circular template.
- Start dotting from center outward using progressively larger tools. Work symmetrically.
- Allow dots to dry 15 minutes between concentric layers to prevent smudging.
- Correct any mistakes with a toothpick dipped in base color.
- Seal with one coat of matte sealer; let cure 24 hours.
How to Display or Gift It
- Cluster three stones on a wooden tray with a small votive for a calming centerpiece.
- Wrap a single mandala stone in tissue and place in a small kraft box as a hostess gift.
- Store extras in a shallow craft drawer with dividers.
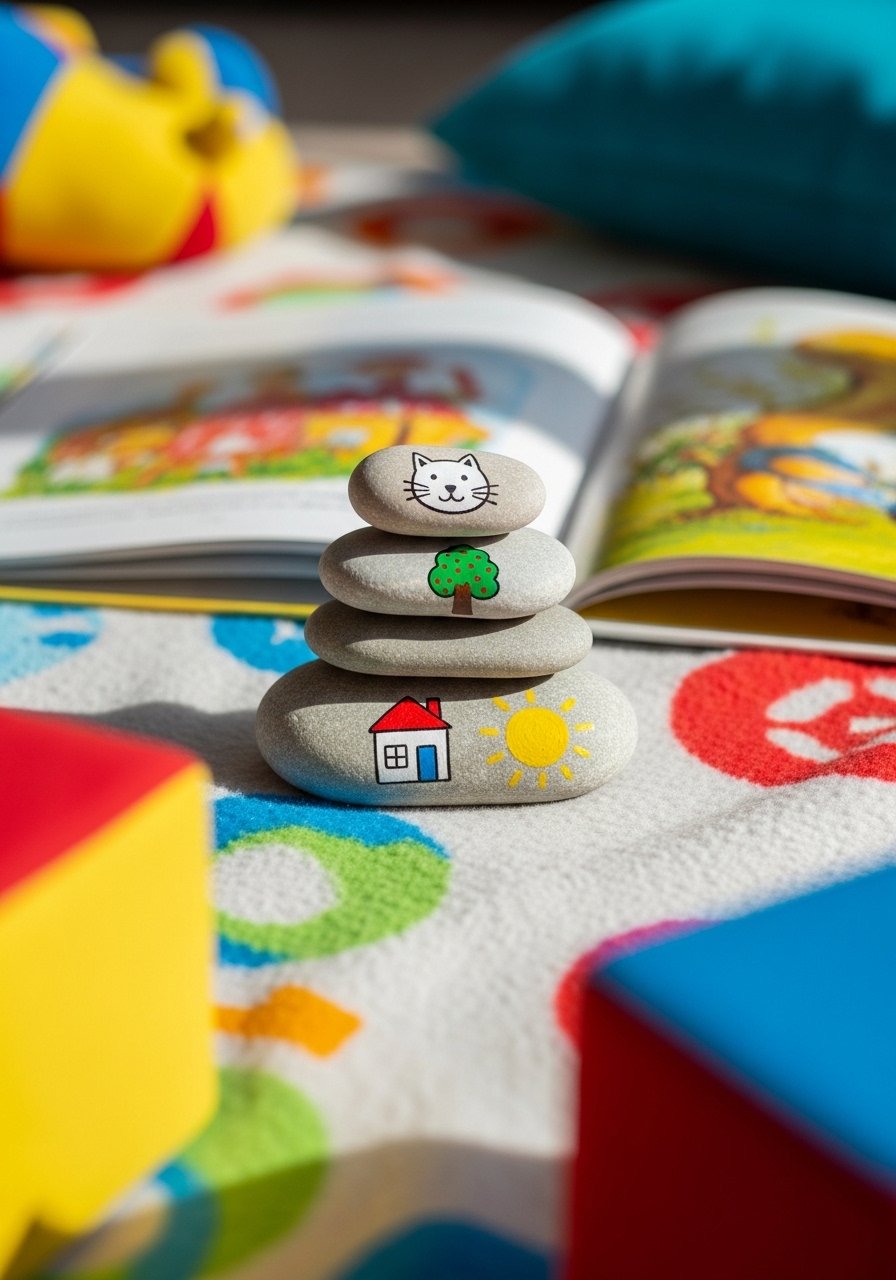
- Story Stones — Reading Prompts
Story stones spark imagination for kids—paint simple icons to prompt storytelling. Use bold colors and clear shapes so little fingers can play without fuss. I often keep a set of washable acrylic paints for kid projects.
Materials
- Flat smooth stones, 4–6 cm (10–20)
- Acrylic craft paints (bright primary colors)
- Medium and small round brushes
- Chalk or pencil for sketching
- Matte sealer (non-toxic)
- Small cloth bag for storage
Instructions
- Wash and dry stones thoroughly (1–2 hours).
- Paint a white base circle on each stone for icon contrast; dry 20 minutes.
- Sketch icons lightly in pencil; paint with bright colors. Two thin coats recommended; dry 15 minutes between coats.
- Touch up outlines with a fine-tip paint pen if desired.
- Seal with a child-safe matte sealer; cure overnight.
- Keep stones in a soft bag for easy storage; check for chips periodically.
How to Display or Gift It
- Store in a small drawstring cotton bag for storytime.
- Use them during reading sessions or as a speech therapy tool.
- Personalize a set with a child’s initials on one stone.
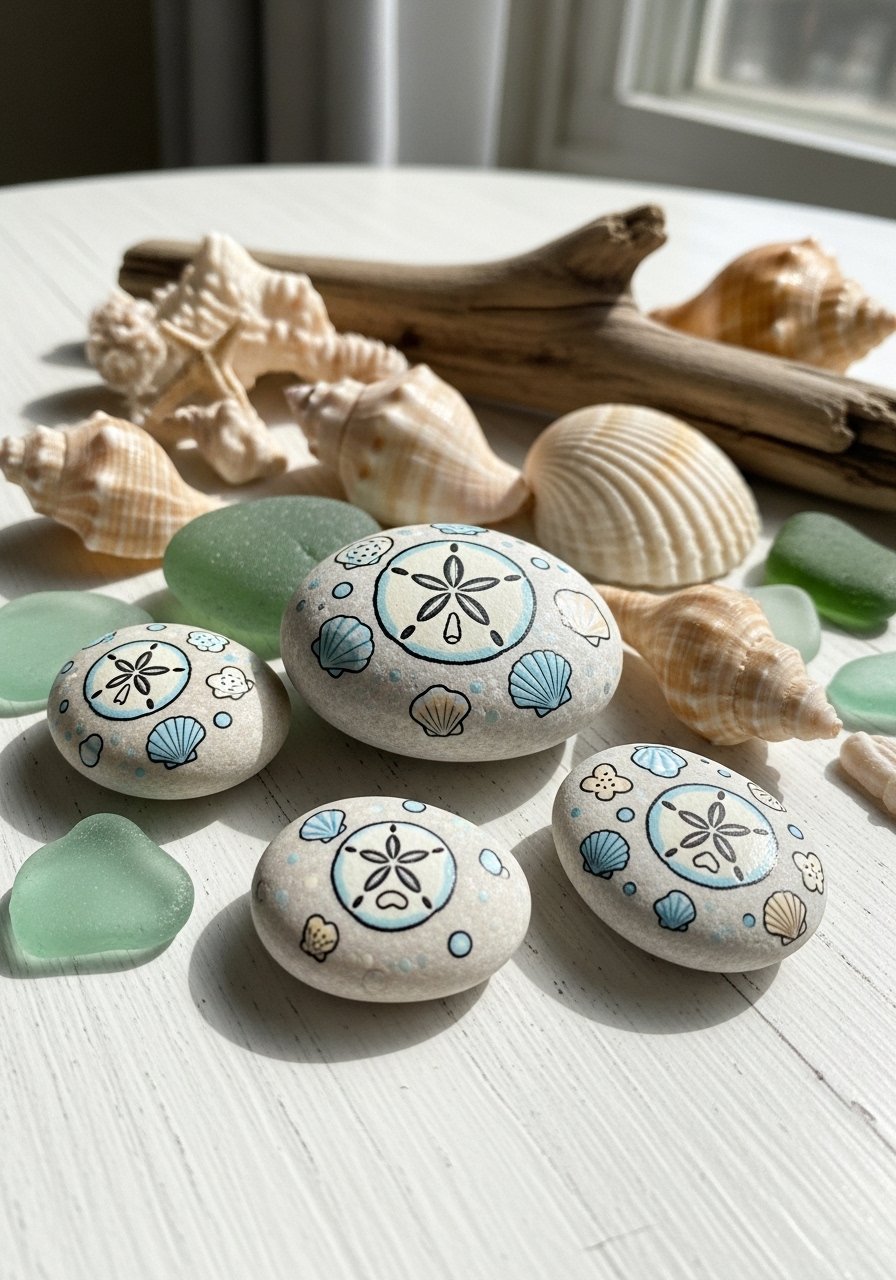
- Coastal Shell & Stone Painting Ideas (Seashell Motifs)
Bring the beach inside with seaside motifs on stones. Pastel washes and light sand textures evoke a coastal feel. For soft blending, a cosmetic sponge wedge works well to create sandy gradients.
Materials
- Smooth beach stones, 4–7 cm
- Acrylic paints: soft blues, beige, white
- Small round brush and fan brush
- Sponge for blending
- Fine sand texture medium (small jar) — optional
- Matte spray sealer (UV-protective)
- Glue for attaching tiny shells (E6000)
Instructions
- Clean stones; apply a thin base coat of soft blue or beige; dry 30 minutes.
- Use sponge to dab lighter tones for a sand-like gradient.
- Paint shell motifs freehand or trace with pencil first.
- Add texture with sand medium while paint is tacky; allow 1–2 hours to harden.
- For accent, glue a tiny real shell to one corner; let adhesive cure 24 hours.
- Seal with two light coats of matte UV sealer; cure 24–48 hours.
How to Display or Gift It
- Arrange in a shallow bowl with sand for a coastal centerpiece.
- Attach a small label and place in a kraft box wrapped in twine for summer gifts.
- Keep pieces in a box away from direct sun to prevent color fade.
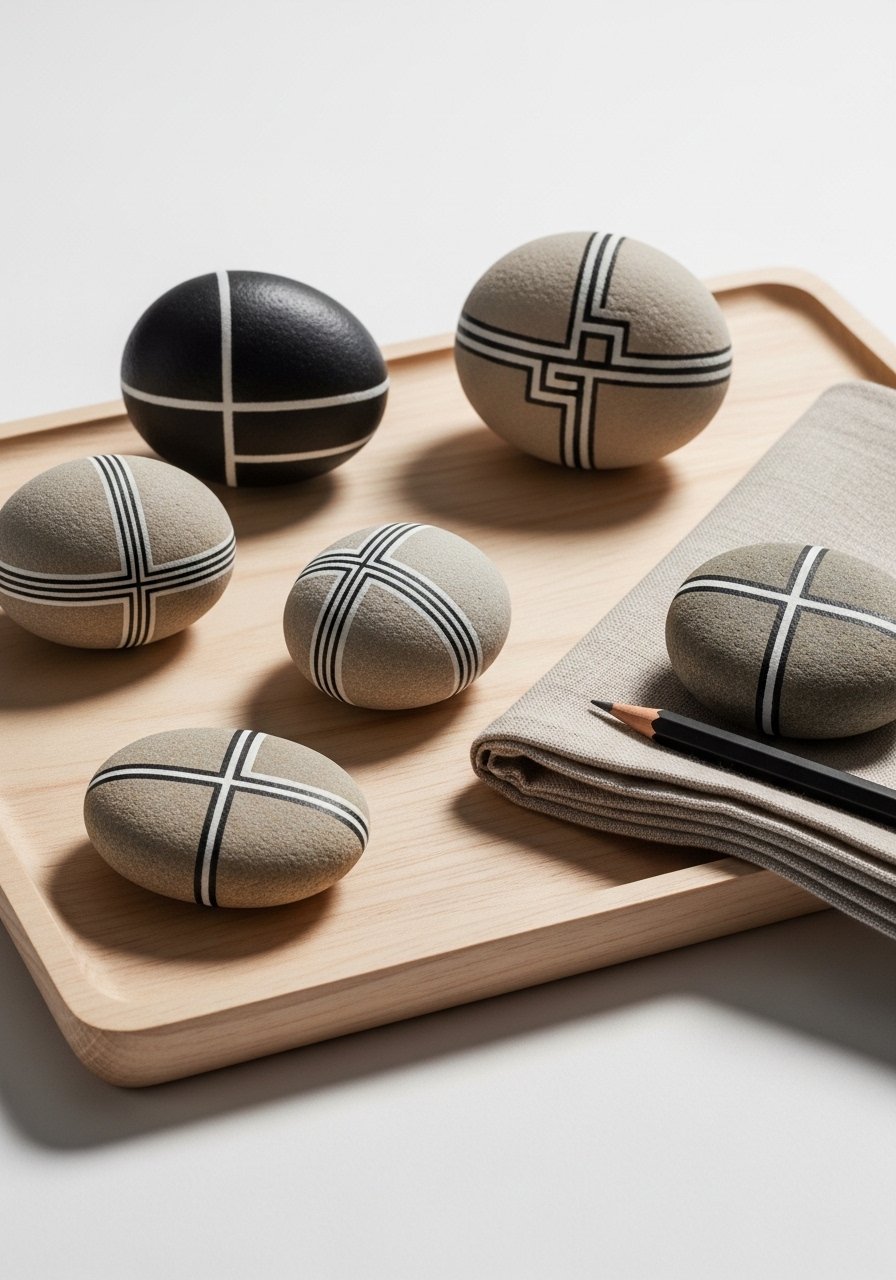
- Geometric Japandi Stones
These minimalist stones fit Japandi and modern interiors—neutral tones, crisp lines. Painter’s tape can help get razor-clean edges on larger stones. I use a precision craft knife and small scissors to cut tiny tape shapes.
Materials
- Smooth round stones, 3–6 cm (6–8)
- Acrylic paints: beige, off-white, black
- Fine liner brush and small flat brush
- Painter’s tape (1/8" and 1/4")
- Ruler or flexible measuring tape
- Matte varnish spray
Instructions
- Clean and base-coat stones with off-white; dry 30–45 minutes.
- Once base is dry, apply painter’s tape to mask geometric sections.
- Paint exposed areas with black or beige in two thin coats; dry 15 minutes between coats.
- Carefully remove tape while paint is still slightly tacky for clean edges.
- Touch up with a fine brush if needed.
- Seal with one coat of matte varnish; cure 24 hours.
How to Display or Gift It
- Display in a small ceramic dish on a console table.
- Bundle three stones with a linen ribbon for a calming office gift.
- Store flat in a slim craft case to avoid rubbing.
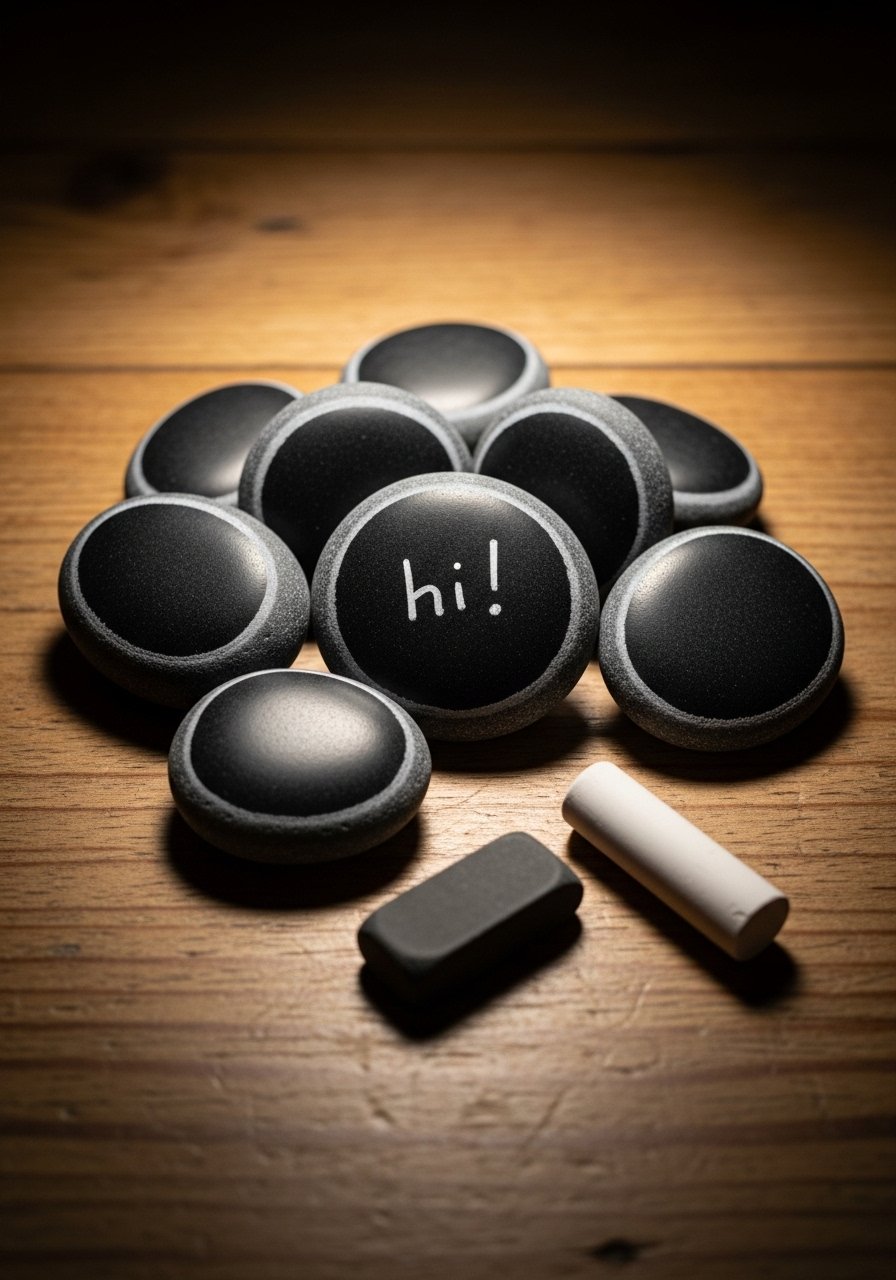
- Chalkboard Stones for Messages
Make reusable message stones by painting with chalkboard paint. They’re great paperweight notes or place cards. Use a small chalkboard paint jar for controlled brush-on application.
Materials
- Flat stones, 5–8 cm
- Chalkboard paint (brush-on), 2 oz
- Fine sandpaper (220 grit)
- White chalk or chalk markers
- Flat foam brush for smooth coats
- Clear spray sealer (optional, for long-term storage)
Instructions
- Sand stone faces lightly to give paint something to adhere to; wipe dust away.
- Apply two thin coats of chalkboard paint with foam brush; dry 30 minutes between coats.
- Cure paint 24 hours before writing.
- Prime surface by rubbing the side of a chalk piece over the board and erasing.
- Write messages with chalk; erase with a soft cloth. For permanent messages, use fine chalk markers.
- If storing, seal edges with matte spray to protect from moisture.
How to Display or Gift It
- Use as place cards by writing guests’ names at an event.
- Keep a bundle near the entryway for quick notes and reminders.
- Wrap sets in twine and tuck into kraft gift boxes.
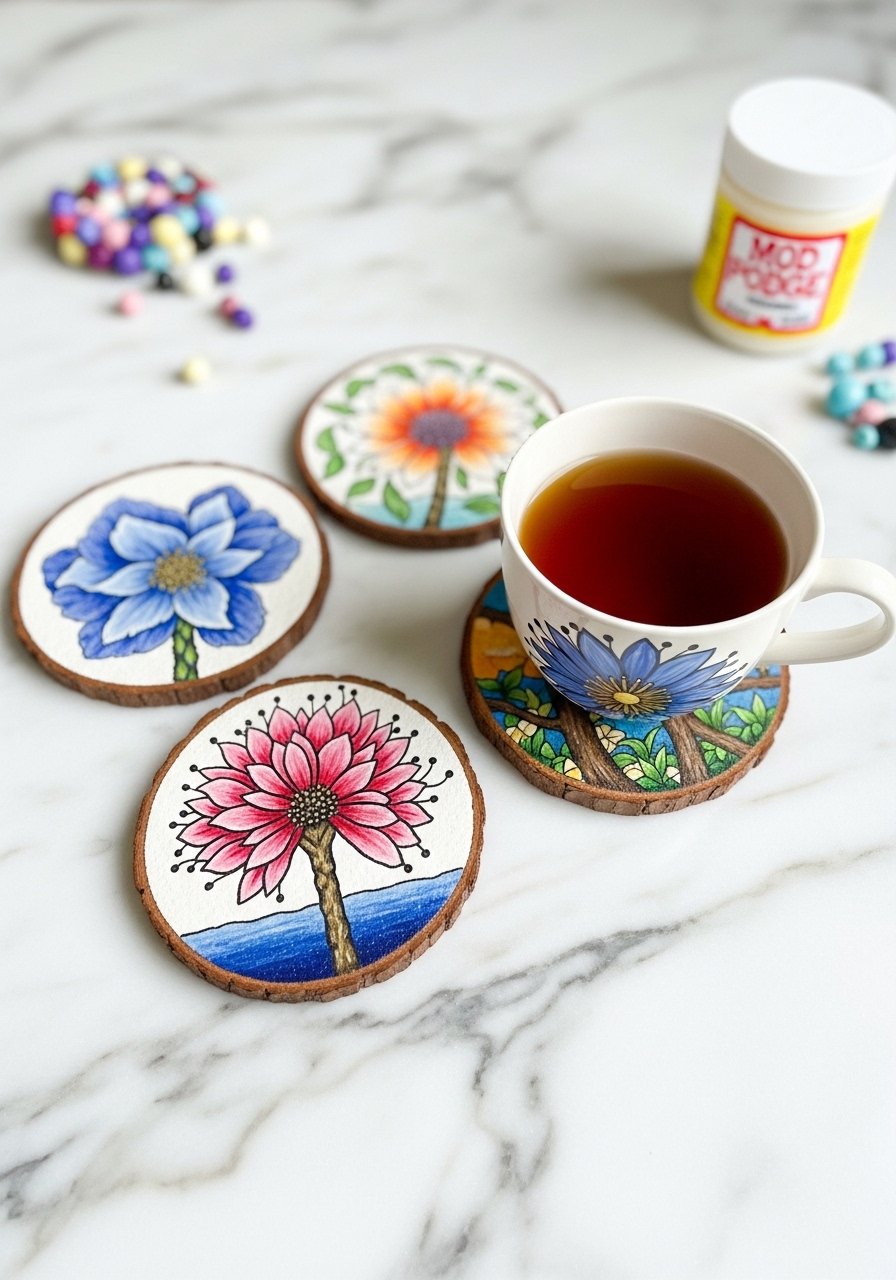
- Pebble Mandala Coasters
Turn thicker flat stones into coasters with sealed paint and felt backs. Protect surfaces by adding felt pads and a waterproof topcoat. A pack of self-adhesive felt pads makes the job quick.
Materials
- Thick flat stones, 8–10 cm diameter (4)
- Acrylic base and accent paints
- Fine brushes and dotting tools
- Waterproof epoxy or outdoor varnish (small kit)
- Self-adhesive felt pads (set of 16)
- Sandpaper (120 grit)
Instructions
- Sand and clean stone surfaces; remove dust.
- Paint designs; allow two coats for opacity. Dry 20 minutes between coats.
- Mix epoxy according to instructions; pour a thin, even coat over each coaster. Work in a dust-free area; let bubble-settle for 5 minutes, then gently run a heat gun for 3–5 seconds if needed.
- Cure epoxy per product—usually 24–72 hours for full hardness.
- Attach felt pads to the underside corners to protect tabletops.
- Test by placing a cup with cold liquid; if the surface beads water, it’s sealed properly.
How to Display or Gift It
- Stack tied with twine and tuck a small note beneath the bow.
- Keep coasters in a small tray near the coffee station.
- For events, personalize each coaster with guest initials.
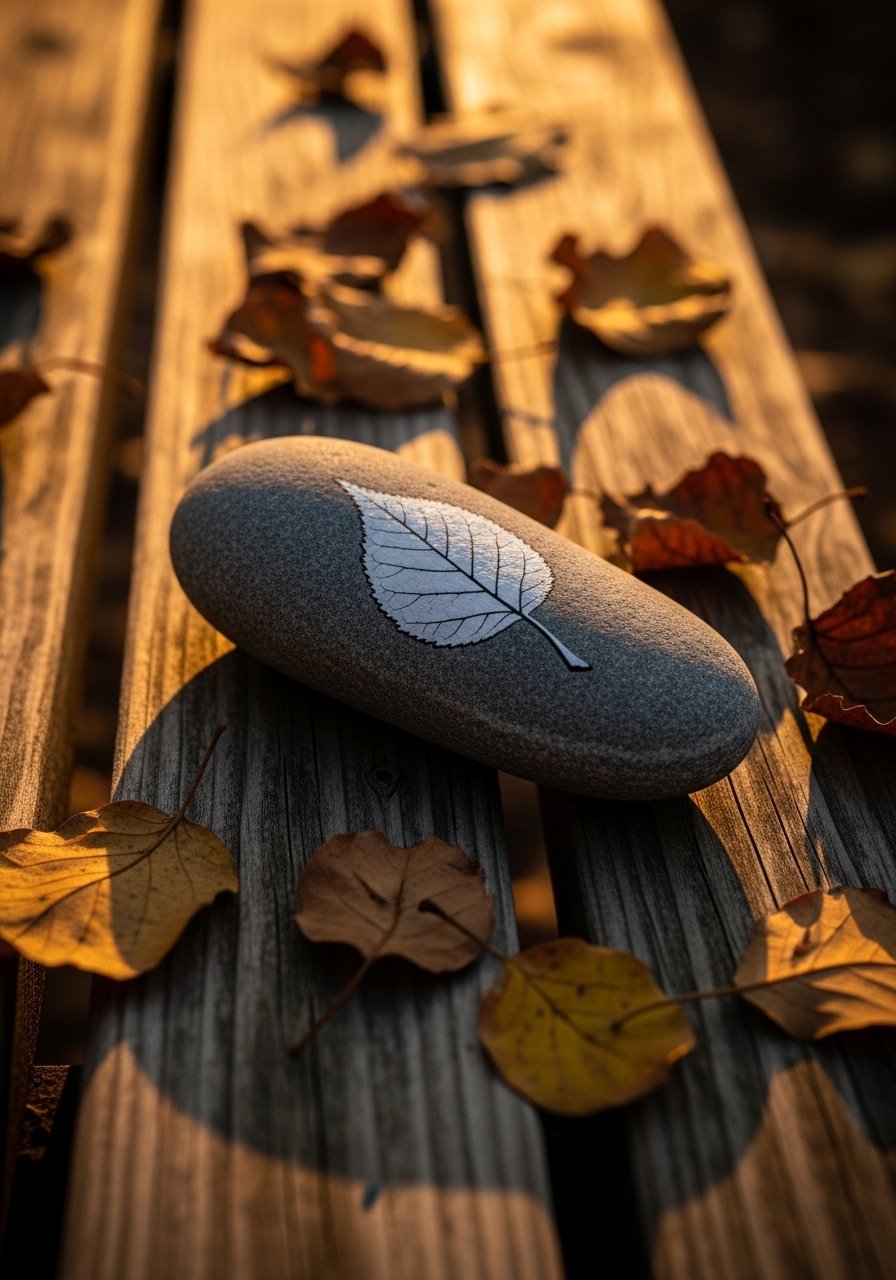
- Leaf Imprint Stone Art
Use actual leaves as stencils for crisp botanical silhouettes. This technique gives organic edges and looks cottagecore when finished in soft neutrals. A tiny foam roller helps press paint through the stencil evenly.
Materials
- Smooth, flat oval stones, 6–9 cm
- Real leaves or cut leaf stencils
- Acrylic paint (white and soft greens)
- Mini foam roller or sponge
- Low-tack spray adhesive (optional)
- Matte spray sealer
- Paper towel
Instructions
- Clean stones; paint a base coat in a muted tone; dry 30–45 minutes.
- Position leaf and lightly tack with spray adhesive or hold in place.
- Roll paint gently over leaf edges to create silhouette. Apply thin layers to avoid bleeding.
- Remove leaf and let paint dry 20–30 minutes.
- If desired, add veining with a fine brush.
- Seal with matte spray; cure 24 hours.
How to Display or Gift It
- Tuck into a small clay pot with succulents as a decorative label.
- Wrap with twine and a dried sprig for a natural gift presentation.
- Keep extras in a lined box; separate with tissue to protect finishes.
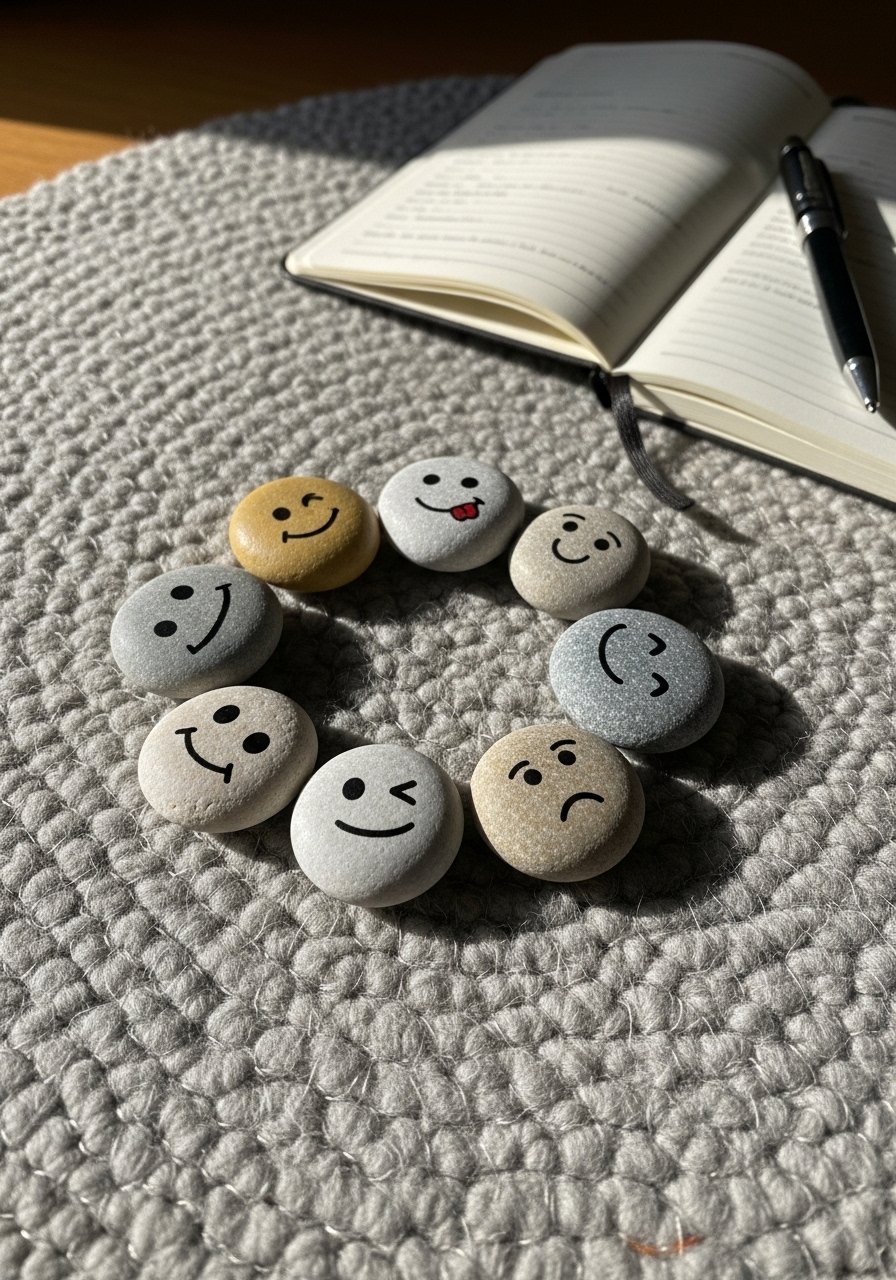
- Emotion Stones—Mindfulness Set
Emotion stones help kids name feelings—each stone painted with a different face and labeled. Use non-toxic paints and a soft matte finish. A set of washable paint pens works great for expressive faces.
Materials
- Small rounded stones, 3–4 cm (7)
- Non-toxic acrylic paints
- Washable paint pens (various colors)
- Small cloth bag or box for storage
- Matte sealer (child-safe)
- Index card to label emotions
Instructions
- Clean and dry stones thoroughly.
- Paint a light base color to help faces pop; dry 20–30 minutes.
- Draw expressive faces with paint pens—happy, sad, angry, surprised, calm, shy, excited.
- Allow ink to cure 30 minutes.
- Seal with a child-safe matte sealer; cure 24 hours.
- Use during check-ins; store in a small bag when not in use.
How to Display or Gift It
- Present as a family tool for kids to point to during check-ins.
- Keep in a small craft storage box to avoid losing pieces.
- Great as classroom aids or therapy tools.
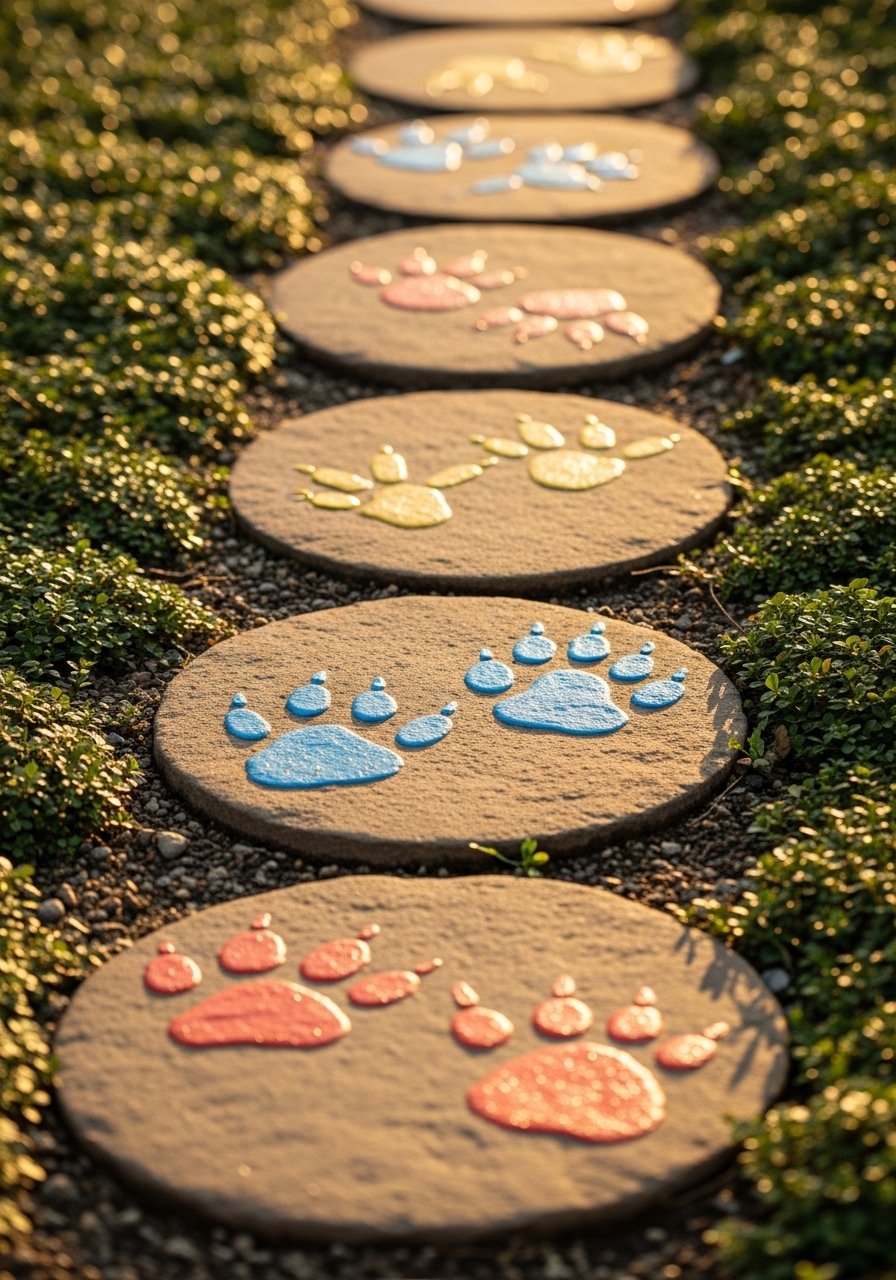
- Animal Footprint Trail (Outdoor Rock Path)
Create a whimsical walkway by painting animal tracks and placing stones along a garden path. Use outdoor acrylics and a UV sealer for weather resistance. A garden trowel set helps you place stones securely.
Materials
- Flat landscaping stones, 10–15 cm (8–12)
- Outdoor acrylic paints
- Small round brush and liner brush
- UV outdoor sealer spray
- Garden sand or gravel for leveling
- Rubber mallet and shovel for placement
Instructions
- Clean stones; paint track designs with two thin coats; dry 20 minutes between coats.
- Let paint cure 48 hours before sealing.
- Spray 2 light coats of UV outdoor sealer; dry 15 minutes between coats.
- Prepare path: level shallow holes with sand/gravel.
- Set stones into prepared bed; tap gently with a rubber mallet to level.
- Check placement after rain and re-seal annually as needed.
How to Display or Gift It
- Use as a playful border for a kid’s garden plot.
- Gift a single decorated stone as a stepping starter for friends with gardens.
- Store spare stones under a covered porch until ready to install.
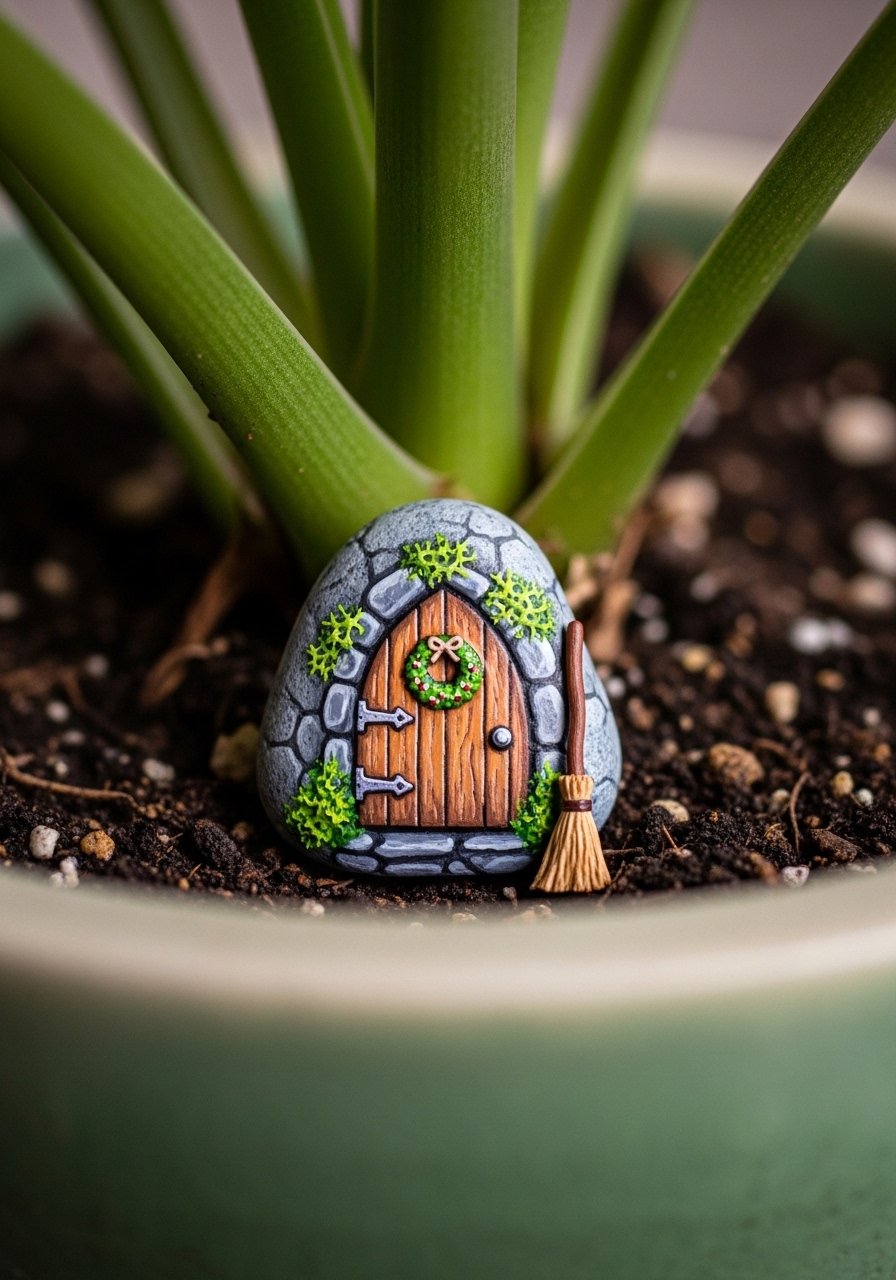
- Fairy Garden Stone Painting Ideas (Mini Doors & Windows)
Tiny doors and windows on stones create a fairy village perfect for potted plants. Add moss and tiny beads for scale. For tiny details, a ultra-fine paint pen set is a lifesaver.
Materials
- Small flat stones, 4–6 cm
- Acrylic paints: wood tones, greens, accent colors
- Ultra-fine paint pen or detail brush
- Small craft moss, tiny beads, and twine
- E6000 glue for attaching embellishments
- Matte sealer
Instructions
- Base-coat stone in a neutral color; dry 30 minutes.
- Sketch door outline; paint in two thin coats for solid coverage.
- Add tiny hardware dots with an ultra-fine pen and a highlight for depth.
- Glue a small moss tuft or a bead "knob" to the door edge; cure 24 hours.
- Seal with matte sealer; cure overnight.
- Place at the base of planters or tuck into moss gardens.
How to Display or Gift It
- Pop into a terrarium or small potted plant to create a fairy nook.
- Wrap a set in tissue and place them in a small wooden box for gifting.
- Keep extra moss and beads in a small bead organizer for future projects.
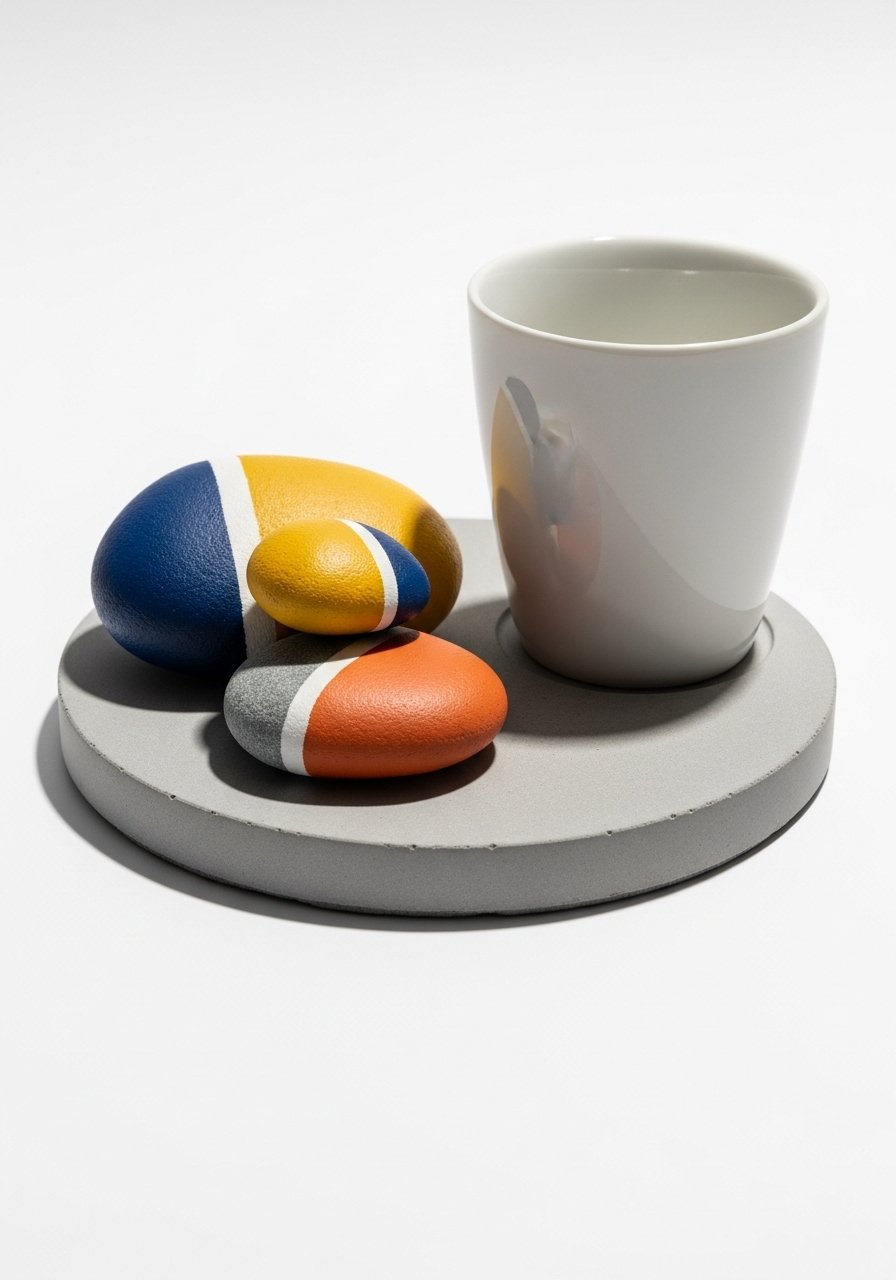
- Color-Blocked Modern Accents
Color blocking brings a modern graphic punch to stones. Sharp edges and contrasting hues work well in living rooms or offices. Use painter’s tape and a small metal ruler to get perfect lines.
Materials
- Smooth medium stones, 5–7 cm (3–6)
- Acrylic paints in three contrasting colors
- Painter’s tape (1/8” and 1/4” widths)
- Metal ruler or straight edge
- Flat foam brush for base coats
- Matte varnish spray
Instructions
- Base coat stones in the lightest color; dry 30–45 minutes.
- Apply painter’s tape to mark off blocks; press edges firmly.
- Paint blocked sections with contrasting colors; two coats may be needed. Dry 15 minutes between coats.
- Remove tape gently while paint is still slightly tacky to prevent peeling.
- Touch up edges with a detail brush if necessary.
- Seal with matte varnish; cure 24 hours.
How to Display or Gift It
- Group on a concrete tray as shelf decor.
- Pair with neutral textiles in Japandi or minimalist rooms.
- Store flat in a shallow drawer to protect edges.
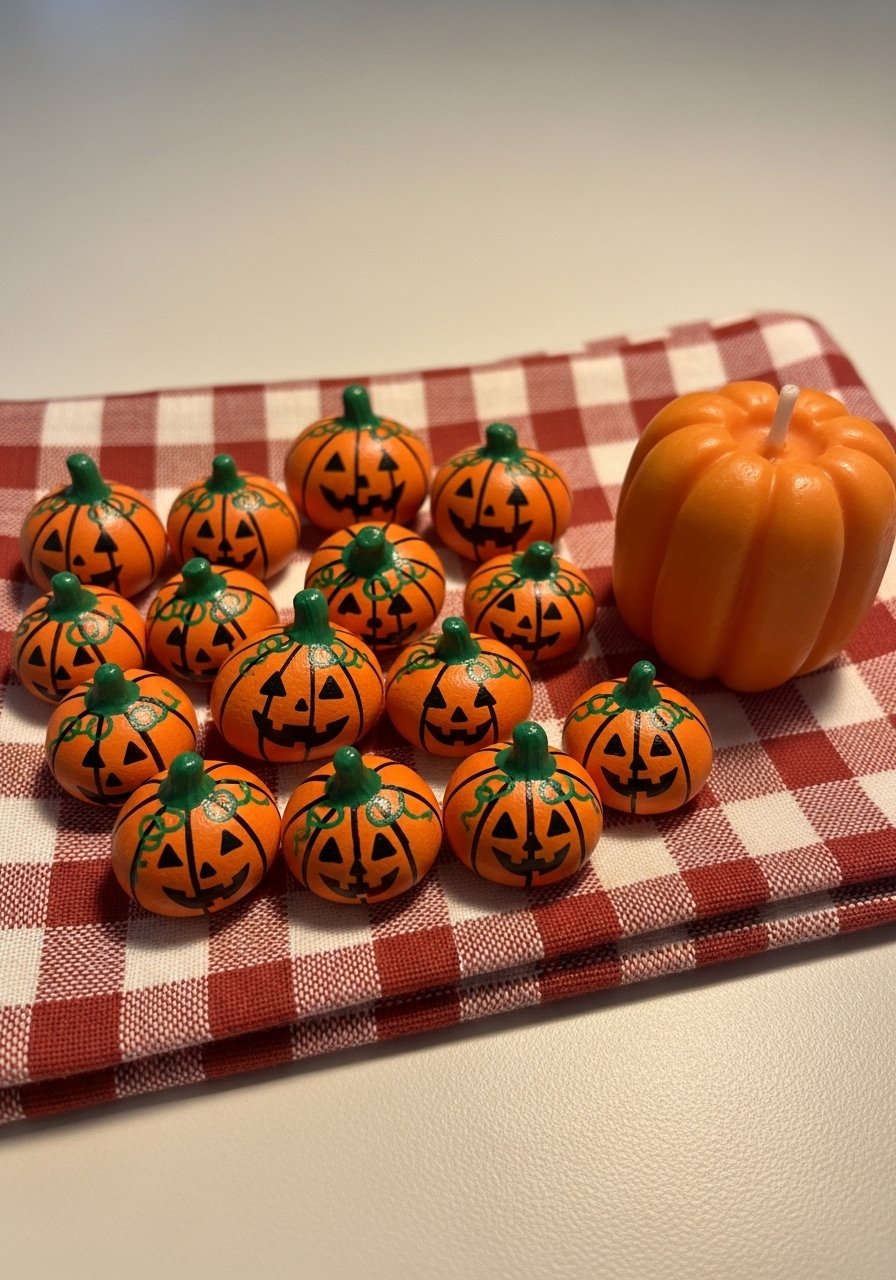
- Seasonal Holiday Stones — Pumpkin Set
Celebrate fall with painted pumpkins—use textured brush strokes for a ribbed look. These are quick, kid-friendly projects. For tiny stem details, a detail brush set helps.
Materials
- Small rounded stones, 3–5 cm (6–8)
- Acrylic paints: orange, green, brown, black
- Small detail brush and medium round brush
- Pencil for sketching faces
- Gloss or matte sealer (your preference)
- Small burlap or twine for bundle display
Instructions
- Clean stones; paint base orange in two thin coats; dry 15–20 minutes between coats.
- Add vertical rib strokes with a slightly darker orange for texture.
- Paint stems in green and add small brown highlights.
- Draw faces with a fine-tip black paint pen; allow ink to cure 30 minutes.
- Seal with two thin coats of sealer; allow 24 hours cure.
- Tie a small bundle of pumpkins together with twine for a tabletop accent.
How to Display or Gift It
- Cluster in a small wooden crate or ceramic bowl for fall decor.
- Wrap sets in kraft paper and tie with twine for seasonal gifts.
- Keep extras in a labeled storage box for quick holiday decorating.
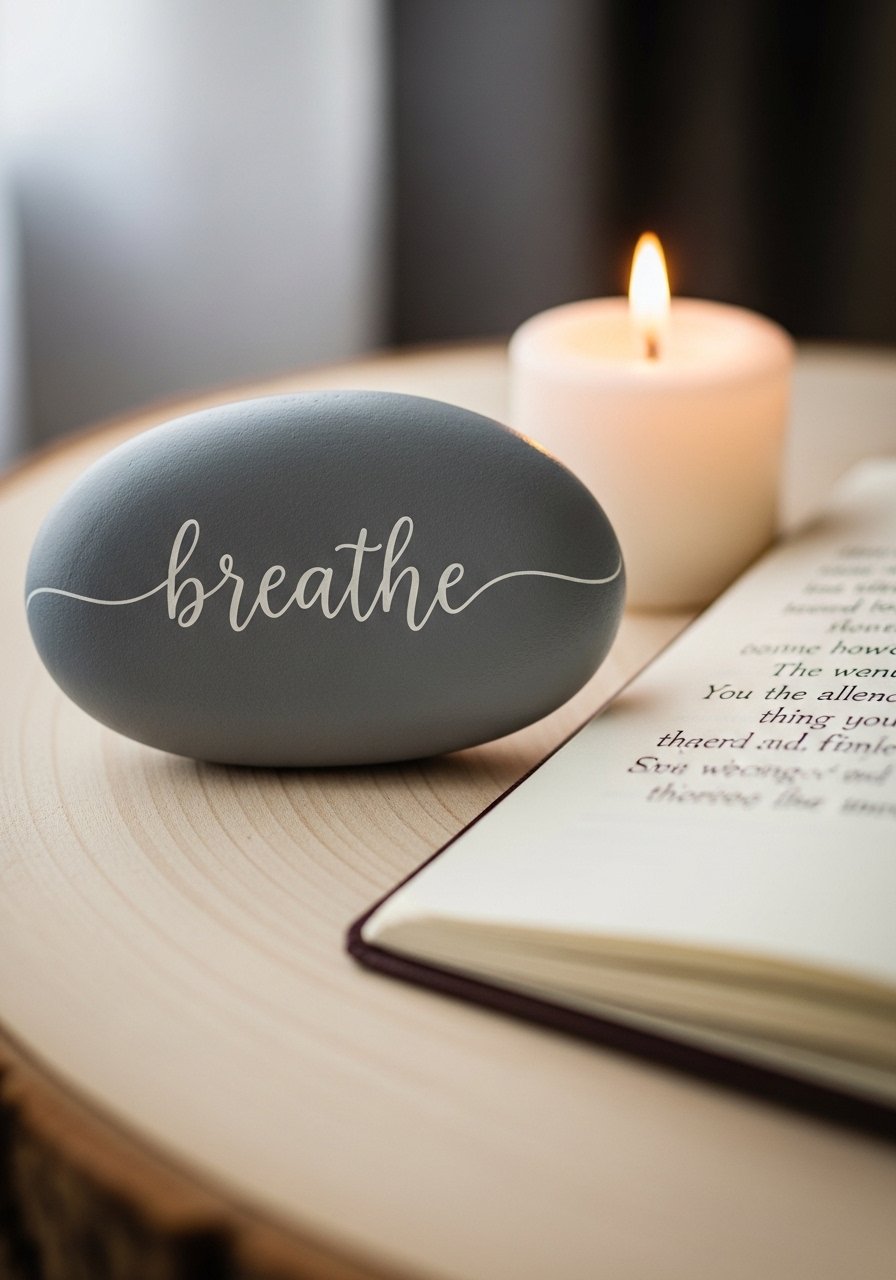
- Inspirational Quote Stones
Write short inspirational words in calligraphy-style pens on stones for bedside reminders. A set of brush-tip calligraphy markers makes lettering simple.
Materials
- Flat stones, 6–8 cm (5–10)
- Chalky paint or soft matte acrylic base
- Brush-tip calligraphy markers (black/white)
- Pencil for guidelines
- Matte spray sealer
- Small ribbon or elastic to keep sets together
Instructions
- Paint a soft base color; dry fully 30–45 minutes.
- Lightly pencil a guideline for lettering spacing.
- Write inspiring words with brush-tip markers; practice on paper first.
- Let ink dry 15 minutes; correct smudges with a small brush dipped in base paint.
- Seal with two light coats of matte spray; cure 24 hours.
- Bundle sets tied with ribbon as bedside gifts.
How to Display or Gift It
- Place a single stone on a nightstand or desk.
- Wrap three together and include a handwritten note for a friend.
- Store spare stones in a small fabric pouch to prevent scratching.
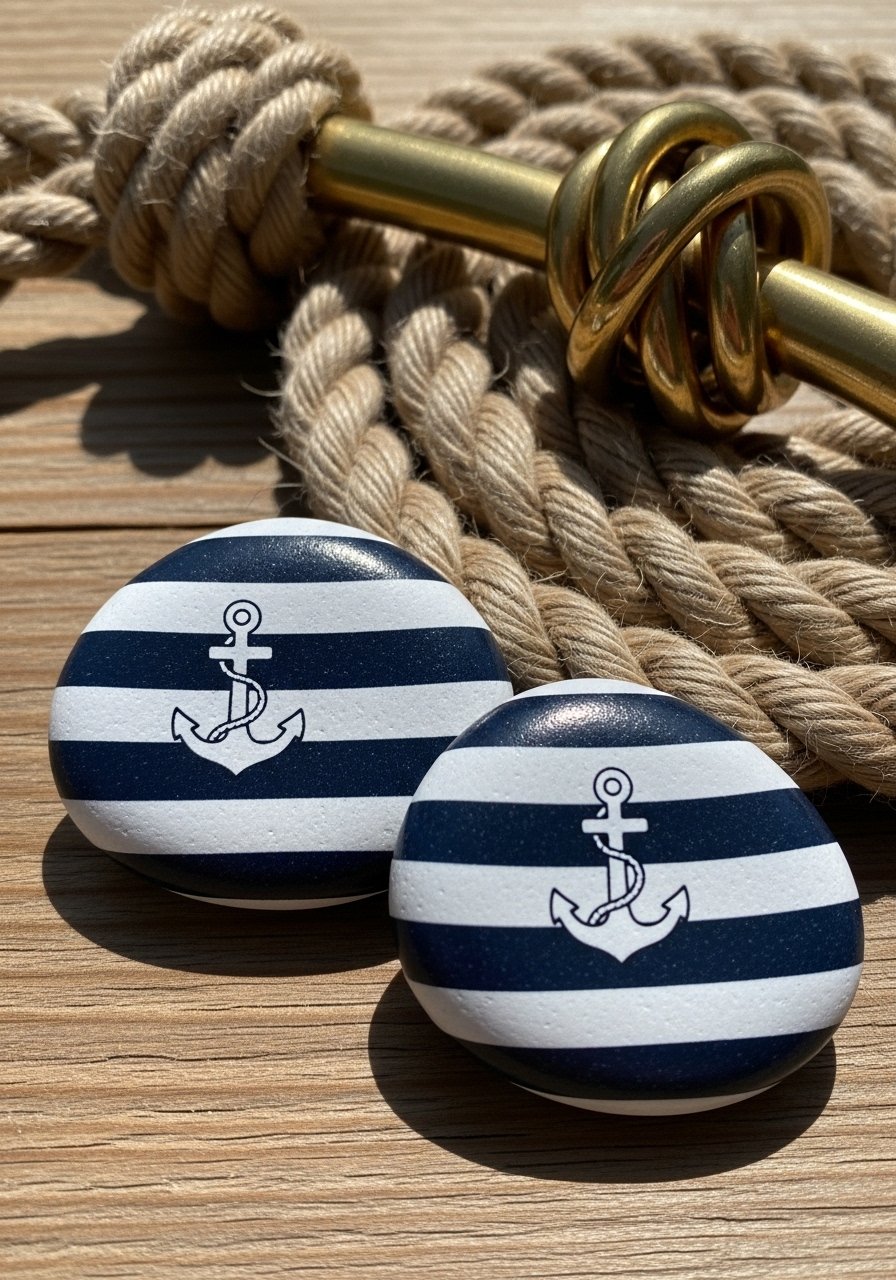
- Nautical Anchor & Stripe Stones
Stripes and anchors give a classic nautical vibe that’s great in beach houses. Painter’s tape ensures crisp stripes. A small roll of marine-grade painter’s tape holds up to humid conditions.
Materials
- Medium rounded stones, 6–8 cm (4–6)
- Navy and white acrylic paint
- Painter’s tape
- Fine brush for anchor details
- Gloss varnish for a polished look
- Twine for nautical accents
Instructions
- Base-coat stones white; dry 30 minutes.
- Apply painter’s tape for stripes; paint navy sections. Two thin coats for opacity.
- Remove tape carefully and retouch edges if needed.
- Paint small anchors with a fine brush; allow ink to cure.
- Seal with glossy varnish; cure 24–48 hours.
- Tie a small piece of nautical twine around a single stone for display.
How to Display or Gift It
- Stack in a small wooden crate with natural rope for a shelf vignette.
- Pair with driftwood or a simple glass jar of sand.
- Wrap in blue tissue and place in a small gift bag for guest favors.
- Painted Petal Rock Necklace Pendants
Make wearable art by drilling tiny holes and turning stones into pendants. Use a mini drill and a bit designed for stone or tile. I recommend a compact rotary tool kit for drilling and finishing.
Materials

- Smooth flat pebble pendants, 2–3 cm
- Rotary tool with diamond drill bit (mini)
- Acrylic paints for design
- Leather cord, 18 inches per necklace
- Small bead accents (optional)
- Two-part epoxy glue (for reinforcing hole edges)
Instructions
- Mark pendant hole at top; drill slowly with water to cool bit (work over a towel).
- Paint designs and allow full cure 24 hours.
- Apply a tiny bead of epoxy around hole inside to reinforce; let cure per product (24 hours).
- Thread leather cord and add bead accents; knot securely.
- Seal painted surfaces with matte sealer.
- Wear carefully—avoid soaking in water.
How to Display or Gift It
- Present on a small card with care instructions.
- Store in a jewelry box with soft compartments.
- For group gifts, attach a tiny tag with recipient’s initial.
- Zen Stacked Pebbles (Painted Balance Stones)
Painted stacked stones create calming desk sculptures. Use thin metallic accents for a luxe look. Apply gold leafing paint with a precision brush or pen. A micro detail brush set is useful.
Materials

- Stacking stones: sizes 2–3 cm, 3–5 cm, 5–8 cm
- Acrylic paints: neutrals and metallic gold
- Micro detail brushes
- Clear matte sealer
- Museum putty for balancing (small amount)
- Soft cloth for buffing
Instructions
- Clean stones; paint each stone a complementary tone; dry 30–45 minutes.
- Add small details like a single dot or thin gold band with a micro brush.
- Allow paint to cure 24 hours.
- Seal each stone with matte sealer; cure 24 hours.
- Use a tiny dab of museum putty between stones to stabilize stacks.
- Place on desk or meditation altar; do not shake or move stacked sculptures roughly.
How to Display or Gift It
- Group in a shallow tray with a small candle for a calming corner.
- Gift as a mindfulness token with a brief note on using them for breathing exercises.
- Store separated in a small divider box when transporting.
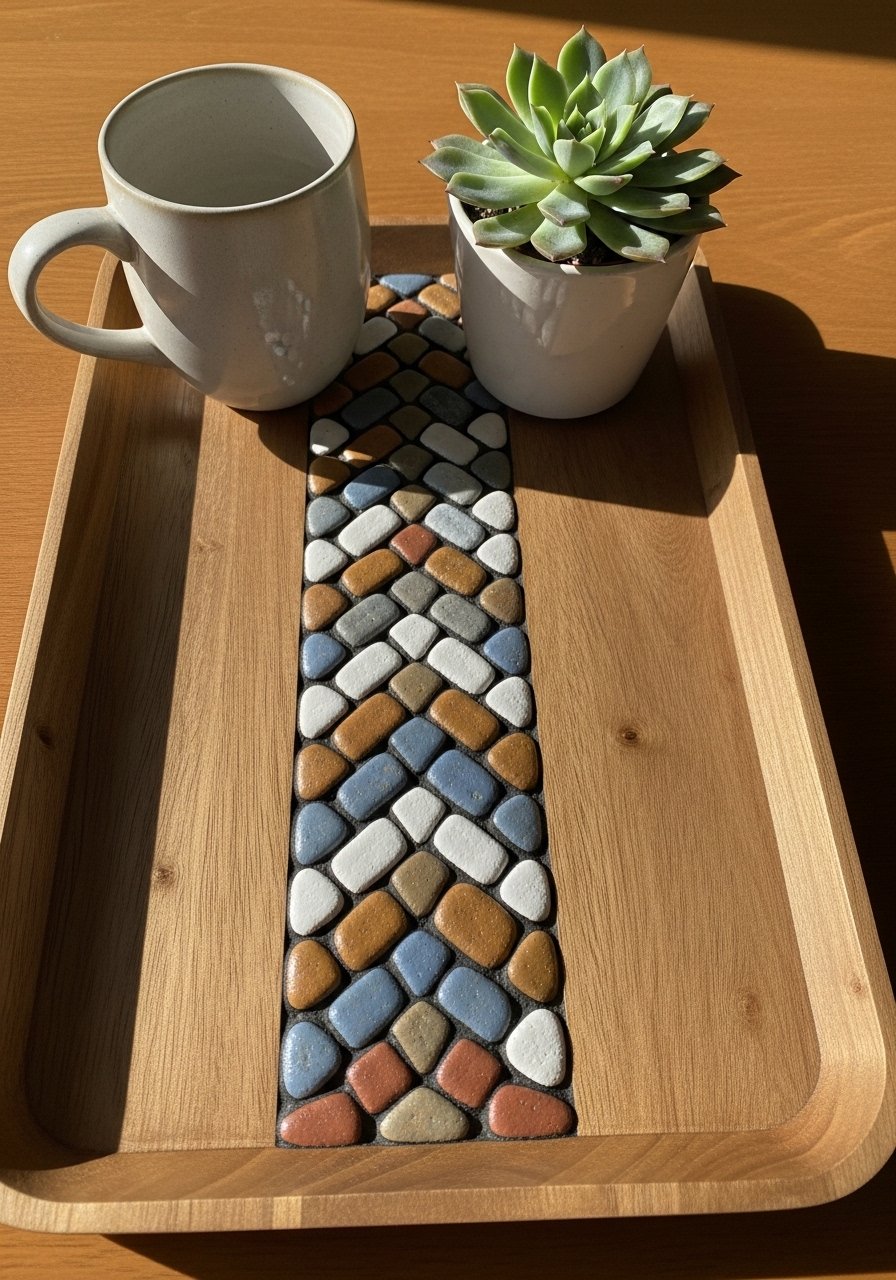
- Mosaic Pebble Tray Accents
Create a mosaic effect using small painted pebbles glued to a wooden tray base. Seal thoroughly to protect from drink spills. A small artist glue gun works for quick adhesion; for heavy use, use epoxy.
Materials
- Small pebbles, 1–3 cm
- Acrylic paints in multiple colors
- Wooden tray (inner base prepped)
- Mini hot glue gun or epoxy
- Grout alternative (non-sanded grout or caulk) for filling gaps
- Clear epoxy resin for protective finish
Instructions
- Paint pebbles in desired color palette; allow 24 hours to cure.
- Plan layout on tray base; glue pebbles in place with mini glue gun or epoxy, working left to right.
- Fill gaps with grout alternative; allow to set per product instructions.
- Mix and pour clear epoxy over the entire tray surface for a smooth, wipeable finish. Cure 24–72 hours depending on resin.
- Trim any raised edges and buff lightly with microfiber cloth.
- Avoid placing very hot items directly on the epoxy surface.
How to Display or Gift It
- Use as a decorative tray for perfumes or as a coffee tray.
- Wrap with cellophane and a ribbon for a special housewarming gift.
- Store flat and avoid stacking heavy items on top.
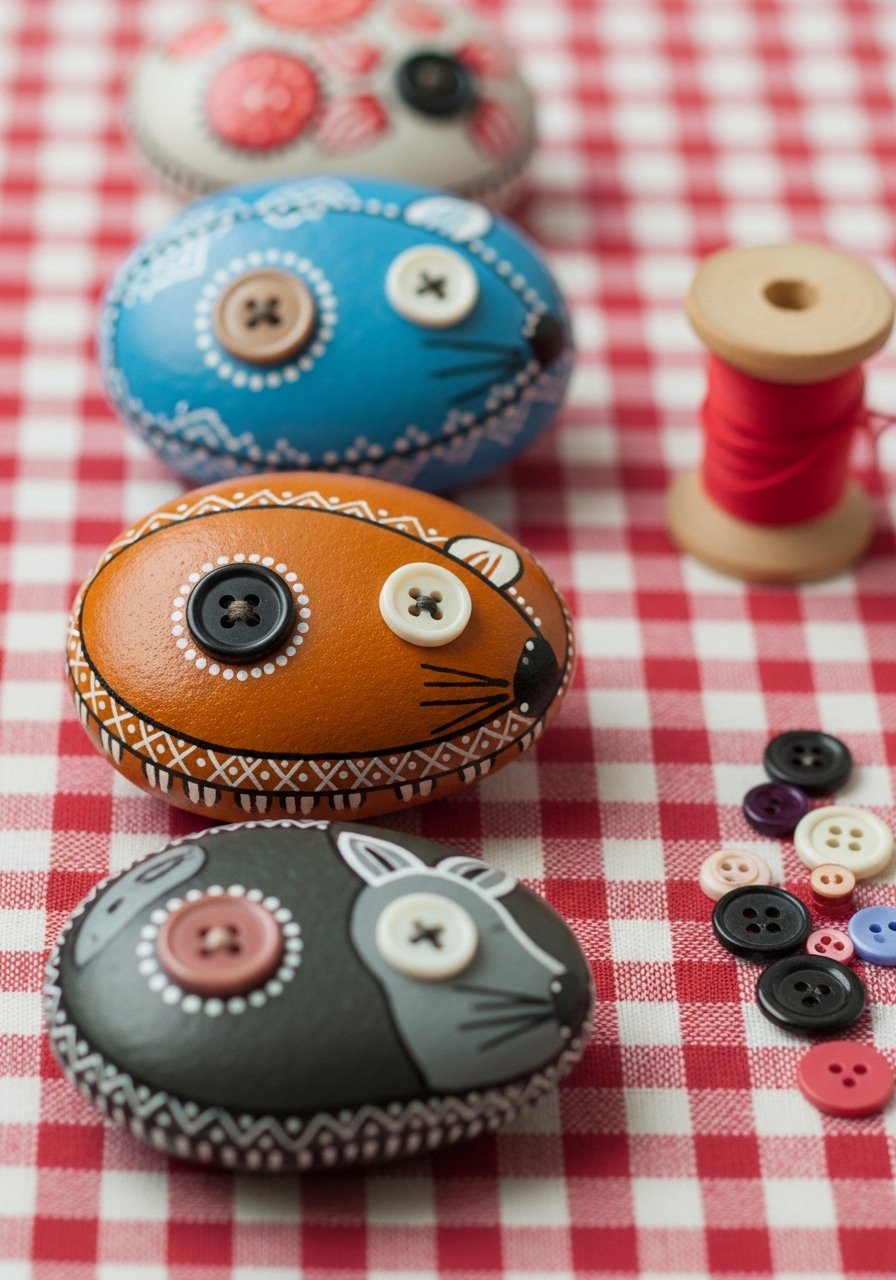
- Button Eyes — Folk-Art Critters
Create whimsical critters by painting faces and adding button-like painted eyes. Faux stitching painted around edges adds a folk-art touch. Use a set of acrylic craft paints with good coverage.
Materials
- Round stones, 4–6 cm (6–10)
- Acrylic paints (various colors)
- Fine liner brush and dotting tool
- Tiny beads or glued buttons (optional)
- Matte sealer
- Toothpick for tiny highlights
Instructions
- Paint base colors; allow 30 minutes dry time between coats.
- Sketch facial features lightly and paint with a fine brush.
- Add dot eyes with a dotting tool; glue on tiny beads for dimensional eyes if desired.
- Paint faux stitches around edge with a thin liner brush.
- Seal with matte sealer; cure 24 hours.
- Play with patterns—polka dots, stripes—to create family sets.
How to Display or Gift It
- Place on a child’s bookshelf as playful decor.
- Wrap in tissue and tuck into a small lunchbox for a surprise gift.
- Keep sets in a shallow drawer separated with felt squares.
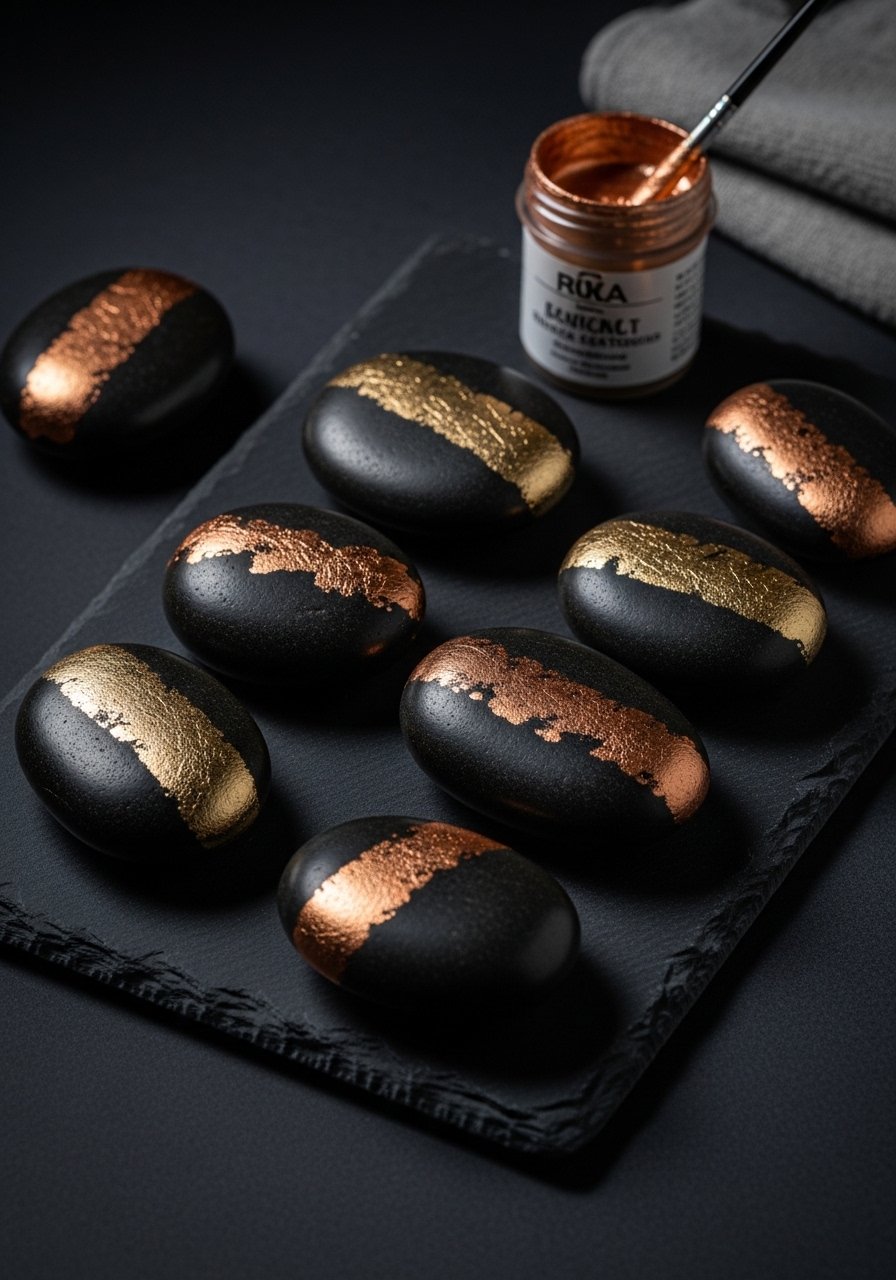
- Metallic Leaf Accent Stones
Add luxurious highlights with metallic paints or leafing pens. Subtle strokes catch the light and pair well with earthy interiors. A metallic leafing pen gives clean tiny lines.
Materials
- Medium stones, 5–7 cm (4–6)
- Dark base acrylic paint (black or charcoal)
- Metallic leafing pen or metallic acrylic paint
- Small dry brush for feathering metallics
- Matte sealer and optional gloss topcoat on accents
- Soft lint-free cloth
Instructions
- Base coat stones in charcoal; dry 30–45 minutes.
- Apply metallic accents with a leafing pen—thin veins, bands, or flecks.
- Feather edges with a dry brush to soften if desired.
- Seal body with matte sealer; dab a tiny gloss on metallics if you want them to pop.
- Cure 24 hours before handling extensively.
- Avoid rough handling to keep metallics from rubbing off.
How to Display or Gift It
- Cluster on a console table with a small sculptural bowl.
- Use as luxe paperweights or mantel accents.
- Store with tissue in a small jewelry-style box.
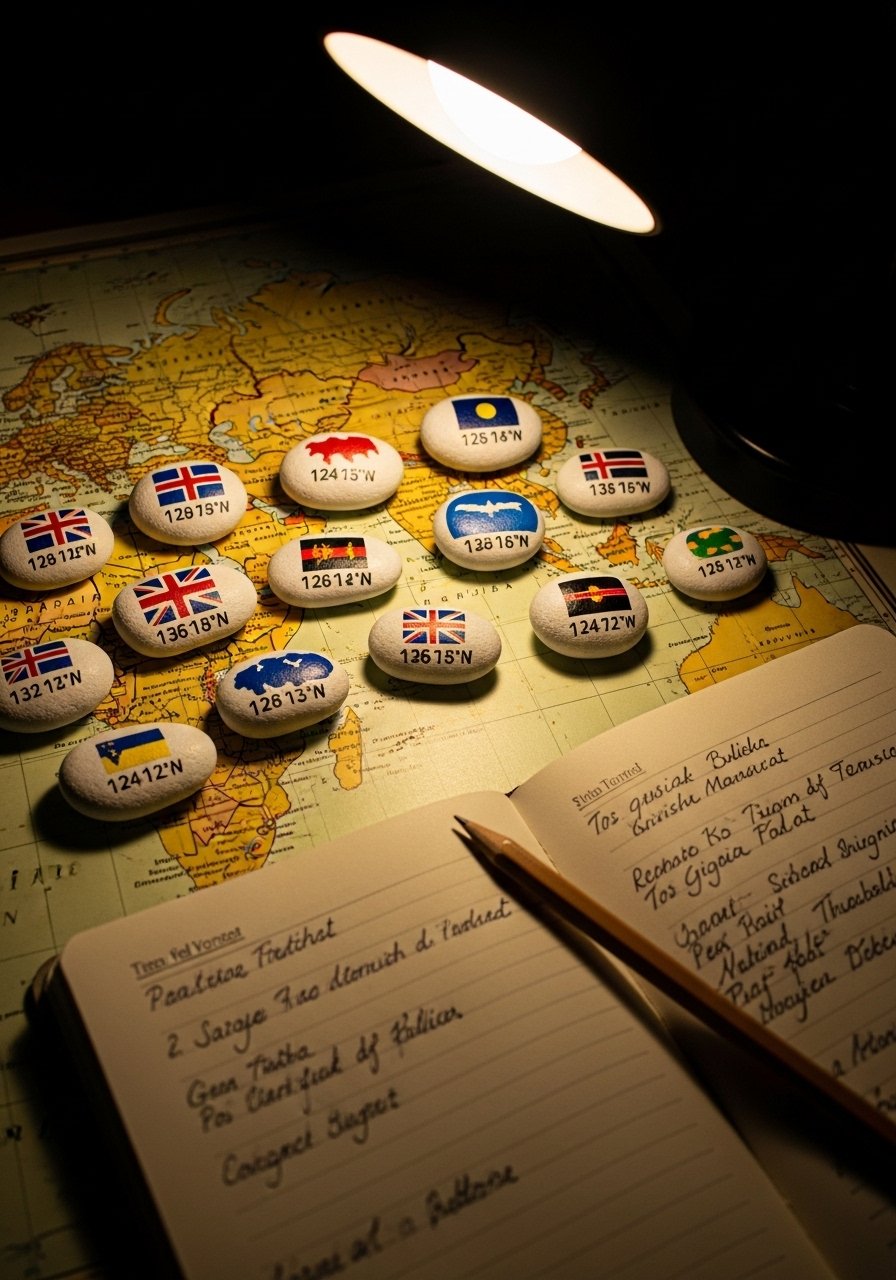
- Painted Map Stones — Travel Tokens
Celebrate favorite places by painting country shapes or coordinates. These make unique travel mementos. A small set of precision brushes helps with tiny maps.
Materials
- Flat stones, 4–6 cm (6–12)
- Acrylic paints (neutral base + accent colors)
- Precision brushes and fine-tip paint pen
- Pencil and printed map reference
- Matte sealer
- Small keepsake box
Instructions
- Paint base color; allow to dry 30 minutes.
- Lightly sketch country silhouette or coordinates using reference.
- Paint silhouette carefully; two thin coats recommended. Dry between coats.
- Use a fine paint pen for coordinates and small lettering.
- Seal with matte sealer; cure 24 hours.
- Store in a small keepsake box with a note about each place.
How to Display or Gift It
- Present as a set corresponding to travel memories.
- Tuck into a scrapbook or travel journal as a token.
- Store in a small wooden keepsake box with labels.
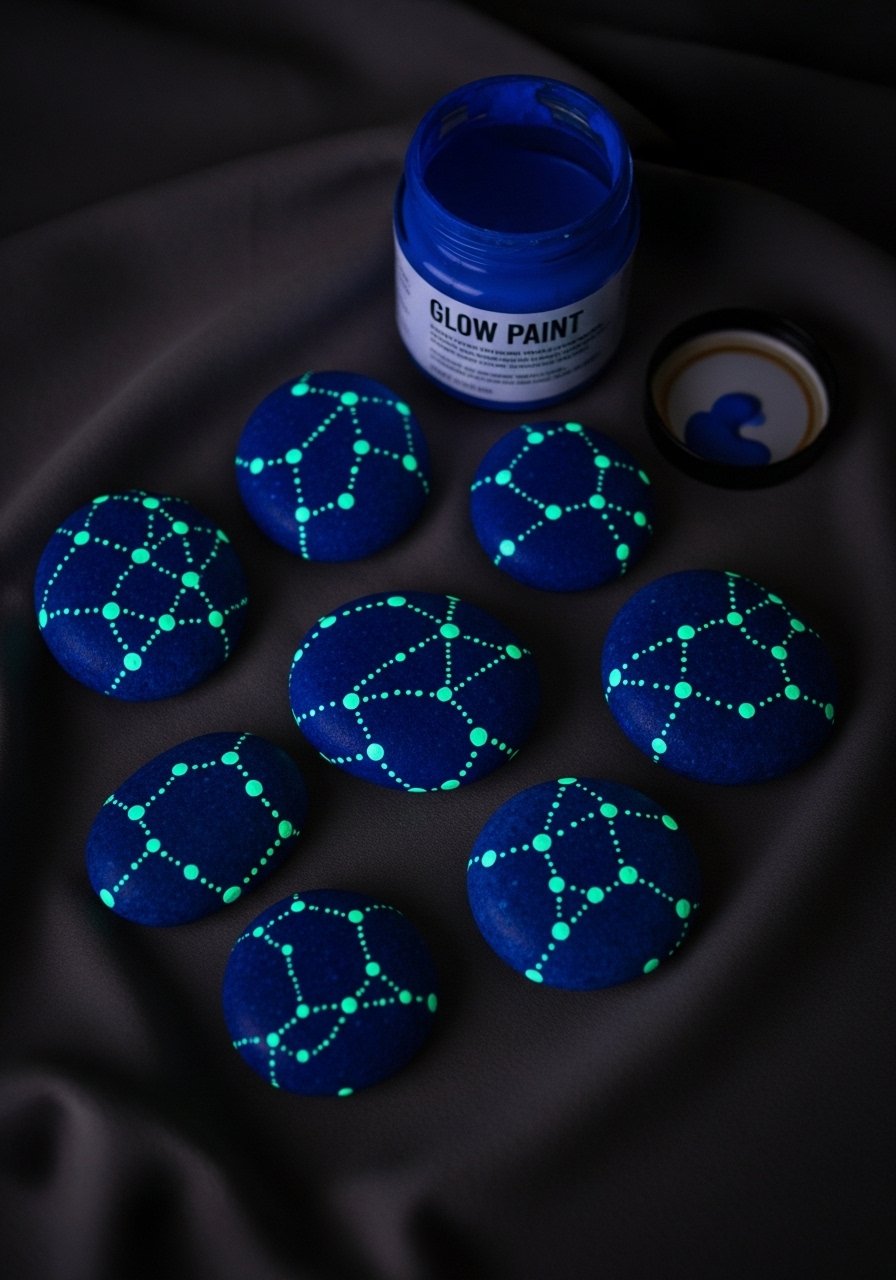
- Glow-in-the-Dark Constellation Stones
These stones charge in daylight and glow softly at night—perfect for kids’ nightlights or backyard pathways. A glow paint topcoat and a clear sealer keep dots bright. I recommend a glow-in-the-dark paint set.
Materials
- Medium smooth stones, 5–8 cm (6–10)
- Deep blue or black base acrylic paint
- Glow-in-the-dark paint (high-quality powder or liquid)
- Fine paint pen for star details
- Matte sealer (clear)
- Small UV flashlight (optional for charging)
Instructions
- Paint base coat in deep blue/black; dry 30–45 minutes.
- Apply small dots of glow paint following constellation patterns; let dry 1 hour between layers if building brightness.
- Add tiny white highlights sparingly to mimic starlight.
- Cure glow paint per manufacturer (often 24 hours) and charge under light.
- Seal with one light coat of clear matte sealer to protect glow layer.
- Test glow after full cure; recharge under sunlight or a UV flashlight.
How to Display or Gift It
- Place in a child’s room as a soft night companion.
- Line a path or rock border with glowing stones for evening ambiance.
- Gift with a small UV flashlight to “charge” them faster.
You’ve now got 25 fresh, practical stone painting ideas that span kid-friendly crafts, thoughtful gifts, and refined decor. From tiny pet portraits to glow-in-the-dark garden accents, there’s a project here for every mood and skill level. Pick a project that matches your supplies, try a new tool like a dotting tool or a rotary drill for pendants, and give yourself permission to make happy imperfect pieces—paint chips and all.
Save or pin this list to come back to when you want a quick creative session. Which project will you try first—mandala dots, pet portraits, or glow stones? Share your finished photos with a friend or swap a set of painted stones as a little handmade surprise. And if you’re stocking up, a multi-purpose hot glue gun with temperature control is one tool that helps across nearly every one of these projects — less string, cleaner edges, and fewer burns.
Happy painting, and may your next rock be the start of something lovely.


