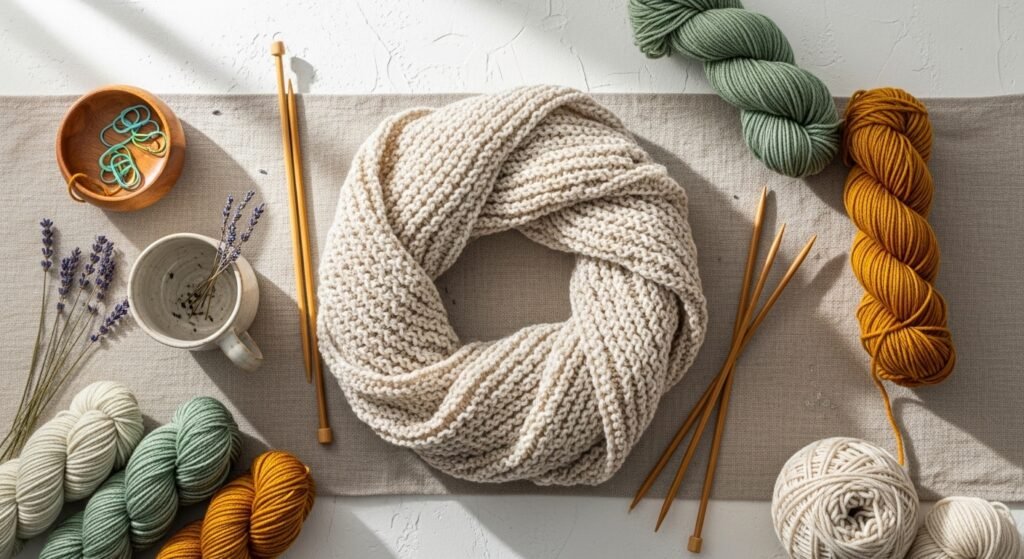
You fell for knitting because it looked soothing, right? Now imagine finishing your first few projects using straight needles and feeling that little thrill when something you made looks like a real, useful thing. These projects are perfect if you’ve been searching for knitting for beginners with straight needles and want easy wins that build skills fast.
Inside you'll find 28 projects that teach basic stitches, simple shaping, seaming, and blocking — all using straight needles. Each item includes exact yarn amounts, needle sizes, step-by-step instructions, and helpful tips for avoiding common beginner mishaps like uneven edges or holes at seams. Keep a pair of size 8 or size 10.5 straight needles on hand; I often reach for my Susan Bates knitting needles set for reliable, snag-free knitting. Grab a set of stitch markers or a row counter to make pattern-reading much friendlier as you go.
Ready to cast on? Pick a project that excites you — farmhouse tea towels or a boho cowl — and let’s knit something you'll love to wear or give.
1. Garter Stitch Scarf (perfect for knitting for beginners with straight needles)
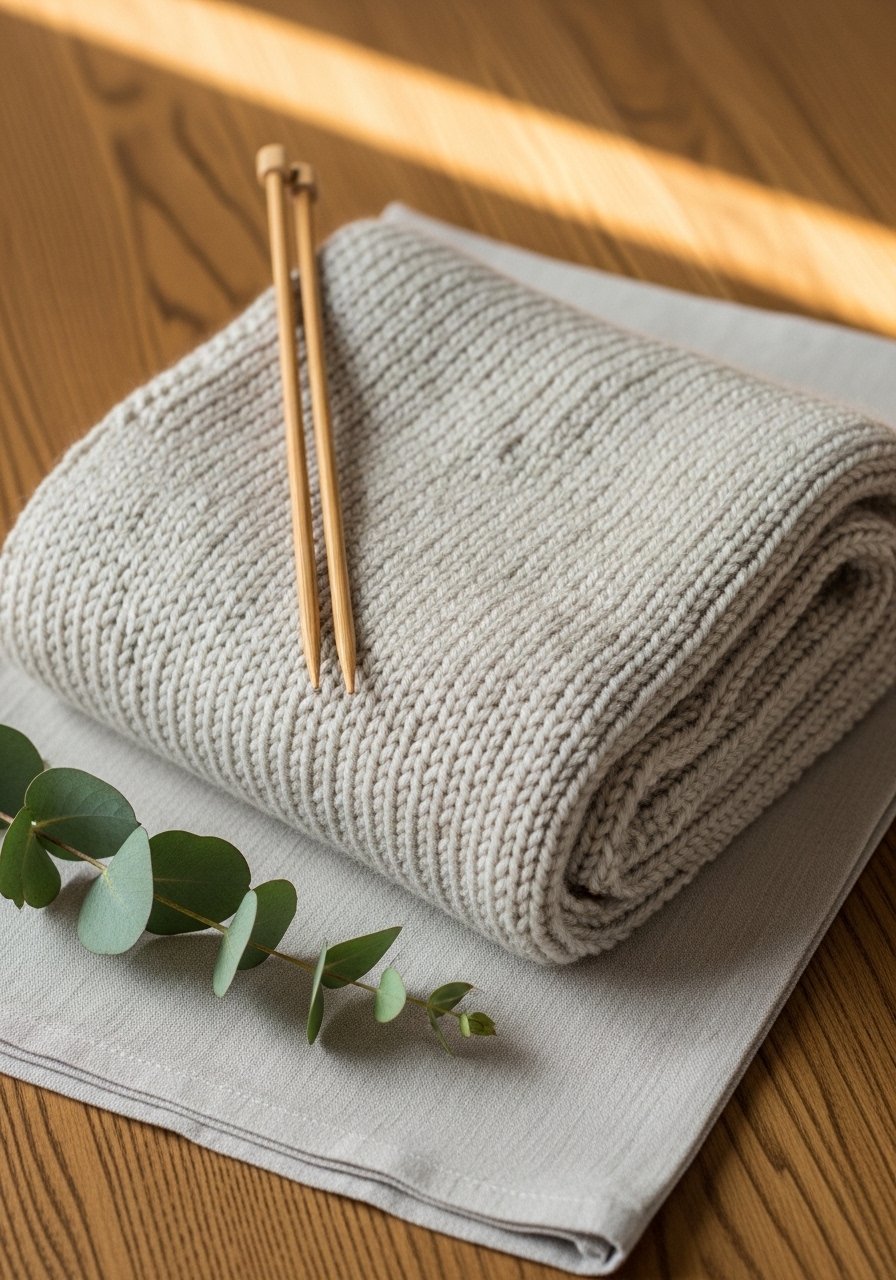
This is the classic first project. Garter stitch is just knits, so you get a squishy, even fabric that feels warm and looks hand-made. It’s forgiving, fast, and gorgeous in bulky yarns. Beginners will love how quickly it grows and how meditative the rhythm becomes. The finished scarf is soft, tactile, and perfect for layered cottagecore or minimalist winter looks. I use Lion Brand Wool-Ease Thick & Quick for extra squish.
Materials
- Bulky yarn: 300–400 yards (approx 3–4 skeins, 100g each)
- Straight needles: US 13 / 9mm, 14" length
- Tapestry needle for weaving ends
- Scissors
- Measuring tape
- Stitch marker (optional)
Instructions
- Cast on 20 stitches (adjust width by casting on more or fewer stitches).
- Knit every row (garter stitch) until piece measures 60 inches or desired length.
- Bind off loosely to retain stretch.
- Weave in ends with tapestry needle; trim excess.
- Block gently if desired: dampen and lay flat to dry for 12–24 hours on a blocking mat.
- Fluff by hand to open the stitches and even the edges.
How to Display or Gift It
- Fold and tie with natural twine and tuck a dried lavender sprig beneath the bow for a gift.
- Drape over a ladder shelf or the back of a cozy armchair.
- Store in a breathable cotton bag to keep moths away.
- For retail-style presentation, place on a small wooden hanger and use a wooden clothespin set to clip a handmade tag.
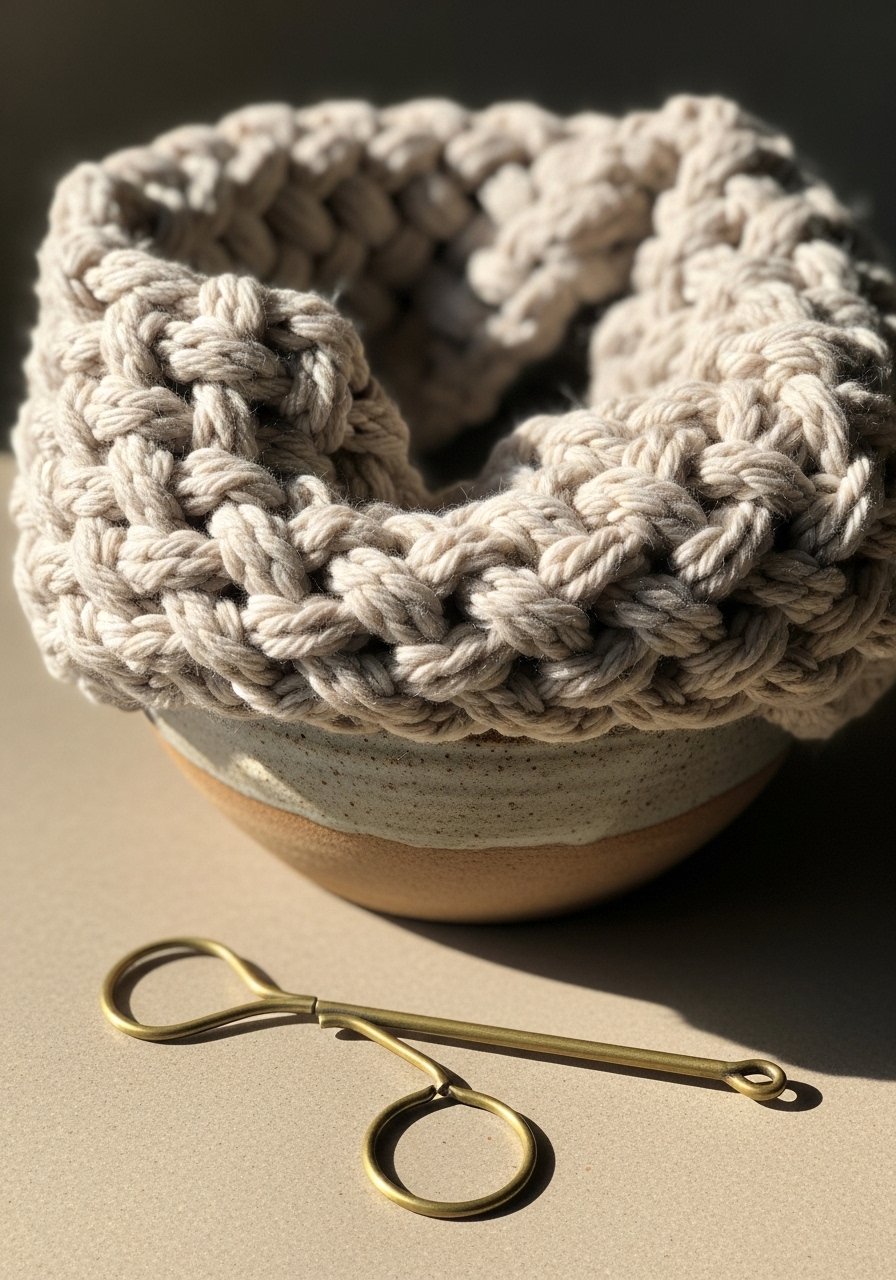
2. Simple Ribbed Headband
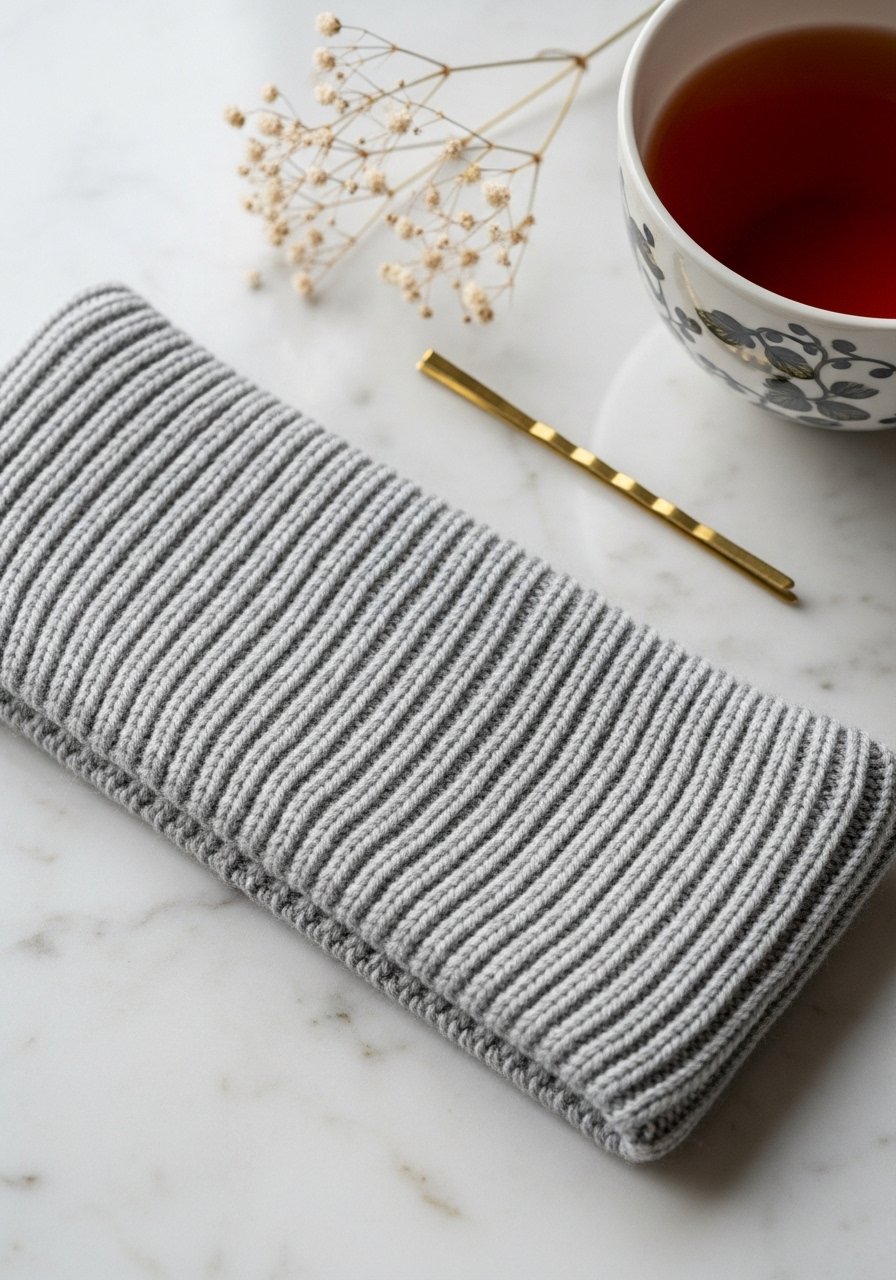
This stretchy headband uses a 1×1 rib so it hugs comfortably without being too tight. It's great for using leftover worsted yarn and perfect when you want something quick and wearable. The texture is pleasing to touch; it looks polished and pairs well with boho or sportier winter jackets. I often grab Clover stitch markers when I need even tension.
Materials
- Worsted weight yarn: 80–120 yards (25–35g)
- Straight needles: US 8 / 5mm
- Tapestry needle
- Stitch markers
- Measuring tape
- Scissors
Instructions
- Cast on 18 stitches.
- Row 1: K1, P1 across. Repeat this row for 14 inches total (or until it comfortably fits around head with stretch).
- Bind off in rib pattern to match stretch.
- Seam the short ends together with mattress stitch for an invisible join.
- Weave in ends and trim.
- Steam-block lightly for 10 minutes to settle stitches.
How to Display or Gift It
- Tuck on a small wooden earring card and display in a basket.
- Add a faux leather tag for a boutique feel.
- Bundle with a matching pair of knitted ear warmers and wrap in kraft tissue.
- Store flat in a stackable craft organizer to keep shape.
3. Two-Color Striped Mug Cozies
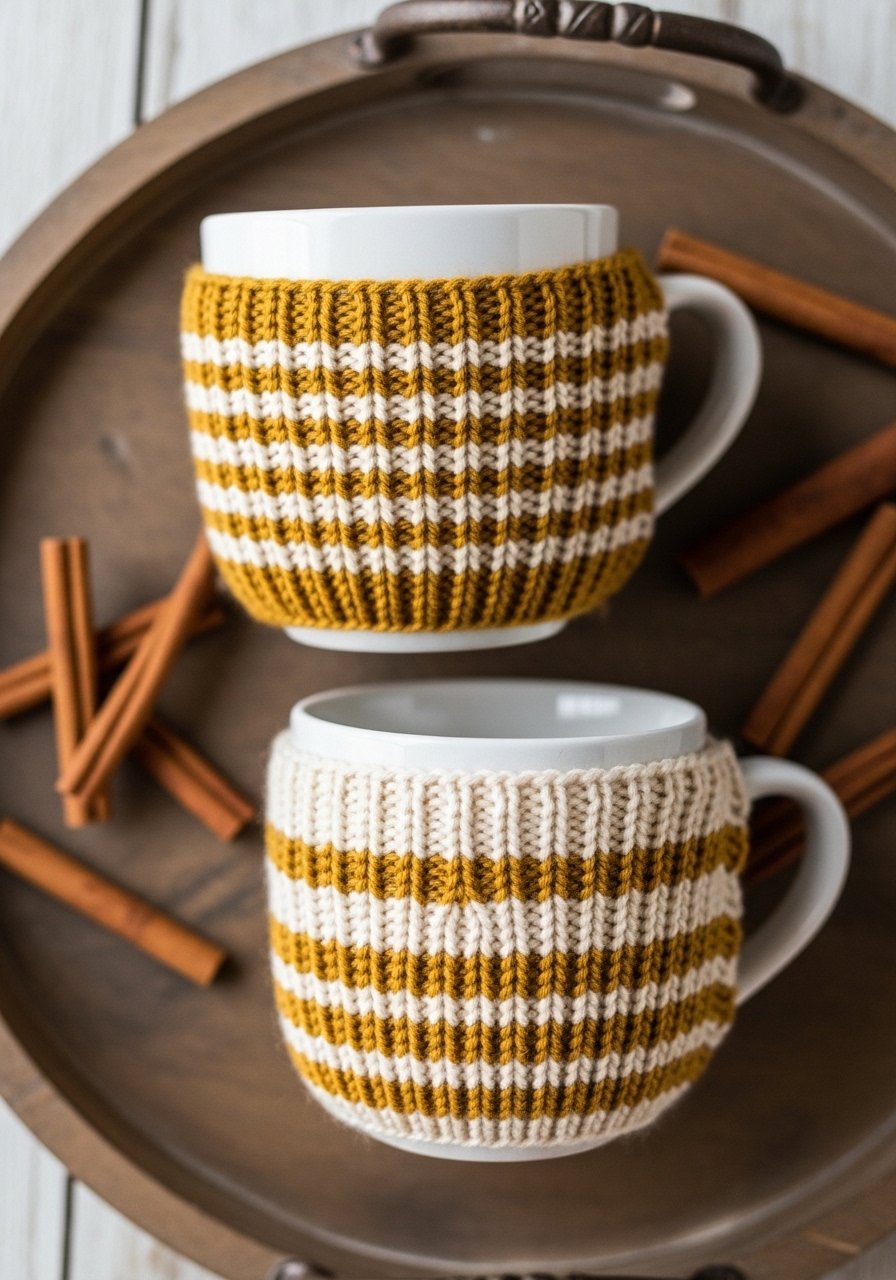
Mug cozies teach color changes and make great quick gifts. Using straight needles, you knit a small rectangle and seam it around a favorite mug. The texture feels cushioned in your hands and adds a handcrafted touch to kitchen decor. Try a Japandi palette for modern neutral gifting. A yarn needle set makes finishing faster.
Materials
- Worsted weight yarn: 50–70 yards total (two colors: 25–35 yards each)
- Straight needles: US 7 / 4.5mm
- Tapestry needle
- Scissors
- Measuring tape
- Small button (optional, 1 per cozy)
Instructions
- Cast on 28 stitches with main color.
- Knit 6 rows in garter or seed stitch for base.
- Switch to stripe color: alternate 4 rows per color until rectangle measures 4 x 7 inches.
- Bind off loosely.
- Fold rectangle to fit mug and seam short edges using mattress stitch. Add button and loop if desired.
- Block lightly for 2–4 hours to set shape.
How to Display or Gift It
- Stack three cozies tied with twine in a mug for a cozy gift set.
- Use a small kraft box and tissue paper.
- Keep extras in a mason jar by the coffee station for guests.
- Label with a handwritten tag and tuck a single-use coffee packet inside.
4. Easy Dishcloths (seed stitch)
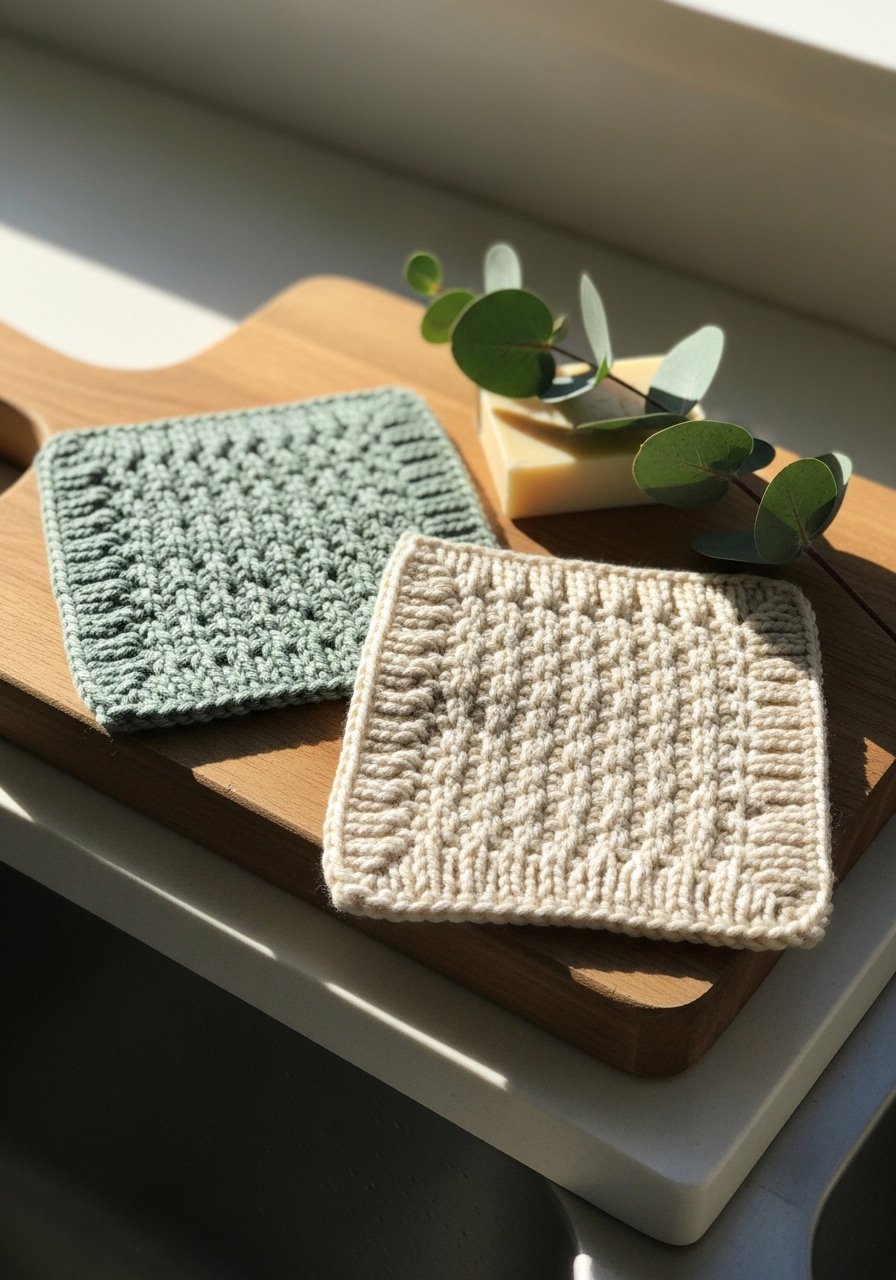
Dishcloths are forgiving, quick, and let you practice stitch patterns on a smaller scale. Cotton yarn gives durability and a pleasant scrubby feel. Seed stitch creates a bumpy texture that dries well and looks homey in farmhouse kitchens. I recommend an absorbent cotton like Lily Sugar'n Cream.
Materials
- Cotton worsted weight yarn: 80–100 yards (approx 1 skein per cloth)
- Straight needles: US 7 / 4.5mm
- Scissors
- Tapestry needle
- Measuring tape
- Small blocking mat (optional)
Instructions
- Cast on 40 stitches.
- Row 1: K1, P1 across. Row 2: P1, K1 across. Repeat for 8 inches (square).
- Bind off in pattern to keep edge elastic.
- Weave in ends, trim.
- Block by pinning to a mat and allowing to dry for 4–8 hours to square it.
- Use as soon as dry; cotton becomes more absorbent after washing.
How to Display or Gift It
- Roll with a wooden dish brush and tie with twine for a hostess gift.
- Stack in a small crate or basket by the sink.
- Wash before gifting for fluff; store flat in a shallow craft container.
5. Beginner Fingerless Mitts
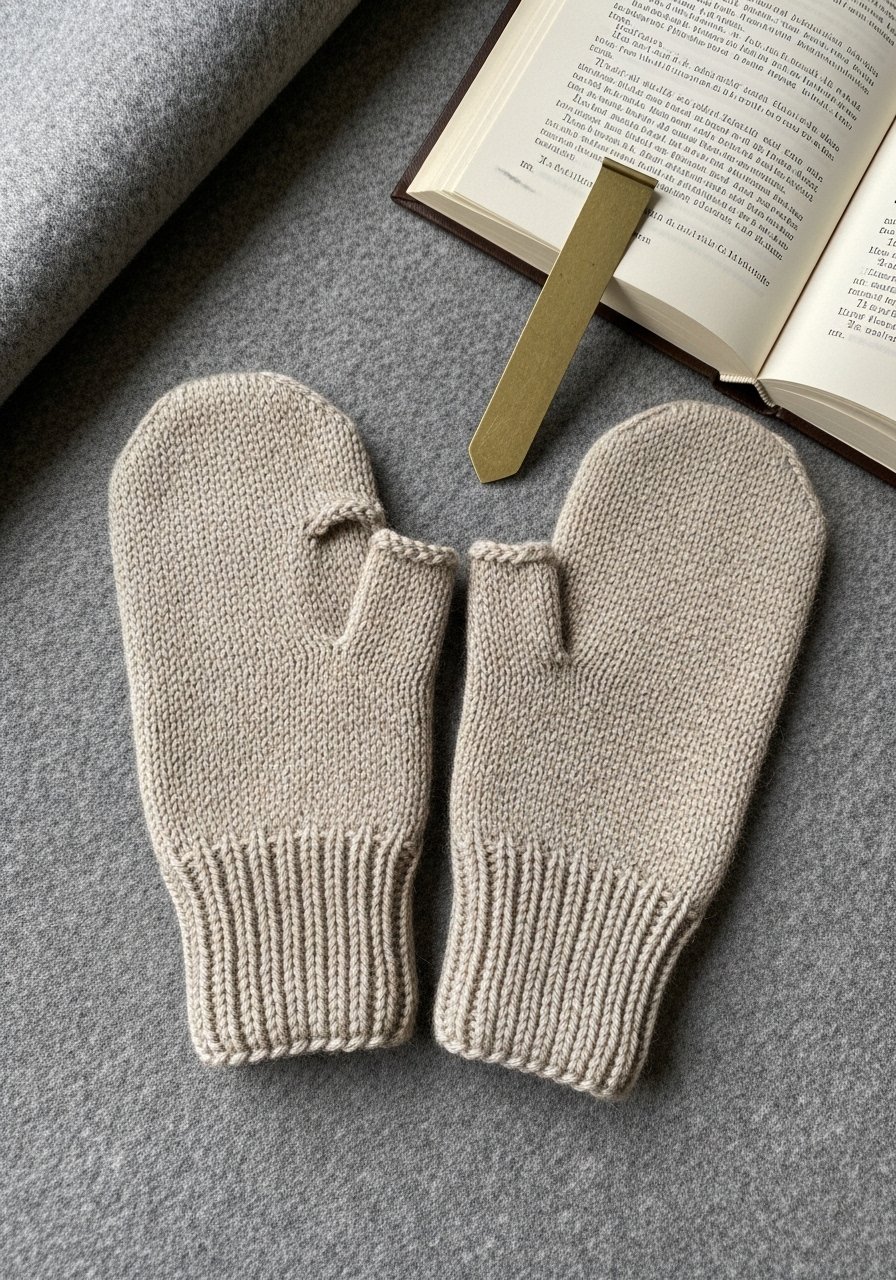
Fingerless mitts let you type or craft while staying warm. Knit flat and seamed, they teach how to add a thumb gusset and shape a cuff. The texture feels cozy on wrists and the thumb opening is satisfying to make. Use a soft acrylic-wool blend for warm, machine-washable mitts like Red Heart Soft.
Materials
- Worsted yarn: 150 yards (two small skeins or one skein)
- Straight needles: US 8 / 5mm
- Tapestry needle
- Stitch markers
- Scissors
- Measuring tape
Instructions
- Cast on 36 stitches.
- Work K2, P2 rib for 1.5 inches for cuff.
- Switch to stockinette (knit one row, purl one row) and work until piece measures 6 inches from cast-on.
- Create thumb opening: bind off 6 stitches, knit remaining. On next row, cast on 6 stitches over gap.
- Continue until piece measures 8.5 inches, ending with a purl row.
- Bind off, seam sides with mattress stitch, leaving thumb hole as gap. Weave in ends.
- Wash and block for 6–8 hours to relax the stitches.
How to Display or Gift It
- Pair with a matching headband and present in a kraft box.
- Hang on a small wooden easel for market display.
- Add a label with care instructions and fiber content.
- Store flat in a fabric organizer to retain shape.
6. Simple Baby Blanket (knitting for beginners with straight needles)
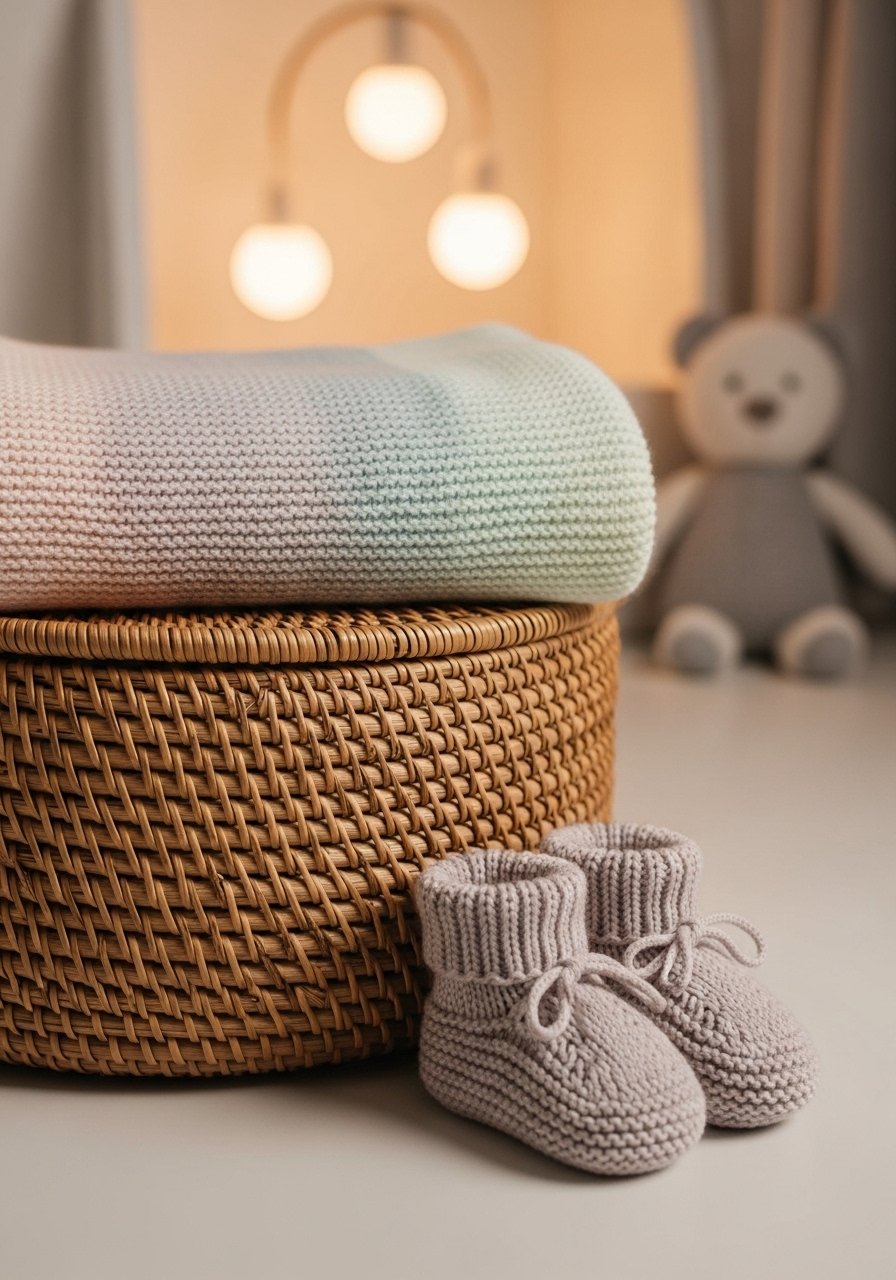
A larger project that still uses basic stitches. Garter or seed stitch works well for a squishy baby blanket. It’s a lovely way to practice consistent tension and learn seaming for the border. A washable acrylic blend is practical for gifting. I use Bernat Baby Blanket yarn for plush results.
Materials
- Super bulky blanket yarn: 700–1000 yards (approx 7–10 skeins, 100g each)
- Straight needles: US 17 / 12mm
- Tapestry needle
- Scissors
- Measuring tape
- Blocking pins (optional)
Instructions
- Cast on 80 stitches for ~30-inch width.
- Knit every row (garter stitch) until blanket measures 36 inches or desired length.
- Bind off loosely.
- Weave in ends using tapestry needle.
- Gently block by laying flat; heavy blankets often only need smoothing out — dry 24 hours.
- For a neat edge, add a simple crochet border with a 5mm hook (optional).
How to Display or Gift It
- Roll and tie with ribbon in a gift basket with baby lotions.
- Drape over a crib rail or rocking chair for nursery styling.
- Machine wash on gentle before gifting; label with washing instructions.
- Store in breathable cotton bags until gifted.
7. Seed Stitch Pillow Cover
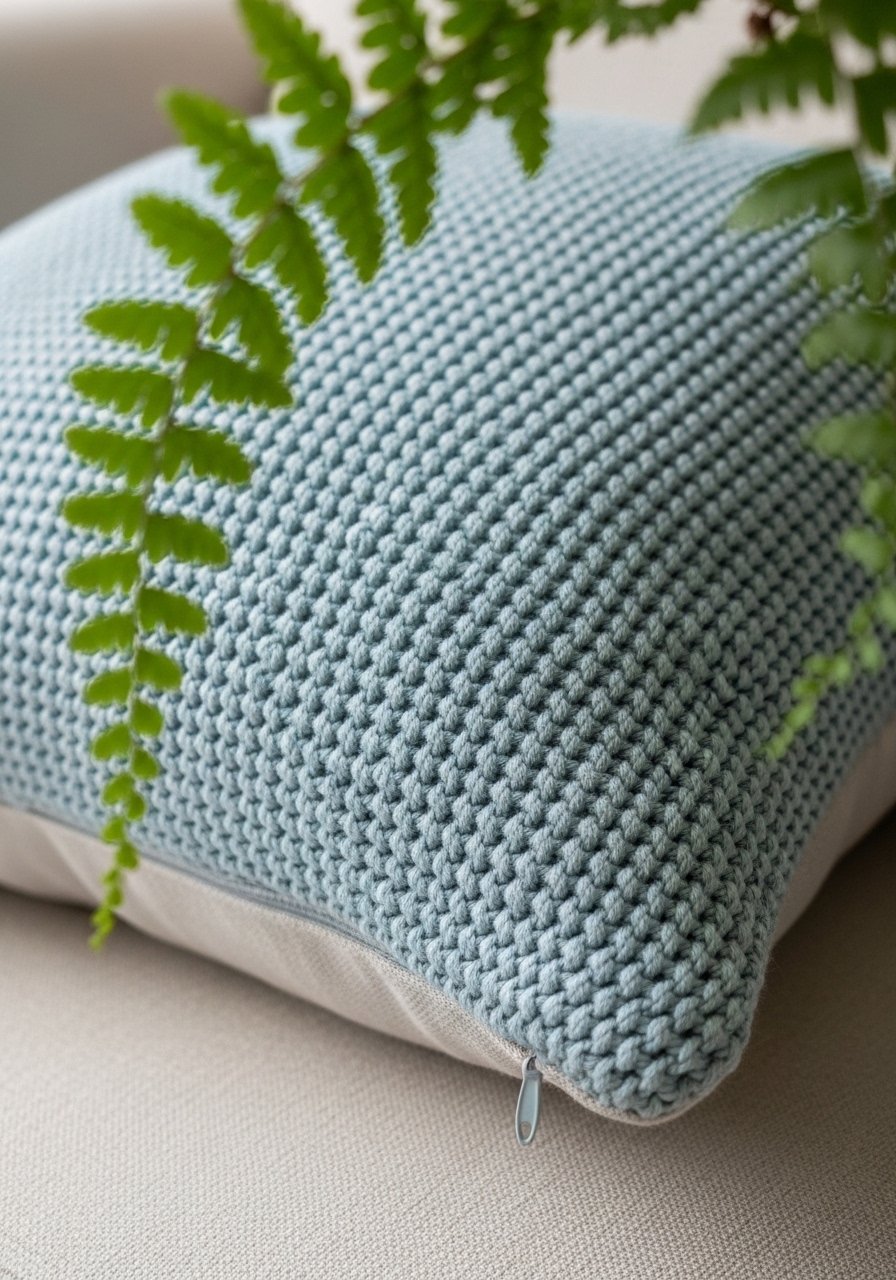
A pillow cover teaches you to knit a larger flat piece and finish with a zipper or seam. Seed stitch gives a subtle two-sided texture that fits farmhouse and Japandi interiors. Use a durable yarn that holds structure, like a wool blend. A zipper installation feels professional with a small zipper pack.
Materials
- Worsted yarn: 400–500 yards (approx 4 skeins)
- Straight needles: US 8 / 5mm
- Tapestry needle
- Zipper: 16" for pillow insert (or sew seam)
- Scissors
- Measuring tape
Instructions
- Cast on 44 stitches for a 16" wide pillow.
- Row 1: K1, P1 across. Repeat for 16 inches (square).
- Bind off in pattern.
- Fold and seam three sides; insert pillow form; sew zipper or seam closed.
- Weave ends and press lightly with a damp cloth; avoid direct iron on synthetic yarn.
- Let seams rest overnight before fluffing (approx 12 hours).
How to Display or Gift It
- Layer with textured cushions on a sofa for cozy styling.
- Add a leather tag or tassel for a boutique touch.
- Wrap in tissue and place in a square gift box for housewarming gifts.
- Store flat to prevent creasing.
8. Chunky Slippers (seamed)
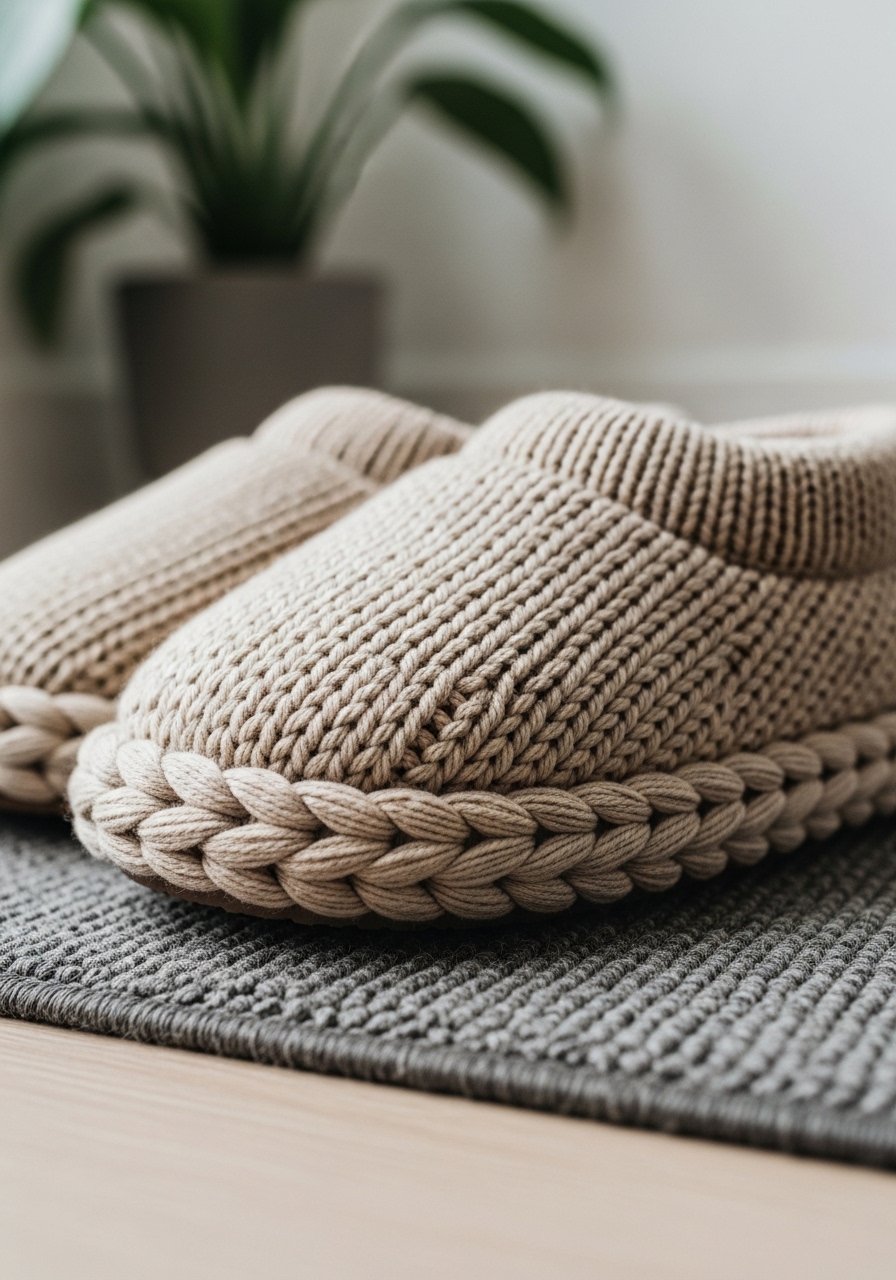
These slippers are knit as flat pieces and seamed, perfect for learning shaping with increases/decreases and making a sole. Thick yarn and big needles make them pop together in a few evenings. Use a super-bulky acrylic-wool mix for warmth and easy washing. Slip-resistant fabric soles can be glued on with craft glue for safety.
Materials
- Super bulky yarn: 300–400 yards total
- Straight needles: US 15 / 10mm
- Tapestry needle
- Stitch markers
- Scissors
- Non-slip fabric or puff paint for soles
Instructions
- Cast on 28 stitches.
- Knit garter stitch for cuff for 2 inches.
- Increase at each end every other row (kfb) until you have 38 stitches for the foot.
- Work even until foot measures 8–9 inches from cuff.
- Decrease at each end to shape toe, then bind off.
- Seam sides and sole with mattress stitch. Attach non-slip sole with craft glue or puff paint and allow to dry 24 hours.
How to Display or Gift It
- Package with a pair of house socks in a kraft box.
- Add a handwritten tag with sizing and care instructions.
- Store in a breathable fabric bag between seasons.
- For market sales, put on a small wooden shoe form for presentation.
9. Simple Market Tote
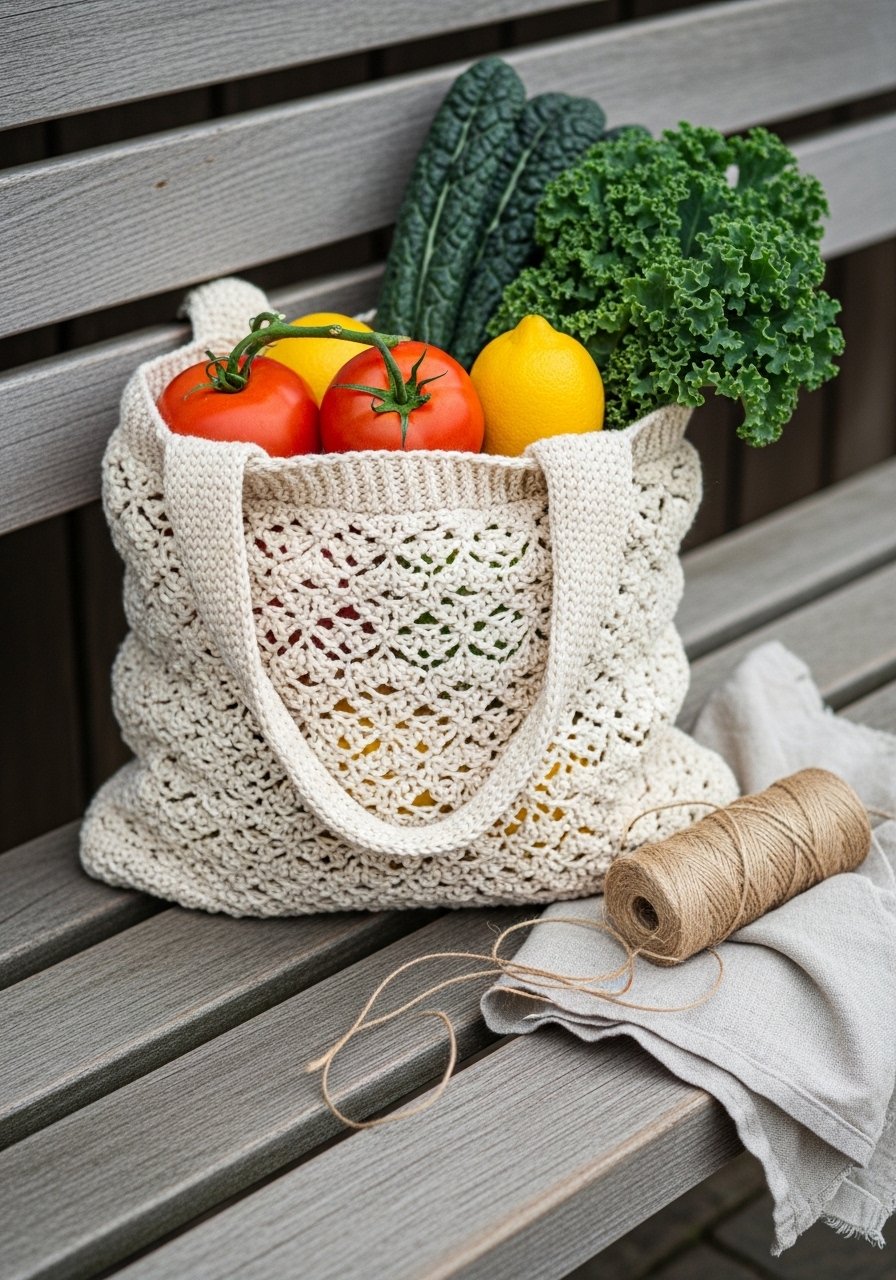
A market tote is a great way to practice long stretches and sturdy edges. Knit two panels and seam them, then add reinforced handles. Cotton yarn holds weight well and fits farmhouse or boho aesthetics. I recommend a durable cotton like Knit Picks Dishie.
Materials
- Cotton worsted yarn: 600–800 yards (approx 6–8 skeins)
- Straight needles: US 9 / 5.5mm
- Tapestry needle
- Stitch markers
- Scissors
- Measuring tape
Instructions
- Cast on 48 stitches for panel width.
- Work garter or seed stitch for 14 inches tall.
- Bind off, make second panel identical.
- Seam sides with mattress stitch, leaving top open.
- For handles, pick up stitches across top edge and knit a narrow strap 18–20 inches long each; bind off and secure ends.
- Reinforce handle attachments with extra rows of stitching and let rest 6–8 hours.
How to Display or Gift It
- Fill with market produce and photograph for Pinterest-ready shots.
- Pair with a list of farmers’ market items on a kraft tag for gift presentation.
- Store flat in a closet or hang by its handles on a peg.
- Add a sewn lining for longevity using a basic sewing machine.
10. Textured Earwarmer (cabled-look without cable needles)
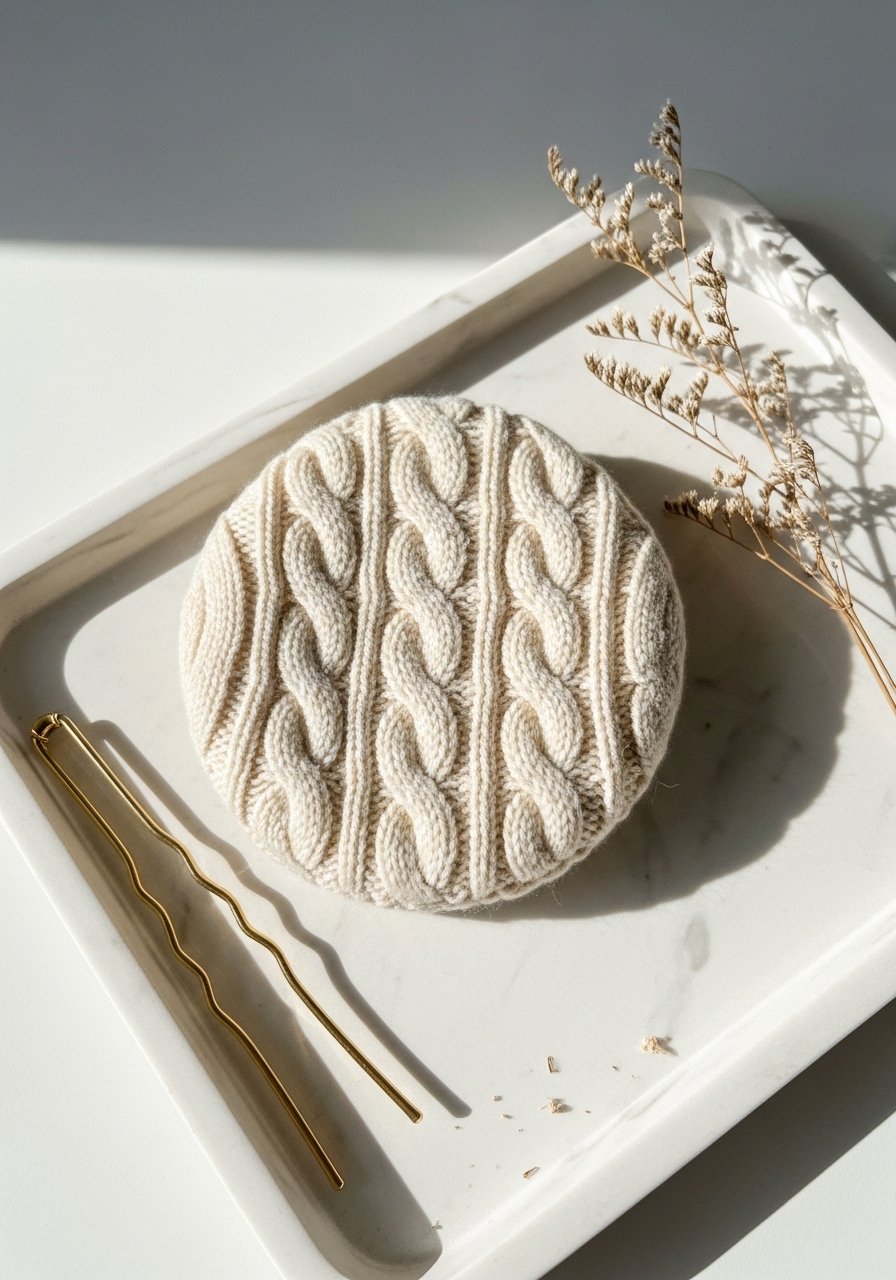
You get the look of cables without the complexity by using slipped stitches. It adds visual interest and is surprisingly simple on straight needles. The band feels structured and cozy against the forehead. Try a soft acrylic-wool blend to maintain shape. A slip-stitch pattern book is a nice reference.
Materials
- Worsted yarn: 80–100 yards
- Straight needles: US 8 / 5mm
- Tapestry needle
- Stitch markers
- Scissors
- Measuring tape
Instructions
- Cast on 28 stitches.
- Work a 2-row repeat: Row 1: K4, slip 1 wyib, repeat; Row 2: purl across. Repeat until 18 inches or desired circumference.
- Bind off in pattern.
- Seam short ends using mattress stitch for invisible join.
- Weave in ends and press lightly with damp cloth.
- Let seam sit for 6 hours before wearing.
How to Display or Gift It
- Place on a small head mannequin for display photos.
- Pair with a matching pair of mitts and tie together with baker’s twine.
- Store rolled to prevent distortion.
- Include a care tag recommending gentle wash and flat drying.
11. Simple Triangle Shawl
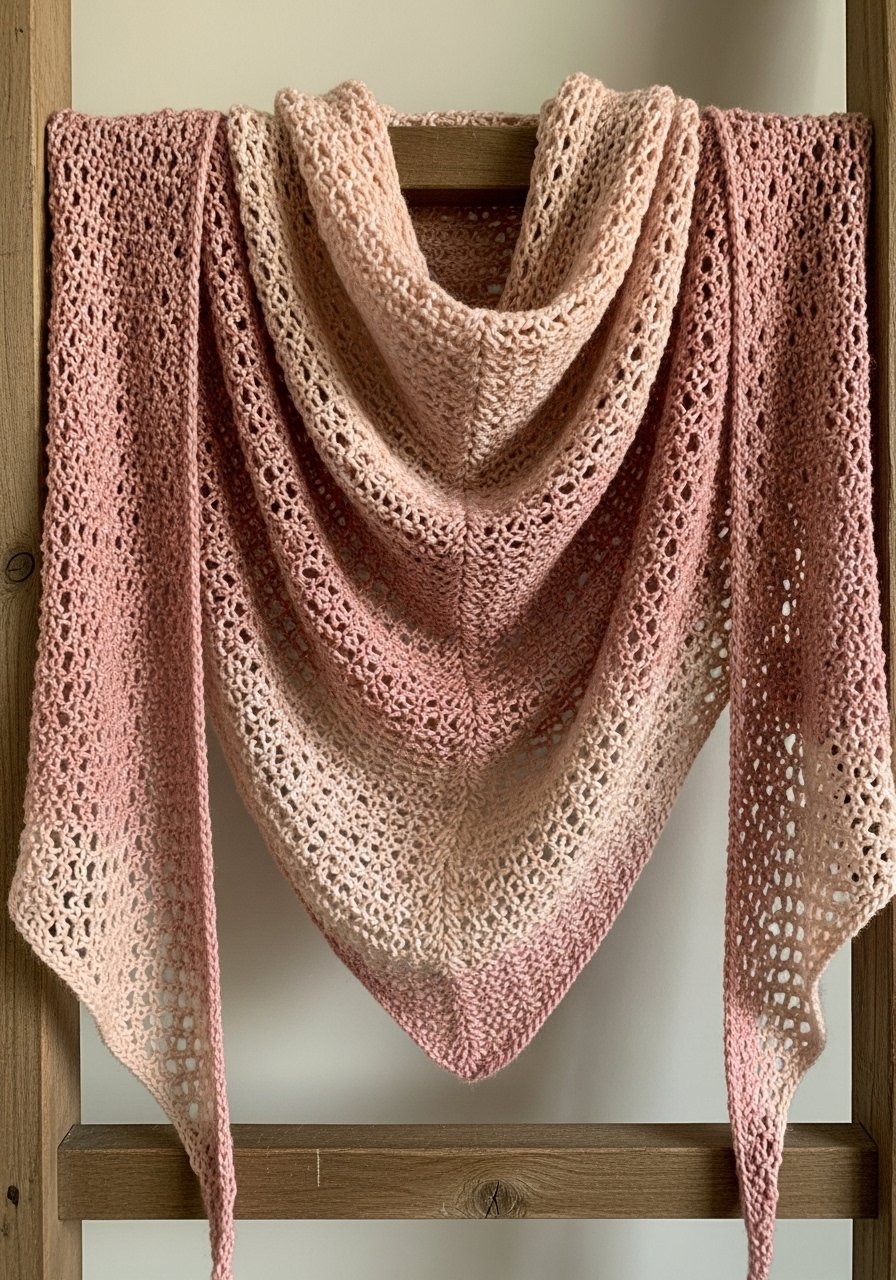
A triangle shawl teaches increases and edge maintenance. Knit from the center top or cast on for the neck and increase outward; both are beginner-friendly. The knitted fabric feels light and wearable, perfect for layering over outfits in Japandi palettes. A row counter ring keeps track of increases.
Materials
- DK or sport weight yarn: 400–500 yards
- Straight needles: US 7 / 4.5mm
- Tapestry needle
- Stitch markers
- Scissors
- Blocking wires (optional)
Instructions
- Cast on 3 stitches (for top-center start).
- Row 1: K1, YO, knit to end — increase every right-side row to create triangle until width about 60 inches.
- Continue until shawl reaches desired size; end with a knit row.
- Bind off loosely.
- Block with pins and wires for a straight edge, allow to dry 24 hours.
- Weave in ends.
How to Display or Gift It
- Drape on a ladder or hang on a wooden hanger for selling shots.
- Pair with a lightweight brooch and tuck in a gift card.
- Fold in a breathable muslin bag for gifting.
- Include care instructions for gentle handwashing.
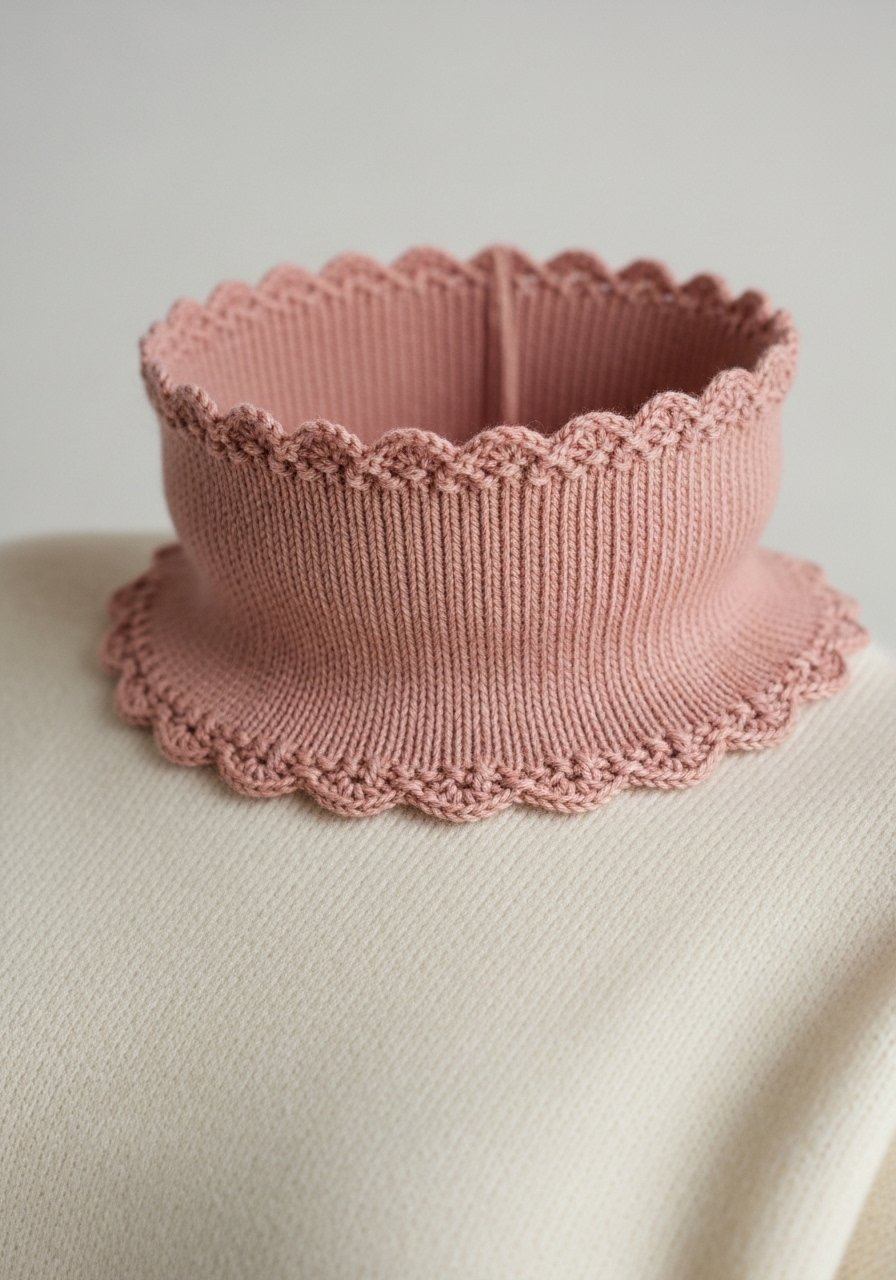
12. Cozy Cowl (in-the-round look, knit flat)
A cowl knit flat and seamed emphasizes texture and warmth. It’s wearable, compact, and portable — a good travel project. Chunky yarn makes the stitches pop and the finished cowl feels indulgent to touch. Use Red Heart Chic Sheep Worsted for a lofty result.
Materials
- Bulky yarn: 200–300 yards
- Straight needles: US 11 / 8mm
- Tapestry needle
- Scissors
- Stitch markers
- Measuring tape
Instructions
- Cast on 48 stitches.
- Work in seed or rib stitch for 12–14 inches (or desired height).
- Bind off loosely.
- Seam short ends together for a continuous loop with mattress stitch.
- Weave in ends and press lightly if needed.
- Let the seam rest 6–8 hours for neatness.
How to Display or Gift It
- Loop on a small wooden bowl for a shop display.
- Package with matching mitts in a small kraft box.
- Store folded to maintain loft.
- Add a handmade care card recommending gentle wool wash.
13. Baby Booties (seamed)
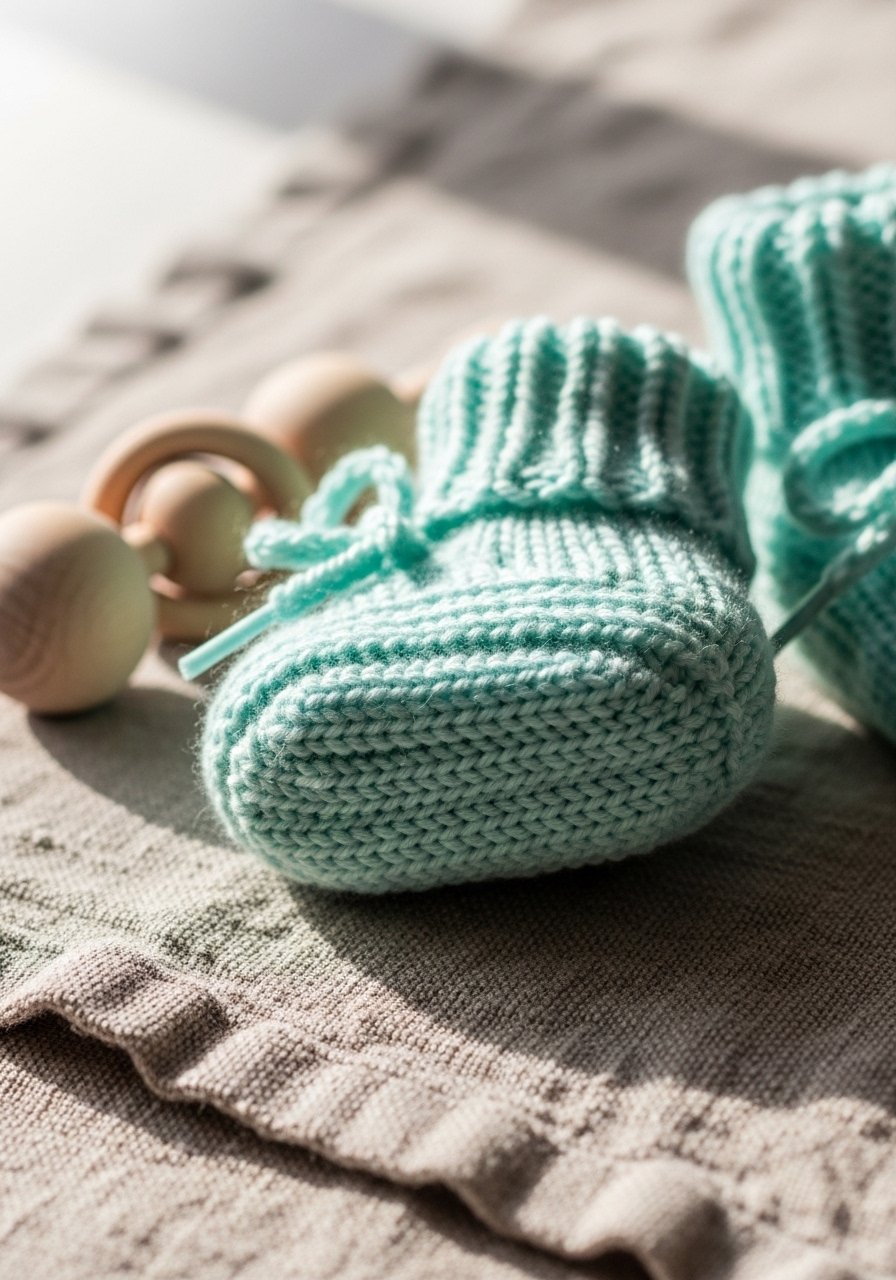
Tiny, adorable, and fast — booties are a happy project for beginners. They teach simple shaping and finishing. A soft acrylic or baby yarn is gentle on skin and machine-washable. I reach for Bernat Softee Baby yarn.
Materials
- Baby DK yarn: 100 yards
- Straight needles: US 6 / 4mm
- Tapestry needle
- Stitch markers
- Scissors
- Measuring tape
Instructions
- Cast on 28 stitches.
- Work rib for 1.5 inches for ankle cuff.
- Knit stockinette until foot measures 3.5 inches.
- Decrease to shape toe over several rows and bind off.
- Seam sides and sole with mattress stitch. Weave in ends.
- Lightly steam to shape and let cool 10–15 minutes.
How to Display or Gift It
- Pair with a knit blanket or hat and wrap in tissue.
- Place in a small gift box with ribbon and a handwritten tag.
- Add a safety note for parents about small parts.
- Store in a labeled craft organizer when making multiples.
14. Basket Weave Dish Mat
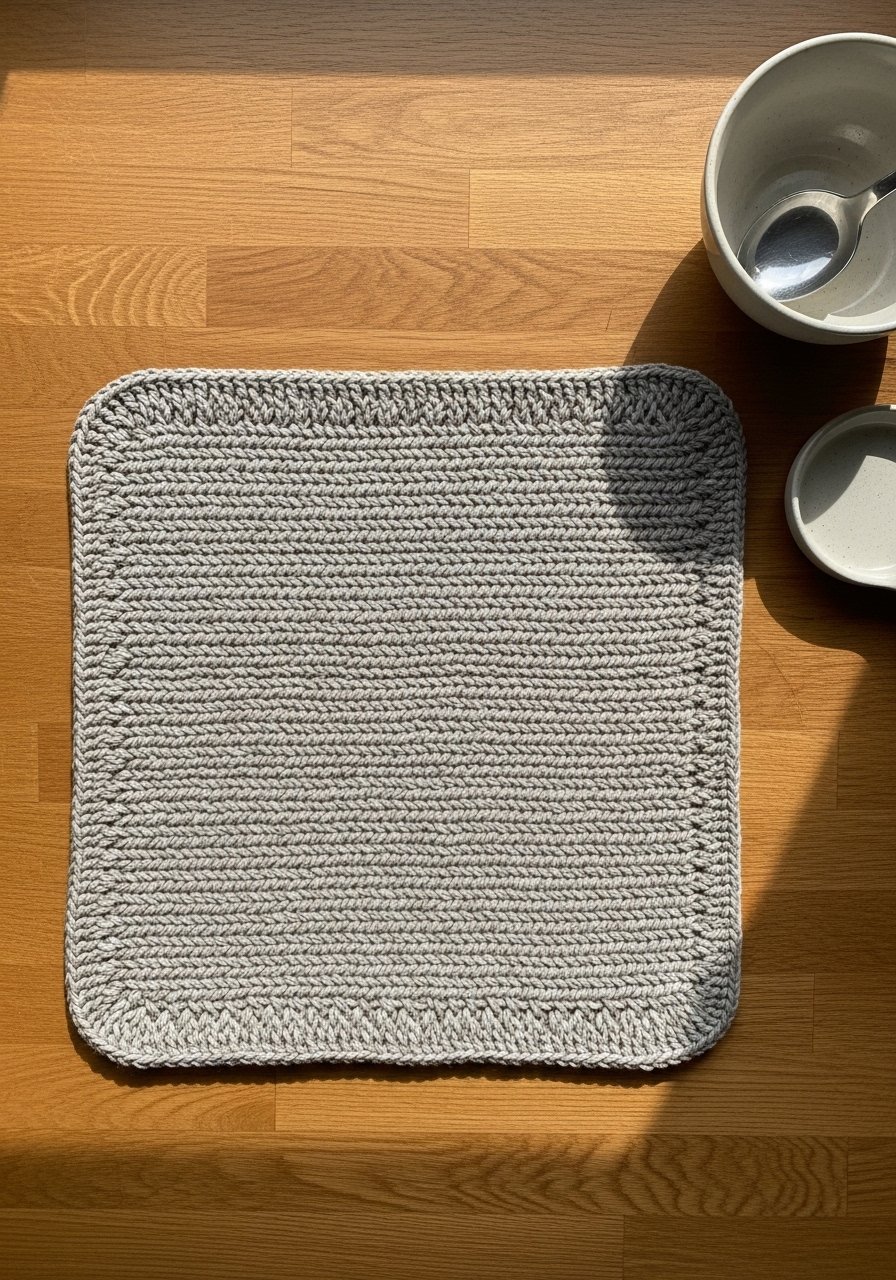
Basket weave texture looks complex but relies on simple knits and purls. This mat is sturdy, quick, and perfect under hot pots or pitchers. Cotton yarn makes it heat-resistant and washer-friendly. A foam brush is handy for sealer if you want to stiffen edges for display.
Materials
- Cotton worsted yarn: 150–200 yards
- Straight needles: US 8 / 5mm
- Tapestry needle
- Scissors
- Measuring tape
- Blocking mat
Instructions
- Cast on 48 stitches.
- Work 8-row basket weave repeat: K8, P8 across and alternate on following rows; repeat until mat is 8 x 8 inches.
- Bind off in pattern.
- Block flat and let dry 4–8 hours for a neat square.
- Weave in ends.
- Optionally starch lightly for stiffness; air dry completely 12 hours.
How to Display or Gift It
- Stack with matching cloths and tie with twine for kitchen gift sets.
- Use as a trivet or under a vase for styling.
- Label as machine washable and store flat in a drawer.
15. Simple Pullover (seamed, beginner-friendly)

A basic pullover knitted flat and seamed is a great first garment. Use stockinette with ribbed edges for structure. This project teaches measuring, basic shaping, and seaming without complex sleeve techniques. Pick a washable wool blend like Cascade 220 Superwash for easier care.
Materials
- Worsted yarn: 1000–1400 yards (depends on size)
- Straight needles: US 8 / 5mm
- Tapestry needle
- Stitch markers
- Measuring tape
- Scissors
Instructions
- Work back panel: cast on stitches for width, knit in stockinette until armhole shaping.
- Bind off shoulder stitches; repeat for front panel, adding neck shaping by binding off center stitches.
- Knit two sleeves flat: shape by decreasing at the top edge, then bind off.
- Seam shoulders, set in sleeves, seam sides.
- Pick up stitches around neckline and knit 1×1 rib for 1 inch, bind off.
- Weave in ends; block garment flat for 24–48 hours for even shaping.
How to Display or Gift It
- Fold with a hanging tag showing size and fiber content.
- Pair with a knitted scarf for a coordinated set.
- Store folded in breathable boxes to preserve shape.
- Offer care tips: wash cool and dry flat to avoid shrinking.
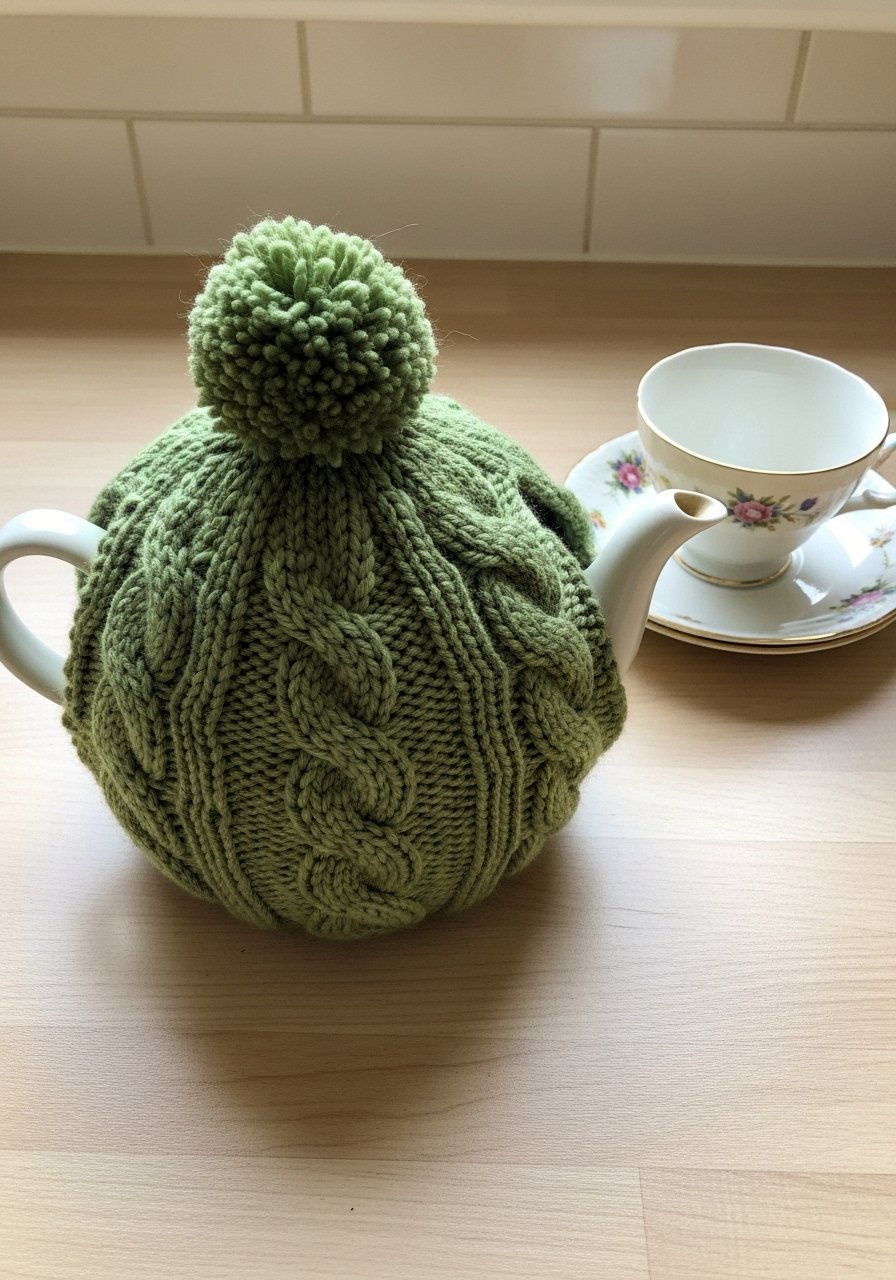
16. Coffee Cozy with Button Closure
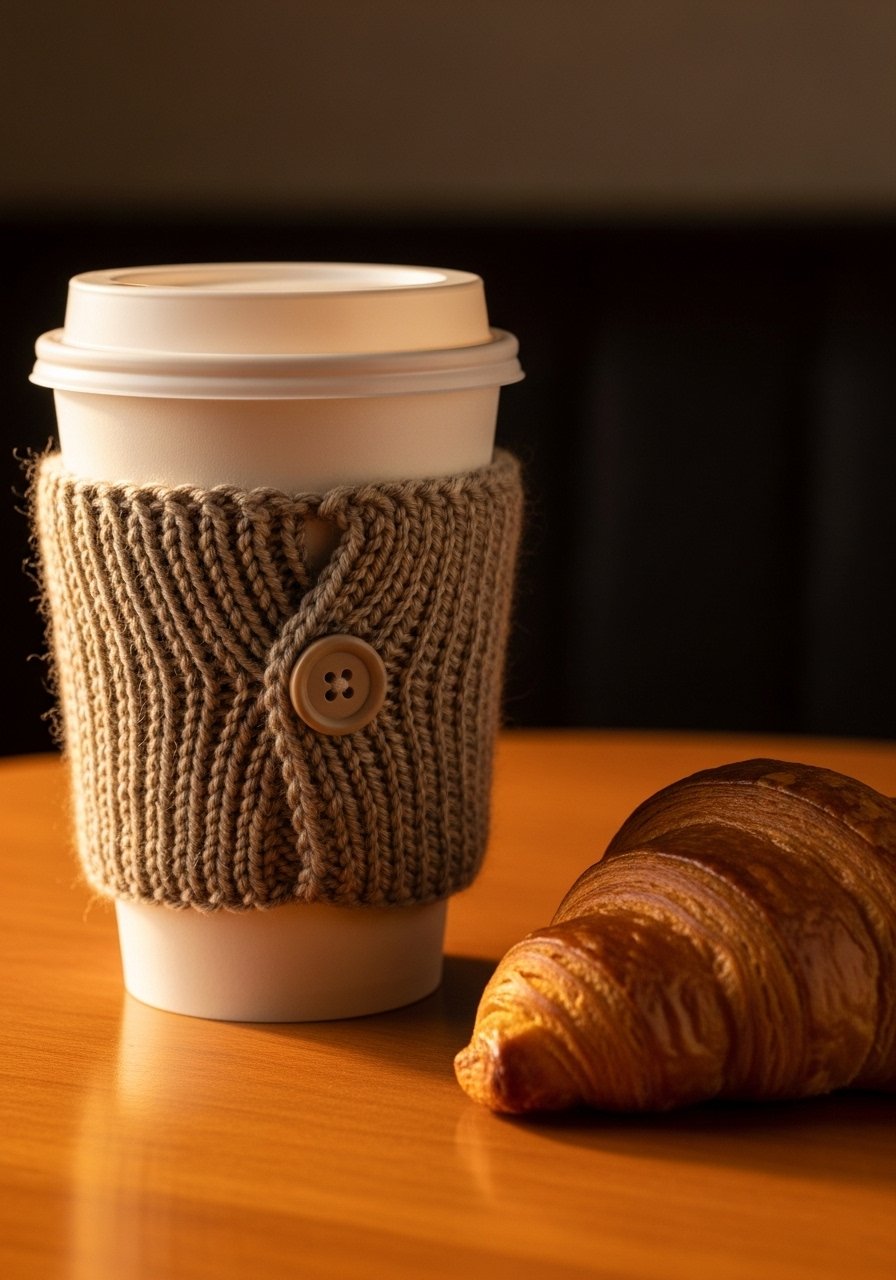
This is a smaller, faster version of mug cozies with a decorative button. It’s practical, especially for commuters. It’s knitted flat, then seamed and finished with a button loop. Cotton or acrylic works—Caron Simply Soft is a soft option.
Materials
- Worsted yarn: 40–60 yards
- Straight needles: US 7 / 4.5mm
- Tapestry needle
- Small button
- Scissors
- Measuring tape
Instructions
- Cast on 26 stitches.
- Knit in seed stitch for 3.5 inches.
- Bind off and seam short edges.
- Sew button on one side; on the opposite side sew a small yarn loop.
- Weave in ends.
- Machine wash if using washable yarn; let dry fully 6–8 hours.
How to Display or Gift It
- Pair with a gift card to a local coffee shop.
- Bundle three cozies in a small tin with a sachet of coffee.
- Store flat or stack in a small basket by the door.
17. Neck Warmer with Picot Edge
A neck warmer with a picot edge adds a dainty finish while using mostly simple stitches. It’s a great practice for tension control and decorative bind-offs. Light fingering or DK yarn gives a feminine drape. A picot bind-off tutorial book is a helpful reference.
Materials
- DK yarn: 150 yards
- Straight needles: US 6 / 4mm
- Tapestry needle
- Scissors
- Stitch markers
- Measuring tape
Instructions
- Cast on 64 stitches.
- Work 1×1 rib for 4 inches.
- Bind off with picot bind-off: K2tog tbl bound off edge creation pattern following a picot instruction.
- Seam short ends with mattress stitch.
- Weave ends and press gently.
- Let seam rest 6 hours.
How to Display or Gift It
- Tuck into a gift box with a sachet of chamomile.
- Layer under coats in a market shot.
- Store folded to keep picot edge crisp.
18. Basic Tea Cozy (seamed)
A tea cozy is both decorative and functional, teaching you to shape a dome by decreasing and seaming. It adds a farmhouse charm to tea service and is a fantastic hostess gift. Use a washable wool blend for warmth. A small measuring tape helps ensure a snug fit.
Materials
- Worsted yarn: 150–250 yards
- Straight needles: US 8 / 5mm
- Tapestry needle
- Scissors
- Stitch markers
- Measuring tape
Instructions
- Cast on for base circumference (measure teapot base) — e.g., 64 stitches.
- Work in stockinette until height is 6 inches.
- Begin decreases evenly every other row to shape dome until about 8–10 stitches, bind off.
- Seam top and sides to form cozy and leave a hole for handle if desired.
- Weave in ends and lightly steam to set shape for 10–15 minutes.
- Test fit on teapot; adjust seam if needed.
How to Display or Gift It
- Pair with specialty tea and a wooden honey dipper in a basket.
- Photograph on a vintage tray for Pinterest.
- Store on the teapot or in a drawer to maintain shape.
19. Knit Bookmark (mini project)
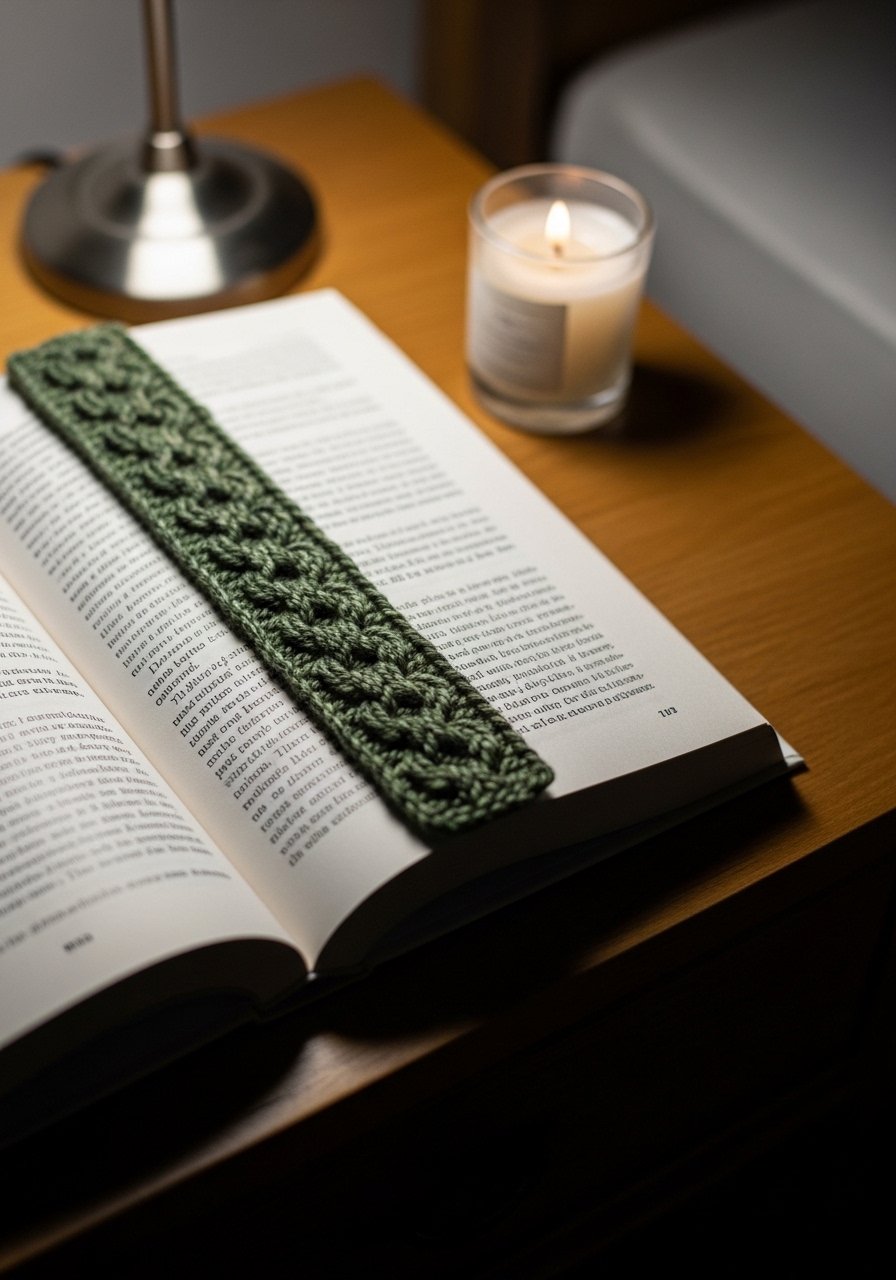
Bookmarks are tiny, instant-pleasure projects that practice even tension and neat edges. They make thoughtful little gifts and use small amounts of yarn. Linen stitch or moss stitch adds texture and a tactile finish. Use a mercerized cotton for sheen like DMC Petra.
Materials
- Cotton or fingering yarn: 15–25 yards
- Straight needles: US 3–4 / 3.25–3.5mm
- Tapestry needle
- Scissors
- Measuring tape
- Small tassel maker (optional)
Instructions
- Cast on 12 stitches.
- Work in moss stitch for 6 inches.
- Bind off loosely.
- Weave in ends and add a tassel if desired.
- Block flat for 1–2 hours to even stitches.
- Trim tassel and present.
How to Display or Gift It
- Tuck into a new paperback as a gift.
- Bundle five bookmarks with a ribbon for a teacher gift.
- Store in a slim craft box to protect tassels.
20. Simple Leg Warmers
Leg warmers are easy to knit flat and seam and add cozy layering to outfits. They teach consistent length and seaming for a tubular look. Use a warm wool blend for stretch and recovery. A fabric measuring tape keeps lengths accurate.
Materials
- Worsted yarn: 300–400 yards
- Straight needles: US 8 / 5mm
- Tapestry needle
- Stitch markers
- Scissors
- Measuring tape
Instructions
- Cast on 56 stitches.
- Work K2, P2 rib for 2 inches; continue in desired stitch for 15–18 inches total height.
- Bind off loosely.
- Seam edges with mattress stitch.
- Weave in ends and steam lightly 10 minutes.
- Let rest 6 hours before wearing.
How to Display or Gift It
- Pair with a dance-themed card for gifts.
- Fold over boots in styled photos.
- Store rolled in a craft drawer to prevent stretching.
21. Knit Pencil Case
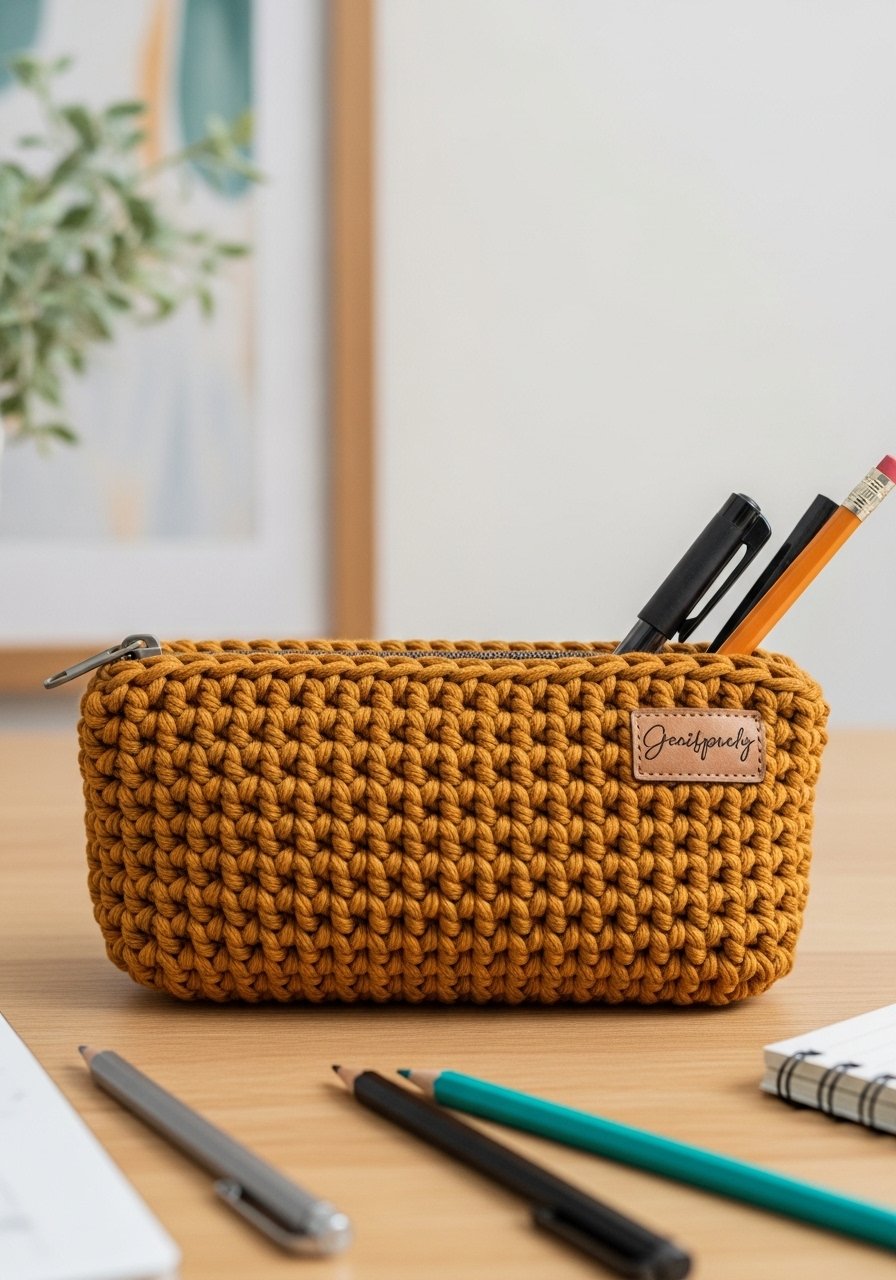
A pencil case teaches neat edges and installing a zipper — very practical for school or craft supplies. You can line it for extra durability. A basic zipper pack and fabric glue help during finishing.
Materials
- Worsted yarn: 150–200 yards
- Straight needles: US 7 / 4.5mm
- Tapestry needle
- Zipper 8–9 inches
- Scissors
- Fabric glue (optional)
Instructions
- Cast on 36 stitches.
- Knit in stockinette or seed stitch for 8 inches.
- Bind off and seam three sides.
- Sew zipper into open edge with tapestry needle and fabric glue if lining.
- Weave in ends and press lightly.
- Let glue cure 24 hours if used.
How to Display or Gift It
- Fill with pencils and a small notebook for a practical gift.
- Add a monogram tag for personalization.
- Store flat to keep zipper aligned.
22. Simple Doll Blanket
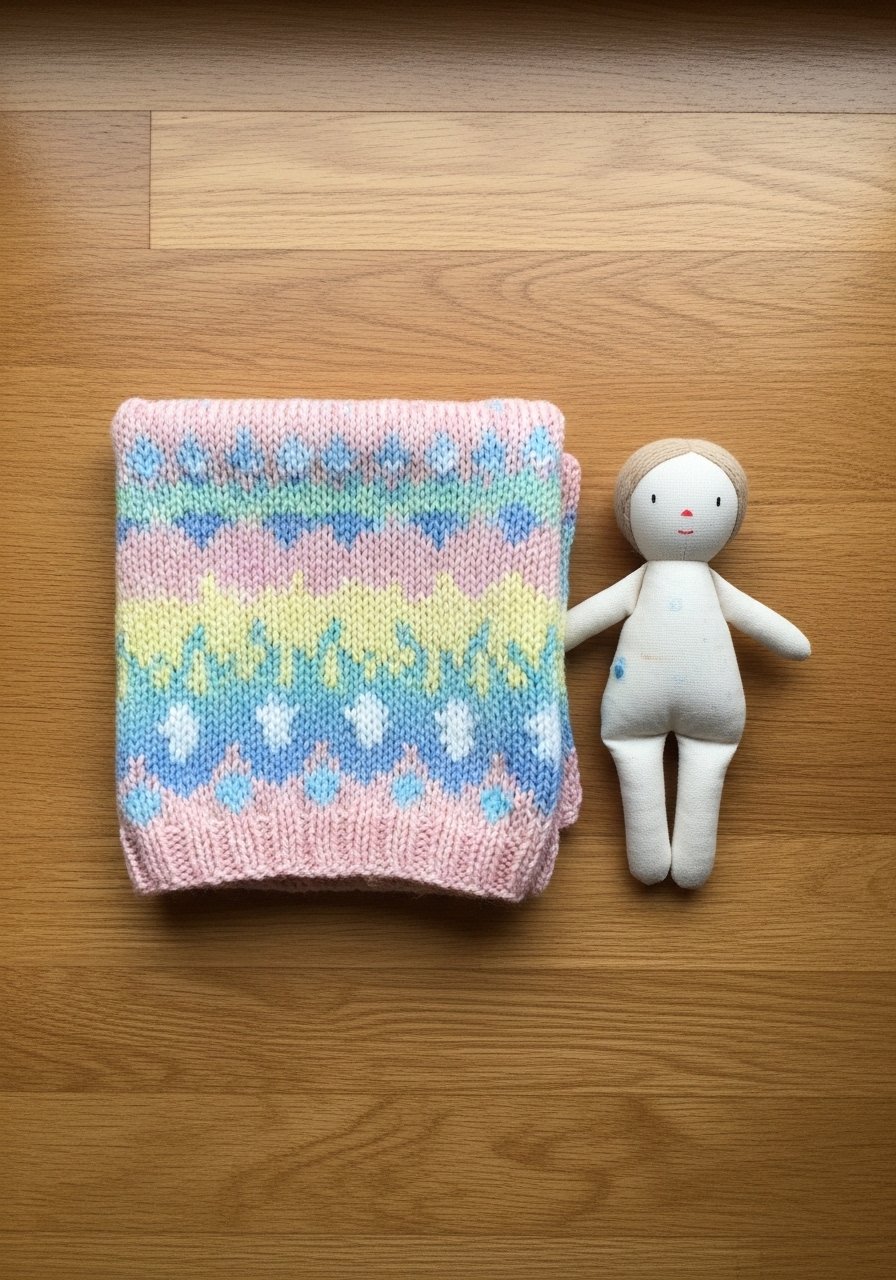
A miniature blanket is perfect for gifts or practice. Use soft yarn and small needles for scaled-down results. It’s a sweet addition to a handmade doll set and quick to finish in an evening.
Materials
- DK yarn: 80–100 yards
- Straight needles: US 6 / 4mm
- Tapestry needle
- Scissors
- Measuring tape
- Small gift box
Instructions
- Cast on 36 stitches.
- Work garter or seed stitch for 12 x 16 inches (doll size).
- Bind off loosely.
- Weave in ends and trim.
- Wash gently and lay flat to dry 4–6 hours.
- Fold and pair with a cloth doll for gifting.
How to Display or Gift It
- Place in a small box with a doll accessory.
- Tie with a ribbon and attach a tiny care tag.
- Store in a shallow drawer to keep shape.
23. Knit Market Produce Bag

This bag is practical and eco-friendly. Use a cotton blend for strength and breathability. Knit two panels and seam for a stretchy mesh-like bag that expands with produce.
Materials
- Cotton yarn: 400–600 yards
- Straight needles: US 8 / 5mm
- Tapestry needle
- Stitch markers
- Scissors
- Measuring tape
Instructions
- Cast on 60 stitches.
- Work a lace mesh by repeating: K1, YO, K2tog across to create stretch. Continue until panel measures 18 inches.
- Bind off and make second panel.
- Seam sides, create reinforced handle by picking up and knitting a band or folding seam.
- Weave in ends and test stretch with weight.
- Wash before first use and let dry 12 hours.
How to Display or Gift It
- Bundle with a farmers’ market guide and gift in a kraft bag.
- Hang from a peg for attractive pantry storage.
- Store rolled in a drawer until market day.
24. Cozy Wrap Vest (simple seams)
A wrap vest is a wearable layering piece knit flat as panels then seamed. It’s straightforward and shows off texture well. Use a lightweight wool blends for season-spanning wear.
Materials
- Worsted or aran yarn: 700–900 yards
- Straight needles: US 8 / 5mm
- Tapestry needle
- Stitch markers
- Scissors
- Measuring tape
Instructions
- Knit back panel to desired width and length in stockinette with rib at hem.
- Knit two front panels with neck shaping by binding off stitches for armhole and neck curve.
- Seam shoulders and sides; finish edges with picked-up ribbing or simple hem.
- Weave in ends.
- Block flat for 24–48 hours to set drape.
- Try on and adjust seams if needed for fit.
How to Display or Gift It
- Pair with a long-sleeve tee for a styled outfit shoot.
- Fold and place in a boutique-style box for gifting.
- Store on a padded hanger to maintain shape.
25. Knit Bike Handle Cozy (small gift)
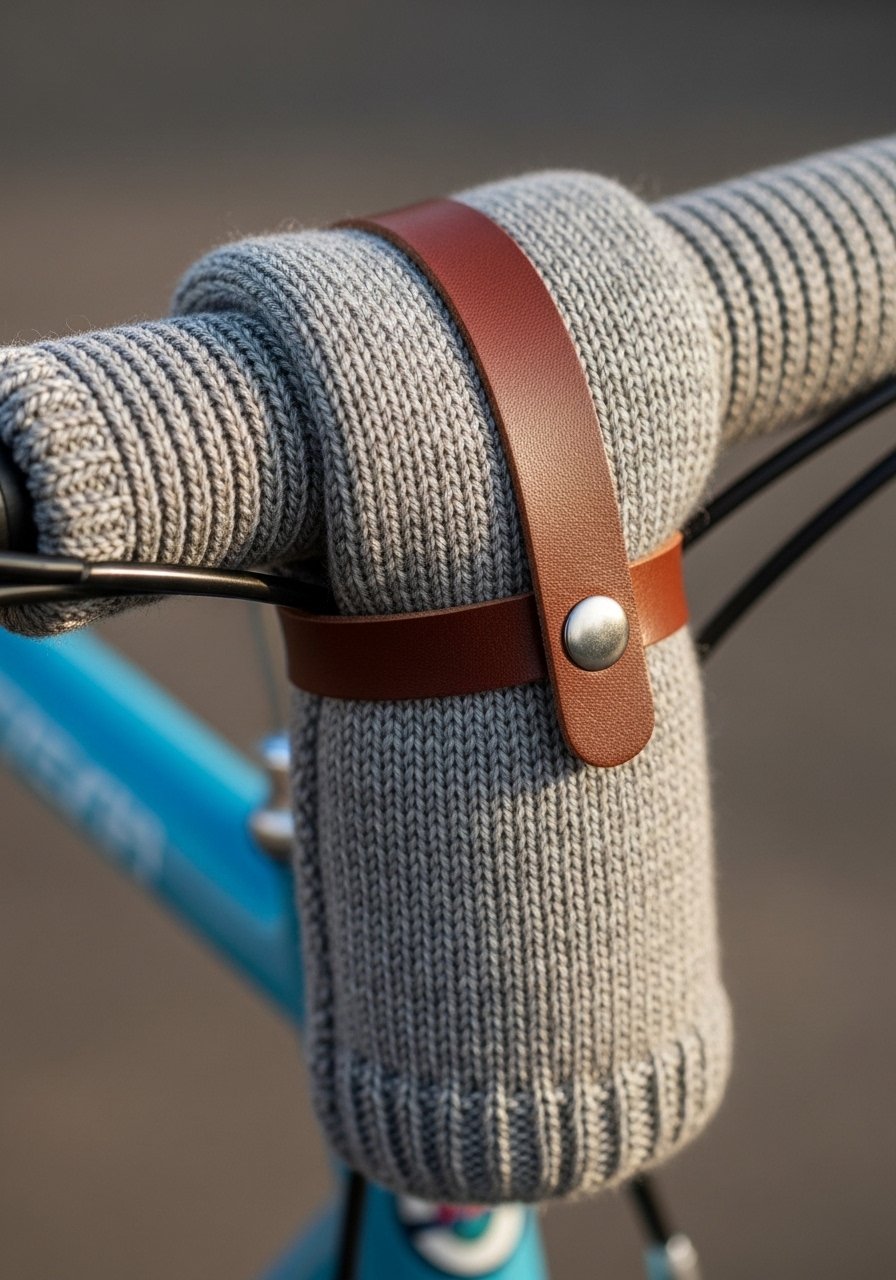
A quirky gift for cyclists, this cozy slides over handles to add grip and comfort. Knit flat and seam, then add a strap. It’s an inventive small project that’s quick and useful.
Materials
- Worsted yarn: 40–60 yards
- Straight needles: US 7 / 4.5mm
- Small button
- Tapestry needle
- Scissors
- Measuring tape
Instructions
- Measure handle circumference and cast on accordingly (e.g., 28 stitches).
- Work in garter or rib for 5 inches.
- Bind off and seam.
- Add a small tab with button for removable closure.
- Test fit and adjust.
- Let seam relax 6 hours.
How to Display or Gift It
- Bundle with a tiny care kit for bike lovers.
- Photograph outdoors for seasonal Pinterest appeal.
- Store in a small zipper pouch to keep clean.
26. Simple Shawlette with Lace Edge

A shawlette adds a feminine layer without being huge. The lace edge gives a delicate finish while the body is simple garter or stockinette. Blocking is key to open the lace properly — allow 24 hours to dry.
Materials
- Fingering or DK yarn: 300–350 yards
- Straight needles: US 6 / 4mm
- Tapestry needle
- Blocking pins and wires
- Scissors
- Row counter
Instructions
- Cast on small number for top center and increase every other row until desired wingspan (e.g., cast on 3, increase to about 200 stitches).
- Work body in garter stitch for 12 inches.
- Add lace chart edge for 6 inches following a simple repeat.
- Bind off loosely.
- Block with wires and pins; let dry 24 hours.
- Weave in ends.
How to Display or Gift It
- Drape over a small wooden ladder for display.
- Pair with a beaded shawl pin in a gift set.
- Store folded with tissue paper to protect lace.
27. Simple Knit Pocket Warmer (rice-filled)
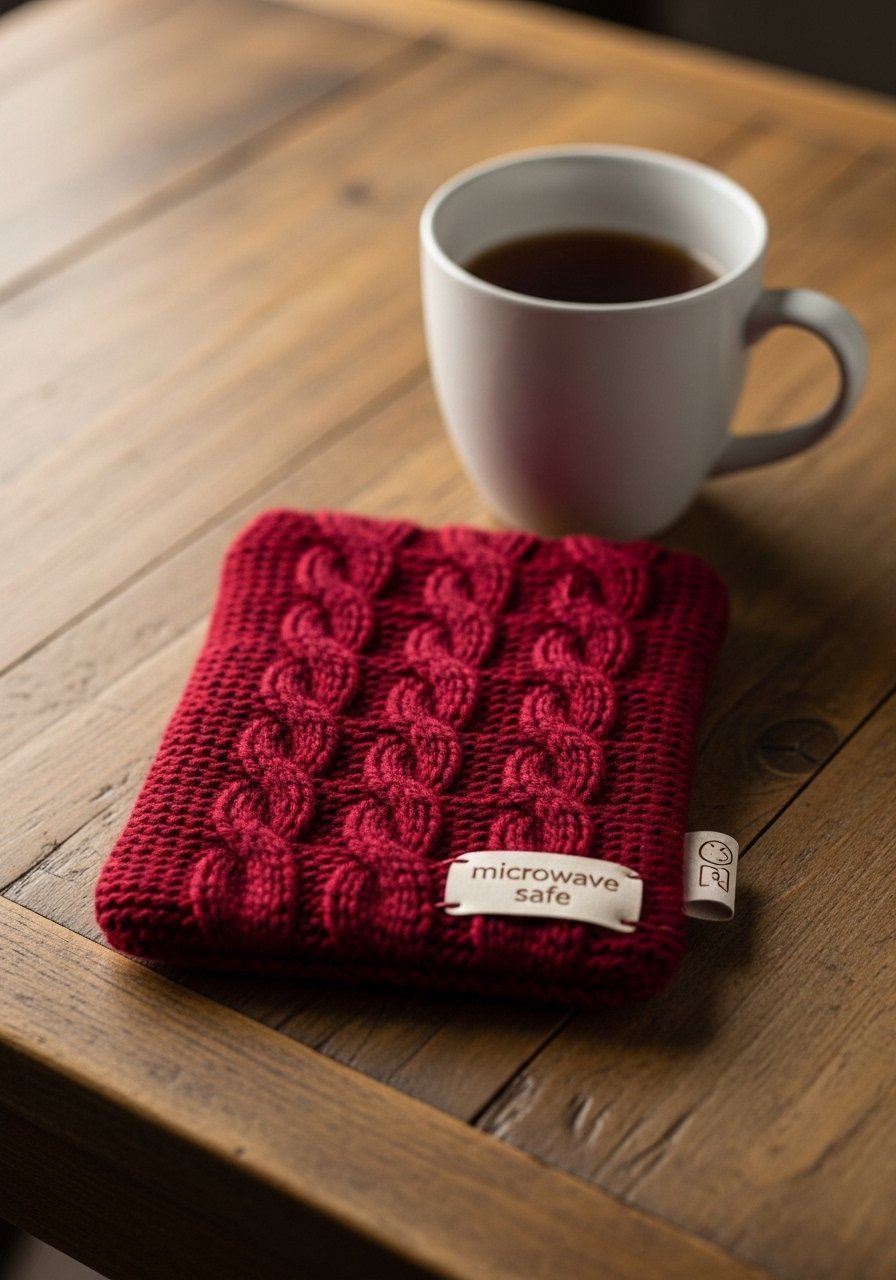
This small sewn pouch is filled with rice to create a microwaveable pocket warmer. Knit two small rectangles and seam, fill with uncooked rice, and sew shut. These are great gifts and travel-friendly. Test heating times conservatively.
Materials
- Worsted yarn: 30–50 yards
- Straight needles: US 7 / 4.5mm
- Tapestry needle
- Uncooked rice: 1–1.5 cups per warmer
- Scissors
- Small funnel or paper cone
Instructions
- Cast on 24 stitches.
- Work garter stitch for 6 inches.
- Bind off and seam three sides leaving an opening.
- Insert rice through funnel and fill to about 3/4 full.
- Sew shut securely and weave in ends.
- Heat in microwave for 20–30 seconds, test temperature before use. Do not overheat.
How to Display or Gift It
- Pair with a small mug and tea bag for a self-care gift.
- Place in a small organza bag for presentation.
- Label with heating instructions and caution notes.
28. Beginner Pocket Scarf (sleeve pockets)
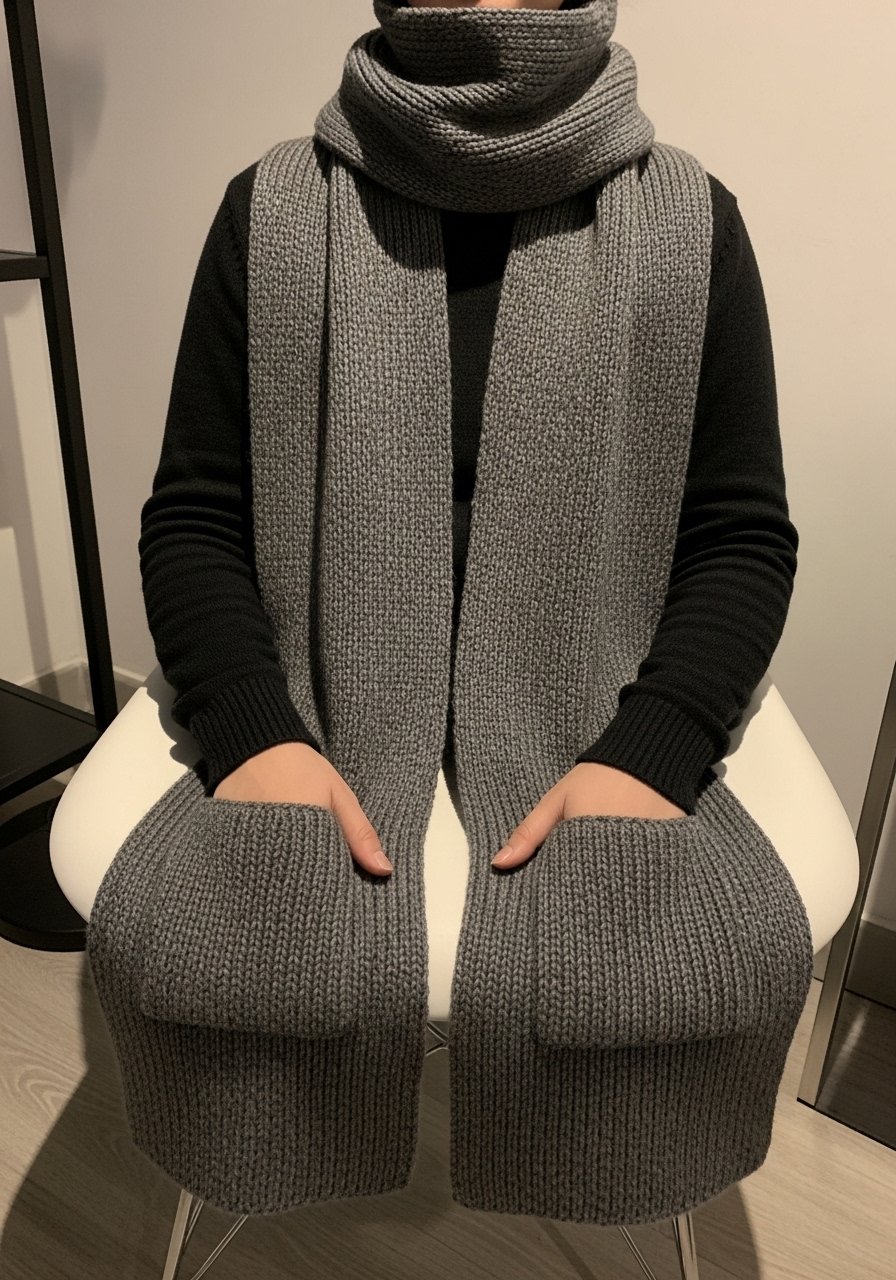
A pocket scarf is useful and clever — knit two long panels or one long strip and add pocket seams at the ends. It's a great next-step project that combines garment and accessory making. Use worsted yarn for warmth.
Materials
- Worsted yarn: 500–700 yards
- Straight needles: US 8 / 5mm
- Tapestry needle
- Stitch markers
- Scissors
- Measuring tape
Instructions
- Cast on 36 stitches.
- Work in garter or seed stitch for 60–70 inches long.
- For each pocket, fold the last 7 inches inward and seam sides leaving an opening to create pocket flap.
- Weave in ends and reinforce pocket seams.
- Steam block lightly 10–15 minutes.
- Test pockets for durability; add reinforcing stitches if needed.
How to Display or Gift It
- Style with a casual coat and photograph for winter Pinterest boards.
- Wrap around a mug and tuck a gift card into one pocket.
- Store rolled to avoid pocket distortion.
You made it through 28 projects — a mix of quick wins and slightly larger pieces so you can practice stitches, shaping, seaming, and finishing with straight needles. Whether you start with a garter stitch scarf or jump into a baby blanket, these projects build confidence and give you beautiful, usable results. Pin this list now so you can return to any project when the mood strikes, and share a favorite with a friend who’s just picked up their first pair of straight needles.
If I had to recommend one tool that helped across most of these projects, it’s a reliable tapestry needle and blunt tip set — they make seaming and weaving ends far less fiddly and speed up finishing. Trust me, a simple tapestry needle set changed how tidy my seams looked across dozens of knits.
Which project are you casting on first?


