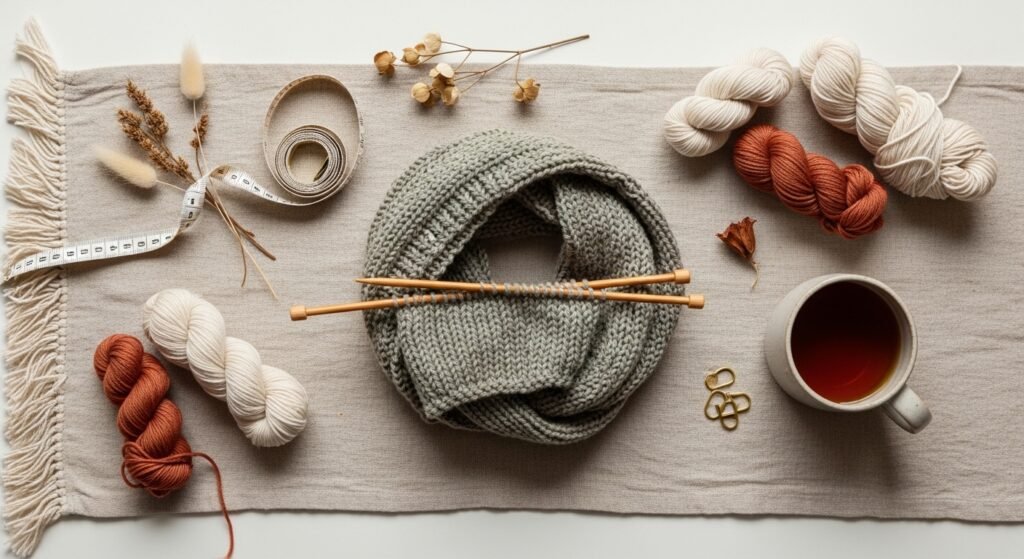
Start with a simple question: ever pick up your needles, only to fumble through a seam, a dropped stitch, or a wonky edge? You’re not alone. These 20 simple beginner knitting tips and tricks will save you time and help you knit like a pro — without turning your living room into a yarn store.
Inside you’ll find quick projects that teach one clear trick each: gauge swatches that actually match, tidy cast-ons and bind-offs, clean joins for stripes, an easy way to fix dropped stitches, and more. Each mini-project is beginner-friendly, includes exact materials, step-by-step instructions, and smart product suggestions so you can buy exactly what helps.
Keep your project bag nearby — I often reach for my circular needles while swatching and a compact row counter when I’m tracking repeats. Grab a pair of US 8 / 5mm circular knitting needles and a set of stitch markers and let’s make these tips stick.
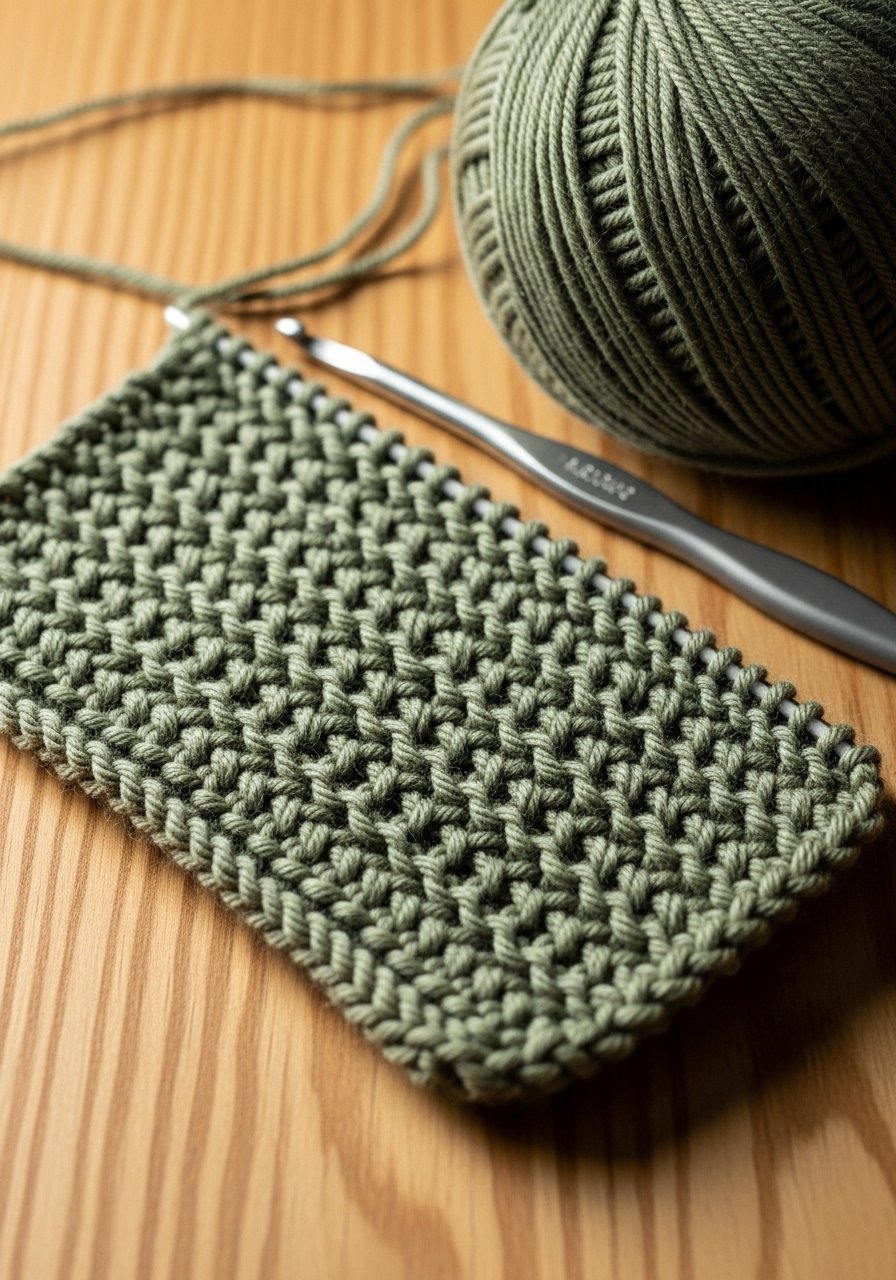
- Perfect Gauge Swatch (Practice before every big project)
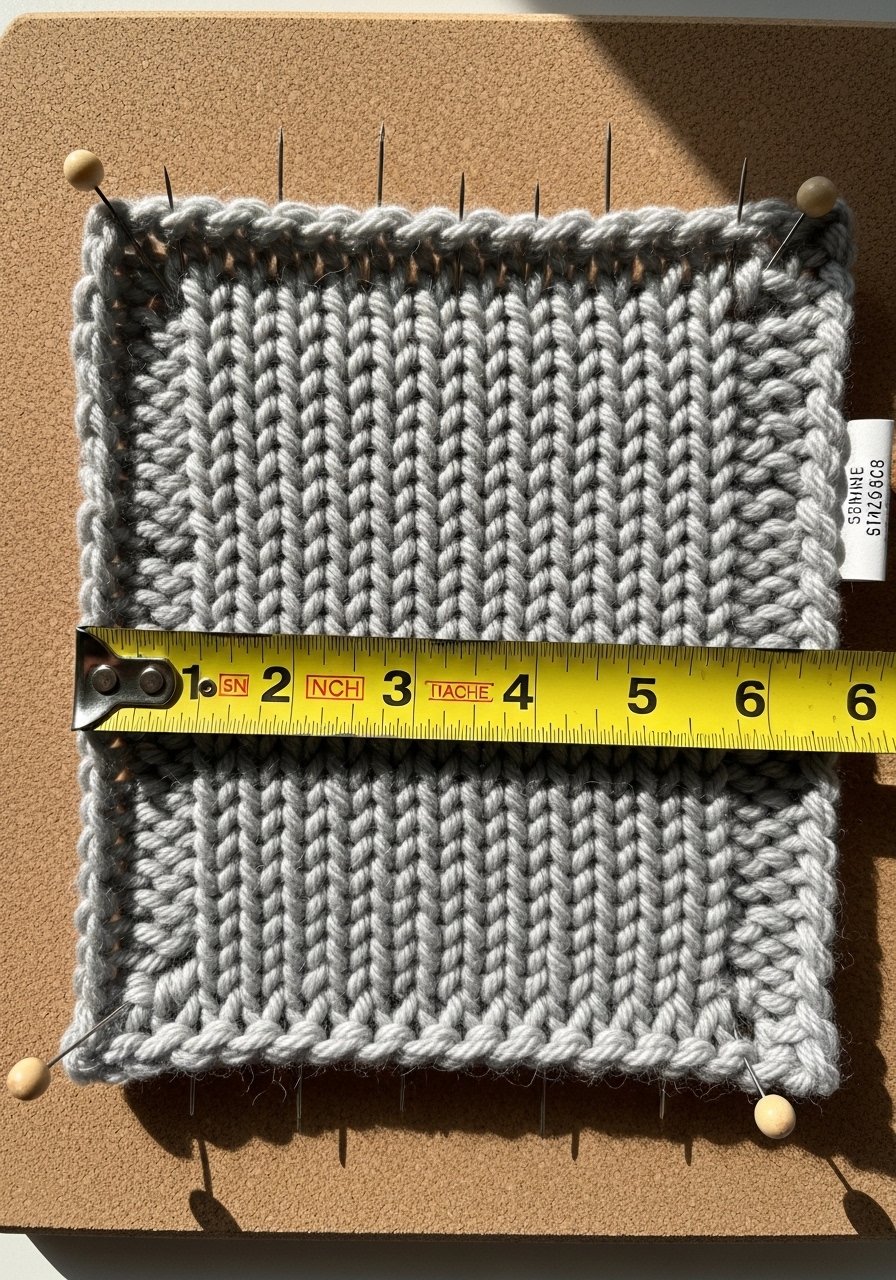
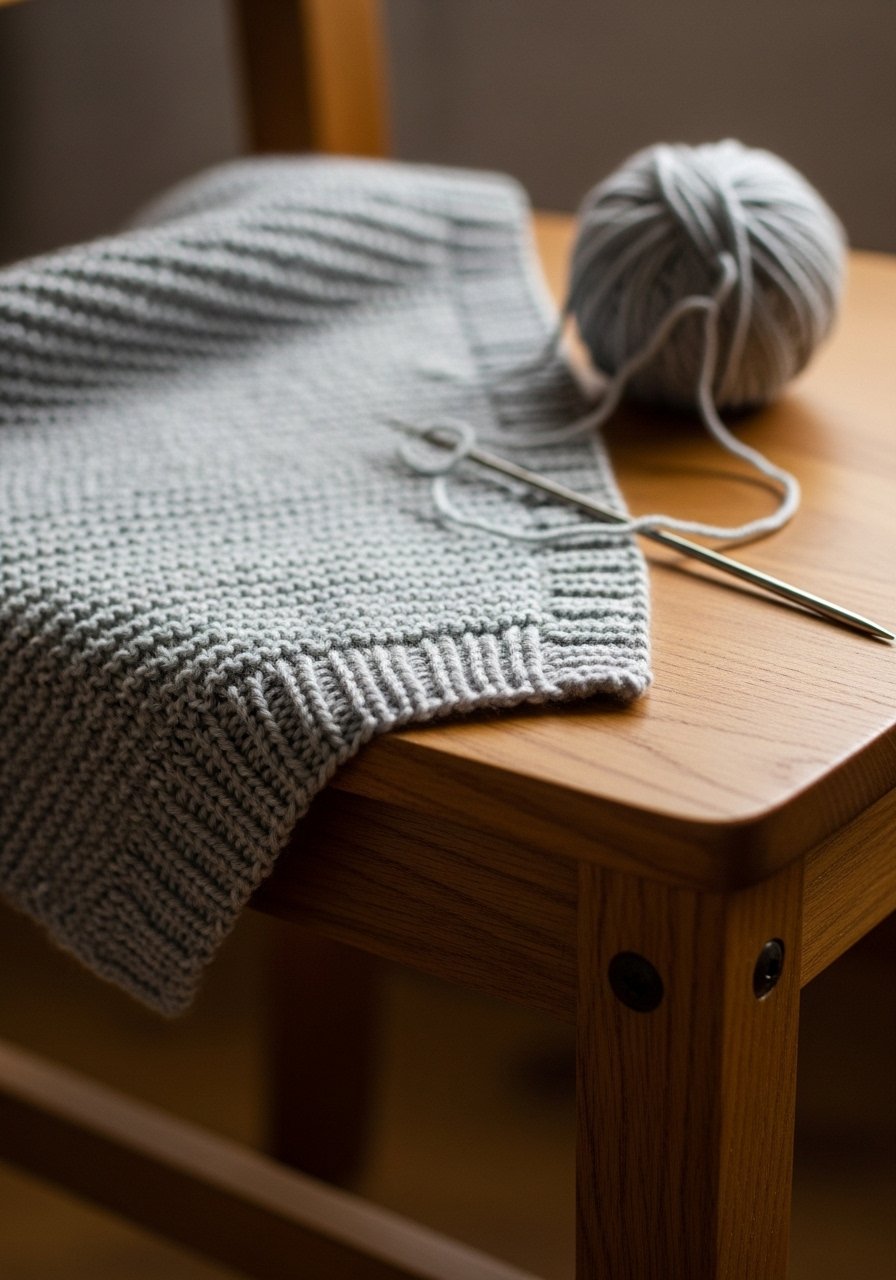
A correct gauge swatch saves hours of frogging. This project teaches you how to measure and adjust tension so garments actually fit. The swatch should look even, feel stable, and show stitch definition—perfect training for colorwork or fitted hats. Beginners and anyone switching yarn will love how this small step removes guesswork. You’ll feel more confident when you start the real piece.
Materials
- Worsted-weight yarn, 50 g (about 110–120 yards), light color
- US 8 / 5mm knitting needles, 16" circular or straight
- Tapestry needle (large-eye)
- Locking stitch markers (set of 20)
- Measuring tape or ruler with inches
- Scissors
- Cork blocking board or towel
- Blocking pins (optional)
Instructions
- Cast on 20–24 stitches with a stretchy long-tail cast-on using the needle size recommended for the yarn label.
- Work 10 rows in stockinette (knit one row, purl one row) or garter if preferred.
- Knit until the swatch is about 4 inches tall.
- Bind off loosely, leaving a long tail for weaving.
- Lay flat on a towel or cork board and gently steam or pin to measurements. Blocking time: 12–24 hours until fully dry.
- Measure 4 inches in the center of the swatch horizontally and vertically. Count stitches in that span. That’s your stitches-per-inch and rows-per-inch.
- If stitches-per-inch is low (too few sts), switch to smaller needles; if high, go up a needle size.
- Re-swatch if needle size changed.
How to Display or Gift It
Pin your swatches in a small binder or a zip pouch for pattern reference. Use a small craft organizer tray to store completed swatches and yarn labels. Swatches make great teacher notes—attach a sticky note with yarn, needles, and gauge and tuck it into gift bundles.
- Tidy Long-Tail Cast-On (A neat edge that won’t pucker)

This cast-on gives a neat, stretchy edge that works for scarves, hats, and cuffs. It’s faster than stringing on individual stitches and looks finished from the start. If you’ve ever had a too-tight first row, this tip is for you. Beginners will appreciate how easy it is with a little practice.
Materials
- Worsted-weight yarn, 20 g
- US 8 / 5mm straight or circular needles
- Yarn needle
- Small ruler
- Scissors
- Sticky note to mark tail length
Instructions
- Measure a tail equal to double the number of stitches you need in inches (e.g., for 20 sts, leave ~40 inches).
- Make a slipknot and place on needle; hold tail over thumb and working yarn over index finger.
- Use the long-tail cast-on motion to create stitches: grab thumb loop with needle tip, then index loop, and slide onto needle.
- Continue until desired cast-on count.
- Check elasticity—stretch the cast-on gently. If stiff, try wrapping the yarn a little looser next time.
- Begin your pattern row. If edge pulls, block lightly or try a slightly larger needle for the first row.
How to Display or Gift It
Use samples of cast-on edges in a small fabric swatch book for reference. Store with a pack of locking stitch markers so you always mark the first stitch of a project.
- Easy Two-Row Garter Heel (Simple sock heel that’s forgiving)
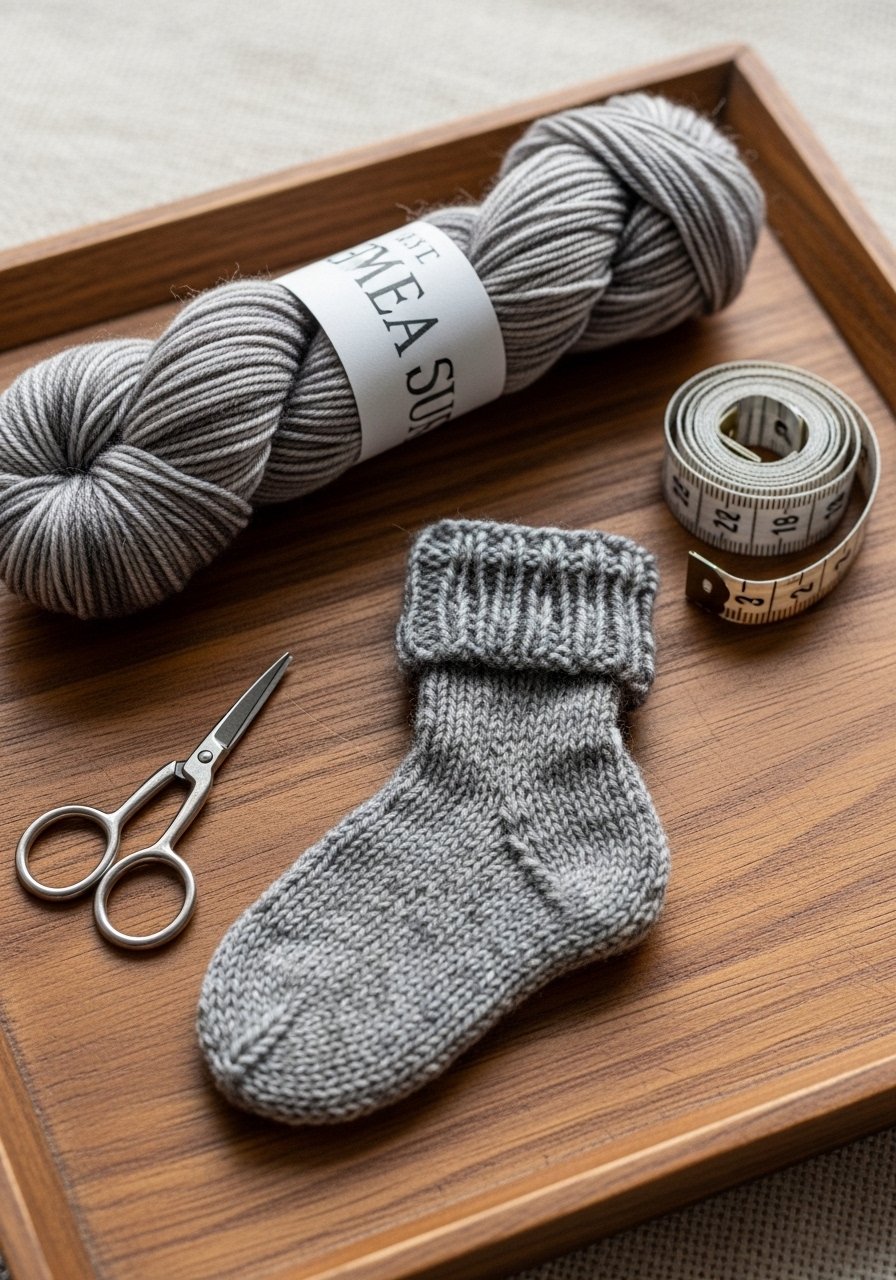
A garter-heel is forgiving and great for first sock attempts or slippers. It avoids complicated short-row shaping but still fits comfortably. The texture looks cottagecore and handmade—perfect as an intro to sock construction. Knitters who dislike fiddly math will love this approach.
Materials
- Fingering-weight yarn, 50 g (approx 400 yards for pair; use 25 g for a sample)
- Double-pointed needles US 1–3 / 2.25–3.25mm, set of 4
- Stitch markers (4)
- Tapestry needle
- Small scissors
- Row counter (optional)
Instructions
- Cast on stitches for cuff and work ribbing for 1–1.5 inches.
- Knit stockinette for foot length until ready to form heel flap.
- For heel flap, work garter stitch back and forth across half the stitches for 12 rows.
- Pick up 4 stitches along the gusset edge for reinforcement.
- Knit around; when foot is complete, decrease evenly toward toe.
- Graft toe with Kitchener stitch and weave in ends.
- Block gently; allow 4–6 hours to settle.
How to Display or Gift It
Place finished socks in a small kraft box with tissue. Pair with a mini skein for a cozy set. For storage use a zip-top craft organizer bag.
- Neat Join for In-the-Round (Invisible yarn join)
Changing colors or joining a new skein without a visible knot makes work look pro. This invisible join technique keeps tension even and avoids bulky bumps. It's perfect for hats, cowls, and colorwork. Gift-givers will appreciate the cleaner finish.
Materials
- Two skeins of the same yarn color/fiber, worsted weight, 50 g each
- Circular needles US 8 / 5mm
- Tapestry needle
- Scissors
Instructions
- Drop old yarn, leaving a 6–8” tail.
- Thread new yarn onto tapestry needle.
- Weave new yarn under 3–4 knit stitches on the needle, then under 3–4 purl bumps on the corresponding side.
- Pull gently to match tension—don’t over-tighten.
- Trim tails after weaving; weave ends into the fabric for about 2 inches.
- Lay flat, steam lightly, and press (no more than 2 seconds with a steam iron).
How to Display or Gift It
Seamless joins look boutique. Display hats on a small wooden easel or in a gift box with a mini yarn skein and care card. Try a small wooden easel for market displays.
- Simple Seed Stitch Headband (Practices tension and stitch reading)

This headband uses seed stitch to teach even tension and stitch recognition. The result is stretchy, warm, and cottagecore-friendly. It’s quick—perfect for practice between bigger projects.
Materials
- Bulky-weight yarn, 50 g (about 80–90 yards)
- US 10 / 6mm knitting needles, 16" circular or straight
- Tapestry needle
- Scissors
- Measuring tape
Instructions
- Cast on 18 stitches using long-tail cast-on.
- Row 1: K1, P1 across.
- Row 2: P1, K1 across.
- Repeat Rows 1–2 until piece measures 18 inches.
- Bind off loosely. Sew ends together using mattress stitch.
- Weave in ends and steam lightly; allow 30–60 minutes to relax.
How to Display or Gift It
Tie with twine and tuck a dried lavender sprig for gifting. Store flat in a fabric storage bin to keep shape.
- Pick-Up Stitches for a Clean Border (Perfect for blankets and sweaters)
Picking up stitches creates polished borders and avoids bulky seams. This is invaluable for finishing cardigans and blankets. It looks tidy and reduces sewing time—great for beginners who dread seaming.
Materials
- Project (sample blanket piece) in worsted weight yarn
- Circular needles US 8 / 5mm
- Tapestry needle
- Locking stitch markers
- Scissors
- Measuring tape
Instructions
- With right side facing, insert needle into the edge stitch ladder.
- Pick up and knit one stitch every two rows for a neat look.
- Continue until edge is complete.
- Work border pattern (e.g., 1×1 rib for 6 rows).
- Bind off and weave in ends.
- Block flat; allow 12–24 hours.
How to Display or Gift It
A picked-up border frames a blanket beautifully. Fold and present in a kraft box with care instructions. Use a craft organizer tray for stacking finished blankets.
- Fix a Dropped Stitch (Quick rescue technique)
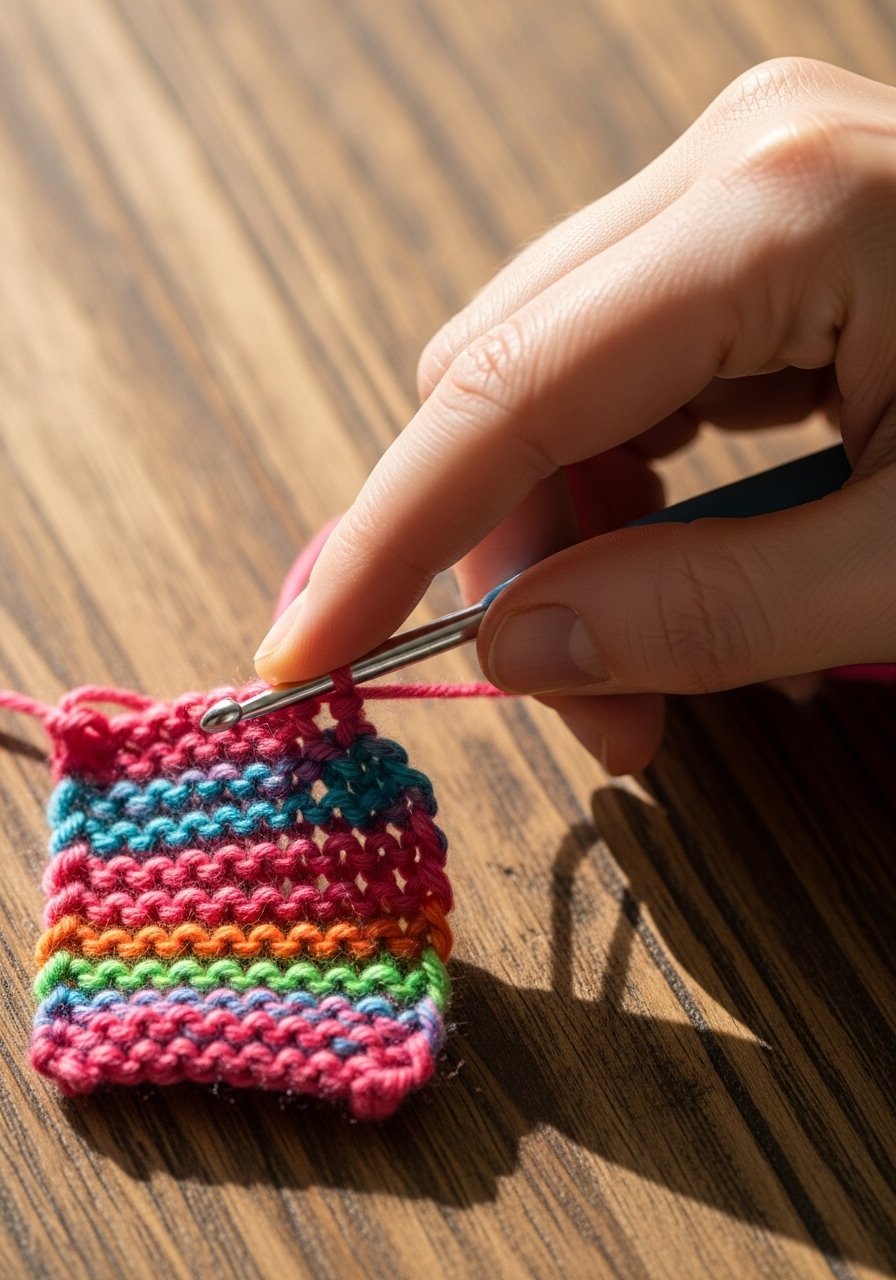
Dropped stitches panic beginners, but rescuing them is easier than it looks. This lesson uses a crochet hook to ladder the stitch back up—fast and satisfying. Keep calm and grab a hook.
Materials
- Small swatch with a dropped stitch (worsted yarn)
- Crochet hook, size to match yarn (e.g., G/6 / 4mm)
- Tapestry needle
- Scissors
Instructions
- Locate the ladder where the stitch dropped.
- Insert crochet hook through the dropped loop from front to back.
- Pull nearest ladder rung through the loop to form a new stitch.
- Repeat until stitch reaches the needle row.
- Place recovered stitch back onto knitting needle.
- Tighten gently to match surrounding tension.
How to Display or Gift It
Include a tiny crochet hook and a tag with “repair kit” in gift sets. Store repair tools in a small craft zipper pouch.
- Blocking for Better Shape (How to block like a pro)
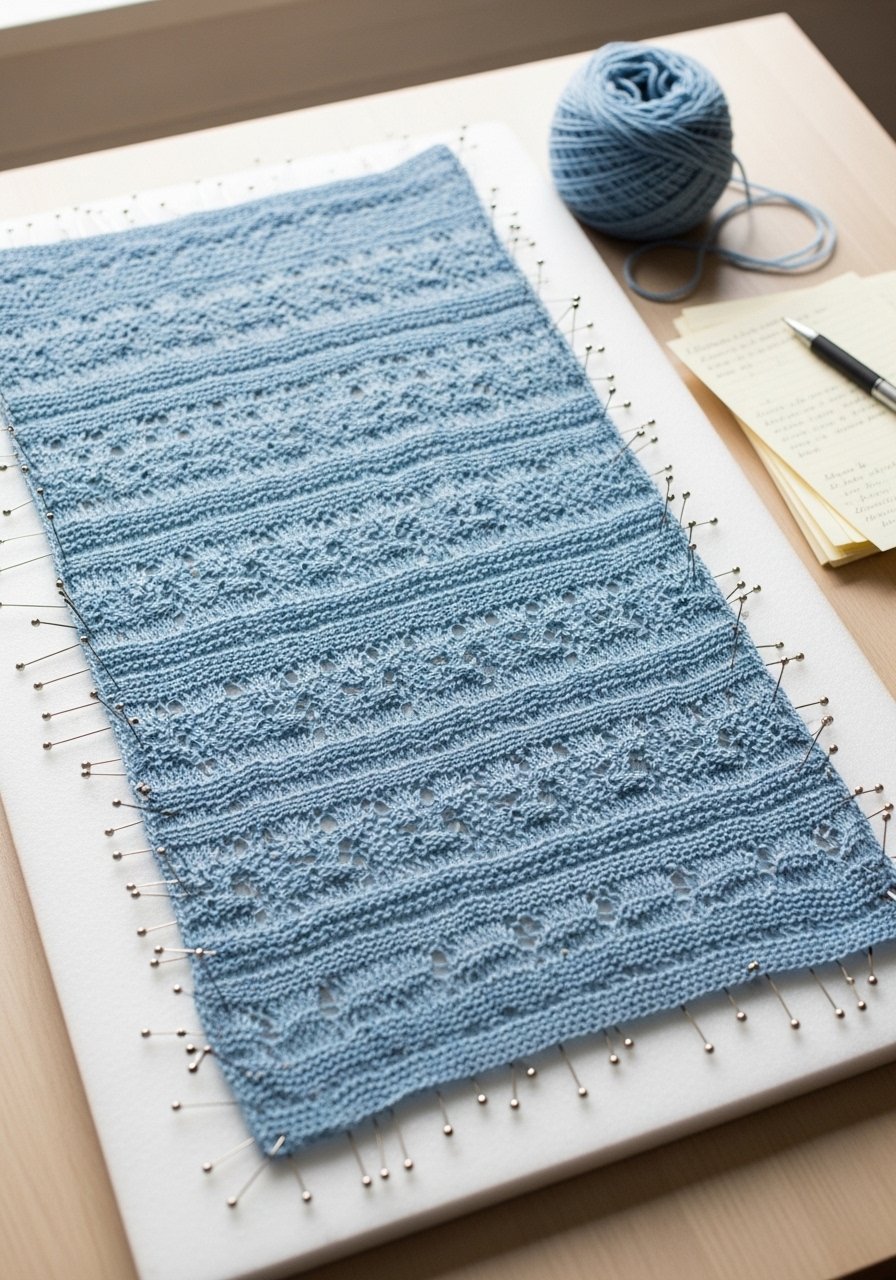
Blocking evens stitches, opens lace, and sets dimensions. This is the finishing move that makes handknits look professional. You’ll learn wet and steam blocking for different fibers.
Materials
- Finished knit piece (e.g., scarf)
- Blocking mats or foam tiles
- T-pins (rust-proof)
- Spray bottle or steam iron
- Measuring tape or blocking gauge
- Towel
Instructions
- For wool: soak piece in lukewarm water for 10–15 minutes, gently press out excess (no wringing).
- Lay flat on blocking mats and pin to desired measurements.
- For delicate fibers: use a spray bottle and lightly mist, then pin.
- Allow to dry 12–24 hours.
- For steam-blocking, hover iron 1 inch above fabric and use steam for 2–3 seconds; don’t press directly unless pattern allows.
- Remove pins and recheck measurements.
How to Display or Gift It
A blocked shawl folds elegantly in a gift box. Use a foam blocking mat set for easy storage between uses.
- Mattress Stitch Seaming (Invisible join)
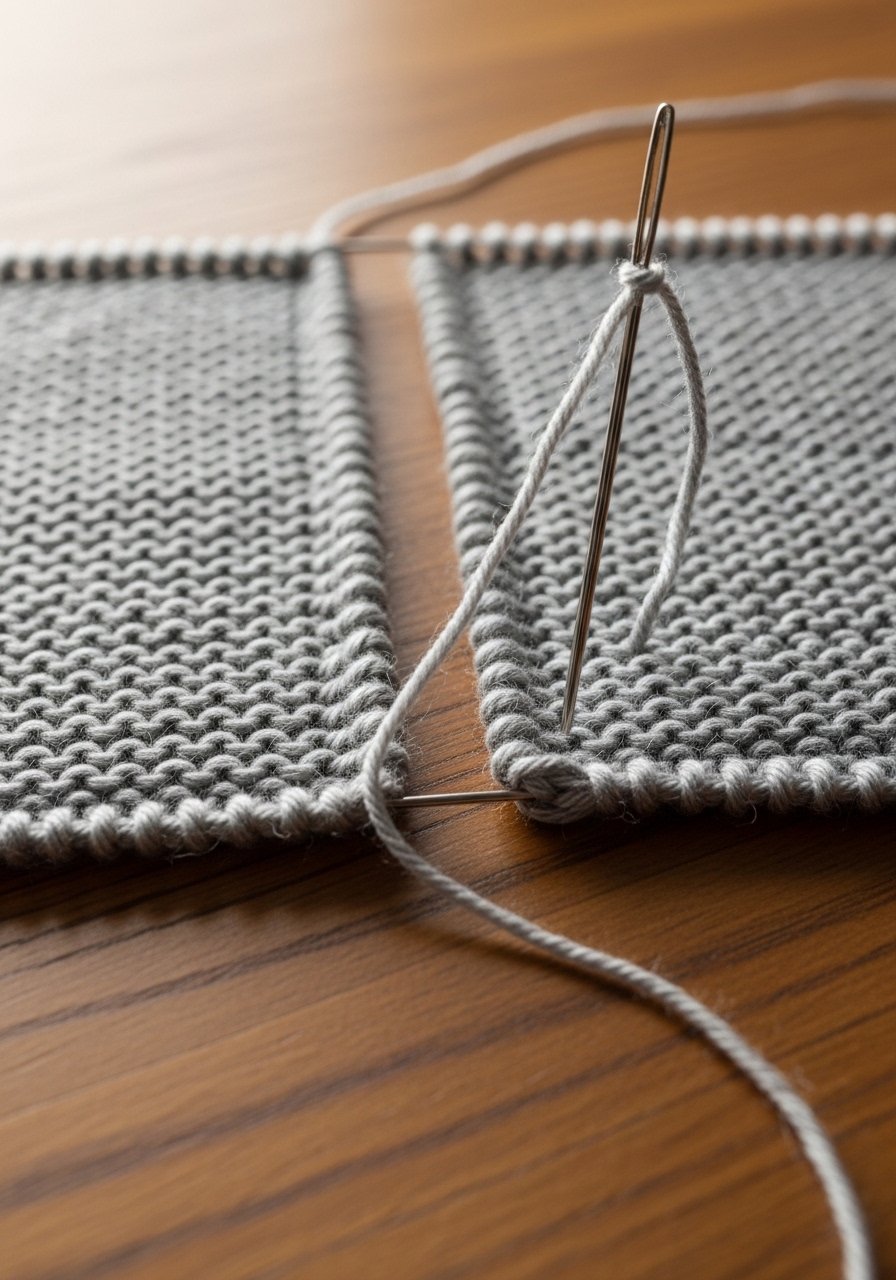
Mattress stitch creates an invisible seam on stockinette—perfect for sweaters. It gives a flat finish and professional look. You’ll learn alignment, tension, and finishing tips.
Materials
- Two knitted panels
- Tapestry needle
- Same yarn used in panels (6–12 inches tails)
- Pins or sewing clips
- Scissors
- Measuring tape
Instructions
- Align panels with right sides facing up and edges touching.
- Thread tapestry needle with a 12–18 inch tail.
- Start at bottom: pick up the horizontal bar between first and second stitch on left panel, then same on right.
- Pull gently to close; repeat evenly up the seam.
- Keep tension even—seam should lie flat, not cinched.
- Weave in tails; press gently.
How to Display or Gift It
Seamed garments hang better. Store finished projects in breathable fabric storage bins.
- Provisional Cast-On (Leave live stitches for later)
A provisional cast-on lets you leave live stitches to be worked later—great for toe-up socks or seamless cuffs. You’ll practice making and removing the provisional chain cleanly.
Materials
- Scrap yarn (contrasting, thin)
- Working yarn (worsted)
- Crochet hook (size to match scrap yarn)
- Knitting needles for project
- Tapestry needle
- Scissors
Instructions
- Make a slipknot with scrap yarn and chain 2–3 stitches with crochet hook.
- Place stitches onto knitting needle by picking up the chain loops.
- Work your project.
- When ready to remove provisional cast-on, use crochet hook to lift the scrap chain and place live stitches on needle.
- Join to live stitches as instructed.
- Weave in ends.
How to Display or Gift It
Provisional cast-ons make two-piece joins seamless. Use a small crochet hook set kept with your needles.
- Simple I-Cord (Neat drawstrings and straps)
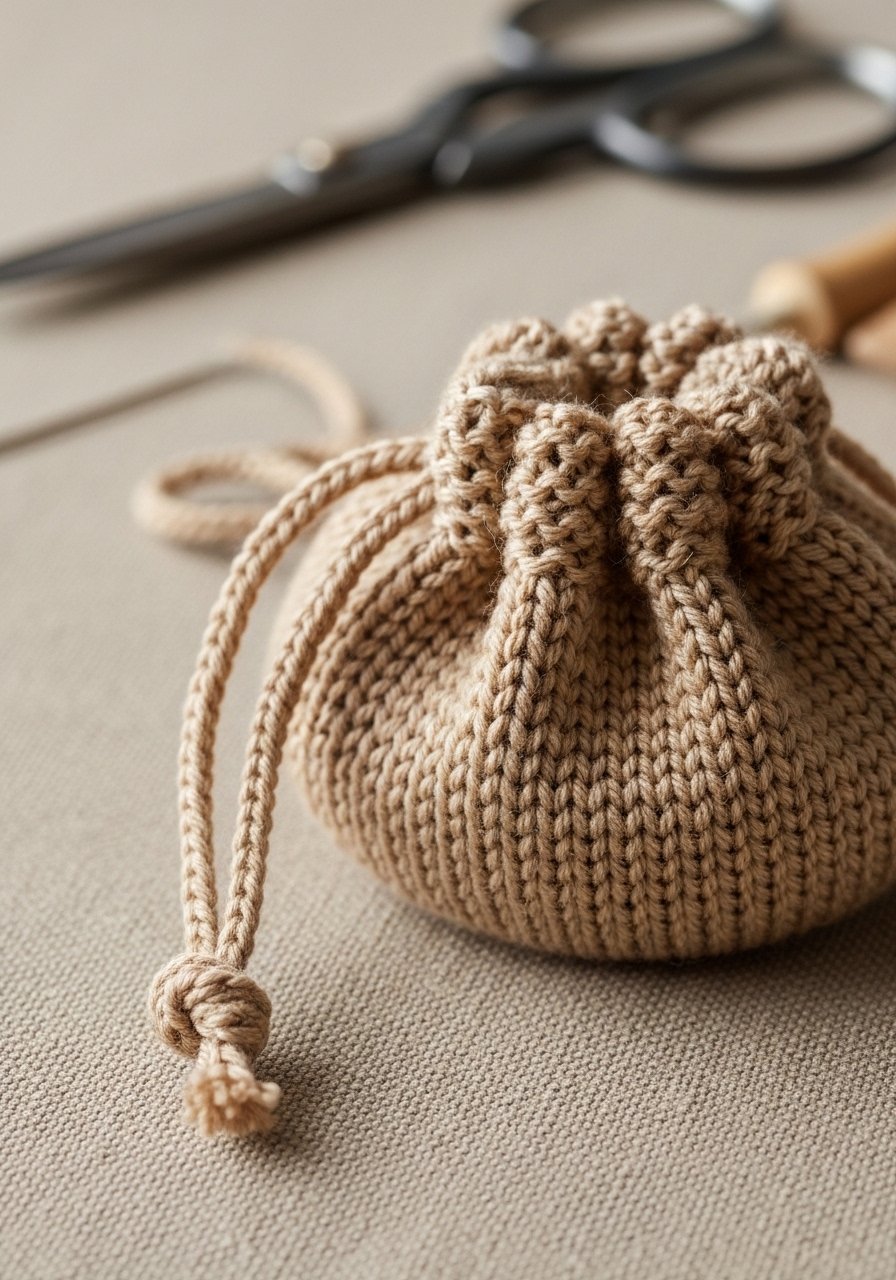
An I-cord is compact and tidy—a great finishing trick for bags, hoody drawstrings, and strap details. It’s portable and rhythmic once you get going.
Materials
- Small amount bulky or worsted yarn
- Double-pointed needles US 6–8 / 4–5mm (or small circular)
- Scissors
- Tapestry needle
Instructions
- Cast on 3 stitches on DPNs.
- Slide stitches to other end, pull working yarn across, and knit all stitches.
- Repeat sliding and knitting to desired length.
- Bind off loosely and sew ends into project.
- For drawstrings, weave into casing and knot ends.
How to Display or Gift It
I-cords add polish to pouches. Present small bags on a small wooden easel or tuck into kraft bags.
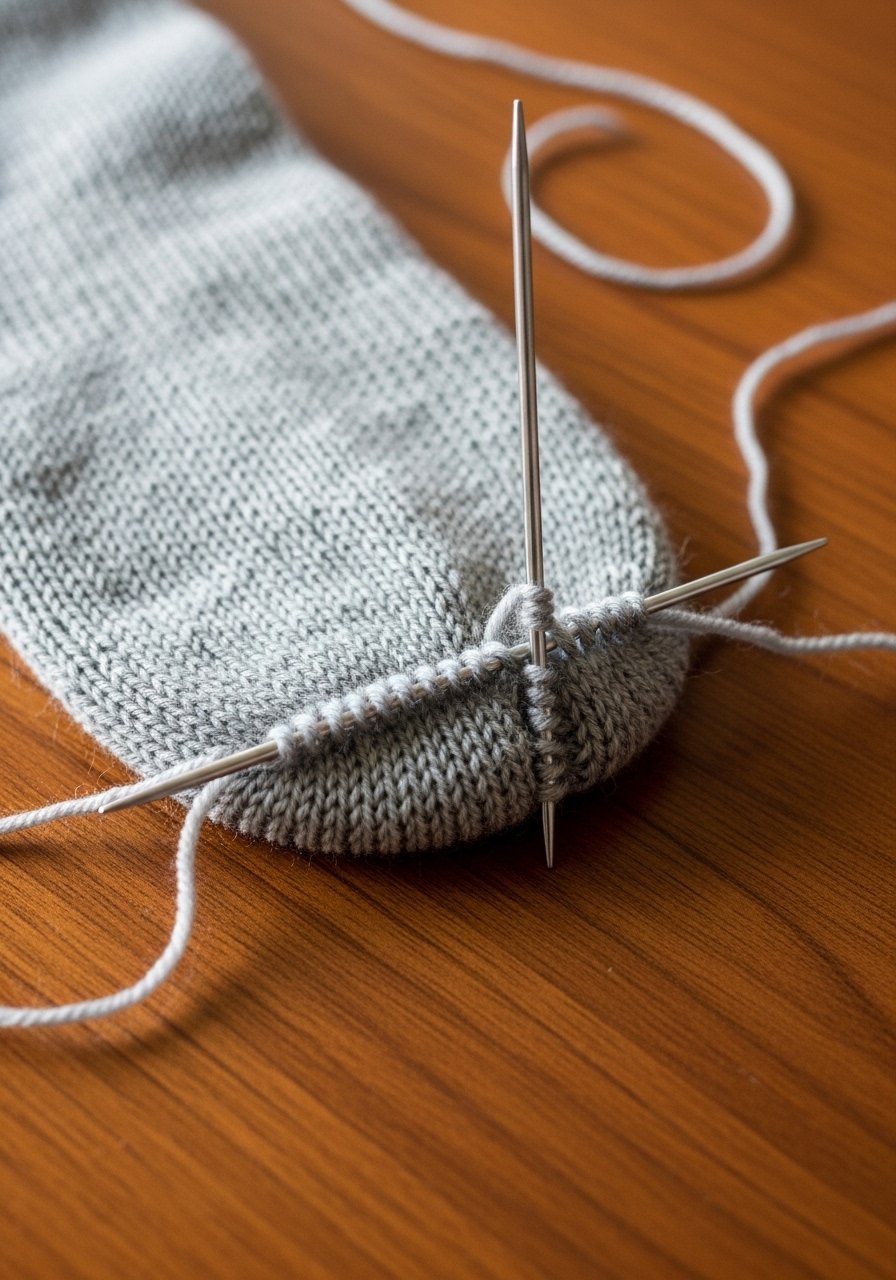
- Knit a Simple Cowl (Practice circular knitting)
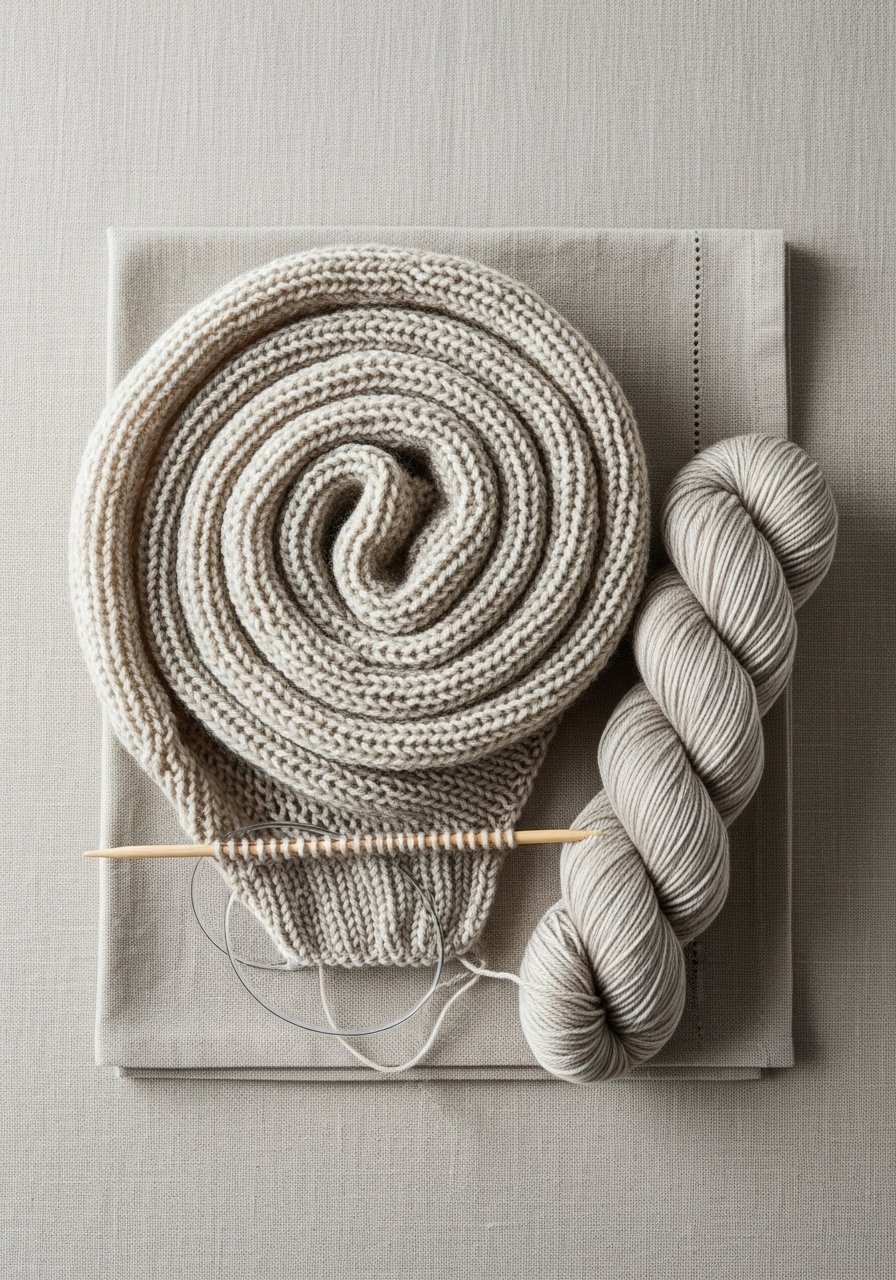
A cowl is a forgiving circular project that teaches joining in the round and working flat in the round. It’s quick and wearable—ideal for practicing tension control.
Materials
- Bulky-weight yarn, 150 g (~200–250 yards)
- Circular needle US 10 / 6mm, 24" or 16" depending on desired circumference
- Stitch marker
- Tapestry needle
- Scissors
Instructions
- Cast on 80 stitches using stretchy cast-on on circular needle.
- Join carefully, placing a stitch marker to mark the beginning.
- Work K2, P2 rib for 6 inches, or desired height.
- Bind off loosely with a stretchy bind-off.
- Weave in ends, block lightly for 2–4 hours.
How to Display or Gift It
Fold and tie with twine for gifting. Include a care tag. Store in a fabric storage bin.
- Kitchener Stitch Toe (Invisible grafting)
Kitchener grafting gives a smooth, comfortable toe—great for socks and slippers. This technique is worth learning once; it makes knit footwear feel finished and comfortable.
Materials
- Two sections to graft (e.g., sock toe)
- Tapestry needle
- Matching yarn tail (12–18 inches)
- Scissors
- Sock blockers (optional)
Instructions
- Arrange two needles with live stitches facing you.
- Thread yarn onto tapestry needle.
- Follow Kitchener sequence: knit off, purl on, purl off, knit on—repeat.
- Continue until all stitches are grafted.
- Pull through and secure; weave tail inside.
- Block if desired; allow 4–6 hours.
How to Display or Gift It
Kitchenered socks slide into shoe boxes nicely. Use a set of sock blockers for finishing presentation.
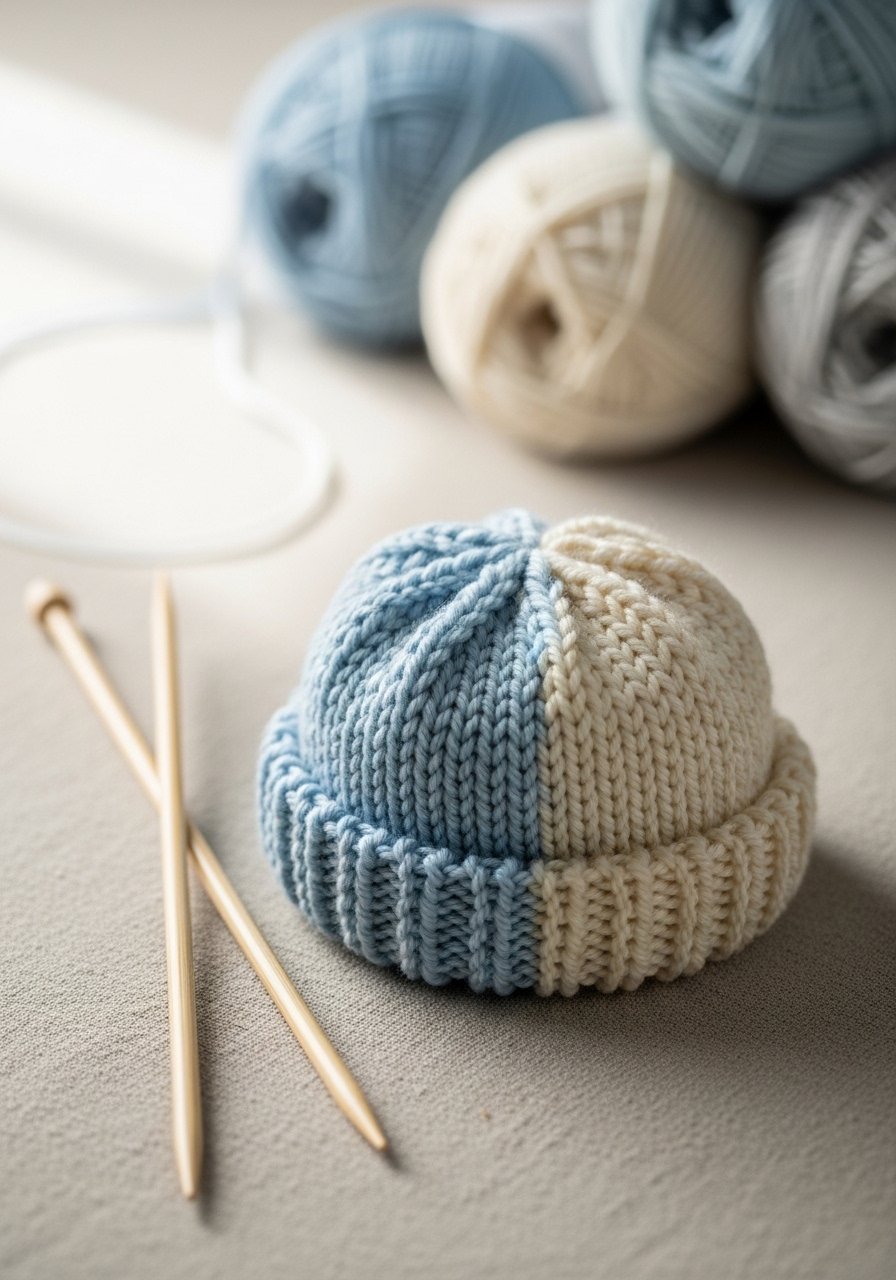
- Color-Change Without Carrying Yarn (Tidy stripe ends)
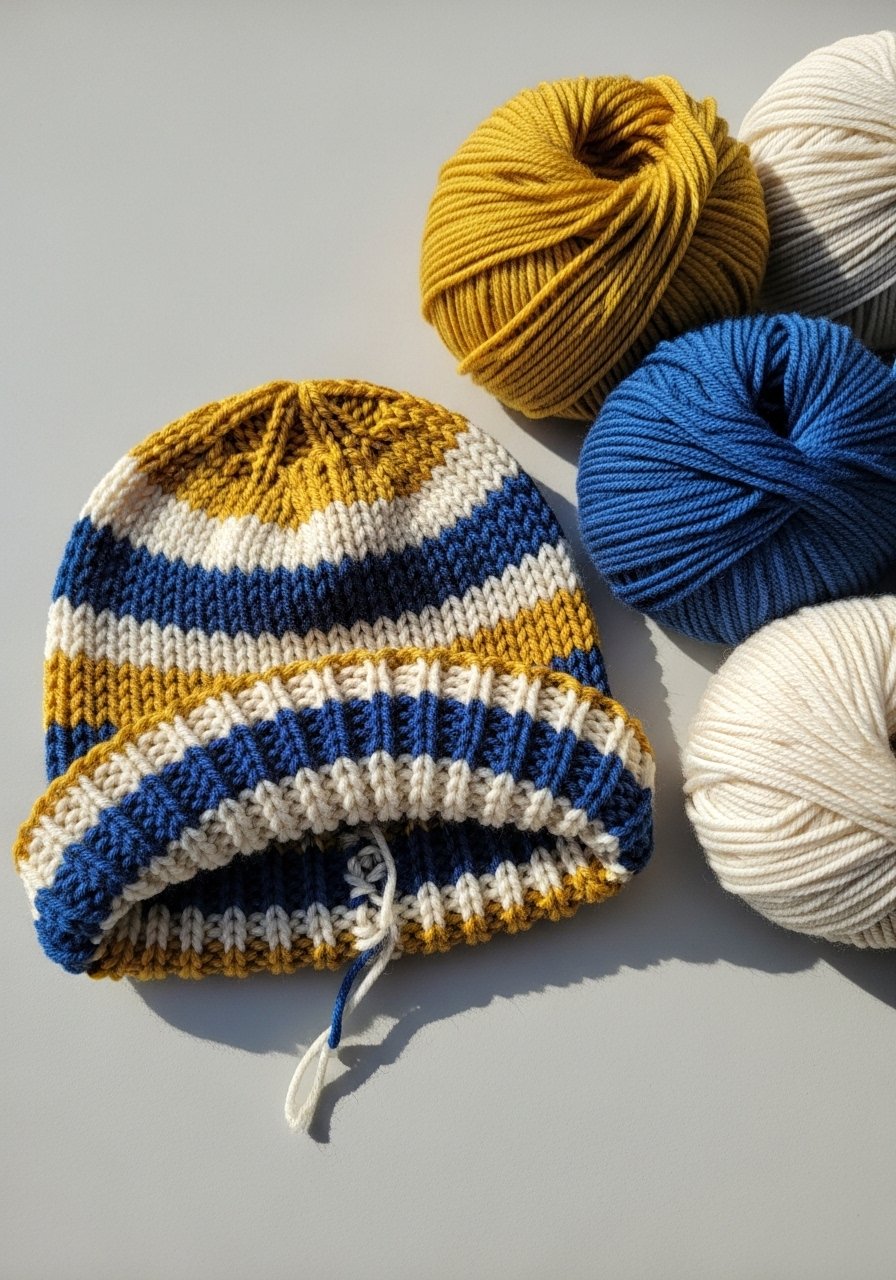
Switching colors can become bulky fast. This approach cuts and weaves ends to keep stripes light and flexible—perfect for baby hats and bold stripes.
Materials
- Two or more colors of worsted yarn
- Circular needles US 8 / 5mm
- Tapestry needle
- Scissors
- Stitch markers
Instructions
- When ready to change color, cut old yarn leaving a 6-inch tail.
- Join new color by tying a loose knot or simply starting with a 6-inch tail.
- After several rounds, weave both tails back into fabric over about 1.5 inches using tapestry needle.
- Trim excess.
- For repeated stripes, consider carrying color every 2–3 stitches only; otherwise weave ends.
How to Display or Gift It
Striped hats look great in tiered market displays. Pack in a kraft box and add a care note. Use a small kraft gift box set.
- Marking Rows and Repeats (Row counters and tracking)
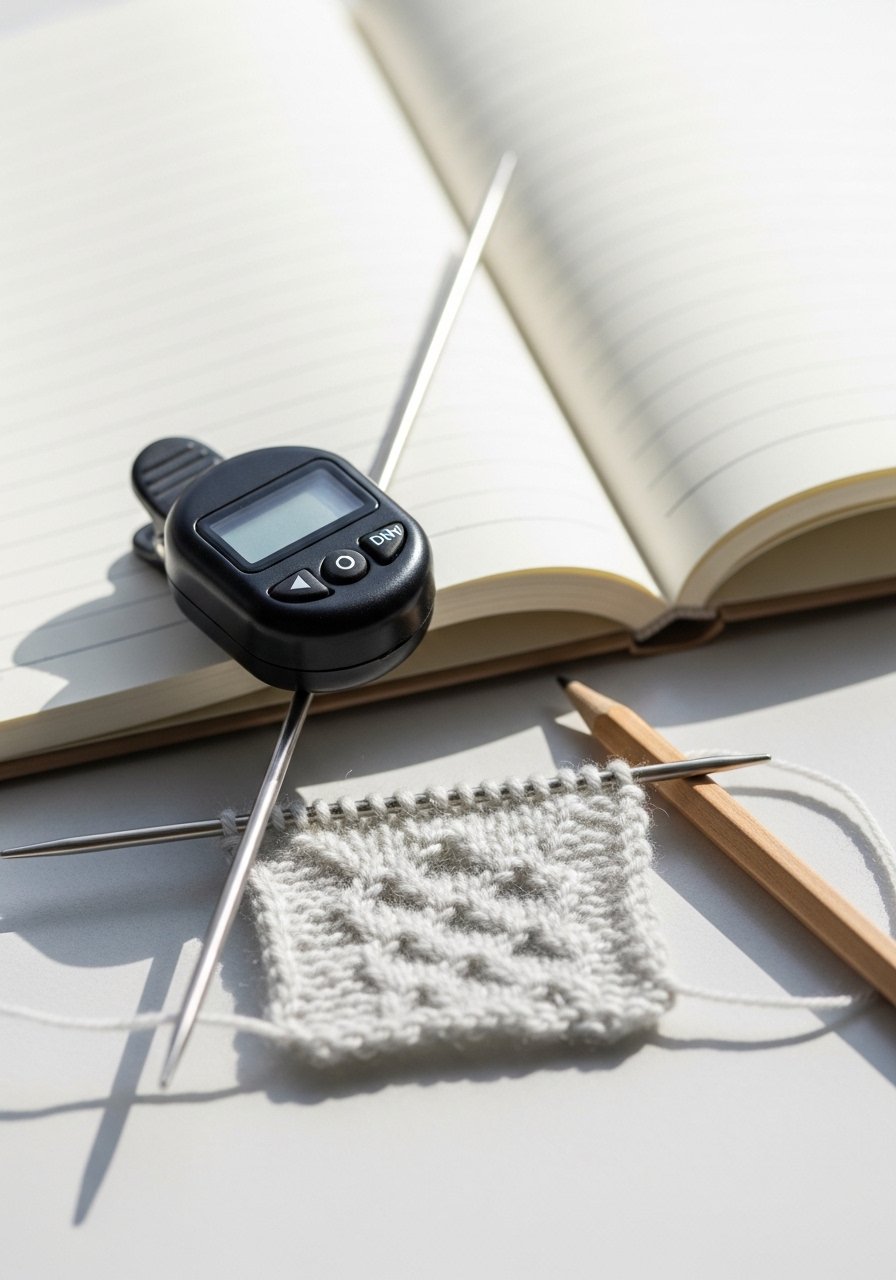
Losing track of rows is common. This project introduces a simple pattern and shows how a row counter saves time. You’ll get comfortable with repeat patterns and rhythm.
Materials
- Lace or textured stitch pattern printed or written
- Yarn (worsted)
- Needles matching yarn (US 7–8)
- Row counter (digital or manual)
- Pencil and sticky notes
- Tapestry needle
Instructions
- Cast on required stitches for pattern repeat.
- Set row counter to zero and mark pattern on sticky note.
- Work pattern, incrementing counter at the end of each repeat.
- If interrupted, your counter shows exactly where you left off.
- For extra safety, write current row on a notecard.
How to Display or Gift It
Row counters make practical gifts. Include in a small knitter’s kit stored in a zip-top craft pouch.
- Preventing Yarn Split (Needle and yarn pairing)

Split yarn is frustrating. This mini-project helps you pair needle tip types (blunt vs. pointy) to yarn strands and practice clean knitting without splits. You’ll get neater stitches and fewer dropped yarn fibers.
Materials
- Two small skeins: one plied, one single-ply (worsted)
- Two needle types: blunt-tipped and pointed
- Small swatch tools (tapestry needle)
- Scissors
Instructions
- Make two small swatches using each yarn and each needle type for comparison.
- Note how the yarn rides on the needle—switch needle type if splitting occurs.
- If splitting happens, slow down the wrist motion and slide yarn closer to the needle tip.
- Practice with a sample of 20 stitches until you get consistent loops.
- Finish and compare stitch definition.
How to Display or Gift It
Store needle types in a needle case to try different tips quickly.
- Simple Buttonband (Learn neat buttonholes)
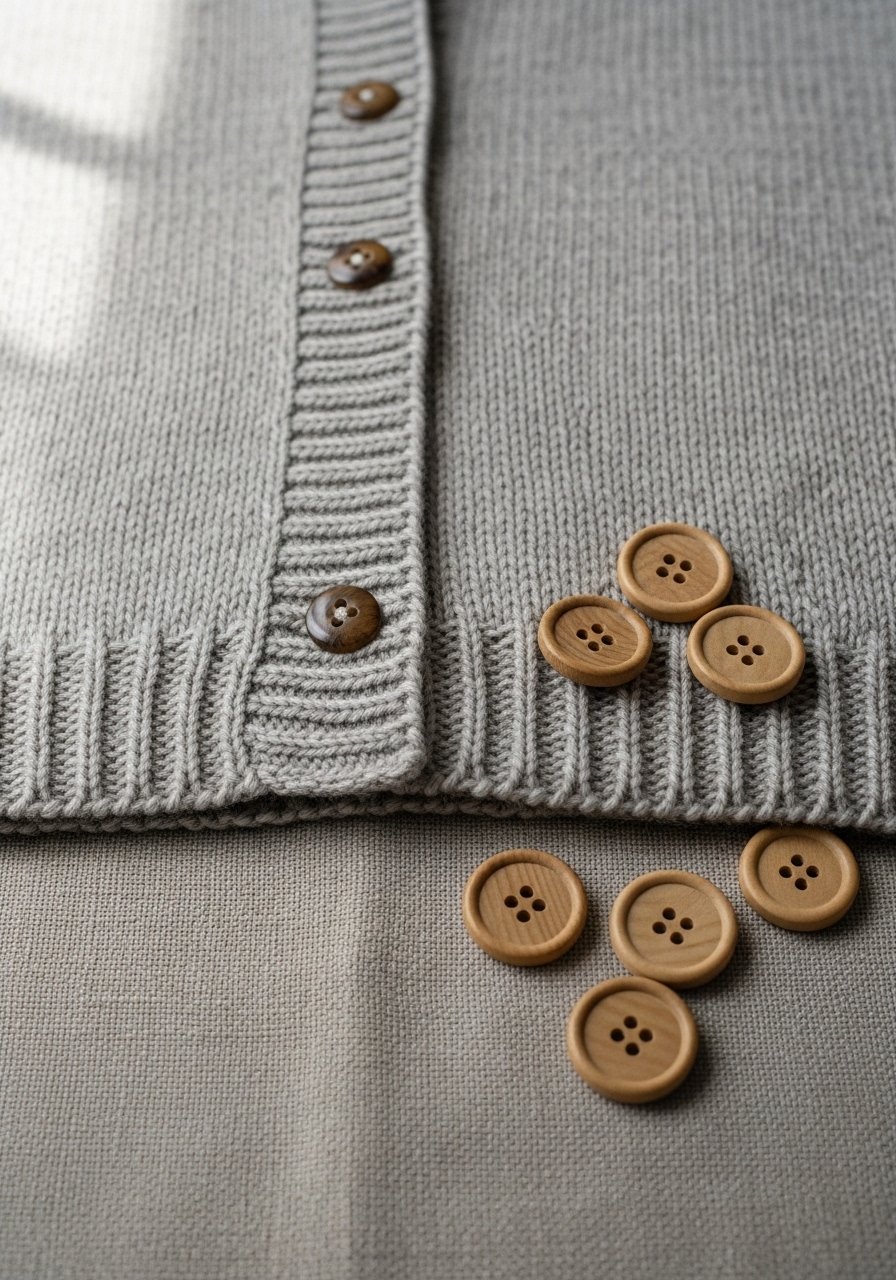
Buttonbands can intimidate, but a simple sewn-on band is fast and tidy. You’ll practice placing buttonholes and attaching buttons with even spacing.
Materials
- Sweater front panel or sample
- Matching yarn
- Knitting needles
- Buttons (4–6)
- Sewing needle and thread
- Tape measure
- Scissors
Instructions
- Edge-bind two narrow bands matching sweater width.
- Sew one band to right front edge and the other to the left, using mattress stitch.
- Mark button positions with tape measure (even spacing).
- Create buttonholes by binding off small sections or using yarn-over method and reinforce with stitching.
- Sew buttons securely, weaving thread through several times.
- Try on and test button tension.
How to Display or Gift It
Fasten buttons with twine for presentation. Store spare buttons in a small jar or kit.
- Seamless Hat Crown Decreases (Even shaping)
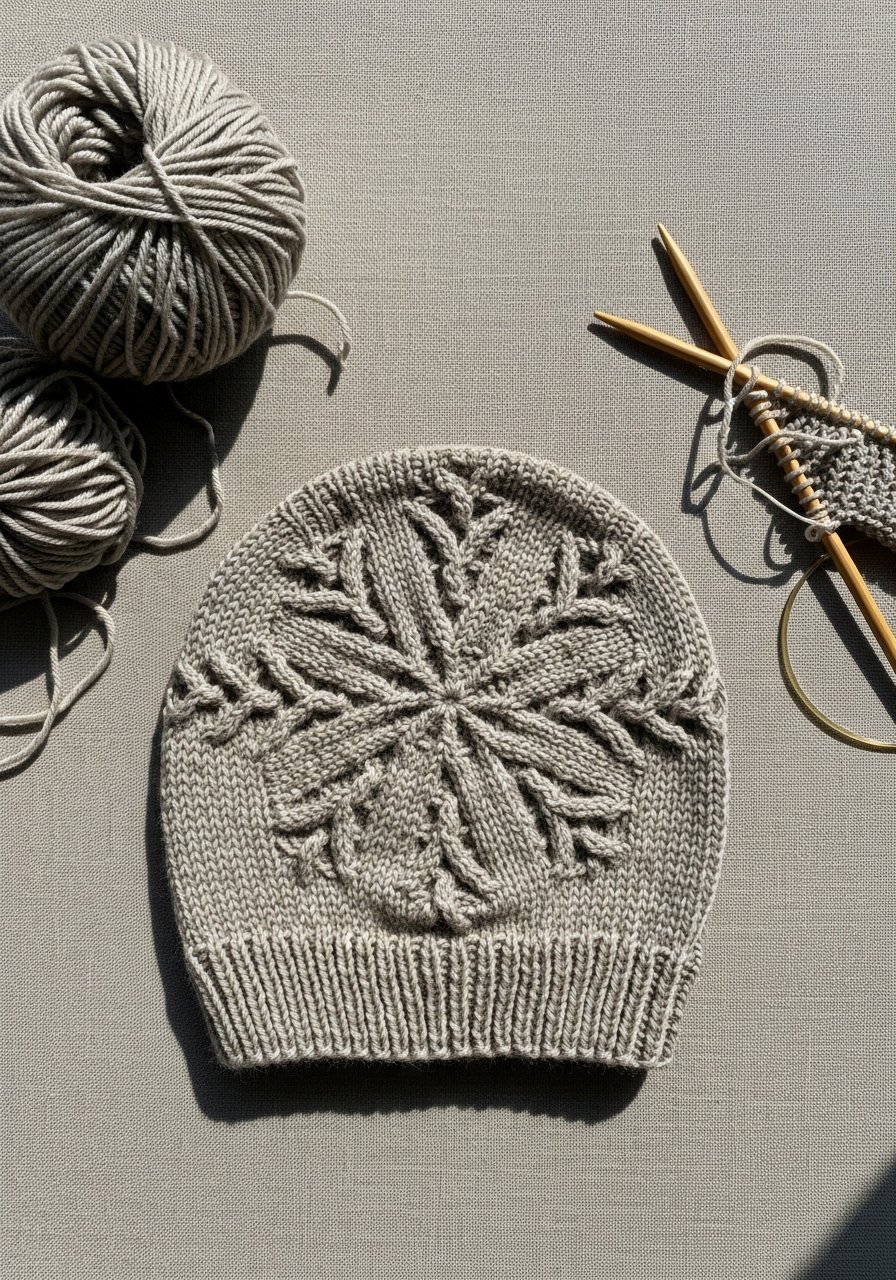
Smooth crown decreases give hats a tidy top without bulky knots. This teaches evenly spaced decreases and tension control—great for beanies and baby hats.
Materials
- Worsted-weight yarn, 100 g
- Circular needles US 8 / 5mm, 16" and DPNs set
- Stitch markers
- Tapestry needle
- Scissors
Instructions
- Cast on required stitches and join in the round.
- Work desired brim (rib) for 1.5–2 inches.
- Knit stockinette until crown shaping begins.
- Decrease evenly using markers (e.g., K6, K2tog repeat).
- Switch to DPNs when necessary and continue decreases every other round.
- Graft or close with preferred method; weave in tails.
How to Display or Gift It
Place finished hats on a small wooden easel for display or fold inside tissue for gifting.
- Easy Lace Panel (Practice yarn overs and decreases)
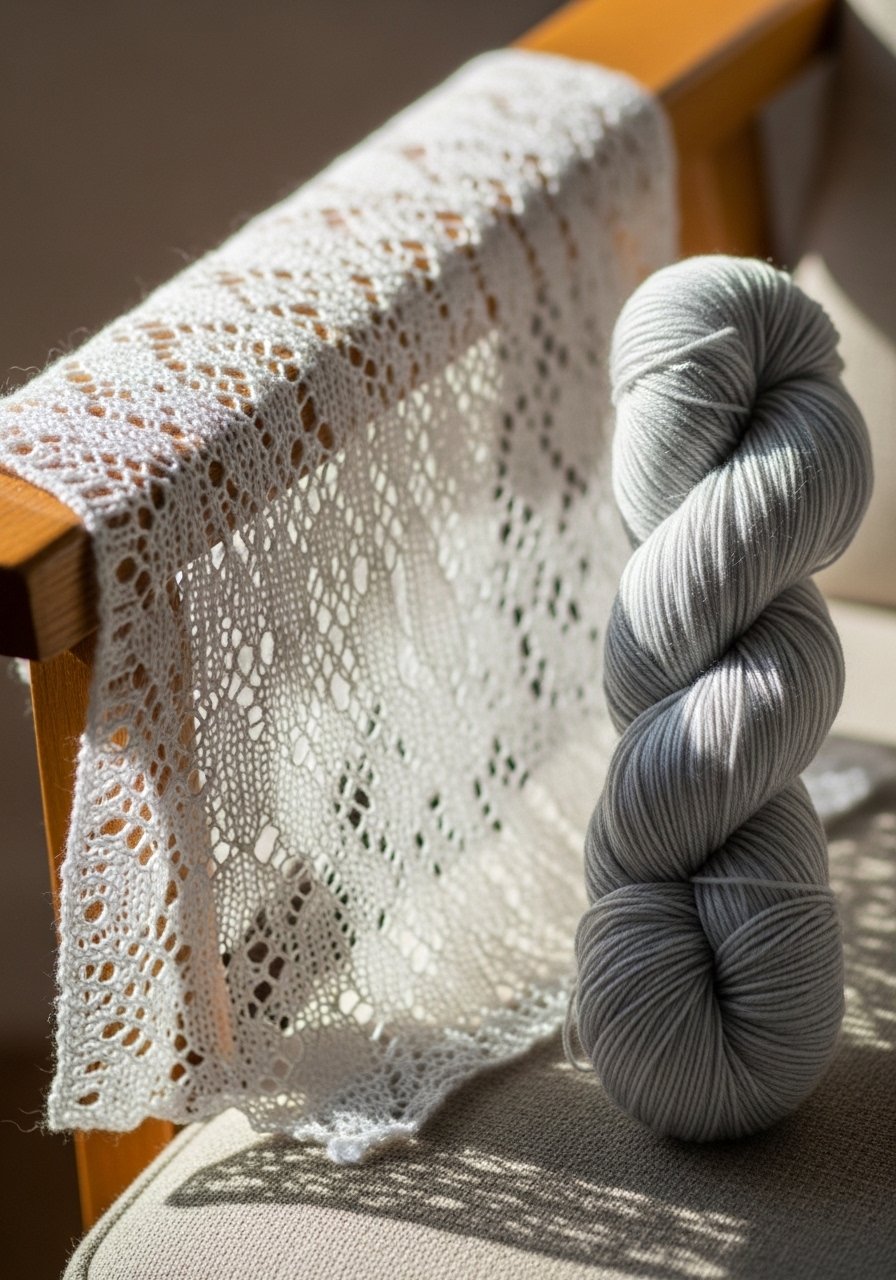
A small lace panel builds confidence with yarn-overs and paired decreases. It’s a gentle introduction to lace patterns and gives a delicate boho or japandi vibe.
Materials
- Fingering or lace-weight yarn, 50 g
- Needles US 4 / 3.5mm or size to match gauge
- Stitch markers
- Tapestry needle
- Blocking pins and mats
Instructions
- Cast on multiples required by lace repeat plus edge stitches.
- Work charted or written lace repeat for 8–12 rows to form panel.
- Check stitch balance: number of yarn-overs must equal decreases.
- Repeat pattern until desired length (6–8 inches).
- Block open using pins; dry 12–24 hours.
- Weave in ends.
How to Display or Gift It
Use lace panels as table trims or frame in small hoops. Store in a flat craft organizer.
- Quick Cabled Headband (Intro to simple cables)
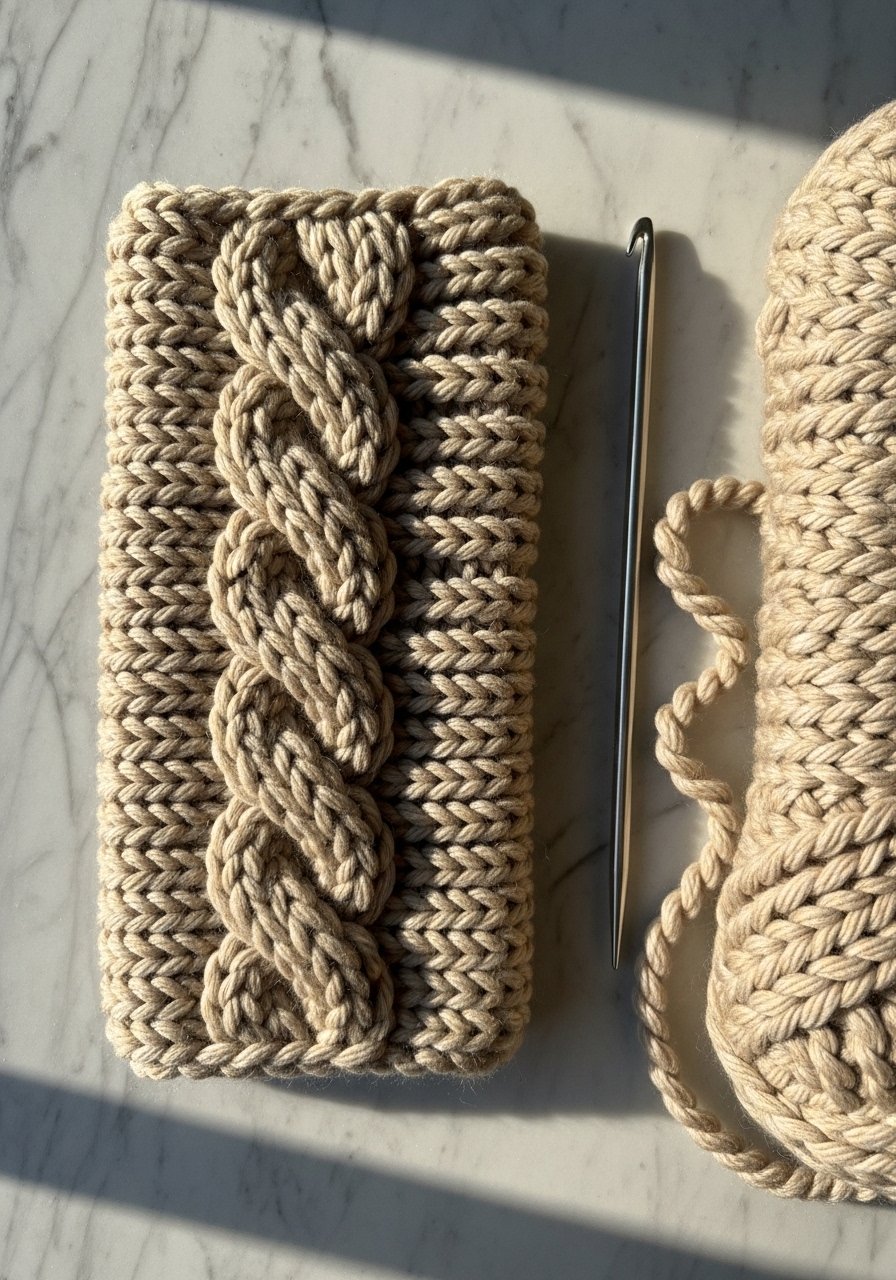
Cables look intricate but often use just a single basic cross. This headband teaches cable crossings with a cable needle—great for learning texture without complex charts.
Materials
- Bulky-weight yarn, 50 g
- Needles US 10 / 6mm
- Cable needle (short double-pointed or hooked)
- Stitch markers
- Tapestry needle
- Scissors
Instructions
- Cast on 22 stitches.
- Work 4 rows of garter or rib for edge.
- Setup row: K2, P2 to center.
- Cable row every 6th row: slip 2 sts to cable needle, hold in front/back, knit next 2, then knit from cable needle.
- Repeat until piece measures 18 inches.
- Bind off and sew ends together with mattress stitch.
- Weave in ends and block for 2–4 hours.
How to Display or Gift It
Cabled headbands pair well with matching mitts. Tie with a ribbon and place in a kraft gift box set.
You made it to the end—bravo. These 20 projects each teach a practical beginner knitting tip or trick you’ll use again and again. Try one or pick a few that match what you struggle with most. Save or pin this page so you can come back when a dropped stitch or fuzzy edge appears. Which tip do you want to try first? Share with a friend, or make a few pieces to gift—knit goods are always warmly received.
If you only pick one extra tool for your knitting kit, a comfortable set of circular needles in a range of sizes changed everything for me—they handle both small and large projects with ease. Consider adding a set of circular knitting needles to your toolkit.


