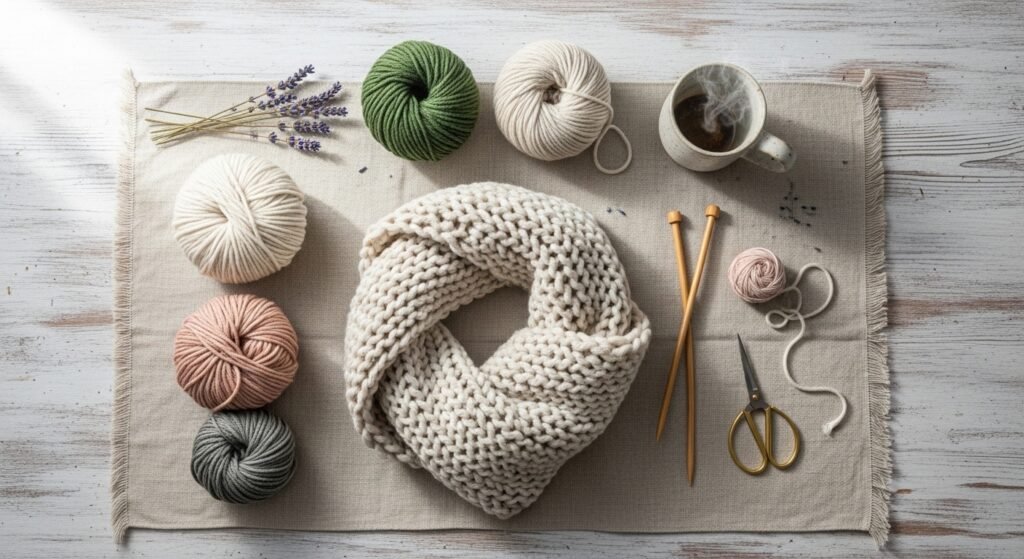
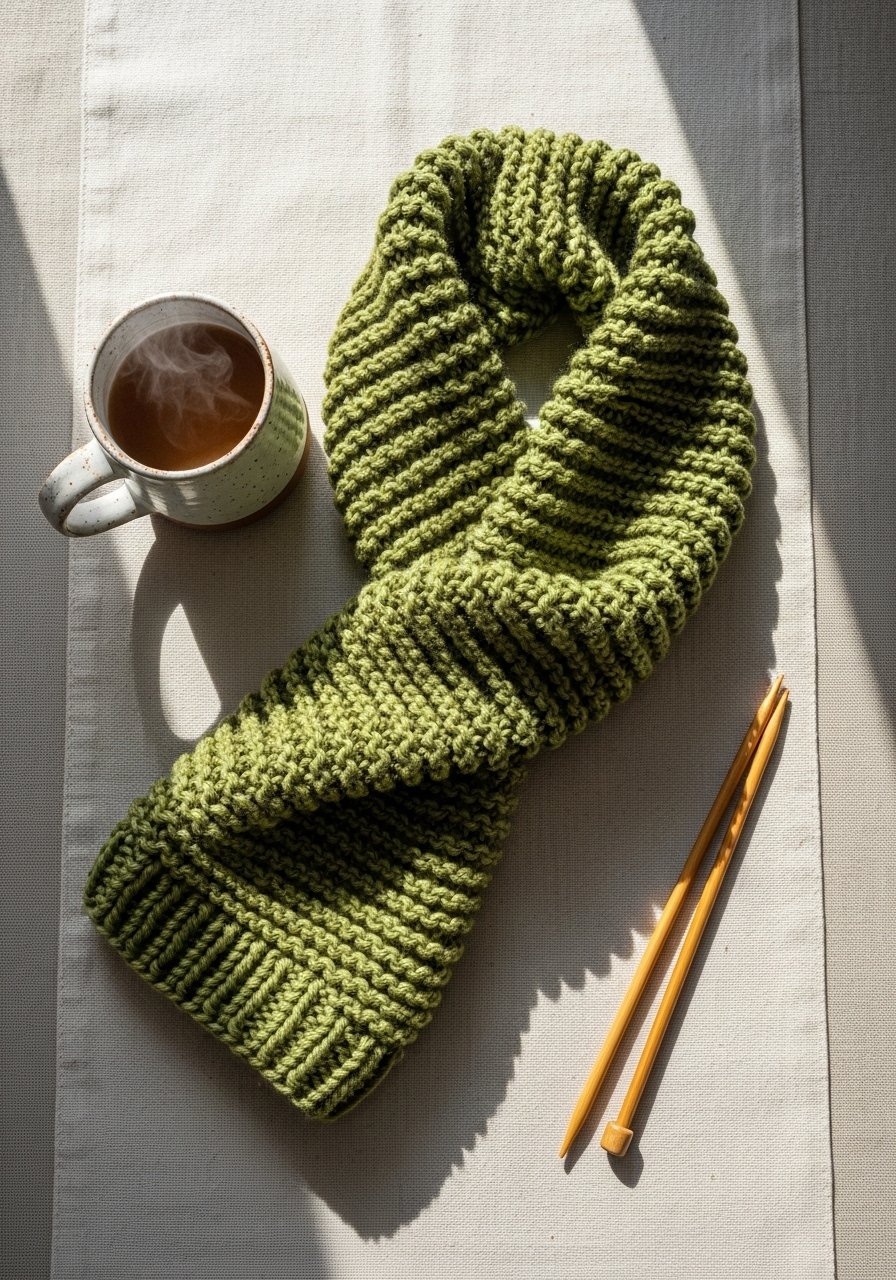
There’s a special kind of calm that comes from a basket of yarn and a pair of needles. If you’ve been curious about knitting for beginners, this list is for you—25 projects that are simple, cozy, and actually look beautiful when you’re finished. You’ll find quick wins (think mug cozies and headbands) and small, satisfying makes that teach stitches, shaping, and finishing without drama.
I recommend starting with a reliable needles set like the bamboo knitting needles set if you want gentle grip and warm handling. A basic stitch marker pack and a yarn needle will save you time and frustration when you hit snags. Each project below names exact yarn weights, yardage, needle sizes, and step-by-step instructions so you can relax and enjoy the rhythm.
Pin the projects you love, grab your yarn, and let’s make some cozy things you’ll actually reach for every day.
1. knitting for beginners: Garter Stitch Infinity Scarf
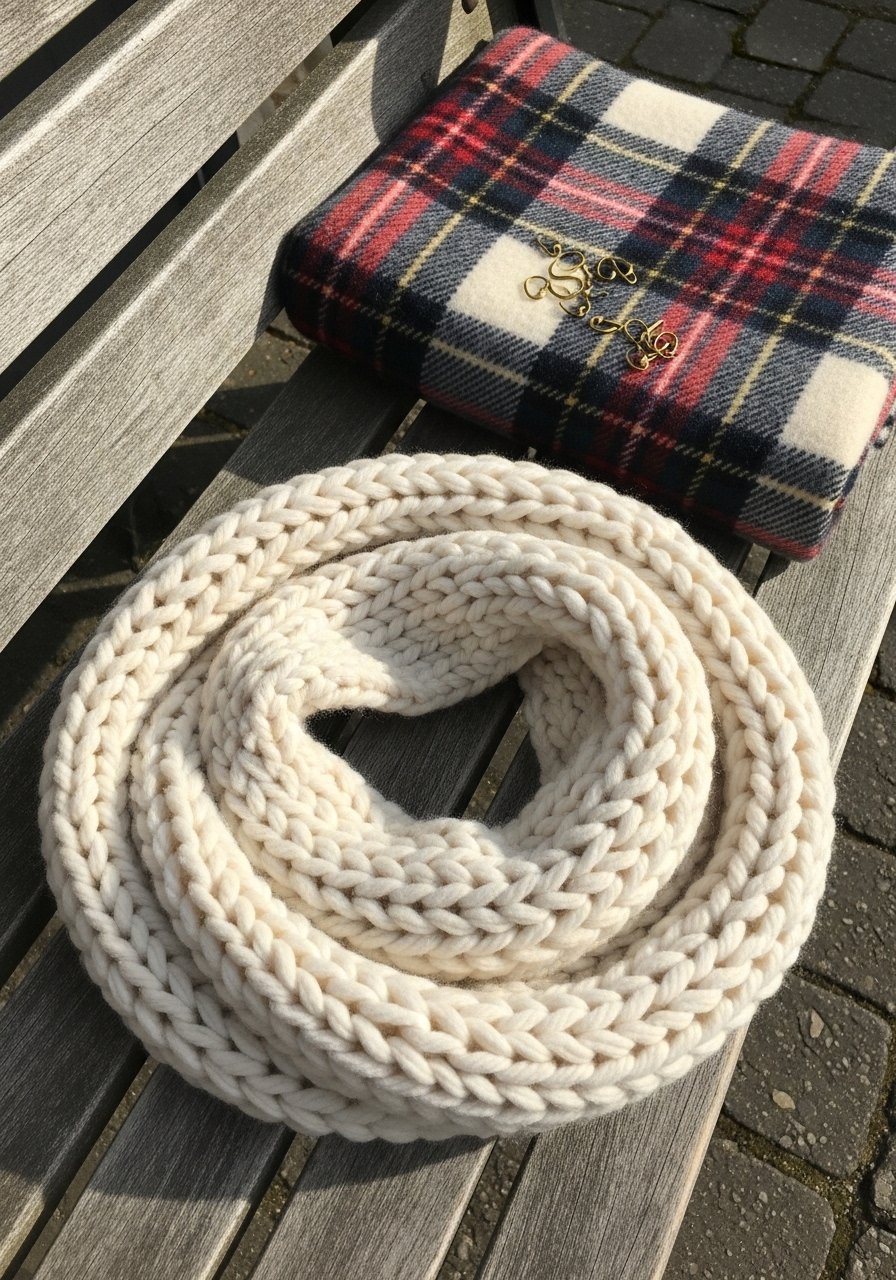
This project teaches you how to cast on, knit every row, and join in the round for a seamless finish. It’s all garter stitch, so it’s soothing and very forgiving. The result is a plush, squishy scarf that looks chic with a winter coat.
Materials
- 300–400 yards worsted weight yarn (approx 275–365 m) — choose a soft acrylic or wool blend
- US 10.5 / 6.5 mm circular needles, 24-inch cable
- Tapestry needle (blunt)
- 6 small stitch markers
- Scissors
- Measuring tape
Instructions
- Cast on 80 stitches loosely using long-tail cast-on.
- Join for working in the round, making sure stitches aren’t twisted. Place one stitch marker to mark beginning of round.
- Knit every round (garter stitch in the round created by knitting one round and purling one if on circulars; with circular needles, work k1, p1 alternate rounds to mimic garter).
- Knit until scarf measures 18–22 inches unstretched (about 60–80 rounds depending on gauge).
- Bind off loosely with a stretchy bind-off.
- Weave in ends with tapestry needle. Block lightly by steam or pinning flat to shape; allow to dry for 2–4 hours if steam-blocked.
How to display or gift it
Loop it twice for a slouchy look on a coat rack. For gifting, fold neatly and tie with jute and a dried sprig. Store wrapped in a breathable fabric bag or a craft organizer drawer. A small wooden gift box looks lovely if you’re presenting it as a holiday present.
2. Simple Ribbed Beanie (knitting for beginners)
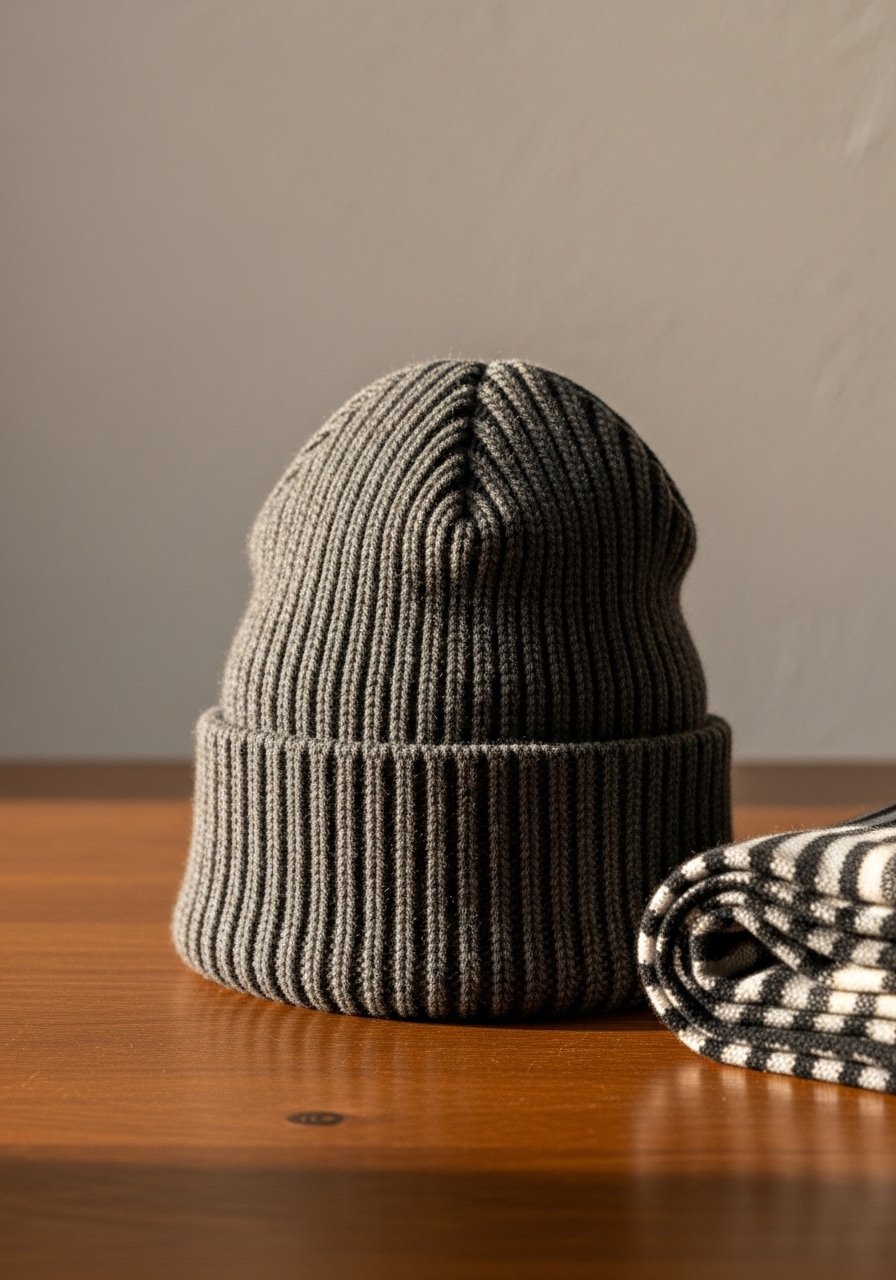
A classic ribbed beanie is forgiving and quick. You’ll learn circular knitting, ribbing (k2, p2), and simple decreasing for the crown. It’s warm, neat, and a great first hat.
Materials
- 150–200 yards bulky weight yarn (approx 135–185 m)
- US 10 / 6 mm 16-inch circular needles and set of double-pointed needles (DPNs) for crown OR US 10.5 / 6.5 mm 16-inch circular for magic loop
- Stitch markers (2)
- Tapestry needle
- Scissors
Instructions
- Cast on 64 stitches loosely, join in the round. Place marker.
- Work k2, p2 ribbing for 1.5–2 inches.
- Switch to stocking stitch (knit every round) for 4–5 inches from cast-on edge.
- Begin decreases: Round 1: k6, k2tog repeat; Round 2: knit; continue decreasing every other round with the knit counts reducing (k5,k2tog, then k4,k2tog, etc.).
- When about 8 stitches remain, cut yarn leaving 6 inches, thread with tapestry needle, pull through remaining stitches and pull tight.
- Weave in ends and block gently if desired.
How to display or gift it
Style it on a small hat stand or nest in a gift box with tissue. A set of lightweight hat blockers keeps shape when storing. Add a faux fur pom-pom or knit one from scraps.
3. Chunky Cozy Cowl
This cowl uses bulky yarn and big needles for instant gratification. You’ll practice circular knitting and working with thicker fibers that feel luxurious and keep warm.
Materials
- 150–200 yards bulky weight yarn (135–185 m)
- US 15 / 10 mm circular needles, 20-inch cable
- Stitch marker (1)
- Tapestry needle
- Scissors
Instructions
- Cast on 48 stitches loosely. Join in the round and place marker.
- Knit every round (stockinette in the round) or alternate knit and purl rounds for texture.
- Continue until piece measures 10–12 inches tall.
- Bind off loosely.
- Weave in ends and block on a towel if you want a more even edge (air dry 2–4 hours).
How to display or gift it
Fold and place on a shelf for a cozy living room vignette or wrap it for a friend with kraft paper. A small stackable craft organizer keeps multiple cowls neat and ready for gifting.
4. Easy Fingerless Mitts
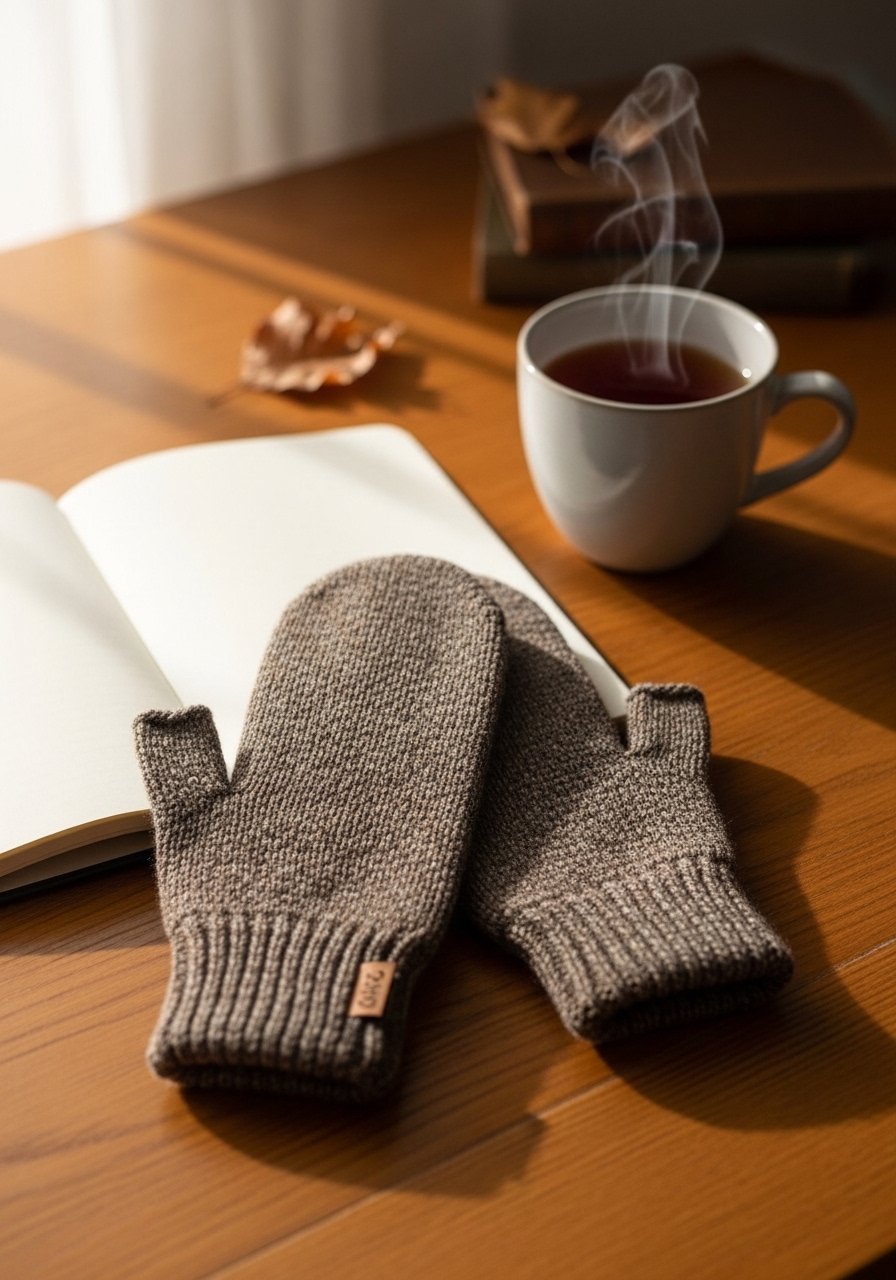
Fingerless mitts are fast and practical, perfect for typing with warmth. You'll learn small-circumference knitting and simple shaping for the thumb.
Materials
- 100–150 yards worsted weight yarn (90–140 m)
- US 8 / 5 mm double-pointed needles (set) or small circular for magic loop
- Stitch marker (1)
- Tapestry needle
- Scissors
- Small stitch holder or scrap yarn
Instructions
- Cast on 36 stitches and divide across DPNs. Join in the round.
- Work k2, p2 rib for 1.5 inches.
- Knit in stockinette for 3 inches from cast-on.
- For thumb opening, knit 18 stitches, place next 6 stitches on stitch holder, cast on 6 stitches over thumb gap, knit to end. Continue knitting until mitt measures 7–8 inches.
- Work ribbing for 1 inch and bind off.
- Return to thumb stitches on holder, pick up 6 cast-on stitches, knit in the round for 1.5–2 inches, bind off. Weave in ends.
How to display or gift it
Pair with a matching beanie or scarf. Slide into a kraft bag with tissue and a tag. Store flat in a craft drawer to avoid stretching.
5. Striped Baby Blanket (Beginner-friendly)
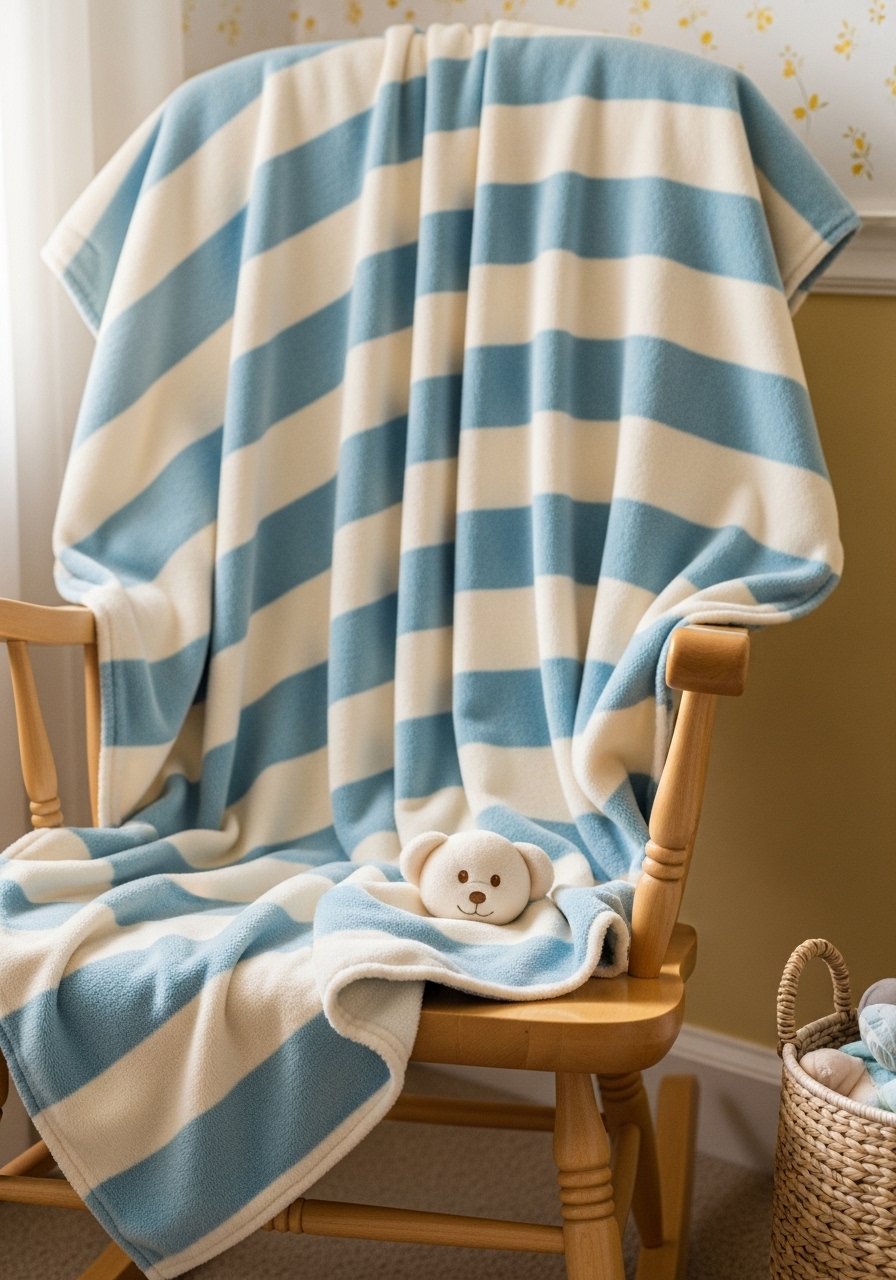
A small striped blanket teaches color changes and maintaining even tension. Use washable yarn for baby-safe care.
Materials
- 400–500 yards DK weight yarn total (200–250 yards each color)
- US 8 / 5 mm straight needles, 32-inch circular optional for larger blankets
- Tapestry needle
- Scissors
- Yarn needle for weaving ends
- 4 stitch markers
Instructions
- Cast on 90 stitches.
- Work garter stitch (knit every row) for 4 rows as border.
- Change to stockinette or garter for body; for garter, knit every row; for stockinette, k1, p1 edge to reduce curling.
- Alternate colors every 10 rows to create stripes. When changing colors, leave a 3–4 inch tail and weave in later.
- Continue until blanket measures 30 x 35 inches.
- Finish with 4 rows garter border. Weave in all ends. Block lightly: pin to shape and let dry overnight (8–12 hours).
How to display or gift it
Roll and tie with ribbon and a small wooden pacifier clip. Store washed and dried folded in a fabric storage box.
6. Simple Knit Headband
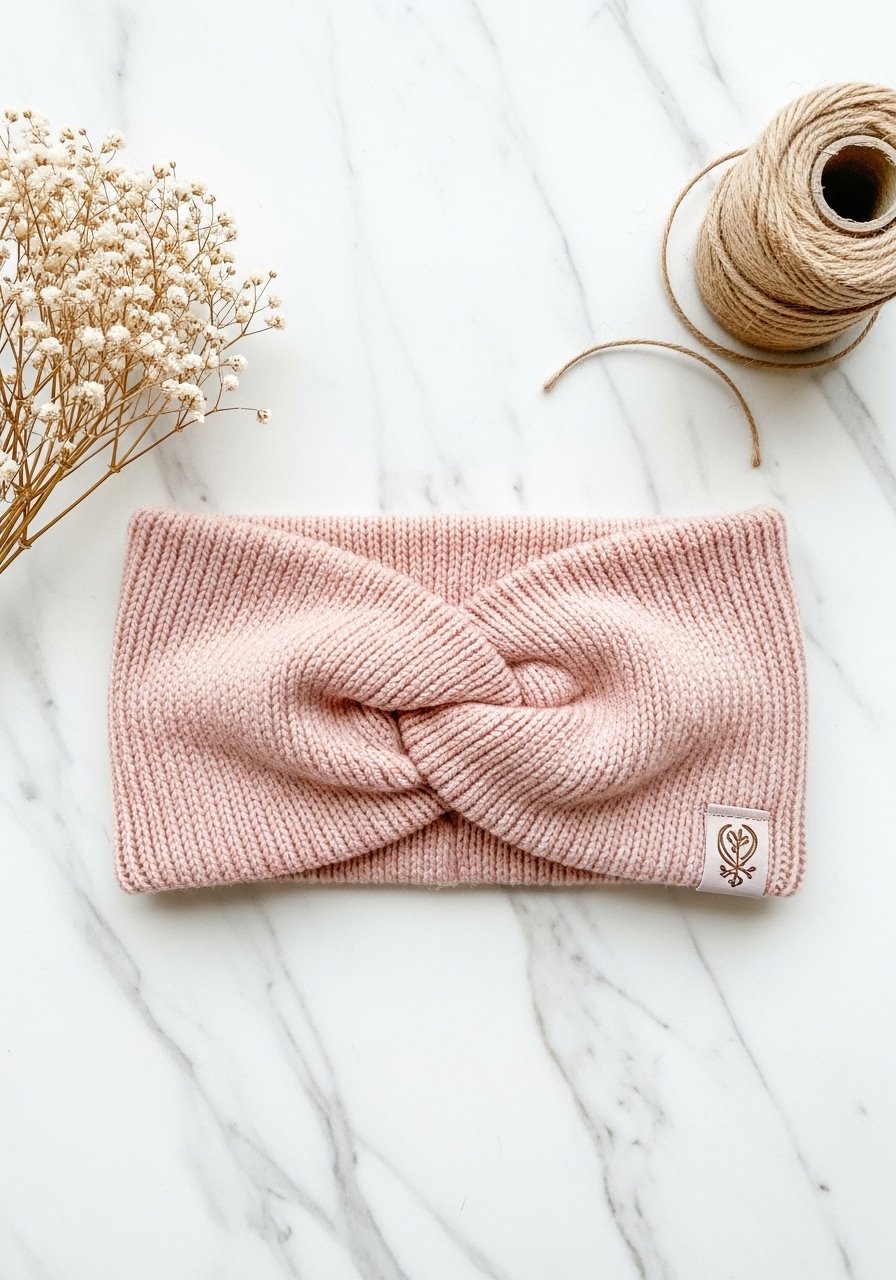
A headband is quick and portable. You learn casting on, knitting in flat rows, and simple seaming.
Materials
- 60–80 yards bulky or worsted weight yarn
- US 8–10 / 5–6 mm straight needles
- Tapestry needle
- Scissors
- Measuring tape
Instructions
- Cast on 22–26 stitches depending on yarn and needle size.
- Work k2, p2 ribbing for 18–20 inches long (fits adult head).
- Bind off loosely.
- Fold ends together and seam using mattress stitch for invisible join.
- Twist before seaming for a turban-style knot, or seam flat for a simple band. Weave in ends.
How to display or gift it
Wrap around a small kraft card and tuck into a jewelry box. Display on a peg or hook with a set of matching mitts.
7. Knit Mug Cozy
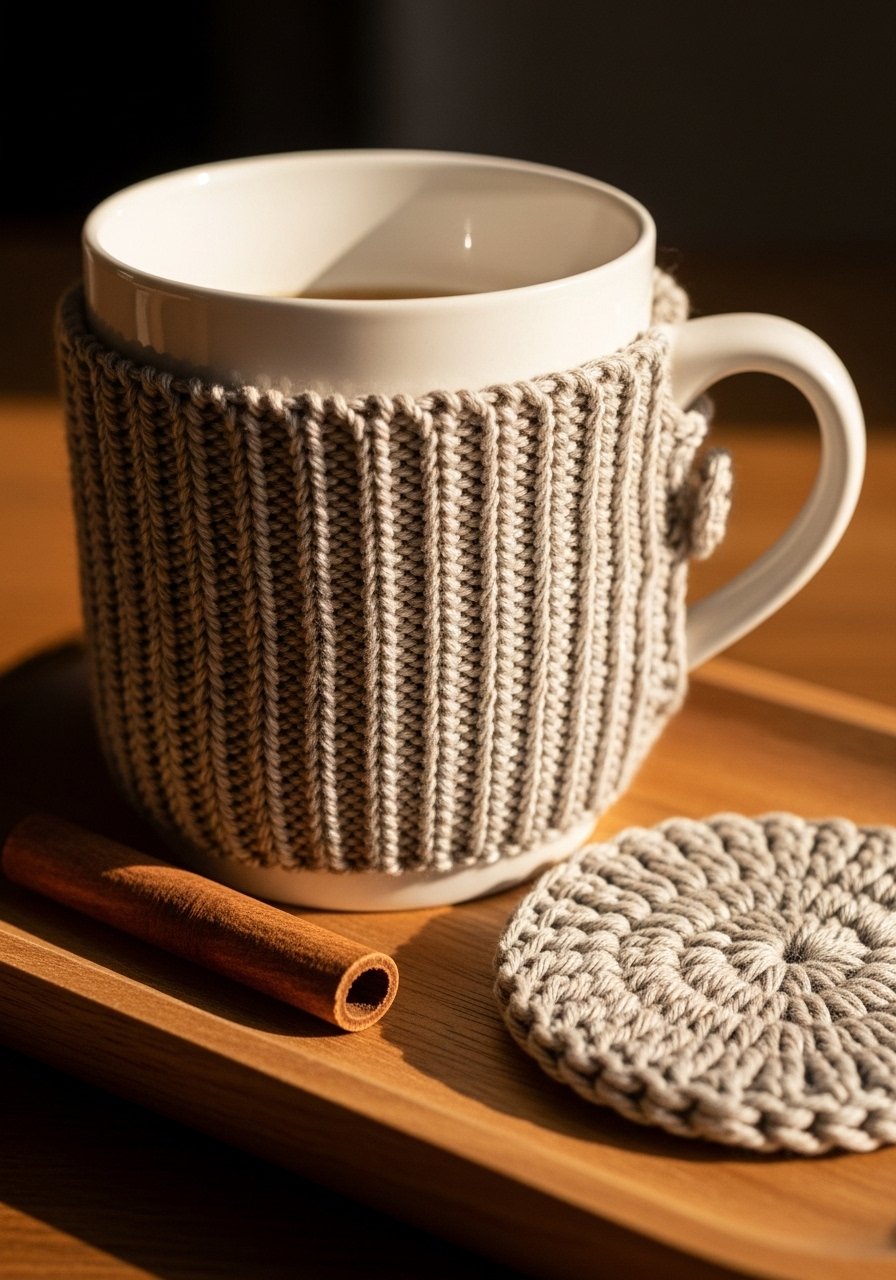
Mug cozies are tiny, fast, and great for practicing gauge and tension. A lovely gift paired with tea.
Materials
- 20–30 yards worsted weight yarn
- US 6 / 4 mm straight needles or DPNs for small circumference
- Tapestry needle
- Scissors
- Small button (optional) and needle for sewing
Instructions
- Cast on 28 stitches.
- Work k2, p2 rib for 3.5–4 inches.
- Bind off and seam short edge to fit snugly around mug.
- Sew a button to one side and create a buttonhole by leaving two stitches unsewn, or leave simple seam.
- Weave in ends.
How to display or gift it
Pair with a small tea sampler and place in a gift bag. Store stacked in a craft organizer drawer.
8. Seed Stitch Coasters (Set of 4)
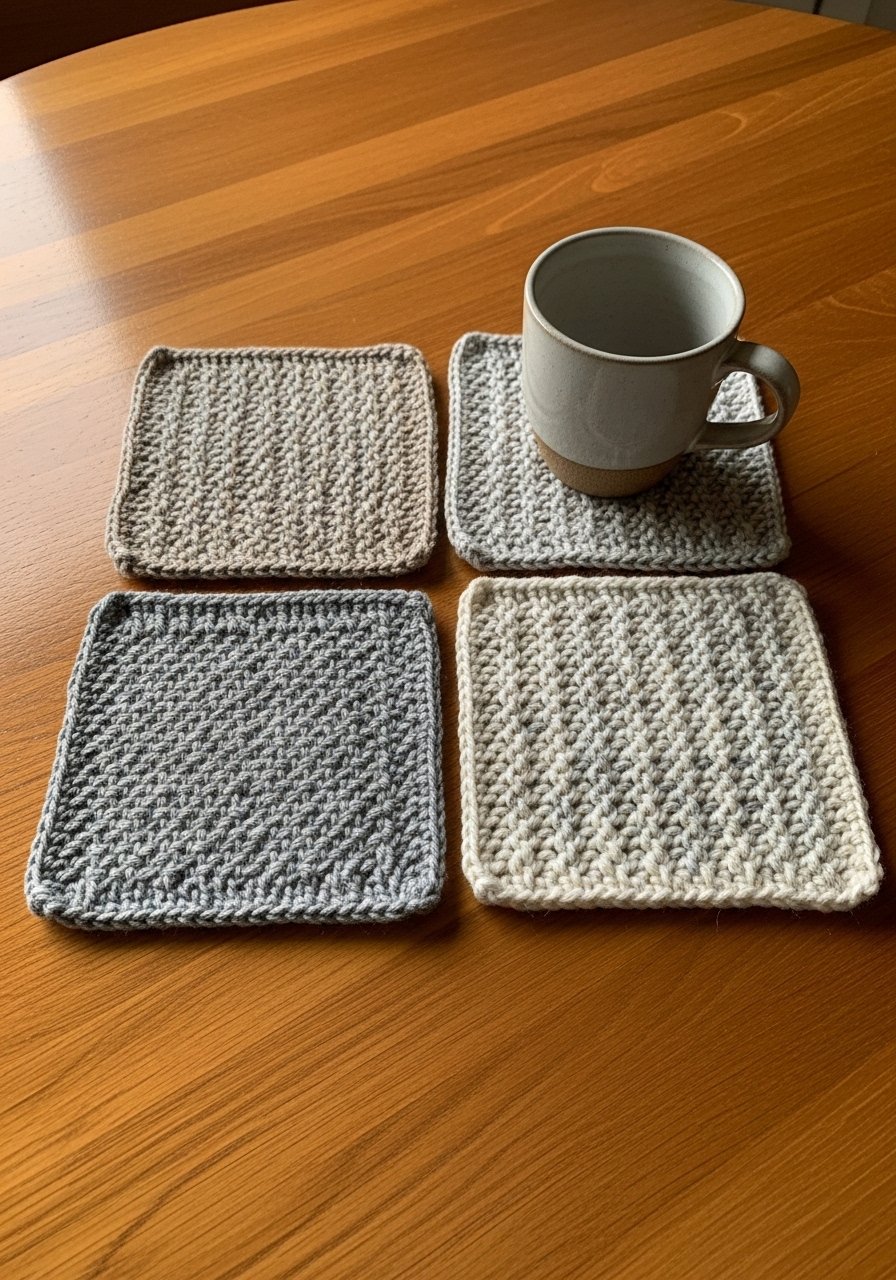
Coasters are a great way to practice seed stitch (alternating knit and purl) and learn to create neat edges.
Materials
- 40–50 yards worsted weight yarn per coaster (total 160–200 yards)
- US 7 / 4.5 mm straight needles
- Tapestry needle
- Scissors
- Blocking mat and pins (optional)
Instructions
- Cast on 28 stitches.
- Row 1: k1, p1 across. Row 2: p1, k1 across. Repeat rows 1–2 for seed stitch.
- Work until square measures 4.5–5 inches.
- Bind off in pattern to keep edge neat.
- Weave in ends and block on mat if you want crisp edges; let dry 4–6 hours.
How to display or gift it
Stack with a ribbon and tuck a small wooden tag. Store in a shallow craft drawer.
9. Easy Baby Booties
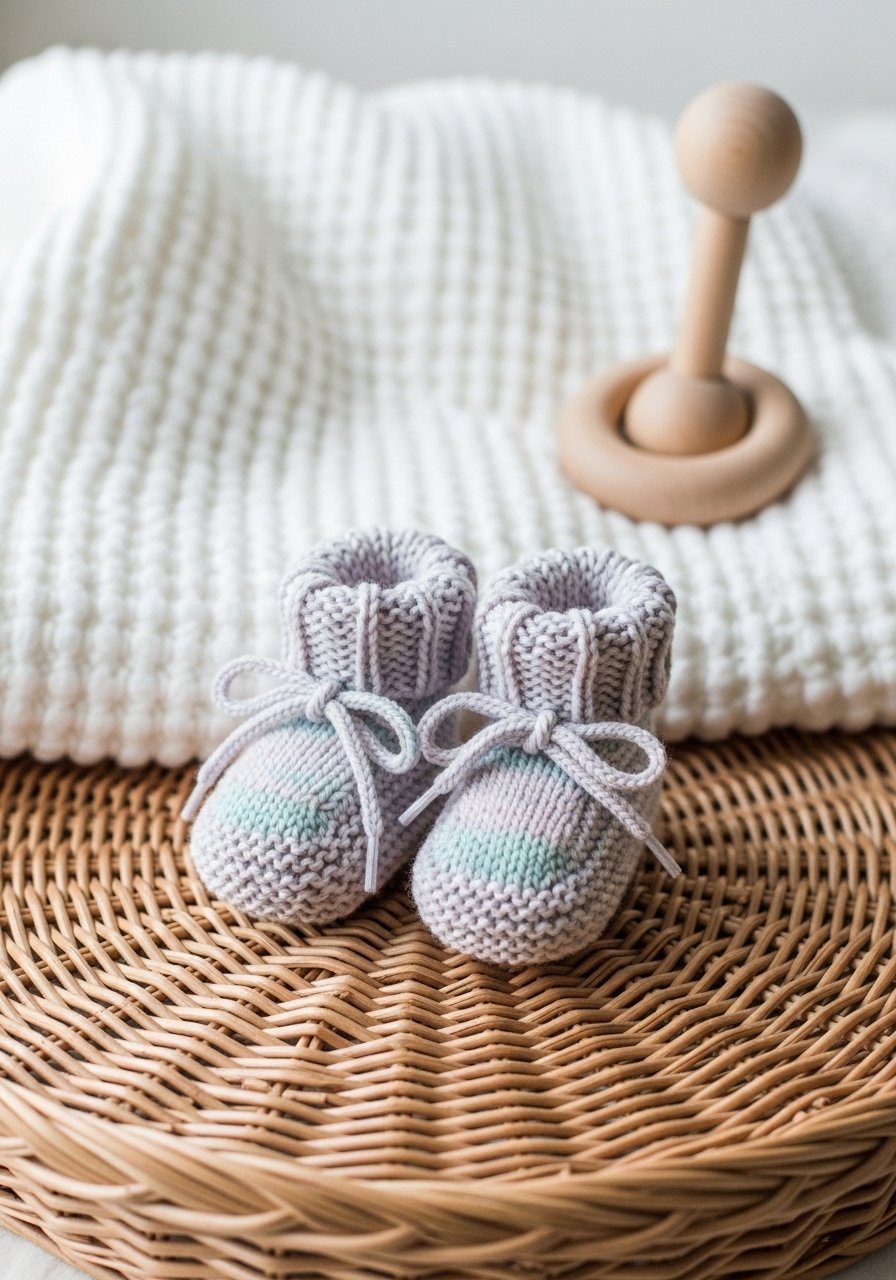
Baby booties teach short rows, shaping, and working small circumferences. Use machine-washable yarn for practicality.
Materials
- 40–60 yards DK weight yarn
- US 5 / 3.75 mm double-pointed needles (set)
- Tapestry needle
- Scissors
- Small ribbon for ties (optional)
Instructions
- Cast on 36 stitches and divide on DPNs. Join in round.
- Knit k1, p1 for 1 inch for cuff.
- Work in stockinette until foot measures 2.5 inches from back of heel.
- Decrease for toe: k2tog around until 8–10 stitches remain.
- Cut yarn, thread through remaining stitches, pull tight. Sew back seam if necessary.
- Weave in ends and add ribbon tie if desired.
How to display or gift it
Place in a small kraft box with tissue and a matching hat. Label with care instructions and store in a drawer.
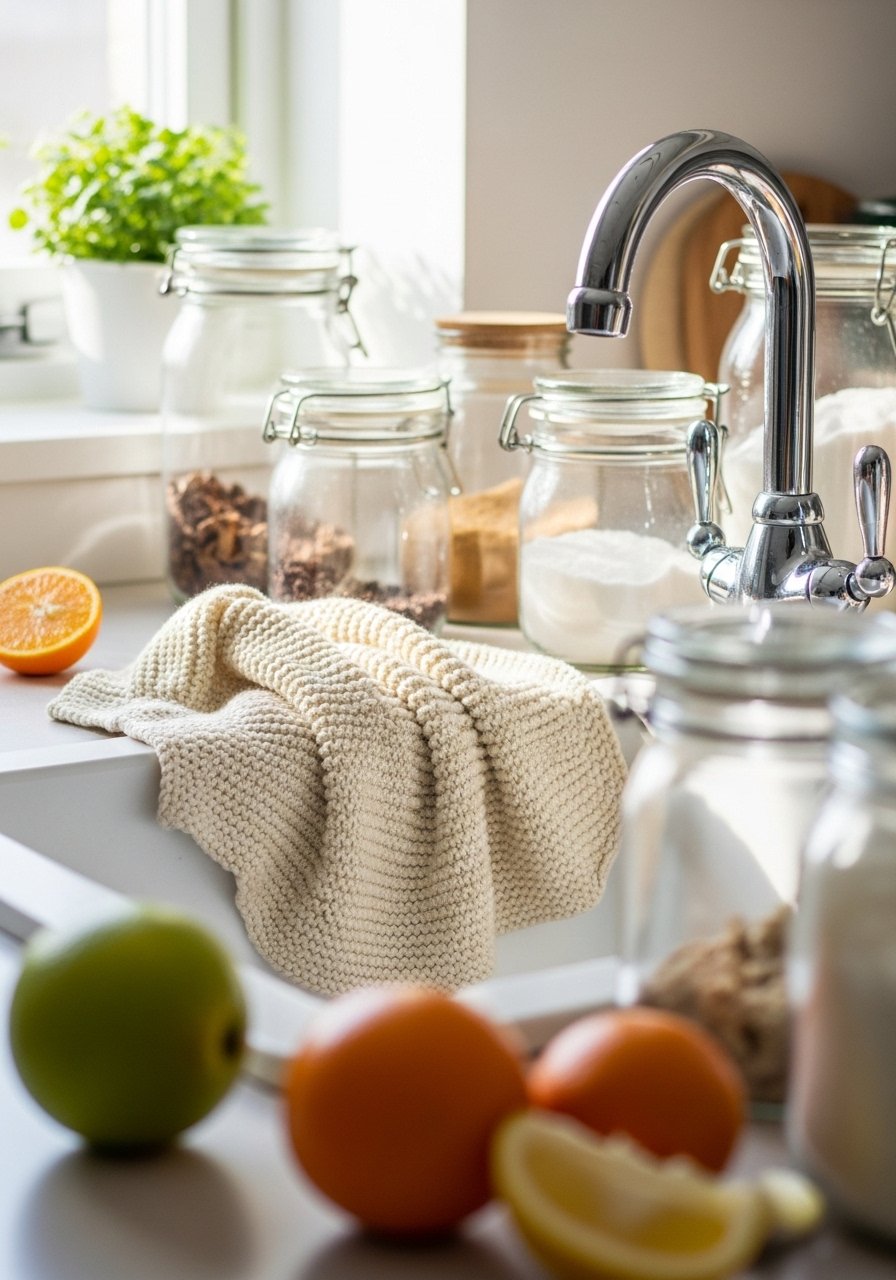
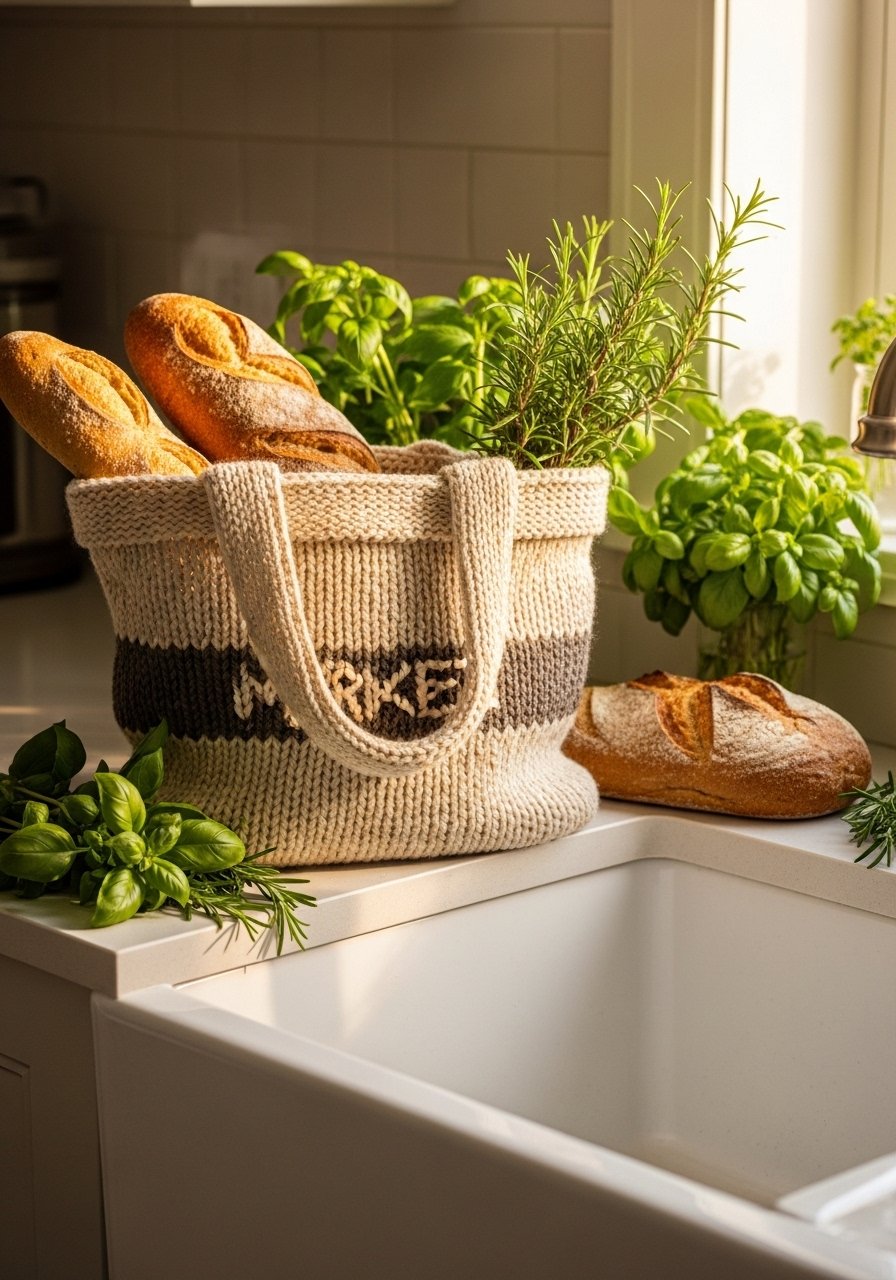
10. Slouchy Market Bag (Simple Mesh)
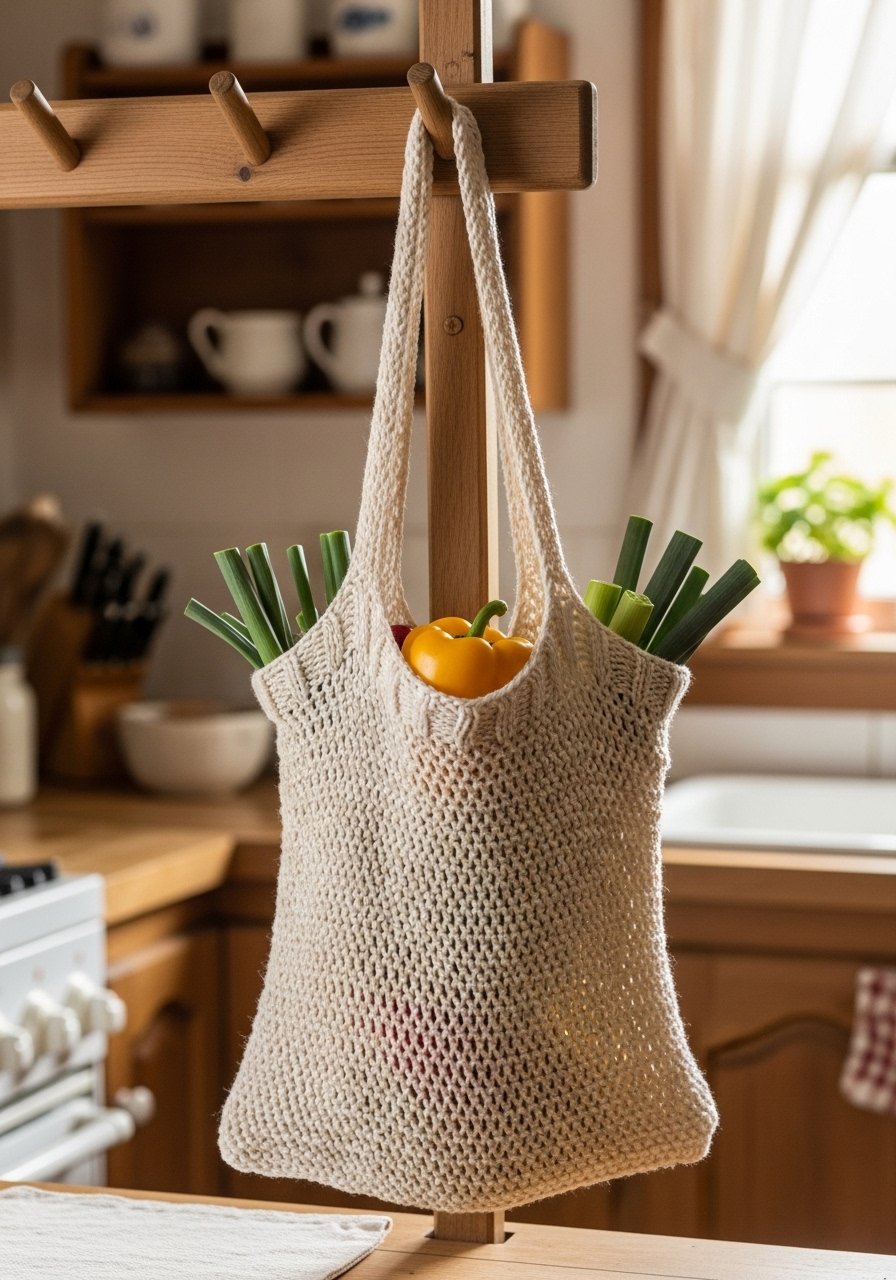
A mesh bag uses simple increases and dropped-stitch mesh. It’s practical for produce and teaches tension control with give.
Materials
- 250–350 yards cotton worsted weight yarn
- US 8 / 5 mm circular needles, 32-inch cable
- Tapestry needle
- Scissors
- Measuring tape
Instructions
- Cast on 60 stitches. Work k2, p2 for 1 inch for the band.
- Switch to mesh: k1, yo, k2tog repeat across a row to create openwork.
- Continue mesh until bag measures 12–14 inches from cast-on.
- Decrease gradually for bottom: k2tog around until 12 stitches remain.
- Cut yarn, thread through stitches, pull tight and secure. Weave in ends.
- Hand wash and block to shape; air dry 6–12 hours.
How to display or gift it
Fold with a set of kitchen towels or place hanging by a hook in the kitchen for styling. A small eco-friendly produce bag set pairs nicely.
11. Beginner Ribbed Throw Pillow Cover
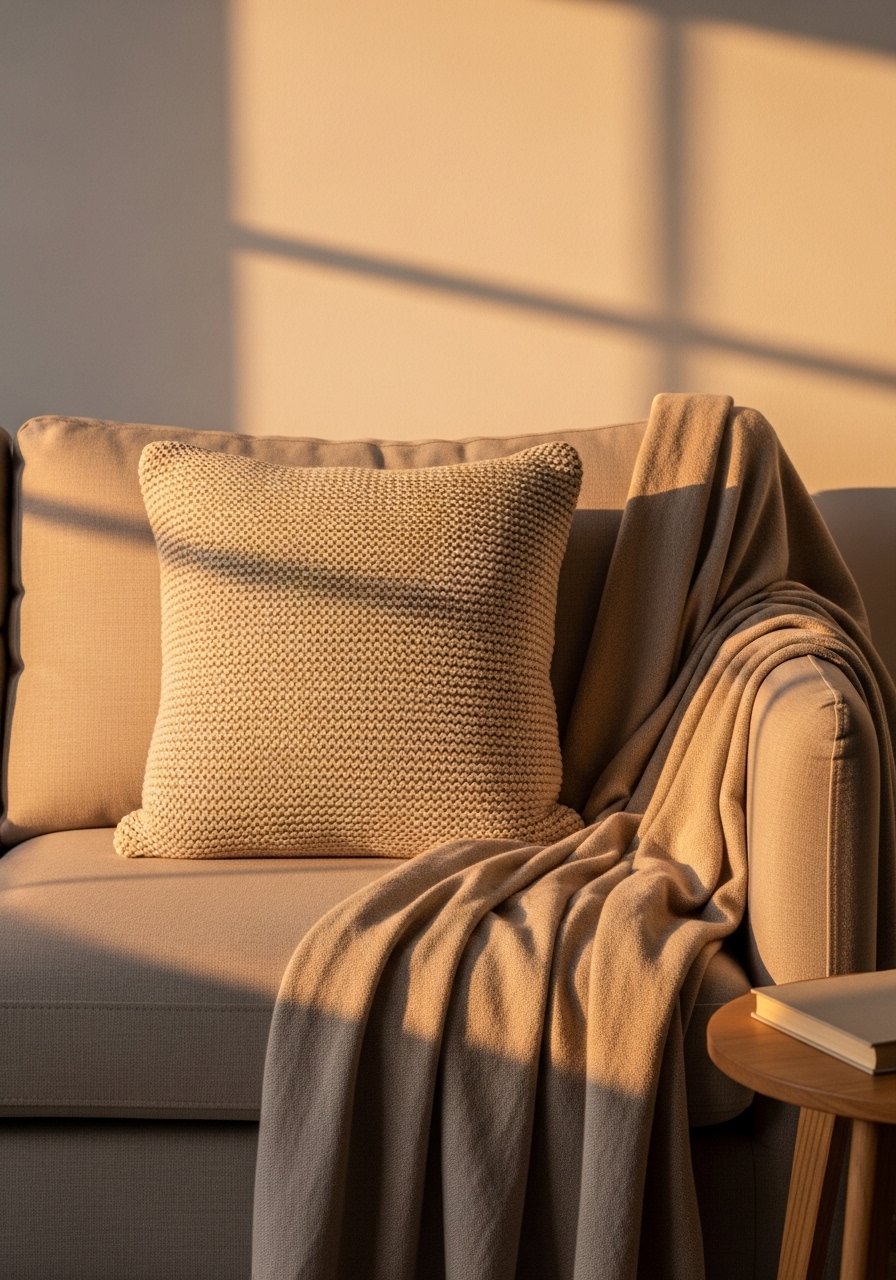
A pillow cover teaches working flat, seaming with mattress stitch, and choosing a pillow insert. It’s an easy home décor win.
Materials
- 300–400 yards worsted weight yarn
- US 8 / 5 mm straight needles or longer circular for flat knitting
- Pillow insert 16 x 16 inches
- Tapestry needle
- Scissors
- Measuring tape
Instructions
- Cast on 64 stitches. Work k2, p2 rib until piece measures 16 inches.
- Bind off and make a second identical panel.
- Place panels right sides together and seam three sides with mattress stitch.
- Insert pillow form and seam remaining side closed.
- Weave in ends and lightly steam-block to even stitches.
How to display or gift it
Style on a couch with layered textures. Store pillow covers folded in a breathable storage box between seasons.
12. Textured Knit Headscarf (Boho Vibe)
This headscarf uses slipped stitches for texture and looks handcrafted and chic. It’s a handy accessory and quick to finish.
Materials
- 80–120 yards DK or worsted yarn
- US 6 / 4 mm straight needles
- Tapestry needle
- Scissors
- Stitch markers
Instructions
- Cast on 18–24 stitches.
- Work textured pattern: Row 1: k2, p2; Row 2: k2, slip 1 purlwise, k1 repeat to create woven look.
- Continue until scarf measures 40–45 inches.
- Bind off and block flat for 2–4 hours to open texture.
- Weave in ends.
How to display or gift it
Wrap around a decorative box or tie around a hat as a band. Store rolled to prevent creasing.
13. Simple Knit Headband with Button
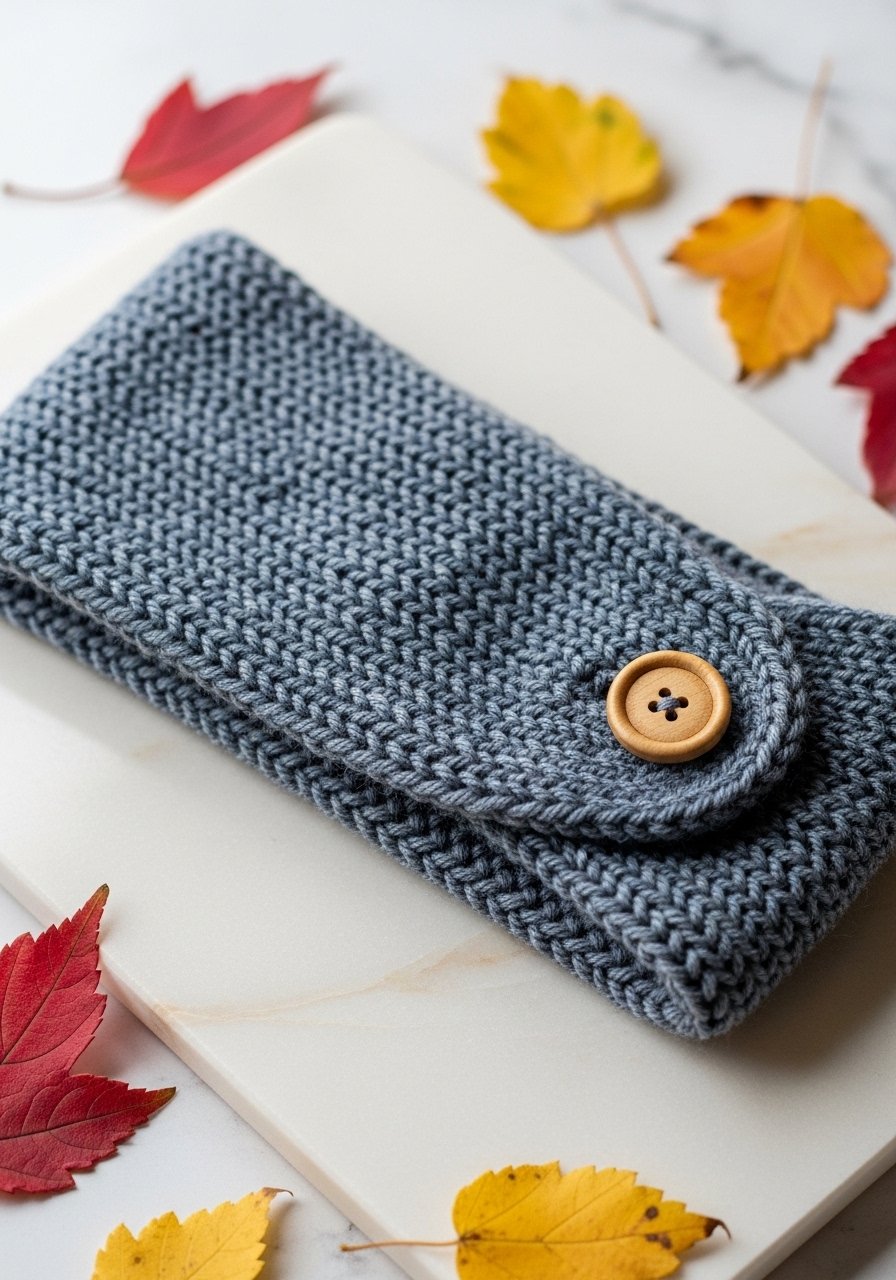
A variation on the headband with a sewn button adds charm and a finishing touch.
Materials
- 60–80 yards worsted yarn
- US 7 / 4.5 mm straight needles
- 1 wooden button (approx 0.5–0.75-inch)
- Tapestry needle
- Scissors
Instructions
- Cast on 20–22 stitches. Work k2, p2 rib for 18–20 inches.
- Bind off and seam. Sew on wooden button and make a small loop on opposite side with yarn to secure.
- Weave in ends.
How to display or gift it
Attach a small handmade tag and tuck into a jewelry-style box. A compact craft organizer keeps finished bands neat.
14. Faux Fur Pom-Pom Beanie
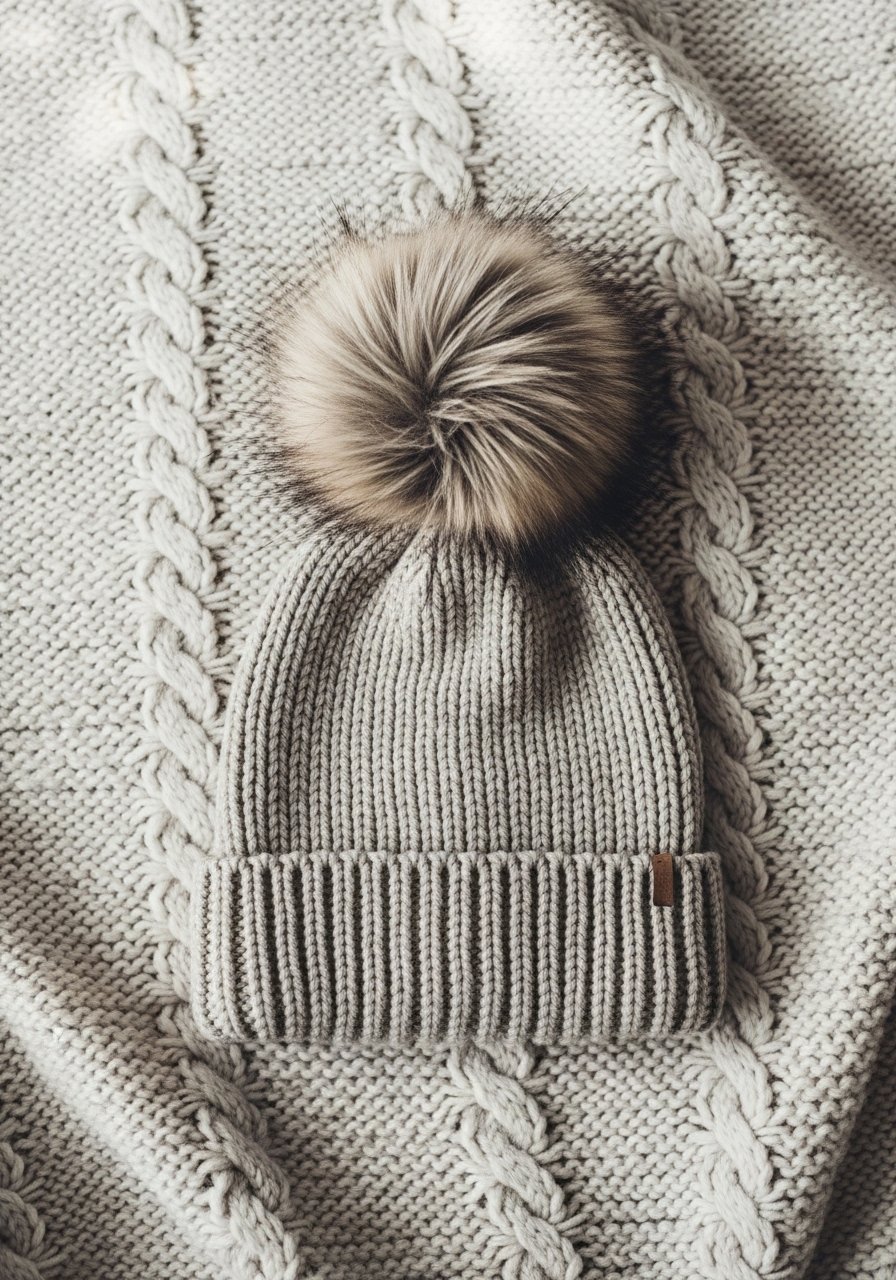
Add a faux fur pom-pom for a boutique look. You’ll pair a simple knit beanie with an accessory for a polished result.
Materials
- 150–200 yards bulky yarn
- US 10 / 6 mm circular needles 16-inch
- Faux fur pom-pom (snap-on)
- Tapestry needle
- Scissors
Instructions
- Cast on 56 stitches, join in the round.
- Work k2, p2 rib for 1.5 inches, then knit in the round for 5 inches.
- Decrease for crown as in beanie instructions.
- Attach faux fur pom-pom to top; many are snap-on—secure per manufacturer instructions.
- Weave in ends.
How to display or gift it
Top with ribbon and place in a small hat box. Store pom-pom beanie on a peg to keep shape.
15. Knit Plant Pot Cozy
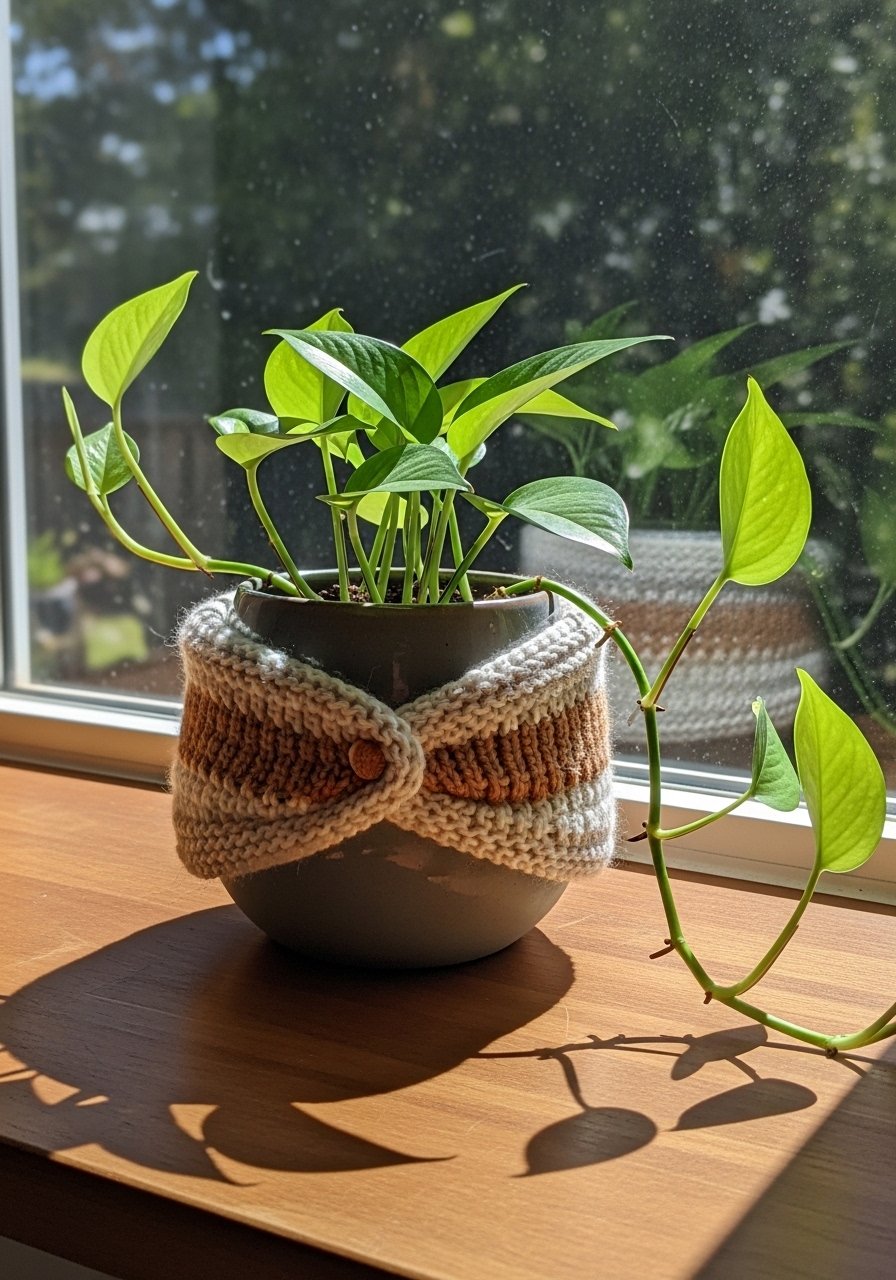
This cozy adds texture to houseplants and practices circular knitting on a small scale.
Materials
- 40–60 yards worsted weight cotton yarn
- US 6 / 4 mm circular needles or DPNs
- Tapestry needle
- Scissors
- Measuring tape
Instructions
- Measure pot circumference. Cast on enough stitches to match circumference (gauge swatch recommended).
- Join in the round and work k1, p1 rib for 1 inch.
- Switch to seed stitch for body until cozy reaches desired height (4–6 inches).
- Bind off and weave in ends. Fit on pot.
How to display or gift it
Pair with a potted succulent for a hostess gift. Store cozed indoors to avoid moisture exposure.
16. Beginner Lace Scarf (Simple Eyelet Pattern)
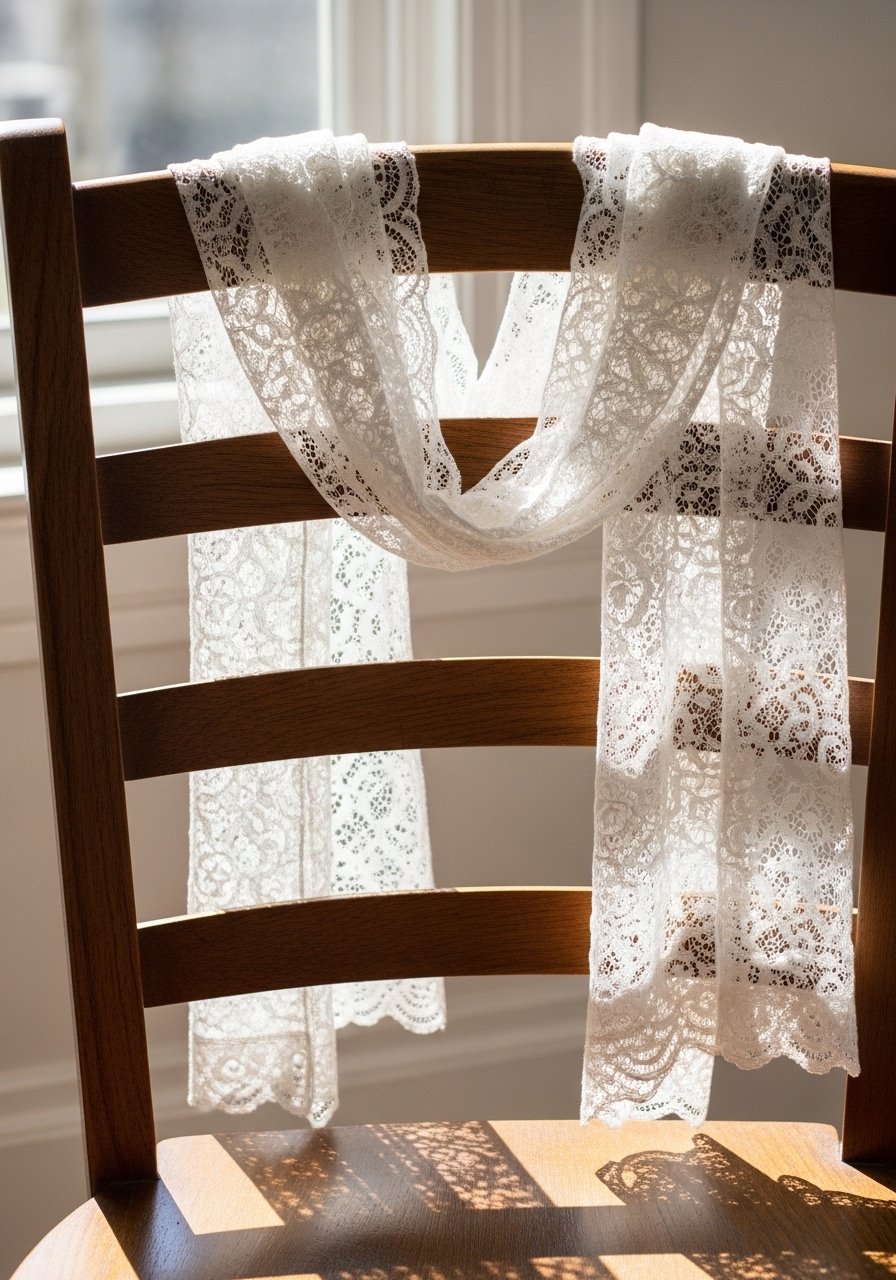
A simple eyelet lace pattern teaches yarn overs and basic decreases while making an airy, elegant scarf.
Materials
- 250–300 yards fingering or sport weight yarn
- US 6 / 4 mm straight or circular needles
- Tapestry needle
- Scissors
- Blocking wires and pins
Instructions
- Cast on 40 stitches. Work garter border 4 rows.
- Lace pattern (repeat): Row 1: k2, yo, k2tog across; Row 2: knit back. Repeat rows.
- Continue until scarf measures 60 inches.
- Finish with garter border and bind off. Soak and block using blocking wires for even edges. Allow to dry 24 hours.
How to display or gift it
Drape over a hanger for display or gift with a handwritten care card. Store flat to preserve lace shape.
17. Quick Knitted Scrunchie
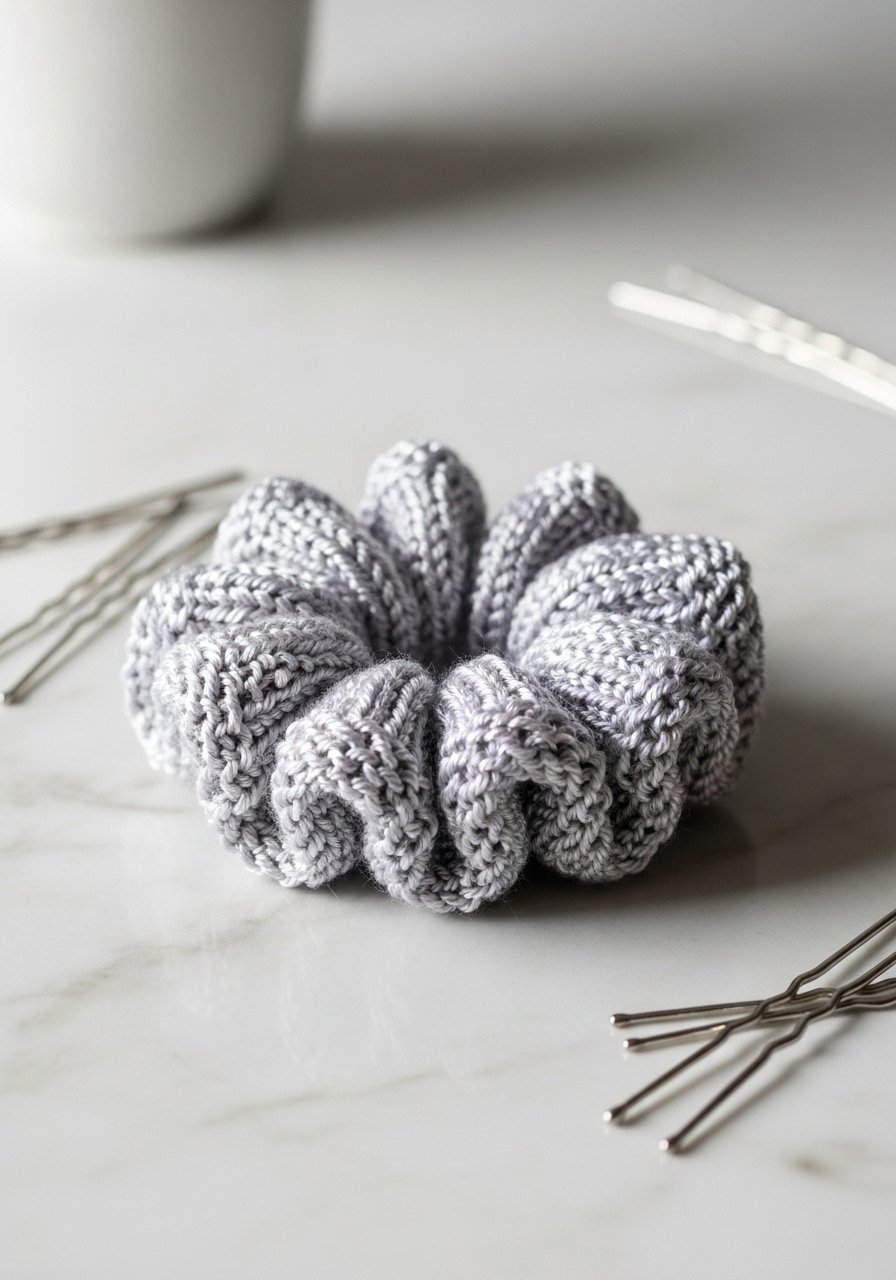
Scrunchies are tiny, portable, and great for busting yarn scraps. They’re perfect for practicing small circular knitting.
Materials
- 10–20 yards fingering or silk-blend yarn
- US 3–4 / 3.25–3.5 mm DPNs or small circular needles
- Elastic hairband (10 inches loop before tying)
- Tapestry needle
- Scissors
Instructions
- Cast on 36 stitches and join in the round.
- Work k2, p2 rib for 1.5 inches.
- Bind off loosely. Fold and sew ends to encase elastic band. Weave in ends.
- Adjust fit by replacing elastic if needed.
How to display or gift it
Set in a small jewelry box or on a ribbon card. Store in a small drawer to avoid snagging.
18. Knit Tea Cozy (Top-down)
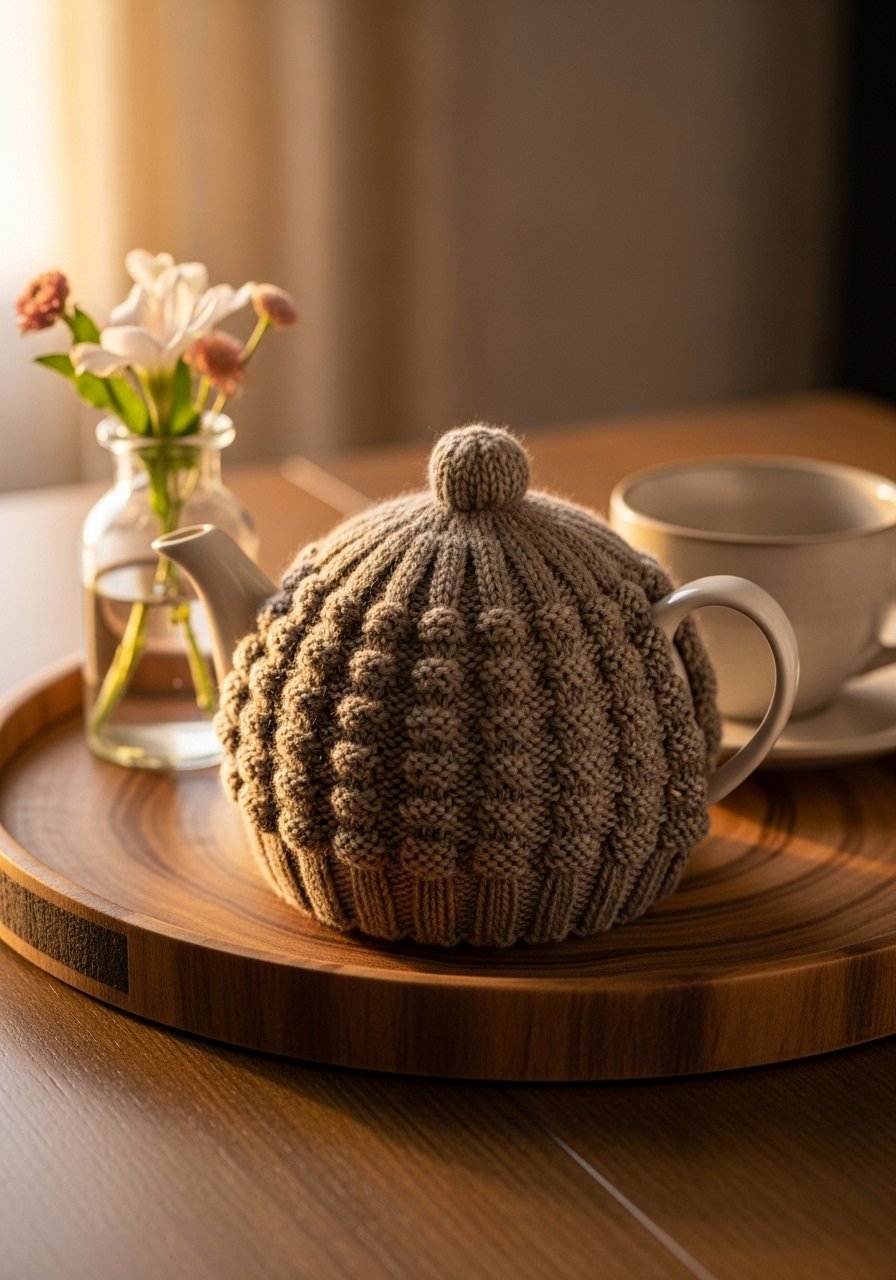
A tea cozy is decorative and functional, gentle shaping for the top teaches decreases and measuring.
Materials
- 100–150 yards worsted yarn
- US 8 / 5 mm circular needles 16-inch
- Stitch marker
- Tapestry needle
- Scissors
Instructions
- Cast on 64 stitches and join in the round.
- Work k2, p2 rib for 2 inches for the base.
- Switch to stockinette and knit until cozy measures 6 inches from cast-on.
- Decrease in rounds evenly to shape top (k6,k2tog etc.) until 8 stitches remain. Thread yarn and pull through.
- Weave in ends. Block over teapot form if desired for a snug fit.
How to display or gift it
Fold and include with a small tea sampler. Store on your teapot or in a kitchen drawer.
19. Basic Baby Hat (Garter Edge)
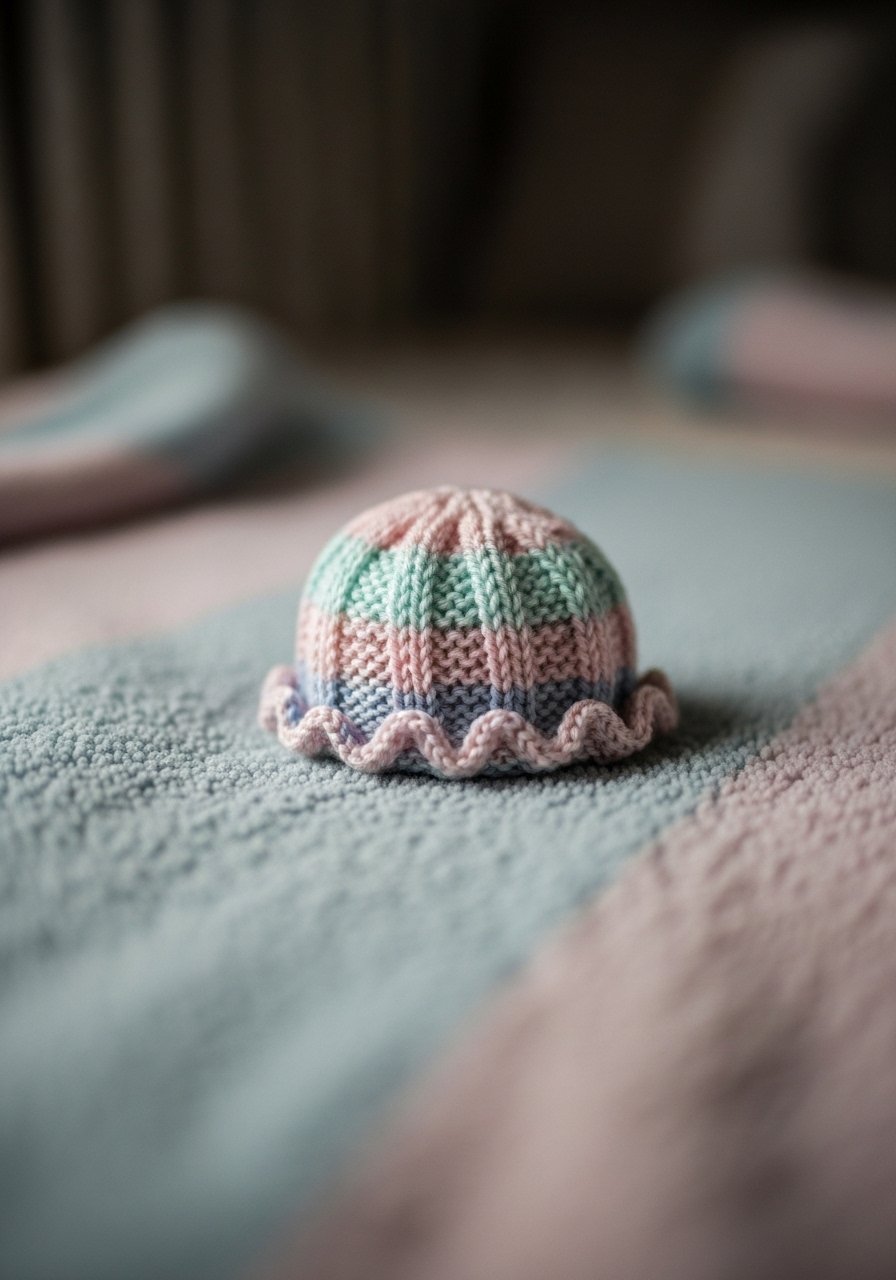
A tiny hat is rewarding and fast, teaching you decreases and working in the round at a small scale.
Materials
- 60–80 yards DK weight yarn
- US 6 / 4 mm DPNs or small circular needle
- Tapestry needle
- Scissors
Instructions
- Cast on 56 stitches and join in the round.
- Work k3, p3 garter edge for 1 inch to prevent curling.
- Knit in stockinette for 4–5 inches.
- Decrease for crown as needed until 8 stitches remain. Pull through and secure.
- Weave in ends.
How to display or gift it
Place with a small matching blanket or booties and tuck into a soft gift box.
20. Knit Dishcloth (Cotton)
Cotton dishcloths are practical and durable. They’re perfect for learning different stitch patterns and machine or hand-washable.
Materials
- 70–100 yards 100% cotton worsted yarn
- US 7 / 4.5 mm straight needles
- Tapestry needle
- Scissors
Instructions
- Cast on 40 stitches.
- Work pattern (seed stitch, or garter, or basketweave) until square measures 8–9 inches.
- Bind off and weave in ends. Machine washable; wash hot and dry to soften. No blocking required.
How to display or gift it
Tie a set of two or three with twine and tuck in a small tin with dish soap. Store folded in a drawer to keep shape.
21. Knitted Headwrap with Cable Accent (Simple Cable)
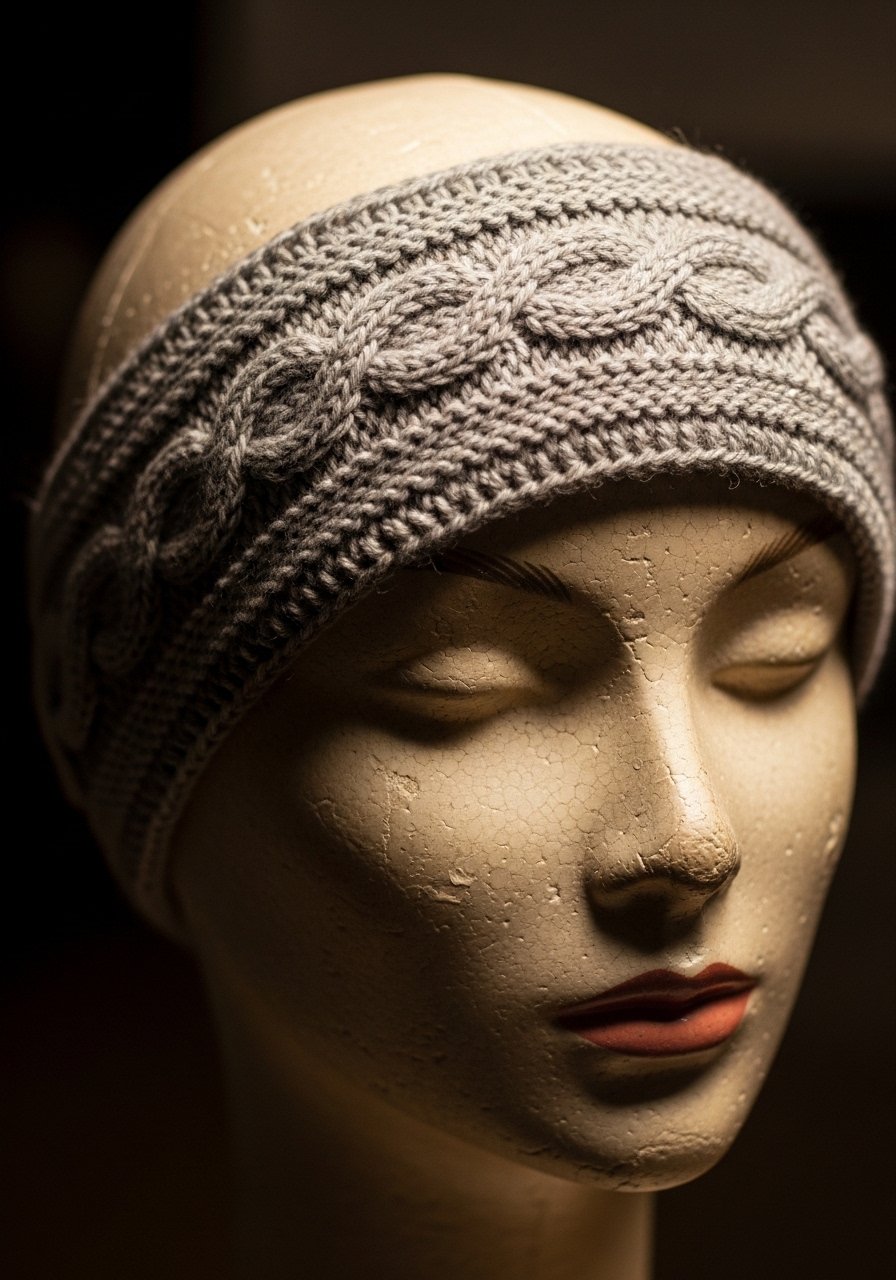
A single cable teaches cable technique without a full sweater. You’ll use a cable needle and learn twist patterns.
Materials
- 80–120 yards worsted weight yarn
- US 8 / 5 mm straight needles
- Cable needle (or spare DPN)
- Tapestry needle
- Scissors
Instructions
- Cast on 28–32 stitches.
- Work k2, p2 edge for 1 inch.
- Cable pattern: over the center 8 stitches, C4F (cross 2 over 2) every 8 rows, with stockinette panels on either side.
- Continue until piece measures 18 inches. Bind off and seam ends, centering cable on front. Weave in ends.
How to display or gift it
Pair with a small jar of hair oil or a scrunchie for a pampering gift set.
22. Simple Knit Slippers (No-sew)
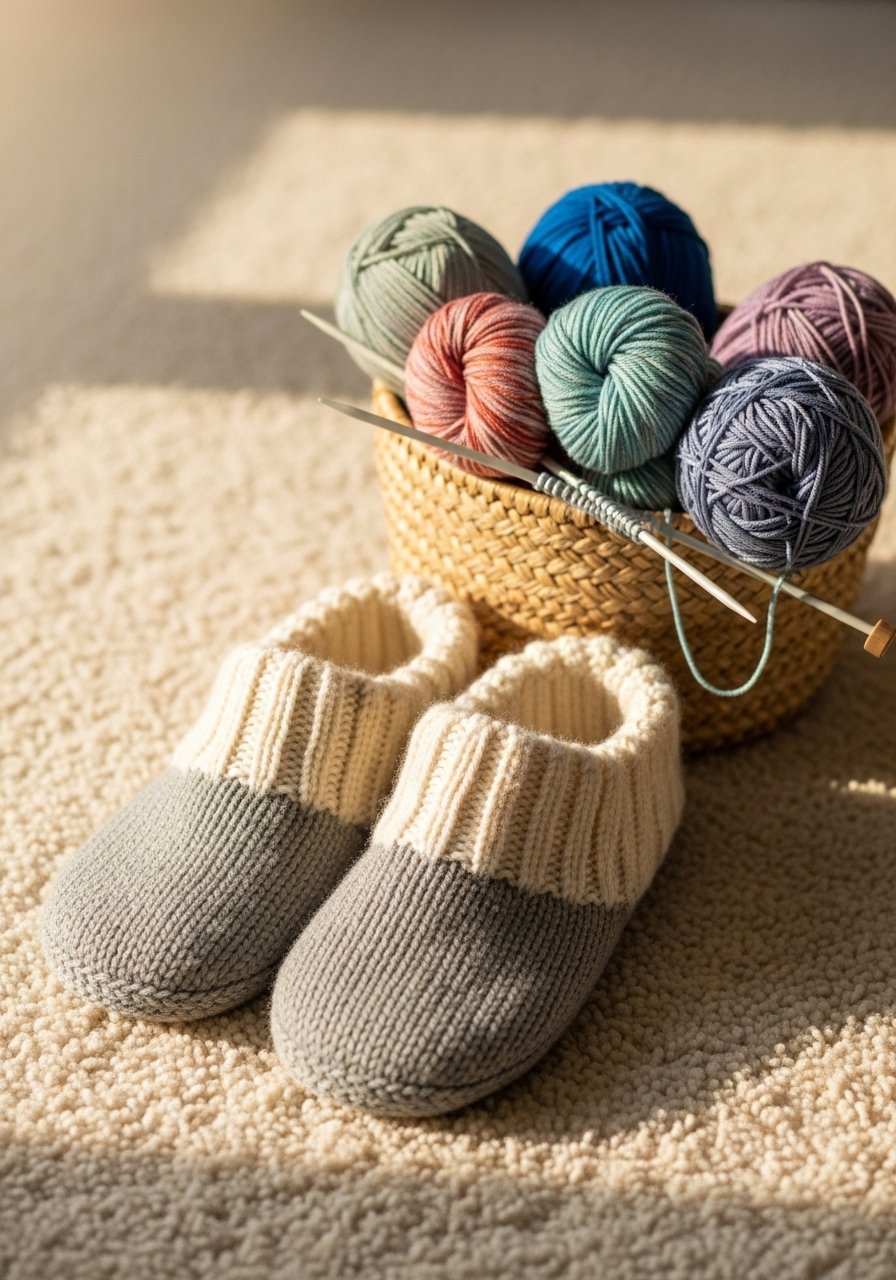
Slippers teach short-row shaping and finishing; the no-sew approach keeps things beginner-friendly.
Materials
- 200–250 yards bulky yarn
- US 10–11 / 6–8 mm circular needle (magic loop)
- Tapestry needle
- Scissors
- Non-slip fabric paint or adhesive dots for soles (optional)
Instructions
- Cast on 36–40 stitches and work in the round for cuff 2 inches.
- Work foot portion in stockinette until the slipper reaches the base of toes.
- Work short rows to shape toe: wrap and turn method across middle section, shaping until about 10–12 stitches remain.
- Thread yarn through remaining stitches and pull tight; weave in ends.
- Apply non-slip dots to soles and let cure 24 hours per manufacturer instructions.
How to display or gift it
Pair with cozy socks and a candle for a lounge gift box. Store flat to avoid flattening the soles.
23. Knit Market Tote (Solid)
A more solid tote uses thicker yarn and reinforced handles to hold groceries. It teaches increases and sturdy finishing.
Materials
- 400–500 yards worsted or bulky cotton yarn
- US 9 / 5.5 mm circular needles, 32-inch cable
- Tapestry needle
- Scissors
- Measuring tape
Instructions
- Cast on 80 stitches and work in stockinette for base 10 inches, then begin increases to shape sides or knit flat then seam.
- Continue until bag measures 14–16 inches tall.
- Pick up stitches for handles and knit 18–20 inches for each handle, or knit handles separately and sew.
- Reinforce handle attachment with a few extra rows and tapestry needle sewing. Weave in ends.
How to display or gift it
Keep it hanging by the door for quick grab-and-go shopping. Store folded in a kitchen drawer.
24. Basic Knit Socks (Ankle, Beginner-friendly)
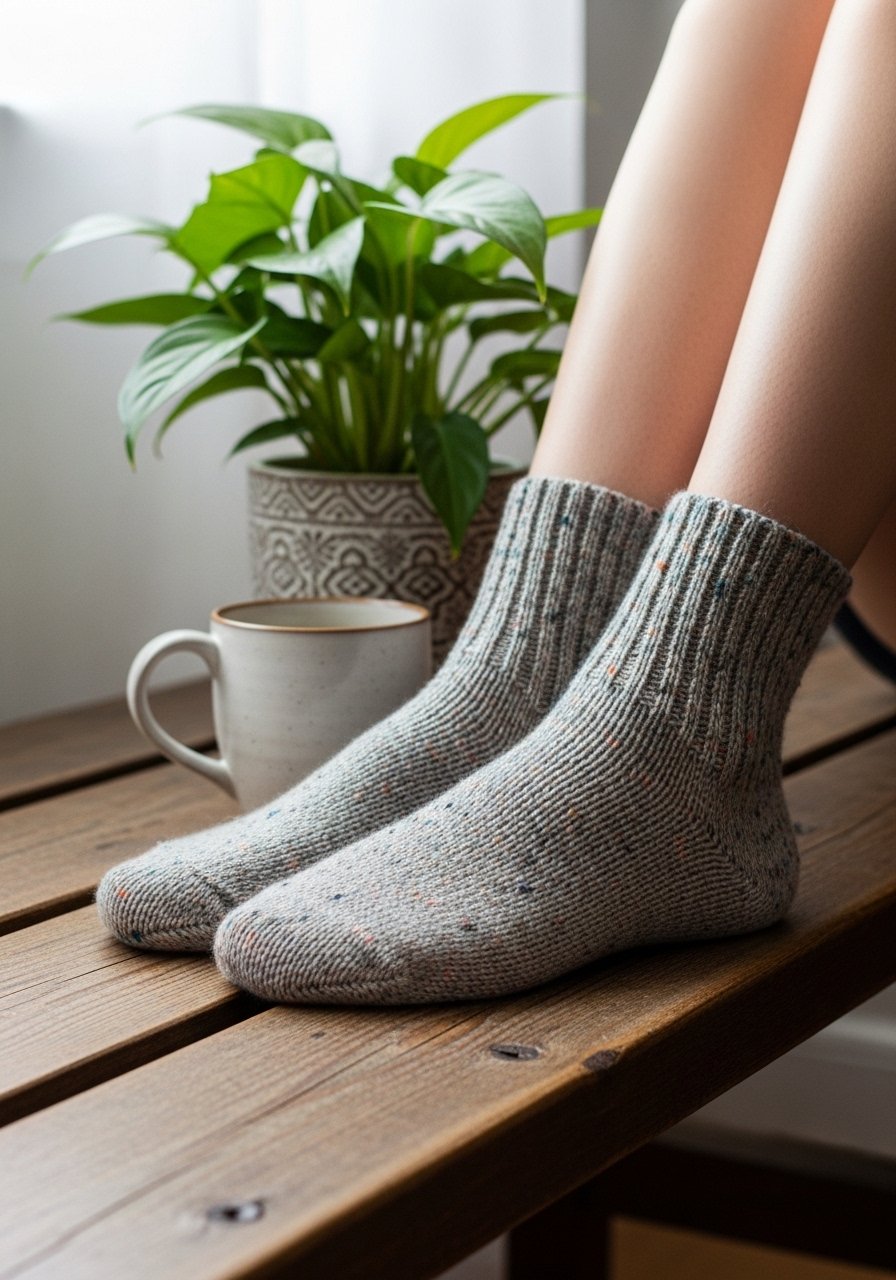
Ankle socks are a gentle intro to sock knitting—shorter length, basic heel shaping, and toe decreases.
Materials
- 200–250 yards sock yarn (fingering weight)
- US 1–2 / 2.25–2.75 mm double-pointed needles (set)
- Tapestry needle
- Scissors
- Stitch markers
Instructions
- Cast on 60 stitches and divide across DPNs. Work k2, p2 cuff for 1.5 inches.
- Knit leg for 2–2.5 inches more for ankle socks.
- Work heel flap back and forth on half the stitches for 1.5 inches, then turn heel with short rows.
- Pick up stitches for gusset and continue knitting foot until desired length.
- Decrease for toe until 8–10 stitches remain; graft with Kitchener stitch.
- Weave in ends and wash gently.
How to display or gift it
Wrap as a set of two in kraft paper. A small sock blocker set will keep shape if you plan to gift multiple pairs.
25. Cozy Oversized Throw (Chunky Blanket)

A chunky throw is satisfying and relatively quick thanks to super bulky yarn. You’ll practice large-scale even tension and finishing edges.
Materials
- 800–1000 yards super bulky yarn (approx 730–915 m) depending on size
- US 50 / 25 mm giant straight needles or arm knitting technique
- Tapestry needle
- Scissors
- Measuring tape
Instructions
- Cast on 40–50 stitches depending on desired width (approx 40–50 inches).
- Work garter stitch (knit every row) for desired length 60–70 inches.
- Bind off loosely. Weave in any large ends and trim neatly.
- If arm knitting, cast on with tail and follow arm knit pattern until desired length.
- Shake and block lightly by laying flat; air-dry 24 hours to set stitches.
How to display or gift it
Drape over the arm of a sofa or roll at the foot of a bed. Store folded in a breathable storage bin during warmer months.
You’ve just scrolled through 25 approachable projects that show how versatile knitting for beginners can be. From quick mug cozies to a full-sized chunky throw, there’s a project here for short afternoons and slow weekend sessions. Pick one that matches your time and yarn stash, and don’t be afraid of small mistakes—they’re invisible after a few ends are woven in.
If you’re stocking a starter kit, a set of bamboo knitting needles and a compact stitch marker set make many of these projects easier. Save this pin for later, try one today, and tell a friend which project you want to make next—what will you start with?
Trust me, having a temperature-controlled hot glue gun changed how tidy my finishes looked across mixed-media gift packaging.


