You know that spark—when a scribble becomes a scene and a blank page stops being blank? These 30 drawing ideas for kids sketchbook are designed to keep that spark alive for daily creativity. Whether your child is five or twelve, these bite-sized projects fit into pocket-sized sketchbooks and encourage experimentation with pens, markers, watercolor, and collage.
You’ll find playful prompts, simple techniques, and step-by-step instructions that build skill without pressure. I mention trusted craft tools and brands because they help kids get better results fast—like using a reliable Staedtler Noris pencil set for sketching or a compact Prang watercolor pan set for wet-on-wet experiments. Each idea includes a full materials list, clear steps with drying times, troubleshooting tips, and ways to display or gift the finished page.
Keep this page saved or pinned for rainy afternoons, quiet mornings, or anytime a sketchbook needs fresh inspiration. Ready? Grab a sharpened pencil and let's fill those pages.
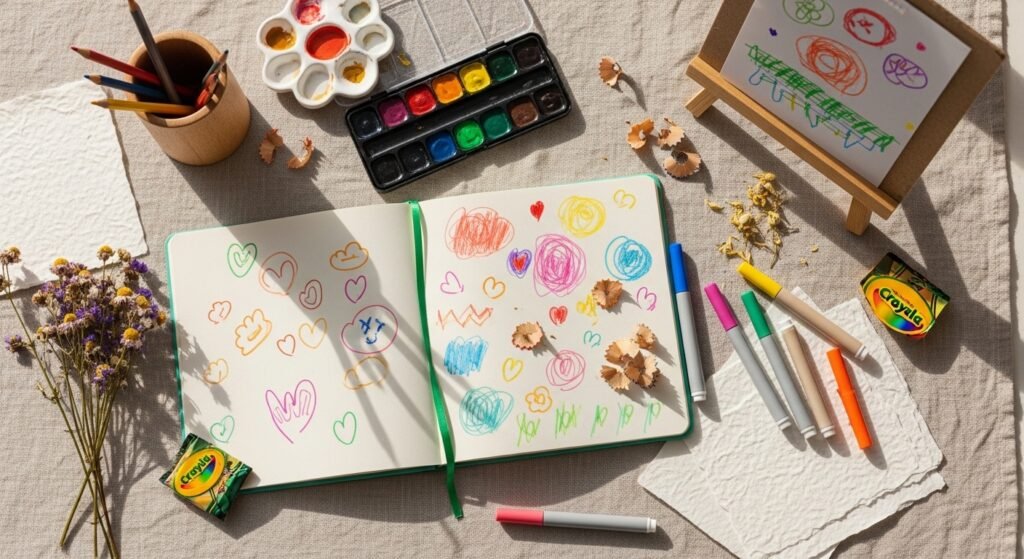
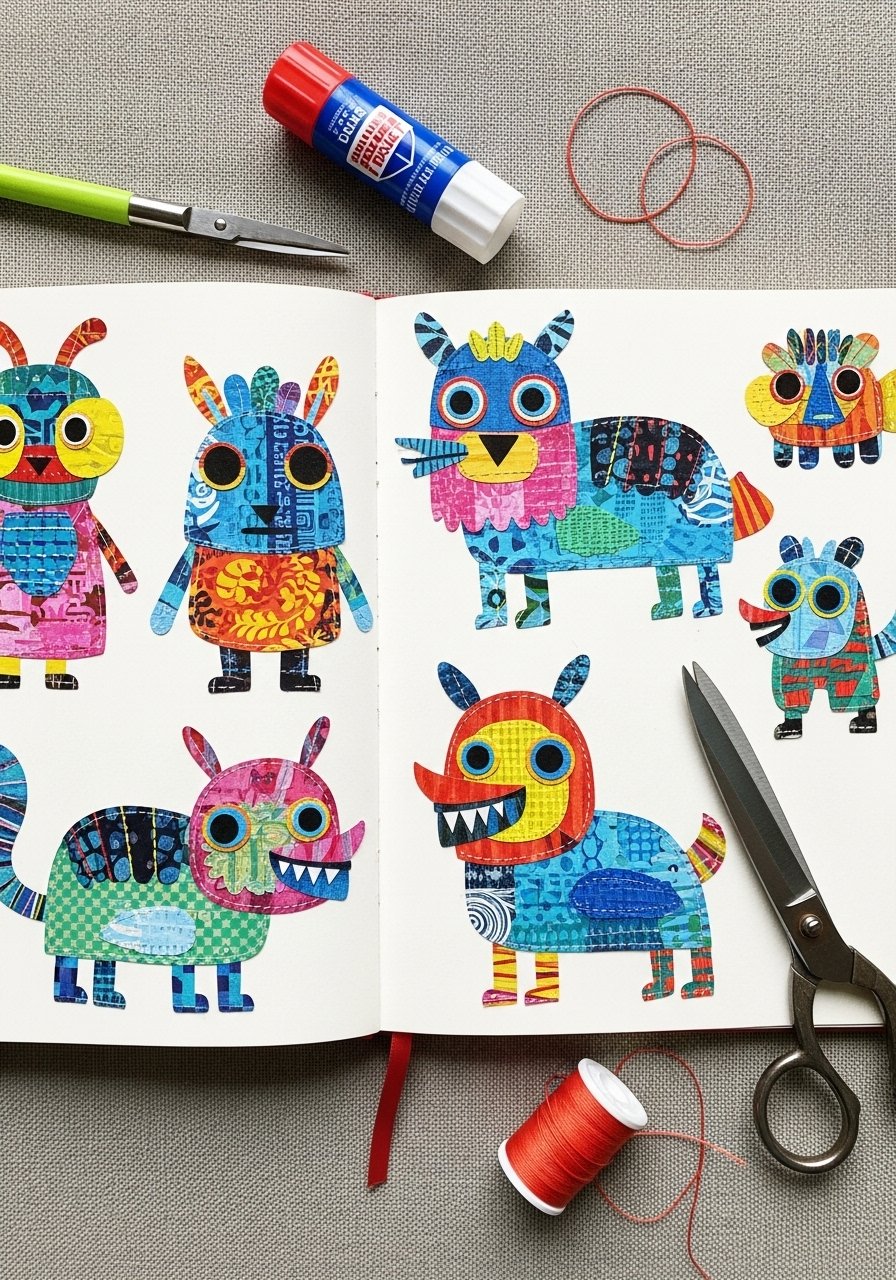
- Monster Mash Sketch Page

This goofy monster page is perfect for loosening up before a longer drawing session. Kids create several tiny characters across a page, mixing shapes, textures, and expressions. It's great for beginners who love creatures and for impatient artists who want quick wins. The page feels lively with bold marker outlines and soft watercolor fills.
Materials
- Sketchbook 5.5 x 8.5 in, 70 lb (100 gsm), 20–40 pages
- Graphite pencil (HB) for thumbnails
- Black fine-liner 0.3 mm (e.g., Staedtler Pigment Liner)
- Washable markers set, 12-pack (e.g., Crayola)
- White gel pen for highlights
- Googly eyes pack (optional, 20 pcs)
- Washi tape for decorating edges
Instructions
- Lightly sketch 6–8 small monster shapes with an HB pencil. Keep lines loose.
- Choose one head shape, one body type, and mix features across monsters.
- Ink each monster outline with a 0.3 mm black fine-liner. Let ink dry 1–2 minutes.
- Color with washable markers; layer strokes for texture. Let marker ink dry 3–5 minutes.
- Add highlights with a white gel pen—dots on eyes, shine on noses.
- Glue a googly eye on one or two monsters for a tactile surprise.
- Frame the page edge with washi tape for a finished look.
How to display or gift it
- Slip the page into a clear pocket in a sketchbook or present it on a small wooden easel.
- Add a kraft-paper backing and tie with twine for gifting.
- Store completed pages flat in a stackable craft organizer until you assemble a mini portfolio.
- Nature Pattern Study

Turn a nature walk into a focused pattern study. Kids sketch tiny versions of leaves, bark texture, pebbles, and petal veins in a tidy grid. This project trains observation and is ideal for calm afternoons. The page ends up feeling like a pocket-sized scientific sketchbook with cozy cottagecore vibes.
Materials
- Sketchbook 6 x 8 in, 140 lb (190 gsm) if using wet media
- Mechanical pencil 0.5 mm
- Eraser (kneaded)
- Colored pencils 24-color set (e.g., Prismacolor Scholar)
- Fine-tipped brown ink pen 0.2–0.3 mm
- Small watercolor brush (size 4 round)
- Portable watercolor half-pan (small set)
Instructions
- Collect 6–9 small natural specimens on a walk.
- Draw a 3×3 grid faintly in pencil on your page.
- In each square, lightly sketch the specimen’s outline.
- Add texture lines (veins, ridges) with the brown ink pen; wait 1 minute to dry.
- Lightly wash color—one thin coat—using watercolor pans; dry 10–15 minutes.
- Layer colored pencil on top for depth. Blend with small circular strokes.
- Erase any remaining pencil grid lines gently.
How to display or gift it
- Mount the page in a glassine sleeve and attach a dried sprig with washi tape.
- Group several studies into a handmade zine and staple the spine.
- Keep specimens stored flat in a craft organizer labeled by date.
- Fantasy Map — drawing ideas for kids sketchbook
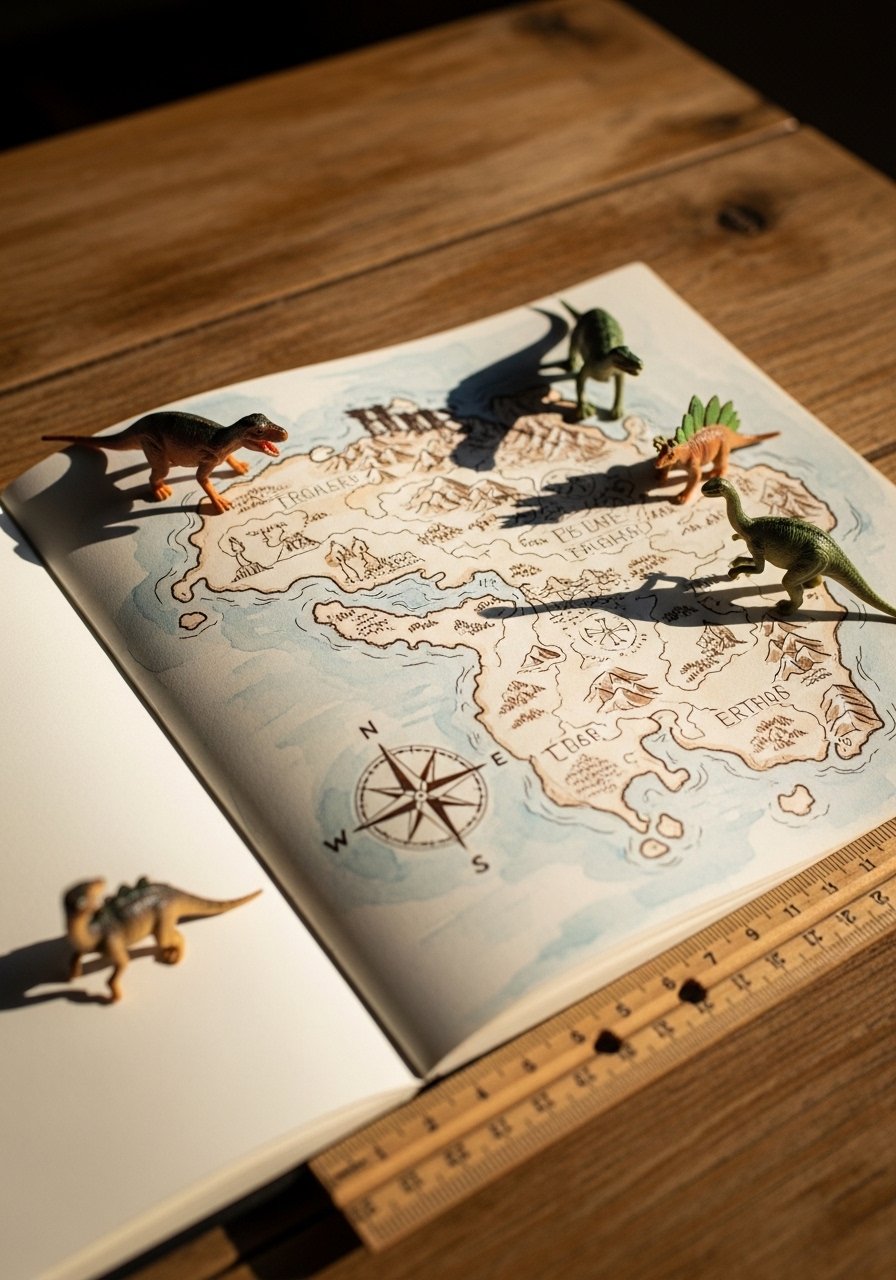
Mapping a made-up world turns storytelling into drawing practice. Kids add mountains, forests, rivers, and quirky landmarks like "Bubblegum Bay." This project blends line work and simple watercolor washes and encourages imaginative vocabulary. It's suited for older kids who like stories and cartography.
Materials
- Sketchbook 8 x 10 in, 140 lb (190 gsm)
- Brown sepia ink pen 0.3 mm
- Pencil (2B)
- Small travel watercolor set
- Round brush size 6
- Ruler 12 in (wooden)
- Compass cookie cutter as stencil (optional)
Instructions
- Lightly sketch island outline with a 2B pencil.
- Add major landmarks: mountains, rivers, forests, towns.
- Use the sepia pen to ink main lines and labels; dry 1–2 minutes.
- Apply a light watercolor wash for sea and land—allow 15 minutes to dry.
- Add texture lines (contour strokes for hills) in pen.
- Detail roads and tiny anchor icons for harbors.
- Erase stray pencil marks gently.
How to display or gift it
- Laminate the map page for use as a placemat.
- Bind several maps into a "World Atlas" for storytelling sessions.
- Place the map in a shadowbox with a small wooden compass for gifting.
- Daily Mood Doodles
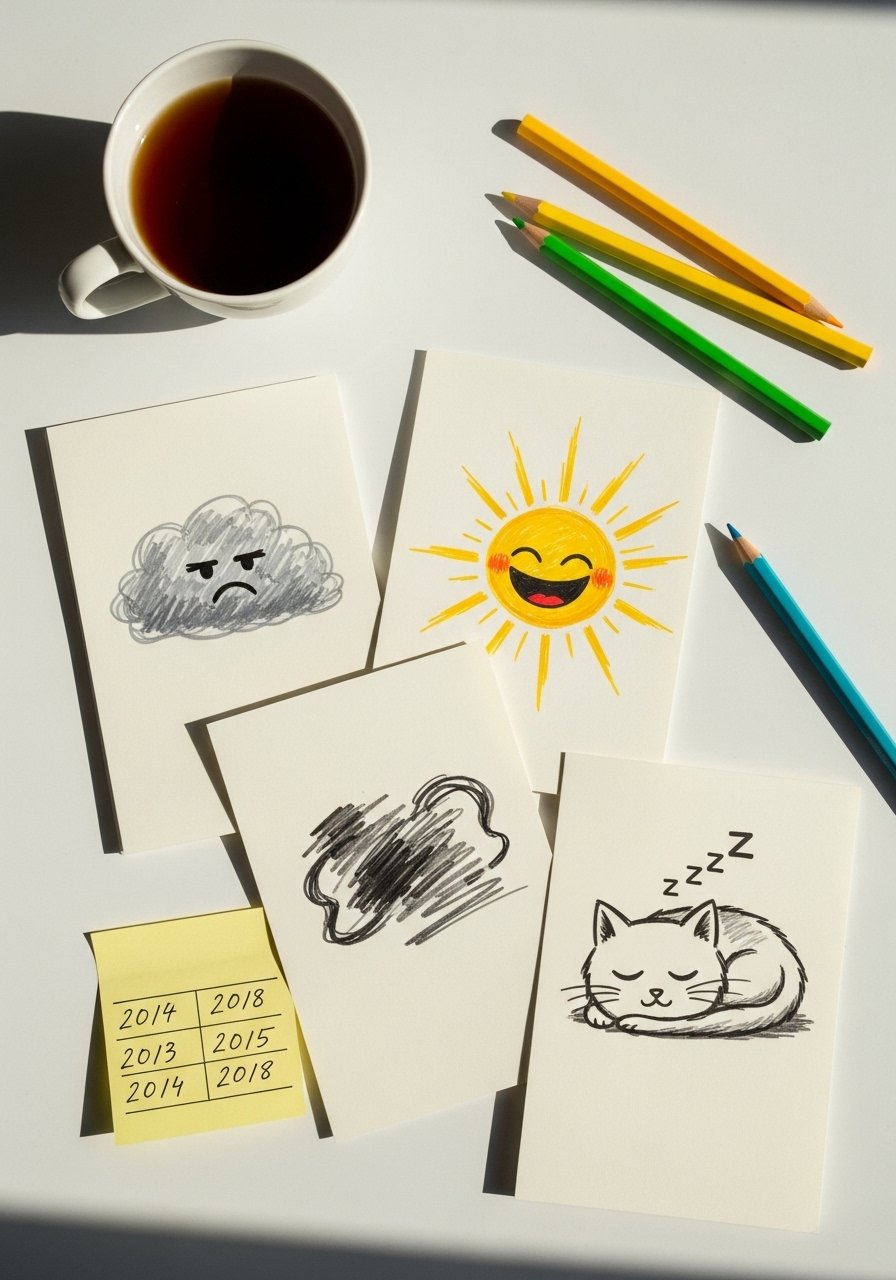
A one-minute daily doodle log helps kids reflect while practicing expression. Each page becomes a tiny mood diary with faces, weather icons, and quick color choices. This is perfect for building a daily sketch habit without time pressure.
Materials
- Pocket sketchbook 3.5 x 5 in
- Colored fineliners 6-pack
- Soft pencil 2B
- Sharpener
- Small date stamp (optional)
- Sticker sheet for rewards
Instructions
- Set a timer for 1–3 minutes per doodle.
- Draw a simple circle or cloud base in pencil.
- Add eyes, mouth, and accessory (tears, sun rays).
- Ink quickly with a colored fineliner; let dry 30 seconds.
- Color a single accent with a matching fineliner.
- Stamp or write the date on the corner.
- Repeat daily—fill a page each week.
How to display or gift it
- Keep pages in a zippered pouch for a portable mood diary.
- Bind weekly pages with a tiny binder clip to create a mini-book.
- Gift a week's strip to family with a note about the artist's week.
- Tiny Portrait Challenge
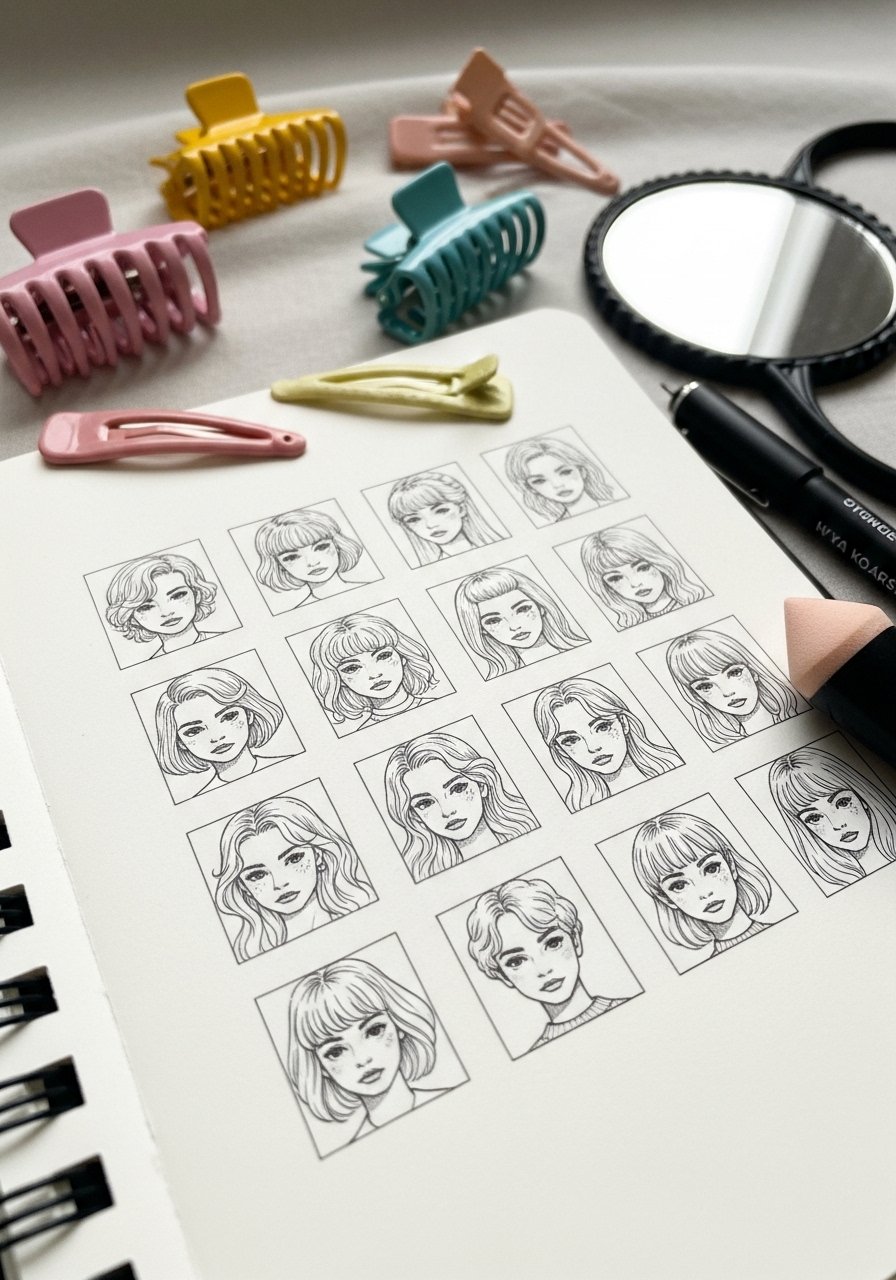
Tiny portraits train observation of faces without intimidation. Kids practice different hairstyles, expressions, and angles, all scaled small so details stay simple. This suits kids ready to try features and shading.
Materials
- Sketchbook 5 x 7 in, 100 gsm
- Pencil set HB–2B
- Blending stump (small)
- Black micron pen 0.2 mm
- Colored pencil for one accent color
- Pocket mirror for reference
Instructions
- Draw 6–8 small squares on your page, about 1.25 in wide.
- Lightly sketch head shapes and center guidelines.
- Add basic eyes, nose, mouth positions.
- Shade lightly with 2B pencil and blend with a stump for soft shadows.
- Ink outlines sparingly with a 0.2 mm pen; wait 1 minute to dry.
- Add a single color accent (hair clip, scarf).
- Erase any heavy pencil lines.
How to display or gift it
- Cut out portraits and make a mini flip-book.
- Frame a row of three portraits in a small frame for a gallery wall.
- Slip the page into a mailing envelope and send as an art postcard.
- Patterned Creature Collage
This hybrid drawing-and-collage project lets kids mix cut papers, doodles, and stitching. They’ll create quirky animals with patterned bodies and drawn details. It's tactile and teaches composition.
Materials
- Sketchbook 8 x 6 in, mixed-media paper
- Patterned scrapbooking paper assorted (5 sheets)
- School glue stick or PVA glue
- Child-safe scissors
- Black marker 0.5 mm
- Embroidery thread 6-strand, small needle (optional)
- Hole punch (1.5 mm)
Instructions
- Cut body shapes from patterned paper.
- Glue bodies onto the sketchbook page with a glue stick.
- Draw faces and limbs with a black marker.
- Punch tiny holes if adding stitched accents.
- Thread the needle with two strands of embroidery floss and stitch simple lines.
- Secure thread on the back with a small piece of tape.
- Press page flat under a book for 30 minutes.
How to display or gift it
- Adhere finished pages to a stiff backing board and frame.
- Bundle several collage pages and wrap in kraft paper as a handmade book.
- Store in a flat craft organizer until dry.
- Comic Strip Sequence
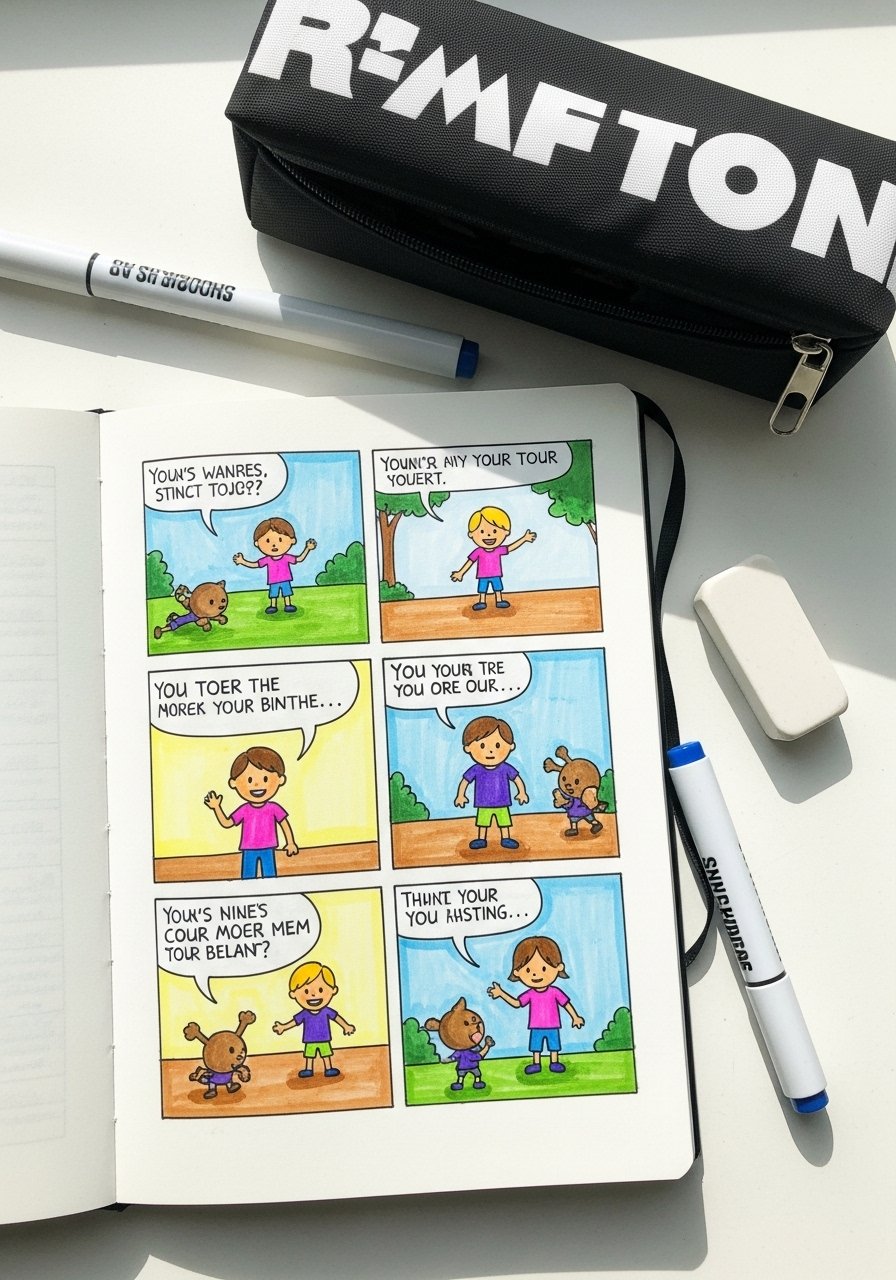
Comics teach storytelling, pacing, and sequential drawing. Kids storyboard a simple joke or moment across panels. This project is great for narrative practice and character consistency.
Materials
- Sketchbook 7 x 10 in, smooth paper
- Ruler 12 in
- HB pencil
- Black brush pen for varied line weight
- Alcohol-free markers set, 8 colors
- Speech bubble stencil (optional)
Instructions
- Use a ruler to draw six equal panels.
- Plan your story in three sentences.
- Sketch thumbnail frames in pencil for each panel.
- Ink key frames with a brush pen; allow 2 minutes to dry.
- Add simple color accents with markers; dry 2–3 minutes.
- Letter dialogue in clear uppercase letters.
- Erase pencil guides and add motion lines for energy.
How to display or gift it
- Make a mini comic zine by folding and stapling multiple pages.
- Scan and print a few copies as a gift for friends.
- Store completed strips in a labeled sketchbook pocket.
- Alphabet Creature A–Z
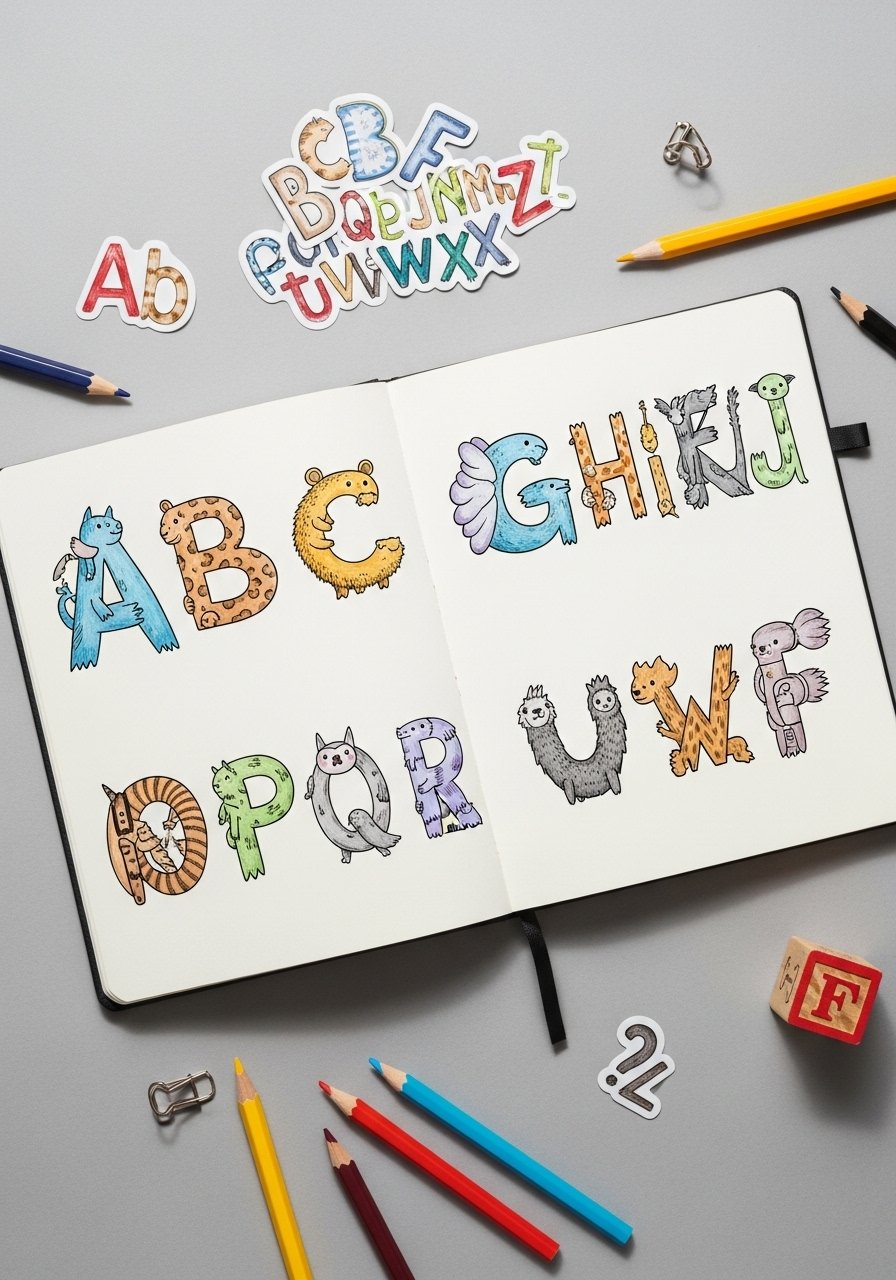
Turn letters into creatures for a fun blend of typography and drawing. This is excellent for early writers and artists who love playful concepts. Each letter becomes a tiny design challenge.
Materials
- Sketchbook 6 x 6 in
- Pencil (HB)
- Colored pencil set 24 colors
- Felt-tip pen for outlines
- Alphabet stickers (optional)
- Eraser
Instructions
- Choose 6–8 letters to start—one page per letter or a grid.
- Draw each letter large and blocky.
- Add creature additions: eyes, ears, tails.
- Ink outlines with a felt-tip pen; dry 30 seconds.
- Color with colored pencils in layered strokes.
- Add small patterns (spots, stripes).
- Repeat over multiple pages until alphabet is complete.
How to display or gift it
- Bind pages into a homemade ABC book.
- Laminate single-letter pages as flashcards.
- Pack a few into a clear folder as a learning gift.
- Seasonal Scene — drawing ideas for kids sketchbook
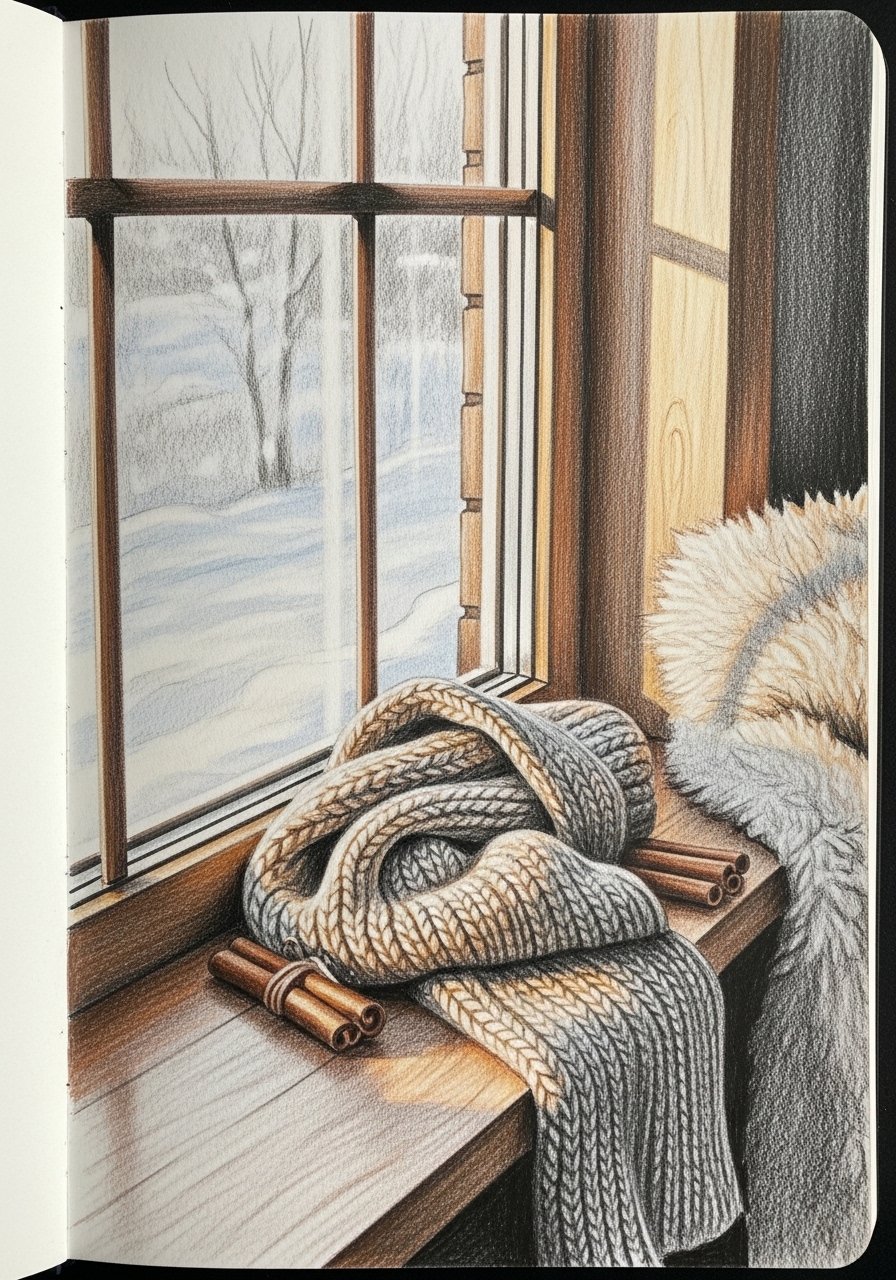
Capture a season in one compact scene: a snowy window, a spring meadow, or an autumn tree-lined path. This project helps kids study atmosphere and color temperature. It’s perfect for seasonal journaling.
Materials
- Sketchbook 8 x 6 in, 160 gsm
- Graphite pencils HB–4B
- Soft pastels set, 12 colors
- Blending fingers or paper stumps
- Kneaded eraser
- Fixative spray (workable)
Instructions
- Lightly sketch composition and horizon line.
- Block in large shapes with graphite.
- Add color temperature with soft pastels—cool for winter, warm for autumn.
- Blend gently with a stump for smooth gradients.
- Darken line work with a 2B for contrast.
- Spray a light coat of workable fixative from 12 inches; dry 15 minutes.
- Add small details (window sill items, falling leaves).
How to display or gift it
- Frame the scene behind glass for seasonal decor.
- Make a set of four seasonal pages as a rotating display.
- Store flat in a portfolio until the fixative cures fully (24 hours).
- Patterned Hands and Feet
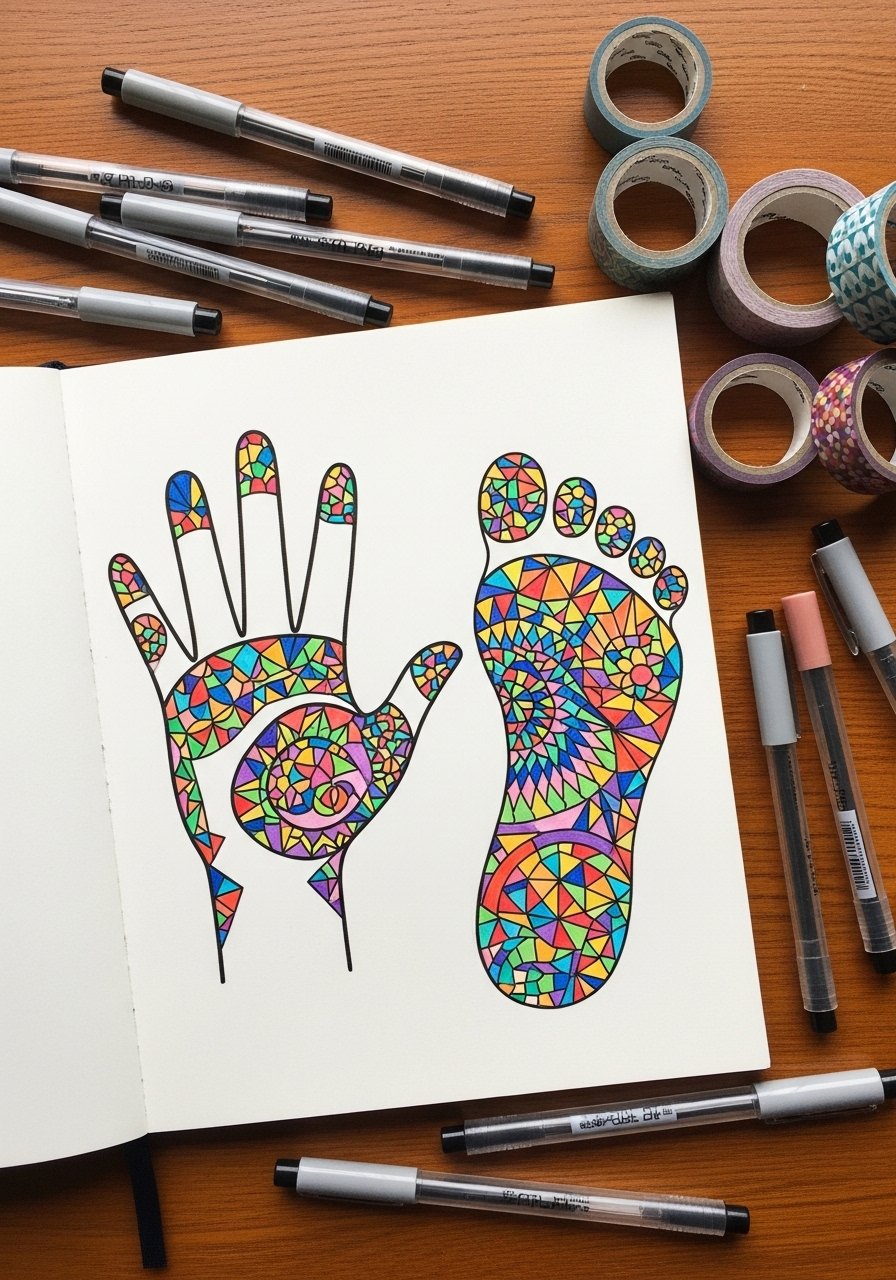
Tracing hands and feet and filling them with patterns builds fine-motor control and design thinking. Kids can experiment with symmetry, repetition, and color palettes.
Materials
- Sketchbook 7 x 9 in
- Skinny gel pens 8-pack (metallic and bright)
- Pencil HB
- Fine ruler 6 in
- Pattern stencil (optional)
- Washi tape for borders
Instructions
- Trace a hand and foot gently on the page.
- Divide each shape into sections with faint pencil lines.
- Fill each section with a different pattern using gel pens.
- Vary pressures for thicker/thinner lines.
- Add metallic accents for pop.
- Erase any stray pencil marks after ink dries (1–2 minutes).
- Frame edges with washi tape.
How to display or gift it
- Turn the page into a card by folding and cutting a smaller rectangle.
- Mount on colored cardstock and add a ribbon for gifting.
- Store with other patterned study pages in a craft organizer.
- Everyday Object Study
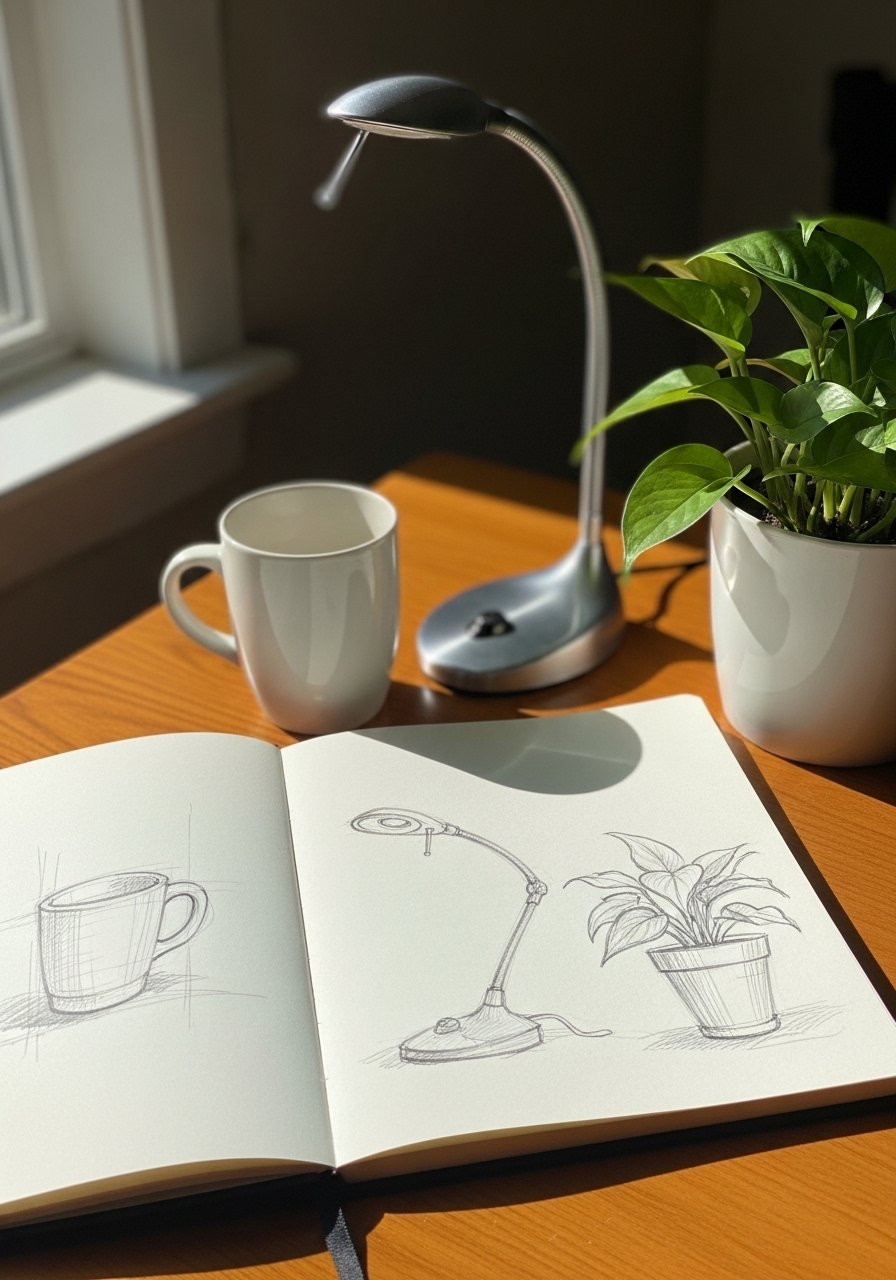
Sketching common household objects trains proportion and light observation. Kids learn to see shapes, reflectivity, and cast shadows. This project is practical and builds confidence quickly.
Materials
- Sketchbook 5 x 7 in
- HB and 2B pencils
- Kneaded eraser
- Small ruler
- Black soft-tip pen
- White colored pencil for highlights
Instructions
- Choose three objects to study and arrange them under steady light.
- Sketch simple shapes lightly with HB.
- Observe and add cast shadows with 2B pencil.
- Darken key edges with the soft-tip pen; dry 1 minute.
- Add highlights with a white colored pencil on dark surfaces.
- Label materials and light direction on the margin.
- Repeat with different objects weekly.
How to display or gift it
- Compile object studies into a "home museum" sketchbook.
- Mount a series on a clipboard wall for an instant gallery.
- Wrap a set of pages in kraft paper for a personalized gift.
- Zentangle Critters
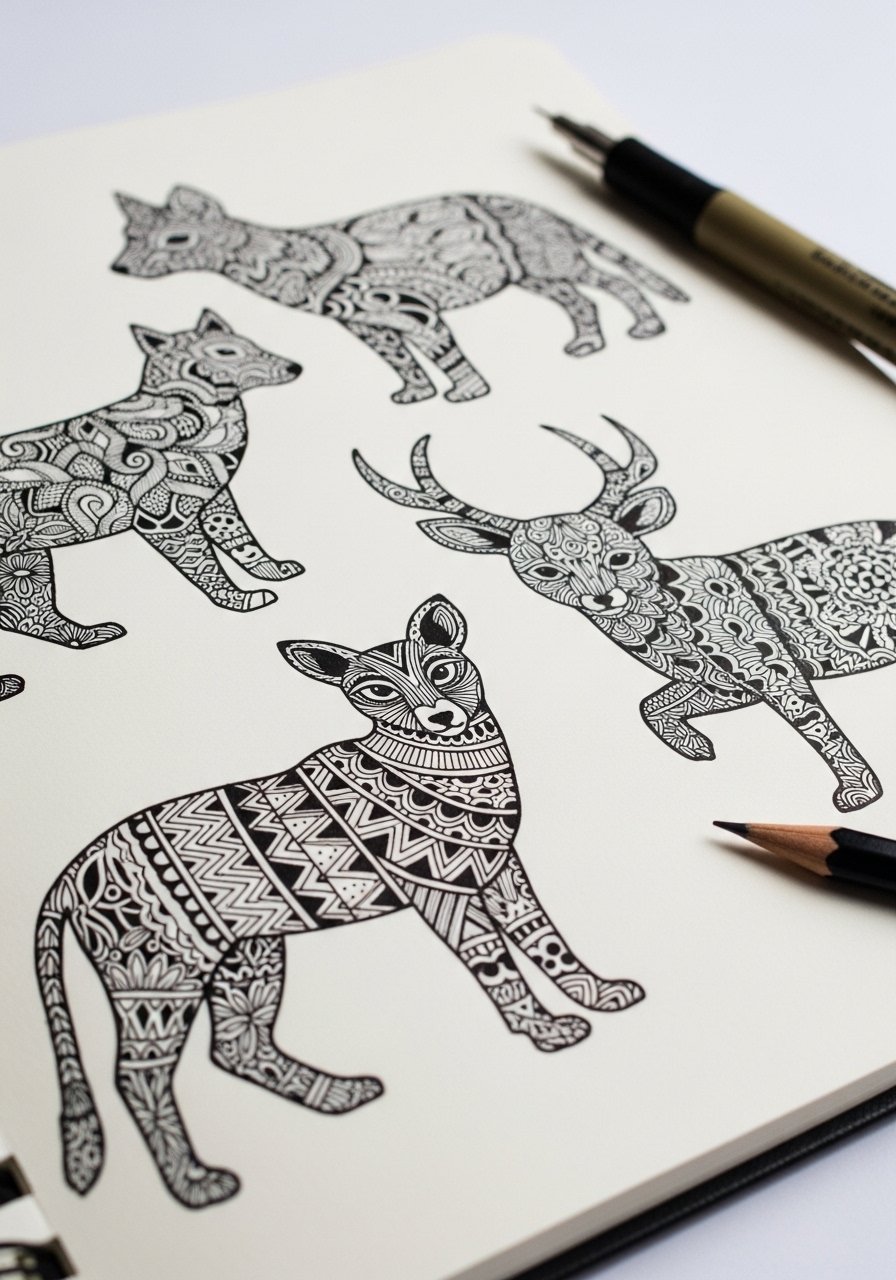
Zentangle-style patterns inside animal shapes teach pattern repetition and relaxation. Kids focus on small areas, which keeps the project low-pressure and meditative.
Materials
- Sketchbook 6 x 6 in, smooth paper
- Black micron pen 0.2 and 0.5 mm
- Pencil HB
- Eraser
- Ruler (optional)
- Pattern idea cards (homemade)
Instructions
- Draw an animal silhouette lightly in pencil.
- Divide the silhouette into sections for different patterns.
- Fill each section with a different repeating mark using a 0.2 mm pen.
- Use 0.5 mm for thicker outlines and contrast.
- Let ink dry 1–2 minutes, then gently erase pencil.
- Add small dot clusters for texture.
- Try shading some sections by cross-hatching.
How to display or gift it
- Make a framed set of three animal tangles for a nursery.
- Cut shapes out and use as gift tags.
- Store flat in a portfolio or display on a small easel.
- Silhouette Story Pages

Silhouettes simplify forms and emphasize composition. Kids paint backgrounds with watercolor, then overlay silhouette scenes—perfect for practicing values and storytelling.
Materials
- Sketchbook 8 x 8 in, 140 lb (190 gsm)
- Watercolor pan set
- Flat synthetic brush size 8
- Black acrylic ink or India ink
- Round brush size 2
- Paper towel
Instructions
- Paint a gradient sky background with watercolor; dry 20 minutes.
- Lightly pencil your silhouette composition after the wash dries.
- Fill silhouettes with black India ink using a round brush.
- Let ink dry 10 minutes; check for tackiness.
- Add small white highlights with a gel pen if desired.
- Press flat under a book for 30 minutes to reduce warping.
- Sign the page and note the date.
How to display or gift it
- Mount on kraft backing and frame.
- Create a set of seasonal silhouette pages for rotating decor.
- Store in a portfolio with interleaving tissue for protection.
- Food Face Doodles
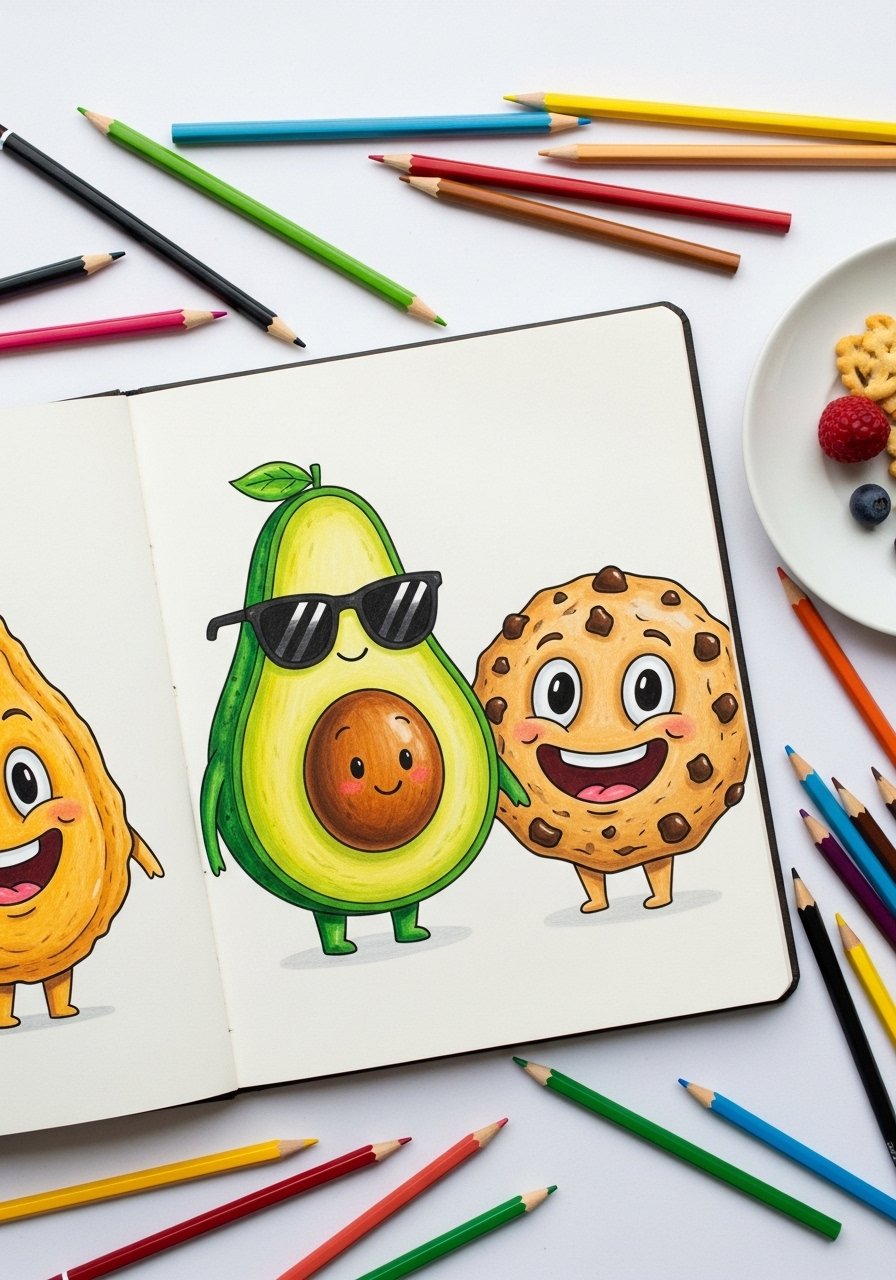
Turning food into characters blends humor and design. Kids will enjoy anthropomorphizing fruits, veggies, and snacks. It’s playful and builds expression skills.
Materials
- Sketchbook 6 x 8 in
- Pencil
- Colored pencils 24-pack
- Black fineliner 0.3 mm
- Snack plate for reference (optional)
- Smock for messy kids
Instructions
- Sketch 6–8 food shapes lightly in pencil.
- Add faces and little limbs to each.
- Outline with a 0.3 mm fineliner; dry 30 seconds.
- Color with layers of colored pencils; blend lightly.
- Add shining spots with a white gel pen.
- Label each character with a silly name.
- Make a mini comic if you like.
How to display or gift it
- Cut characters out and make stickers using sticker paper and a laminator.
- Assemble a recipe-card style page with favorite lunch ideas.
- Store pages flat in a craft organizer.
- Rocket Launch Sequence
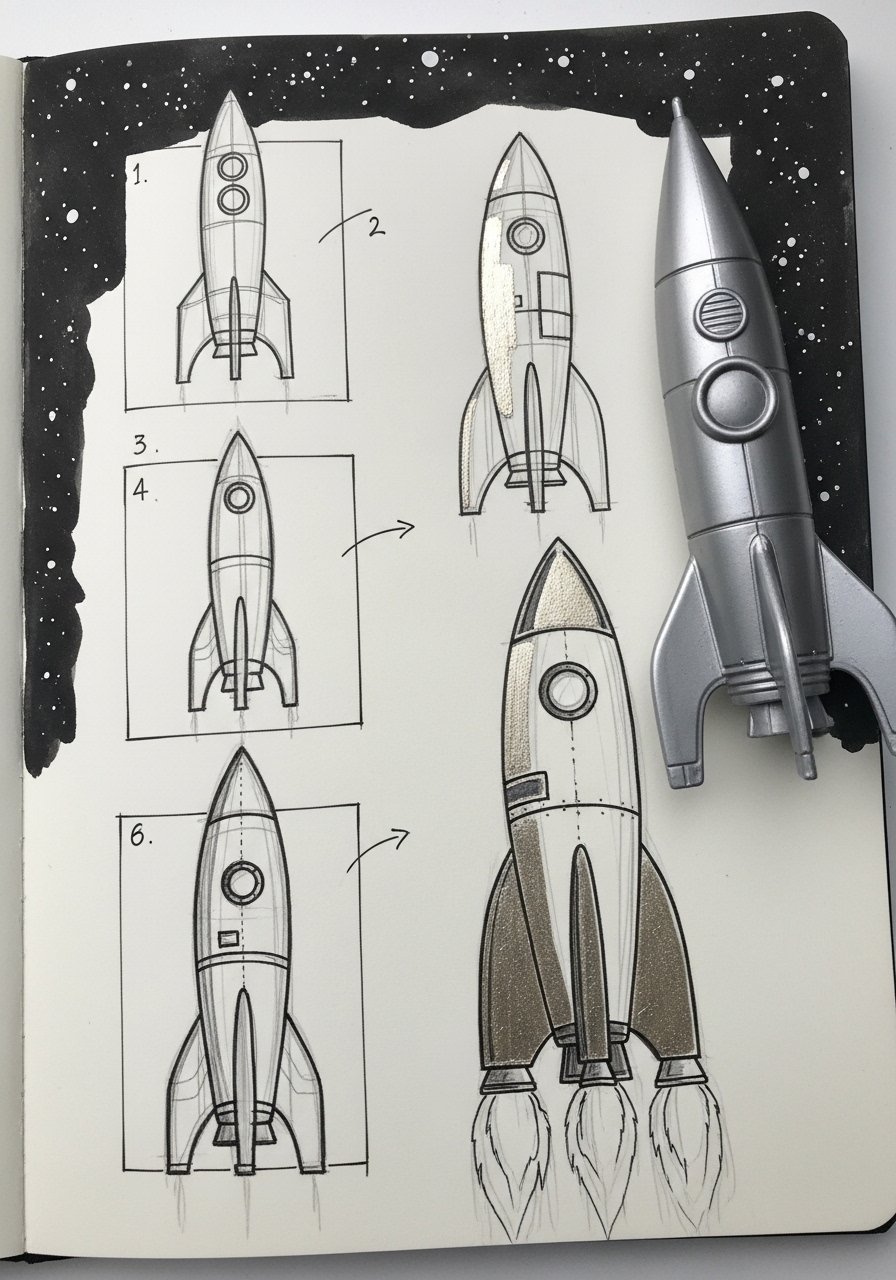
A step-by-step drawing sequence breaks complex subjects into simple stages. Drawing a rocket from basic shapes to finished detail boosts confidence and planning skills.
Materials
- Sketchbook 7 x 10 in
- HB pencil
- Eraser
- Black watercolor paint
- Small round brush size 4
- Metallic silver gel pen
- Ruler
Instructions
- Divide the page into four panels with a ruler.
- Panel 1: draw a basic triangle/oval rocket shape in pencil.
- Panel 2: add fins and a window.
- Panel 3: ink outlines and add flame lines.
- Panel 4: paint a black starry background; dry 15 minutes.
- Add metallic accents with a silver gel pen.
- Erase stray pencil marks and date the page.
How to display or gift it
- Make a page-a-day drawing tutor for friends.
- Bind multiple sequence pages into a "How-To" mini-book.
- Frame a finished panel for a kid's room.
- Optical Illusion Lines
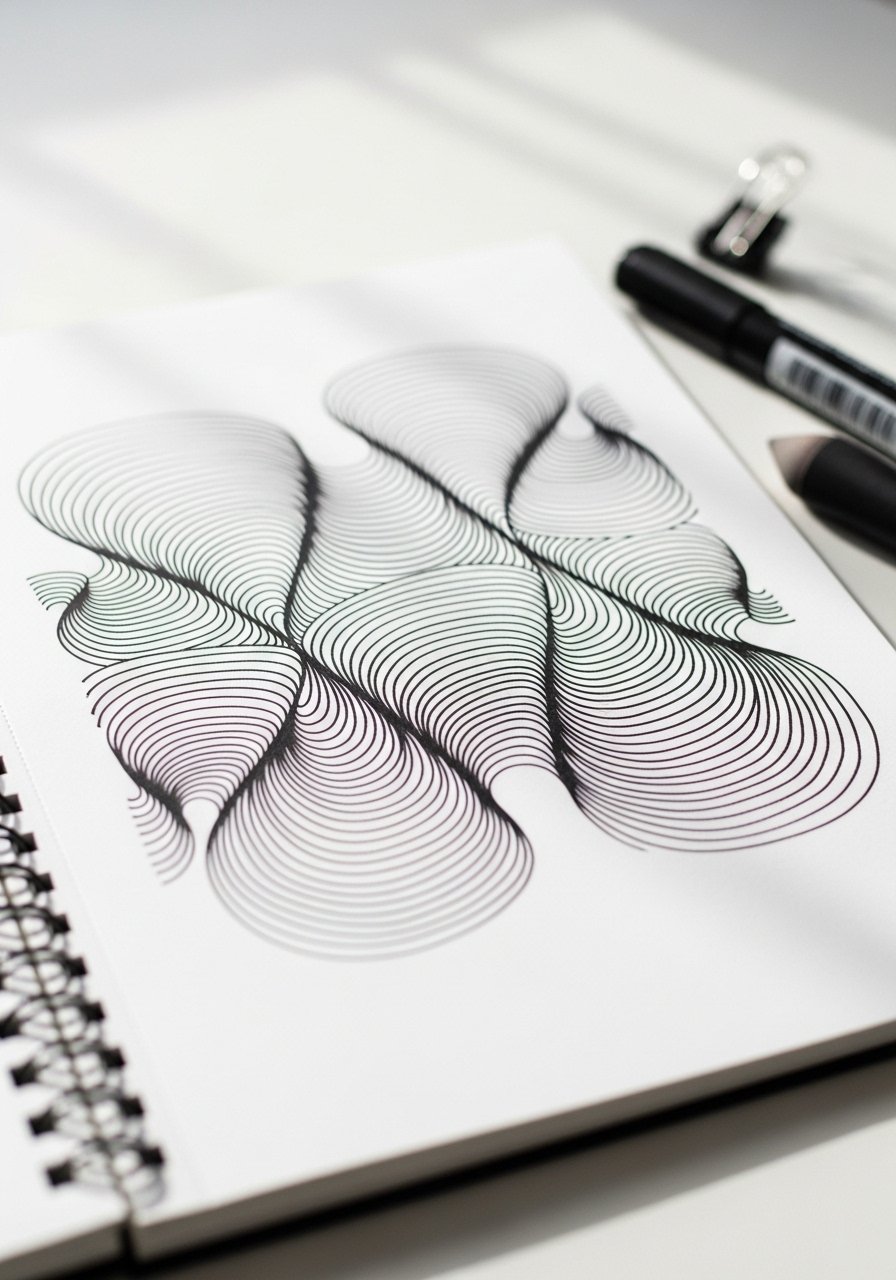
Optical line patterns teach control and rhythm. Kids create bulging shapes using parallel lines—great for practicing steady hand movement and precision.
Materials
- Sketchbook 6 x 6 in
- Black marker 0.5–1.0 mm
- Pencil
- Ruler
- Eraser
- Colored pencil for accent shading
Instructions
- Lightly sketch the central curved guide in pencil.
- Draw parallel lines following the curve with a black marker.
- Space lines 1–2 mm apart for pronounced effect.
- Thicken some lines for depth variation.
- Add subtle colored pencil shading around bulges.
- Erase pencil guide lines after ink dries (1–2 minutes).
- Try different curvatures for new illusions.
How to display or gift it
- Frame and hang as a bold wall accent.
- Turn a page into a bookmark by trimming and rounding corners.
- Store in a sketchbook sleeve.
- Robot Design Blueprints
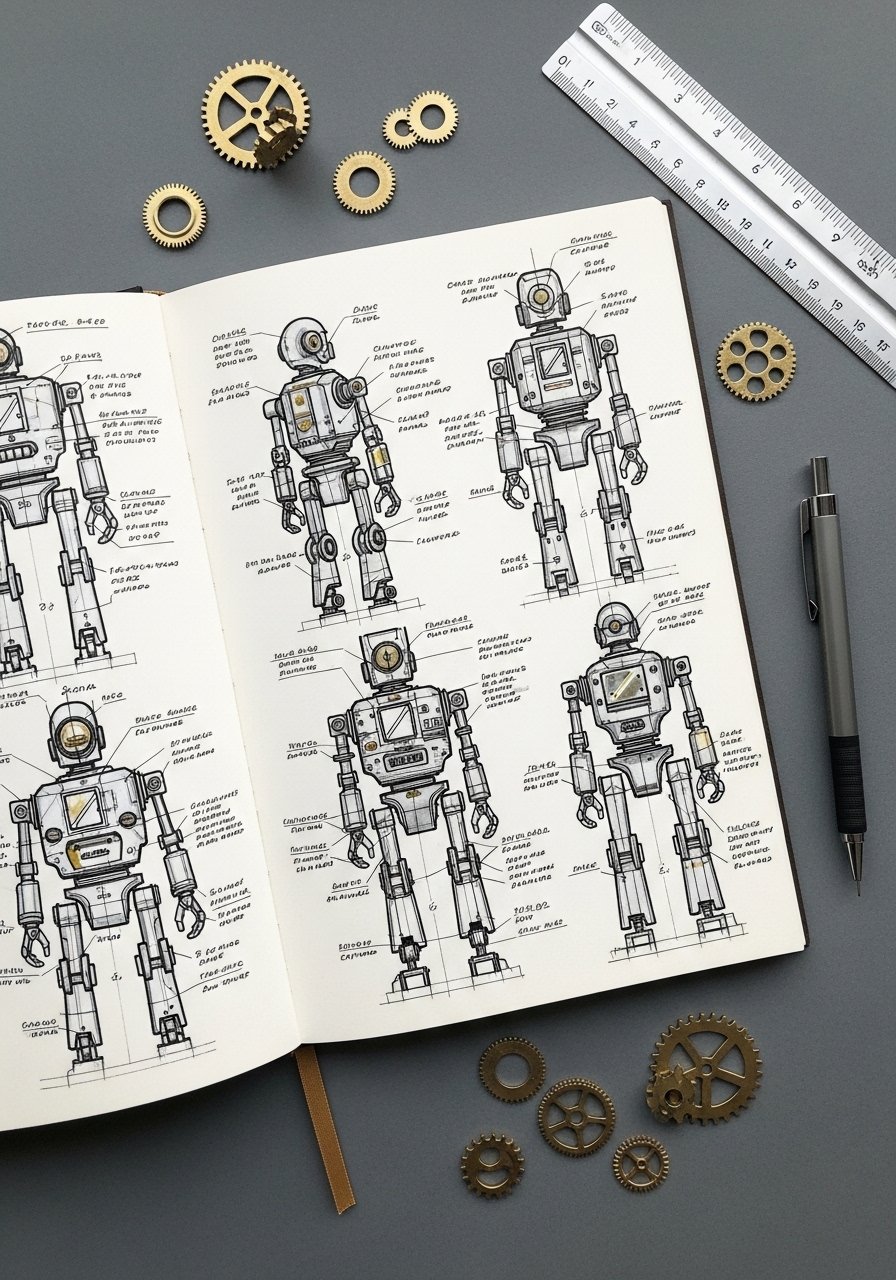
Designing robots encourages technical thinking and playful invention. Kids sketch parts, label functions, and add measurements. This project suits older kids who enjoy tinkering.
Materials
- Sketchbook 8 x 10 in
- Mechanical pencil 0.5 mm
- Fine-liner pen 0.3 mm
- Ruler and protractor
- Silver metallic marker
- Graph paper (for practice)
Instructions
- Sketch a basic robot silhouette in pencil.
- Break the body into modular parts—head, torso, arms, legs.
- Add labels and simple dimensions in mm or cm.
- Ink key edges with a fine-liner; dry 1 minute.
- Add metallic accents with a silver marker.
- Add small functional details like bolts and vents.
- Create a second page with alternate parts for customization.
How to display or gift it
- Punch holes and bind fills into a "robot idea book."
- Laminate standout pages for a desk reference.
- Pair with a small model kit in a gift box.
- Underwater Creature Mix-up
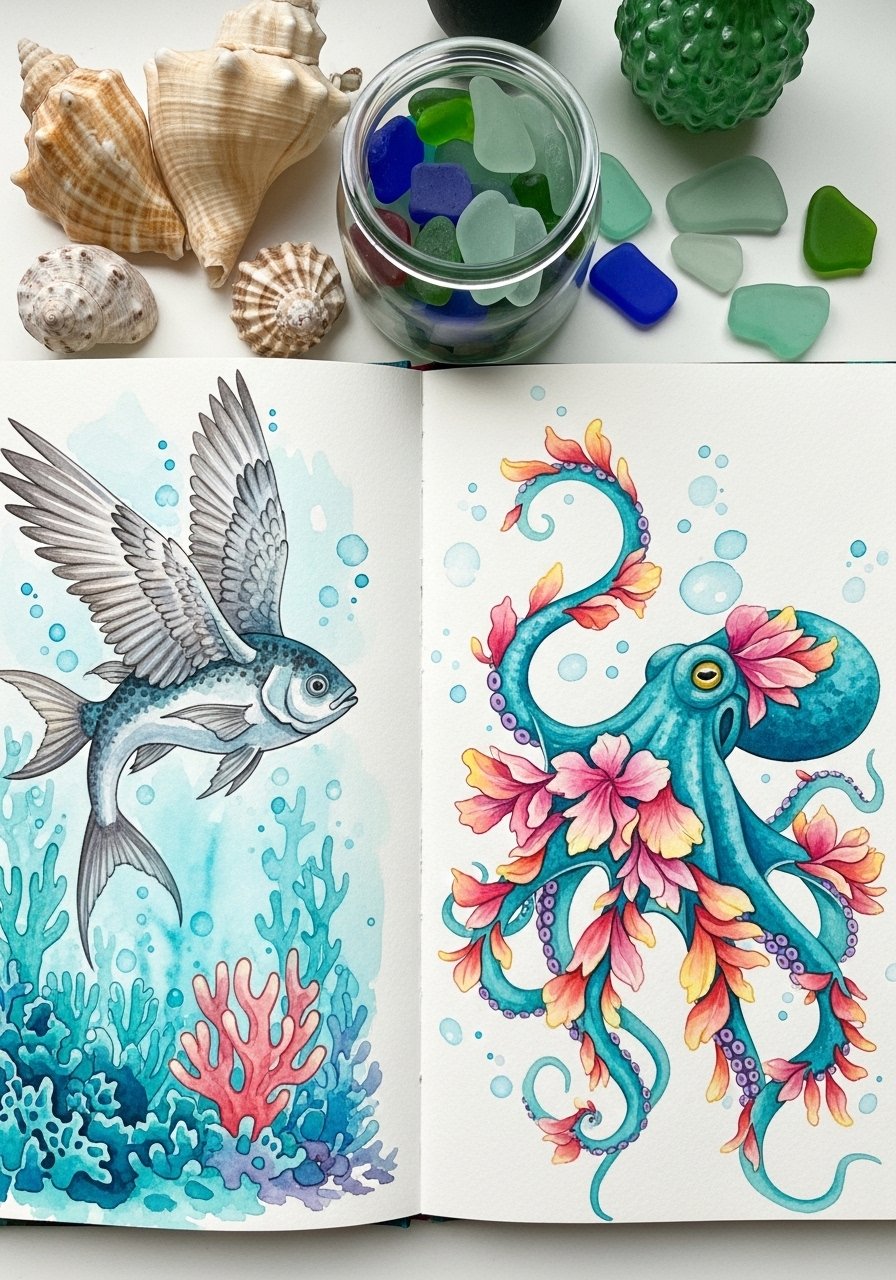
Combine animals and plants into whimsical sea creatures. This encourages imagination and mixed-media use. Kids practice blending colors for watery effects.
Materials
- Sketchbook 8 x 6 in, 140 gsm
- Water-soluble colored pencils 12 colors
- Small water brush
- Black fineliner 0.3 mm
- Pencil
- Sea-themed sticker sheet (optional)
Instructions
- Sketch creature shapes lightly in pencil.
- Add mismatched features: fins, petals, feathers.
- Color with water-soluble pencils and activate with a water brush.
- Let wash dry 15 minutes.
- Add outlines and texture with a fineliner.
- Apply white highlights with gel pen if desired.
- Sign and date the page.
How to display or gift it
- Make a seaside-themed mini zine for beach-lovers.
- Frame under glass and add a tag of the creature's "habitat."
- Store in a waterproof sketchbook sleeve when traveling.
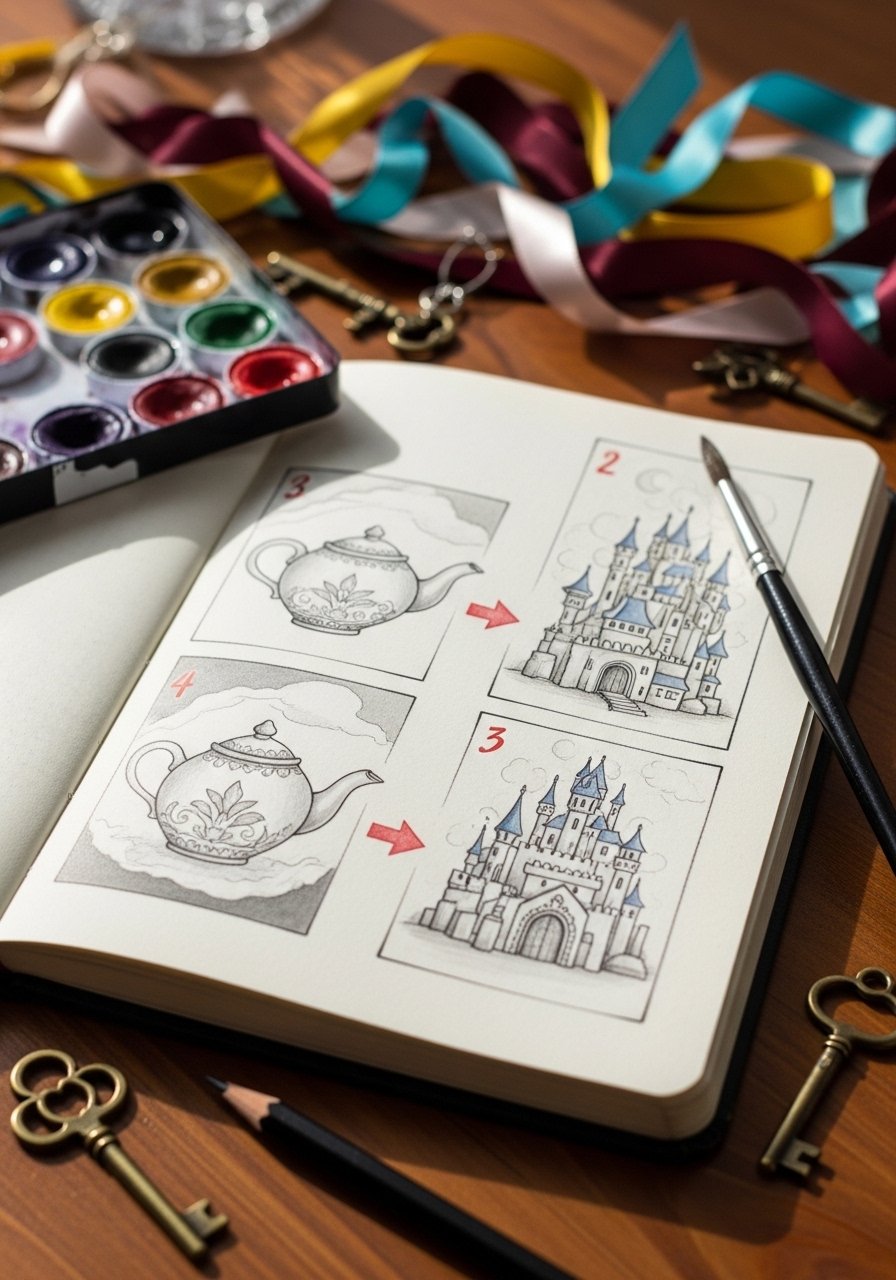
- Magic Object Transformation
Pick an everyday object and morph it into something magical over a few panels. This project encourages visual problem-solving and narrative flow.
Materials
- Sketchbook 7 x 9 in
- Pencil
- Watercolors small set
- Round brush size 4
- Black pen 0.3 mm
- Colored pencil for accents
Instructions
- Choose an object (teapot, shoe, lamp).
- Sketch 3–4 transformation stages in panels.
- Add guiding lines to keep proportions plausible.
- Paint light washes for each stage; dry 10–15 minutes.
- Ink final details with a fine pen.
- Add whimsical flourishes (flags, windows).
- Add a title and date to the page.
How to display or gift it
- Create a flipbook from sequence pages.
- Present as a bookmark set for a friend who likes fantasy.
- Store pages in a labeled portfolio.
- Mini Travel Journal Page
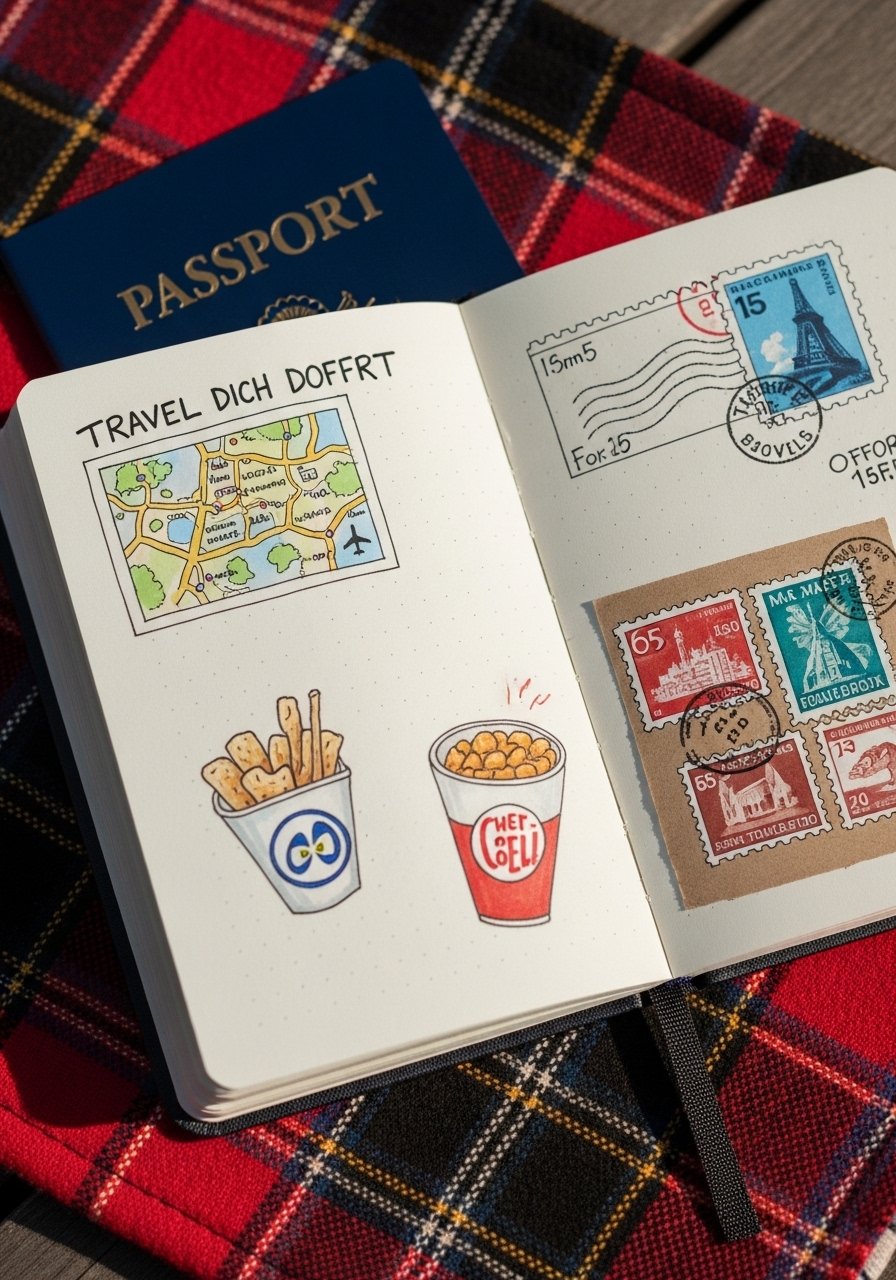
Document a mini-adventure with sketches, quick icons, and notes. Great for vacations, short walks, or field trips. This encourages observation and memory-keeping.
Materials
- Pocket sketchbook 4 x 6 in
- Micron pen 0.3 mm
- Colored pencil set 12
- Glue stick for ticket stubs
- Small stapler (optional)
- Washi tape
Instructions
- Reserve half a page for a tiny map.
- Sketch a favorite snack or souvenir.
- Attach a ticket stub or leaf with glue stick.
- Add quick notes: date, weather, one cool thing.
- Color small areas with colored pencils.
- Reinforce edges with washi tape to prevent tearing.
- Repeat each day of travel.
How to display or gift it
- Bind multiple pages into a travel zine as a gift.
- Store in a zipped pouch in your tote for easy access.
- Frame your favorite page in a tiny frame for keepsake display.
- Mirror-Maze Monster — drawing ideas for kids sketchbook
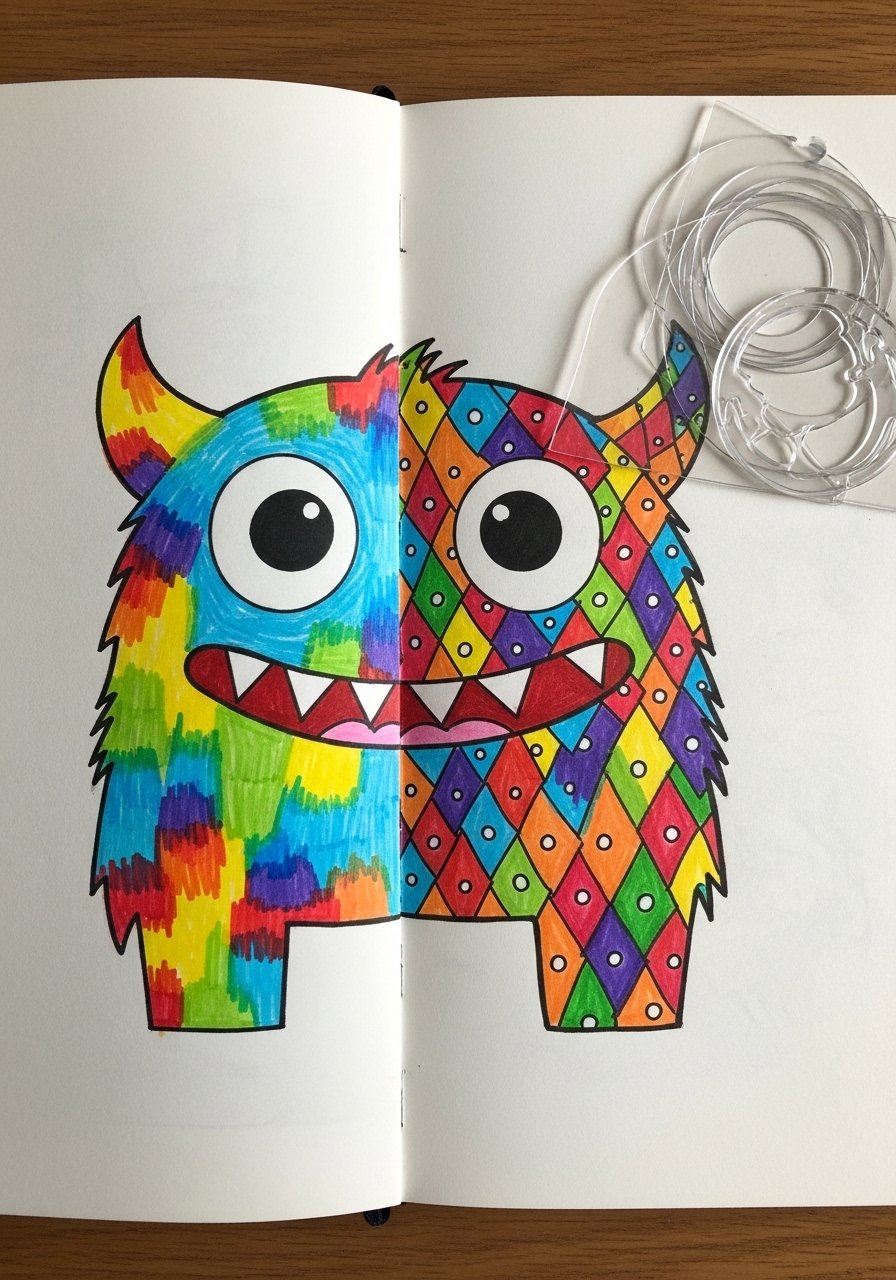
Explore symmetry by drawing half a creature and mirroring it. This exercise develops spatial reasoning and pattern repetition. It’s satisfying and quick.
Materials
- Sketchbook 6 x 8 in
- Pencil
- Symmetry ruler or fold line
- Black ink pen 0.3 mm
- Colored marker set 6 colors
- Eraser
Instructions
- Lightly draw a vertical center line.
- Sketch half a monster along the line.
- Fold the page or use a symmetry ruler to guide the mirror half.
- Complete the mirrored side in pencil.
- Ink the full monster; wait 1–2 minutes to dry.
- Color with markers, mirroring color placement.
- Erase center guide lines and sign.
How to display or gift it
- Create a gallery strip of mirrored monsters for a wall.
- Make a set of mirrored cards for birthday invites.
- Keep in a portfolio with other symmetry studies.
- Music-Inspired Scribbles
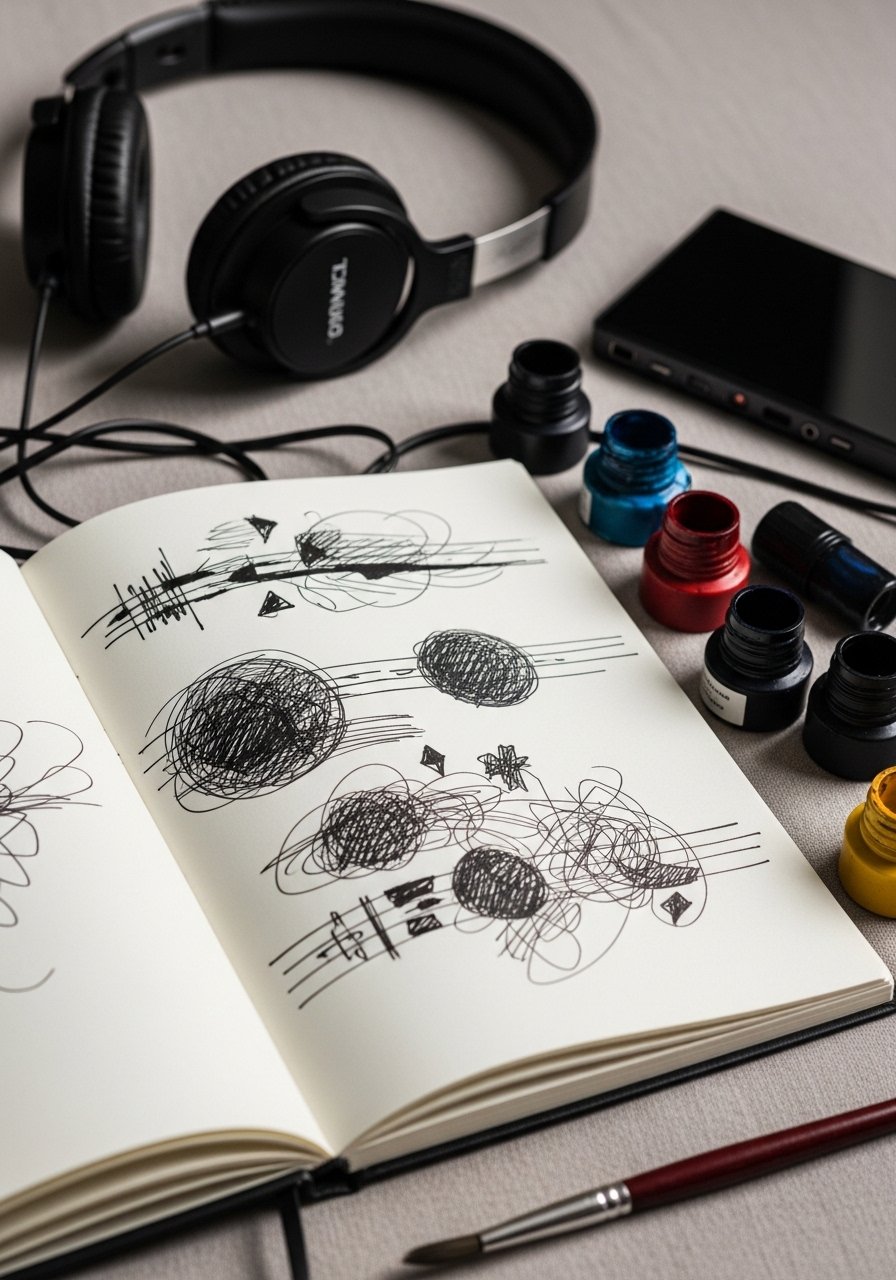
Listen to a song and translate it into lines, shapes, and colors. This synesthetic exercise helps kids express mood through mark-making rather than representation.
Materials
- Sketchbook 7 x 9 in
- Ink brush pens set
- Water-soluble markers
- Headphones for quiet listening
- Pencil
- Timer
Instructions
- Pick a song and set a timer for 3–5 minutes.
- Close eyes for the first minute, then start drawing what you feel.
- Use bold ink pens for strong beats and light strokes for soft parts.
- Add marker color to emphasize choruses.
- Step back and add small details that echo motifs.
- Title the page with the song name.
- Repeat with different genres.
How to display or gift it
- Turn pages into a mixed-media playlist booklet.
- Frame a favorite piece and include the song title as a label.
- Store in a music-themed folder.
- Architectural Doorways
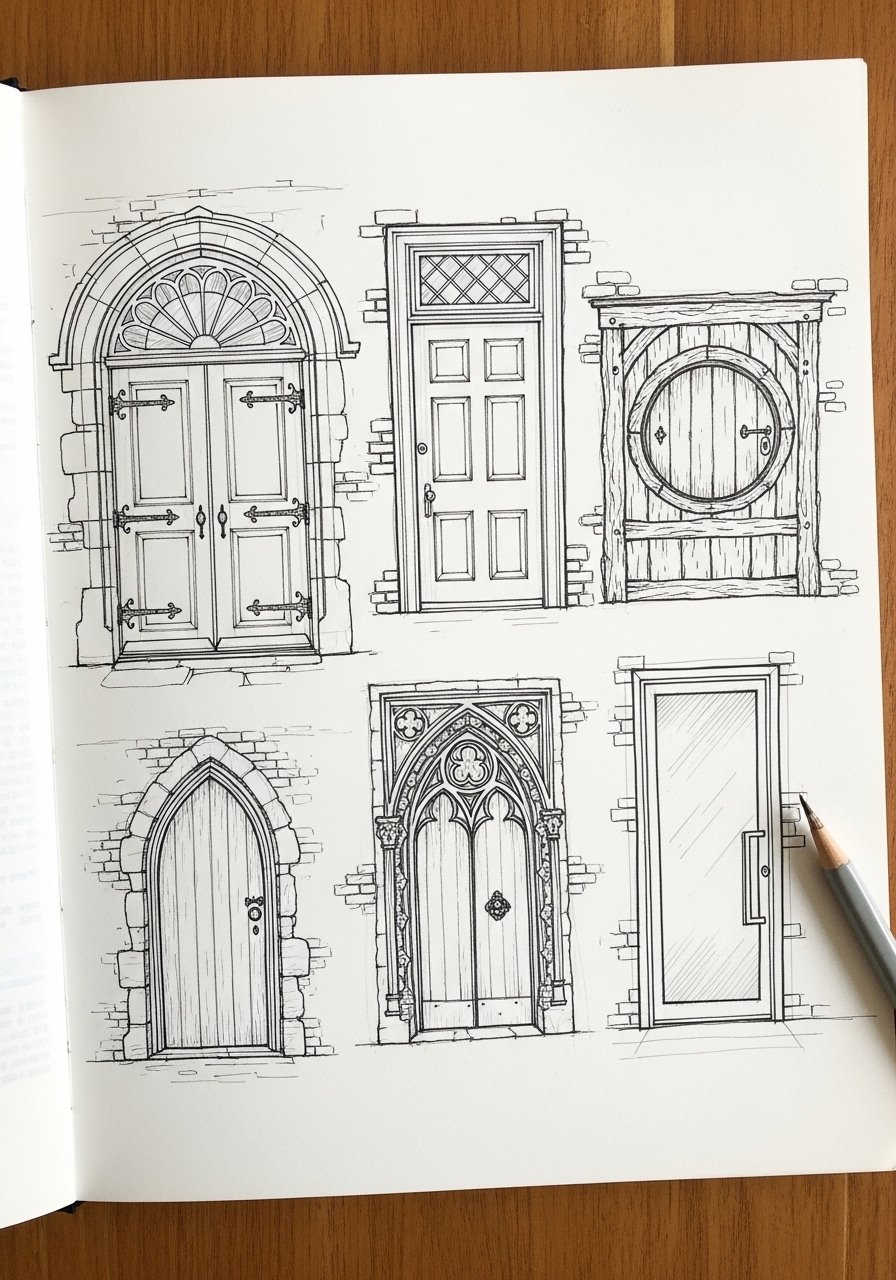
Draw doorways to practice perspective, texture, and design. Kids learn about scale, proportion, and decorative details like hinges and knobs.
Materials
- Sketchbook 8 x 10 in
- Pencils HB–2B
- Fine-liner pen 0.3 mm
- Ruler
- White gel pen for highlights
- Architectural photo reference (printout or phone)
Instructions
- Choose 4 door styles to study.
- Lightly block shapes with an HB pencil.
- Add paneling and hardware details.
- Ink outlines and texture; dry 1–2 minutes.
- Shade with 2B pencil for depth.
- Add highlights with a white gel pen.
- Label materials and era for learning.
How to display or gift it
- Make a small book of door studies and bind with twine.
- Frame as part of a home decor series.
- Use pages as inspiration for dollhouse doors.
- Weather Wheel Illustrations
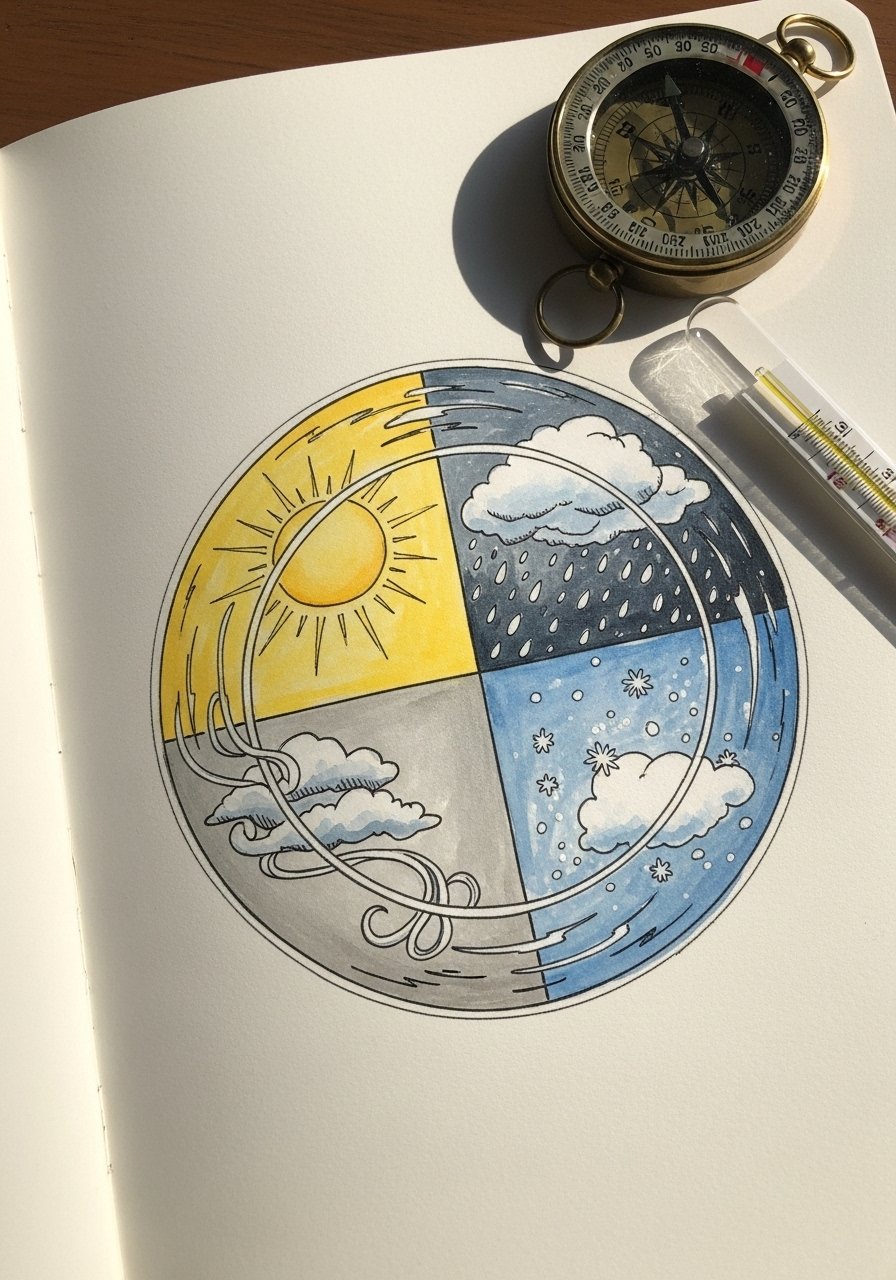
A weather wheel combines icon drawing and color theory. Kids illustrate weather types and can update it daily as a visual journal.
Materials
- Sketchbook 7 x 7 in
- Compass or jar lid for circles
- Watercolor set
- Ink pen 0.3 mm
- Small round brush size 2
- Pencil and eraser
Instructions
- Draw a 3 in diameter circle and divide into 4–6 segments.
- Sketch weather icons in each segment.
- Paint color washes that match each weather (blue for rain, gray for clouds).
- Ink icon lines after watercolor dries 10–15 minutes.
- Add tiny labels and dates.
- Use daily as a quick record—color a dot by date.
- Store in a sketchbook or display on a clipboard.
How to display or gift it
- Laminate the wheel and add a spinner for a classroom activity.
- Make a set of seasonal wheels for gifting.
- Keep multiple wheels in a weather journal.
- Draw-Your-Own Superhero
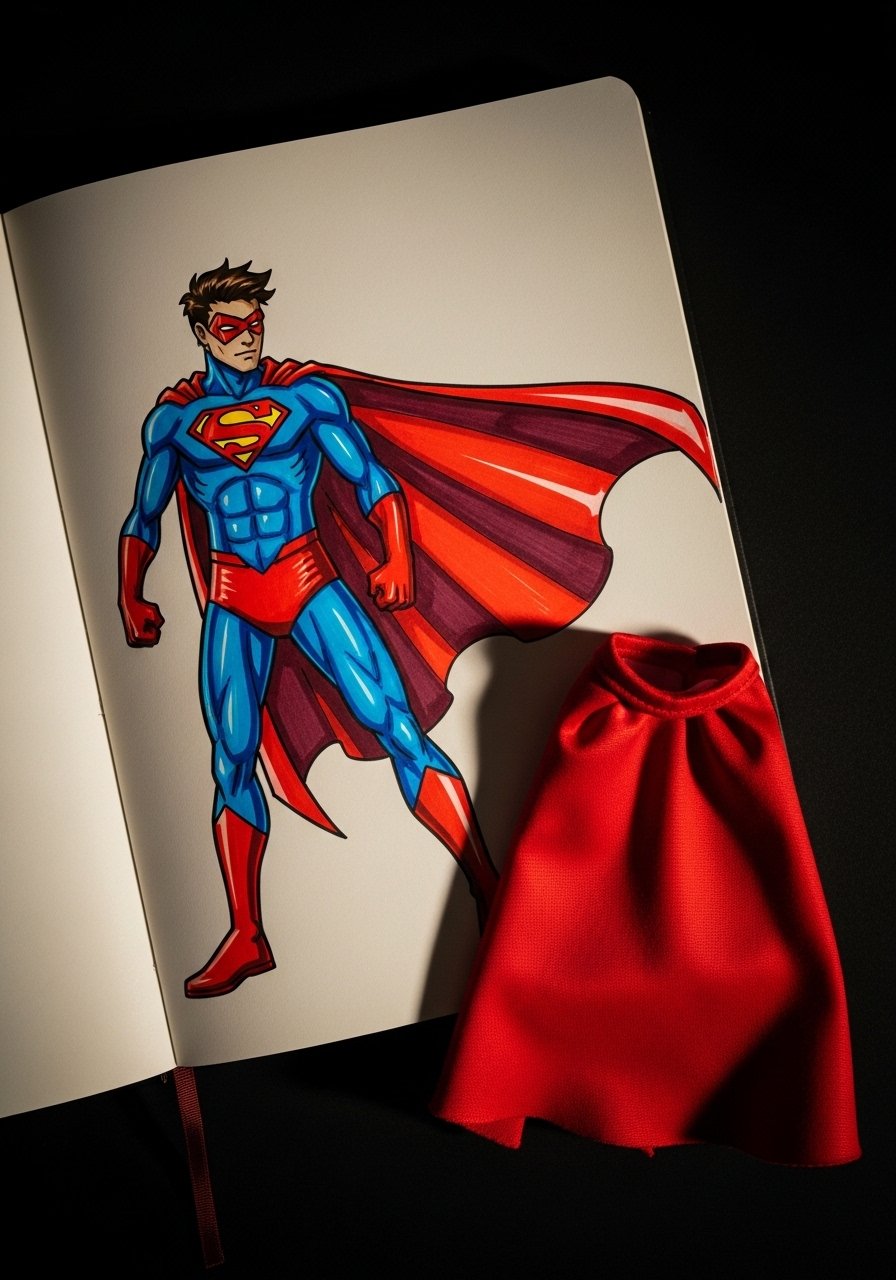
Designing a superhero lets kids invent costumes, powers, and poses. This encourages dynamic figure drawing and character traits.
Materials
- Sketchbook 8 x 10 in
- Pencil
- Dynamic pose reference cards
- Alcohol markers 6-pack
- Black brush pen
- White gel pen
Instructions
- Start with a stick-figure pose.
- Build volumes: torso, limbs, head.
- Add costume elements and power motifs.
- Ink with a brush pen for energy.
- Color with markers; let ink settle 3 minutes.
- Add highlights with a white gel pen.
- Write a short hero backstory beside the drawing.
How to display or gift it
- Create a superhero trading card set.
- Bind several hero pages into a comic-style booklet.
- Send a custom hero page to a friend for encouragement.
- Stamped Texture Studies
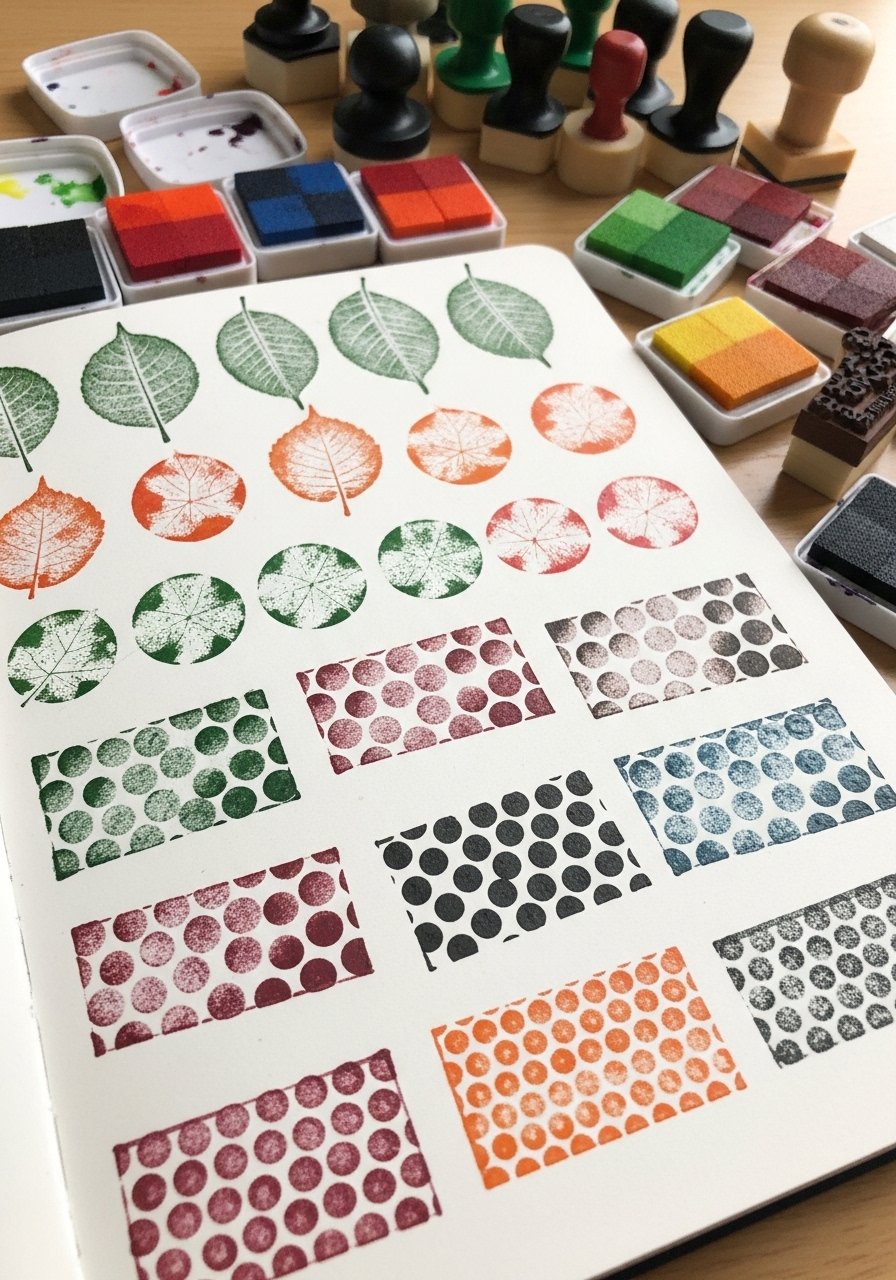
Make and use stamps to explore texture and repeat patterns. Kids learn printmaking basics and how textures can build interest in a drawing.
Materials
- Sketchbook 6 x 8 in
- Ink pads assorted colors
- Foam stamps or carved erasers
- Sponge and bubble wrap for texture
- Acrylic block for mounting stamps
- Paper towel
Instructions
- Press sponge or bubble wrap into ink and stamp several times.
- Make a stamp from a carved eraser for a motif.
- Create repeating rows or grids of texture.
- Overlay pencil or ink drawings on top of texture.
- Let ink dry 10 minutes before stacking pages.
- Experiment with pressure for lighter/darker prints.
- Note which textures pair best with certain drawings.
How to display or gift it
- Use textured papers as backgrounds for greeting cards.
- Assemble a sampler book as a tactile gift.
- Store stamps in a small craft organizer until next use.
- Shadow Puppet Silhouettes

Create silhouettes inspired by shadow puppets. Kids focus on clear outlines and the drama of negative space. This is great for evening crafts and storytelling.
Materials
- Sketchbook 8 x 6 in
- Black ink pen 0.5 mm
- Cut-paper puppet shapes
- Light source (lamp)
- Pencil
- Scissors
Instructions
- Cast puppet shadows onto paper using a lamp.
- Trace the shadow outline gently in pencil.
- Ink the silhouette solidly with a black pen.
- Add small negative-space details with a white gel pen if desired.
- Label character names and a short scene.
- Try moving the light for different shadow effects.
- Store puppet cut-outs flat for reuse.
How to display or gift it
- Make a shadow-puppet show night with family.
- Mount silhouette pages in a frame and add a tiny light behind glass.
- Package several silhouette pages with a puppet for gifting.
- Texture Rubbings and Overdraw
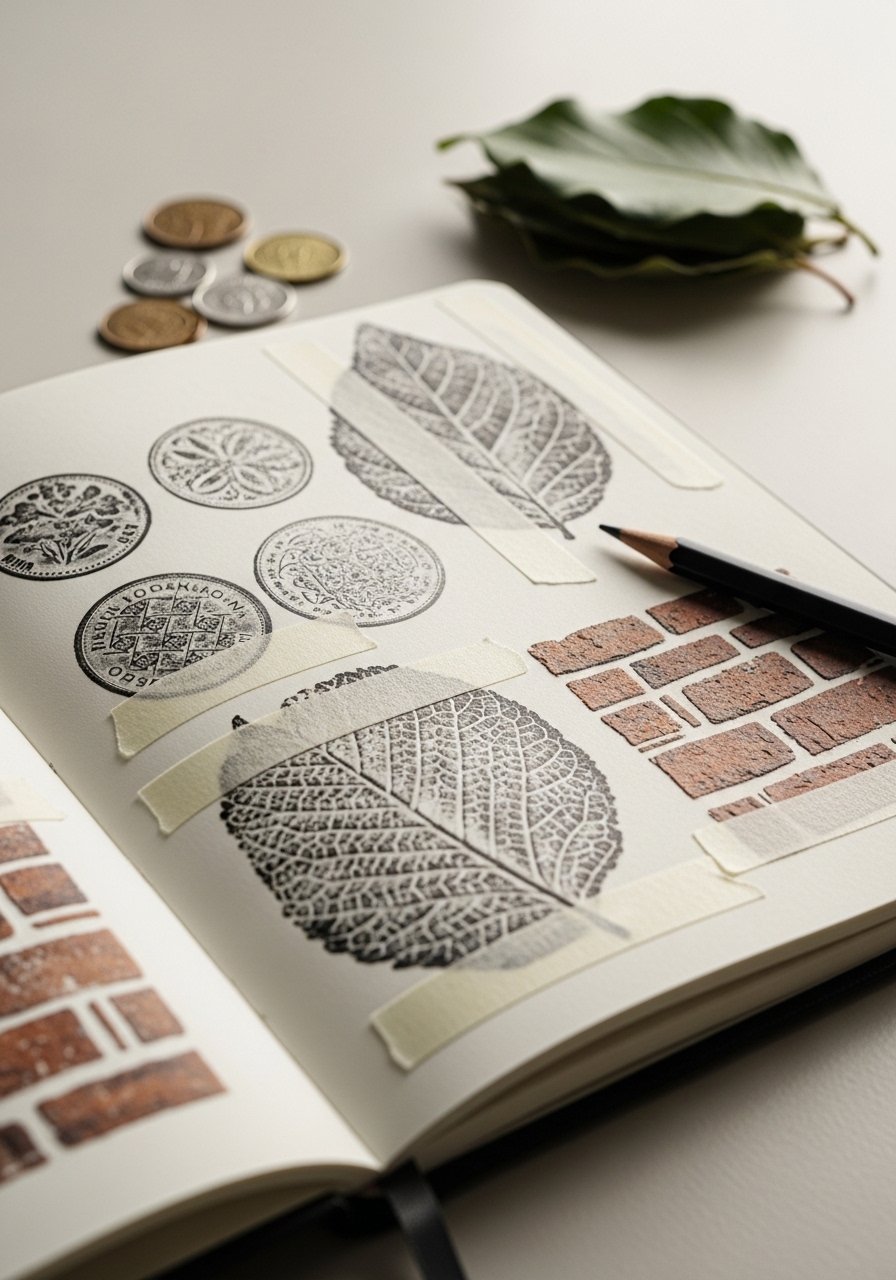
Rubbings capture real textures and can be overdrawn to create hybrid designs. This project connects observation with creative reinterpretation.
Materials
- Sketchbook 8 x 10 in
- Soft pencils (B–4B)
- Thin paper for rubbings
- Masking tape
- Assorted textured objects (coins, leaves, wood)
- Fine-liner pen
Instructions
- Tape thin paper over a textured object.
- Rub with a soft pencil side to reveal the texture.
- Repeat with multiple textures on a page.
- Choose a rubbing and overlay a drawing with a fine-liner.
- Combine two rubbings into one hybrid sketch.
- Label textures and where they came from.
- Store textured papers flat to avoid creasing.
How to display or gift it
- Make a texture sampler booklet.
- Frame a favorite rubbing with a small label of its origin.
- Bundle several rubbings as a sensory gift for kids.
- Glow-in-the-Dark Night Scene
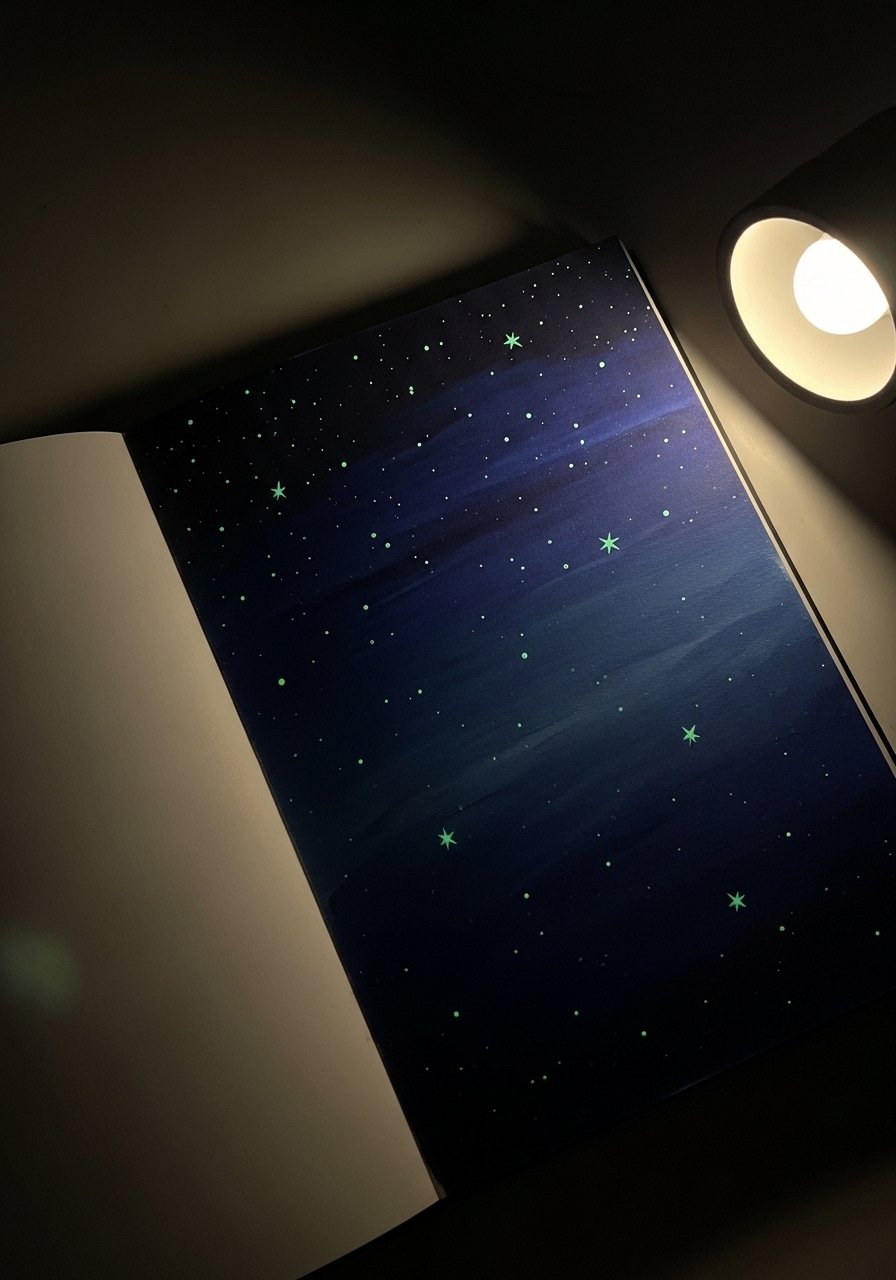
Use glow-in-the-dark paint for a secret night page kids can reveal in the dark. It’s magical and encourages layered painting techniques.
Materials
- Sketchbook 8 x 8 in, heavyweight paper
- Acrylic gouache or opaque paint set
- Glow-in-the-dark paint (small 15 ml pot)
- Round brush size 6 and 0
- Masking tape
- Palette
Instructions
- Mask page edges with tape.
- Paint a dark sky base with blue and black acrylic; dry 20 minutes.
- Add stars with a small brush using white paint; dry 10 minutes.
- Dot a thin layer of glow paint over selected stars; let cure 4–6 hours (full glow builds after charging under light).
- Remove tape and sign.
- Charge under a lamp for 5–10 minutes before switching off to see the glow.
- Store flat away from sunlight to preserve glow pigment.
How to display or gift it
- Include a small LED light in the gift box to "charge" the page.
- Frame under glass and add a battery-powered light behind for a constant glow.
- Keep pages flat in a portfolio away from direct heat.
- Collaborative Scribble Game
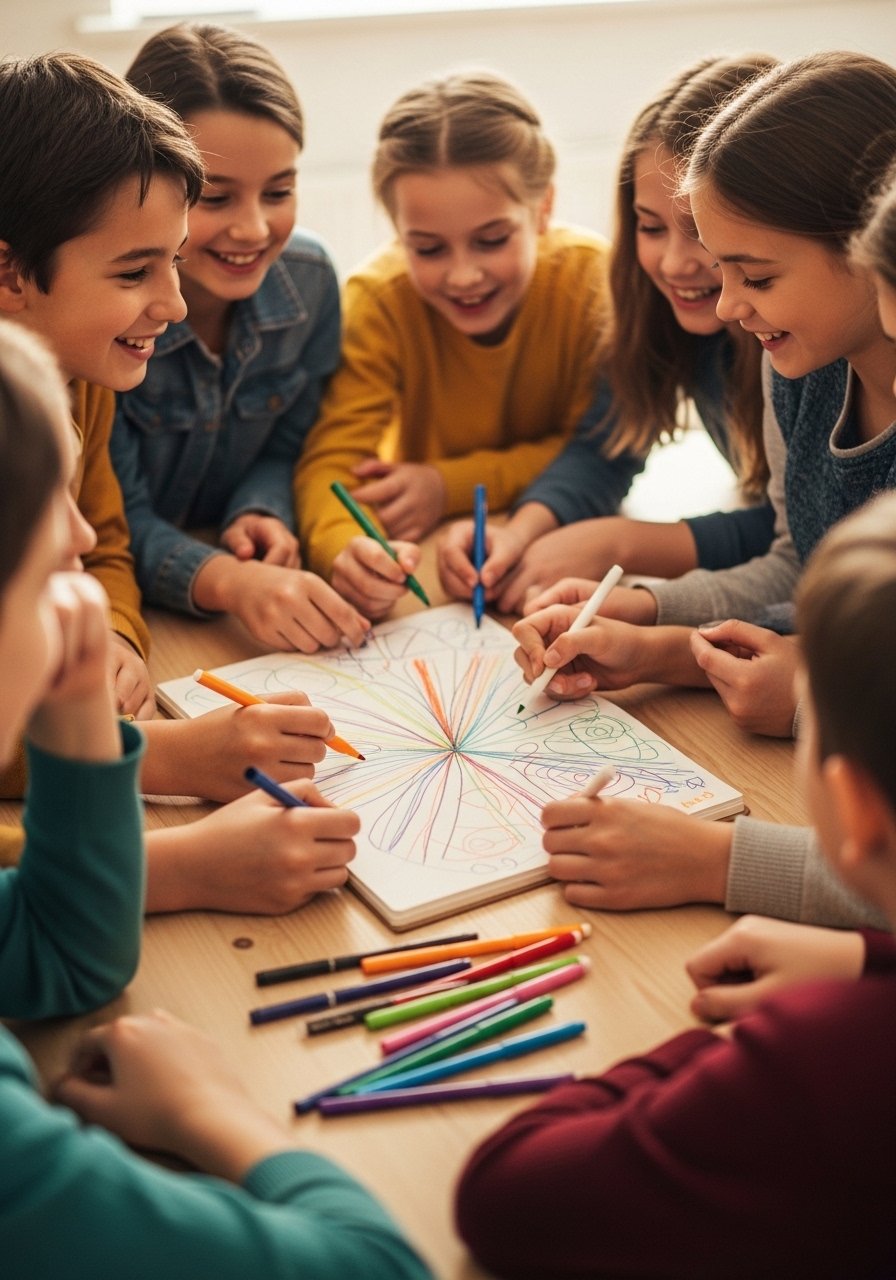
Pass a sketchbook around and have each child turn a random scribble into a character or scene. This collaborative game builds imagination and group creativity.
Materials
- Large sketchbook 9 x 12 in
- Assorted colored pens and markers
- Timer
- Sticker rewards
- Tabletop organizer for supplies
Instructions
- One player makes a random scribble in pencil; time 30 seconds.
- Pass the book clockwise.
- Next player adds a new line to suggest a shape; time 1 minute.
- Repeat until the page becomes a complete scene.
- Ink key lines and add color accents.
- Give sticker rewards for funniest, scariest, and most creative transformations.
- Label contributors and date the page.
How to display or gift it
- Frame the collaborative page as a memory for the group.
- Scan and print copies for each participant.
- Store in a family sketchbook for future additions.
Thanks for sticking with these 30 playful prompts. With projects ranging from one-minute mood doodles to multi-step mixed-media pages, there’s something here for every kid and every day. Try rotating a prompt each week so your sketchbook never feels stale. Pin this list for rainy afternoons, and share it with another family who’d love to keep a little artist busy.
Trust me, having a temperature-controlled hot glue gun and a good stackable craft organizer makes cleanup and storage so much happier for busy homes. Which project will you try first?


