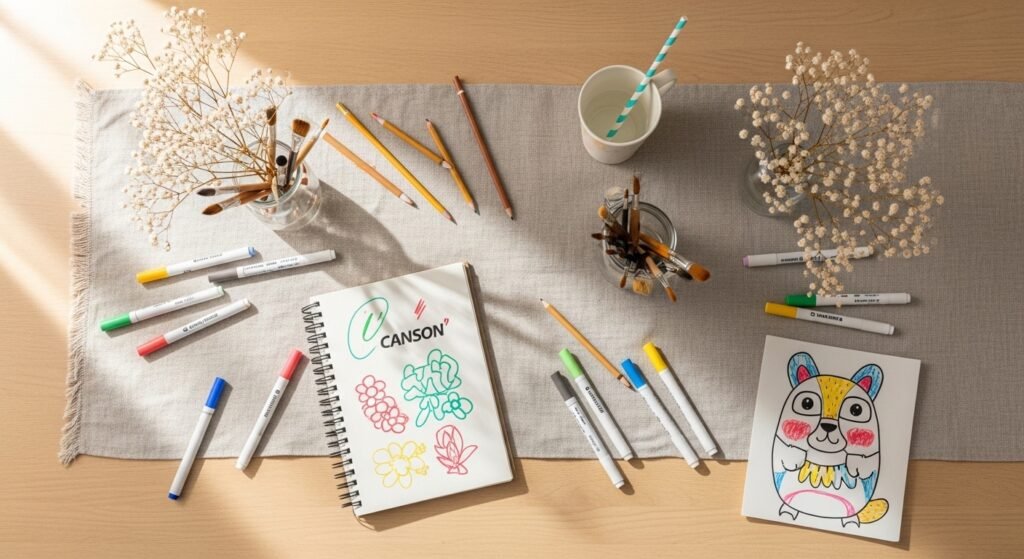
Kids fidget, imaginations spark, and all you need is a pencil and a little inspiration. These 25 drawing ideas for kids are hand-picked to be playful, easy to follow, and adaptable for any age or skill level. Whether your child loves bold color, tiny details, or big, messy marks, you’ll find something here that fits the moment—and the supplies you already have.
You’ll see simple trace-and-color projects, clever prompts for shy artists, and step-by-step lessons that teach shapes, perspective, and storytelling through drawing. I often keep a Canson sketchbook on the table and a set of Prismacolor colored pencils nearby so kids can go straight from idea to finished piece. Let’s grab pencils, set a 20-minute timer, and make something fun.
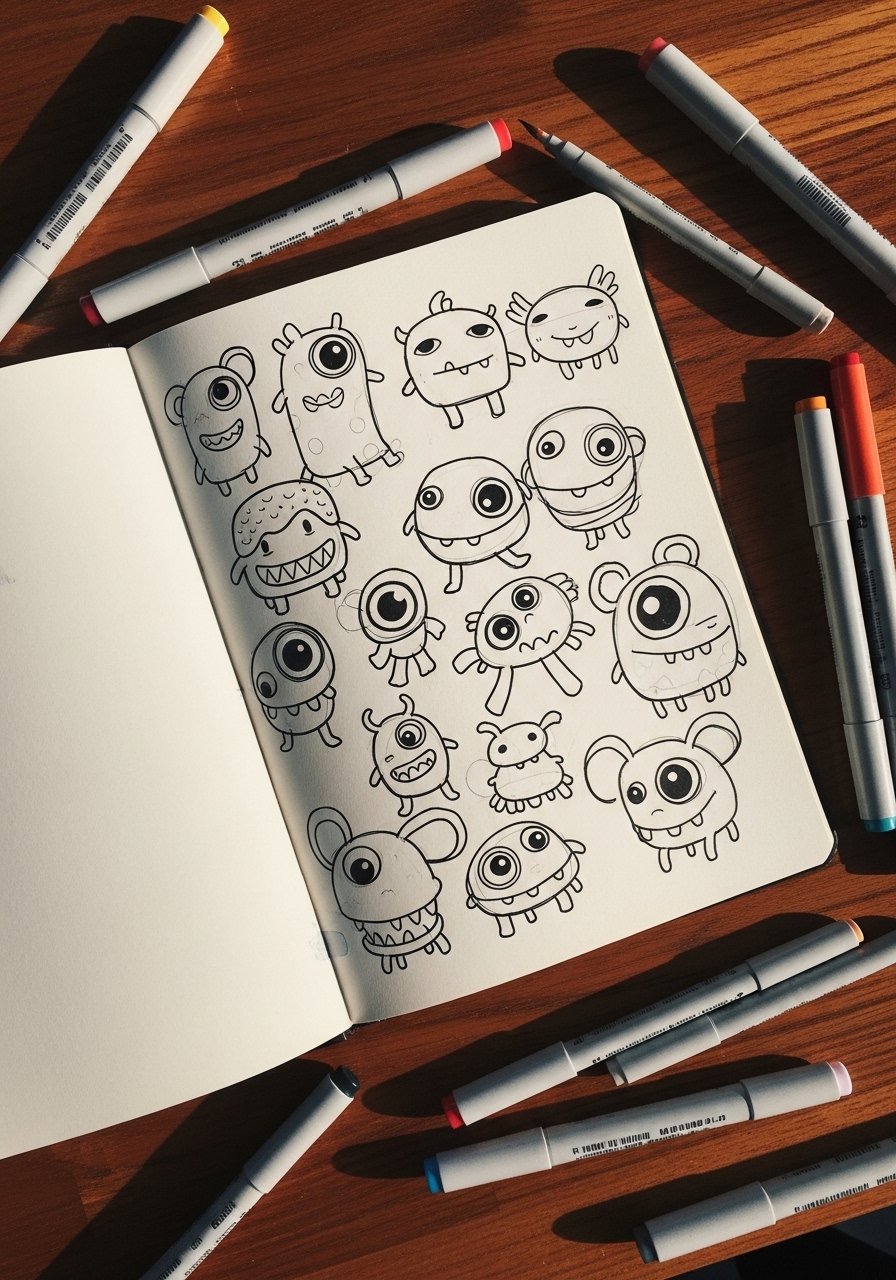
- Friendly Shape Monsters
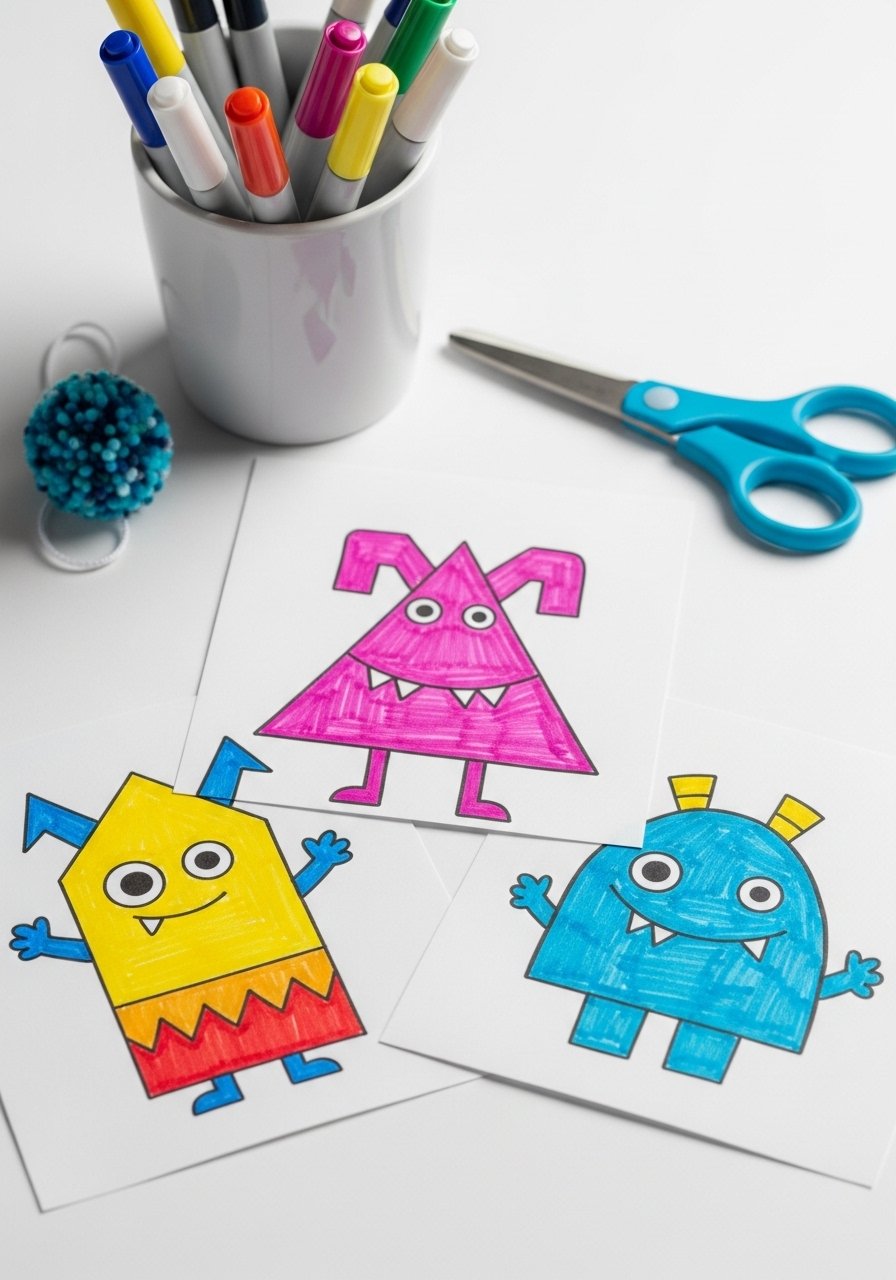
These shape monsters teach kids to see basic forms—circles, triangles, squares—and turn them into characters. The finished drawings look bold and chunky, great for framing in a playroom. Beginners and pre-writers love this one because it builds confidence with predictable shapes and silly faces. Use a washable marker set for bright, no-drip color.
Materials
- White drawing paper, 9 x 12 in, 10 sheets
- Pencil (HB)
- Eraser, kneaded
- Black fine-tip marker, 0.4 mm
- Washable marker set, 10–24 colors
- Ruler, 12 in
- Colored cardstock (optional for backgrounds)
Instructions
- Prep a sheet of 9 x 12 paper and set a pencil and eraser handy.
- Draw a large circle, triangle, or square in pencil as the monster body.
- Add eyes: try one big eye, three small eyes, or an eye on a stalk.
- Draw mouths and teeth—zigzags make playful teeth.
- Add arms, legs, horns, or antennae using simple curved lines.
- Trace lines with the black fine-tip marker and let it dry 2–3 minutes.
- Color with washable markers. Let marker ink fully dry 5–10 minutes before stacking.
- Optional: cut out the monster and glue it to colored cardstock for a framed look.
How to Display or Gift It
- Tape a trio of monsters on a bulletin board in rows to create a mini gallery.
- Punch a hole and add ribbon to hang them as mobile shapes.
- Slide the drawing into a small wooden frame and gift to grandparents.
- Store extras flat in a stackable craft organizer until dry.
- Make multiple monsters at once for a birthday activity station.
- Rainbow Fingerprint Critters
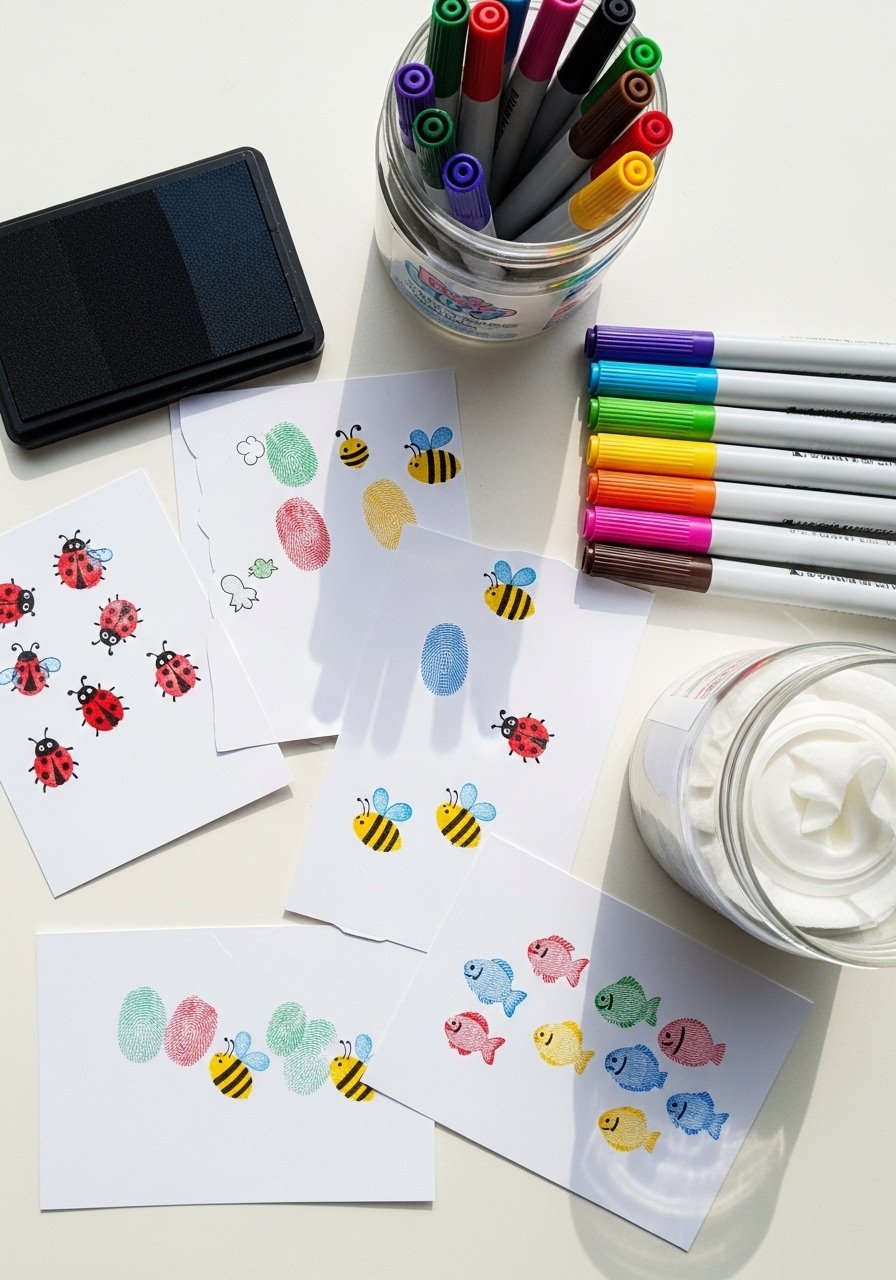
This tactile drawing idea turns fingerprints into tiny animals. Kids get immediate results and enjoy the sensory part of pressing ink or washable paint to paper. It's perfect for toddlers through early elementary and makes sweet gift tags. A small washable ink pad or paint works best.
Materials
- Index cards or 4 x 6 cardstock, 20 pieces
- Washable ink pad or washable paint
- Fine-tip permanent marker (for small details)
- Cotton swabs for tiny dots
- Baby wipes or damp cloth for cleanup
- Acrylic sealant spray (optional for keepsakes)
- Small paint palette (if using paint)
Instructions
- Set out cards and choose ink pad colors.
- Press a clean finger into the ink pad or paint then onto the card to make a fingerprint.
- Let fingerprints dry 5–10 minutes.
- Use the fine-tip marker to add eyes, legs, wings, or fins.
- Use a cotton swab dipped in paint to add small spots or accents.
- Let ink/paint cure 30 minutes to 1 hour before stacking.
- Optional: spray a light coat of acrylic sealant for a lasting finish and allow 24 hours to cure.
How to Display or Gift It
- Turn cards into gift tags by punching a hole and adding twine.
- Glue a set into a small photo album for keepsakes.
- Frame a collage in a shadow box for a nursery wall.
- Store extras in a clear craft box to keep prints flat.
- Symmetry Butterflies (drawing ideas for kids)
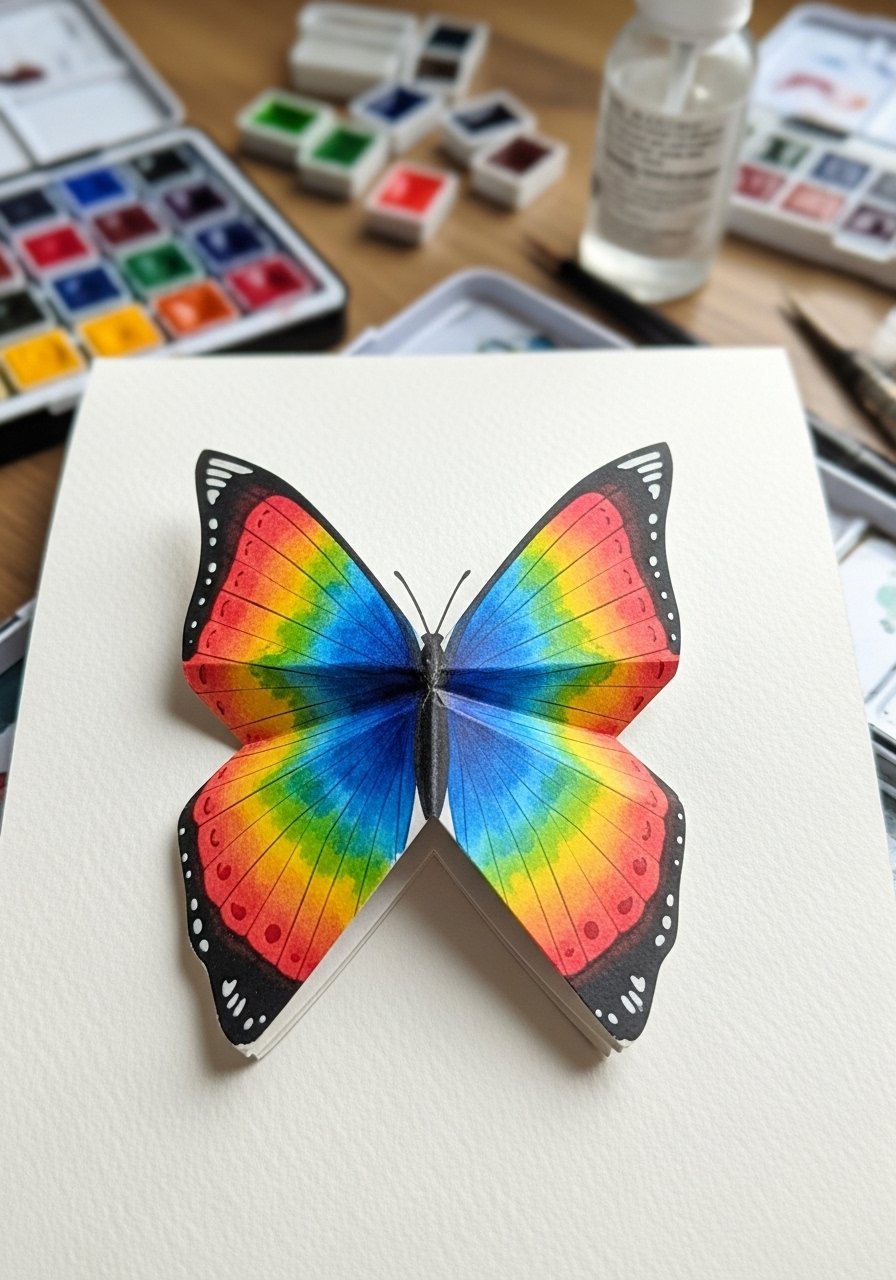
Symmetry drawing teaches observation and helps kids explore positive/negative space. This watercolor butterfly uses fold-and-press techniques for magical mirrored patterns. Great for preschoolers and early elementary artists who enjoy surprise reveals. I use a small watercolor pan set for rich, kid-safe pigments.
Materials
- Watercolor paper, 6 x 6 in squares, 10 sheets
- Watercolor pan set
- Small round watercolor brush, size 6
- Pencil
- Black fine liner pen
- Cup of water and paper towel
- Palette or plate for mixing
Instructions
- Fold a watercolor paper square in half and open it flat.
- Paint blobs and strokes along one half—don’t paint the crease.
- Quickly fold the paper back and press with fingers or a brayer to transfer paint.
- Open to reveal the mirrored butterfly pattern.
- Let paint dry 20–30 minutes.
- Once dry, use a black fine liner to draw butterfly body, antennae, and wing details.
- Flatten under a heavy book if paper curls; allow 1–2 hours to flatten fully.
How to Display or Gift It
- Mount on colored cardstock and glue to a greeting card.
- Create a garland by folding multiple and stringing with twine.
- Frame a group of butterflies in a grid for a seasonal wall display.
- Keep extras in a waterproof envelope to prevent smudging.
- Dot-to-Dot Scene (easy tracing and drawing for kids)
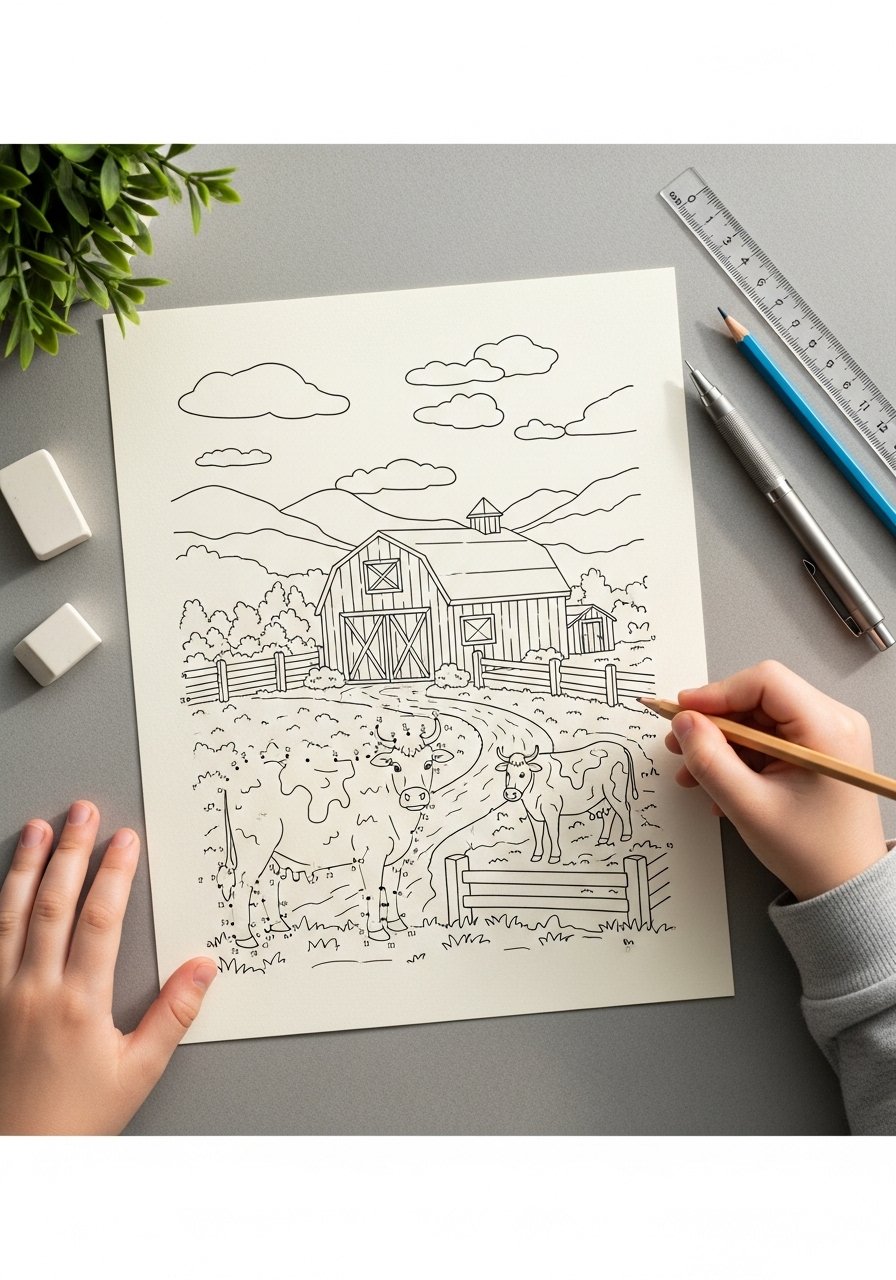
Dot-to-dot drawings teach counting, fine motor control, and reveal a hidden picture when connected. This scene version helps kids make backgrounds after they finish the outline. Perfect for kindergarteners and up. Use a mechanical pencil for crisp lines.
Materials
- Heavyweight drawing paper, 8.5 x 11 in
- Mechanical pencil, 0.5 mm
- Eraser
- Ruler (12 in)
- Colored pencils
- Fine-tip marker for outlining
- Template dot-to-dot guide printed or hand-drawn
Instructions
- Arrange numbered dots lightly in pencil across the page.
- Use the mechanical pencil to connect dots in sequence.
- Once the picture forms, erase stray guide marks.
- Outline with a fine-tip marker and let ink dry 2–3 minutes.
- Add background elements: clouds, sun, fences, or trees.
- Color with colored pencils, layering for value and texture.
- Finish by blending with a stump or tissue for soft skies.
How to Display or Gift It
- Turn finished pages into a custom activity book for travel.
- Laminate and use as reusable sheets with dry-erase markers.
- Bundle several scenes into a handmade story booklet.
- Store templates and finished pages flat in a portfolio folder.
- Texture Rubbings and Drawings
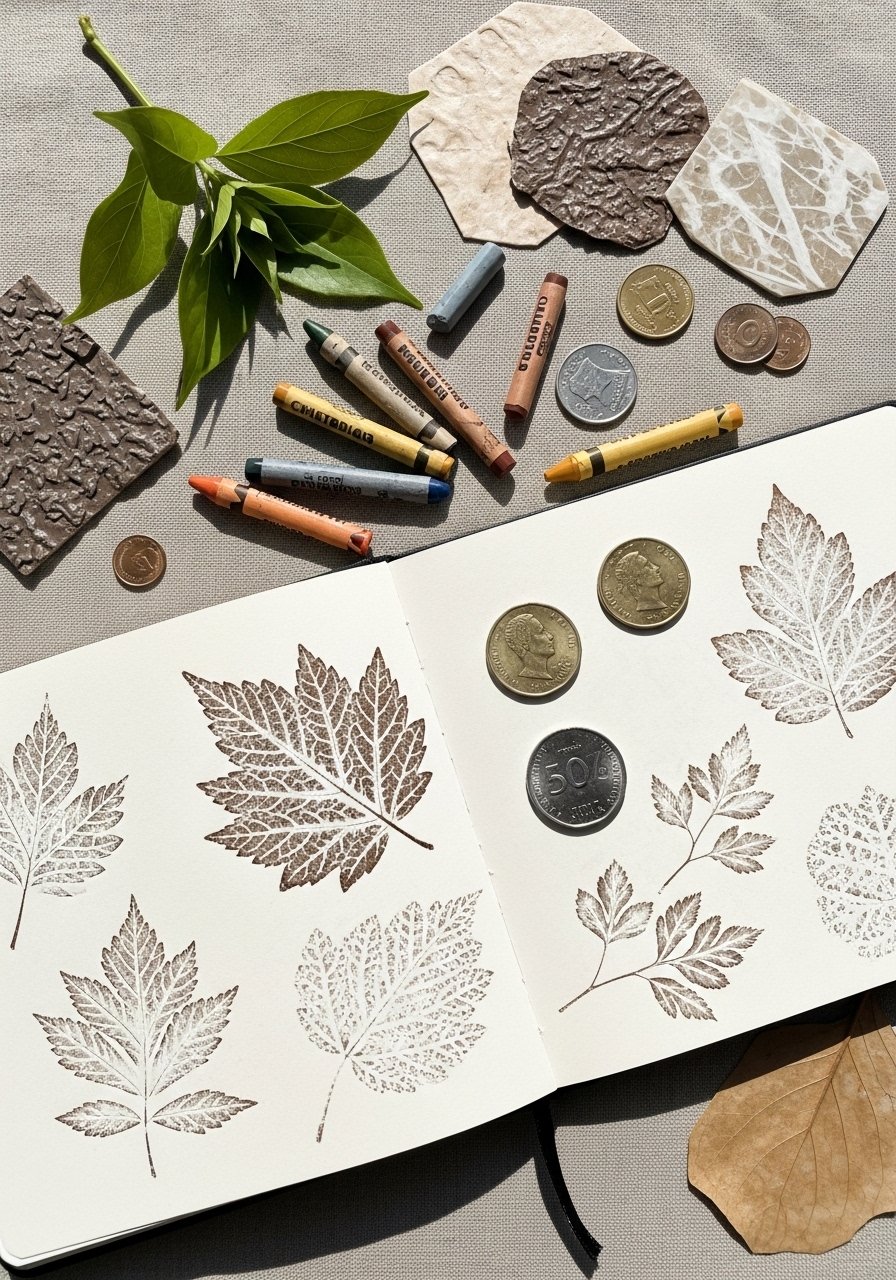
Rubbings encourage kids to explore texture in the real world and then draw inspired details. The finished pages have tactile interest and look great in a nature journal. This suits nature walks and curious kids. Use a pack of wax crayons for strong rubbings.
Materials
- Sketchbook, 6 x 8 in
- Assorted leaves, coins, bark pieces, 10–20 items
- Wax crayons (peel wrappers off mid-section)
- Pencil
- Clear tape for holding items in place
- Magnifying glass (optional)
- Small clipboard for outdoor work
Instructions
- Tape a textured object to a flat surface with the textured side up.
- Place a sheet of paper over it and hold steady.
- Rub the crayon on its side across the paper until the texture appears.
- Label the rubbing with date and location if desired.
- Use pencil to add drawn details or combine multiple rubbings into a scene.
- Let crayon dust settle; no drying time needed.
- Store rubbings flat in the sketchbook to protect texture impressions.
How to Display or Gift It
- Make a nature journal as a gift for a grandparent.
- Frame single rubbings in a neutral mat for a modern botanical look.
- Bind a collection into a small book for a nature study.
- Store textured items in small glass jars labeled by date.
- Cute Animal Step-by-Step
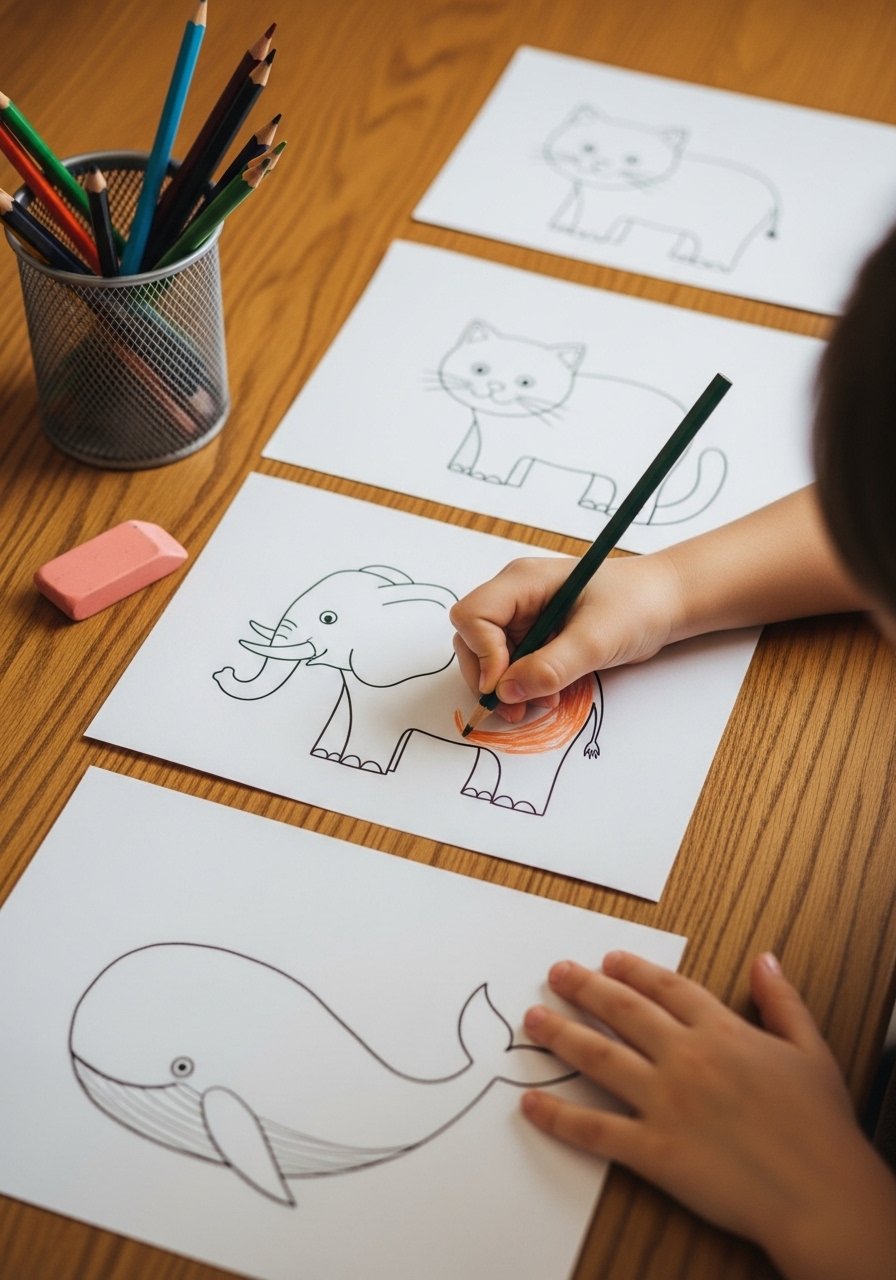
Step-by-step animal drawings break complex forms into simple shapes. The results are friendly and stylized, great for cards or learning to draw anatomy basics. This fits beginners and older kids building confidence. For crisp erasing and line work, I like a kneaded eraser.
Materials
- Sketchbook or drawing paper, 8.5 x 11 in
- HB pencil
- Kneaded eraser
- Black fineliner pen, 0.3–0.5 mm
- Colored pencils or markers
- Reference images printed (optional)
- Blending stump (optional for shading)
Instructions
- Lightly sketch basic shapes: circle for head, oval for body.
- Add connecting lines for neck and limbs.
- Refine into animal features: ears, eyes, snout.
- Erase construction lines gently with the kneaded eraser.
- Ink outlines with a fineliner and wait 2–3 minutes to dry.
- Color and add shading with colored pencils; layer for depth.
- Use a blending stump for soft shading if desired.
How to Display or Gift It
- Create a set of animal greeting cards using folded cardstock.
- Laminate a few for refrigerator art.
- Frame a series of animals as a nursery gallery.
- Store finished pieces in a flat portfolio for future reference.
- Alphabet Doodles (drawing ideas for kids)
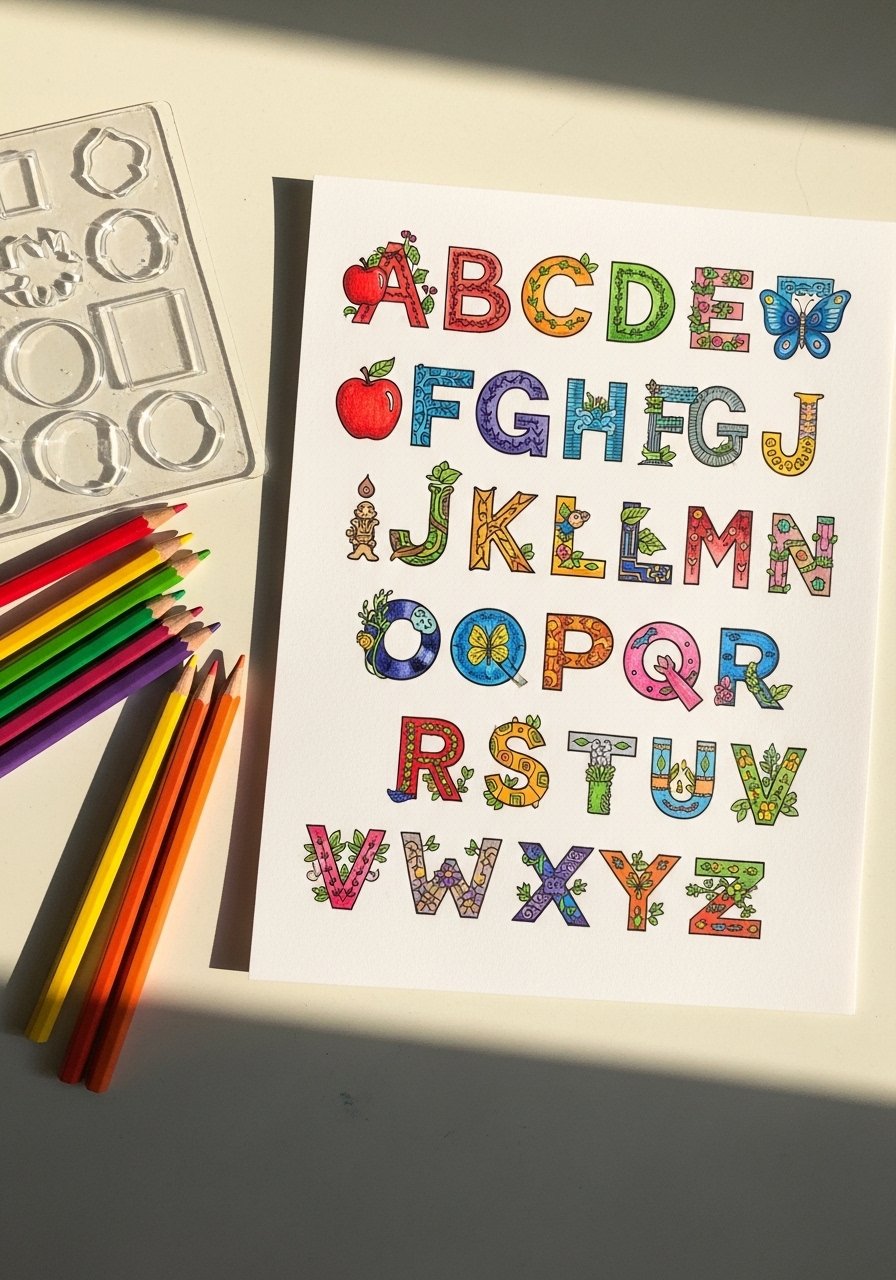
Alphabet doodles pair letter learning with simple drawing prompts. Each letter becomes a mini drawing challenge. Great for early readers and homeschool lessons. A small stencil set helps with neat lettering.
Materials
- Letter practice worksheet or blank grid, 8.5 x 11 in
- Pencil
- Colored pencils
- Letter stencil (optional)
- Fine-tip black pen
- Eraser
- Ruler
Instructions
- Draw a grid or print an alphabet doodle template.
- For each letter, think of a simple object starting with that letter.
- Sketch a tiny illustration next to or inside the letter.
- Trace letters with a fine-tip pen and let dry 2–3 minutes.
- Color each doodle, keeping details bold and legible.
- Add borders or patterns around letters for added texture.
- Use the sheet as a display piece or laminate for repeated practice.
How to Display or Gift It
- Bind the sheets into a homemade alphabet book.
- Frame single-letter artworks for a playful nursery display.
- Use laminated pages as placemats for alphabet practice at meals.
- Store extras in an indexed binder.
- Mini Comic Strips
Mini comics teach storytelling and sequential drawing. Kids learn to plan a beginning, middle, and end with illustrations and simple speech bubbles. Ideal for older kids and reluctant writers. A set of black gel pens helps get crisp lines.
Materials
- Kraft paper or drawing paper, cut to comic size (6 x 8 in), 10 sheets
- Pencil
- Black gel pens or fineliners
- Colored markers or pencils
- Ruler for panel lines
- Eraser
- Sticky notes for planning dialogue
Instructions
- Use a ruler to divide the page into 3–4 panels.
- Plan a short story on sticky notes for each panel.
- Lightly sketch scenes in pencil, focusing on action.
- Add speech bubbles and simple captions.
- Ink with black pens and let dry 2–3 minutes.
- Erase pencil lines and color lightly to keep focus on story.
- Staple several strips together to make a comic mini-book.
How to Display or Gift It
- Bind multiple strips into a homemade comic book for a friend.
- Add to a postcard and mail a mini comic.
- Display a weekly strip on the fridge for family laughs.
- Store completed strips in a labeled magazine file.
- Nature-Inspired Pattern Pages
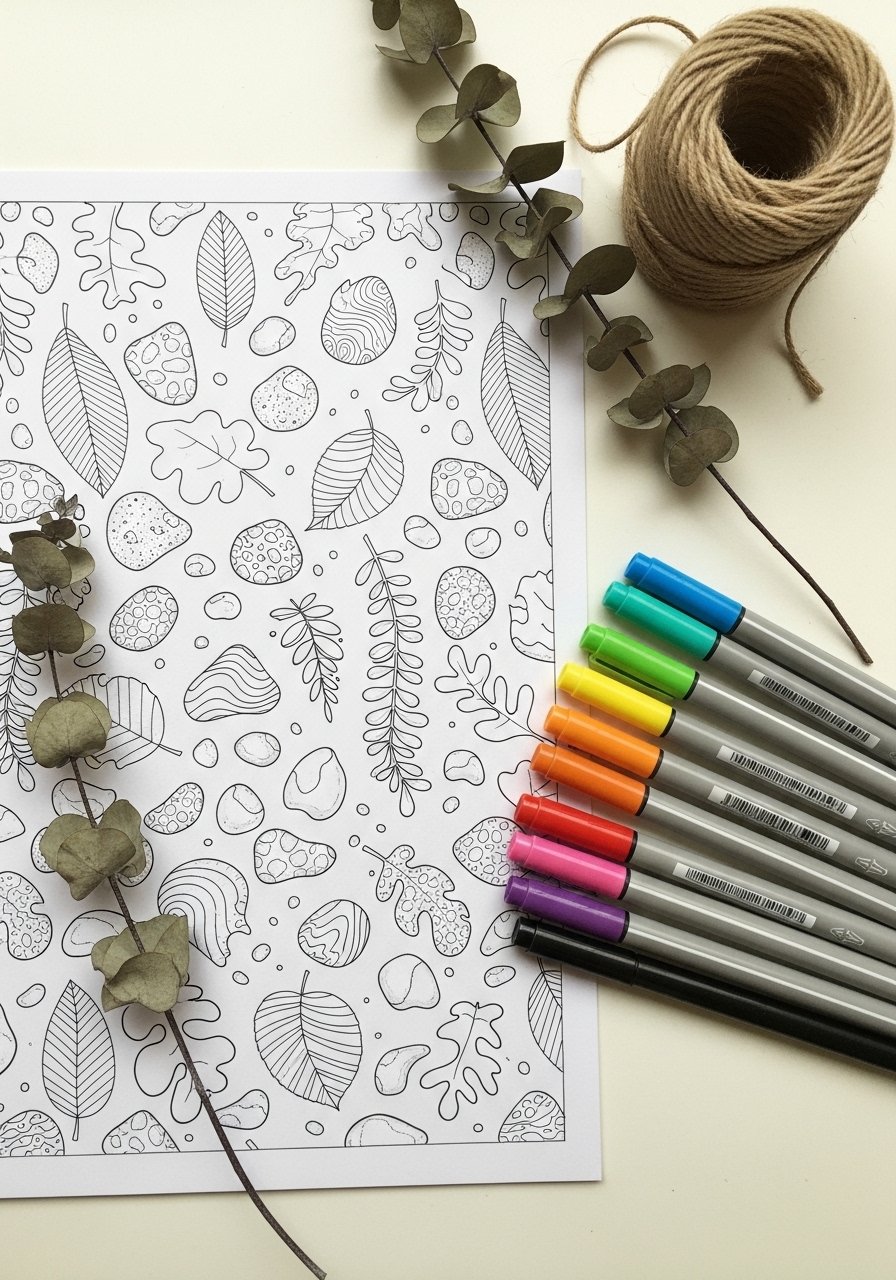
Pattern pages build repetition skills and hand control. Kids can fill a whole page with leaf clusters, waves, or pebble patterns for a calming, meditative activity. Older kids and those who enjoy details will love this. I recommend a set of colored fineliners for crisp patterns.
Materials
- Heavy drawing paper, 8.5 x 11 in
- Pencil
- Colored fineliners, set of 6–12
- Ruler
- Compass (optional)
- Eraser
- Reference photos of textures (optional)
Instructions
- Lightly sketch a grid or freeform sections to guide patterns.
- Choose a motif (leaf, wave, dot cluster).
- Start with larger shapes, then fill with smaller repeating marks.
- Vary spacing and line weight for rhythm.
- Outline or color sections with fineliners; let ink dry 2–3 minutes.
- Add highlights or metallic dots for contrast.
- Sign and date the page when complete.
How to Display or Gift It
- Bind pattern pages into a calming coloring book.
- Frame a favorite page as subtle wall art.
- Use them as background paper for cards or scrapbooking.
- Store in a flat portfolio or large envelope.
- Galaxy Scribble and Wash
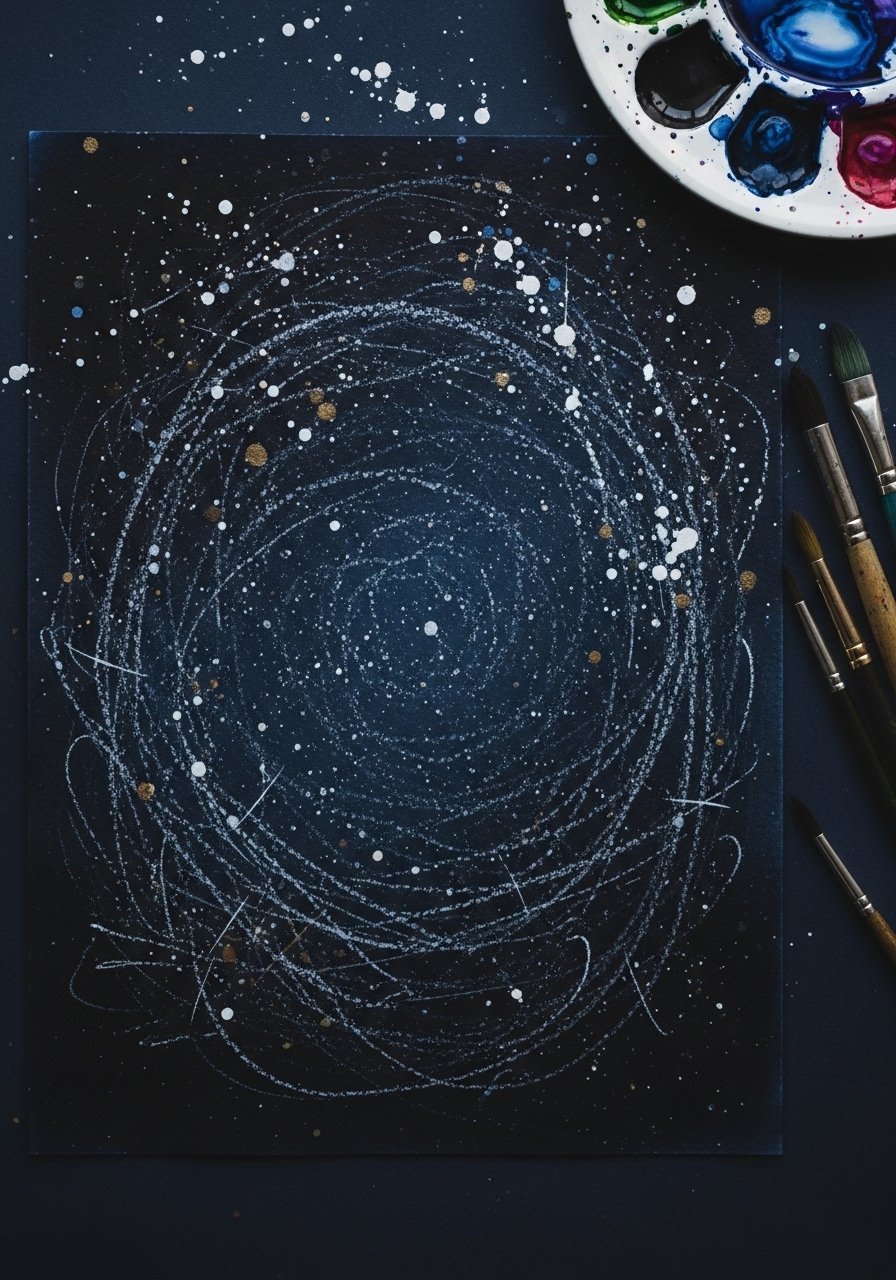
This galaxy project uses crayon resist and watery paint to create glowing nebulas. It's messy in the best way and teaches layering and contrast. Great for school-age children and kids who love color. A basic acrylic craft paint set or watercolor pans work well.
Materials
- Watercolor paper, 9 x 12 in
- Oil pastels or white crayon for resist
- Watercolor pans or diluted acrylics
- Round brush, size 8
- Toothbrush or splatter brush for stars
- White gouache or acrylic for star splatter
- Masking tape to secure paper
Instructions
- Draw swirls and big shapes with oil pastel or white crayon.
- Tape paper to the board to avoid buckling.
- Wet the paper and apply diluted dark blues and purples in washes.
- Layer more color while areas are still damp to blend.
- Use a toothbrush dipped in white paint to splatter stars from a foot away.
- Let paint dry 30–60 minutes depending on paper thickness.
- Add metallic accents with a gel pen for twinkling stars.
How to Display or Gift It
- Frame a galaxy as a bedside night-sky print.
- Cut into postcards for imaginative notes.
- Bind several into a space-themed mini book for a party favor.
- Store flat in a protective art portfolio.
- Eyes and Expressions Study
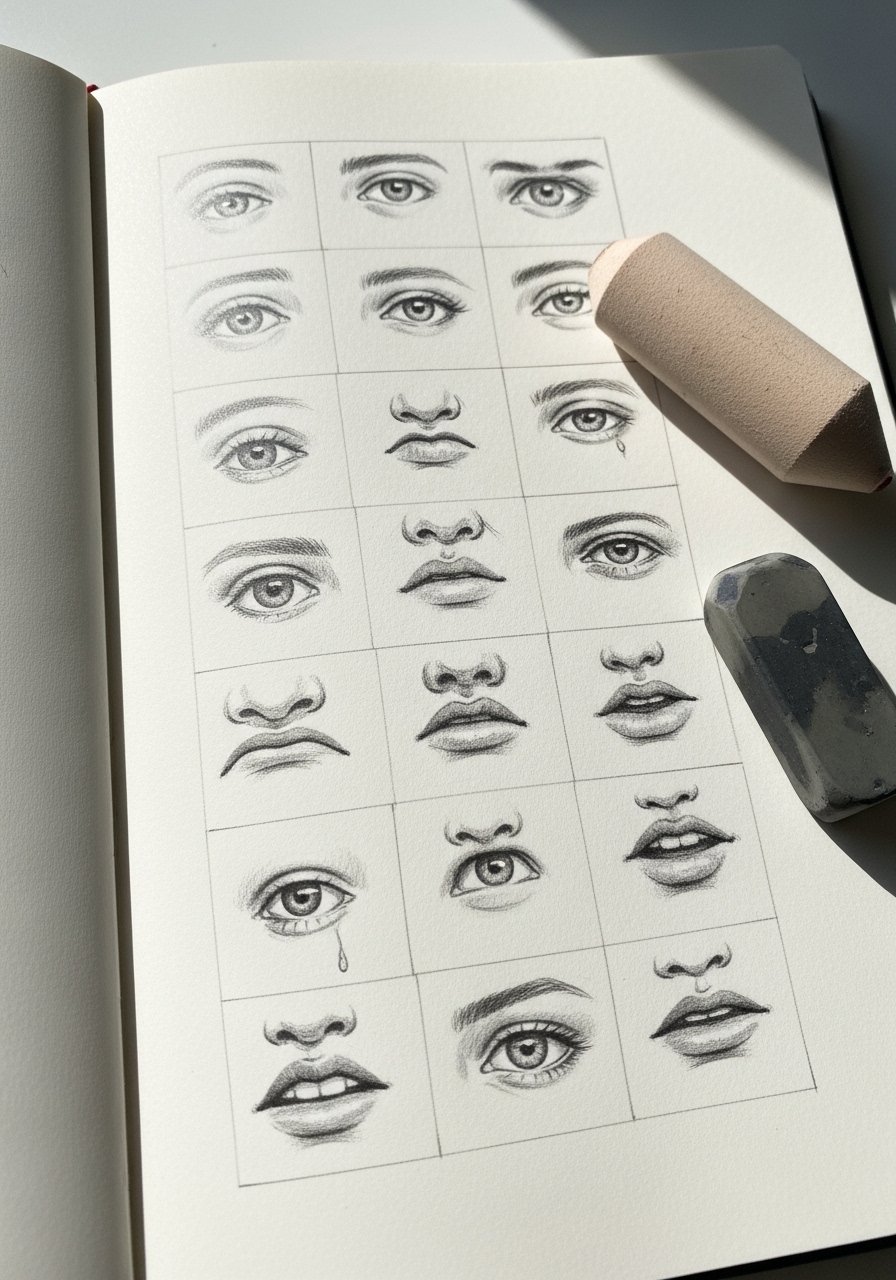
Drawing facial expressions builds emotional literacy and observation skills. Kids practice tiny details that convey big feelings. This works well for older kids or budding illustrators. Use a blending stump for soft shading.
Materials
- Sketchbook, spiral-bound 8.5 x 11 in
- Pencils (2B, 4B)
- Kneaded eraser
- Blending stumps
- Black fineliner
- Reference photos of faces
- Mirror for self-study
Instructions
- Draw a simple face grid with light pencil lines.
- Start by sketching different eye shapes for each expression.
- Add eyebrows and mouths to match the emotion.
- Shade lightly with a 2B pencil and blend for soft shadows.
- Use a kneaded eraser to lift highlights.
- Ink select lines for clarity and let dry 2–3 minutes.
- Practice repeating expressions to build speed and confidence.
How to Display or Gift It
- Compile into a emotions flipbook for kids to explore feelings.
- Use pages as prompts for role-playing games.
- Frame a favorite for an expressive gallery wall.
- Keep in a labeled sketchbook for progress tracking.
- Cityscape Silhouettes
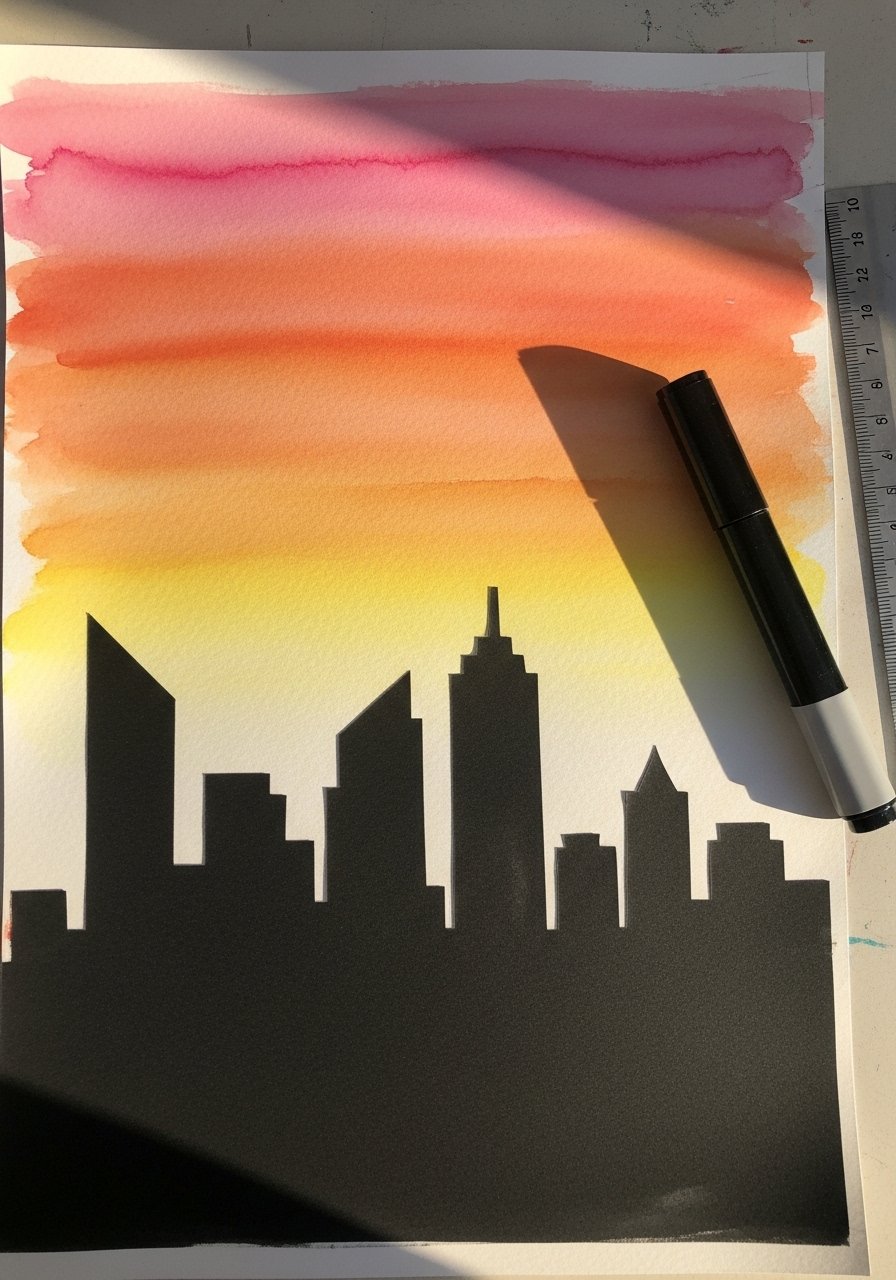
Silhouette cityscapes are great for practicing perspective basics and negative space. Kids paint a sunset wash then draw simple black skylines for dramatic contrast. Works for older kids and mixed-age groups. Use a foam brush for smooth washes.
Materials
- Watercolor paper, 11 x 7 in (landscape)
- Watercolor set
- Foam brush or flat brush
- Black acrylic marker or paint
- Pencil and ruler
- Paper towel
- Masking tape
Instructions
- Tape paper to the board for a clean edge.
- Paint a sunset gradient with horizontal washes—yellow to deep orange to purple.
- Let wash dry 20–30 minutes.
- Lightly sketch a skyline silhouette with pencil.
- Fill silhouette with black paint or marker in even strokes.
- Let black paint dry 15–20 minutes before removing tape.
- Add tiny window dots with a gel pen if desired.
How to Display or Gift It
- Mount on black matboard for bold contrast.
- Create a set of skylines from different cities and string as bunting.
- Frame as a modern nursery or playroom piece.
- Stack finished pieces flat in a portfolio until gifting time.
- Cartoon Food Characters
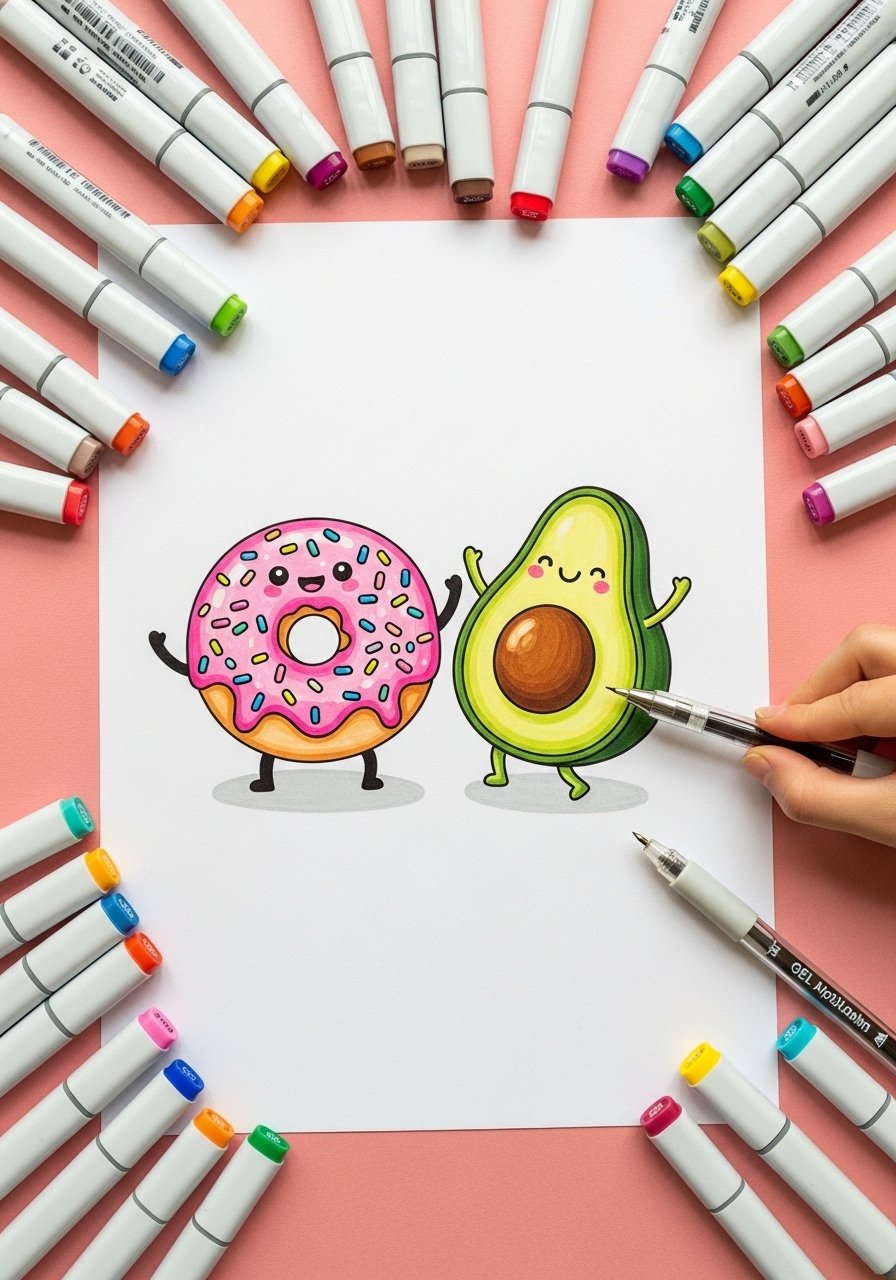
Food characters combine simple shapes with personality. Kids love turning snack items into characters and inventing backstories. Perfect for preschoolers up to tweens. Use a white gel pen for crisp highlights.
Materials
- Bright colored drawing paper, 9 x 12 in
- Pencil
- Colored markers
- White gel pen
- Black fineliner
- Stickers for extra decoration (optional)
- Eraser
Instructions
- Lightly sketch the basic food shape (circle for donut, pear for avocado).
- Add facial features and tiny arms or legs.
- Ink with a black fineliner and allow 2–3 minutes to dry.
- Color boldly with markers, leaving highlights.
- Add white gel pen highlights on glossy spots.
- Erase stray pencil marks carefully.
- Create matching recipe-card backs with the food’s favorite toppings.
How to Display or Gift It
- Make a set of food character trading cards.
- Use them as lunchbox notes for school.
- Stick them on a memory board with washi tape.
- Store in a card organizer for collecting.
- Patterned Rock Faces
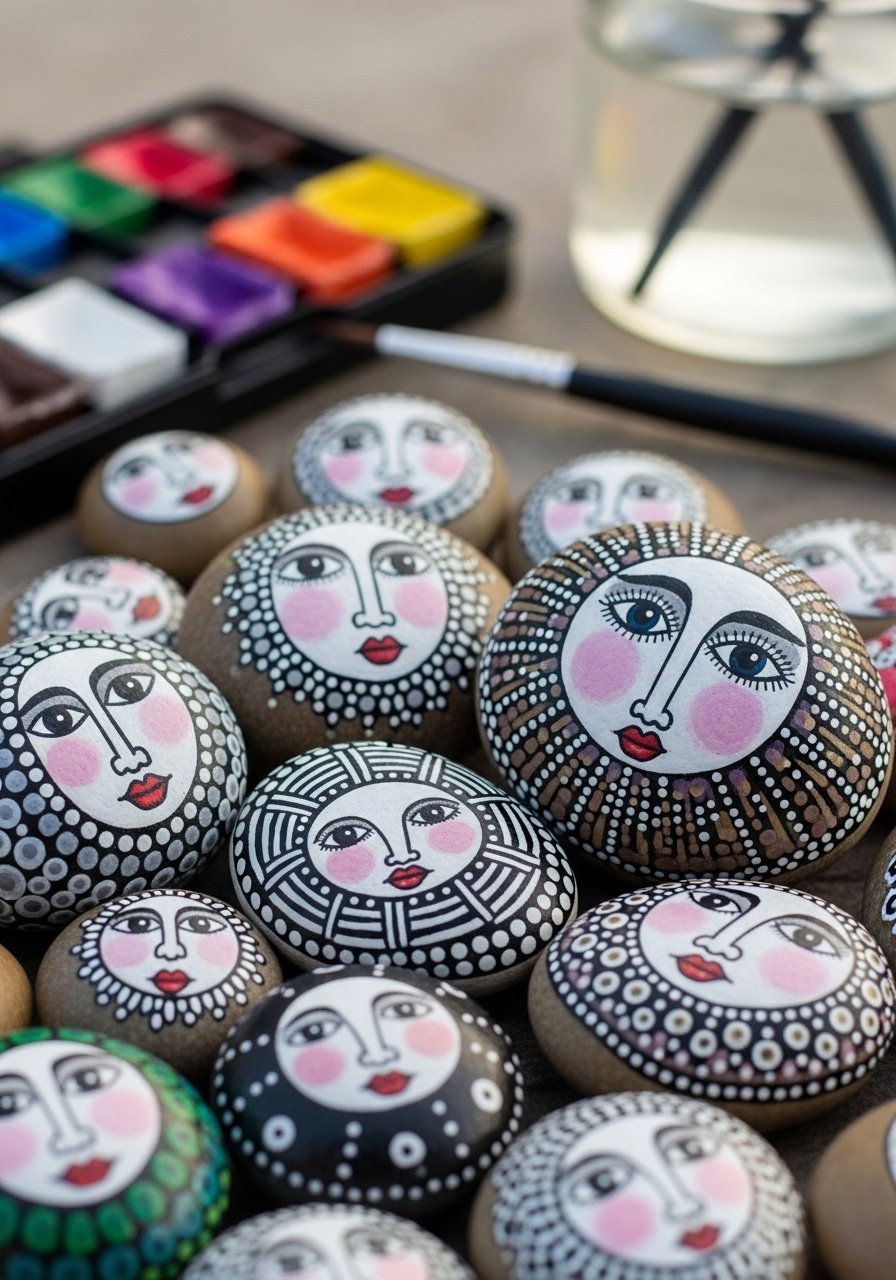
Drawing faces on rocks combines painting and fine drawing. Rocks become keepable little characters that kids can hide or gift. Use an acrylic paint set and a fine liner brush for details.
Materials
- Smooth river rocks, 10–12 pieces (2–3 in)
- Acrylic paints, small set
- Fine liner brush
- Black paint pen or fineliner
- Clear acrylic sealer spray
- Paper towels
- Palette
Instructions
- Wash and dry rocks thoroughly; let dry overnight.
- Paint a base color and allow 30–60 minutes to dry.
- Sketch simple faces lightly with pencil (if possible).
- Paint facial features and patterns with a fine brush.
- Use a black paint pen for sharp outlines and wait 10 minutes to dry.
- Spray a thin coat of clear acrylic sealer and allow 24 hours to cure.
- Touch up any details after sealing if needed.
How to Display or Gift It
- Place rocks in a small jar or bowl as desk friends.
- Hide them in a local park as part of a kindness rock hunt.
- Use as paperweights or plant pot accents.
- Store in a small craft box lined with tissue.
- Mirror Drawing Challenge
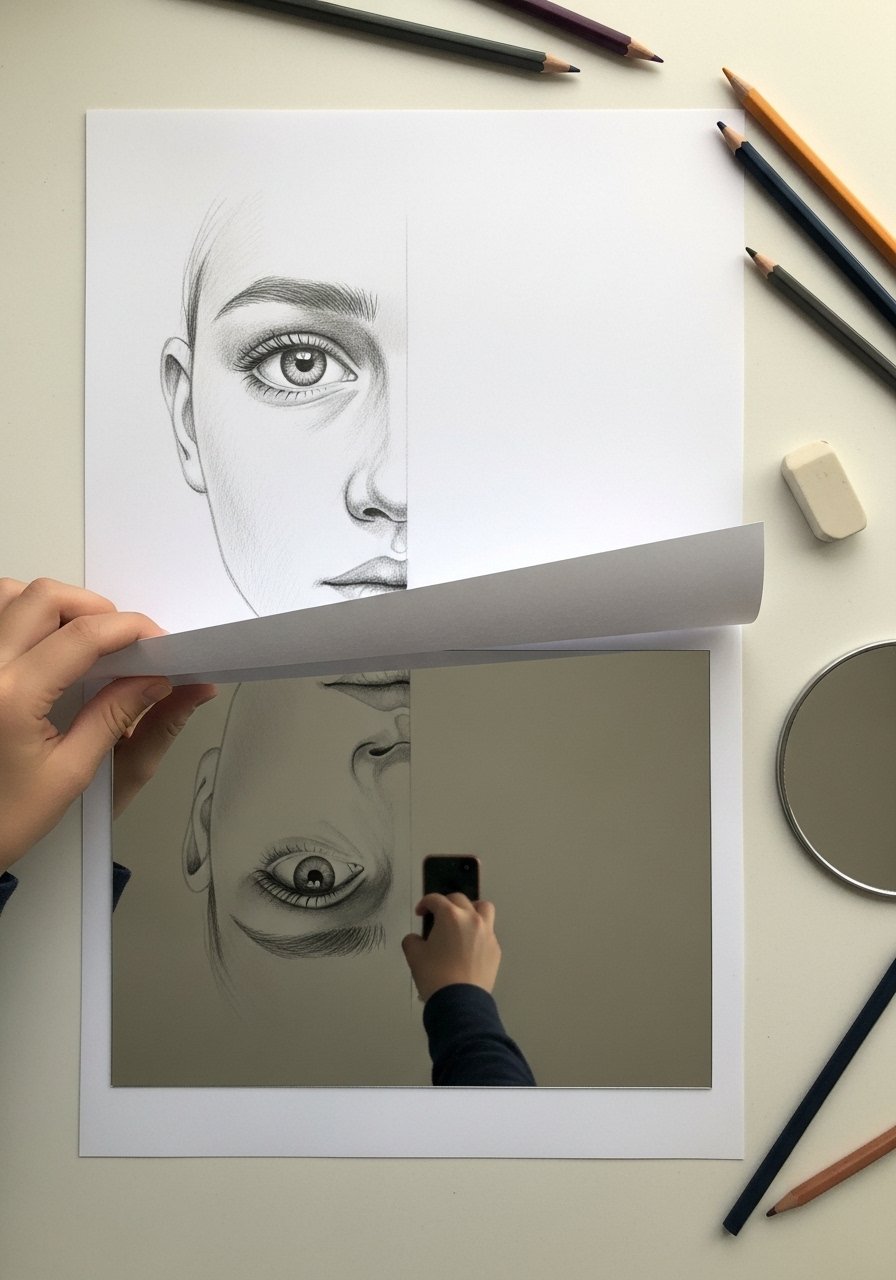
Mirror drawing helps kids practice symmetry and observational skills. Folded pages reveal a mirrored counterpart when traced over light—great for older kids learning proportion. An LED tracing pad speeds the process.
Materials
- Folded drawing paper, 8.5 x 11 in
- Pencil
- Kneaded eraser
- Ruler
- Small mirror (for reference)
- LED tracing pad (optional)
- Fine-tip pen
Instructions
- Fold paper in half and open flat.
- Draw half of a subject (face, heart, butterfly) on one side of the crease.
- Place the paper onto the tracing pad or hold to a window to see through the paper.
- Trace the visible lines on the blank side to create a mirror image.
- Outline with pen and let dry 2–3 minutes.
- Erase pencil marks and color symmetrically.
- Practice with different subjects to improve accuracy.
How to Display or Gift It
- Frame symmetrical drawings in pairs for gallery walls.
- Turn into greeting cards with mirrored motifs.
- Keep a stack of mirrored practice sheets in a labeled folder.
- Use as warm-up exercises before longer drawing sessions.
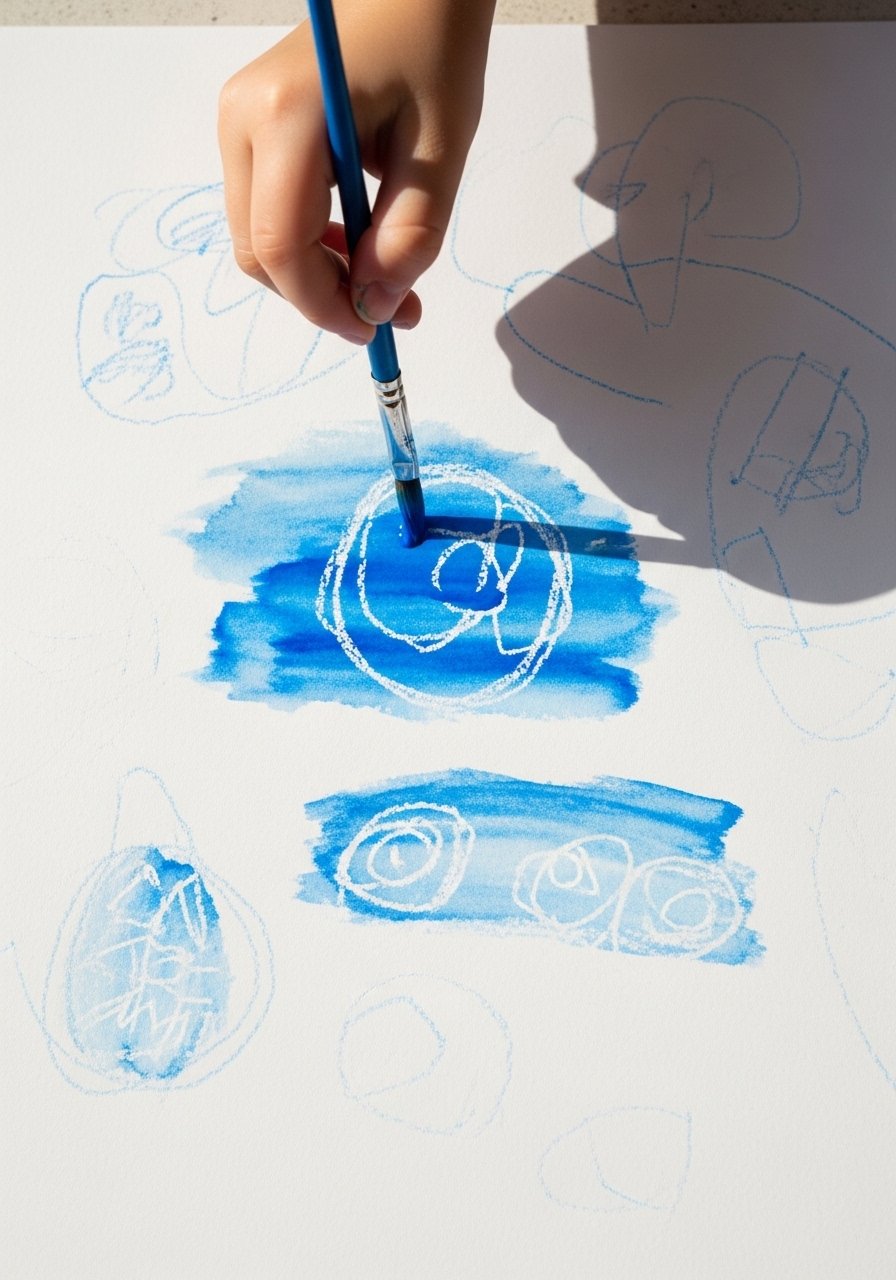
- Scribble Creature Remix
Start with random scribbles, then find creatures inside them. This project boosts imagination and improvisation. Kids of all ages can enjoy the playful discovery. A set of washable markers lets you add bold character features.
Materials
- Sketchbook
- Crayons or markers
- Pencil
- Black fineliner
- Eraser
- Sharpener
- Timer (optional)
Instructions
- Set a timer for 2 minutes and make full-page scribbles.
- Scan the scribbles for shapes that look like faces or bodies.
- Lightly pencil in the creature outlines.
- Ink with a fineliner and allow 2–3 minutes to dry.
- Color selectively to emphasize features.
- Add small details like teeth or claws with marker.
- Repeat to build a whole zoo of scribble creatures.
How to Display or Gift It
- Make a "Scribble Zoo" flipbook for a funny gift.
- Frame a favorite creature and add a name tag.
- Turn a page into a birthday card for a friend who loves silly art.
- Store in a spiral sketchbook for easy browsing.
- Patterned Name Plates
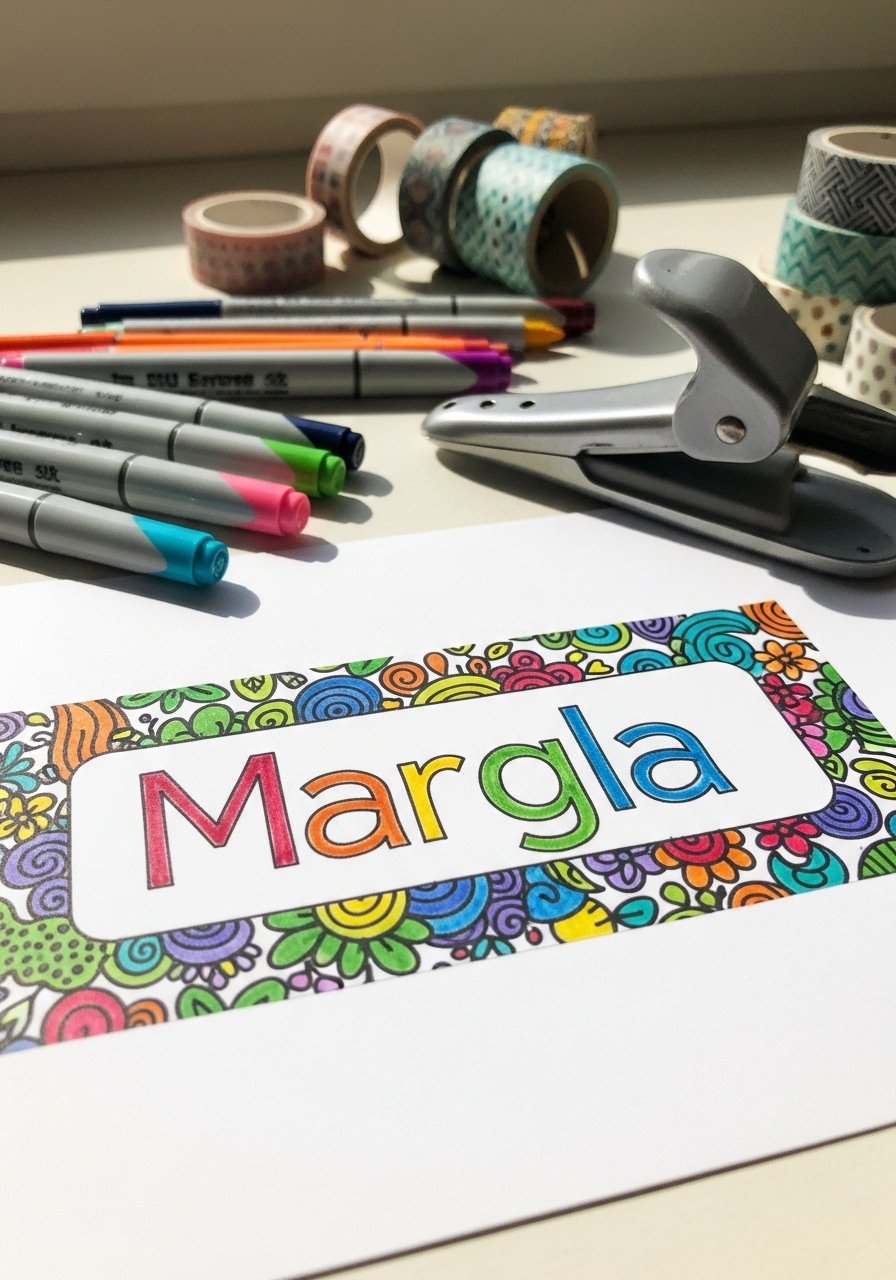
Name plates teach kids to personalize and plan a composition around text. They make great door signs or desk labels. This suits ages 5+ and is excellent for back-to-school crafts. Use washi tape for instant borders.
Materials
- Cardstock, 9 x 4 in
- Pencil
- Colored markers
- Washi tape
- Hole punch (optional)
- String or ribbon (if hanging)
- Ruler
Instructions
- Measure and lightly pencil the name centered on the card.
- Sketch surrounding patterns—dots, stripes, leaves.
- Use washi tape to create clean borders.
- Trace letters with a bold marker and fill with patterns.
- Add small doodles in the negative space for balance.
- Let ink dry 2–3 minutes, then punch holes and add ribbon if desired.
- Attach to backpack handle or hang on a bedroom door.
How to Display or Gift It
- Use as a desk name plate or door hanger.
- Include as a customized party favor or place card.
- Store extra name plates flat in a labeled envelope.
- Laminate for outdoor use on cubbies.
- Tiny Story Illustrations
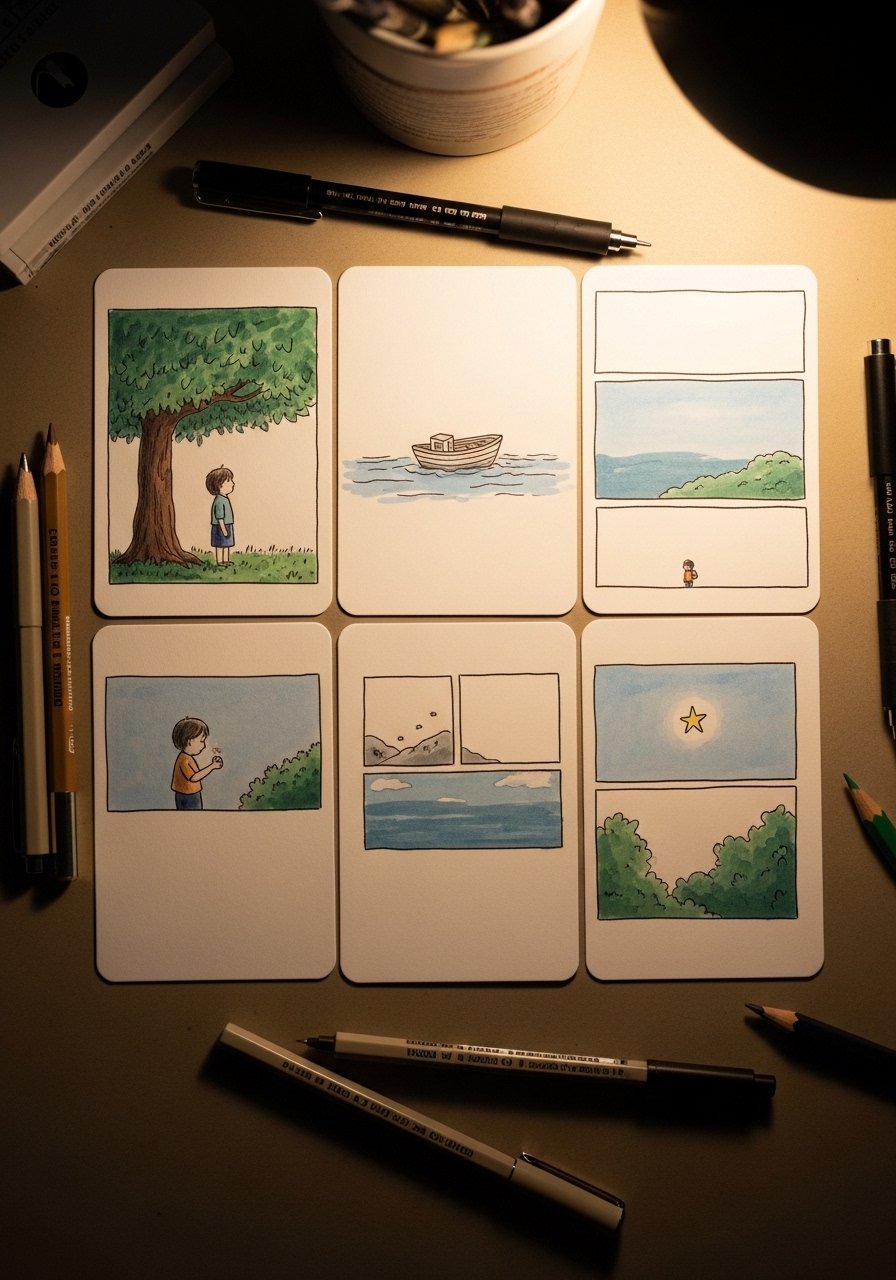
Tiny story illustrations challenge kids to tell a scene in one small frame. This practices composition and narrative economy. Older kids and young writers both benefit. Keep a set of index cards handy.
Materials
- Index cards, 4 x 6 in, 20 cards
- Pencil
- Black fineliner
- Colored pencils
- Eraser
- Ruler
- Small folder for storage
Instructions
- Choose a short prompt (lost kitten, picnic, secret door).
- Sketch one key moment for the story on a single card.
- Draw lightly, focusing on foreground and action.
- Ink with a fineliner and let dry 2–3 minutes.
- Add simple color to highlight focal points.
- Arrange cards in sequence to tell the full story.
- Staple or bind into a tiny illustrated tale.
How to Display or Gift It
- Bind cards into a small flipbook for a storytime gift.
- Mail an illustrated postcard series to a friend.
- Keep cards in a labeled box for quick storytelling prompts.
- Use as illustration practice for longer picture books.
- Chalk Pastel Landscapes
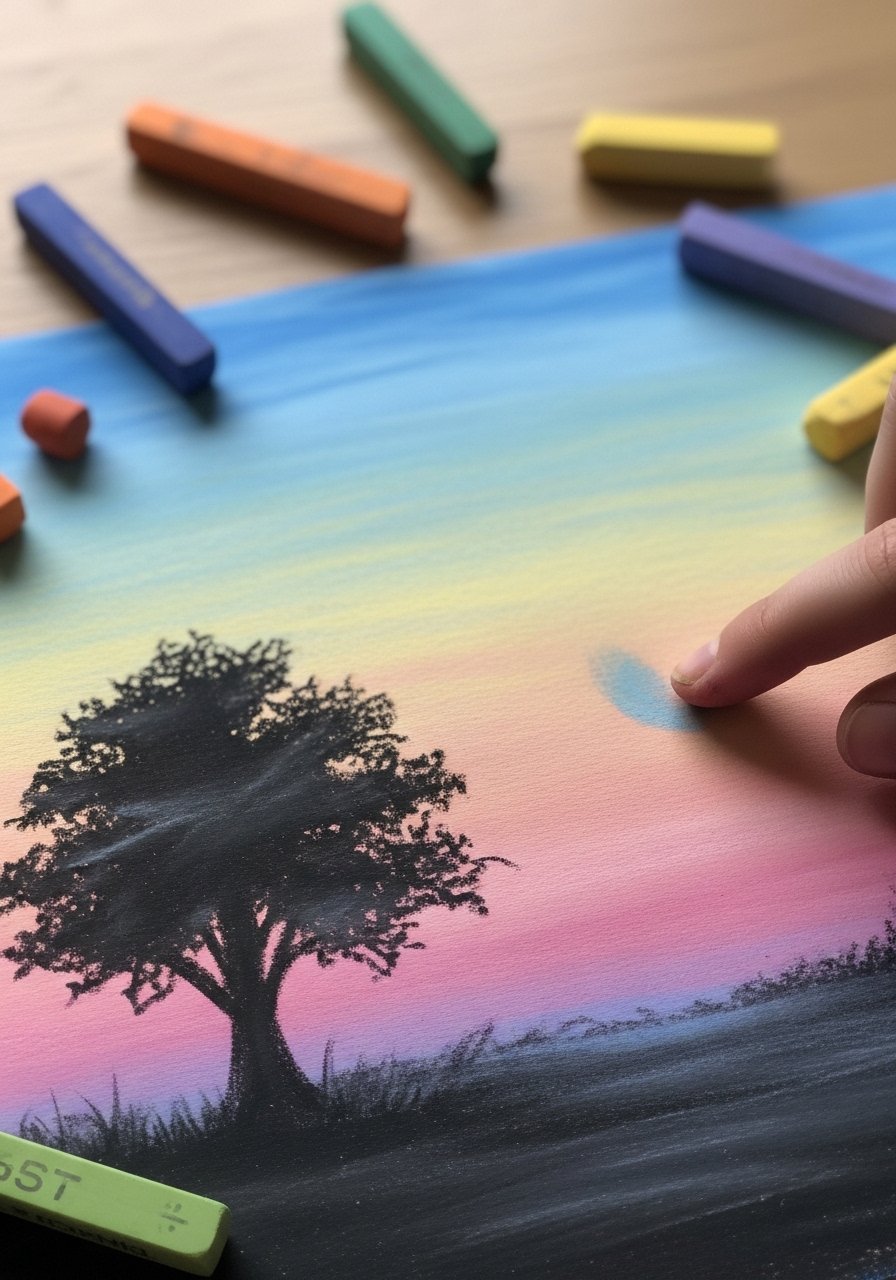
Chalk pastels are buttery and forgiving, perfect for lush skies and soft edges. This project teaches blending and value layering. Best for older kids who like tactile media. I recommend an artist chalk pastel set.
Materials
- Pastel paper or heavy drawing paper, 9 x 12 in
- Soft chalk pastel set
- Tissue or blending stumps
- Fixative spray
- Protective apron or old shirt
- Kneaded eraser
Instructions
- Tape paper down to prevent movement.
- Lay down light sky colors with side of pastel.
- Blend edges with tissue or stump for smooth transitions.
- Add midground hills and foreground silhouettes with darker pastels.
- Use a kneaded eraser to lift highlights if needed.
- Spray a light coat of fixative from 10–12 inches and let dry 15–20 minutes.
- Store flat with a sheet of glassine between works.
How to Display or Gift It
- Frame under glass for a soft matte look.
- Wrap in kraft paper and gift as a seasonal print.
- Make sets of small landscapes for a calendar project.
- Keep flat in a portfolio with interleaving paper.
- Silly Self-Portrait Prompts
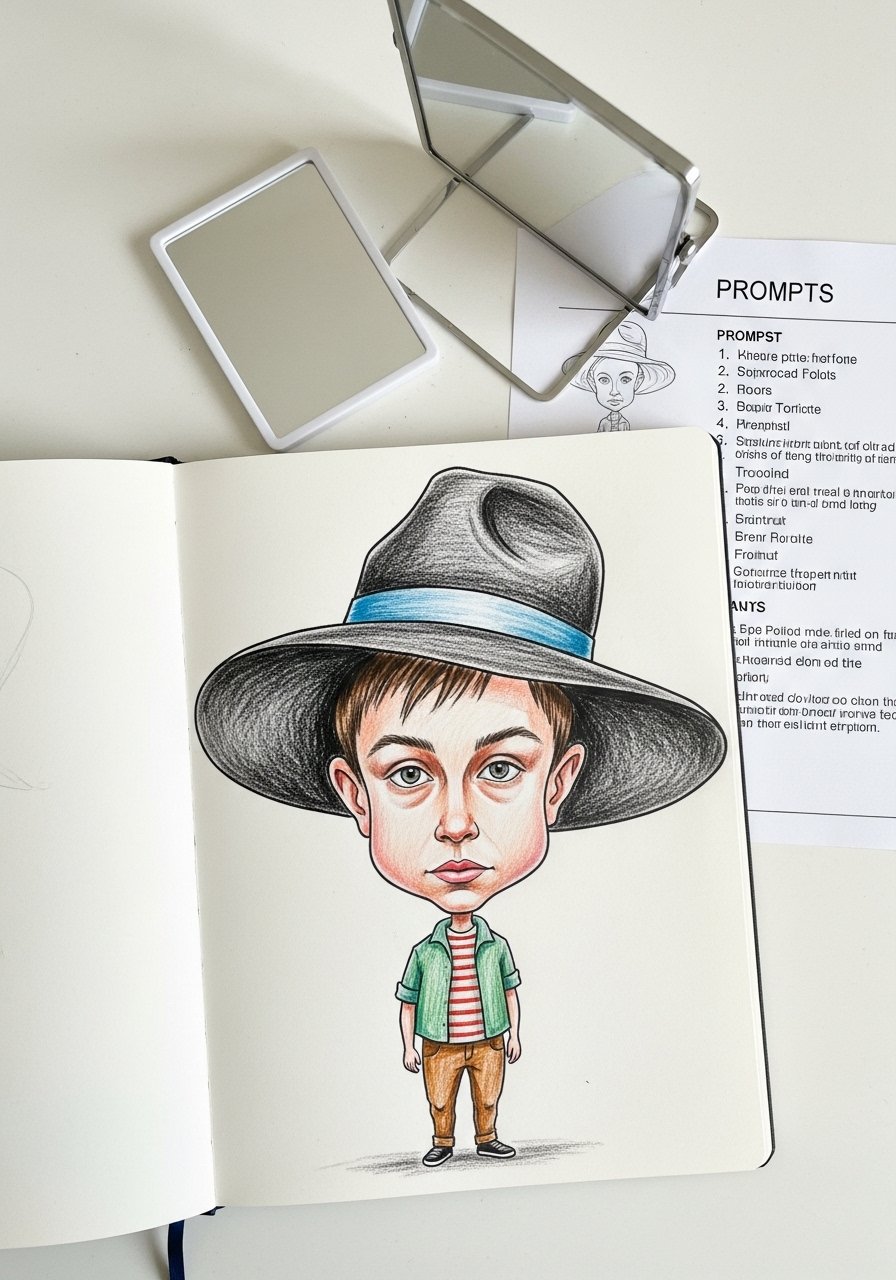
Self-portrait prompts get kids thinking about identity and exaggeration. Use playful prompts ("draw yourself as a superhero") to loosen perfectionism. Great for confidence-building. A simple small mirror helps for observation.
Materials
- Sketchbook
- Pencil
- Mirror
- Colored pencils
- Prompt list printed or written
- Black fineliner
- Eraser
Instructions
- Set a prompt (e.g., "you with wings").
- Look in the mirror and sketch a light outline.
- Add exaggerated details according to the prompt.
- Ink lines with a fineliner and let dry 2–3 minutes.
- Color and add patterns or accessories.
- Add a short caption or thought bubble for personality.
- Date the portrait to see progress over time.
How to Display or Gift It
- Make a "Me" wall with a series of portraits across a school year.
- Turn a portrait into a personalized bookmark.
- Laminate a favorite for a backpack zipper charm.
- Store older portraits in a memory box.
- Crayon Resist Sunprints
Crayon resist lets kids draw with white crayon and reveal images once painted over. It’s magical and great for teaching planning and contrasts. Suitable for preschoolers through elementary. Use a basic box of crayons.
Materials
- White crayon and regular crayons
- Watercolor paper, 9 x 12 in
- Watercolor set
- Flat brush, size 10
- Cup of water
- Paper towel
- Tape
Instructions
- Draw with white crayon on dry watercolor paper; press firmly.
- Paint a wash over the entire sheet with diluted watercolor.
- Watch the crayon drawing appear as paint resists the wax.
- Let wash dry 20–30 minutes.
- Add details with colored crayons or a fineliner once dry.
- Flatten under a book if paper warps.
- Sign and date the piece.
How to Display or Gift It
- Create a set of sunprints for seasonal cards.
- Frame with a thin white mat to emphasize the resist effect.
- Bind into a painting practice book to compare techniques.
- Store flat in a portfolio until ready to gift.
- Scratch Art Reveal Pages
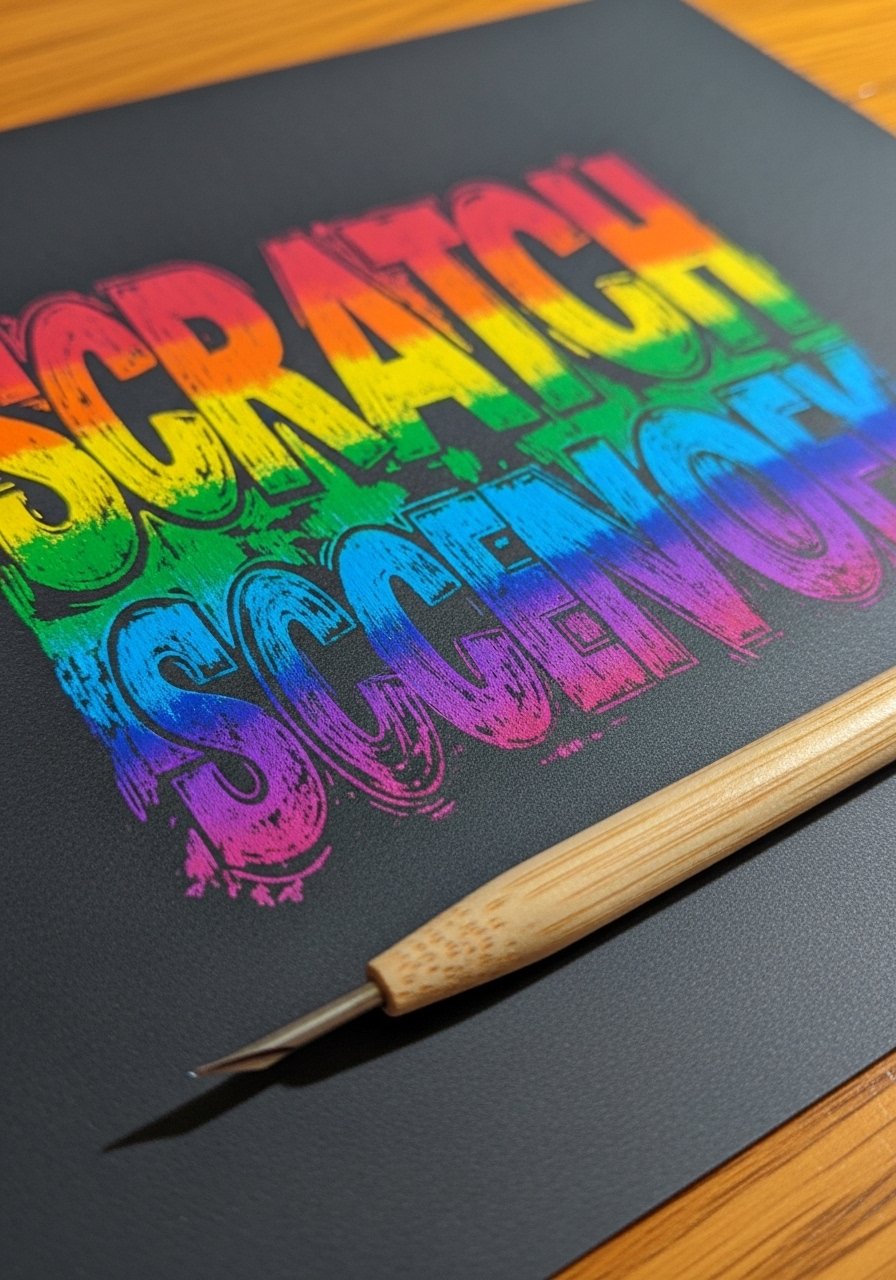
Scratch art is dramatic and super satisfying. Kids draw by scraping away a black coating to reveal bright colors beneath. It teaches negative drawing and planning. Use pre-made scratchboard sheets or make your own with wax crayons and black paint. A scratch art set speeds things up.
Materials
- Scratch art sheets (or create with crayon layer + black tempura paint)
- Wooden scratch tool or toothpick
- Paper towels
- Pencil for planning
- Ruler
- Protective surface covering
Instructions
- If making your own, color paper with crayons in rainbow layers, then paint with a black tempera mix and let dry 1–2 hours.
- Sketch a simple design in pencil if desired.
- Use the wooden tool to carefully scratch lines and shapes.
- Vary pressure for thicker or thinner lines.
- Brush off residue gently with a dry brush.
- Frame or mount immediately; colors can fade if scratched too thin.
- Store finished pieces flat to avoid chipping.
How to Display or Gift It
- Frame small scratch-art pieces as bold accents.
- Make bookmarks with a scratched strip and laminate.
- Bundle a few as colorful gift sets for art-loving friends.
- Keep leftover sheets in a protective folder.
- Map-Making and Treasure Drawing
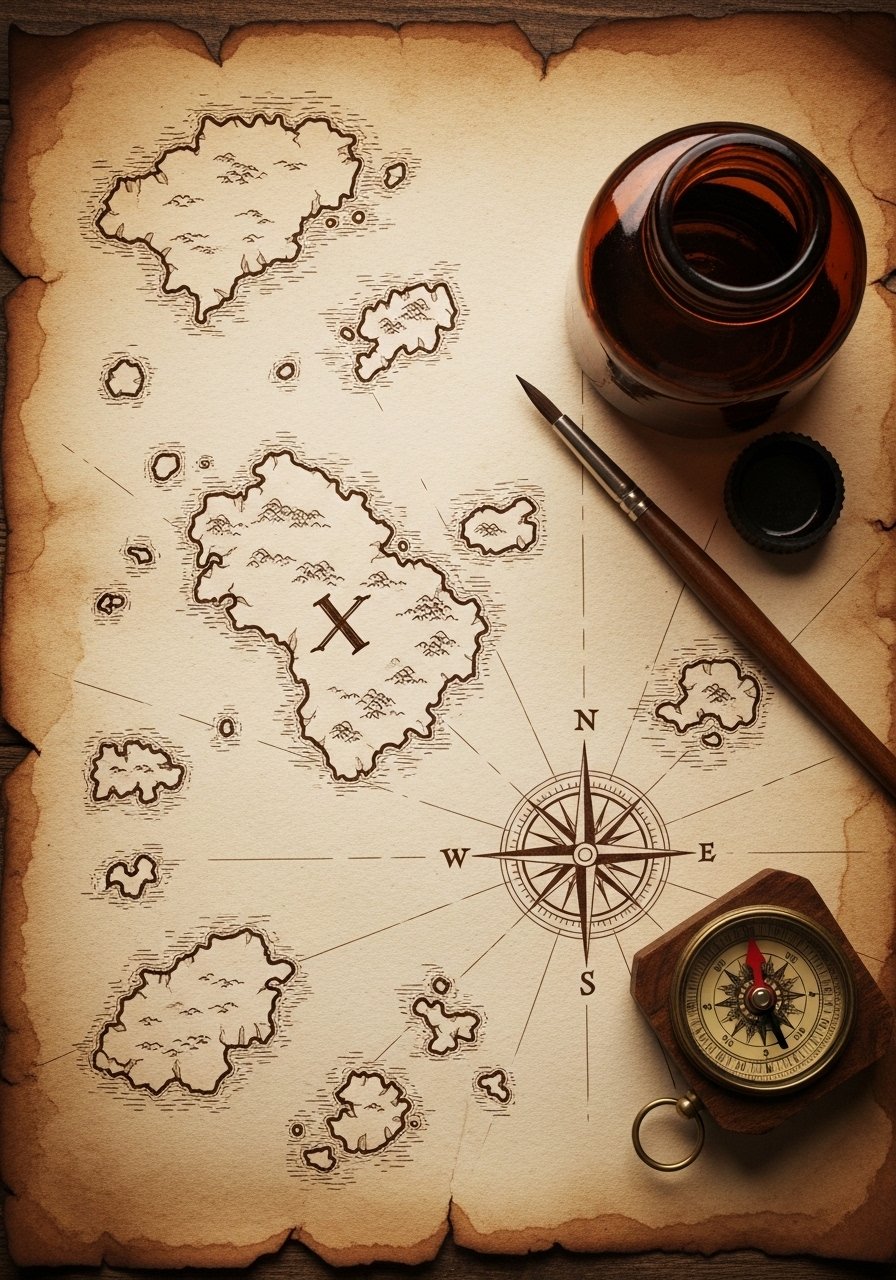
Map-making mixes drawing with storytelling and geography basics. Kids design islands, landmarks, and routes to treasure. This activity is ideal for imaginative play and group games. Try aging paper with a light tea wash for authenticity.
Materials
- Heavyweight paper, 8.5 x 11 in
- Tea bag for staining (optional)
- Brown ink pen or sepia marker
- Colored pencils
- Ruler and compass
- Sticker X or red marker
- Scissors for map edges
Instructions
- Optionally stain paper with a tea wash and let dry 30–60 minutes.
- Lightly sketch island shapes and landmarks.
- Use a sepia marker to ink coastlines and paths.
- Add a compass rose and scale bar.
- Color subtle land tones with colored pencils.
- Burn or fray edges carefully (adult supervision) for an antique look.
- Fold and use for treasure hunts or story prompts.
How to Display or Gift It
- Roll the map and tie with twine for a pirate party invite.
- Frame as a bedroom feature for imaginative play.
- Store in a tube or flat in a portfolio.
- Use as a prop for scavenger hunts with small prizes.
- Mandala Rocks and Paper Mandalas
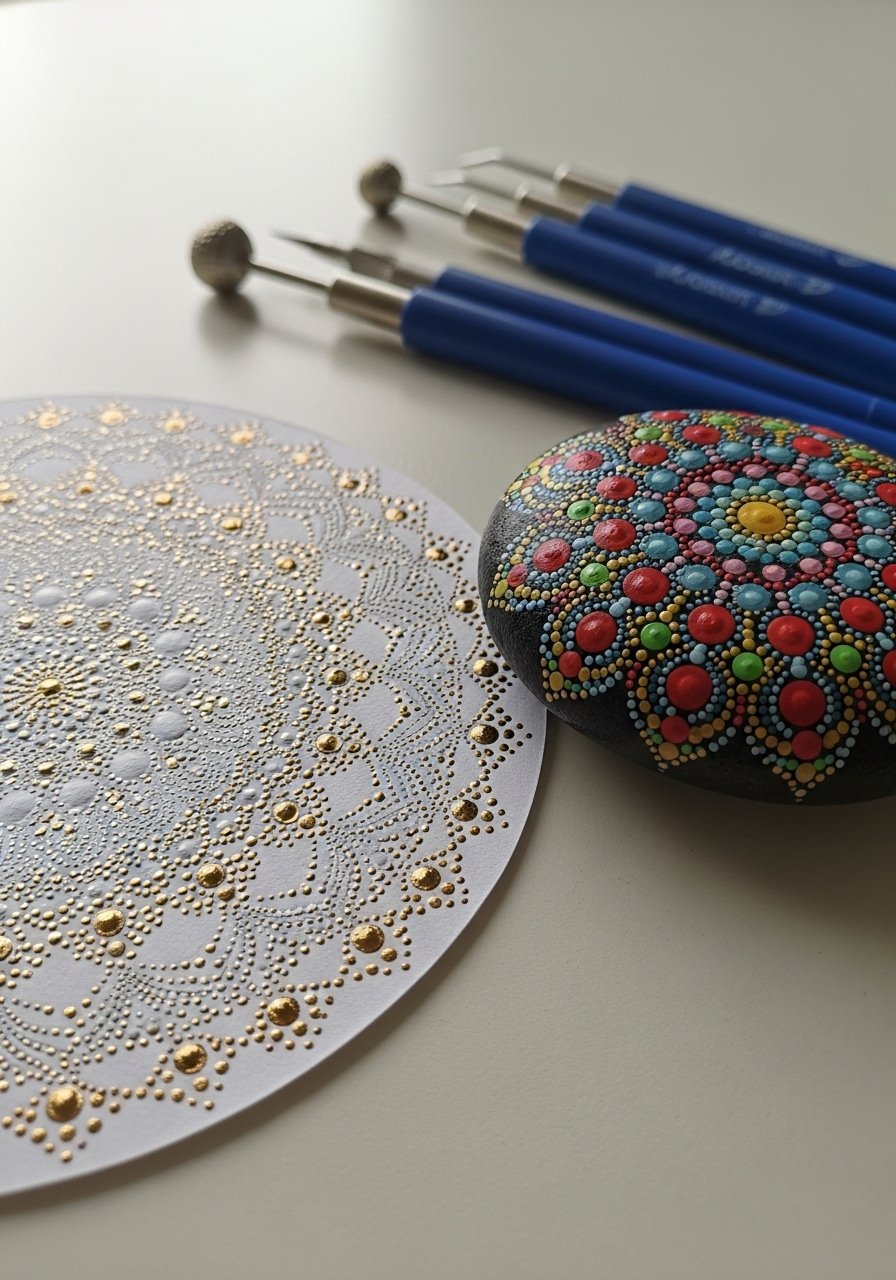
Mandala drawing teaches focus, symmetry, and pattern sequencing. Kids create calming, detailed circular designs on paper or stones. Older kids and anyone who enjoys repetitive patterns will relax into this. A dotting tool set gives precise dots.
Materials
- Round paper templates or compass
- Pencils
- Dotting tool set or blunt stylus
- Acrylic paint or paint pens
- Round rocks (optional)
- Ruler
- Fine brush
Instructions
- Draw concentric circles with a compass to create guides.
- Start from the center and add repeating dots, petals, or shapes.
- Use dotting tools for even, round dots.
- Alternate colors and sizes for contrast.
- Let paint dry 15–30 minutes between layers for clarity.
- Seal rocks with a light acrylic spray and cure 24 hours.
- Frame paper mandalas or display rocks in a dish.
How to Display or Gift It
- Arrange mandala rocks in a small bowl for a coffee table.
- Frame paper mandalas in a simple white mat.
- Gift a set of tiny mandala rocks as calming tokens.
- Store paper mandalas flat with tissue between pieces.
- Collaborative Giant Mural
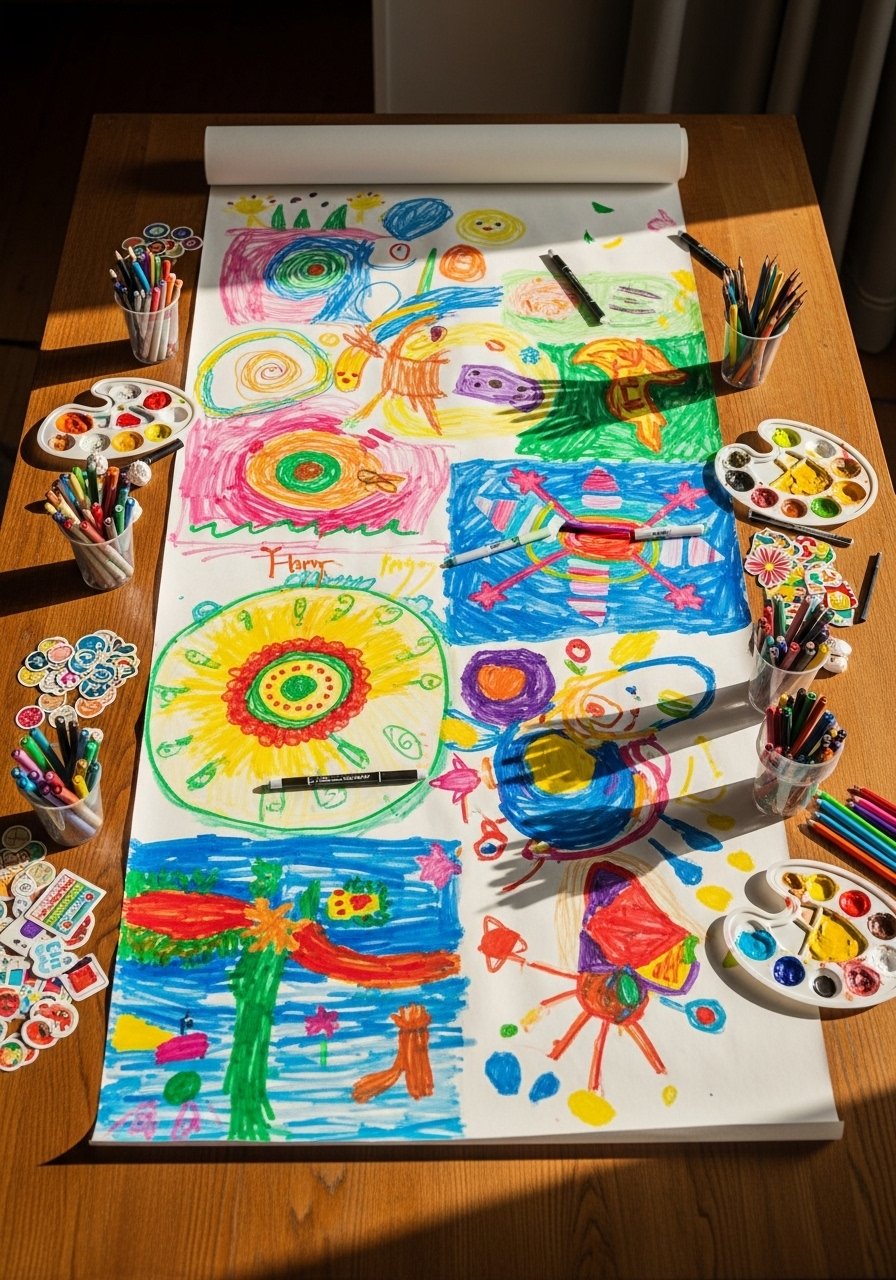
A collaborative mural gets everyone drawing together and practicing composition at scale. This is perfect for family art days, classroom projects, or party activities. Use a long roll of butcher paper so everyone has space. A butcher paper roll is ideal.
Materials
- Butcher paper roll, 24–36 in wide, several yards
- Assorted markers and paints
- Painter’s tape to secure paper
- Stools or cushions for working height
- Aprons or old shirts
- Wet wipes for cleanup
- Optional: stamps or sponges
Instructions
- Tape the butcher paper to a long table or wall at child height.
- Divide the mural into sections with light pencil lines or leave freeform.
- Assign themes or let kids draw whatever they like.
- Encourage connecting elements between sections for cohesion.
- Let paint dry 30–60 minutes before rolling up.
- Take photos of the finished mural and sign the bottom with names and date.
- Roll and store flat or hang a portion as long-term art.
How to Display or Gift It
- Scan or photograph sections to make keepsakes or prints.
- Cut favorite areas and frame as individual artworks.
- Use mural segments as unique wrapping paper for gifts.
- Store rolled in a tube for easy transport.
You now have 25 playful, do-able drawing ideas for kids that span sensory techniques, storytelling, and skill-building. Try a quick shape monster warm-up, then move into a longer project like a collaborative mural. Save or pin this list so you can pull up a perfect activity any time you need one. Which idea will you try first—fingerprint critters or a galaxy wash? Share a photo with a friend or use a simple hot glue gun with temperature control for mixed-media add-ons—you’ll notice how much smoother projects go when you have a reliable tool on hand.


